I go through batteries at a fairly high rate. Electronic devices for the wilderness, such as my headlamp and GPS, see regular use. At home, things like my wireless mouse need power. The biggest drain are my lights – particular in the winter, when they are used to light my regular commute.
This last spring I decided to invest in a set of rechargeable batteries. Although some of my devices run on CR123 batteries, most use AA or AAAs. To start with, I was concerned only with being able to recharge the AA and AAA batteries. Years ago I had a set of rechargeable batteries, but I think the technology was not very developed back then. They seemed to drain quickly and not hold many charges. Today, the market is different. Some brief research showed that there were many options out there, with positive reviews for most of them.
What most reviews seemed to suggest was that the majority of the offerings were all of equal quality, with most differences unlikely to be noticed outside of a laboratory. The most popular, though, seemed to be the Sanyo Eneloop and Maha Powerex batteries. I found some claims that, between the two, the Eneloops held a charge longer while on the shelf.
I decided to try the Eneloop batteries, and purchased a package that included a charger, 8 AAs and 4 AAAs. The charger can charge up to four batteries at once, either AAA or AA, but it must be done in pairs. It cannot charge one battery at a time, or three. This has turned out to be an occasional inconvenience. I have some devices that use three batteries, and some that need just one. To charge the batteries for those devices I always have to give the charger an extra battery.
The charger takes around five hours to bring a dead battery up to a full charge. I have read that the Maha Powerex MH-C9000 charger can charge the batteries in a shorter period of time. It also gives the user more control over the charge, which has the potential of increasing the life of the batteries.
The batteries themselves I have been very happy with. I don’t have the knowledge to provide any objective information on their chemistry or electronics. Suffice it to say that they work. They seem to last longer in the same devices than their non-rechargeable counterparts did. I have not noticed any degradation in those batteries that I have recharged. That is not surprising. Sanyo claims the Eneloop batteries can be recharged 1,500 times – a number I have not come anywhere near to approaching.
Since the initial purchase, I have bought two more packs of AA and AAA Eneloops. All of my electronics now run on rechargeable batteries, save for those few that require CR123 batteries. The batteries themselves are an expensive investment, but they have payed off. Now that I have a good number of both AA and AAA sizes, and am happy with the Eneloop brand, I would like to purchase a more specialized charger, such as the aforementioned C9000.
If you use any non-rechargeable AA or AAA batteries in your electronics, I recommend giving Eneloops a try. The financial savings alone is enough of a benefit to justify their use.
Although it’s no longer required for the amateur radio Technician license, I have decided to learn Morse code. Despite it’s age, Morse remains one of the most effective ways to transmit information over long distances using minimal infrastructure and power.
To begin, I have printed and laminated the code chart from learnmorsecode.com. This makes encoded and decoding Morse a simple (although not fast) task. I’ve also put a variety of audio files consisting of slow Morse transmission on my media player. With a notebook and pen, I can practice decoding the messages wherever I am.
Begin where Forest Road 63 ends. Step around the barrier and immediately enter the Wild Sky Wilderness. Parallel the north fork of the Skykomish River along the old road, watching as the road slowly changes into trail. Shortly, enter the Henry M. Jackson Wilderness. Pass a junction with the Pass Creek Trail.
Continue along the north fork of the Sky, as the trail slowly gains elevation. Enter into meadows with views of Long John Mountain and June Mountain to the north and Skykomish Peak to the south. Climb still further, and reach Dishpan Gap.
At the junction, consider a short detour north to nearby Blue Lake and Pilot Ridge, in the Glacier Peak Wilderness, but decide against it. Instead, take the Pacific Crest Trail south.
Walk along the ridge. Gaze south, to far off Stuart Peak, and west to the distinctive snow-capped peaks of Gothic Basin and surroundings. Feel some sense of satisfaction at having traveled a piece of this country.
Head over Wards Pass, pass the junction with Cady Ridge, and reach Lake Sally Ann. Pitch camp. Eat dinner. Wish your moon-shadow a good night, and retire.
Rise in the morning. Not too early, not too late. Feel the warmth of the morning sun. Break fast, break camp, and step back onto the PCT. Head south once more.
Walk along the shoulder of Skykomish Peak, through open meadows, and look east to green Wenatchee Ridge.
Descend into old growth trees. Reach Cady Pass, and continue past it. At Pass Creek, sit and think. Contemplate a route along West Cady Ridge, but allow laziness to win and choose the shorter path along Pass Creek.
Descend the gradual valley of Pass Creek, crossing the low creek once or twice. At the bottom, reach a boardwalk that crosses the marsh. After, ford the cool and strong North Fork. Thereafter, arrive at the familiar junction with the North Fork trail.
Walk south and west, watching as the trail slowly changes into road. There, ahead, is Forest Road 63.
I purchased a pair of Outdoor Research Flex-Tex Gaiters last spring. I had owned the full-length Rocky Mountain High Gaiters from Outdoor Research for a year, and was a big fan of them. They are not completely waterproof, but are highly water-resistant, and still maintain a level of breathability that makes them appropriate for year-round use. I find them adequate for protecting my legs when bushwhacking and for keeping me warm and dry when traveling in rain and snow – but I’m always looking to loose weight. My eye had been on the Flex-Tex gaiters for a while. I thought that they would be a good alternative to full-length gaiters during the warmer months: something lighter and cooler which could provide protection from debris but would also handle the wet and snow that is often found in the alpine summer.
When I went to purchase the gaiters, I found that sizing was an issue. Unlike Outdoor Research’s other gaiters, the Flex-Tex do not come in normal sizes. They are offered only in the combination sizes of Small/Medium and Large/Extra Large. In the Rocky Mountain High gaiters I wear a medium. The Small/Medium Flex-Tex gaiters were far too small for me to even get on. The Large/Extra Large gaiters fit well around my footwear, but were loose at the top around my calf. Unlike other gaiters from Outdoor Research, the Flex-Tex had no adjustment to tighten the fit.
I purchased them anyway, thinking to give them a shot. After using them on an early season trip in the snow, it was evident that they would not work. The loose top allowed too much snow to enter the gaiter.
Rather than giving up on the gaiters and immediately returning them, I held on to them for a while. I thought that it would be simple enough to modify the gaiters by adding a new cuff on top of the gaiter, creating a channel of material through which could run a thin piece of webbing. The webbing could be cinched down around the leg and secured with a camlock. This would provide the same adjustment mechanism as that found on my full-length gaiters. It would not be a perfect seal, but short gaiters will never keep out as much debris as tall ones.
The gaiters lay neglected for a while. A few months later I found myself in Seattle Fabrics and wound up purchasing the needed webbing, as well as some stretchy Lycra material which I thought would serve as the added cuff. Then I forgot about the project again.
Eventually, I remembered the gaiters, and wanted to get them done. At that time I had some material left over from hemming a new pair of Kuiu Attack Pants. The Kuiu pants are made out of Toray Primeflex, an impressive soft-shell which I discussed in my review of the Kuiu Guide Gloves. While heavier than the Lycra, I thought that Primeflex would provide more durability and be a better match to the soft-shell of the Flex-Tex gaiters.
The project was a success. With the Primeflex cuff sewn atop the gaiters’ normal cuff and a piece of webbing put through it, I can cinch down the top of the gaiter around my calf and secure it with the camlock buckle. Because the top of the gaiter has not been modified to be permanently smaller, I can still wear the gaiters over pants – although I almost always wear them next to skin. I have not done much post-holing in snow this summer, but the new cuff has provided a tight enough seal to keep out flying snow that comes from glissading down snowy slopes and kicking steps on the way up. Neither rocks, dirt, nor twigs have yet to find their way in.
Now that I have a proper fit, the Flex-Tex gaiters have become my preferred wear. They are breathable, water-resistant, and tough. At 5.29 ounces, the modified gaiters are only slightly lighter than the 6.98 ounces Rocky Mountain High gaiters. It is not a huge difference, but I find that I still prefer the Flex-Tex gaiters. The Rocky Mountain gaiters I never wore specifically for debris. They stayed in my pack until I encountered wet or snow. The Flex-Tex gaiters are comfortable and breathable enough to wear all the time – even when gaiters are not necessarily needed – which makes them more efficient at keeping out debris. For my type of travel, I find the Flex-Tex gaiters more functional than short gaiters that I’ve tried from other companies, such as Integral Designs and Dirty Girl.
The Spider Gap – Buck Creek loop is one of the most popular trips in the north Cascades. For 40 miles the trail winds through the Glacier Peak Wilderness. It takes the traveler through low, emerald valleys and atop high alpine ridges.
Spider Gap
The trail along Phelps Creek is well used by hikers and hunters. It is a wide horse road, leading through thick woods. When I arrive in the middle of the week there are three different groups heading out, but no one else going in. It looks as if I have hit a lull in the summer crowds.
At the head of the valley the forest thins, giving way to wide meadows, good camps, and the remnants of avalanche slides. Two grouse hunters were tramping through the meadows, and one person hunting the opening of archery season for deer. None of them had so far had any luck.
From Spider Meadows my route climbs up the first of many ridges. I was aiming for Spider Gap, a small pass between towering rock, carved by the small but powerful Spider Glacier. The trail is steep. The noontime sun strikes it hard. Trees are soon left behind in the valley bottom, and any shade left with them. An occasional cooling breeze gives reason to stop and gaze back down to the valley of Phelps Creek below.
Soon I hit talus. Soon after, the source. Spider Glacier: narrow but long, and uphill to the Gap. I put my trekking pole into the pack, trading it for an ice axe. The year’s heavy snow and late melt-off means that the glacier is still covered with a coat of snow. I progress slowly, but the snow allows for a relatively easy walk up without the traction devices that would be necessary had I been walking on the ice itself. All the way up, I think to myself that I should have done the loop in reverse, so that I could glissade down the glacier rather than walk up it. (Later, I shared my observations with others I encountered on the trail. None seemed to agree. “You have a different idea of fun that I do,” said one.)
At the head of the glacier and the top of the gap I drop pack to hydrate and take in the views. This is surely mountain goat country – bare, carved rock and spiring peaks abound. Peering down the other side I spot the ever diminishing Lyman Glacier and the relatively young Upper Lyman Lakes. My goal for the day is the lower Lyman Lake, hidden in the trees beyond.
Snow fields occasionally cover the rocky north facing slopes on the other side of the Gap, but I can see faint outlines of a trail where the snow has melted, traversing the western slope of Dumbell Mountain. Ice axe still in hand, I make my way in that direction.
As I reach the opposite side of a field of snow, I find myself among scree and boulders. No longer can I make out the previously spotted trail. I peer ahead, but I cannot see its relief anywhere along the slope. I’m not sure what the trail was making for, anyways. When I did see it, it looked to keep the slope of the mountain, heading off perhaps to Rubin Creek on the other side. It is definitely not the obvious route given the topography. A few hundred feet below me I can see Upper Lyman Lakes, and the bare fields surrounding. It looks easy enough to just walk along the edge of the lakes, following the drainage down to lower Lyman Lake itself. Simpler than fooling around on the side of the mountain.
So I begin the descent, lowering myself down large boulders, occasionally loosing my footing as I kick loose small rocks that go tumbling down. After some time I reach another snow field, steep and perhaps forty or fifty feet down to the other side. I could go around it, but it has been slow going, making my way among the rocks. “Ballsy,” I think, but what’s the point of packing an ice axe if you aren’t going to really use it? I carefully step onto the snow, sit down, and push off.
The late season snow is hard packed and crusty, more like ice, which makes for a faster acceleration than I had planned. I cannot dig in with my heels or the spike of the axe enough to slow the descent. Nearing the bottom, I’m forced to roll over and arrest with the pick of the axe to avoid flying into the talus below. That done, and feeling quite pleased with myself, I merrily make my way down the remaining hundred feet to the lakes below. Reaching the bottom, I spot good tread, and even a few cairns here and there. I don’t know what route the path took down from the Gap – it certainly wasn’t the same as mine – but there it is.
The tread soon turns to trail. Clouds begin to move in and, as I make my way to the lower lake, I feel drops of rain on my face. The trail descends into trees, reaching Lyman Lake itself soon thereafter.
At the lake there are a few other people already camped. I find a likely looking spot and pitch the tarp before the rain increases. It does not last long, soon diminishing to only occasional sprinkles. That and the accompanying breeze are enough to keep down any bugs.
A downed Hemlock tree next to my camp provides plenty of slightly-damp wood. I break off a few branches and after three minutes of processing have enough to fire up the Inferno. After dinner I have plenty of fuel left over, so I boil some water for hot chocolate. The fire is still going as I finish the drink, allowing me to heat a bit of water for cleaning and then dry the pot before putting it away. Then to bed.
Image Lake
I rise early, break camp, and walk a couple hundred feet through the woods to the shore of the lake. Breakfast, and water, and then I’m gone. I want to get on the trail ahead of the others, whom I assume are doing the same loop as I. The trail winds along the shore of the lake for a short while before breaking off to head north and west. It climbs out of forest, into the meadow below Cloudy Pass. Here I spook deer and marmot, the latter collecting grass for their winter holes. (Already, the temperature dropped to freezing last night.) I spotted blue sky as I woke, but now Cloudy Pass is living up to its name. Looking back, I see clouds moving in to veil Lyman Lakes and the Gap.
Low clouds obscure the country by the time I reach Cloudy Pass. Descending to the other side I catch tantalizing glimpses of massive walls of rock all around me. I rather enjoy this hiking, walking through the mists in country that is new to me. It is fitting for the second day of September, being in stark contrast to the sweaty hikes under strong sun that defined much of August.
After Cloudy Pass, I avoid the descent all the way into the valley bottom just to rise again by taking a shortcut along the side of a steep ridge to Suiattle Pass. At the top of the pass I look forward and can see mammoth slopes of snow obscured by trees and clouds. Glacier Peak is in front of me, but still only allowing glimpses of its noble flanks. I step onto the Pacific Crest Trail and descend lower into thick trees, reaching the junction with the trail to Miners Ridge. Here the classic loop continues south along the PCT, but I intend to make the detour to Miners Ridge and spend a night at the famed Image Lake. There, the summit of Glacier towers over the lake and is reflected in the still waters, giving the lake its name.
It is late morning now. The sun has begun to burn off the clouds as I start the climb to the top of the ridge. Mining artifacts from the sixties liter the trail, making for interesting archaeological pauses. (The ridge was largely saved from being destroyed by copper mining thanks to William O. Douglas.)
As the trail climbs, the day warms, and the trees are once again left behind, revealing meadows which carpet the upper slopes of the ridge. The clouds are all but gone now. Under a blue sky, green fields roll out before me and, to the south, Glacier Peak, the Wilderness Sentinel, stands in all its glory, surrounded by its court of lesser peaks.
The trail leads along the southern face of the ridge and descends to the small basin that holds Image Lake. There are good camps just south of the lake, where I drop my pack. It is just shortly after noon now, but I plan to spend the night here so that I may catch the sunrise over the lake the following morn. The rest of the day is spent exploring the basin and taking in the views.
Buck Creek Pass
I rise at half past five to a clear dawn. Down comes the tarp, and I throw my things into the pack and walk slightly up the ridge on the north shore of the lake. As the sun rises, it sets fire to the summit and upper glaciers of the peak. I eat breakfast as the show progresses, and soon the whole of Glacier is red with the dawn. That’s my cue to leave. I pack up again, and retrace my steps east along the southern slope of Miners Ridge. There are plenty of deer out browsing, or perhaps they are just watching the sun rise.
At the bottom of the ridge I come to the end of my detour and once again gain the Pacific Crest Trail. There, the trail descends further to Miners Creek, re-entering thick old growth where the morning light has barely yet penetrated. After the creek is crossed, I leave the PCT and head south, aiming for Middle Ridge and Buck Creek Pass.
I spend the rest of the morning in the old growth forest. The trail begins to climb, soon opening up to expose the avalanche-scoured slopes of Middle Ridge. The shady trees are left behind just as the sun reaches its peak. Views of the aptly named Fortress Mountain dominate the route.
I stop for lunch at the top of Middle Ridge. The bugs, which have hitherto not been bothersome on this trip, encourage me to cut the break short. I descend once more, this time steeply into the valley of (not so) Small Creek. There is shade down here in the forest. I drop my pack again, this time for a more relaxing break.
There is one more climb ahead of me: up steep, dusty slopes to Buck Creek Pass, the last high point of the loop. It’s a slog to get up there under the early afternoon sun, but, once gained, the pass offers close-up views of the eastern slopes of Glacier, rising steeply up from the deep Suaittle valley. Flower Dome, Helmet Butte and Liberty Cap surround the meadows here at the pass.
I see two groups camped at the pass, but it is early yet, and after yesterday’s short day I want a longer hike today. The trail leads down to Buck Creek. I follow, into the last valley.
The trail chooses a long and gradual way down to the valley bottom. It is the weekend now. I pass many people on the way up, likely looking to sleep at the pass. I think that it will get a bit crowded up there tonight, and I’m glad that I chose to come down to the cool and largely empty valley.
It’s late afternoon and I figure that I’ve come seventeen miles or so from Image Lake. Another four or five miles and I’ll be at the Buck Creek trailhead, which I don’t want to reach until tomorrow. Branching off the trail, I head close to Buck Creek and soon find a clearing large enough for my tarp. I decide on an early dinner, followed down with the last of the trail mix. Afterwards I entertain myself with a fire built up around the stove.
Trinity
The night is not as cold down in the valley as it was in the high country around Lyman and Image lakes, but it still gets down close to freezing. I wake early, shivering. The sun won’t reach down here for a few hours yet. Quickly, I complete the morning routine and regain the trail, looking to generate some heat with movement.
I’ve only been a couple hours on the trail when I reach the trailhead outside of the small town of Trinity (which looks to consist of three buildings). I’m not yet done with the loop – three miles remain, on dirt road, until I reach the Phelps Creek trailhead. I shed a few layers at the Buck Creek trailhead, which the sun has begun to warm, and meet a man preparing to take a mule train up to the pass. Then, it is the dusty road. An hour later I am back where I entered the Wilderness, satisfied in my experience of these mountains.
The secret of the mountains is that the mountains simply exist, as I do myself: the mountains exist simply, which I do not. The mountains have no “meaning,” they are meaning; the mountains are. The sun is round. I ring with life, and the mountains ring, and when I can hear it, there is a ringing that we share. I understand all this, not in my mind but in my heart, knowing how meaningless it is to try to capture what cannot be expressed, knowing that mere words will remain when I read it all again, another day.
I reviewed the Kuiu Guide Gloves on ITS Tactical. Check it out. Or just go straight to Kuiu and buy a pair. They’re that good.
At 2.6 ounces (74 grams), the Guide Glove weighs only 0.3 ounces more than a pair of Mechanix Original Gloves of the same size – an impressive feat, considering that the Guide Glove is made of much more substantial materials. In every way, the gloves have exceeded my expectations. They are more breathable, more water repellent, and provide a higher dexterity than I expected.
Many outdoor gear brands sell thin webbing belts. These belts aren’t meant to hold much gear. They simply hold your pants up. The thin, pliable webbing makes for a svelte belt that can be comfortably worn under a pack hip belt or a climbing harness. The webbing also tends to be of a low quality, and the belts are often priced ridiculously high. Why pay $15 for something that you can make yourself at little cost, if not for free?
I had worn a Frequent Flyer Belt from The Wilderness Tactical on a daily basis for a number of years. It is an excellent belt, but I occasionally found the wide and thick webbing, which is appropriate for some uses, to be uncomfortable and cause chafing under the heavy hip belt of my pack. As an experiment, I purchased a Patagonia Friction Belt when it was heavily discounted during a sale. That worked well for a while – it was more comfortable under my pack – but the webbing used was very low quality. It was also still a bit stiff. I thought, why should there be any stiffness at all to the belt? It serves no purpose in the backcountry.
I made my first belt in early March. Initially I intended for it be used only when backpacking, but it proved functional enough that I soon made three more and wear them on a daily basis. The webbing is stiff enough to hold a multi-tool and a knife, which is the most that I carry on my belt these days, both in wilderness environments and urban.
The webbing I used is simple tubular webbing. It is strong, and yet softer and more pliable than most flat webbing, making for a comfortable belt. Any climber most likely has yards of the stuff laying around. I happen to use BlueWater 1” webbing, which exceeds the strength of military-spec webbing, but, in a belt, this is irrelevant. My stitching will certainly blow long before the webbing.
After sewing, I cut the webbing so that the total length of the belt is about 39”. That provides plenty of length to use the belt as improvised lashing, if I ever need it.
I first began using ladderlocs as the buckles. This worked, but I later experimented with using two D-rings. I now prefer the smoother operation of the D-ring buckle. I have experienced no slippage with either type of buckle. Both the ladderlocs and the D-rings I had laying around from previous projects, or from old gear (I always salvage the hardware from old, ratty gear before throwing the rest away).
The total cost to me for all of these belts was zero. If you had to buy the webbing and hardware, you may be looking at around $2. A far cry cheaper than any similar belt you’d find in a store! The total weight of a single belt is 50 grams (1.76 oz).
These here is God’s finest scupturings! And there ain’t no laws for the brave ones! And there ain’t no asylums for the crazy ones! And there ain’t no churches, except for this right here! And there ain’t no priests excepting the birds. By God, I are a mountain man, and I’ll live ‘til an arrow or a bullet finds me. And then I’ll leave my bones on this great map of the magnificent…
Continuing with my recent theme of short, low-mileage trips I ventured back into the Alpine Lakes Wilderness last weekend. After hitting snow at low elevations at the Foss Lakes the previous week, I decided this time to head east of the crest.
Whitepine Creek runs just west of Leavenworth and provides a lesser known and lesser used route onto Icicle Ridge and the surrounding area, compared to the popular Icicle Creek Road. I reached the nearest trailhead at midmorning on Friday. As I pulled my pack out of the car, I realized something was missing. Whoops, no trekking pole! I only ever carry one pole anymore, and don’t find it to be required gear for walking. Its import lies in the fact that I use it to set up my tarp. The pole isn’t needed when I string up the tarp between two trees – which I prefer to do whenever two conveniently placed trees present themselves at my intended camp – but I would be getting high on this trip and thought it likely that I would be spending a night or two above tree line.
Near the trailhead’s bulletin board I spotted a few walking sticks leaning against a stump. Throwing the pack on my back, I walked over to the sticks and inspected the lot for one that would suit me. I found one that was light and skinny, but still strong enough to serve for any swift stream crossings that may lay ahead. It was a good height for walking, which meant it was too tall for the front beak of the tarp. I could cut it down to size later.
With stick in hand, I headed out. The trail leads into the Whitepine valley, filled with thick pine woods which provide shade from the morning sun. Occasionally, I caught a glimpse of the valley ridge above. At two and a half miles, I reached a junction with Wildhorse creek, which drains into Whitepine on its way out of the mountains. I took a left and began the climb up the Wildhorse valley, to its head at Frosty Pass and the high country beyond.
The Whitepine and the Wildhorse sit in the Chiwaukum Mountains, which in Wenatchee means many-little-creeks-leading-together. True to form, dozens of small creeks flow down the otherwise dry eastern ridge of the Wildhorse, turning it into a wet hike. In places the trail was a creek. In others, the small amount of use and large amount of moisture had created thick patches of salmon berry and devil’s club that obscured the trail. I push through it, hoping that I’m the only one walking through this berry feast at the moment.
As the trail lead higher, the trees began to thin and the views along the opposite ridge reveal high peaks and green fields.
With wet, muddy feet I reached Frosty Pass sometime in mid-afternoon., around 10 miles and a few thousand feet of elevation from the trail head. The sun is strong. The weather forecast called for 90°F down below. It doesn’t feel much cooler up here.
From Frosty Pass, my route headed directly east and climbed up to Icicle Ridge. Shortly, I reached the first of the ridge’s lakes, Lake Mary, which was my destination for the day.
In the time that it took to set my pack down and take a drink of water, I had dozens of mosquitos biting my skin. I was ready for them this time, after having a similar experience last week. Rain pants, rain jacket, hat, headnet and gloves all came out of my pack. I soon was protected inside a sweaty bug suit.
I tied my tarp up between a couple trees, avoiding having to cut my walking stick down to length for a front pole. Below the tarp, went my bivy sack. Rain didn’t seem likely, but the net hood of the bivy would ensure a bug-free night.
That night I was awoken by some clomping off to the south of camp. Something larger than a mouse, but smaller than a Sasquatch.
Saturday morning I broke camp upon waking, wanting to get someplace higher and breezier than buggy Lake Mary before breakfast.
Past the lake, the trail climbs to Mary’s Pass. As I walked, I watched the sun’s rays creep over the eastern ridge and brighten the lower valley. Marmots scampered down the trail, and the mosquitoes continued to buzz.
At the top of the pass the world opens up. There is a sea of mountains in all directions, green carpeted valleys emanating from their depths, and the blue sky above. I’ve spent a lot of times in the mountains. This spot, on this day, is one of the most beautiful that I’ve seen. I cannot capture it.
I ate breakfast above the pass, and spent the rest of the morning and early afternoon rambling around the alpine wonderland. I explored some of the valleys and lakes down below, climbed back up the ridges and scrambled to the top of the peaks. Towards the late afternoon I decided it was time to leave. I wanted to retrace my steps from earlier in the morning and the previous afternoon, dropping back over Frosty Pass before climbing up to Lake Grace on the other side of Snowgrass Mountain. I had seen the beginning of the trail that led to the lake on the hike in. It wasn’t marked on either of my maps, and I curious to see what was up there.
Soon after I started on the Lake Grace trail it became evident that it was little used. It was even more overgrown than the Wildhorse Creek trail and, in spots, had been completely wiped out by avalanches. There were occasional cairns stacked along the route, but they soon died out as I discovered their source. About a quarter mile ahead there was a group of three, slowly plodding down the trail. As I approached their leader commented that I looked like I knew where I was going. “Nope,” I replied. “Never been here before.” He had been stacking the cairns occasionally, as he found what looked like it might be a trail. They were a slow moving group, with large packs, so I darted on ahead, exploring the route and backtracking to find them when I had located what I thought was the official trail. In that manner we slowly made it to a small meadow with many creeks running through it. Above, a waterfall fell down the face of a cliff. The basin above must hold our lake, we reasoned, and prepared ourselves for the climb.
I aimed straight up and began a slow steady plod. The others, wishing to mark the actual trail rather than my adhoc route, took a longer route, slowly searching for the remnants of switchbacks. I soon left them behind and climbed the face alone.
At the top was a green meadow strewn with large boulders. I weaved through them, making my way deeper into the basin, soon discovering three lakes: Lake Grace, a second unnamed lake, and a third that was likely just a seasonal puddle of snow melt. Having found our destination, I went back through the boulders and climbed down a couple hundred feet till I was within shouting distance of the others. I wanted to make sure they knew where the lakes lay and had an idea about the rest of the route. This accomplished, I climbed up again and re-entered the basin.
The lakes were surrounded by rough meadows covered with heather and other such small shrubs. The basin was not visited enough to result in any obvious spots to camp. With some searching, I found a bare spot of dirt. It was large enough for me to lay down on and more-or-less flat. I pitched my tarp, threw down the bivy (there were bugs up there too) and prepared for the sunset, which was soon to begin. (I wanted to keep my walking stick at full length for the long descent the next day, so I became a little creative with the pitch.)
The next day I rose at dawn to watch the sun climb in the east and begin to light the peaks of the high Cascades both south and west. Before the light reached into the basin I broke camp and descended the ridge, back to the junction with the Wildhorse Creek trail below Frosty Pass. From there I left the high country behind, racing the sun down into the forested valleys of the Wildhorse and the Whitepine. Six long hours after waking I arrived back where I had begun, and left the mountains for another short time.
Mountains lie all about, with many difficult turns leading here and there. The trails run up and down; we are martyred with obstructing rocks. No matter how well we keep the path, if we miss one single step, we shall never know safe return. But whoever has the good fortune to penetrate that wilderness, for his labors will gain a beatific reward, for he shall find there his heart’s delight. The wilderness abounds in whatsoever the ears desire to hear, whatsoever would please the eye: so that no one could possible wish to be anywhere else. And this I well know; for I have been there.
We have packed everything we need for the trip in a backpack. If the backpack is light, we will walk more easily. With a heavy pack, we walk with bended knees, and a slower pace.
Having a lot of belongings takes a toll. Things can determine how we live, requiring monthly payments, maintenance and repair.
When we can carry all our life’s necessities on our backs, we can go where we want.
On a journey, we sleep on the ground. We cook food over a fire. Life is simple. Everyone who pursues simple life, does so by choice.
…
On a journey, whatever we can’t do without is a life necessity. This is the question raised during the journey by actual situations, what is needed for a society based on life-necessities. Is there something better than what we experience in our daily life, and if so, what is it? Why do we practice simple life? Does exertion have any positive value? Almost everything in simple life requires more exertion that our daily life.
Having nice things and being comfortable has become the norm in our society, which consumes steadily more resources so that we can live more and more comfortably. This is characteristic of an industrial growth society.
When we take with us only our life’s necessities, our equipment must last, it must be of high quality.
I gained the pass just before noon. On the other side, the ridge fell to reveal Jack Creek, Mount Stuart and the other paths I had traveled the year before. It’s pleasing to see that country again, and I gaze off into the Wilderness as I recall some of the moments of that past trip. I’m also satisfied that my route finding had gone perfectly to plan.
Last night, camped back beyond Lake Anne, I had taken out map and compass and, while dinner sat in the cozy, planned today’s route. The cross country section was only a couple miles, but I find it useful to plan carefully, whether the route is two miles or 20.
I had come in on the De Roux trailhead, which climbed up a ways from the Teanaway valley before reaching Gallagher Head Lake. My plans for this piece of rambling were uncertain. I had an idea or two, but no certain plan. Summer was late this year. I wasn’t sure what sort of snow I would hit, or where. Whatever conditions I did meet would factor into determining my route.
At Gallagher I met a couple who had camped the previous night at Lake Anne. We greeted one another and they asked where I was headed. “Up Ingalls way,” I said, with a vague waving of the hand. I told them that I knew I was heading to Lake Anne, and then from there I’d leave the trail, heading toward Ingalls Peak, to see what I would see.
After lunch at the lake, I continued down the trail, making my way north and west to the other side of Esmeralda Peaks.
South of Anne Lake, I decided to make a late afternoon camp. I went off the trail aways and found a spot just on the edge of a cliff overlooking the Esmeralda basin. With the tarp pitched, I wandered down to a small creek for water. There, I had dinner, as well, before climbing back up to where I had made camp.
The long summer evening gave me plenty of time to take in the view and. That night, there were thousands of stars that needed gazing.
The following morning I had broken camp and climbed over the final saddle to Lake Anne. From there, I left the trail, aiming for an unnamed pass just north of Ingalls Peak. My intention was to climb over that, descend into the Jack Creek valley, and then climb back up to Stuart Pass. From there, I would go to Lake Ingalls and head back down, effectively circumnavigating the peak.
After enjoying the view at the top of the pass, I turned to the more immediate matter of the descent. The east side of the ridge was steeper than the west, and covered with crumbling talus. I tried three different ways down, but on all them I eventually had to turn around and climb back up. I try not to climb down anything I can’t climb up. Some rope and hardware would have been handy, but I had none. I had packed my ice ax, thinking it likely that there would be more snow here at 7,000 feet, but, except for the occasional small field, it was melted. Had I come a week or two earlier, most of the ridge probably would have been snow covered, which would have made the descent simpler. As it was, no route presented itself. I decided that instead of making Lake Ingalls, I would retrace my steps to last night’s camp and head down and out along Esmeralda Basin.
First, though, came lunch. On the map, someone had drawn an imaginary line along the top of this ridge, designated one side as the Alpine Lakes Wilderness, and the other as just plain old National Forest. I decided that as long as I was up here, I would enjoy my overly-rehydrated beans in the Alpine Lakes. So, I went 50 feet or so down the west side again, till I happened upon a spot to sit.
After lunch I spent some time scrambling around on the northern most peak of Ingalls, before retracing my steps back to an unmarked meadow. From there, I made for Lake Anne, regaining the trail at the lake’s northern outlet.
As I make my way towards Esmeralda, and then proceed into the basin, I enter day-hiking range and find the trail cluttered with swarms of day trippers. There are three or four backpackers mixed in among them. Near the end of the trail, I have my first meeting with that most curious specimen, the iPhone backpacker. I had heard that these people exist, going into the backcountry with only the GPS on their cell phone for navigation, but wasn’t quite sure if it was all a joke. Apparently not. He was making for Lake Anne, and I tried to point out on my map where I thought some good camping would be if Anne was overly crowded, but it was clear he did not know how to read it.
At the end of the trail I reached the road. The De Roux trailhead, my final destination is still a few miles further. I make it a mile down the road before being stopped by a woman I had greeted back up in the high country somewhere. She had come out behind me, and offered me a ride the rest of the way to De Roux.
On our last morning in the Red Buttes Wilderness, Avagdu and I woke up to a very wet camp. We wanted fire, but neither of us had brought any dry wood into our shelters the night before. Everything was soaked.
We gathered what we could – branches from dead fall that were up off the ground, as well as dead lower branches from standing trees – but the trees were so sparse in the area that, even after splitting, much of this wood was still wet. (I should mention that we wanted a fire, but did not need one. I, at least, was not hugely motivated to put a large amount of energy into batoning. So a small amount of our failure ought to be attributed to laziness.)
After failing to get a blaze going with the wet wood, even after using a bit of inner tube to extend the flame, I hit on the idea of using the Inferno.
I’ve had my Trail Designs Ti-Tri for two and a half years now. It’s been my primary stove system for all of that time. Last Fall, I contacted Trail Designs and had them send me an Inferno insert for the system. The Inferno consists of a second, inverted cone and a grate. The grate raises the base of the fire up off of the ground, allowing for an improved air flow, and the second cone creates a double-walled stove. This turns the Ti-Tri into a wood gassifier, similar to the Four Dogs Bushcooker or the ever-popular Bushbuddy.
So, back at camp, I thought the Inferno might help. I had never used it before solely to start a camp fire, but I knew from previous experience using it to cook my dinner that it was efficient enough to burn damp wood. It would give us a raised platform, allowing us to build the fire up off of the saturated ground, and the cone would provide a wall to keep the heat in and help dry the wood.
It was a success.
We split a bit more wood, and did a bit more feathering. It was all still as damp as before, but shortly we achieved a small blaze inside the Inferno. From there, it was simply a matter of building the fire up and around the Inferno. With the heat put out by the cone, even the wet, unprocessed wood would dry and burn. As the fire built up, the Inferno could be pulled out with a multi-tool or a couple sticks, and packed away with the rest of the Ti-Tri, ready to cook the next meal.
The weight of the Inferno insert varies. It is dependent on the size of the outer Caldera cone, which in turns varies based on the size of the pot. For my system, which is built around a 900mL pot from Titanium Goat, the pieces that comprise the Inferno weigh in at a collective 38 grams (1.34 ounces). Given that it not only increases the Ti-Tri’s efficiency as a wood burning stove, but also functions as an emergency fire starter, I’m happy to haul the extra weight.
Three years ago I wrote a guide to building a VPS web server for serving sites in a PHP environment. That setup served me well for some time, but most of the sites I run now – including this one – are now written in Python. Earlier this year I built another web server to reflect this. It’s similar to before; I still use Ubuntu and I still like to serve pages with nginx. But PHP has been replaced with Python, and many of the packages used to build the environment have changed as a result. As with the last time, I decided to compile my notes into a guide, both for my own reference and in case anyone else would like to duplicate it. So far, the server has proven to be fast and efficient. It serves Python using uWSGI, uses a PostgreSQL database, and includes a simple mail server provided by Postfix. I think it’s a good setup for serving simple Django-based websites.
Basic Setup
As with last time, I recommend following Slicehost’s basic server setup article. It discusses user administration, SSH security, and firewalls. I no longer use Slicehost as my VPS provider, but I find that Slicehost’s articles provide an excellent base regardless of the host.
Packages
Packages should upgraded immediately to address any known security vulnerabilities.
12
$sudoapt-getupdate
$sudoapt-getupgrade
After the repositories have been updated, I install some essential packages.
1
$sudoapt-getinstallbuild-essentialscreendnsutils
Build-essential includes necessary tools to compile programs. I am incapable of using a computer that does not have screen on it, so that gets installed too. The third package, dnsutils, is optional, but includes dig which is useful for troubleshooting DNS issues.
DenyHosts
Slicehost’s setup article recommends turning off password authentication in SSH, forcing users to login with keys only. I use keys whenever I can, but I appreciate the option of being able to login to my server from any computer, when I may or may not have my SSH key with me. So I leave password authentication enabled. This presents the possibility of brute-force attacks. Enter DenyHosts. DenyHosts, which I have discussed previously attempts to protect against SSH attacks by banning hosts after a certain number of failed login attempts. When password authentication is enabled, running DenyHosts is a smart move.
Later on I’ll be installing some Python development packages. One of them creates a directory called /usr/lib/pymodules/python2.6/.path, which sets off a warning in chkrootkit. Part of chkrootkit’s desgin philosophy is to not include any whitelists: if chkrootkit finds something that it doesn’t like, you’re going to hear about it. I have cron run chkrootkit nightly and I want to receive any warnings, but I don’t want to receive the same false positive every morning in my inbox.
The solution is to create a file that contains chkrootkit’s warning. I call that file whitelist and store it in the same directory as chkrootkit. When chkrootkit is run, any output is redirected to a file. That file is compared to the whitelist using diff and the output of that – if any – is then read. At the end, the file containing chkrootkit’s output is deleted so that the working directory is ready for the next run. The effect is that I only hear warnings from chkrootkit that I have not explicit whitelisted. All of this can be accomplished in a single crontab entry.
The script that my cronjob runs is slightly different from the one demonstrated in the Slicehost article. Their script executes a few commands, groups the output together, and sends it to mail to email the system administrator. This results in daily emails, regardless of whether rkhunter finds any warnings or not. My script is simpler and does not result in so many messages.
The version check and update commands both have the -q switch, which disables any output – I don’t care to know whether rkhunter updated itself or not. The final line actually executes the scan. Notice that there’s no reference to mail. This script does not send any messages. The reason for that is that rkhunter itself provides the mail functionality. Inside of /etc/rkhunter.conf there is a MAIL-ON-WARNING variable. As long as the machine has an smtp server on it (which I’ll get to later in this guide), simply filling in this variable will result in any warnings being emailed to the system administrator.
Web Server
With the basics complete, it’s time to start serving something! In my previous article I covered serving a PHP-based Wordpress site via FastCGI and nginx. This time around the stack will be different: nginx, uWSGI, Python, and Django.
A few basic packages will help flesh out the server’s Python development environment:
The nginx package in Ubuntu’s official repositories is always notoriously outdated. It used to be you had to compile the server from source, but there is now an Ubuntu PPA for the latest stable versions. As described by the nginx wiki, all that is needed is to add the PPA to your sources.list and apt-get away!
If you do Python development and haven’t heard of virtualenv, it is well worth reading up on. It allows the user to create an isolated, virtual Python environment for each project. This helps immensely when developing (or serving) multiple projects on a single machine. Needless to say, I consider it to be a required package.
Install
I’ll be installing virtualenv and virtualenvwrapper (a set of scripts to facilitate working with virtual environments). I also prefer pip over easy_install for managing Python packages.
Virtual environments can be stored wherever you fancy. For now, I keep them in a hidden folder in my home directory. For these examples, I’ll setup an environment called myproject.
Notice the --no-site-packages switch. That tells virtualenv to create this environment without any of the Python packages already installed, creating a completely fresh, clean environment. The --distribute switch causes the new virtual environment to be setup with distribute, a replacement for the old and rather broken setuptools.
All that’s needed to get virtualenvwrapper up and running is to add two lines to your .bashrc and re-source the file.
We can now use commands like workon to ease the process of activating a certain environment.
I’ll go ahead and install yolk in the environment to help manage packages.
123
$workonmyproject
$pipinstallyolk
$yolk-l
The last command will cause yolk to list all packages installed in the environment. Try deactivating the environment and then running yolk again.
123
$deactivate
$yolk-l
yolk:commandnotfound
‘yolk’ wasn’t found, because it was only installed within the virtual environment. Neat!
Install Django
Finally, it’s time to install Django! The process is simple enough.
12
$workonmyproject
$pipinstalldjango
And that’s it!
The Python Imaging Library is likely to be needed for any Django project. I installed it in the beginning of this section, but because I used the --no-site-packages when creating my virtual environment, it is not available for use within the project. To fix that, I’ll just link the package in. I also previously installed psyopg2, which Python will need to communicate with my PostgreSQL database, so I’ll link that in as well. psyopg2 depends on mx, which was also previously installed but still must be made available in the environment.
While I’m still in the virtual environment, I’ll go ahead and create a new Django project. The project will have the same name as the environment: myproject. For this tutorial, I’ll stick with the precedence set by the Slicehost tutorials and use demo as the name of both my user and group on the server.
I like to keep my sites in the /srv/ directory. I structure them so that the code that runs the site, any public files, logs, and backups are all stored in separate sub-directories.
Notice that the logs and public directories were chowned to the www-data group. That is the name of the user and group that nginx will run as. The web server will need permissions to write to those locations.
Save Requirements
With the environment setup and all the necessary packages installed, now is a good time to tell pip to freeze all the packages and their versions. I keep this file in a deploy folder in my project.
Now that I have something to serve, I’ll configure uWSGI to serve it. The first step is to create a configuration file for the project. I call mine wsgi.py and store it in /srv/myproject.com/code/myproject/. It appends the current directory to the Python path, specifies the Django settings file for the project, and registers the WSGI handler.
With that done, the next step is to decide how uWSGI should be run. I’m going to use Ubuntu’s upstart to supervise the service. I keep the upstart script in my project’s deploy/ directory.
1 2 3 4 5 6 7 8 9101112131415161718
$vim/srv/myproject.com/code/deploy/uwsgi.conf
description"uWSGI server for My Project"
startonrunlevel[2345]
stoponrunlevel[!2345]
respawn
exec/usr/local/sbin/uwsgi\
--home/home/demo/.virtualenvs/myproject/\
--socket/var/run/myproject.com.sock\
--chmod-socket\
--pythonpath/srv/myproject.com/code/\
--modulemyproject.wsgi\
--process2\
--harakiri30\
--master\
--logto/srv/myproject.com/logs/uwsgi.log
Sadly, upstart doesn’t seem to recognize links. Rather than linking the config file into /etc/init/, I have to copy it.
Nginx’s configuration is pretty straight-forward. If you’ve never configured the server before, Slicehost’s articles can set you down the right path. My own nginx config looks something like this:
I keep the virtual host config for my project inside the project’s code/deploy/ directory. A basic virtual host for a Django project would looks like this:
To install and enable the virtual host, I’ll link the configuration file first to the nginx sites-available directory, and then link that link to the sites-enabled directory.
Django has a very good built-in cache framework. I like to take advantage of it with a memory-based backend: namely, memcached. It’s fast, efficient, and easy to setup.
All that’s needed is to install memcached on the server, followed by the Python API python-memcached.
The default configuration file in Ubuntu lives at /etc/memcached.conf. I usually stick with the defaults, but sometimes end up changing the port that memchached runs on or the amount of memory it is allowed to use.
I maintain a configuration file for each of the domains being served by the machine. The file for a domain lives in – you guessed it – the associated project’s deploy/ folder. Each contains two entries: one for the nginx virtual host and one for the uWSGI instance. The reason for this is that each config block needs a postrotate section to restart the associated server after the logs have been rotated. I don’t want nginx to be restarted everytime a uWSGI log is rotated, and I don’t want uWSGI restarted everytime an nginx log is rotated.
A web server isn’t much use without a database these days. I use PostgreSQL.
Install
1
$sudoapt-getinstallpostgresql
Configure
PostgreSQL has some unique terminology and ways of doing things. When I first set it up for the first time, having coming from a MySQL background, not everything was completely straightforward. As usual, Slicehost has a number of articles that will provide a foundation.
In the /etc/postgresql/8.4/main/postgresql.conf file, I uncomment the following two lines:
track_counts = on
autovacuum = on
Then restart the database server.
1
$sudo/etc/init.d/postgresql-8.4restart
After that I’ll change the password for the postgres user and the postgres database role.
If I’m restoring a previous database from a backup, now would be the time to import the backup.
1
$psql-Umyproject<myproject.postgresql
And now Django should be able to connect!
The basic server is setup and secure. Django, uWSGI, nginx and PostgreSQL are all running and getting along swimmingly. At this point, many people would be done, but I also like to have a minimal mail server.
Mail Server
Most of my domains use Google Apps, so I don’t need a full-blown mail server. I do want programs and scripts to be able to send mail, and I prefer not to do so through an external SMTP server – I’d rather just deal with having sendmail running on my own box. And I do have a few domains that do not use Google Apps. They have one or two aliases associated with them, so the server needs to receive messages for those domains and forward them off to an external address. If any of this sounds vaguely familiar, it’s because it’s the same thing I detailed last time. My setup now is the same as then, so I won’t repeat any of it here.
I use Git to keep track of the code for all my projects. (If you’re new to Git, you ought to skim the Git Reference or Everyday GIT With 20 Commands Or So). To manage websites, I create a repository of the directory with the code that runs the site (in this case, /srv/myproject.com/code/) and another empty, bare repository to work as a hub. With a post-update and post-commit, the end result is an excellent web workflow:
A copy of the hub can be checked out on a local machine for development. Whenever a change is committed, a simple git push will push the code to the web server and automatically make it live.
Changes can be made on the server in the actual live website directory. (This is not a best practice, but I do it more often than I should probably admit.) Whenever a change is committed, it is automatically pushed to the hub, so that a simple git pull is all that’s needed on the development machine to update its repository.
A more detailed explanation of this workflow is at Joe Maller’s blog.
To start, I need to create a repository for the new project I created in this tutorial. And, since this is a new server, I need to give Git my name and email address to record with every commit.
Now the hub needs a post-update script so that every time something is pushed to it, that change is automagically pulled into the live website directory.
1 2 3 4 5 6 7 8 91011121314
$vim/srv/myproject.com/hub.git/hooks/post-update
#!/bin/shechoecho"**** Pulling changes into live"echocd/srv/myproject.com/code||exitunsetGIT_DIR
gitpullhubmaster
execgit-update-server-info
$chmod+x/srv/myproject.com/hub.git/hooks/post-update
And the live website directory requires a post-commit script so that every time something is committed inside of it, that change is automagically pushed to the hub.
1 2 3 4 5 6 7 8 910
$vim/srv/myproject.com/code/.git/hooks/post-commit
#!/bin/shechoecho"**** pushing changes to Hub"echo
gitpushhub
$chmod+x/srv/myproject.com/code/.git/hooks/post-commit
All that’s left is to check out the hub onto the development machine – my laptop, in this case!
Now go back to the server, and the file should be there! To test things the other way around, I’ll delete the file from the live repository.
12345
$cd/srv/myproject.com/code/
$ls
myprojecttest
$gitrmtest
$gitcommit-m"Removing the test file"
And once again to the development machine:
123
$gitpull
$ls
deploymyproject
No more test! It’s pretty dandy.
Restoring
If I was building a new server and restoring a project from an old server, I would simply mirror the old hub and then clone that in the live directory.
Prior to building this server, I was new to a lot of this – particularly, uWSGI and virtualenv. The following tutorials helped me a good deal in putting together the perfect setup for my needs.
Avagdu and I pulled into the trailhead around 7 PM. After getting our gear together, we decided to take advantage of the long summer evening to log a few miles. The trail into the Red Buttes Wilderness climbs steadily through pine woods. It’s dry and dusty with the lack of rain. But that’s to be expected. We’re back in California, after all.
Occasional glimpses of large slides and the valley below can be had through the trees. Soon enough, the sun sets behind the hills. I remove the headlamp from my pack and throw it around my neck. Avagdu stops a minute later to do the same. There’s another hour or so of good hiking to be got yet.
Our destination this night is Echo Lake. I don’t think it’s too much further down the trail. After I wet my feet in a stream crossing, I figure we must be close, but the sun is down, the moon not yet risen, and I’m worried I’ll miss the spur trail that goes off to the lake. Shortly after the crossing we’re surprised by a small wilderness camp: a shelter made of 4 upright posts and a few pine boughs for a roof, a table, a bit of firewood, and what is either an attempt at a chair or a Nessmuk-style fire. I can’t tell which. It’s an impressive setup. “Someone Ray Mears-ed it up,” Avagdu says. The only thing we can’t figure out is why the shelter is lashed together with duct tape rather than cordage. Or why the bundle of firewood is wrapped in duct tape.
It’s a bit after 10 PM now. We decide to take advantage of our luck and spend the night here. The shelter doesn’t look waterproof, but there’s no other flat ground around. It doesn’t feel like rain tonight anyway. There’s enough room for us both to throw our bivvies down underneath.
I had eaten before reaching the trail. The meal is still sitting in my belly. Forgoing dinner, I go off to hang my food. Avagdu decides to cook a small meal for himself – out of hunger, or just so that he’ll have a few less ounces to carry tomorrow. While we’re sitting around the fire pit, I spot a small mouse scurrying around the shelter. He seems disappointed that new tenants have moved in. Particularly because we had moved the old sock (his bed, I think) from the ground of the shelter to the table. After sniffing around for a while he scurries off.
We’re off early in the morning, with expectations of a short climb before arriving at the lake for breakfast.
Things don’t go as planned.
The grade steepens, as expected, but the trail keeps going on. Eventually we break out of the trees into a muddy meadow. Snow patches begin to appear. Somewhere in the meadow I loose the trail. By 10 AM we both feel that we should have reached Echo Lake. The mileage posted at the trailhead was only 4 miles, which we’ve certainly accomplished by now. I’m getting hungry, so I decide to stop in a patch of trees for a bowl of oatmeal. We both eat. After cleaning my pot I get out the map. It’s a large, ungainly thing. I plot our position and get a bearing to the lake. Not too far off, but I still don’t trust the mileage. It’s definitely further than 4 miles from the trailhead.
We climb up higher. The snow is constant now. We end up on a small knob above the lake. Echo Lake is surrounded by snow and looks to be still partially frozen over. Neither of us feel like venturing down for a visit. Our route now takes us up out of the basin onto the Siskiyou Crest. If we went down to the lake we’d just have to climb back up again. So we decide to forgo the lake and instead head higher, aiming for the saddle between Red Butte and Cook and Green Butte.
The slope we’re climbing is facing north. I hope that once we get over to the other side the snow will be gone. Or at least less. Before leaving for the trip I hadn’t been able to find any recent reports or conditions for the area. I figured we wouldn’t be getting very high and, hey, it’s California (the whole state is a desert, right?), so we didn’t plan for much snow.
I’m wearing my Merrell Trail Gloves, which aren’t exactly ideal for kicking steps. But going uphill isn’t too much trouble. We reach a bare scree field, climb it, and gain the saddle. I’m pleased to see that both the top of the ridge and the south slope are covered not by snow, but by Manzanita.
Just on the other side of the ridge is our goal: the Pacific Crest Trail. We’ll be on the PCT for the next few miles, which ought to help us make up for time lost in the snow. The PCT is the superhighway of the mountains – wide, tame, and well groomed compared to most wilderness trails.
Our route takes us west along the ridge, toward Red Butte. Only a few yards down the trail we come upon a group of three camped on the ridge. They had planned the same route as we, but also did not expect the trail to Echo Lake to be so long nor the snow to be so prevalent. It had upset their schedule. They no longer had time to complete the loop. Instead, they decided to spend some time enjoying the view from the ridgetop before descending and heading out.
The trail is wide and dry. It goes on for a bit before intersecting an old logging road. Just west of the junction both road and trail continue into a snow-filled basin. So much for dry feet! There’s a good stream of snow melt flowing here which we use to fill up our reservoirs, not sure where the next good source will be.
From there, the trail climbs over a ridge and down into another basin, which holds Lily Pad Lake. The road parallels the trail and ends in the same lake basin. I choose to follow the road, which is easier to spot under snow. The basin provides views of the other side of Red Butte, the namesake of this Wilderness.
Once across, both road and trail take a steep route up and out of the basin. I decide to take a route slightly longer but easier given the snow. Once gaining the other side, we’re once again in mostly dry territory with only occasional patches of snow. I find the PCT and follow that for a bit before loosing it in another snow field. On the other side, I find the road. Good enough.
The road ends at a fence made of stacked rocks. From there we can look down into this new basin and see the PCT. Lily Pad Lake sits below it. Both hold more snow. The ridge on the west side of the basin has more snow and looks steeper than any field we’ve yet encountered. We must climb that, but not yet. It’s early afternoon and my stomach calls for lunch.
It’s windy up on the ridge. There’s a small notch in the rock fence where I setup my stove, keeping it out of the wind. A pot full of noodles, a few mouthfuls of granola with dark chocolate chips, and I’m feeling copacetic in the sun. But we’re not getting any closer to the other side of the basin and Avagdu has finished his crackers and MRE peanut butter. It’s time to move on.
Climbing down from the end of the road we regain the the PCT. It is soon obscured by snow. The slope is indeed steep here – steep enough that I don’t feel safe crossing it without an ice axe or traction devices. But there’s a bare spot above. I make for that, where we can cross above the snow field and then come back down on the other side. I’m having flashbacks of last year in the Glacier Peak Wilderness.
We make it to the top, and across, but before heading back down to where we need to be there’s a finger of the snow field to descend. Avagdu goes first, sitting down on the snow and attempting a controlled descent that ends up being a glissade to the other side. I do the same.
It’s not much further till we reach a similar obstacle. But this time we can’t go up and around the snow. The only choice is to go straight across. I lead this one, slowly kicking steps across the field. It’s easier to cross on a diagonal line, heading slightly uphill. Eventually I end up above where I need to be, with Avagdu behind me. Below, the snow continues for 30 feet before reaching the trail, which at that point is bare. It’s a steep glissade without an ice axe to control the descent. The best option looks to be to sit and attempt to crab walk down, kicking in my heels to make steps as I descend. This works till about halfway, where a step fails and I slip, sliding down the rest of the way. It’s close – I almost miss the bare spot and end up in a tree well further down the mountain – but I’m able to slide enough to the right that I make it, with no problem other than cold hands from digging into the snow.
Meanwhile, Avagdu is above, watching the performance with some amount of trepidation. He sits down for his turn and I attempt to guide him in, instructing him to kick steps with his heels and aim for the log on the trail. The beginning is good. Then he slips and starts the glissade. He’s further to the left than I was, but he’s reaching for the handholds on the exposed trail and it looks like he’ll make it without trouble, until his reach turns into a somersault. Luckily the somersault takes him in the right direction and he crashes into a branch of the log or a bit of rock. I can’t see which. Later, he says that whatever hit him did so on his heavily padded hip-belt, which probably saved him some discomfort and bruising on the hip.
After a well deserved breather and a bit of water, we continue. It’s not too much longer before, predictably, the trail once again crosses into snow and enters a steep slope. This time it looks like we can go up and around along a tricky scree field, but a group of large boulders prevents me from seeing what is held in store for us on the other side.
We go for it, carefully making our way across the scree along the edge of the snow. It’s the most difficult part yet. On the other side, I climb up the group of boulders to getter a better view of the route above. It’s not a good sight. We’re almost at the top of the ridge, but directly across from us is another steep, snow covered slope. There’s no way around it, above or below, and I don’t want to attempt another crossing so steep without more tools. Directly above us is steep as well. We might be able to make it, climbing with both hands and feet, but there look to be a few cornices up there at the top. That makes me uncomfortable. Avagdu has come around by this time and points out a possible route, saying that there’s a few trees along there to break our fall. I start laughing. That’s exactly what I look for when I’m scouting out a route, but hearing it voiced out loud is somehow humorous. “Yeah, don’t worry, there’s some ground down there to break our fall!”
Another look around. It doesn’t look good. I still can’t see over the top of this ridge, so even if we make it up I’m not sure what waits for us further on. More of the same, likely, which will upset our schedule.
I suggest we turn around. Avagdu agrees. If we’re careful, we can take Avagdu’s suggested route a little further along, which will put is in intermittent trees. We can glissade from tree to tree, hopefully avoiding any big wells, and make it down to the bottom of the basin. From there, it’s a simple matter of crossing the basin (while avoiding a fall into the lake, which is still partially obscured by snow). The other side of the basin is clear of snow, so we can switchback our way up till we hit the trail or road, and then backtrack to the saddle between the two buttes where we first climbed up out of the basin and Echo Lake.
We reached the spot where we first joined the PCT. The camp belonging to the group of 3 is gone. They must have packed out ahead of us.
I scout out the ridge a bit, checking to see if there’s a better way down the north side than the route we took up. There doesn’t seem to be anything. Looking down from the spot where we finally gained the ridge on the way up, our path looks steeper than before. Funny how that works.
Avagdu and I both relax for a bit, enjoying the view and watching a few clouds roll in. The slope isn’t getting any less steep. After chucking a few rocks down to see where they land, we decide to go for it.
We descend the bare scree field and are back in the snow. Luckily, we can glissade down this time rather than having to climb up. It’s quick, and fun.
Just below where we now know Echo Lake to be we come upon the remains of an old fire ring. There are flat spots around that will make decent spots for us to pitch our tarps, but with the lake on one side and the muddy meadow on the other it looks like it will become too buggy for my tastes. We opt to continue down further, crossing the meadow and descending back into the woods.
At 7 PM we reach a spot with wide flat areas at the base of a cliff. There’s a small trickle of water in the back and the trees are sparse enough to let the sunlight in and allow some views of the sky. This will do for camp.
An abundance of dead wood lies on the floor. The novelty of actually picking dry firewood off the ground rather than having to break it out of trees encourages me to start collecting the makings of a fire. While Avagdu is pitching his tarp I take a spade-shaped rock to dig a small pit. Then I build a basic lay. Soon the flames are jumping.
The night brings heavy rain. The noise on the tarp is enough to wake me up a few times during the night. In the morning I wake but don’t rise for a couple hours, hoping that the rain will soon die down. When it turns to a light sprinkle, I venture out. Our camp has certainly become wet. Avagdu is up and about. He didn’t pack much in the way of insulating layers, so he’s chilly and wants a fire. All of the wood is now sodden. Even that up in the trees is wet, none of the branches being thick enough to protect those below them. It takes some doing, but eventually, with a bit of splitting, feathering, and a few other tricks, we rekindle the fire.
After breakfast the rain picks up again. Neither of us want to sit around outside getting wet, so we retreat to the tarps. The rain puts out our unattended fire.
We have no firm plans for this day. By late morning it appears that the rain won’t give up. We decide that rather than staying in the wet woods all day, it will be better for us to head out and continue on our road trip back up to Washington. A few hours on the road today will make us more likely to accomplish our goal of being in Portland for a meeting on the morrow.
As we break camp the rain continues. We descend lower into the valley. The rain becomes heavier. The sky seems like a torrent by the time we reach the bottom, and both of us are wet. The trailhead is reached shortly after, and there: shelter and some dry clothes.
I leave the mountains, sure in the knowledge that I will return. Perhaps to a different range, but to mountains none the less.
Give him a far reach of eye, the grasses rippling, the small streams talking, buttes swimming clear a hundred miles away. Give him… the clean, ungodly upthrust of the Tetons. They were some.
About a month ago I gave my Izula a cosmetic make-over, inspired by Widerstand‘s similar mods to his Becker knives.
Originally the knife had a light tan powder coating on it, which protected the blade from rust and other wear, but did nothing for style. The first step I made in the modification process was to spend a couple hours with a piece of sandpaper, scraping off the coating until I was down to bare metal. That gave the knife a nice, raw look. But it also made it susceptible to rusting. The solution: a patina!
The last time I talked about patinas I achieved it with moldy potatoes and citrus fruit. This time around I went the easier route and dumped the Izula into a bowl of vinegar over night. I thought it looked great when it came out, and I was pleasantly surprised that I could still see the RAT logo and Izula ant. To finish off the coating I rubbed a little mustard on a few spots on either side of the blade.
The way the knife comes from the factory, the gimping is nice and rounded, providing a comfortable grip for the thumb. I almost never place my thumb on the back of the spine, so gimping doesn’t do much for me. And because it was rounded, it couldn’t throw any sparks off a ferro rod. To make the whole affair a bit more useful I took a Dremel tool and redid the gimping. It’s much more rough and sharp now, less ideal for thumbs but great for throwing sparks.
After that all that was left was to re-wrap the handle with a new piece of paracord – black this time – and the job was done. My favorite EDC knife: even better than before.
You may not notice much, but this blog has been completely rewritten.
I started developing in Django last winter and quickly became smitten with both the Django framework and the Python. Most of the coding I’ve done this year has been in Python. Naturally, I had thoughts of moving this website from Wordpress over to a Django-based blog.
For a while I did nothing about it. Then I had another project come up that required some basic blog functionality be added to a Django-based site. A blog is – or, at least, can be – a fairly simple affair, but before writing my own I decided to look around and see what else was out there. There’s a number of Django-based blogs floating around (Kevin Fricovsky has a list), but few of them jumped out at me. Most were not actively developed and depended on too many stale packages for my taste, or they just had a feature set that I didn’t like.
Out of all of them, two presented themselves as possibilities: Mingus (written by the previously mentioned Kevin) and Nathan Borror’s django-basic-apps. Mingus tries to be a full-featured blogging application and was much too complex for the simple project I was then working on. But the blog application in django-basic-apps (a fork of which provides Mingus with its core blog functionality) looked like it would fit the bill. As the name implies, it is meant to be a very basic blog. I dived in to the code I discovered that, with a few modifications, it would do what I needed.
So I finished that project. But now having messed with blogging in Django I was more motivated to get started on rewriting my own site. I took another look at Mingus. Although it was too complex for the previous project, the features it provides are very similar to the features I wanted for this website. I looked at and thought about Mingus for a time, repeatedly turning it down and then coming back to it. The question centered around the project’s staleness more than anything else. Currently, Mingus is built for Django 1.1. That’s an old version. As of this writing, the current version is 1.3. Many improvements have been made in Django since 1.1 and I was not too keen to forgo them and run an old piece of code. Mingus is under active development, and will be updated for Django 1.3, but it’s a hobby-project, so the work is understandably slow.
In the end, I decided that the best thing to do was go my own route, but take some pointers and inspiration from Mingus. I would make my own fork of django-basic-apps, using that blog as the basis, and build a system on top of that. I created my fork last month and have been steadily plodding away on it in my free time. Over the course of the development I created a fewsimpleapplications to complement the core blog, and contributed code to another project.
It’s not quite done – there’s still a few things I want to improve – but it’s good enough to launch. (If you notice any kinks, let me know.) I’m quite pleased with it.
This is a notable occasion. I’ve been using Wordpress since before it was Wordpress, but it is time to move on. (Wordpress is a fork of an old piece of code called b2/cafelog. My database tables have been rocking the b2 prefix since 2002.)
As you’ve no doubt noticed, the look of the site hasn’t changed much. I tweaked a few things here and there, but for the most part just recreated the same template as what I had written for Wordpress. I am planning on a redesign eventually. For now, I wanted to spend my time developing the actual blog rather than screwing with CSS.
So, there you have it. Everything is open source. Download it, fork it, hack it (and don’t forget to send your code changes back my way). Let me know what you think. Build your own blog with it! (There’s even a script to import data from Wordpress.) I think it’s pretty sweet. The only thing lacking is documentation, and that’s my next goal.
Disqus
The biggest change for the user is probably the comments, which are now powered by Disqus. Consider it a trial. I’ve seen Disqus popping up on a number of sites the past year or so. At first it annoyed me, mostly because I use NoScript and did not want to enable JavaScript for another domain just to comment on a site. But after I got over that I found that Disqus wasn’t too bad. As a user I found it to be on par with the standard comment systems provided by Wordpress, Blogger, and the like. The extra features don’t appeal to me. But as an administrator, Disqus appeals to me more because it means that I no longer have to manage comments myself! And as a developer, I’m attracted to some of the things that Disqus has done (they’re a Python shop, and run on top of Django) and their open source contributions.
So I’m giving it a shot. Disqus will happily export comments, so if I (or you) decide that I don’t like it, it will be easy to move to another system.
Markdown
One final note: I like Markdown. That might be an understatement.
I first starting using Markdown on GitHub, which I signed up for about the same time I started with Django and Python. After learning the syntax and playing with it for a few weeks, I discovered that I had a very hard time writing prose in anything else. In fact, the desire to write blog posts in Markdown was probably the biggest factor that influenced me to get off my butt and move away from Wordpress.
So, I incorporated Markdown into the blog. But rather than just making the blog Markdown-only, I took a hint from Mingus and included django-markup, which supports rendering in many lightweight markup languages.
Because I’m still new to Markdown and occasionally cannot remember the correct syntax, I wanted to include some version of WMD. WMD is a What You See Is What You Mean editor for Markdown, a sort of alternative to WYSIWYG editors like TinyMCE. (It is my believe that WYSIWYG editors are one of the worst things to happen to the Internet.) All WMD consists of is a JavaScript library. The original was written by a guy named John Fraser, who was abducted by aliens some time in 2008. Since his disappearance from the interwebs, WMD has been forked countless times. I looked around at a few found a version that I was happy with (which happens to be a fork of a fork of a fork of a fork), and rolled it into a reusable app. While I was at it, I made some visual changes to the editing area for the post body. The result is an attractive post editing area that is simple to use and produces clean code. I think it is much better than what is offered by Wordpress.
Last week I noticed that the top right compression strap on my Triple Aught Design FAST Pack EDC had begun to rip off from the pack. This is the first failure I’ve experienced on the pack, which has been in regular use since Fall 2007.
I’m surprised that it was this particular strap that failed first. I don’t often carry heavy items in the Transporter Tail, so the strap does not have a lot of stress placed on it. Still, I feel better about sewing it back down than I would about repairing a load-bearing strap.
Now: A needle, a length of #69 nylon thread, and a bit of time.
I’ve toured Whidbey Island before by bus, car and foot, but never by bicycle. I decided to remedy that today. It was forecast to be warm and sunny (only the third day of the year I can say that about), so I woke up early to make the 9:00 AM ferry sailing.
Whidbey is a pleasant mixture of forest and pastoral farmland. I decided to confine my explorations to the south end of the island, as that’s the area I know least.
I logged about 45 miles in the saddle over a leisurely 6 hours, plus about 2 hours of breaks, including lunch in Langley.
Yesterday I felt that I was becoming too complacent on my runs. I needed something to increase the challenge. So, this morning I tossed 20 lbs. into the FAST Pack and strapped it on. That made things interesting.
For the past few years I have been using a cheap headlight from Cateye on the front of my bike. When turned on to the blink setting, it did an acceptable job of making me seen, but it did very little to light up the road. Last January I decided that I wanted to replace or supplement it with a better light.
I looked at the lights carried by various bike shops for a while, but none of them impressed me. The high end bike-specific lights are bright, to be sure, but they tend to be much more expensive than a hand-held light of comparable output.
I thought it would be neat if I could somehow attach a normal light to my handlebars. Not only would this be cheaper than purchasing the equivalent bike headlight, but the light would be multifunctional: appropriate either for my bike or my belt. None of my own hackish attempts to mount a normal light on the handlebars satisfied me, so it was with relief that I heard about a company called Twofish.
The Lockblock is a piece of rubber with perpendicular “U”s on either side. Each side fastens to an object with a small piece of hook-and-loop webbing. The Bikeblock is similar, but the two “U”s are parallel, and each side fastens to its respective object with a single continuous piece of hook-and-loop webbing. Lockblocks are to be used when you want to mount an object perpendicular to something else, such as a light on handlebars. Bikeblocks are appropriate when you want to mount the object parallel to something else, such as a pump to a frame. I bought three of each.
My first use of the Lockblock was to replace the Cateye headlight with my old Novatac 120T. The difference was immediately noticeable on my first night-ride. The 120T lights up the road, both bringing me to the attention of motorists and bringing potholes to the attention of me.
But I still thought it could be better. I wanted a second light.
Research showed that the Fenix LD20 was a popular choice to use in conjunction with Lockblocks. It blasts out a fair number of lumens and I liked that it ran on AA batteries rather than CR123s, so I picked one up.
The combination of the Fenix LD20 and Novatac 120T really light up the road. The Lockblocks hold both lights securely, and they make for a safe commute on long winter nights.
Although I was happy with this setup, I wanted to try using the parallel mount of the Bikeblock to add a helmet light into the mix. The Bikeblock fastens easily and securely across the vents of my Giro Stylus. Between my two lights, the shorter profile of the Novatac 120T made it more appropriate for a helmet mount.
I’ve been running the 120T on my helmet for about a week now. It’s nice to have the light point wherever I’m looking – and the ability to flash inattentive drivers is appreciated – but the light does add a noticeable weight. It’s annoying enough that I don’t keep the light on my helmet during the day, but so far I’ve been steadily putting it back after the sun sets. I haven’t decided if I’ll keep it up there, or if I’ll ditch the helmet light idea. I think that as winter turns to spring and the days lengthen, the Bikeblock will come off of my helmet.
I also use a Bikeblock for its intended purpose – to hold a pump to the bike frame. This is much more secure than my previous method, which consisted only of two pieces of hook-and-loop webbing.
Twofish’s mounts offer a serious challenge to the standard bike-light market. I’m pleased with both the Lockblock and Bikeblock and cannot see any reason to move back to a bicycle-specific headlight.
Lanolin is a kind of wax that sheep and other wool-bearing animals produce to protect their coats. It is, in fact, a waterproofing agent. Any lanolin that remains in the wool after shearing is generally stripped out during the process of turning the hair into clothing, thus reducing the wool’s ability to shed water.
Commercially, lanolin is often used as a skin treatment product for humans. Lansinoh, in particular, makes a pure-lanolin nipple cream for breast-feeding mothers.
I first learned about lanolin from a comment on my review of West German wool pants. Jenne, the commenter, recommended washing wool products using something called Eucalan. Eucalan is a natural wash that deposits lanolin in the wool. Rinsing isn’t necessary with Eucalan, so much of the hassle (and danger of felting) that is usually associated with washing wool can be avoided.
For an extra treatment, Jenne recommended dissolving a small amount of Lansinoh’s pure lanolin in hot water before adding the Eucalan.
I was intrigued by this method. The no-rinse aspect made it simpler than carefully washing wool with Dr. Bronner’s, which was my previous choice. And increasing the health and functionality of my wool by restoring the natural oils made good sense – the same thing must be done to leather. I bought both the Eucalan and the nipple cream.
Eucalan comes in a few different scents. I first bought the unscented version, which seemed most appropriate for outdoor wear. Later I bought a jug of the Eucalyptus version. Eucalyptus oil is a deterrent to moths and fleas, so Eucalan recommends using this version before storing wool garments for a while. (The eucalyptus scent is very subtle after the wool has been dried – you’re not going to go around smelling like flowers.)
I’ve since washed my West German wool pants, West German wool knickers, Italian wool knickers, and two Pendleton wool shirts – the majority of my non-merino wool clothing – in Eucalan with added Lansinoh and have been pleased with the results. I recommend giving it a shot if you wear wool in wilderness settings.
The Process
Dissolve a small amount (about one inch) of Lansinoh HPA Lanolin in hot water
Add enough room-temperature water to cover the garment to be washed
Add about two cap-fulls of Eucalan and mix it in
Add the wool to be washed
Let soak for 15 – 30 minutes
Pull out the wool, hold it up, and let the water drip out for a minute or two
Arriving at Rialto Beach just past 1:00 PM, I took a few minutes to stuff my food into the bear can I had borrowed from the Ranger Station on my way out. The cans are required to keep food secure not from bears, but from marauding raccoons. This was to be the third year I had hiked the Olympic Coast in Winter and, outside of the Sierra Nevada, these have been the only times I’ve carried a bear can. Still, thanks to the warmer temperatures along the coast, even with the can my pack feels light compared to what I must carry this time of year when high in the mountains.
High tide had been at 11:30 AM. It is still high enough to make beach-walking difficult. I opt to make my way through the thick trees and marsh instead of braving the beach. There are no cars in the parking lot when I leave, but I surprise two people panning for gold along a small creek. Neither are talkative. When I ask if they had found anything, the one only replies “a little”. I don’t know if that is the truth, or if he was just anxious to get me gone.
I spend an hour in the woods. The tide is low enough now that I can make my way down to the beach, exchanging thick trees for wet sand. Occasionally I have to run up the beach and jump on top of driftwood to escape from the occasional wave, but for the most part the way is easy going between Rialto and Hole-in-the-Wall.
The area is thick with Bald Eagles. Every 15 minutes or so I spot one in a tree, or landing on a sea stack, or one flying over the ocean. At one point I see two eagles eating on a large fish head that had washed up on the beach. (I don’t know what kind of fish, but the head was close to the size of a football.) The two are eating just on the other side of a large boulder. We don’t notice each other until I come around the rock, at which point they jump and fly off. At a distance of about 10 feet, that’s the closest I have ever been to an eagle.
At Hole-in-the-Wall, the sandy beach comes to an end for a good while. Now begins the obstacle course that defines a walk along the wild coast. Piles of driftwood, tide pools, slippery rocks, and tall headlands all present a much different challenge from the steady plodding that characterizes walking in the mountains. The various balancing tricks, pull ups and push ups that are required make one thankful for a well packed backpack.
After rounding one headland I come upon two deer, out looking for whatever seafood it is that deer fancy. They don’t seem too concerned about me, but eventually bound up the steep cliff as I close in.
Around the next headland there’s an octopus lying in the sand. It has been partially eaten by something.
The tide is out now. I walk blissfully along a rare sandy stretch of beach that doesn’t require much attention, and find myself surprised by a dark brown spot ahead of me. My first thought is Marmot, but they belong in the mountains, not the coast. Then I think Badger, but the tail is wrong and they also had no business on the coast. An Otter! I couldn’t identify it at first, as I had no experience to link it to. This was the first time I had seen an Otter – leastwise, on land and in the wild.
The Otter is slowly flopping down the beach, throwing his front arms forward and then pulling along the rest of his body. His legs wiggle a bit but are clearly useless on land. I approach slowly. He turns his head and looks at me, slows and then finally stops as I approach. I don’t know if he isn’t concerned by my presence, or if he is tired from inefficient land movement. Perhaps he thinks the best course of action is to play (sorta) dead.
I’m able to get within four feet of the Otter, where I stop to admire his fur and watch his whiskers twitch as he sniffs me. It would be easy to approach close enough to touch him – a tempting thought – but I don’t think he’ll appreciate that. Instead I try to make conversation. “Hey, you’re a mammal. I’m a mammal. We both have nipples.” At this the Otter’s concern seems to grow, so I leave him and continue around the next headland. I don’t want him to have to cut short his time on the beach on my account.
My tide chart has sunset scheduled for 5:00 PM, which is drawing near. I’m still in an area with the ocean on my left and sharp cliffs on my right. The map shows that it is a long way to the next suitable camp spot. I resign myself to hiking for a short while in the dark. At least the tide won’t be coming in till 7:00 PM.
I walk along, and watch the sun set over the edge of the world.
At 6:00 PM I come to an area where the cliffs on my right give way to a clump of trees. I make my way inside and find a spot to pitch the tarp. After dinner in the dark, I crawl into my bag and go to sleep. The roaring of the tide wakes me once around midnight, but, unlike the last time I spent the night out here, my camp tonight is well above the high tide mark.
The tide gives me trouble the next day. It is about an hour later than the day before, with high tide hitting at 12:30 PM. I was hoping to wake up early and log a few miles at low tide around 6:30 AM, but I end up not waking till 9 AM. At that point the tide is high enough that I could barely get anywhere before high tide, at which point I would be able to go nowhere at all. I decide not to make any move until after high tide, though that means a later start than yesterday, and so a longer hike into the night.
It is a gray morning. Rain steadily falls from the sky, coupling with the ocean mist to give all a good soaking. I lie about, enjoy a slow breakfast, read some and write some. By 1:00 PM my patience is gone and I decide to see if any progress can be made. After breaking camp I find that I can scale partway up the cliff that starts on the north edge of my clump of trees, and traverse along that a way. From there I’m able to hop along a few large boulders that stick up out of the ocean, but I can’t get far. Eventually I have to stop and sit out the tide atop a group of rocks. It always goes out slower when you’re waiting for it.
An hour passes and the tide has gone down far enough that there are occasional stretches of bare sand between waves. This allows me some progress. I watch the waves go up and down for a minute, try to get a feel for the timing, and dash along the briefly-bare beach, clambering up the next pile of driftwood or large boulder before the waves come. Sometimes I make it, sometimes the waves catch me. More than once I make it to the top of a rock, but the wave hits with enough force that the water bounces up and splashes me. I’m wet already from the rain, so in the end it makes little difference.
The gray morning turns into a gray afternoon, which passes without difference. I don’t notice it getting dark until only a few minutes before sunset. I’m no more than halfway to where I want to be, but why pack a headlamp if you’re not going to use it? The next two hours are spent along the usual obstacle course of driftwood, headlands, and barnacle covered rocks, made even more interesting due to the dark. But after I pass them, the last hour and a half is along another rare stretch of sandy beach. I make up for lost time by running stretches. With a pack on my back and soft sand underfoot, running is a challenge, but it keeps me warm. Still, I don’t arrive into camp till 8:30 PM.
The rain continues into the next morning. I breakfast on the westernmost point in the contiguous US, turn south, and retrace my steps for a couple days back to Rialto Beach.
"In the static mode an observer may unify the pieces of a puzzle, but only as a blueprint -- kinetics adds the third dimension of depth, and the fourth of history. The motion, however, must be on the human scale, which happens also to be that of birds, waves, and clouds. Were a bullet to be made sentient, it still would see or hear or smell or feel nothing in land or water or air except its target. So, too, with a passenger in any machine that goes faster than a Model A. As speed increases, reality thing and becomes at the pace of a jet airplane no more substantial than a computer readout."
- Harvey Manning, Walking the Beach to Bellingham
Wishlist is a Django application for creating wishlists.
I used Amazon Wishlist for a number of years, but my paranoia finally caught up to me and I decided that I didn’t need to give Amazon that much more information about my interests.
I tried a few substitutes and found that my requirements for a wishlist were less than common. I don’t often use wishlists in the usual way of asking people for gifts on special occasions. Instead, I use wishlists privately to keep track of items that I wish to purchase myself. It helps me to determine savings goals, to track books that I want to read, etc. As such, I usually do not want items on my wishlist to be publicly viewable.
Out of the substitutes I tried, Wishlistr was undoubtedly the best, but there were some aspects of it that I didn’t like. After using it for a while, I decided to write my own app.
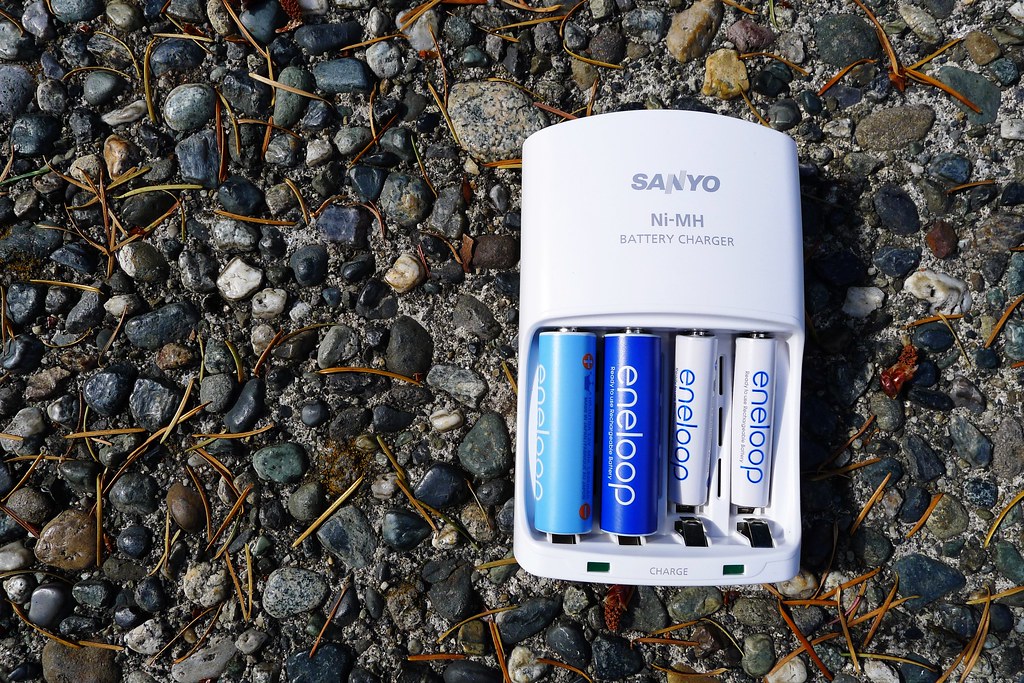
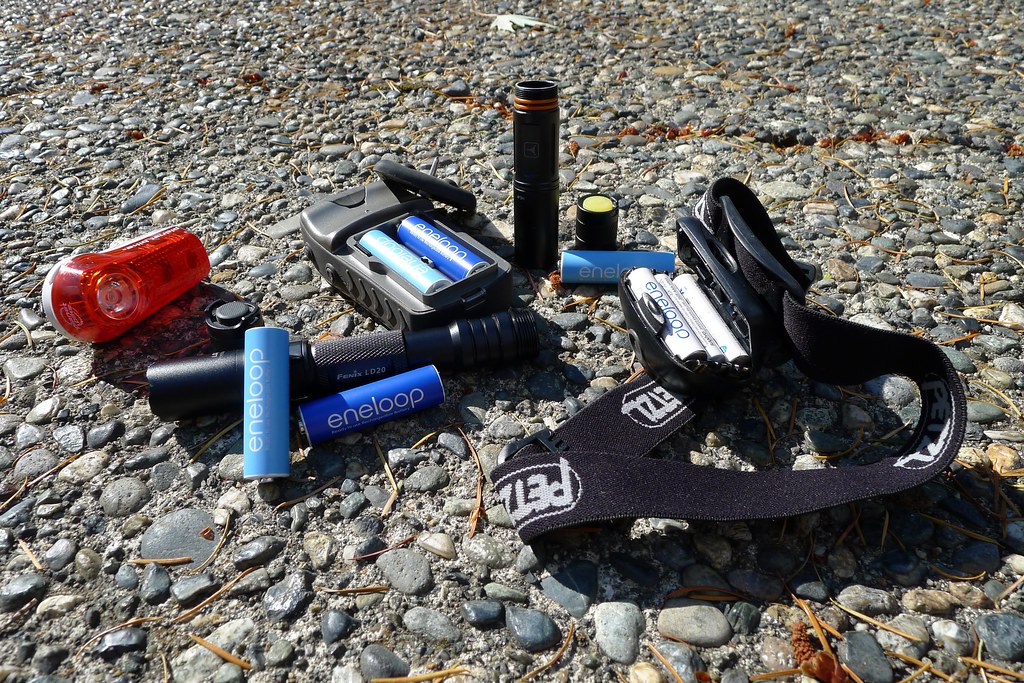
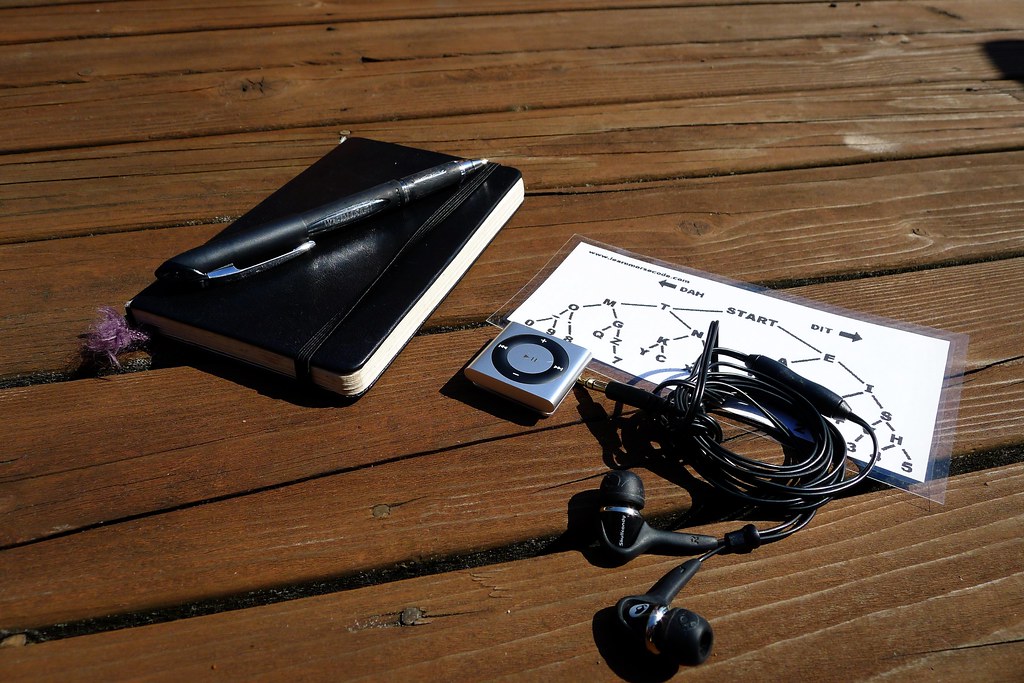
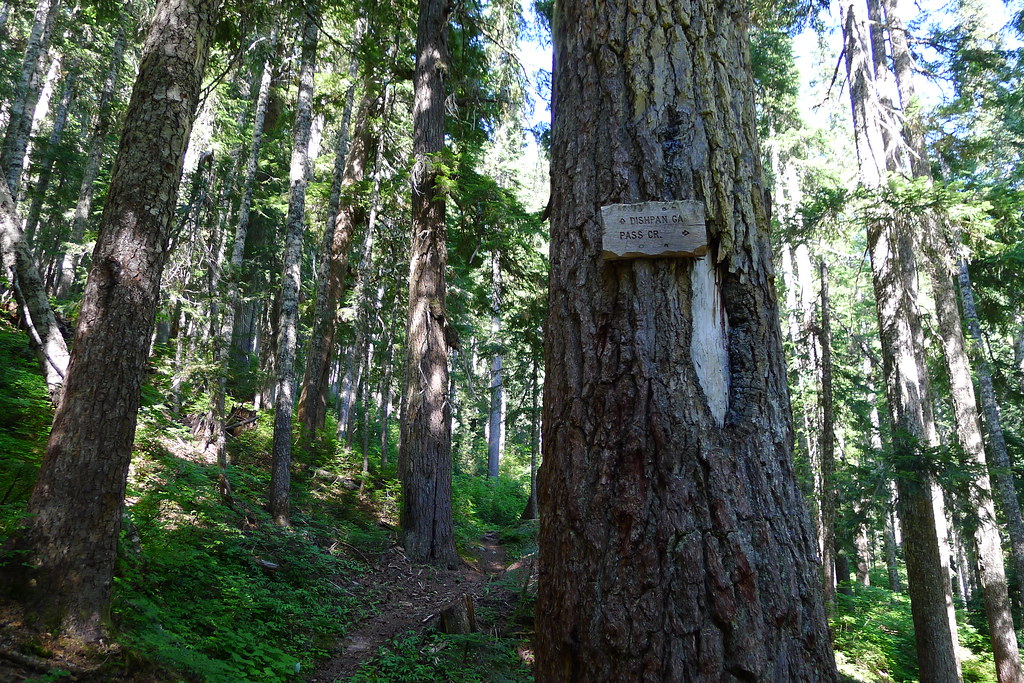
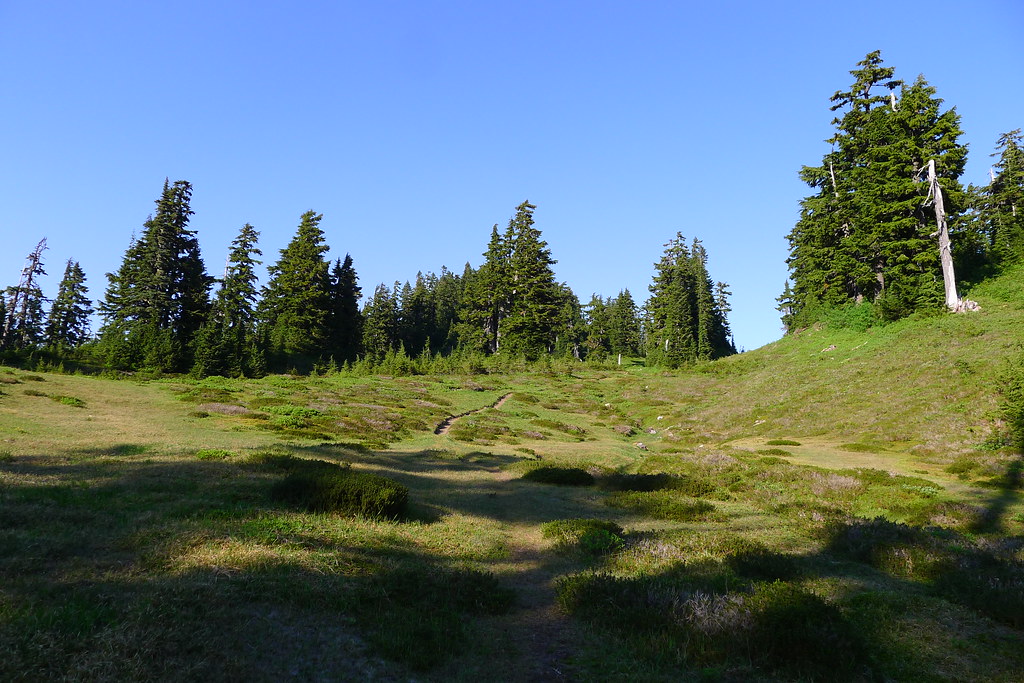
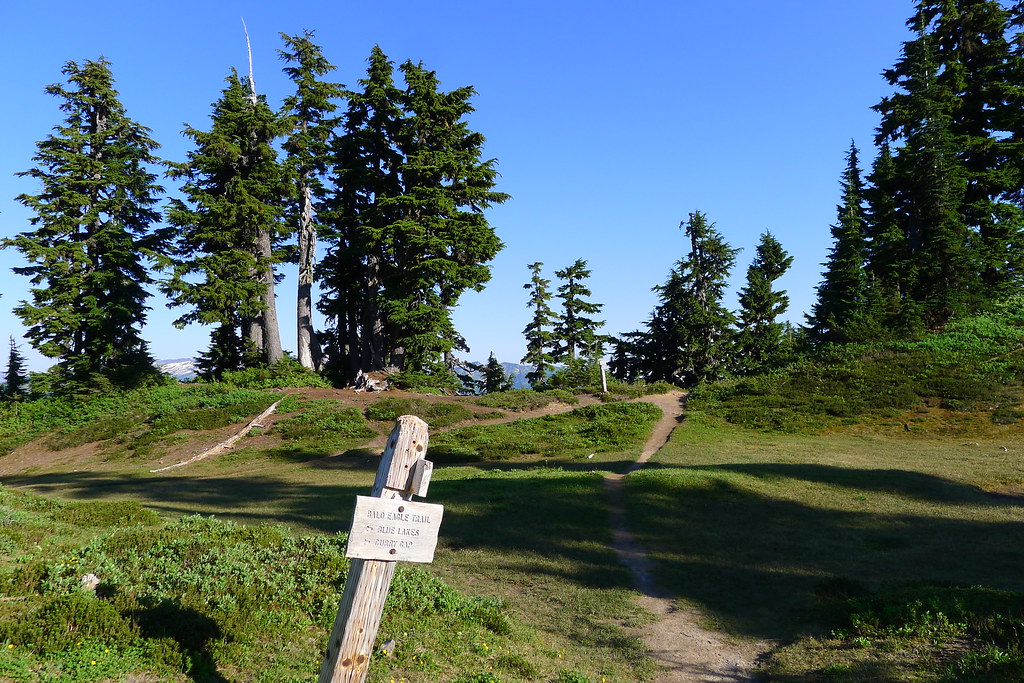

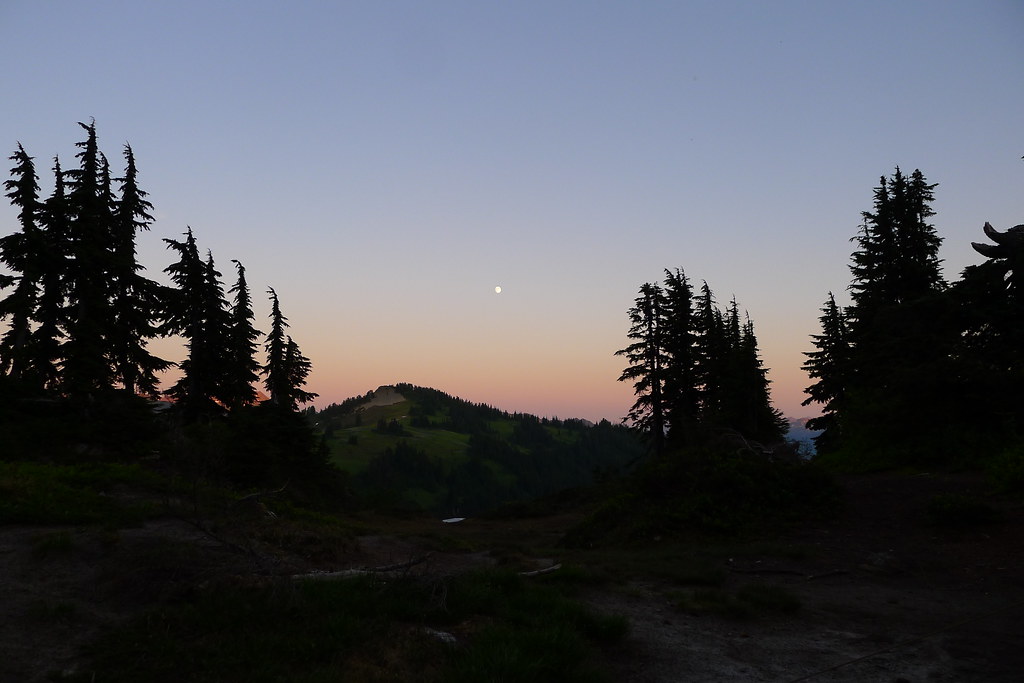
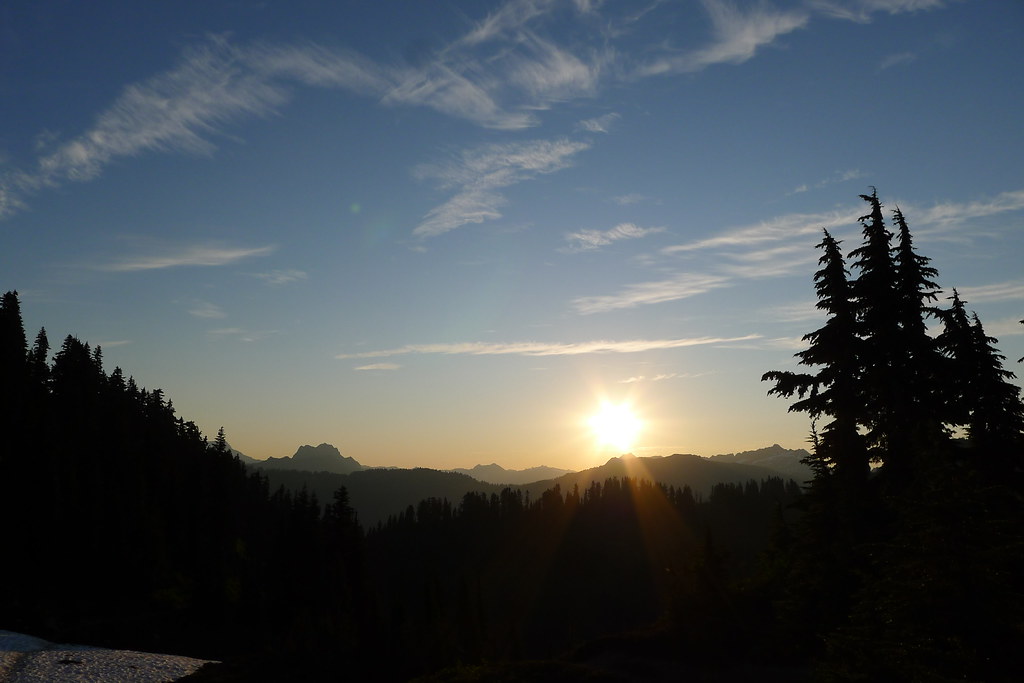
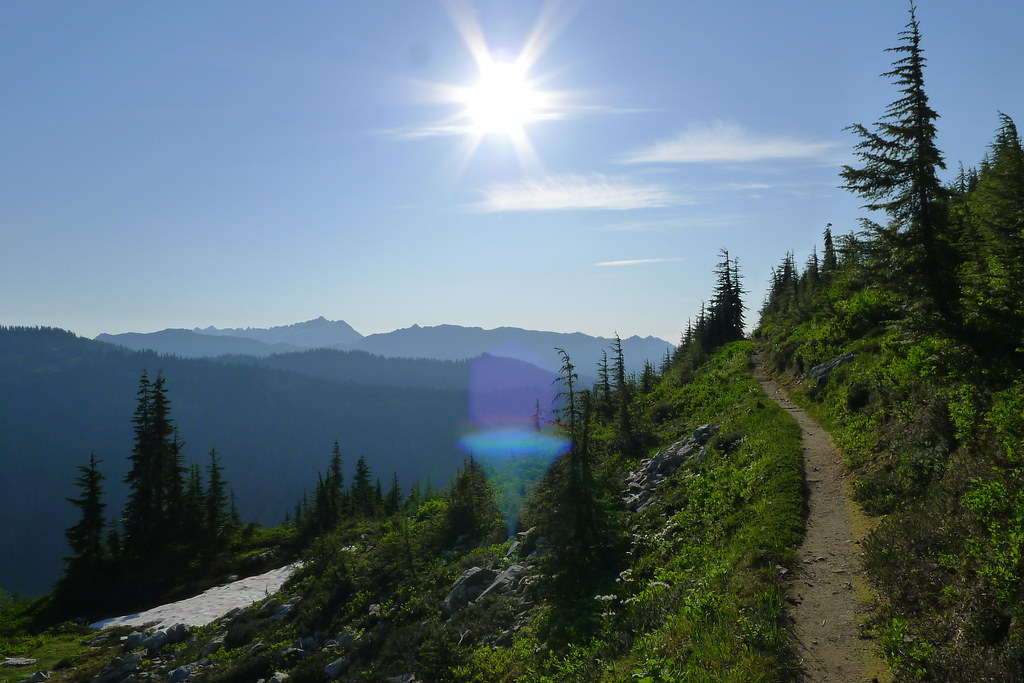
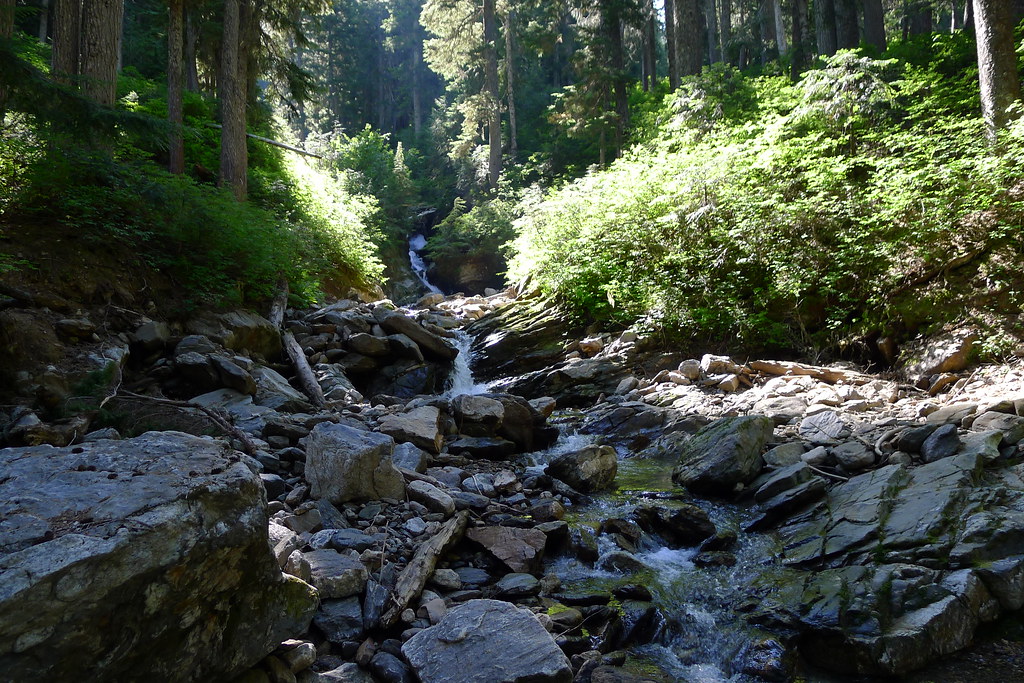
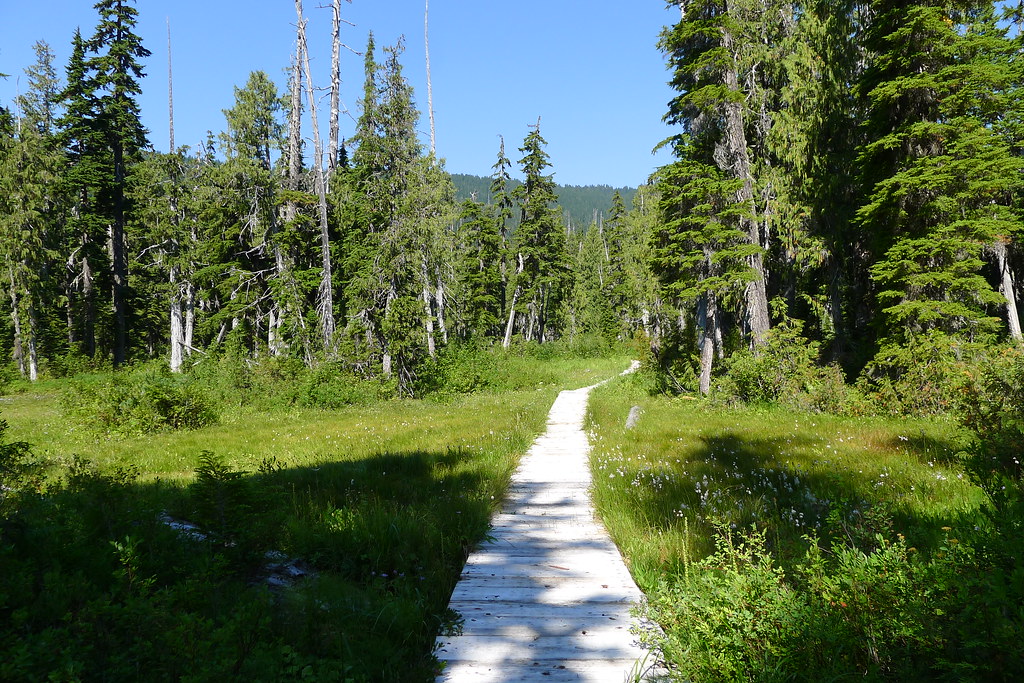
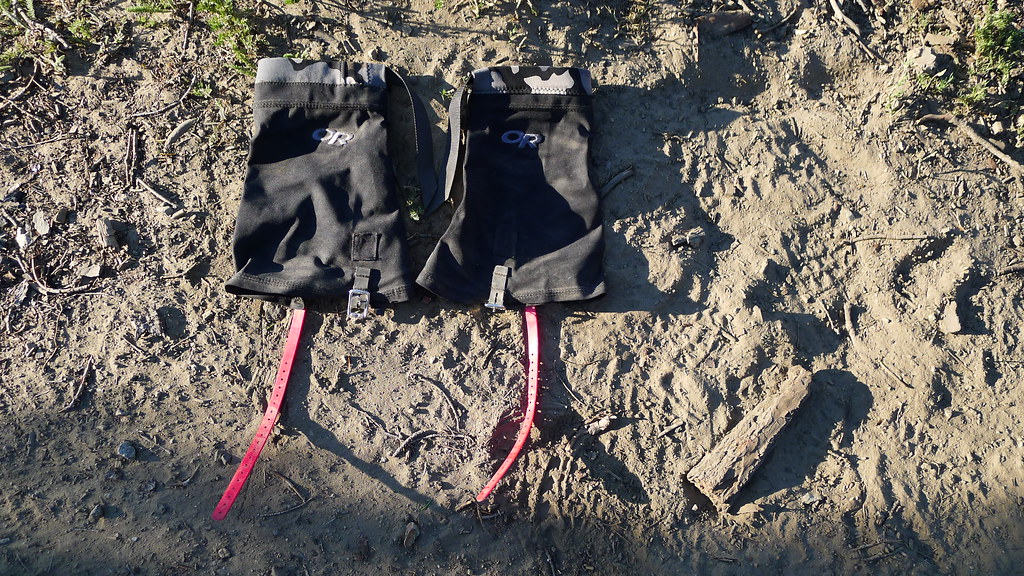
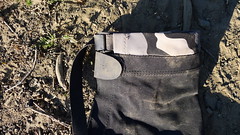
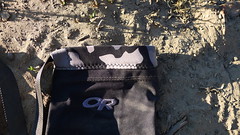
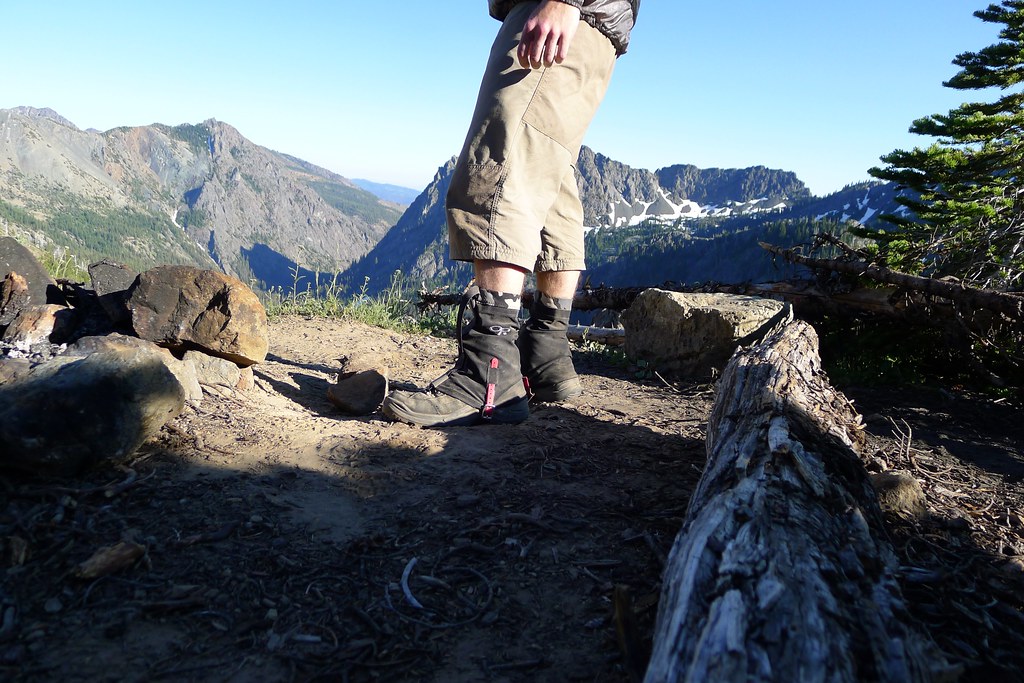
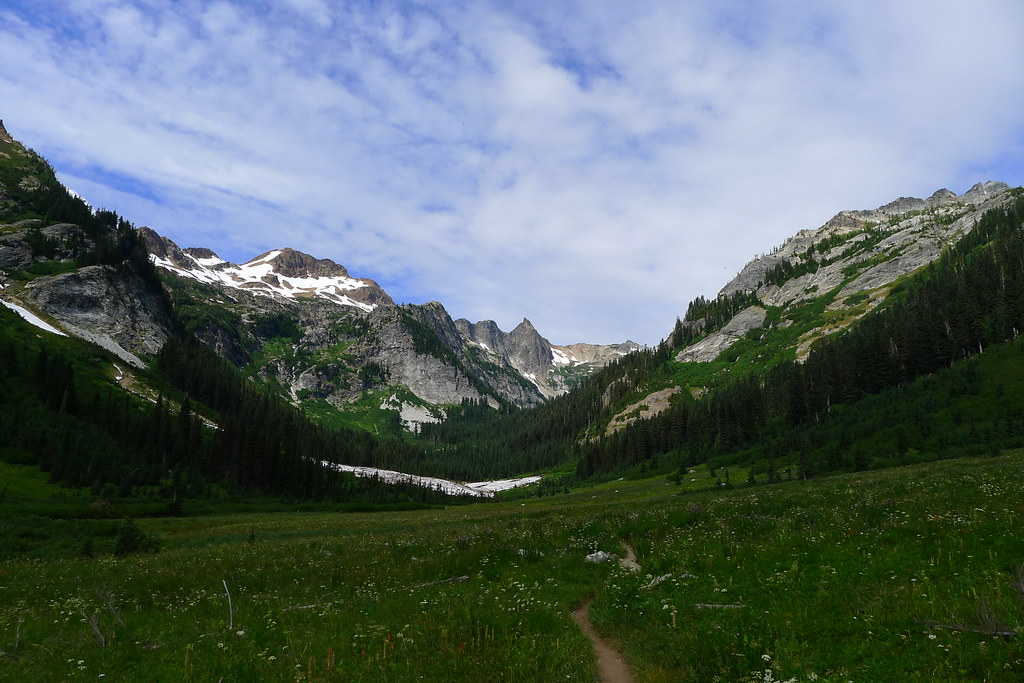
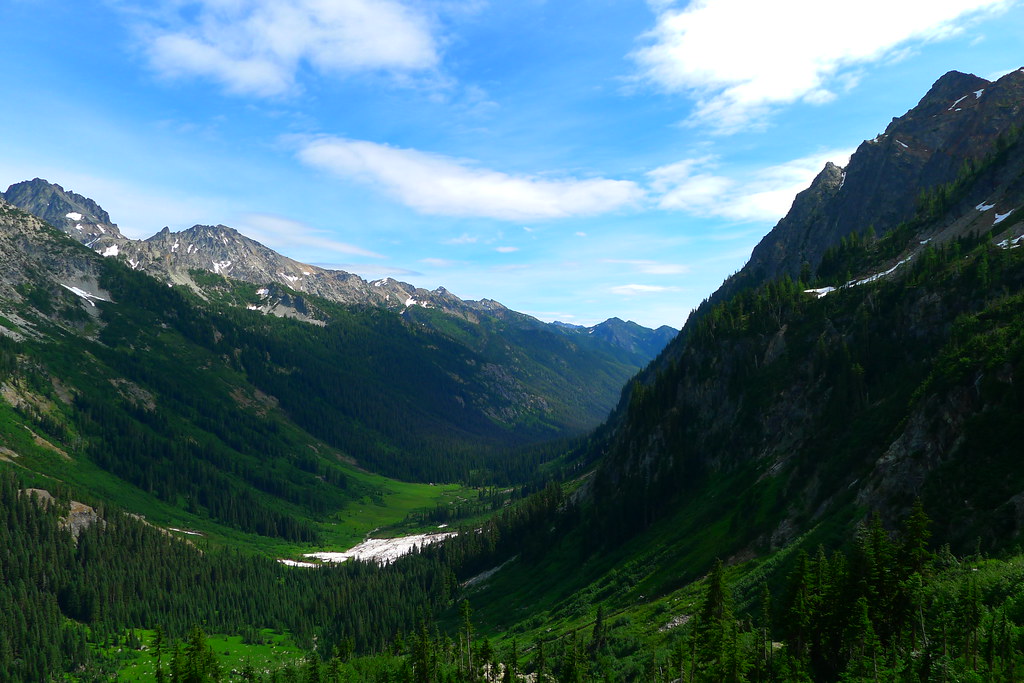
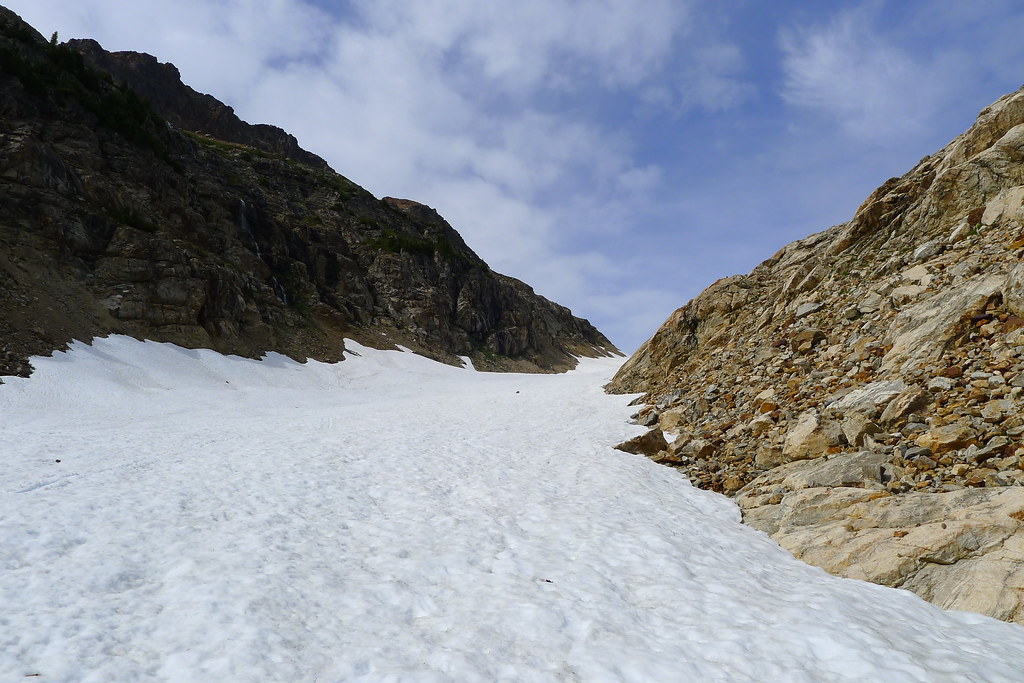

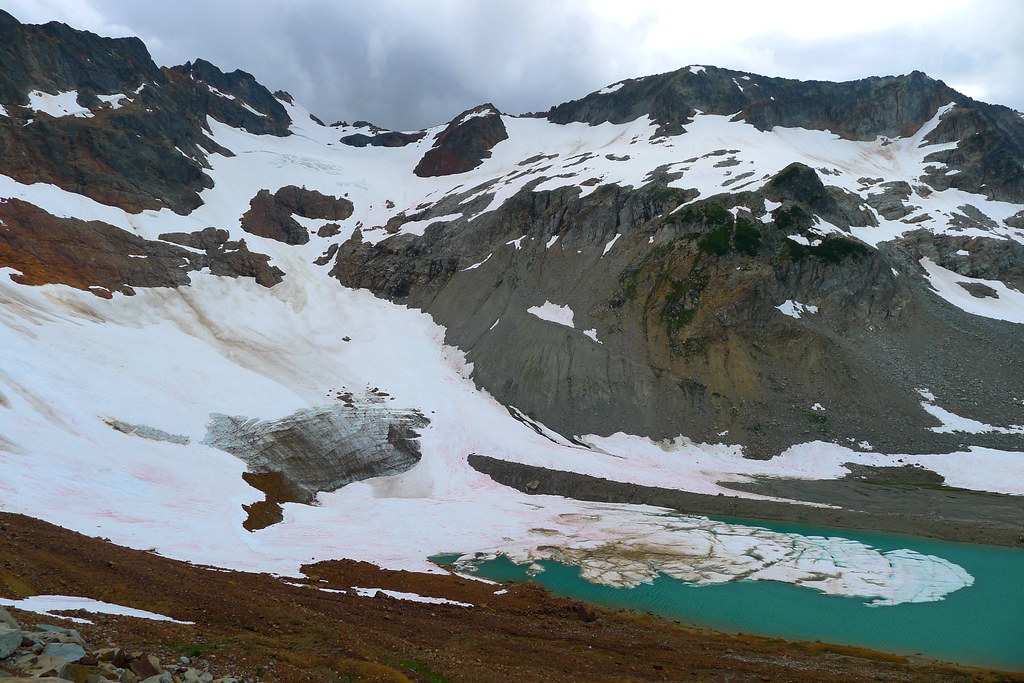
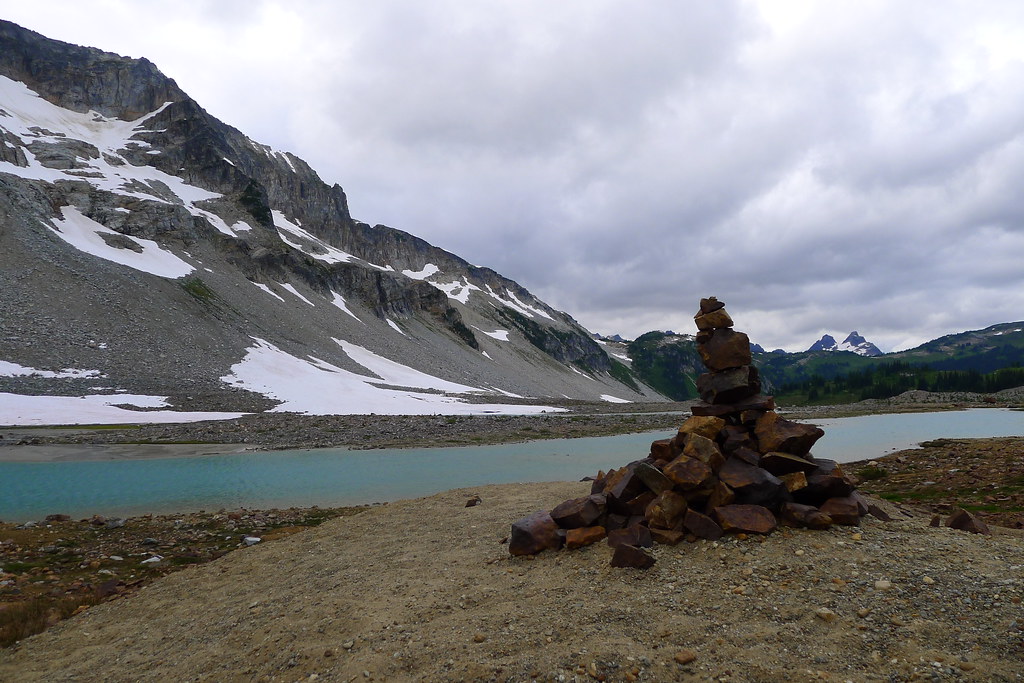
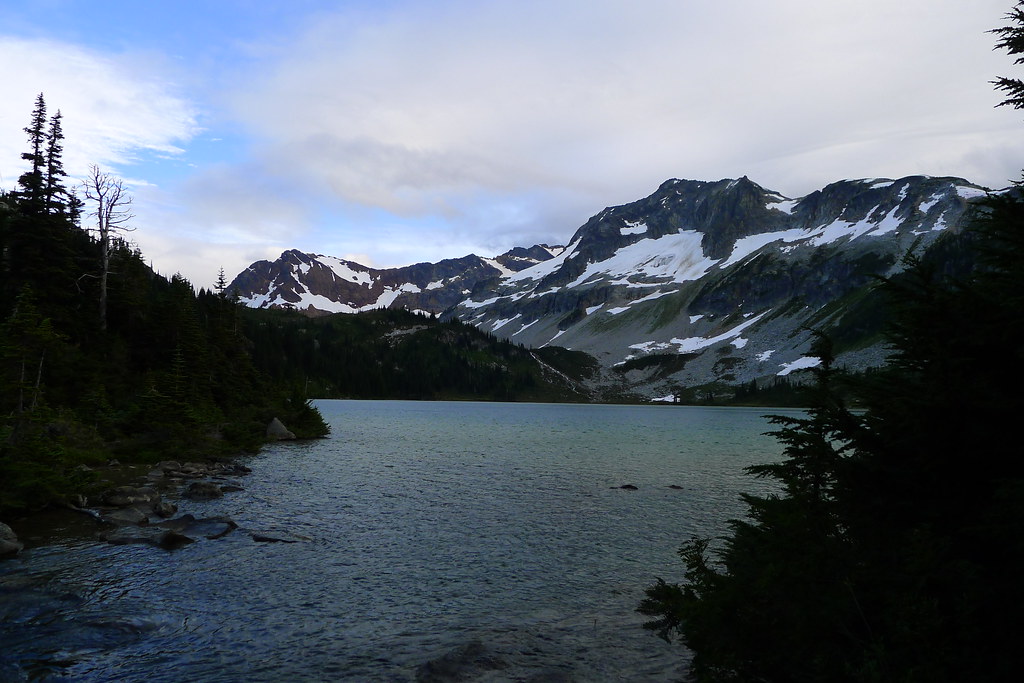

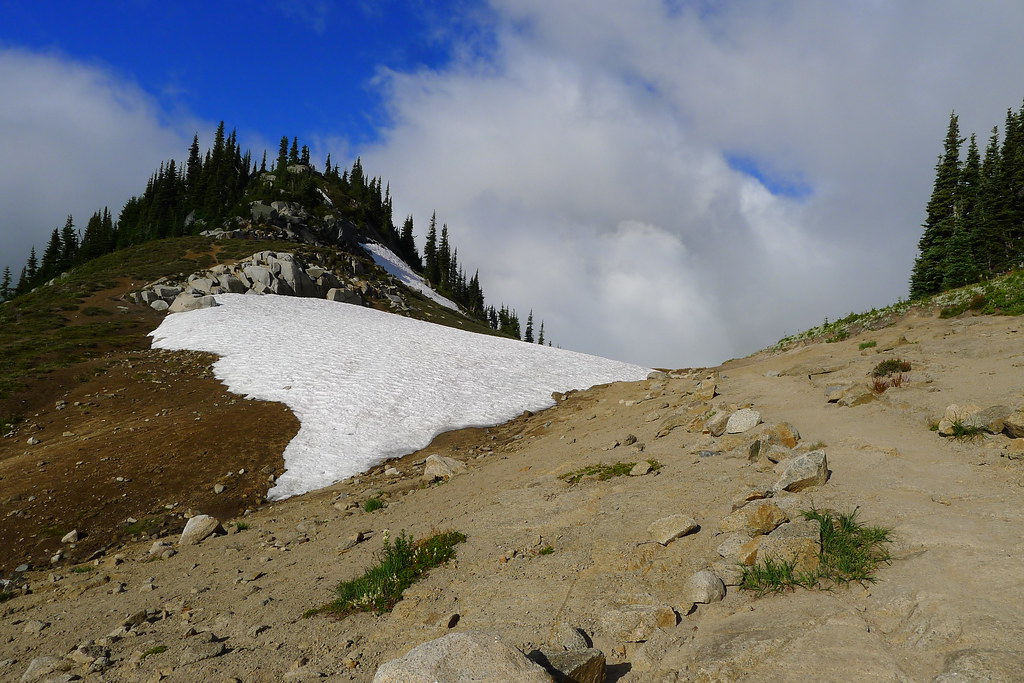
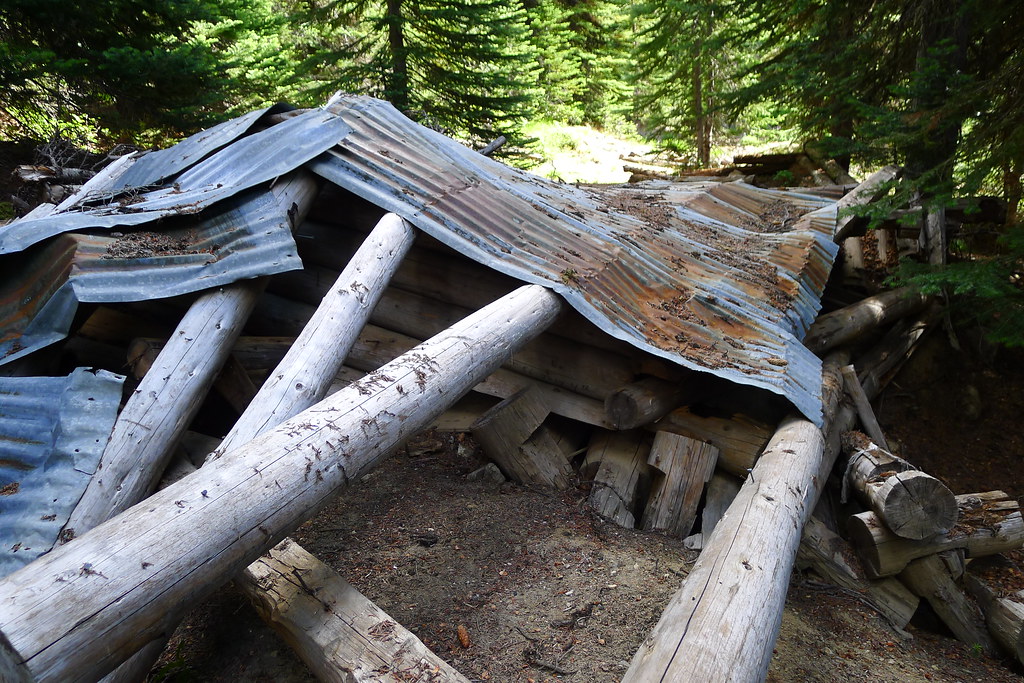
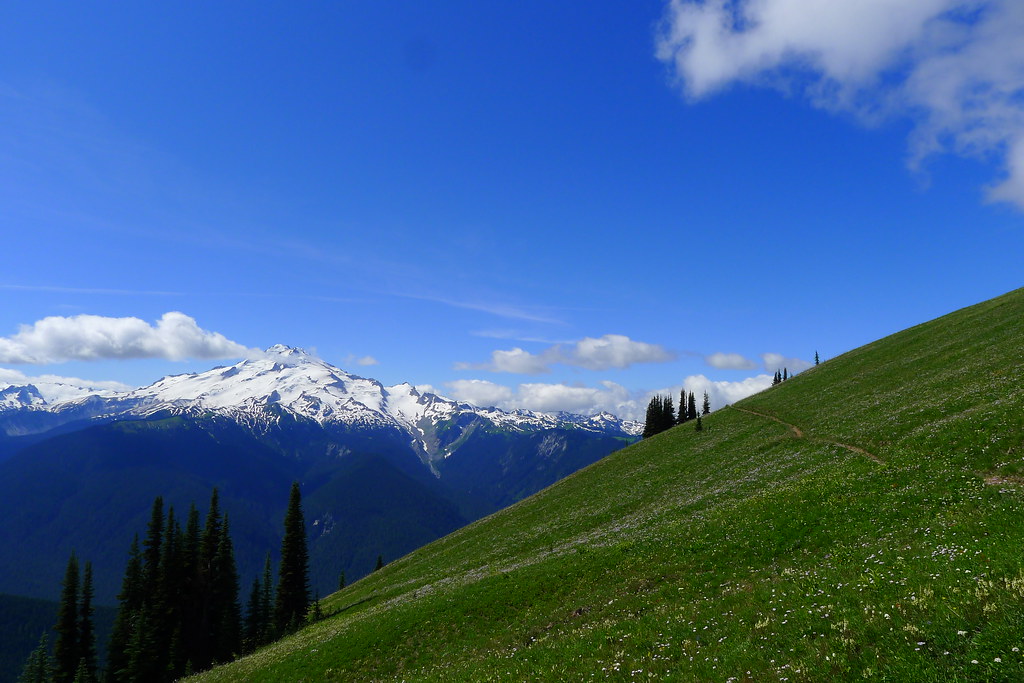
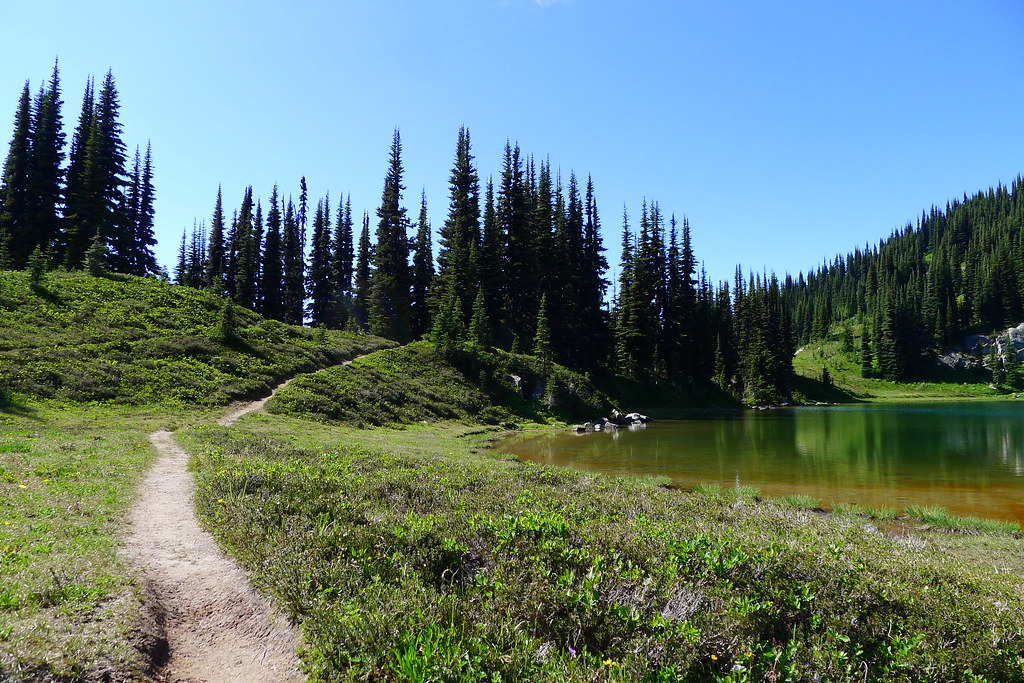
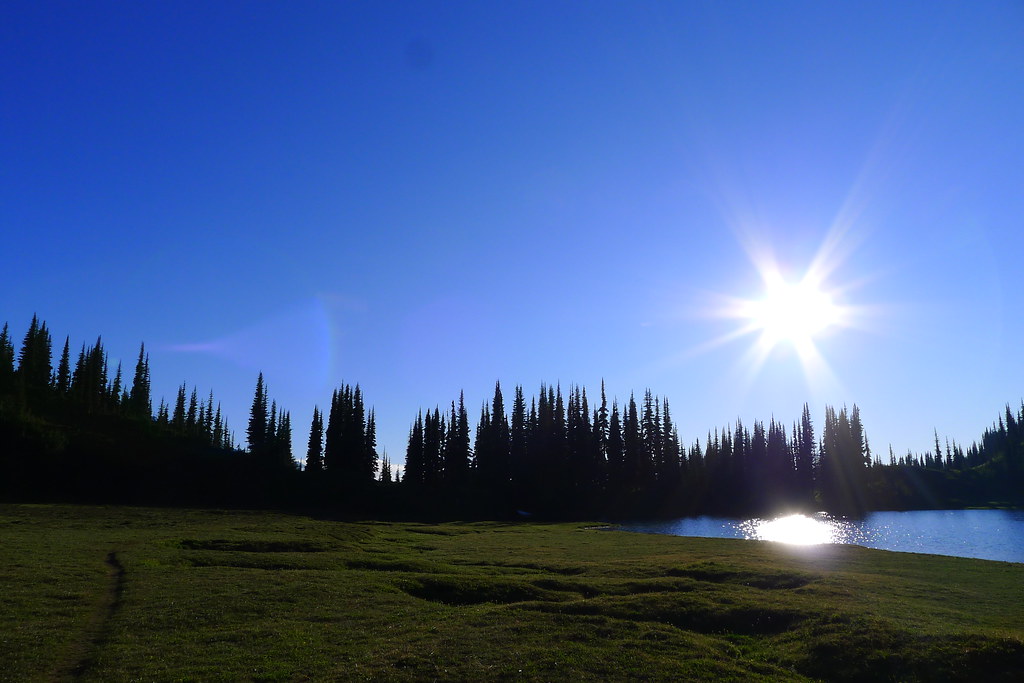
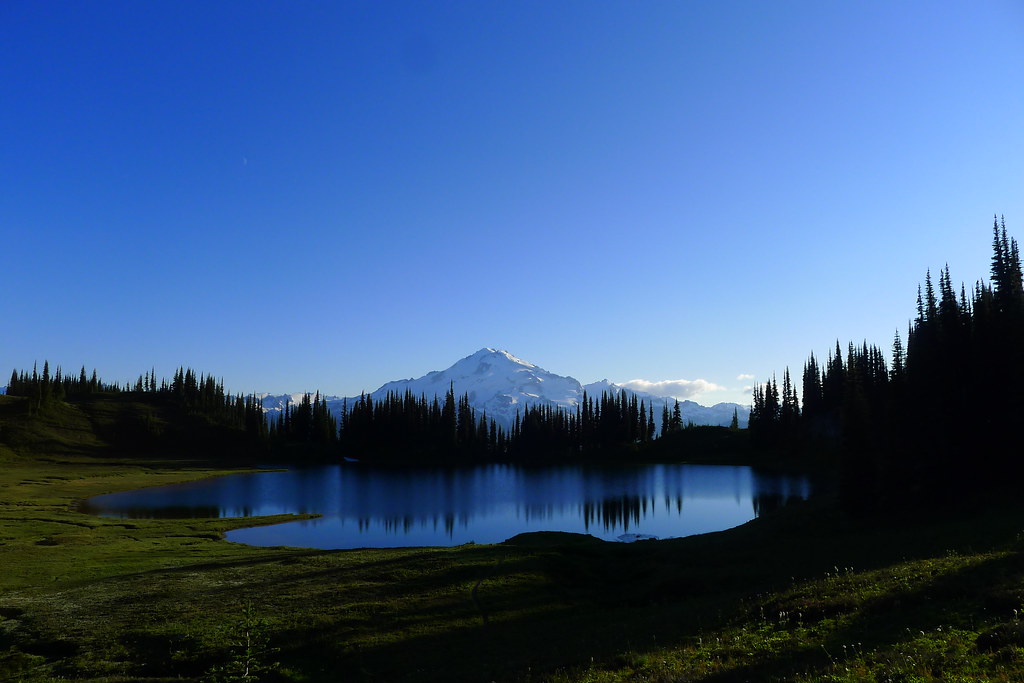
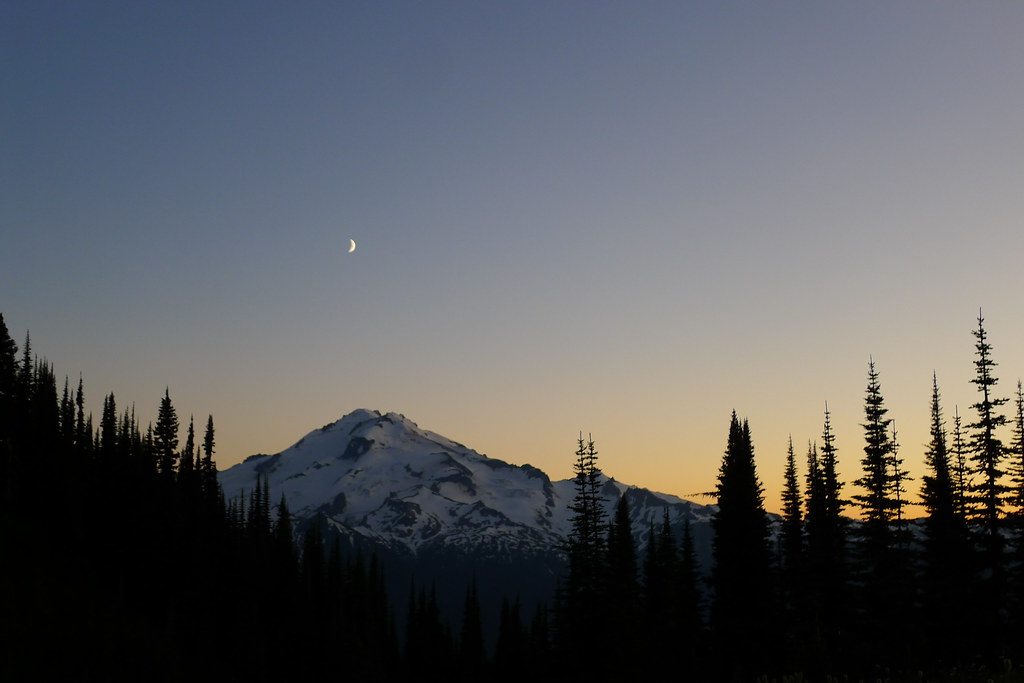
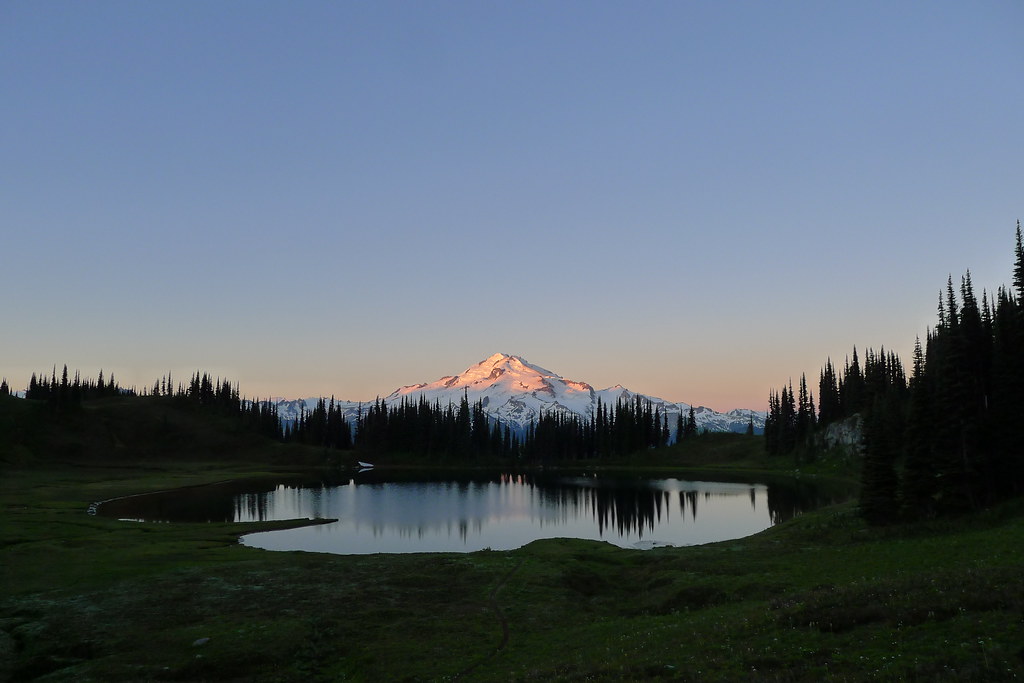
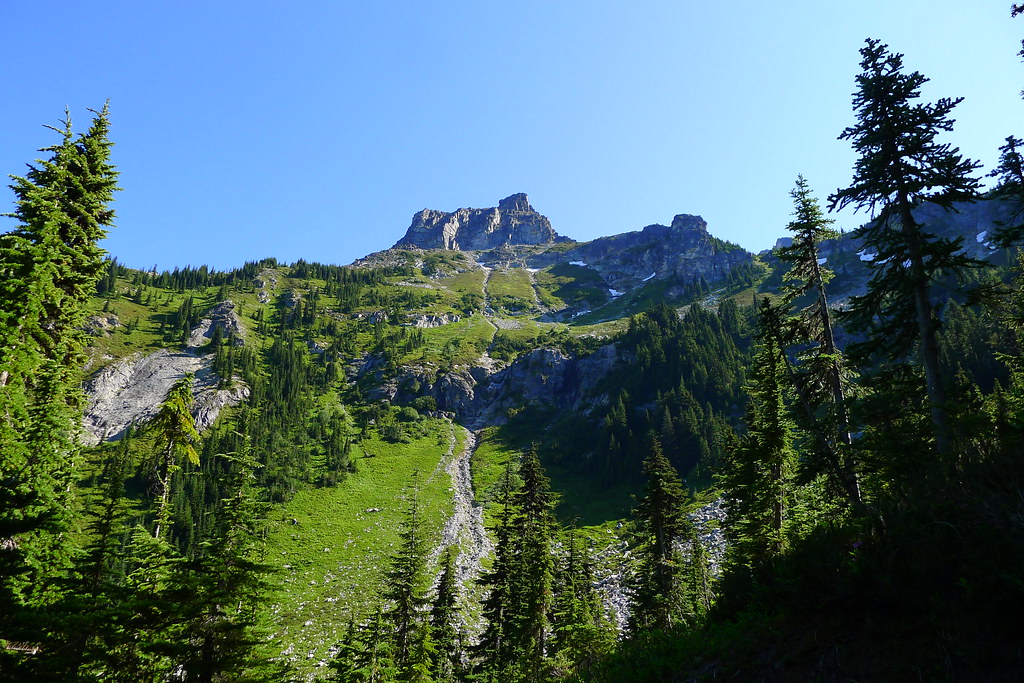
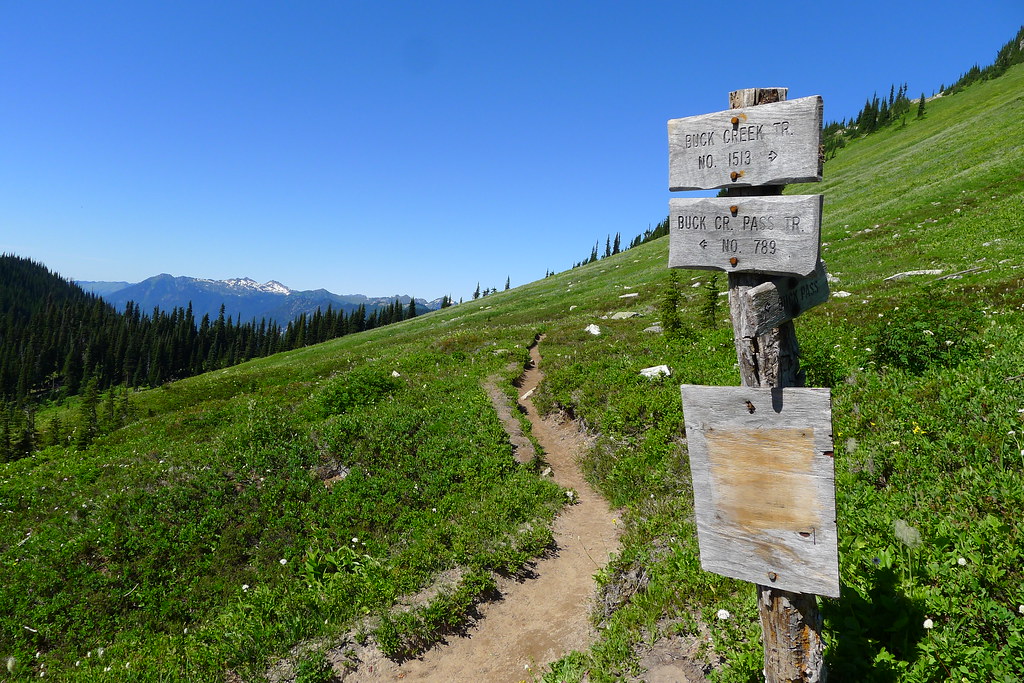
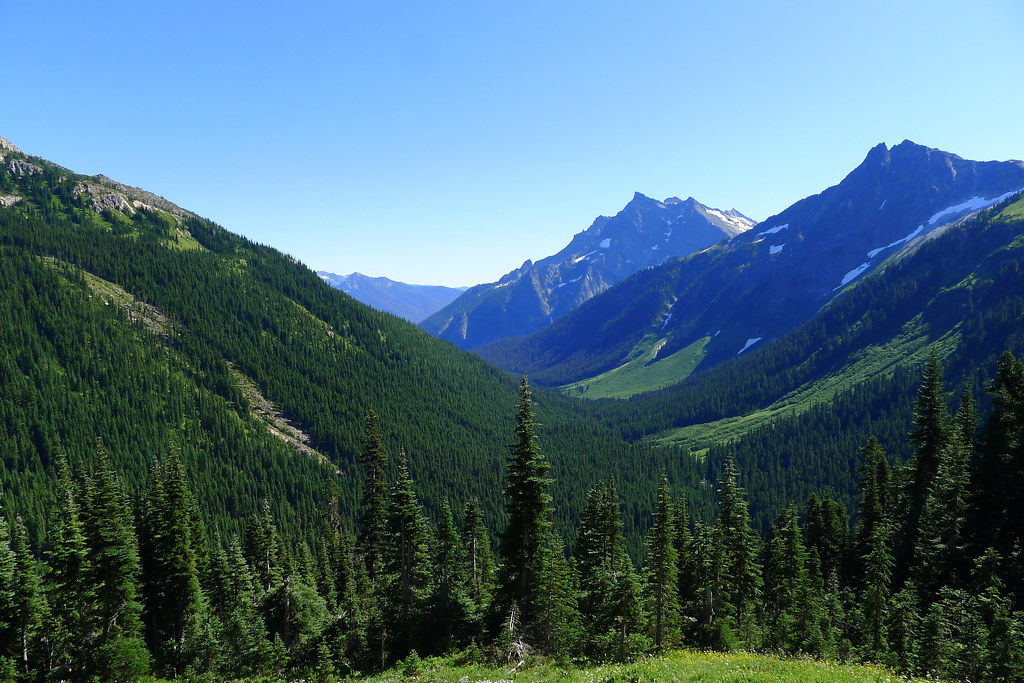
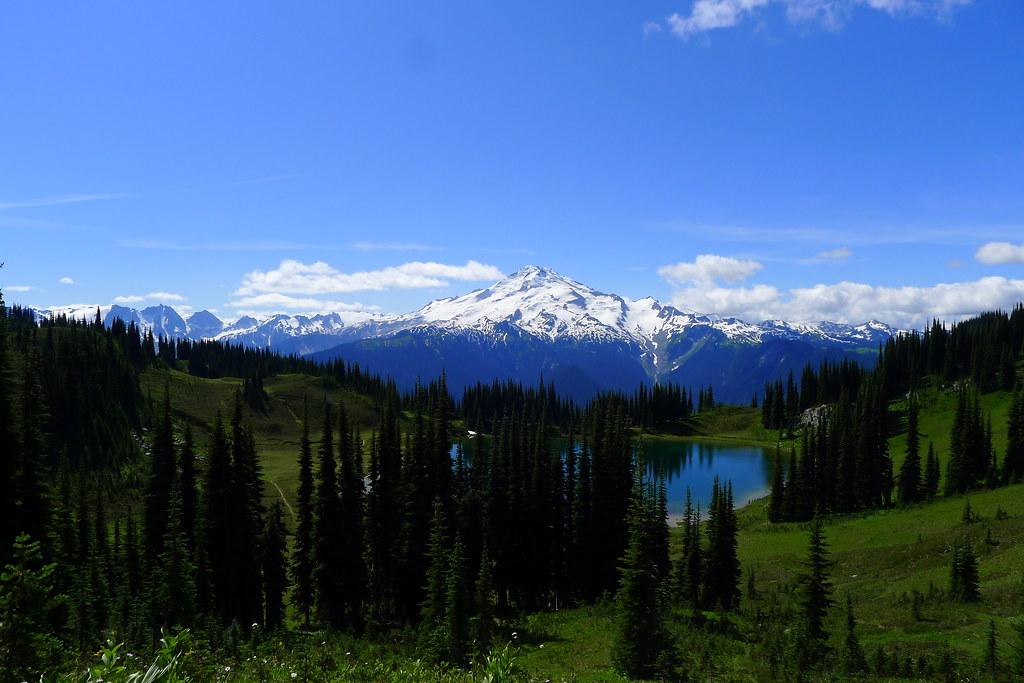
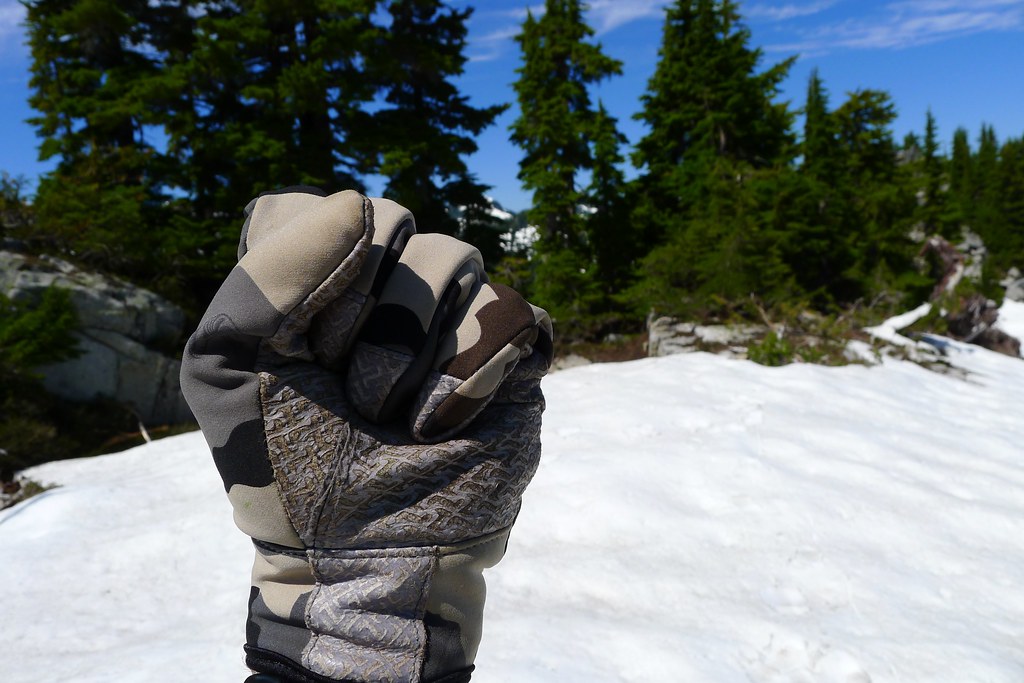

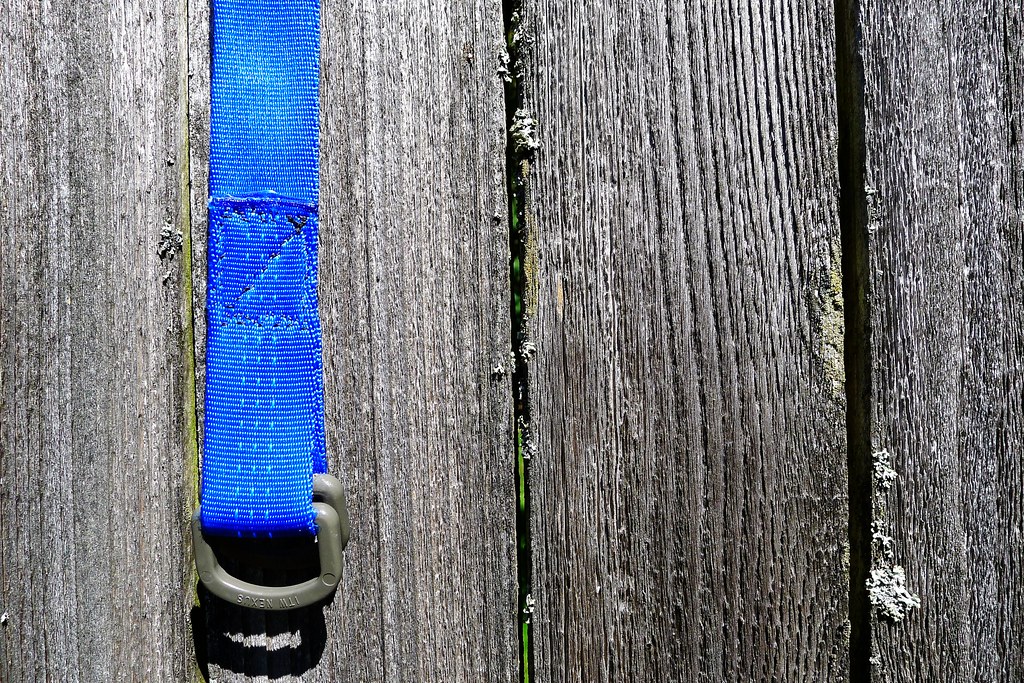
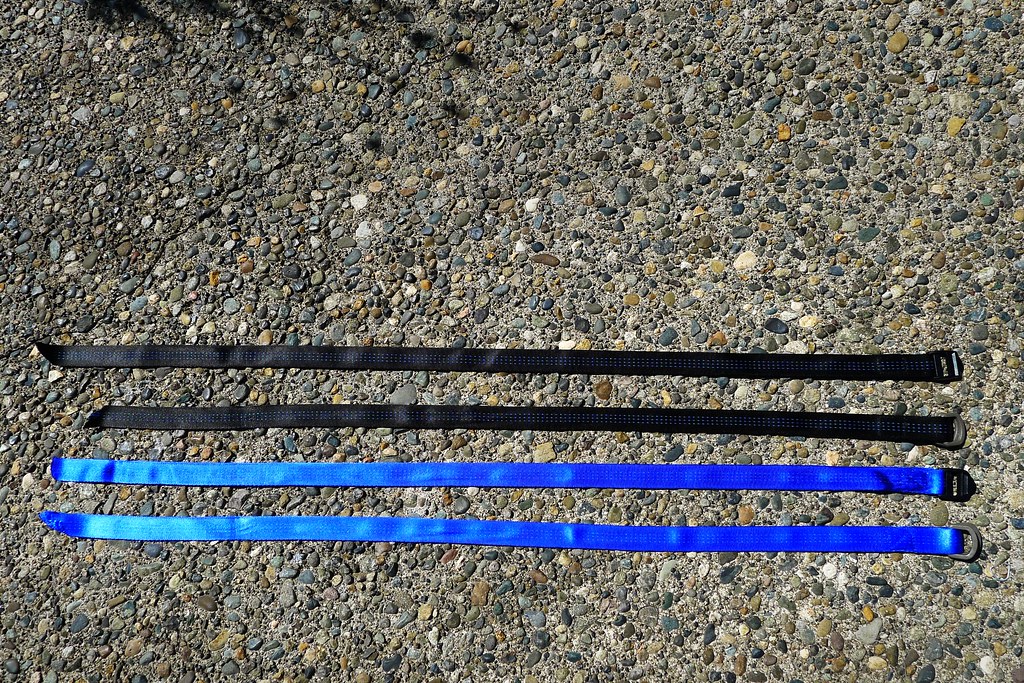
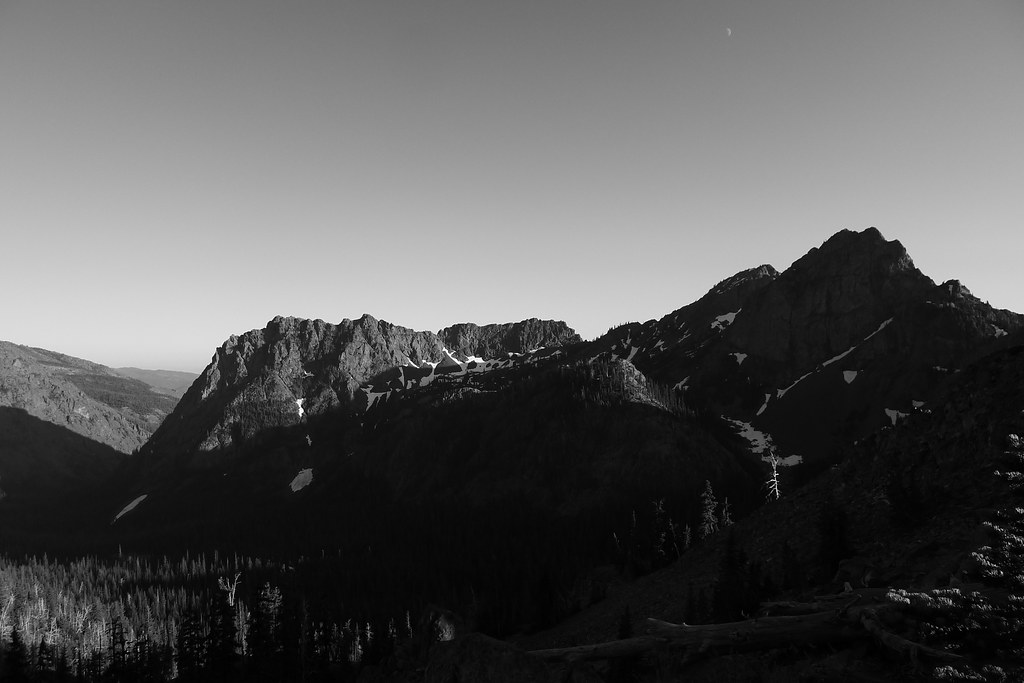
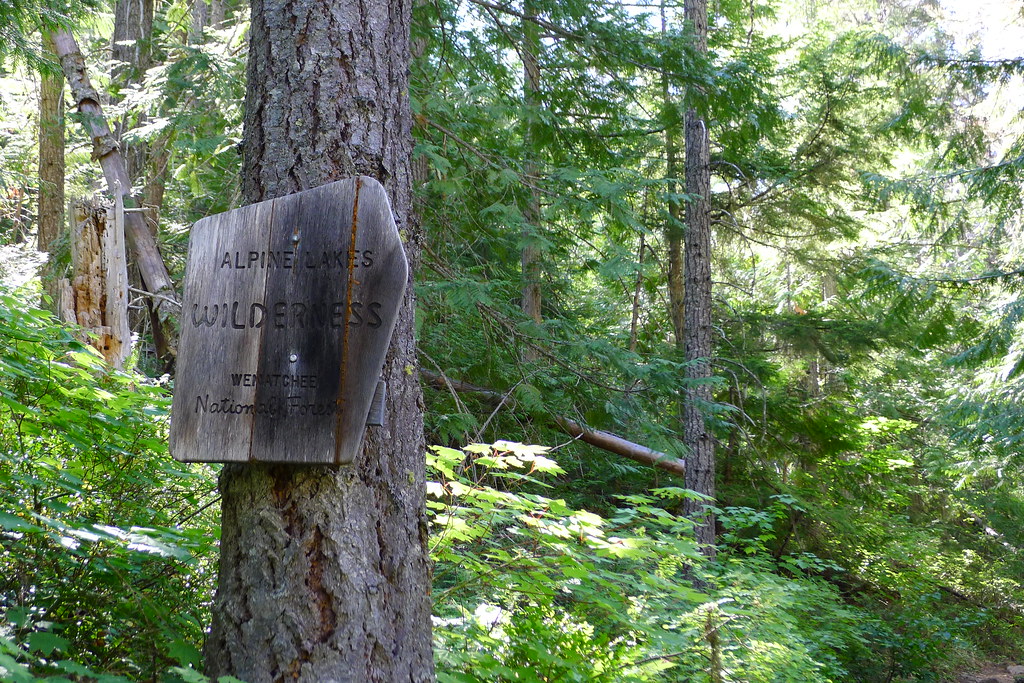
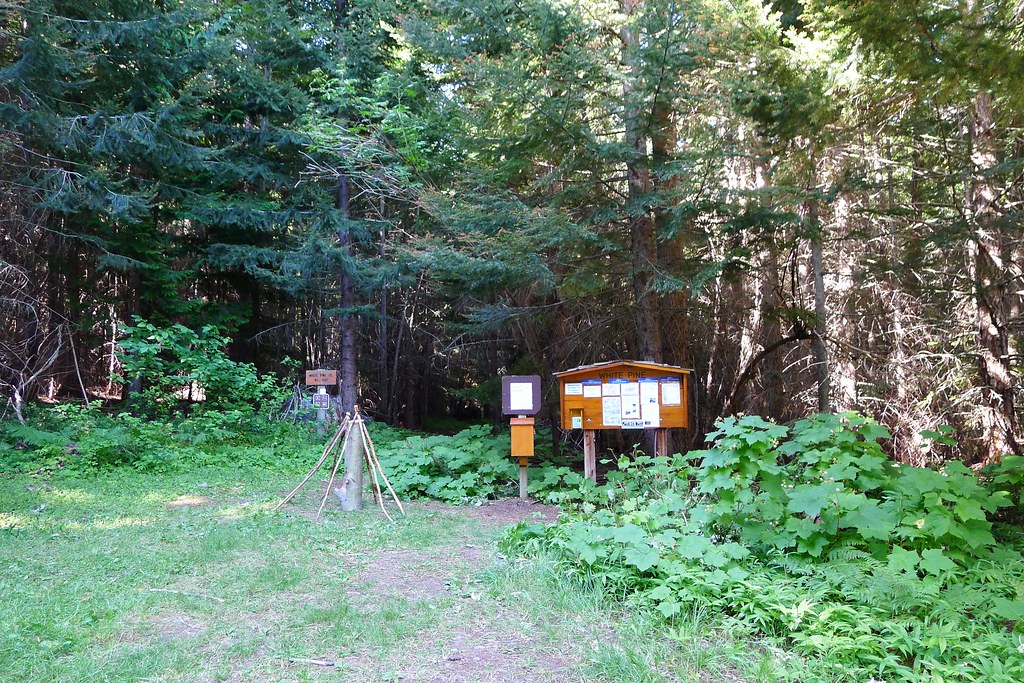
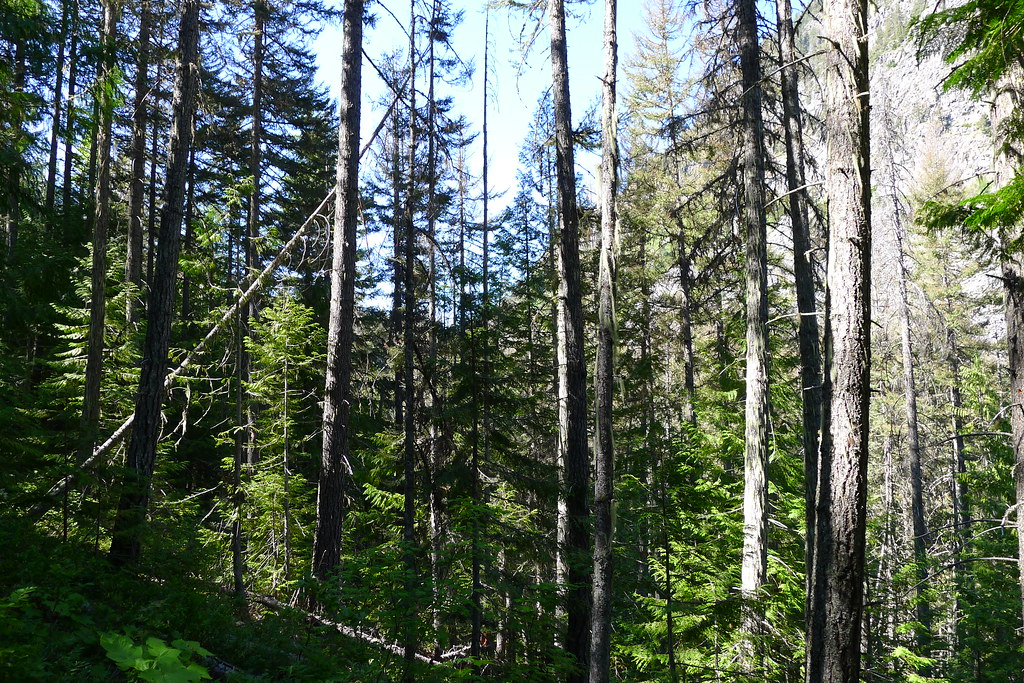
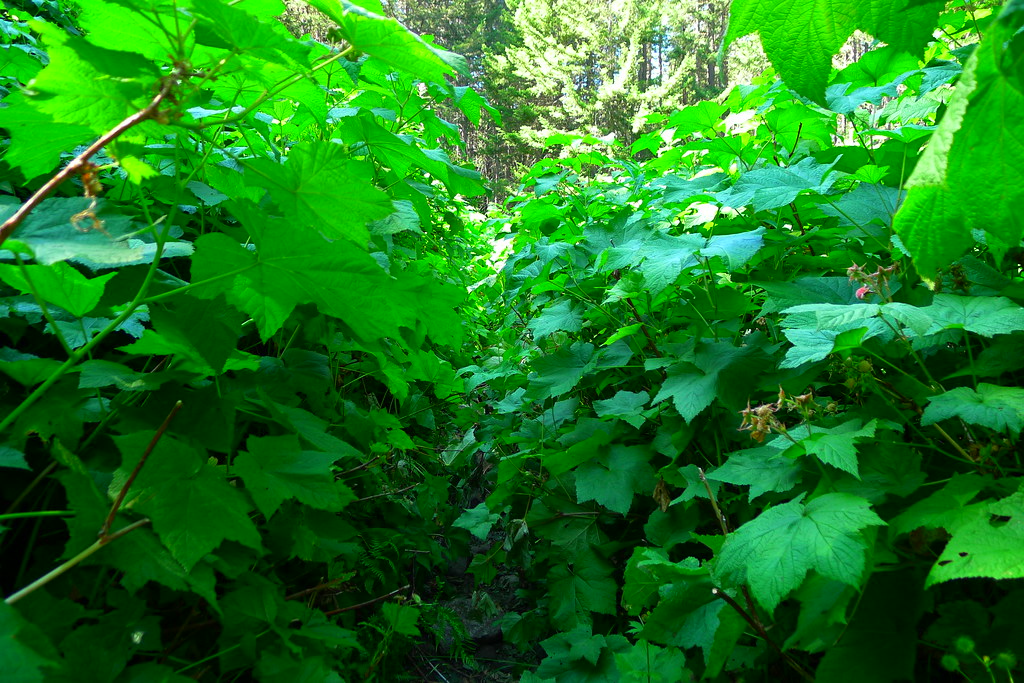
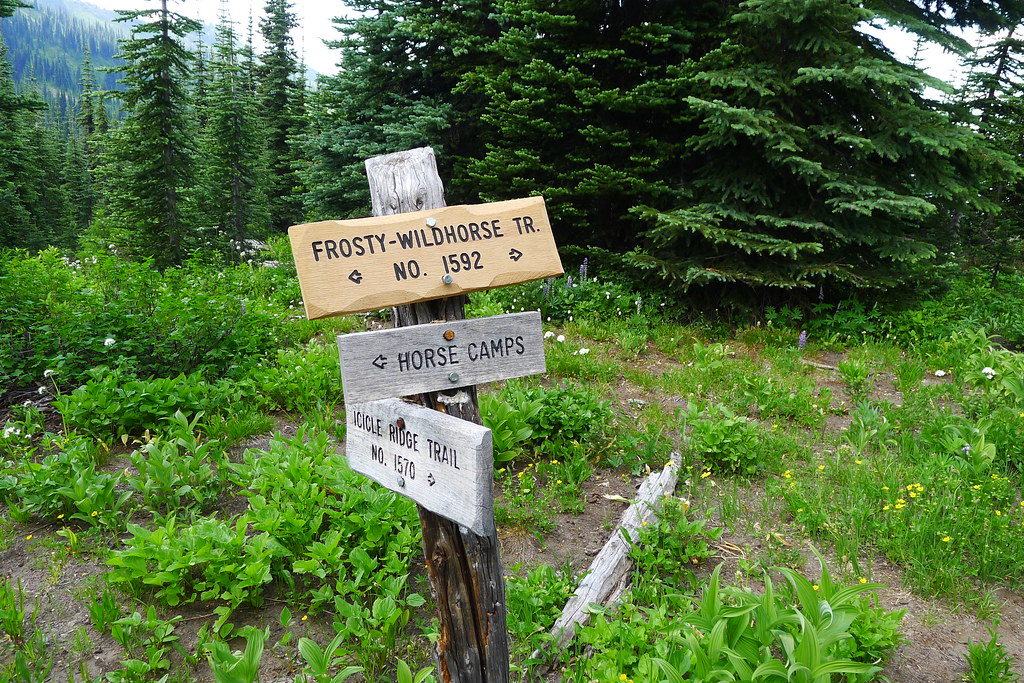

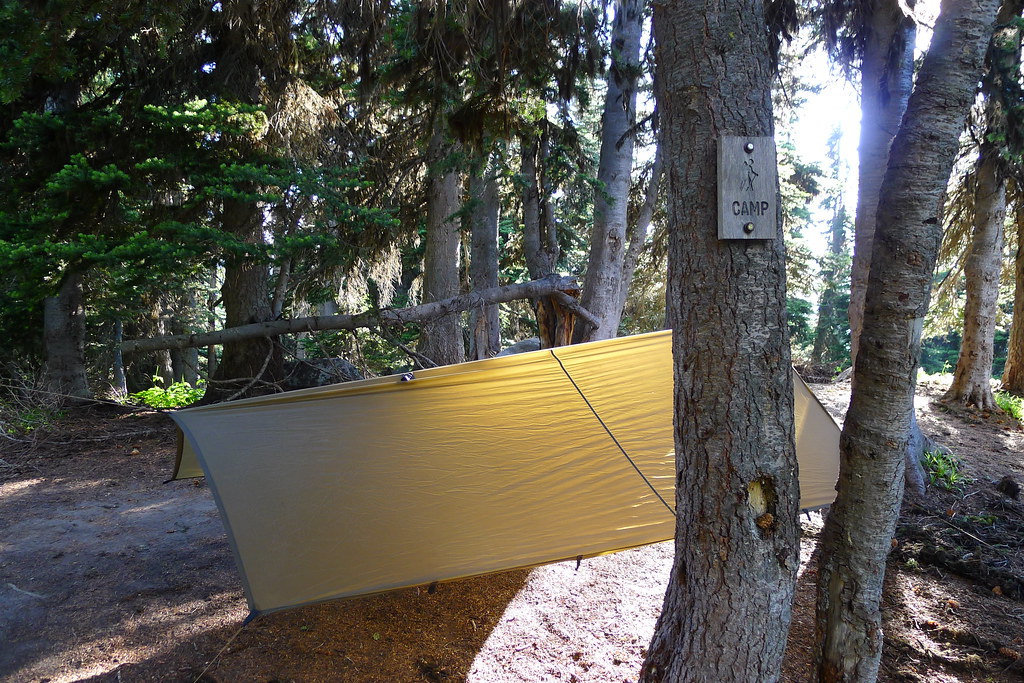
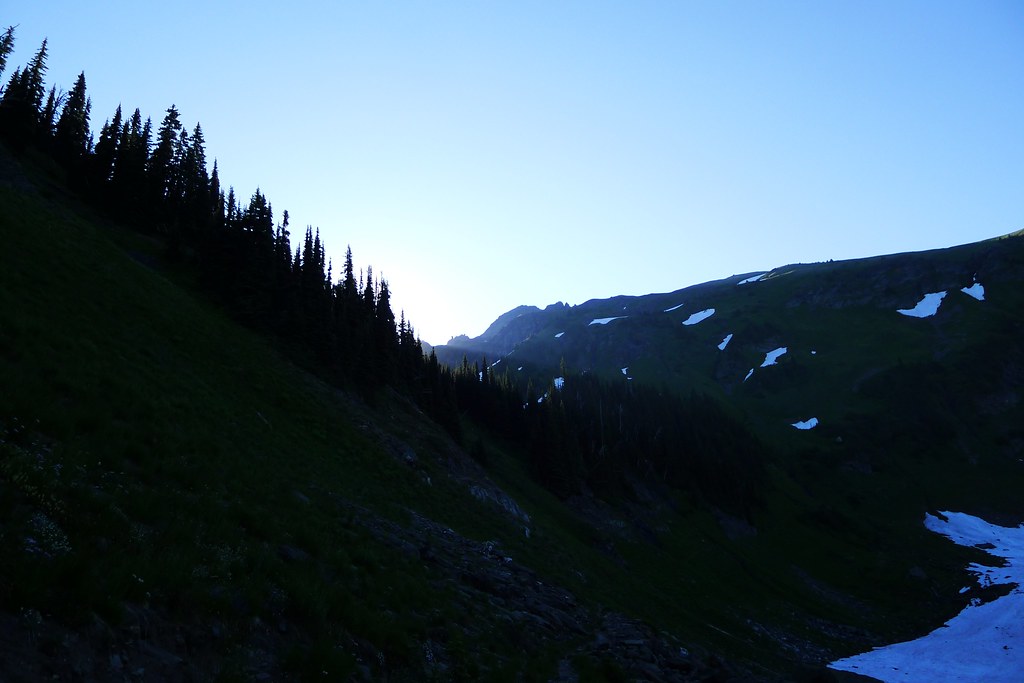
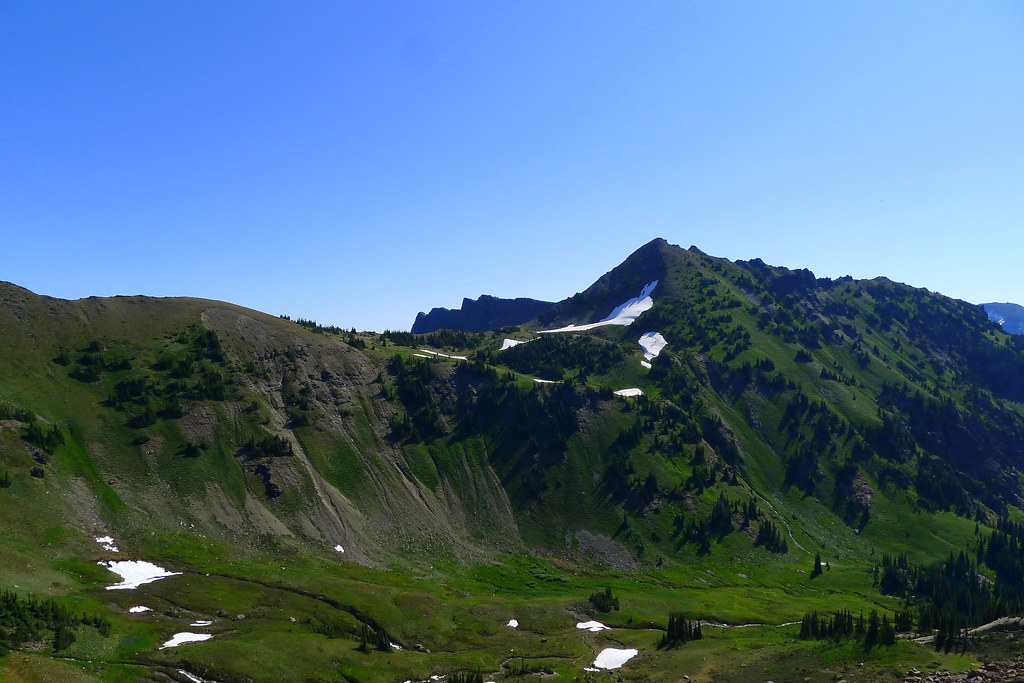
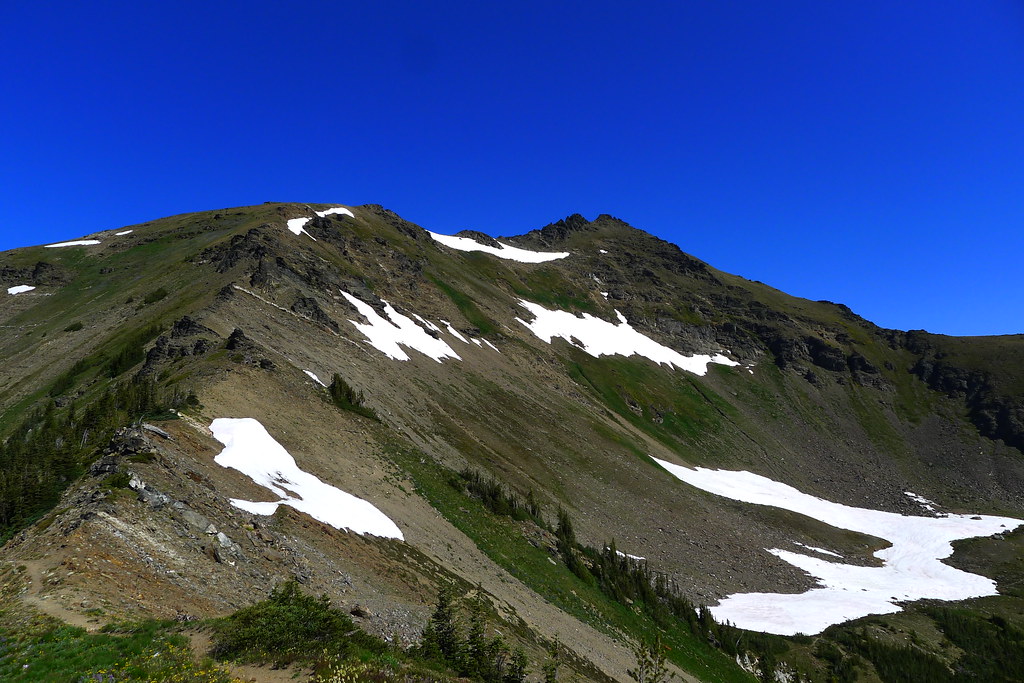
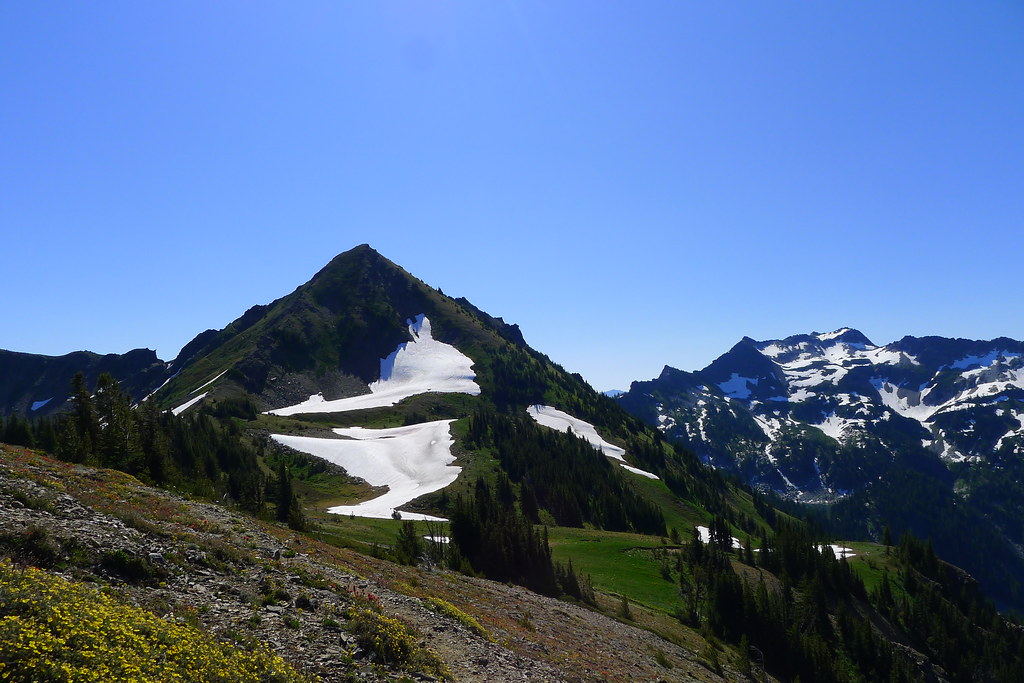
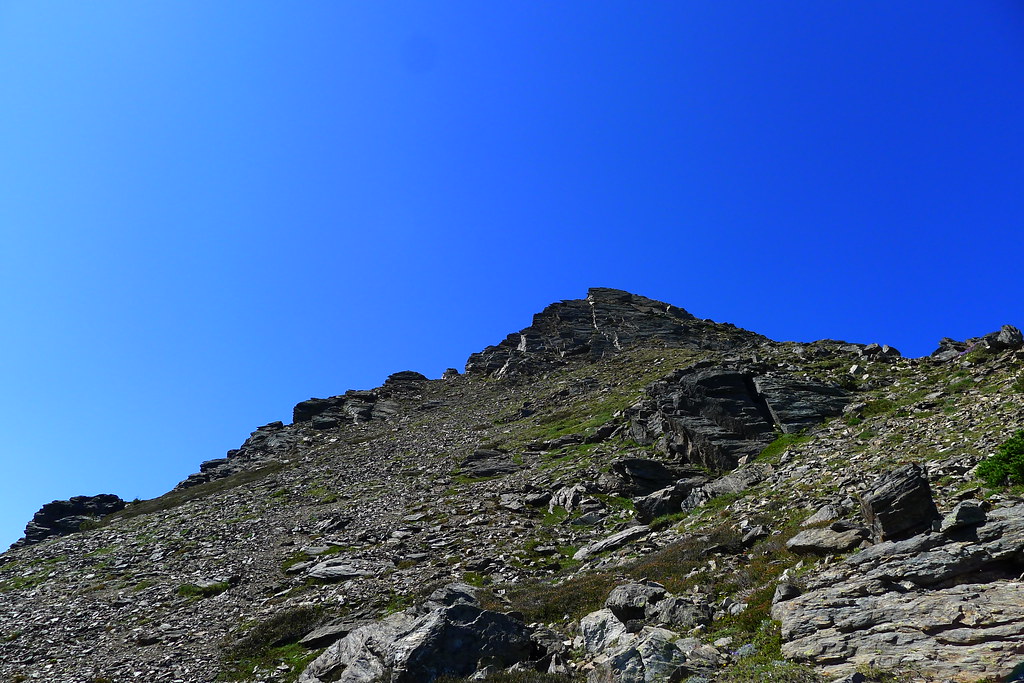
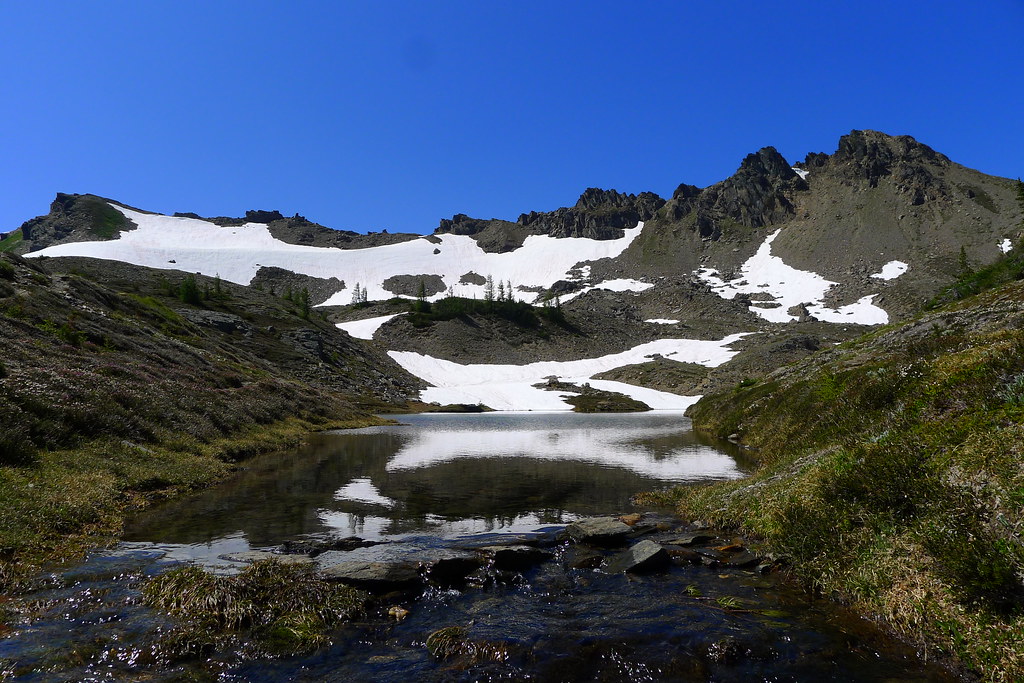
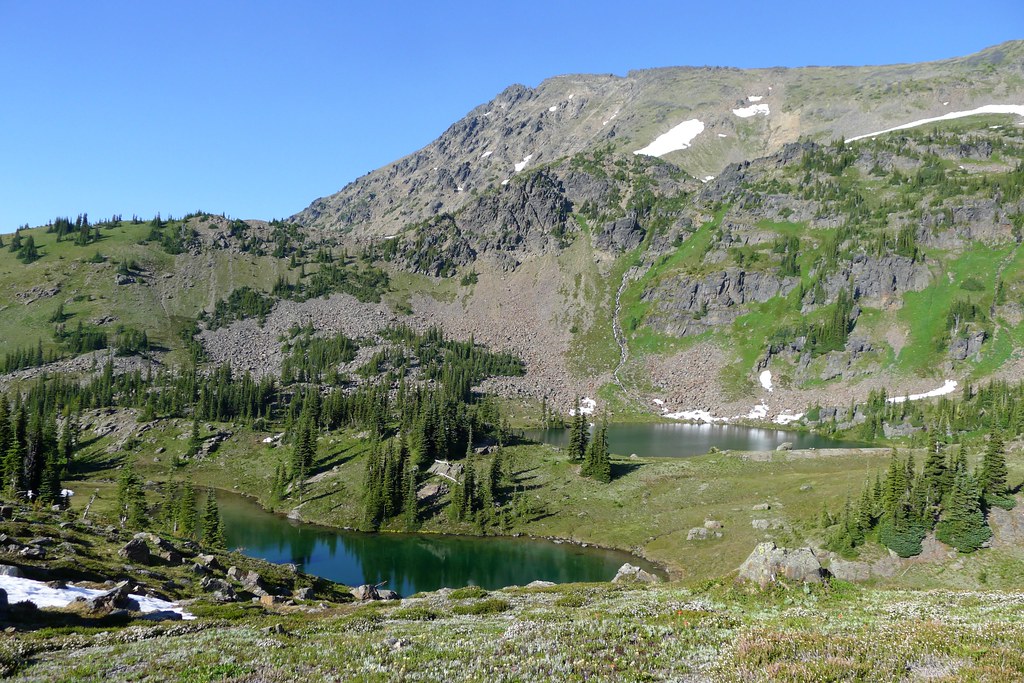
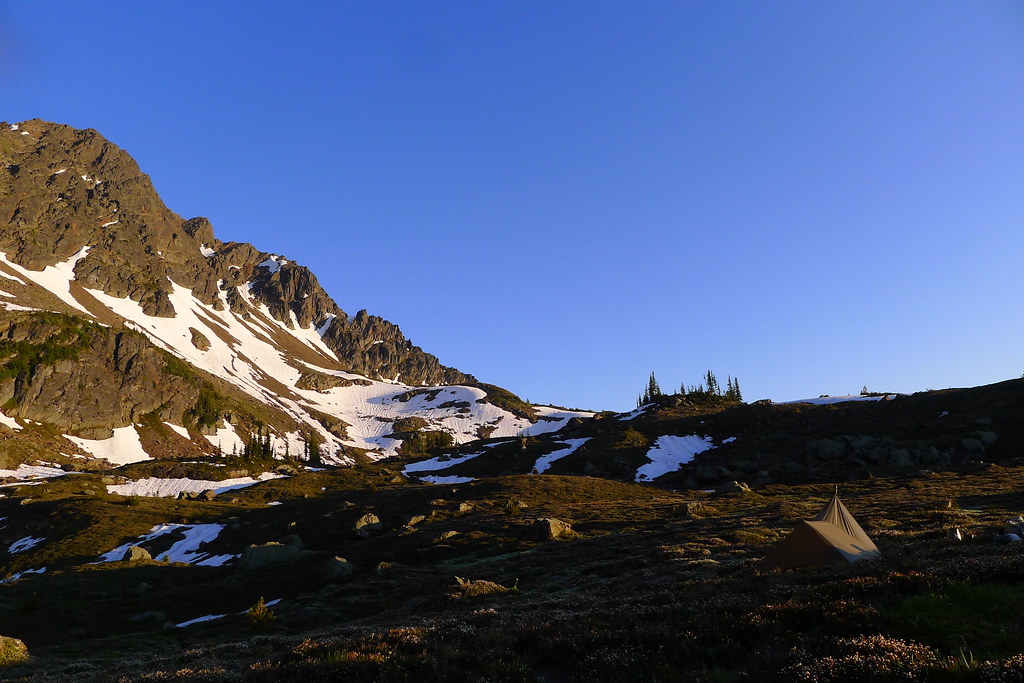
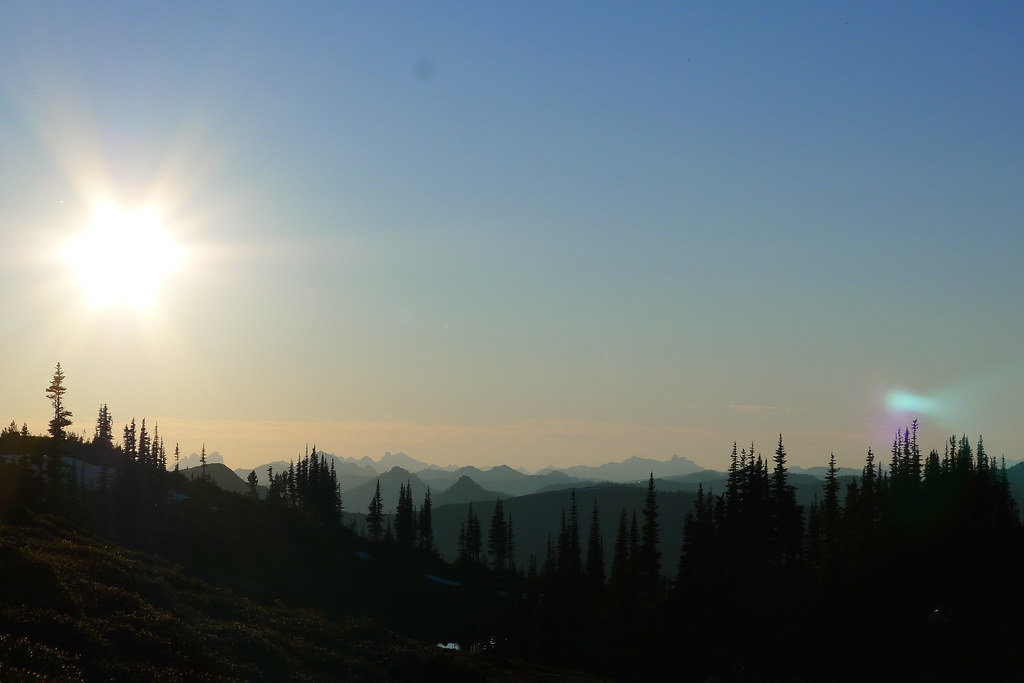

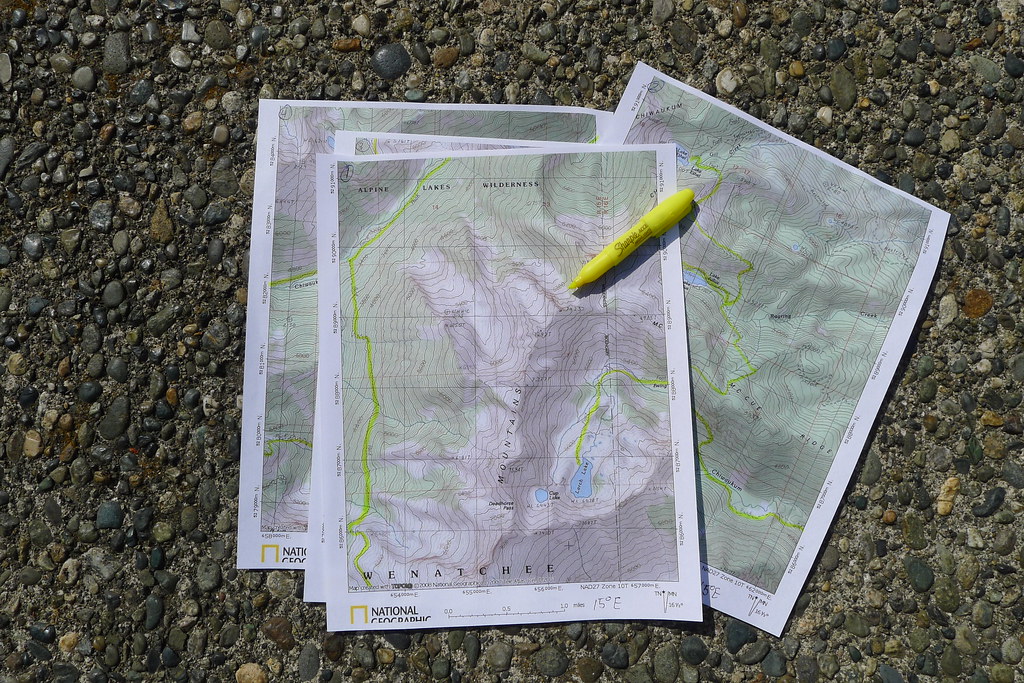
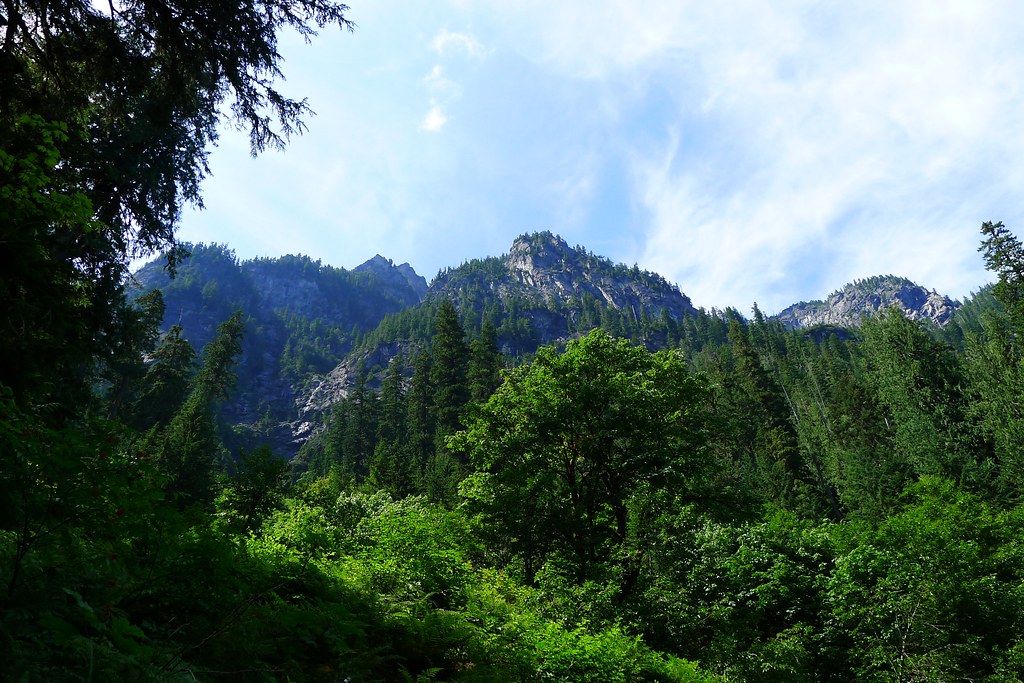
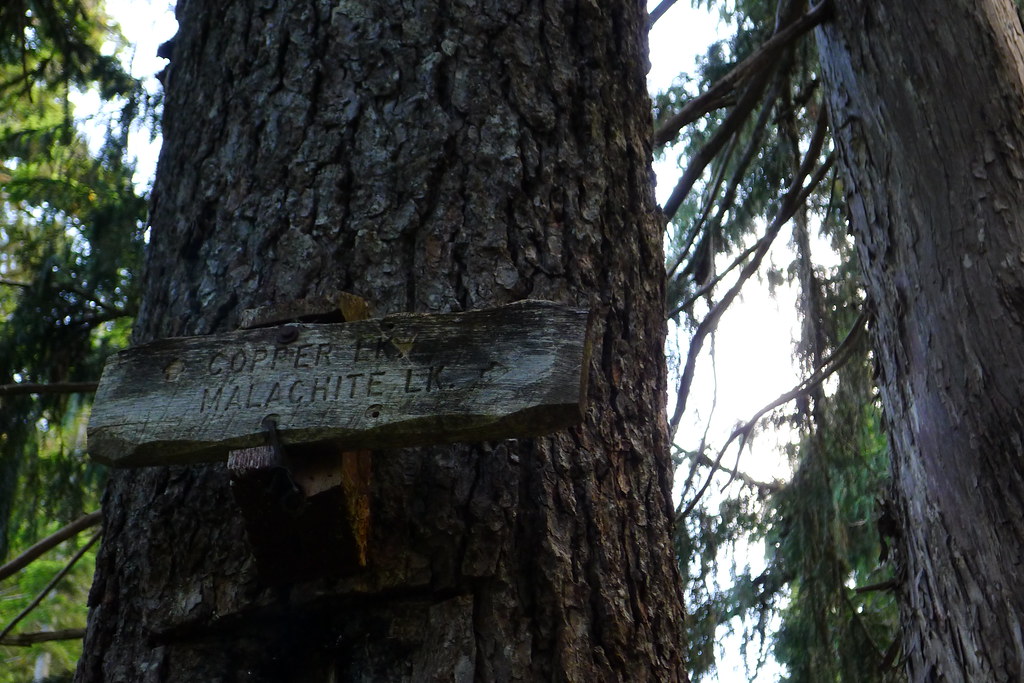
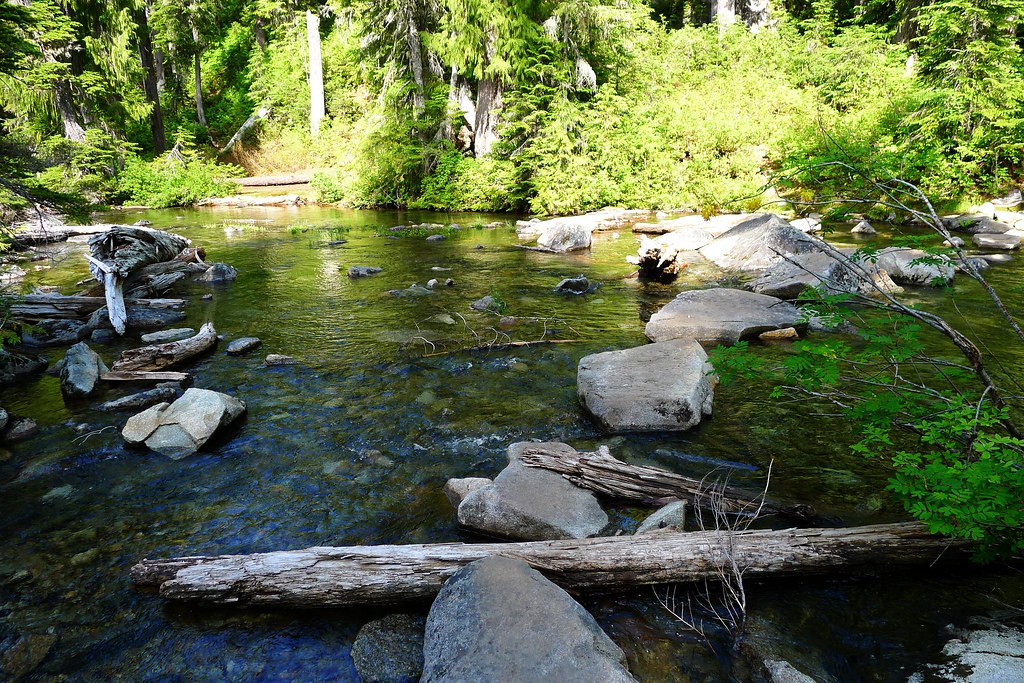
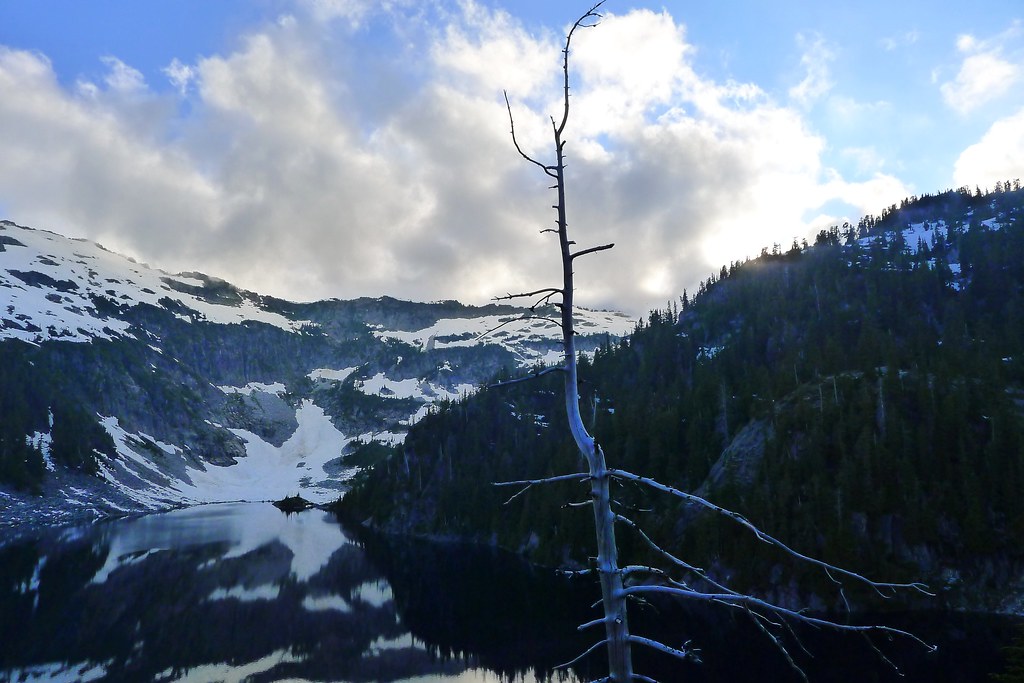

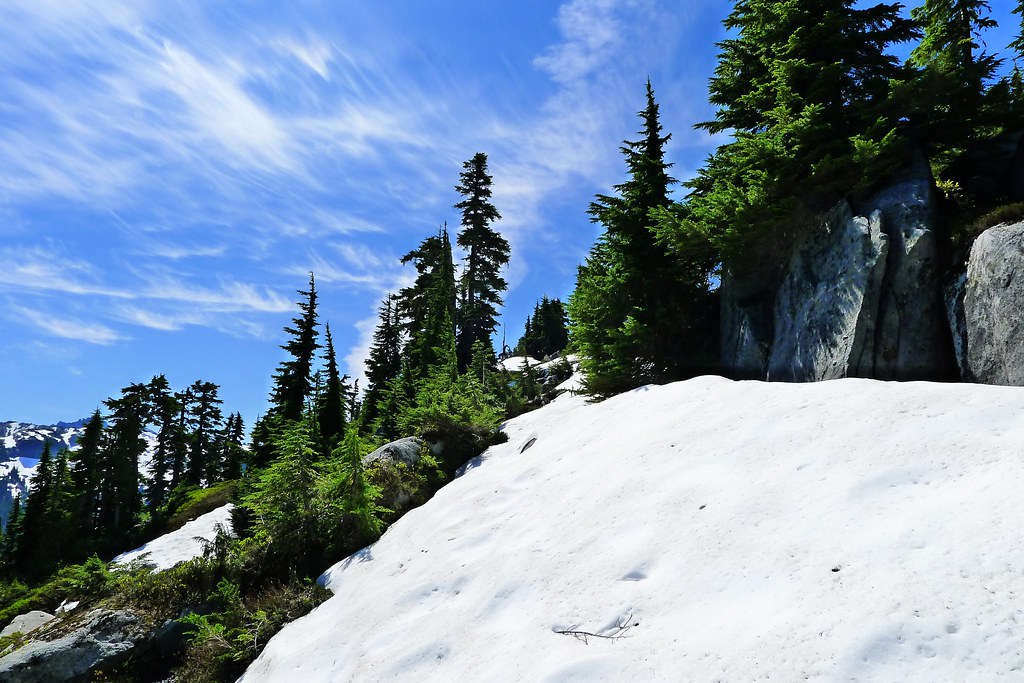
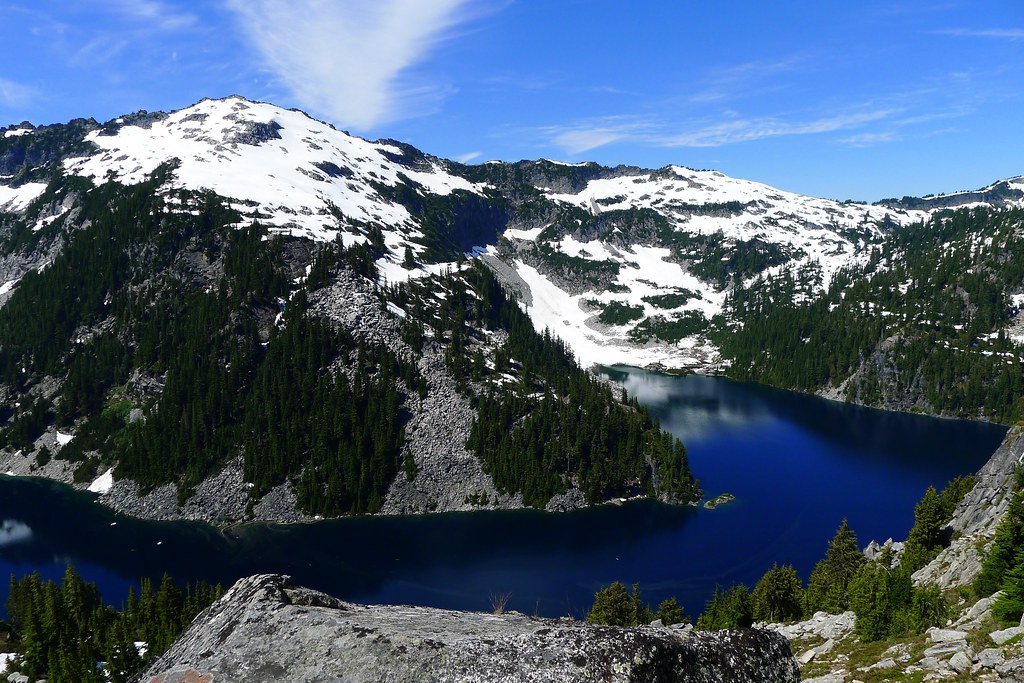
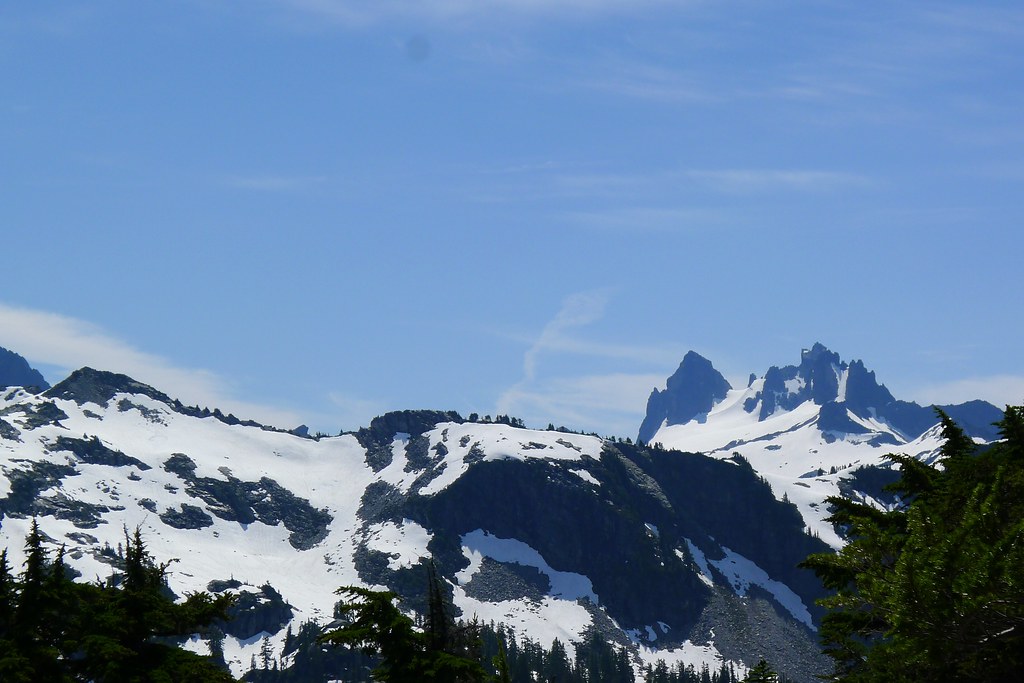

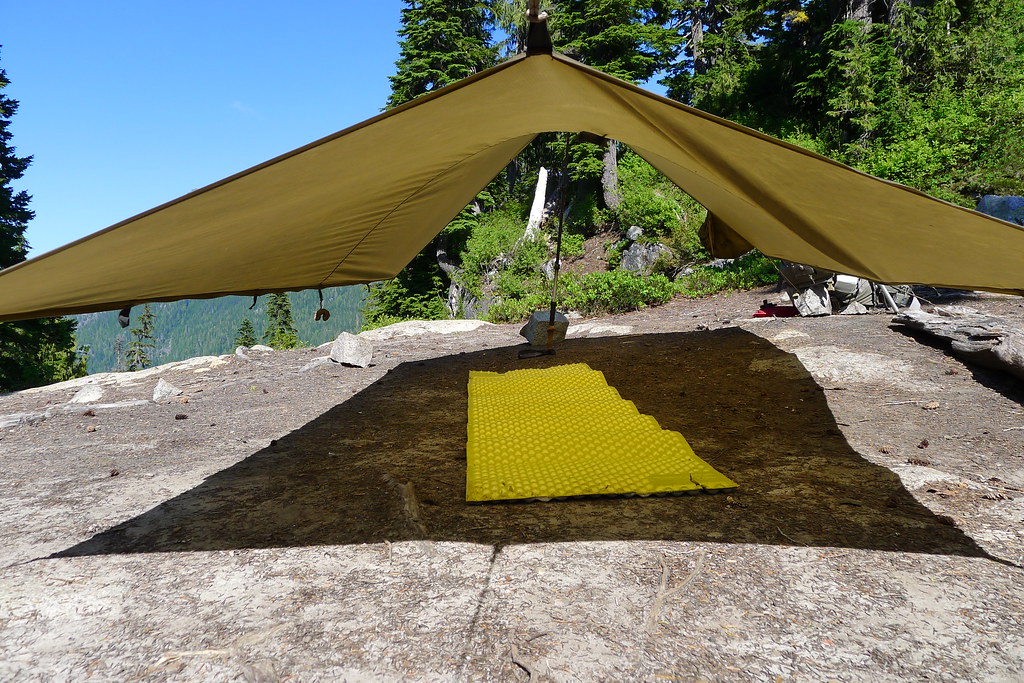
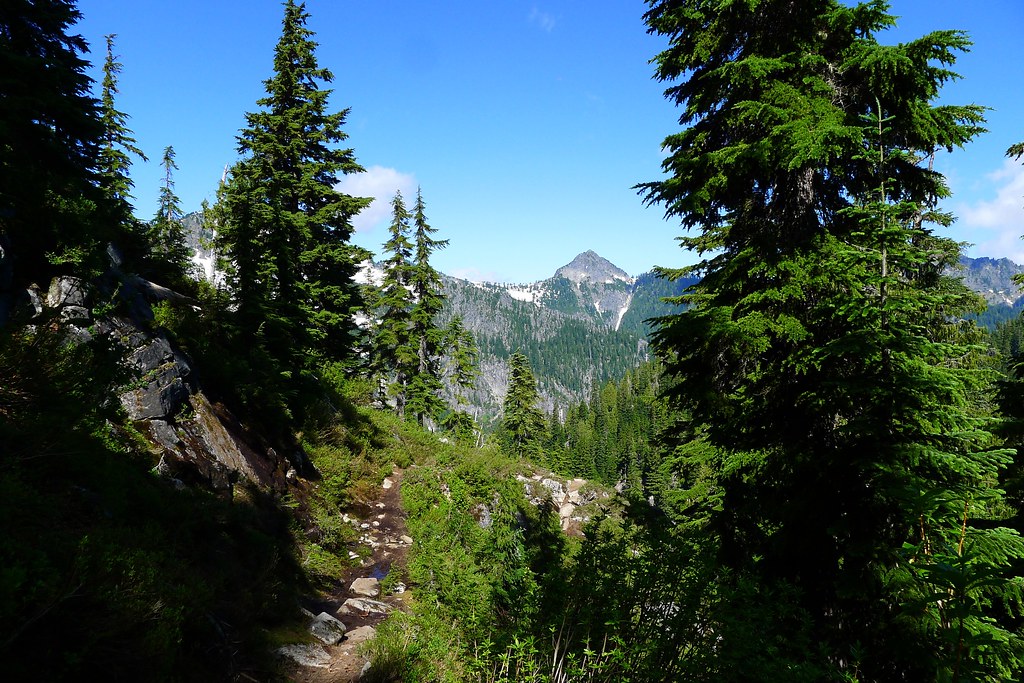

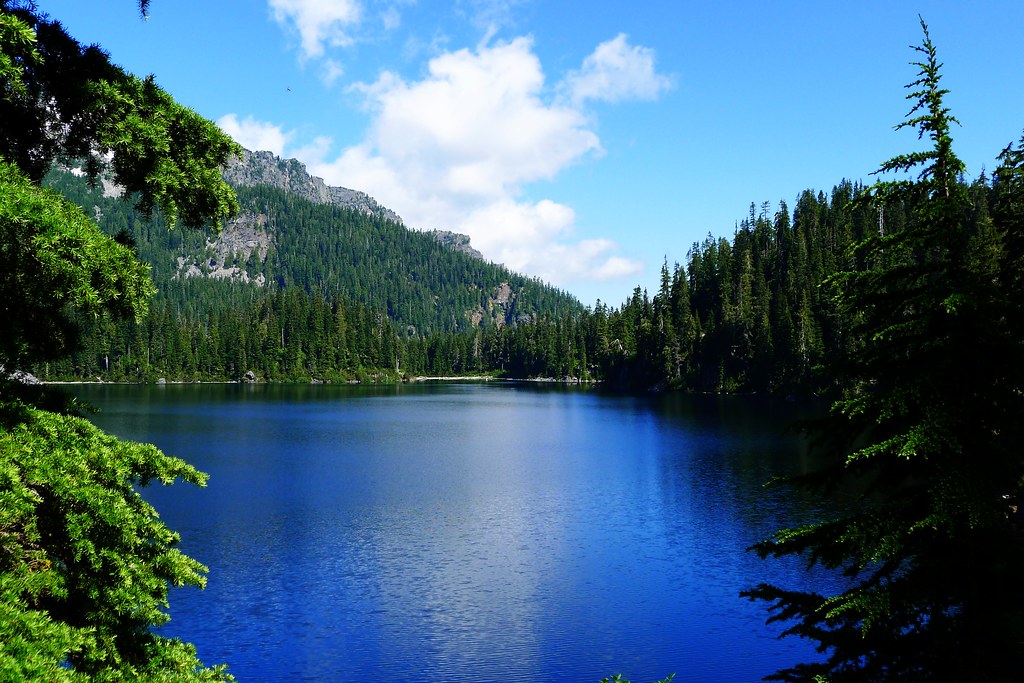
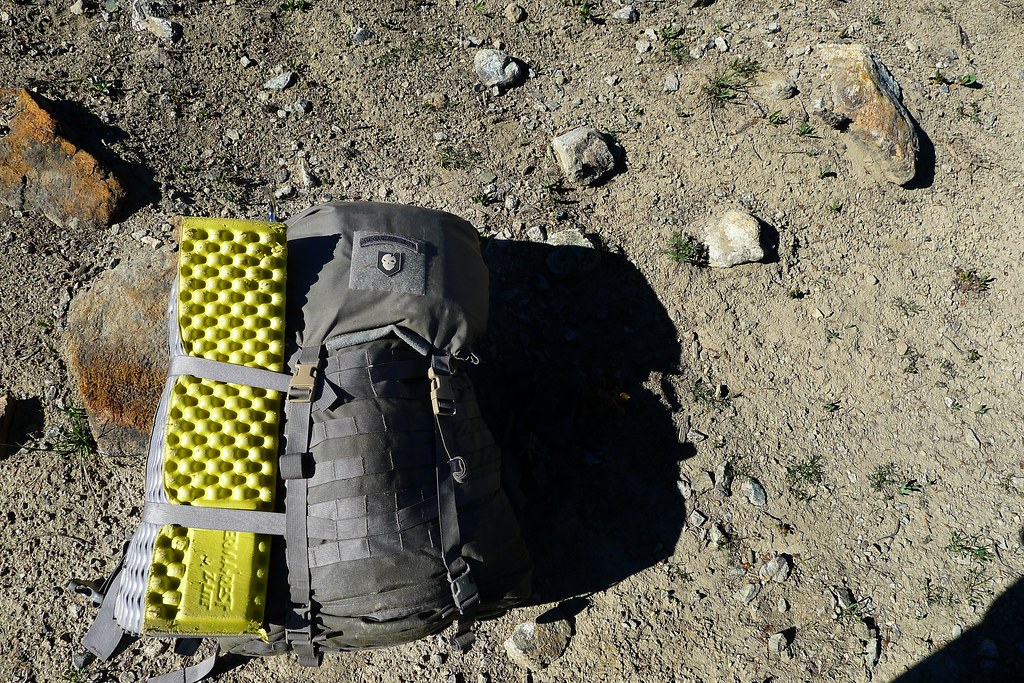
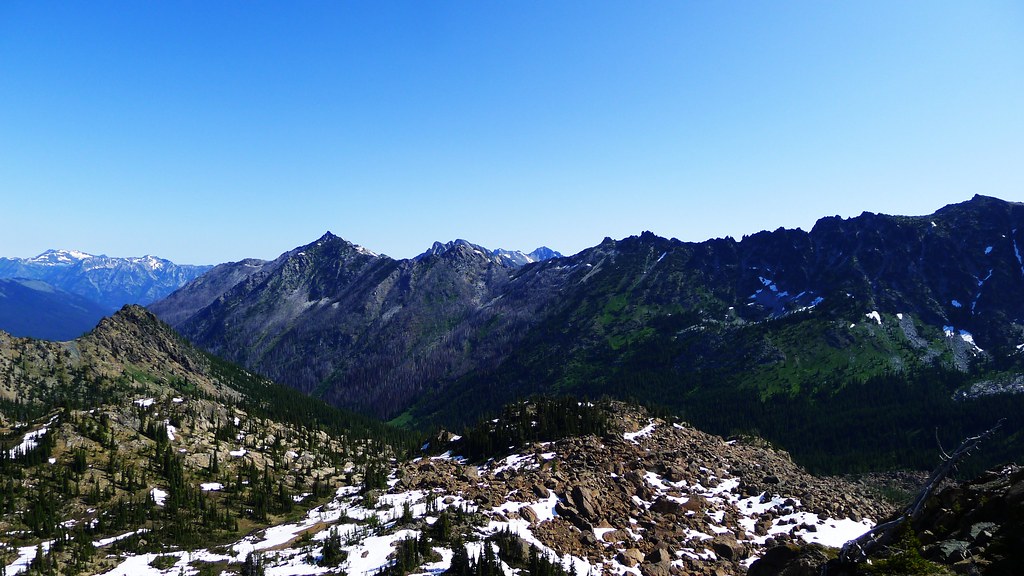
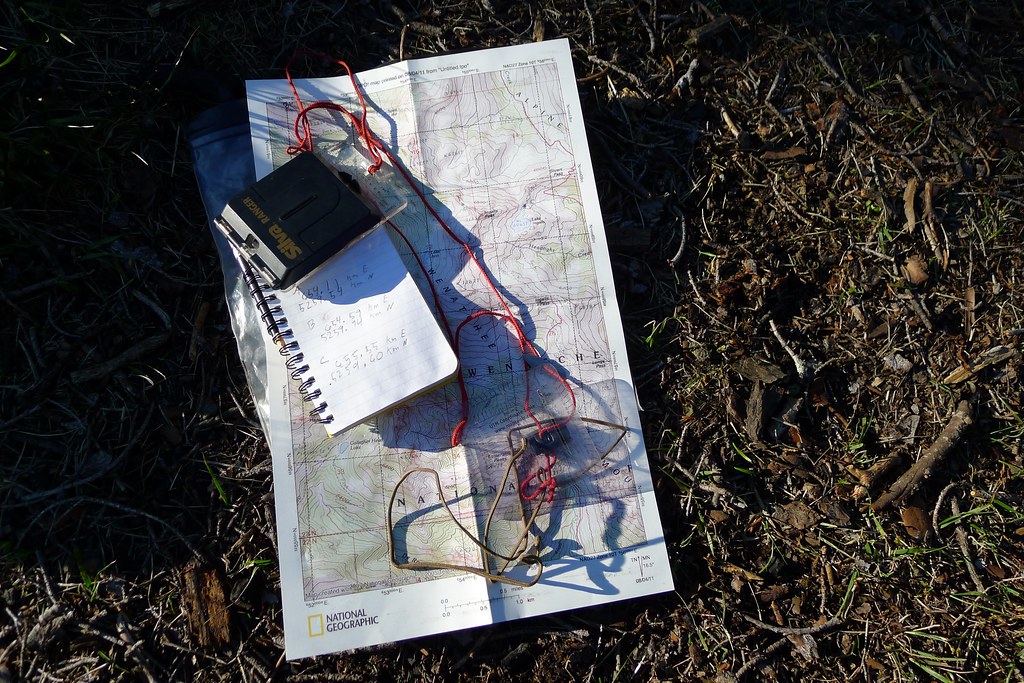

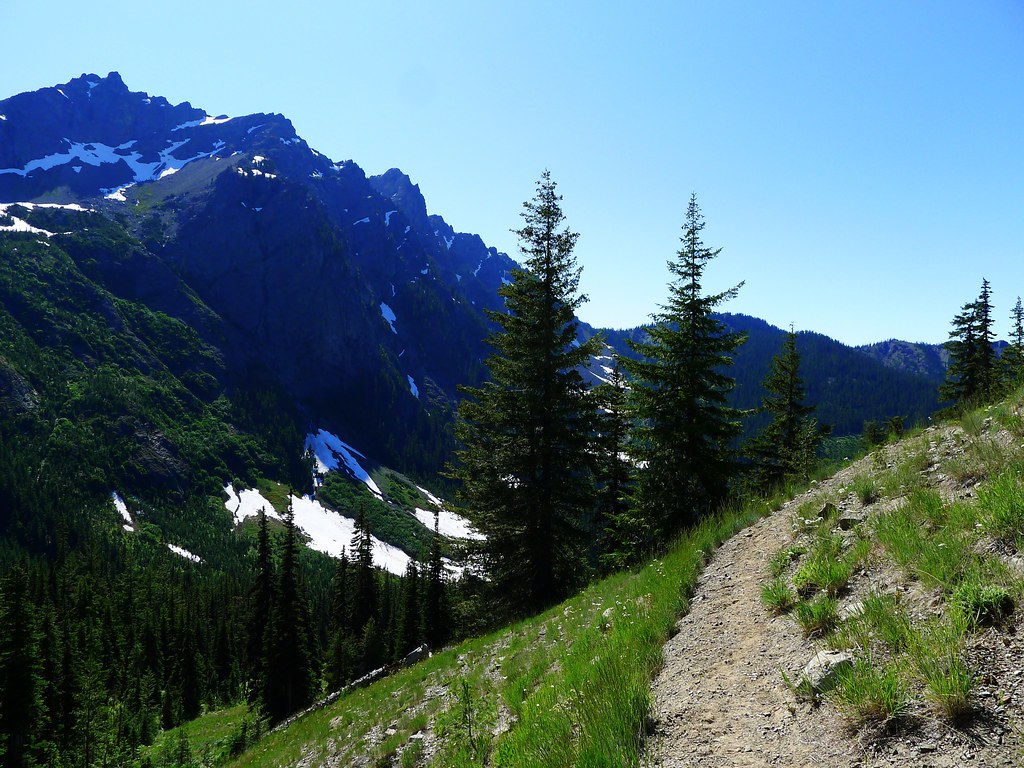
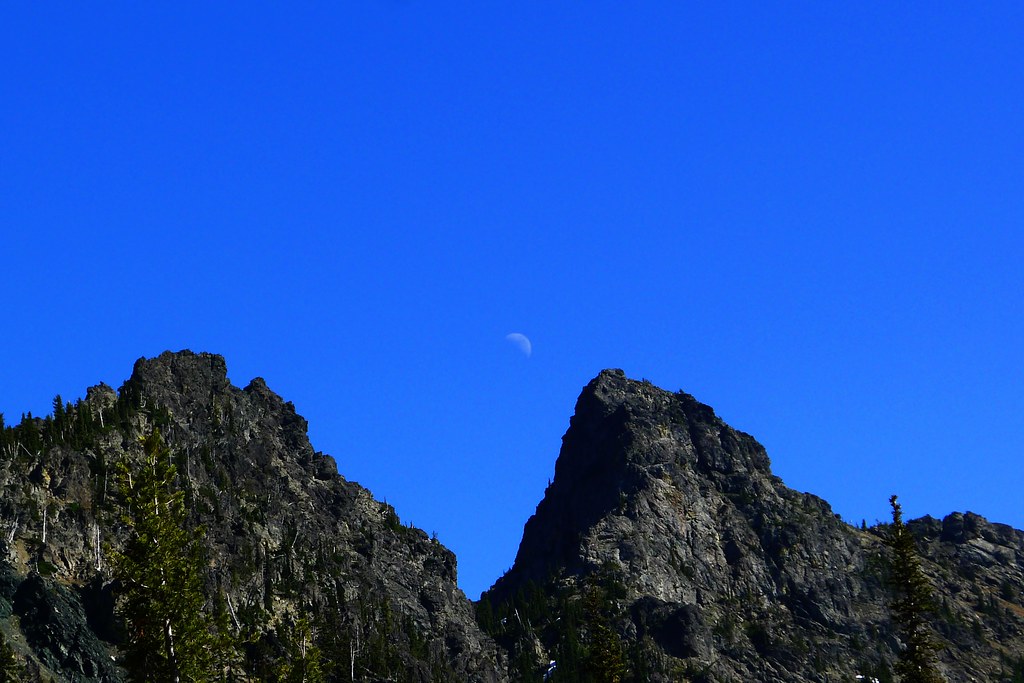
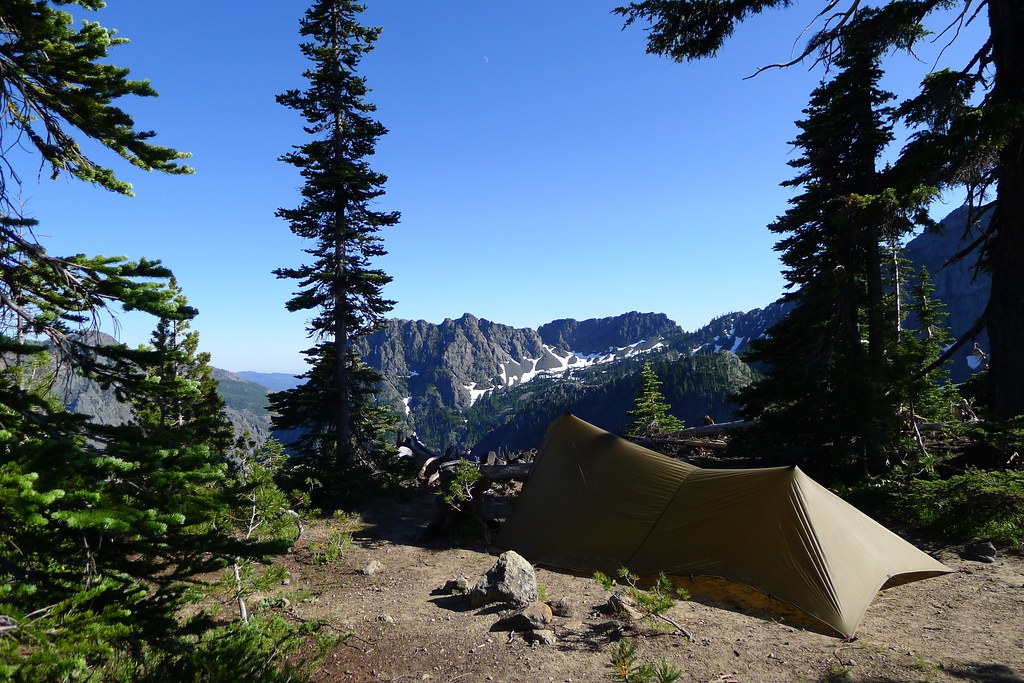
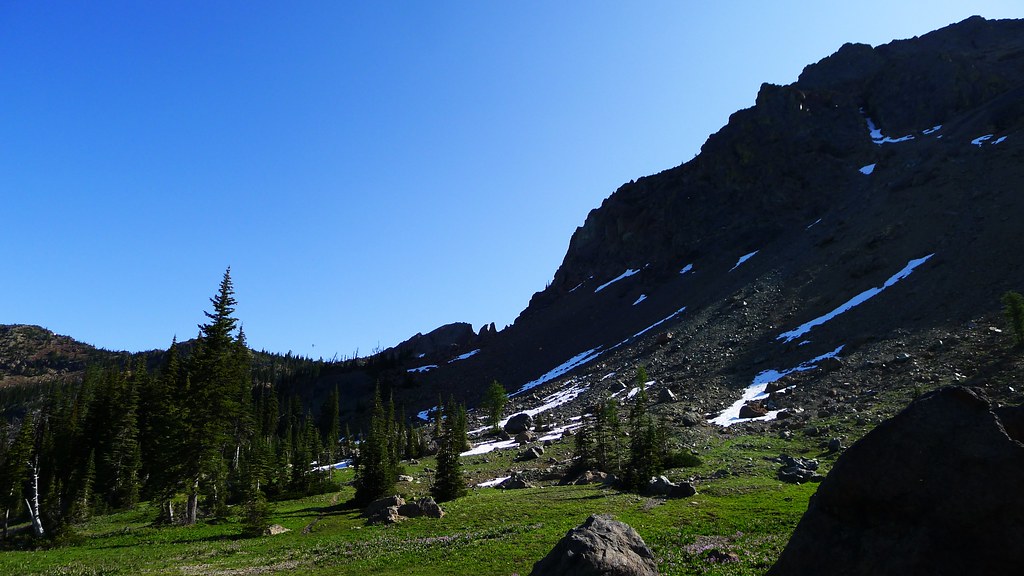
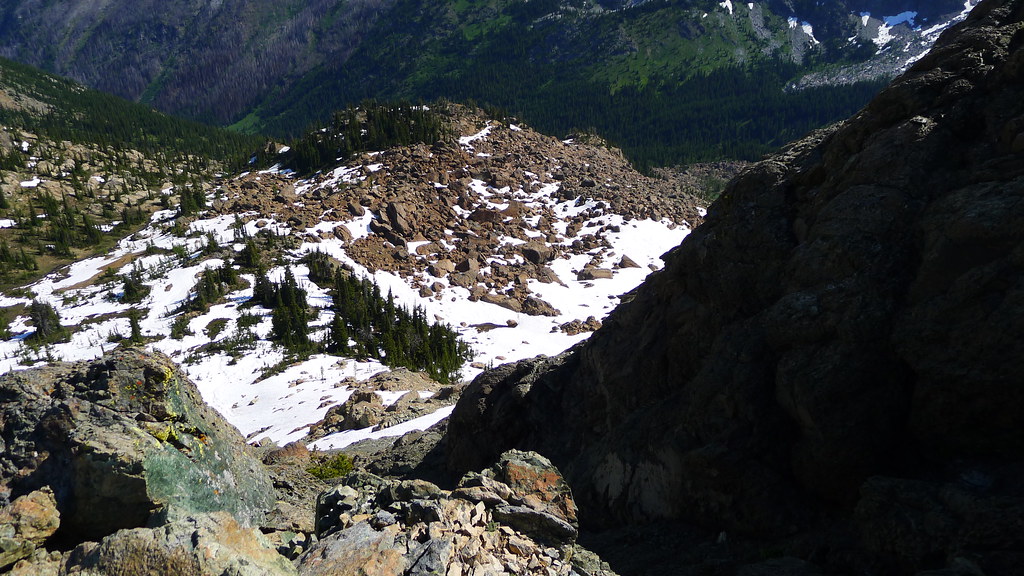
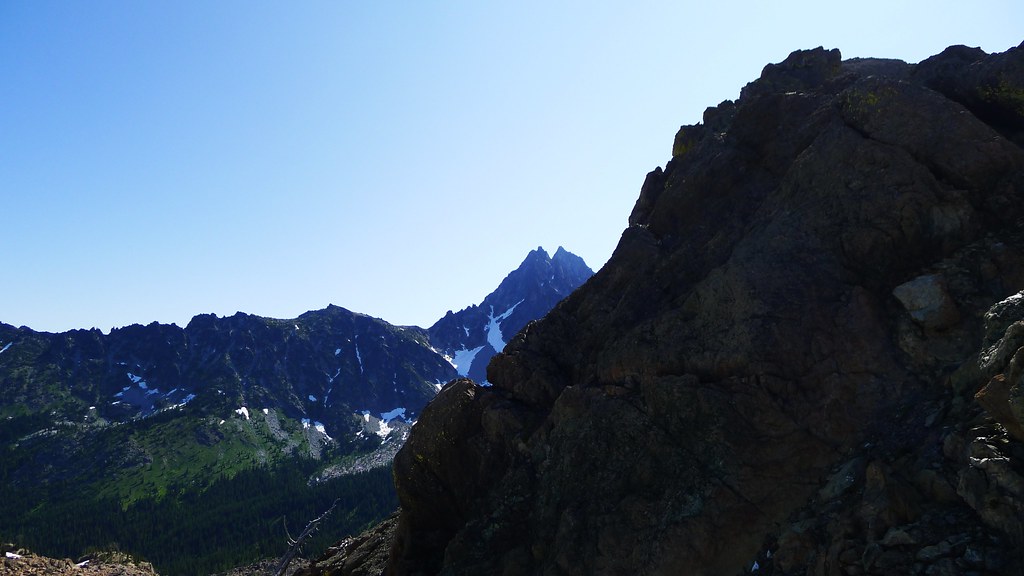
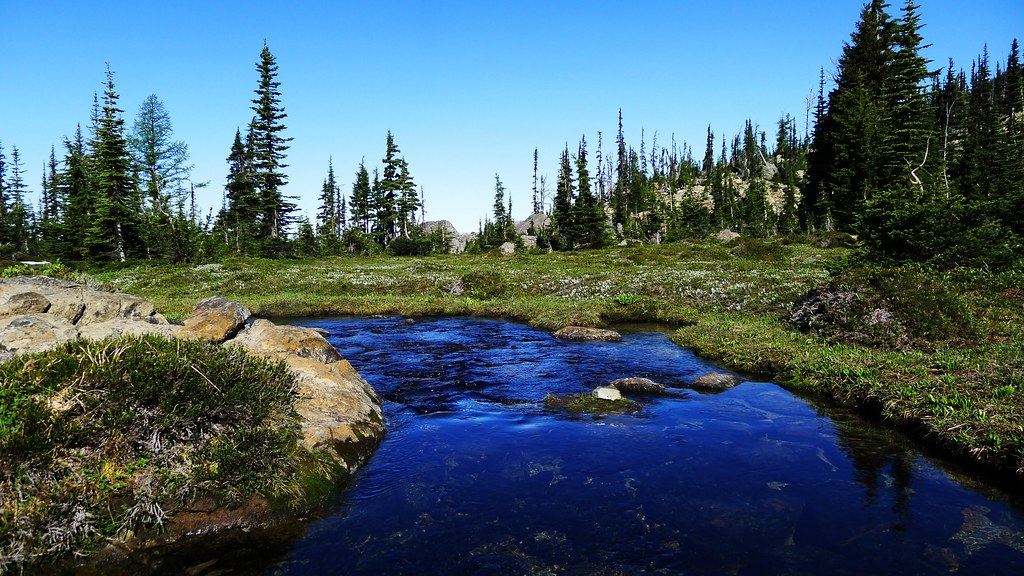
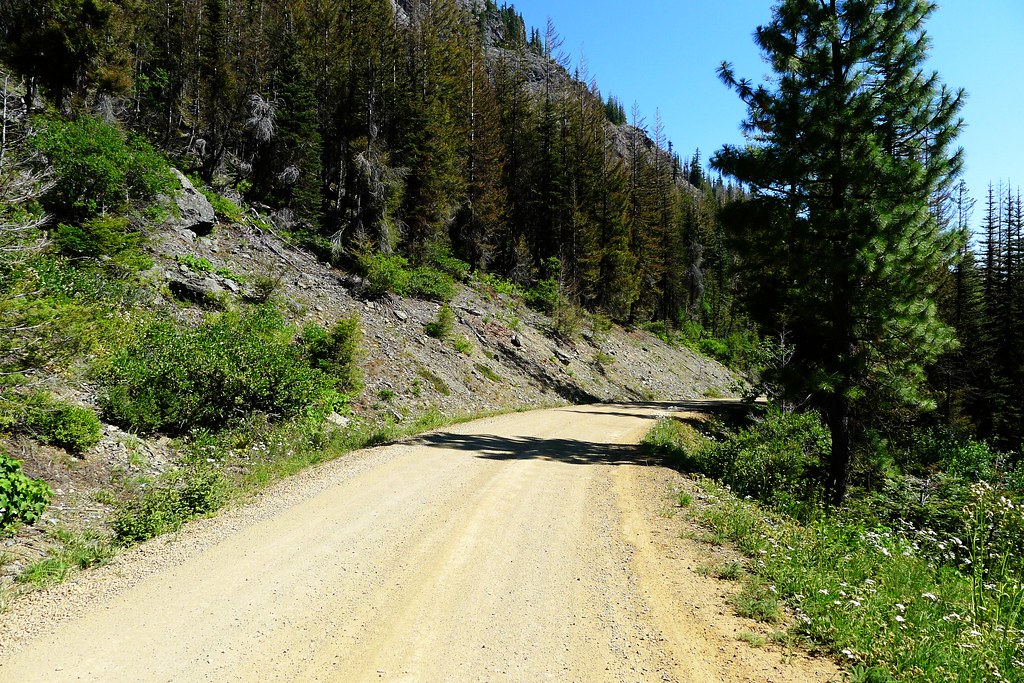

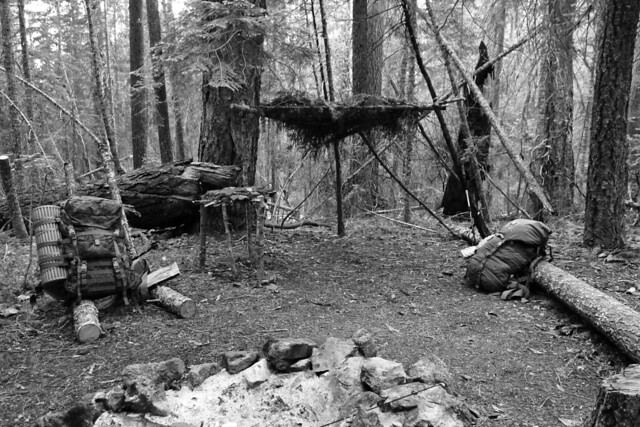
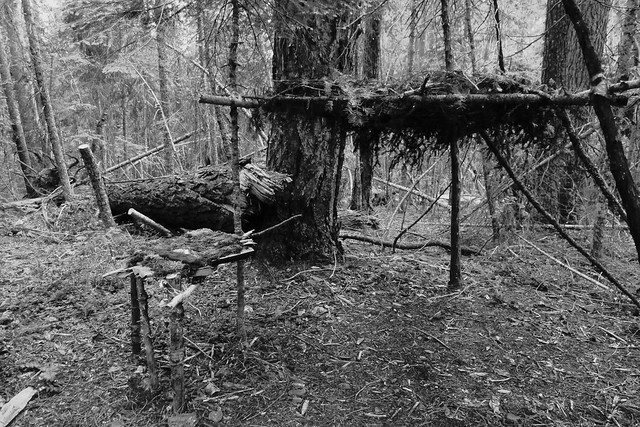
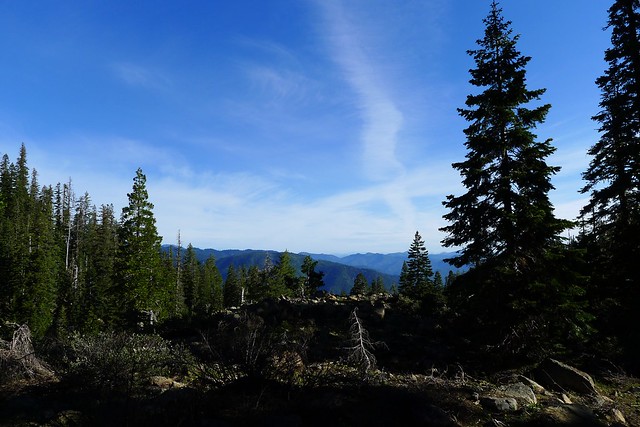
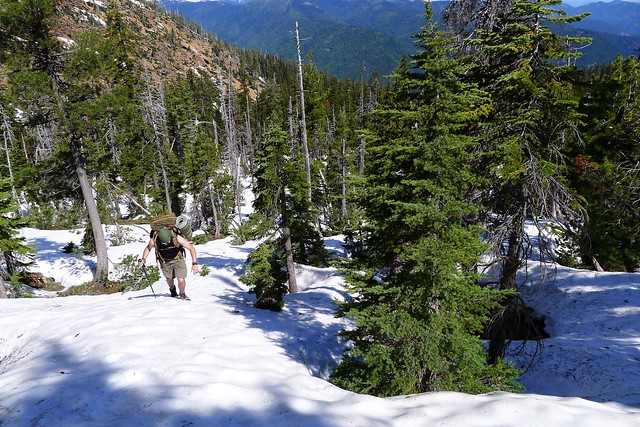
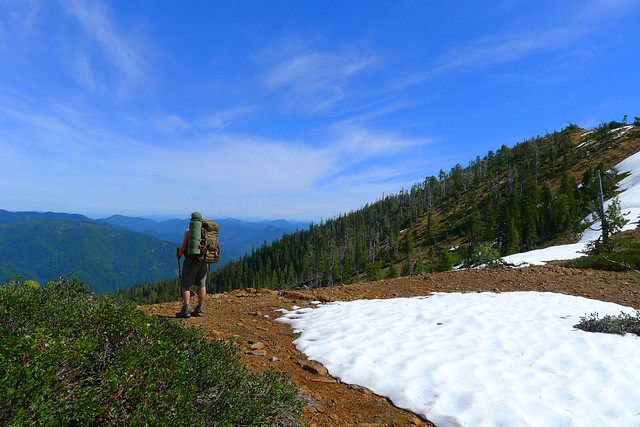
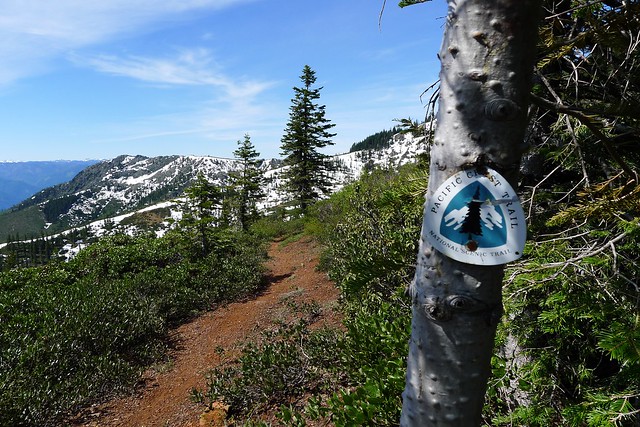
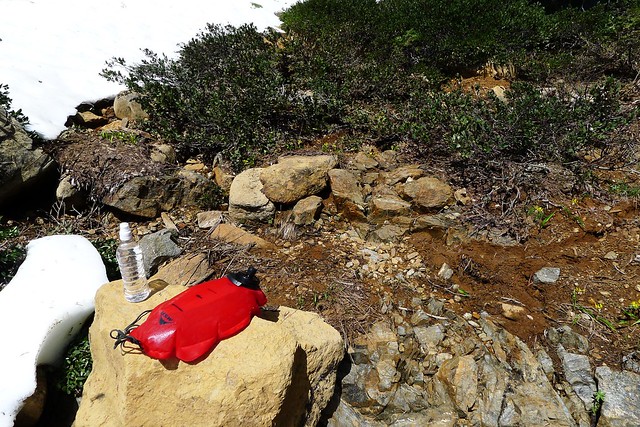
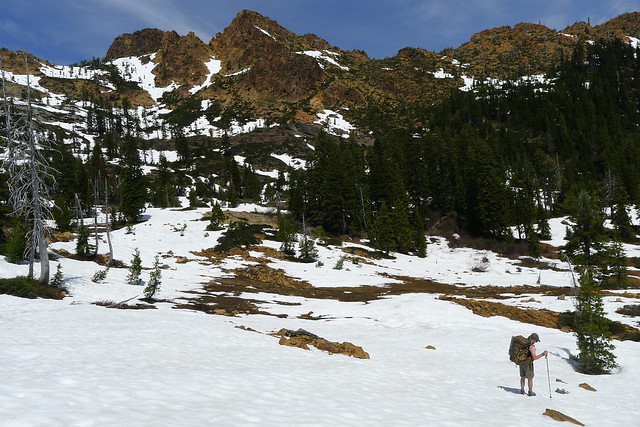
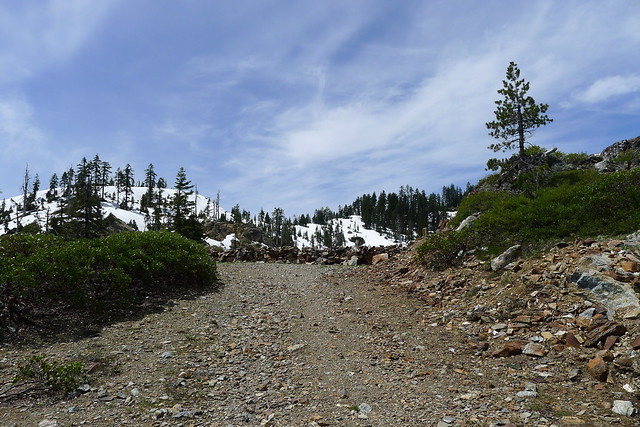
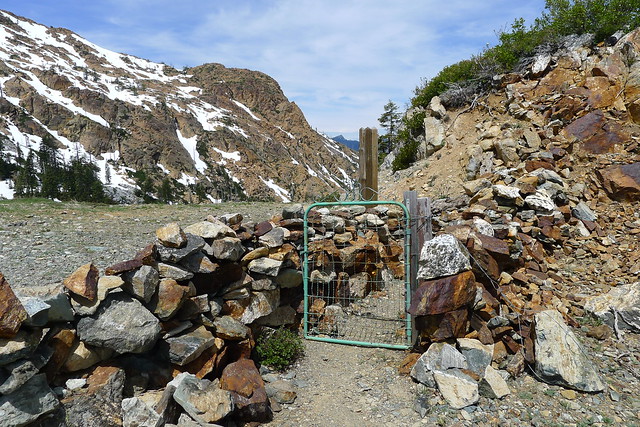
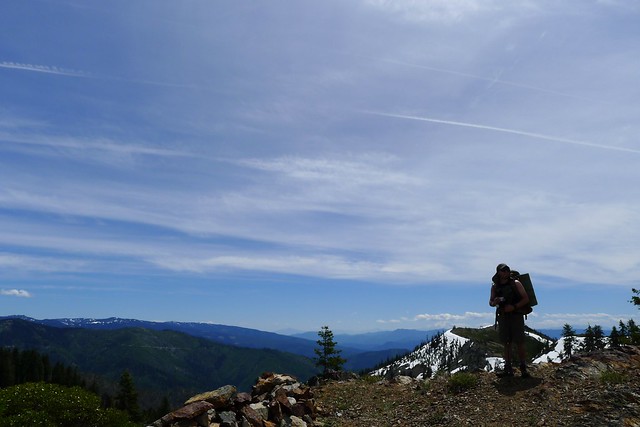
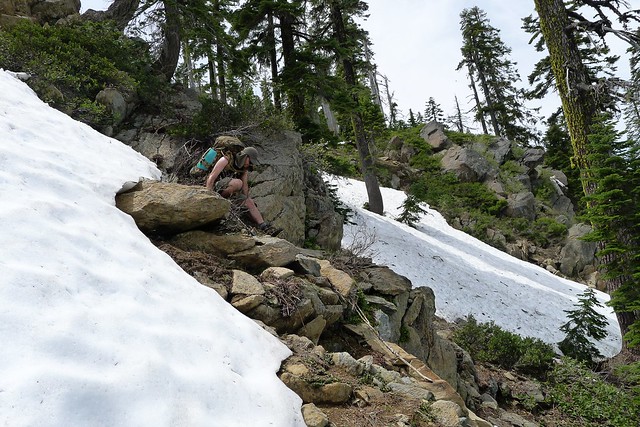
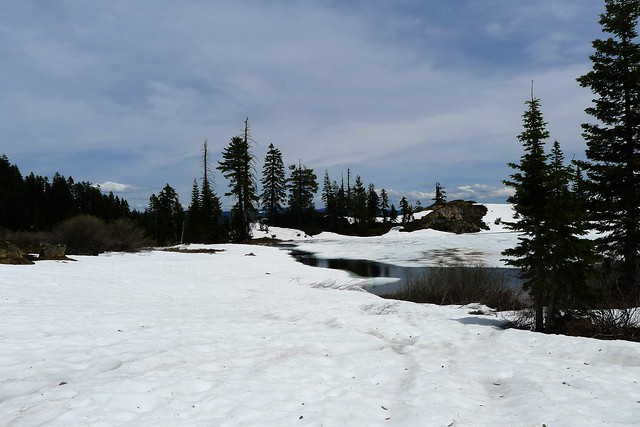
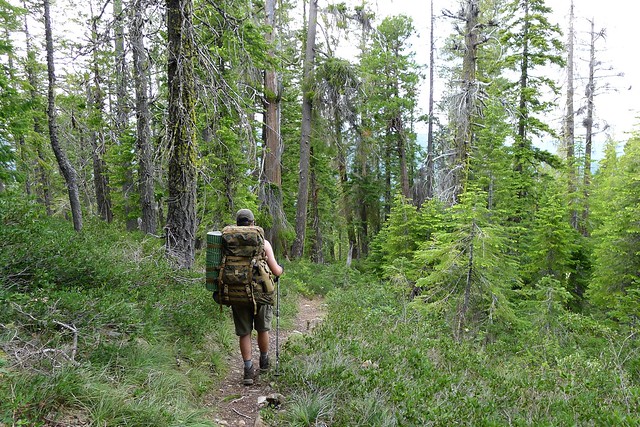
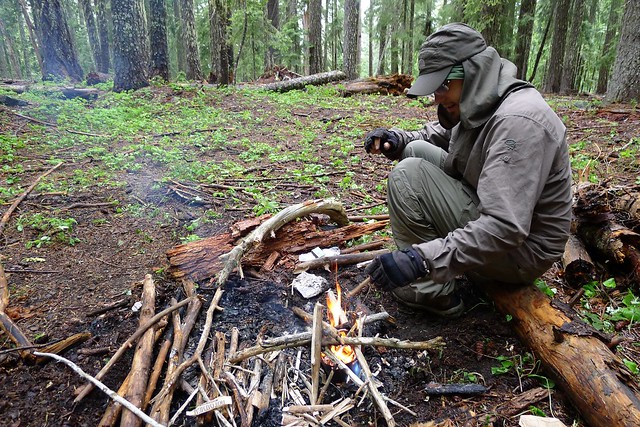
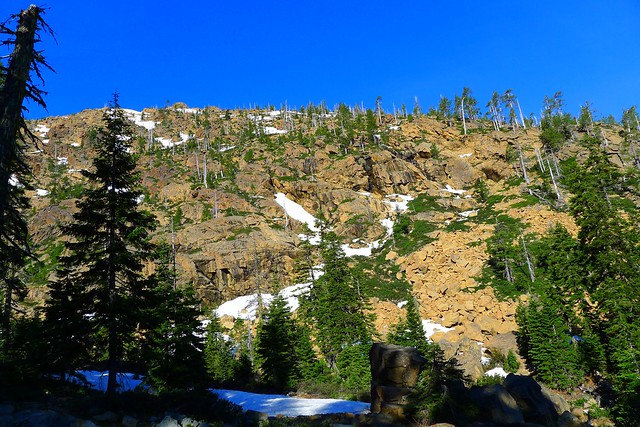
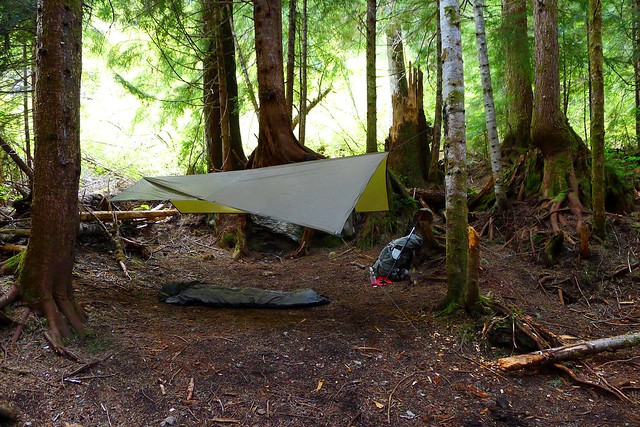
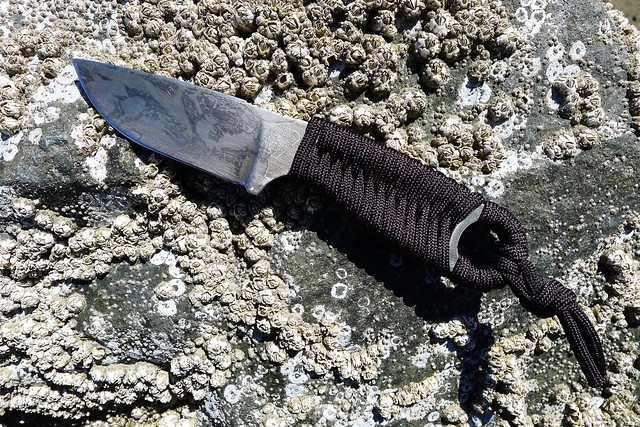
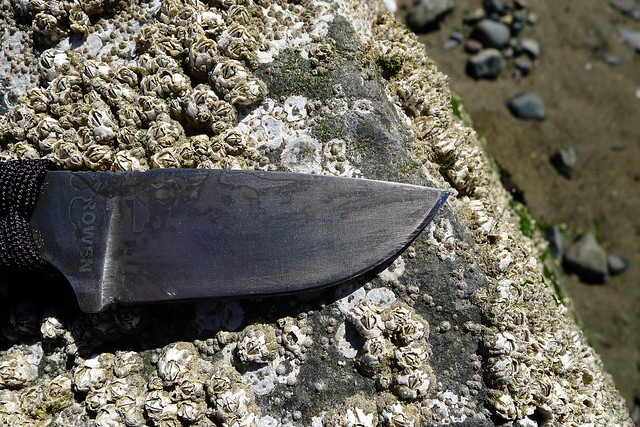
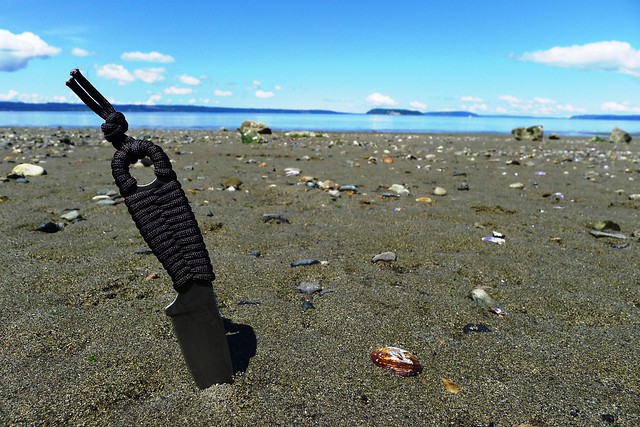
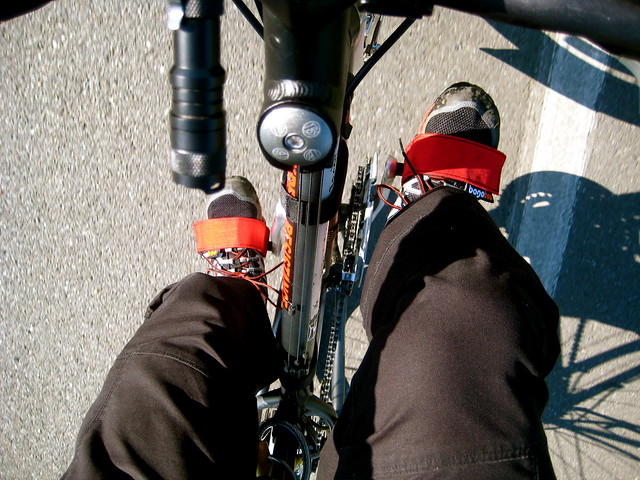
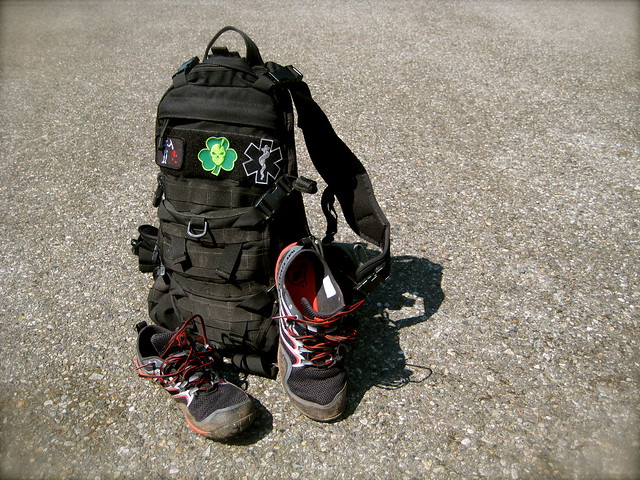
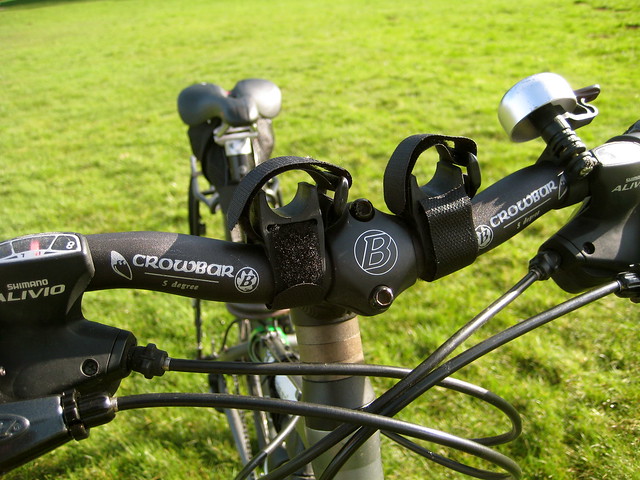
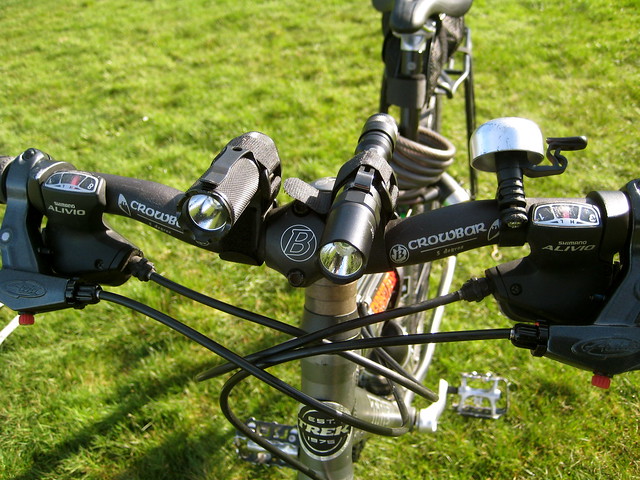
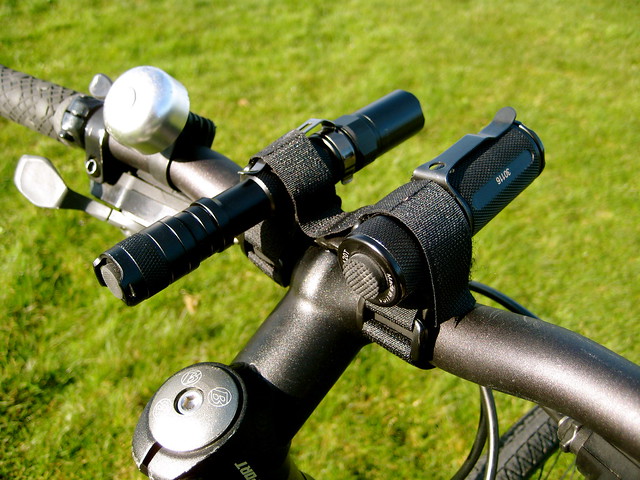
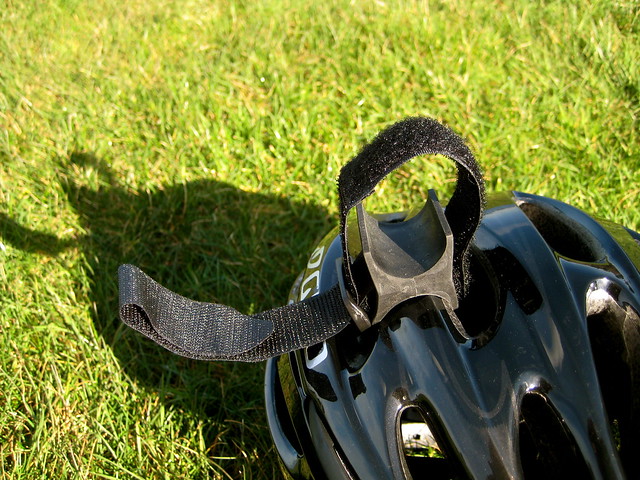
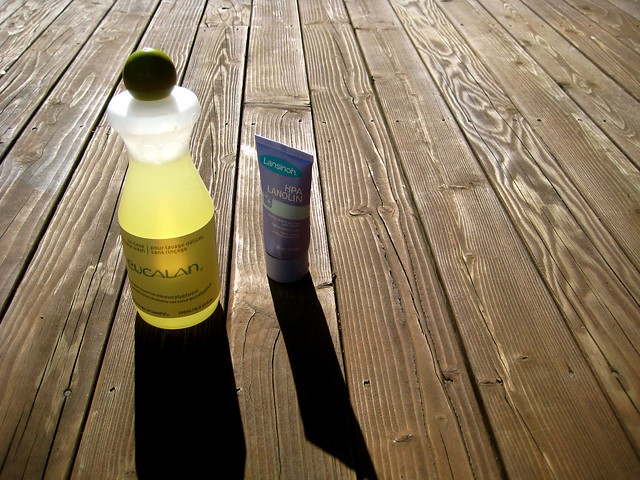
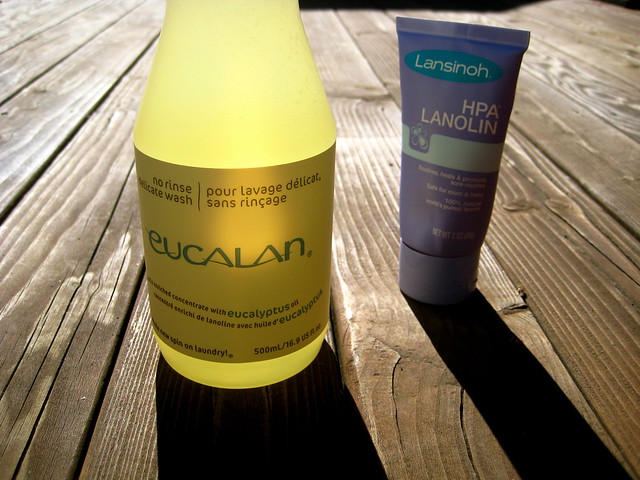

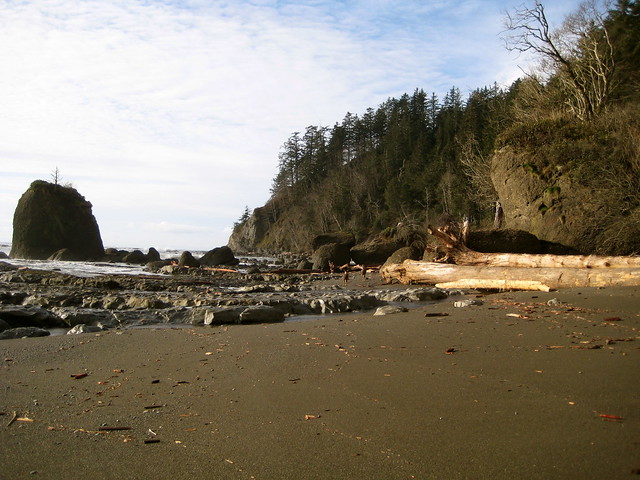
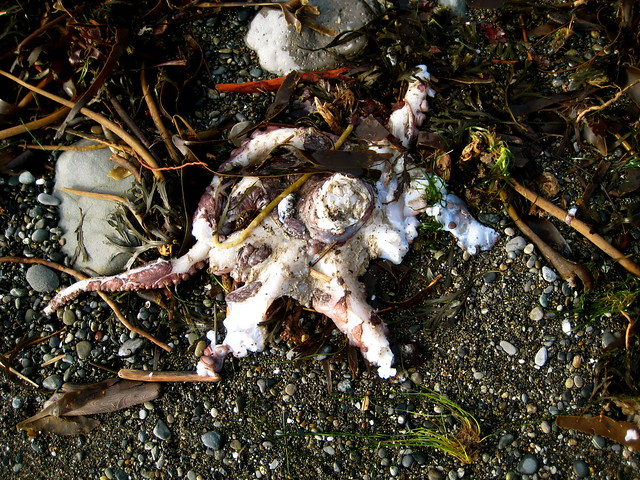
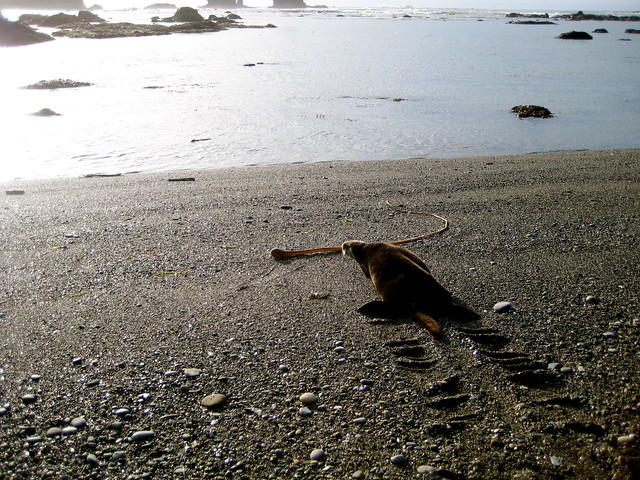
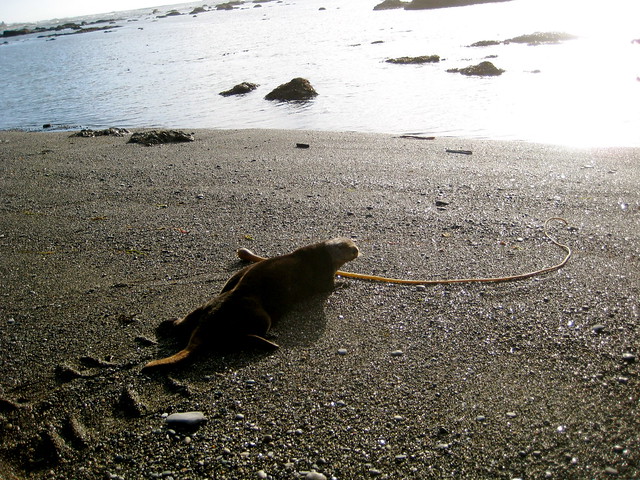
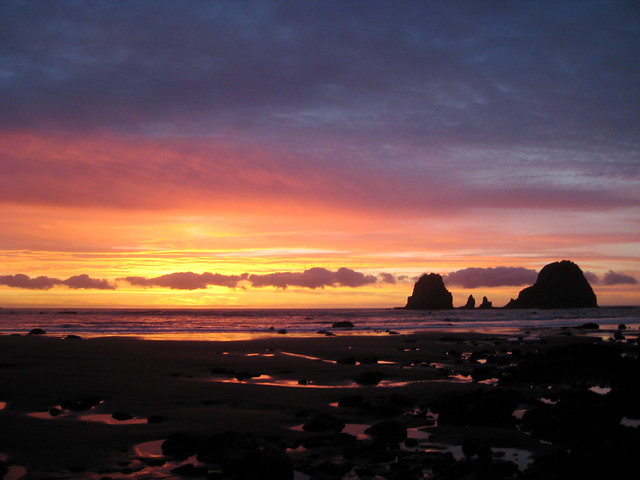
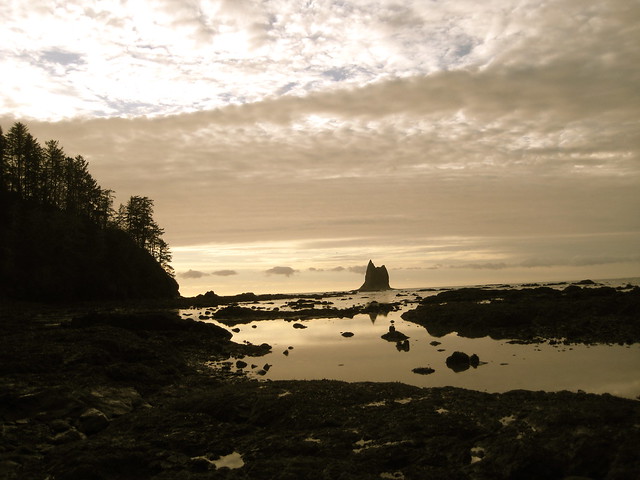