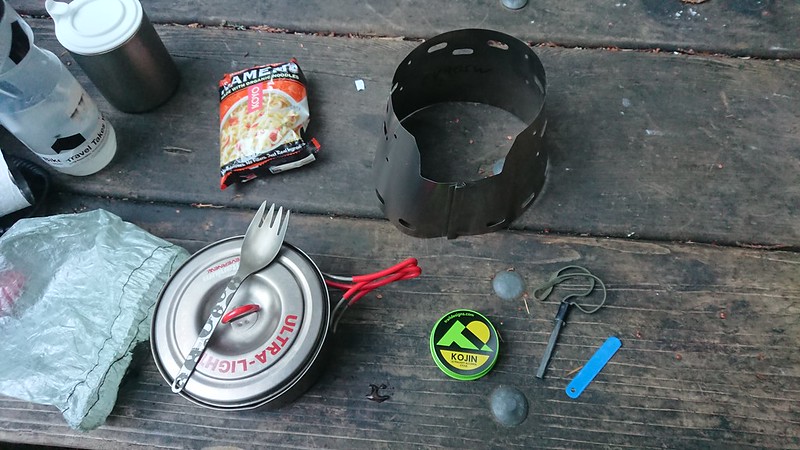
I purchase a modified StarLyte a couple years ago but haven’t used it much. It burns well but is difficult to light with a spark unless it is slightly overfilled. The Kojin takes a spark easily. It is lightweight, durable, can be snuffed with its lid, and holds enough fuel for a short overnight trip. I haven’t measured fuel consumption or boil times, but it seems difficult to find anything to fault with the Kojin. I doubt I’ll carry a 12-10 with my Ti-Tri again.
On our last morning in the Red Buttes Wilderness, Avagdu and I woke up to a very wet camp. We wanted fire, but neither of us had brought any dry wood into our shelters the night before. Everything was soaked.
We gathered what we could – branches from dead fall that were up off the ground, as well as dead lower branches from standing trees – but the trees were so sparse in the area that, even after splitting, much of this wood was still wet. (I should mention that we wanted a fire, but did not need one. I, at least, was not hugely motivated to put a large amount of energy into batoning. So a small amount of our failure ought to be attributed to laziness.)
After failing to get a blaze going with the wet wood, even after using a bit of inner tube to extend the flame, I hit on the idea of using the Inferno.
I’ve had my Trail Designs Ti-Tri for two and a half years now. It’s been my primary stove system for all of that time. Last Fall, I contacted Trail Designs and had them send me an Inferno insert for the system. The Inferno consists of a second, inverted cone and a grate. The grate raises the base of the fire up off of the ground, allowing for an improved air flow, and the second cone creates a double-walled stove. This turns the Ti-Tri into a wood gassifier, similar to the Four Dogs Bushcooker or the ever-popular Bushbuddy.
So, back at camp, I thought the Inferno might help. I had never used it before solely to start a camp fire, but I knew from previous experience using it to cook my dinner that it was efficient enough to burn damp wood. It would give us a raised platform, allowing us to build the fire up off of the saturated ground, and the cone would provide a wall to keep the heat in and help dry the wood.
It was a success.
We split a bit more wood, and did a bit more feathering. It was all still as damp as before, but shortly we achieved a small blaze inside the Inferno. From there, it was simply a matter of building the fire up and around the Inferno. With the heat put out by the cone, even the wet, unprocessed wood would dry and burn. As the fire built up, the Inferno could be pulled out with a multi-tool or a couple sticks, and packed away with the rest of the Ti-Tri, ready to cook the next meal.
The weight of the Inferno insert varies. It is dependent on the size of the outer Caldera cone, which in turns varies based on the size of the pot. For my system, which is built around a 900mL pot from Titanium Goat, the pieces that comprise the Inferno weigh in at a collective 38 grams (1.34 ounces). Given that it not only increases the Ti-Tri’s efficiency as a wood burning stove, but also functions as an emergency fire starter, I’m happy to haul the extra weight.
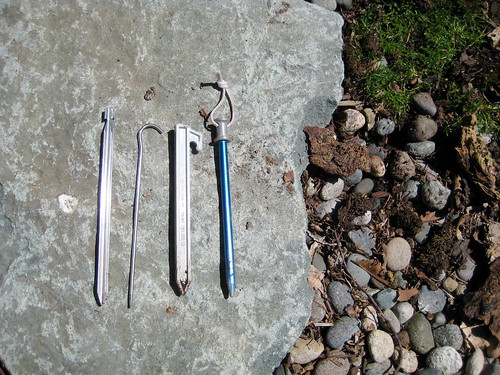
I’m always looking to shed a gram or two from my pack without sacrificing too much functionality. One of the categories of gear that I have been focusing on of late are my tarp stakes. For the past year and a half I have attempted to discover what works best by experimenting with four different types of stakes in a wide variety of ground conditions. The stakes I’ve used are Durapegs (6”), Tite-Lite Titanium Stakes (6.5”), Easton Aluminum Stakes (6.25”), and Big Agnes X-peg Stakes (7”).
Big Agnes X-peg Stakes
The X-pegs measure 7” in length, are made of aluminum, and tip the scale at 11 grams (0.38oz). They came with my old Seedhouse SL1, which was the last tent I bought before moving to tarps. The four-sided design gives them a lot of grip in the earth and the notched top securely grabs cordage or a webbing tie out. It’s a pretty basic design, but effective in many types of earth. I’ve beat on these stakes for some time and haven’t bent or broken one in any use.
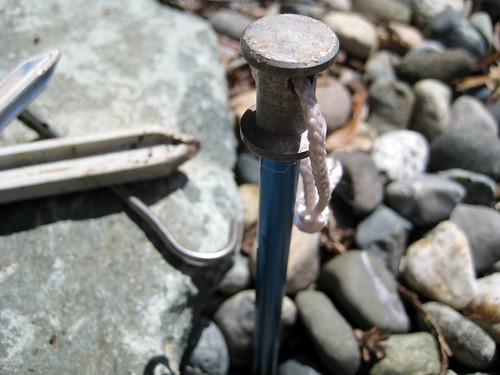
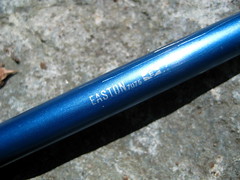
Easton Aluminum Stakes
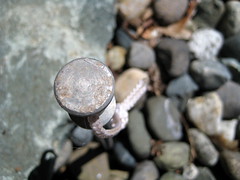
The Easton stakes are 6.25” long, also made of aluminum, and weigh 8 grams (0.28oz). These are popular stakes with lightweight backpackers. They have a nice flat head to hammer on with a rock and a small cordage loop at the top to make pulling them out of the ground very easy.
At first glance, one would expect the Easton stakes to be inferior to the X-pegs. Though both are made of aluminum, the Easton stake is hollow, which makes it lighter but easier to break. The body of the Easton stake is cylindrical and smooth so that it doesn’t grip in the earth as well as the four-sided X-peg. Despite all this, I have yet to break or bend an Easton stake. I have also never had one accidentally pull out.
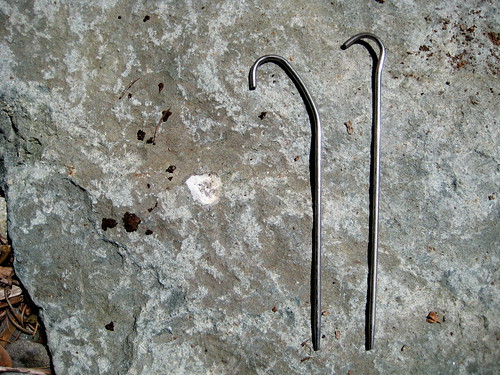
Tite-Lite Titanium Stakes
The Tite-Lite is a 6.5” titanium stake that weighs only 6 grams (0.2oz). It’s a simple stake in the classic shepherd hook design. Though the weight is great, this is the least functional and my least favorite of the bunch. Because of the small diameter it will go into most any ground, but it will also pull out. I’ve had these stakes come out in the middle of a windstorm, forcing me to get up three or four different times during the night to replant them (the Easton stakes and Durapegs were also in use at the same time and never once came out). They twist in the ground fairly easily, allowing cordage and webbing tie outs to slip off. And in very rocky ground, they will bend.
For me, there’s too much functionality sacrificed for the savings in weight. I no longer use these.
Durapeg
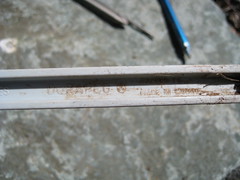
The Durapeg is 6” long, made of ABS plastic, and weighs 14 grams (0.49oz). These are the stakes that Kifaru sells with all their shelters. Similar to the X-peg, they are four-sided and have wide indents on two sides to grip the dirt. There’s a flat top for pounding on and a good hook to hold a tie out. Once you put these things in the ground, they don’t tend to move. Despite the fact that they’re the heaviest of the bunch, they’re also my favorite. They simply have proven themselves to be the most effective stake in the widest array of ground conditions. The wide indentations on either side eat a whole lot of ground, making them better in snow and sand than the X-pegs (though they certainly aren’t the best option for a dedicated snow stake).
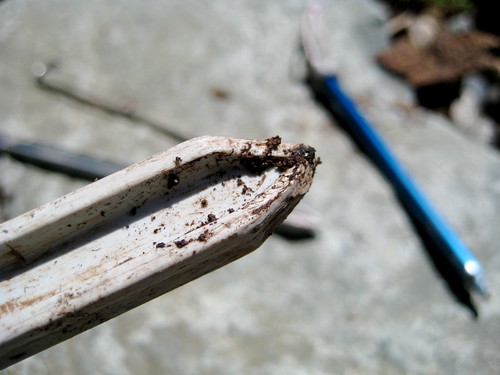
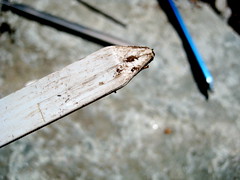
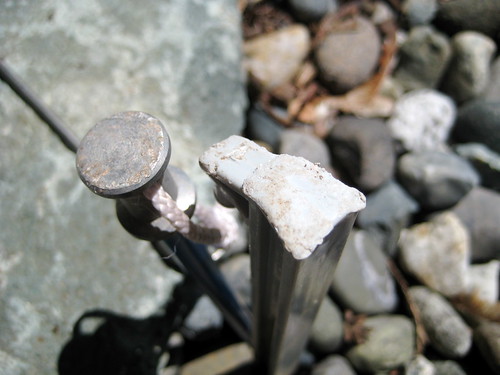
I have had a Durapeg bend in very rocky ground but, unlike with the Tite-Lite, the bend in the Durapeg was not enough to affect the functionality. Still, the bent Durapeg has been removed from my rotation. I have yet to have any of these break, but I’m afraid that the bend will be enough to snap the Durapeg if I tried to pound that particular stake into really hard ground again.
The top of the Durapeg does get chewed up a bit after being beat on with a few rocks. So far this hasn’t proved to weaken or in any other way damage the stake overall. I’ve also had some pitting occur on the flat head of the Easton stake due to being driven in with rocks.
Current Carry
My Kifaru Paratarp has 12 different tie out points. Using all of these allows one to get a real tight pitch, but I find is almost always unnecessary. When I’m pitching the tarp in an elevated manner by tying it out to trees, the most that I’ll need are 4 stakes – one for each corner. When pitched in the normal manner with trekking poles, I find that 7 stakes are all that are needed for a good pitch. An eighth stake placed in the webbing tie out between the front and middle tie out on whichever side I’m sleeping on will widen out the shelter a bit and give me more head space. I carry 8 stakes. Currently those 8 stakes consist of 6 Durapegs and 2 Eastons. Also in the bag are 4 Nite-Ize Figure 9s which help me to pitch the tarp from trees or toss up a clothesline or a place to hang a water bladder. The bag itself a lightweight silnylon thingy that came as the stake bag with the Big Agnes Seedhouse SL1.
The whole package – bag, stakes, and Figure 9s – weighs 122g or 4.3oz. With this (and a couple hanks of paracord) I find that I can throw up a secure and comfortable shelter in just about any condition. Occasionally I’ll switch out a couple of the Durapegs for a couple X-pegs, but currently I prefer the greater holding power of the former.
I do still have two of the lightweight Tite-Lite stakes that I carry with my Ti-Tri. These serve to elevate the pot in wood-burning mode. If I want to I can use these when pitching the tarp to bring up the total number of stakes to 10, but I rarely do.
If anybody has a favorite stake different from the ones discussed here – and it weighs 14g or less – let me know about it! I’m always looking to improve the package.
When I purchased my Trail Designs Ti-Tri Titanium Stove System, I bought it with a 900mL pot from Titanium Goat. I like the pot, but it has one shortcoming: there are no measuring marks on it. I’m not comfortable just pouring a little water into a pot and saying “Well, that looks like 2 cups.” I prefer a slightly higher level of accuracy.
Originally I addressed this by scoring the handle of my spork to mark 1, 2, and 3 cups measured in the pot – an idea which I think originally came to me from somewhere on the BackpackingLight Forums. This method works ok – though making the marks deep enough to be visible on the titanium was a bit tough with my knife – but I’ve never felt that it is very accurate. It will tell me if I have roughly 1 cup of water in the pot, but I could really be anywhere between 3/4 of a cup to 1 1/4 cups. That’s the difference between nice, fluffy couscous and overly soggy (or dry and undercooked) couscous, you know.
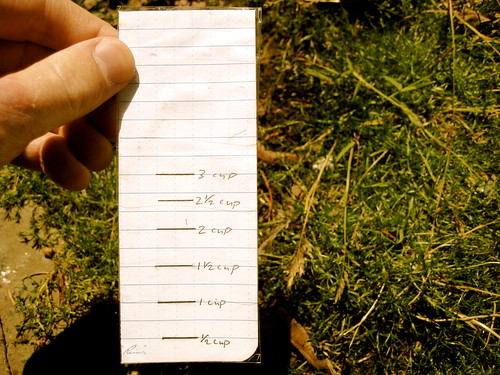
As a more accurate replacement, I came up with the idea for the Water Measuring Doohicky: a piece of paper with marks on it. Ingenious, isn’t it?
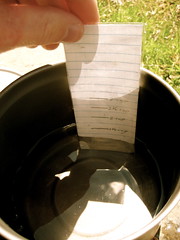
For the paper, I chose a cut a piece out of a page in one of my Rite in the Rain notebooks. Then I put 1/2 cup of water into the pot, set in the paper, noted the water line, took out the paper and marked the water line. This was repeated at 1/2 cup increments up to 3 cups. (The pot holds 4 cups when filled to the rim, so 3 cups is the most I would ever want to cook with.) After I had all the marks determined, I cut an identical piece of paper and put marks at the same levels. Then I tossed the soggy paper and was left with a fresh, dry piece of waterproof paper with the appropriate marks.
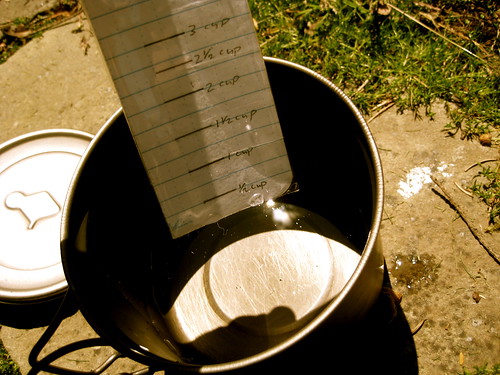
As a poor-man’s lamination, I wrapped it with clear packing tape. Even though the Rite in the Rain paper is waterproof, it gets a little soggy when submerged and takes a while to dry out. Water doesn’t cling to the tape at all. I can give it a shake or two after taking it out of the pot and it is immediately dry. The tape also adds a little stiffness, which helps achieve more accurate measurements.
I made two of these doohickeys at the same time, but have been using only one since last Fall. It works great. I am somewhat embarrassed it took me almost a year to come up with the idea. Even though I only made marks at 1/2 cup increments, the grid on the paper allows me to easily measure with 1/4 cup accuracy. As opposed to the marks on the spork, this paper is one extra thing to carry, but when placed on my scale it doesn’t register. I don’t think it weighs me down any.
I had done the lamination before I thought of this, but next time around I think I will write common cooking ratios on the back: water to couscous, water to dehydrated brown rice, etc. Usually I write those ratios on the ziploc freezer bags that hold my food, but the bags get replaced and rotated fairly frequently. The Water Measuring Doohickey has proved that it will last for a longer period of time.
Yesterday, Avagdu asked me if the Vargo Triad XE stove could be burned inside the cone of my Trail Designs Ti-Tri Stove System. I’ve used it in the cone a couple of different times, but never performed any direct comparisons between it and the 12-10 alcohol stove that comes with the Ti-Tri system. Today, I spent some time with both stoves to do just that. Temperatures were around 42 degrees Fahrenheit.
I burned both stoves with the same amount of fuel. One of the downsides of the Triad XE stove is that because the main fuel source is enclosed within the inner container, it cannot be directly lit. Instead, some fuel must be placed within the outer section of the stove. This is then lit to prime the main fuel source. On an alcohol stove where the main fuel is directly accessible, such as the 12-10, the outer priming ring is not always required. It will usually be used when operating in colder temperatures. To be fair for these tests, I primed both stoves with the same amount of alcohol.
The Triad XE stove had to be tested in two different modes: with support legs extended and with support legs collapsed. With the legs collapsed, the stove sits a little lower than the 12-10. With legs extended, it’s a bit higher. The tests were done on a hard, solid surface so that when the legs were extended they were not pushed into the ground (as they might be when using the stove on dirt). The Triad XE took longer to bring the 2 cups of water to a boil with the legs collapsed, which is to be expected, since the flames are further from the pot.
Interestingly, when the Triad XE’s legs were extended, it took a significantly shorter period of time than the 12-10 stove to bring the same amount of water to a boil. One would think that the 12-10 stove, being designed by Trail Designs specifically to work within the Ti-Tri cone, would be superior to a general-purpose stove like the Triad XE burning inside the same cone. The Triad XE also had a longer burn time than the 12-10, suggesting that it makes more efficient use of the same amount of fuel (although, in practice, it may require more fuel than the 12-10 since the Triad XE must always be primed and the 12-10 must not).
All in all, it seems that leaving the 12-10 at home and bringing the Triad XE with the rest of the Ti-Tri system would be a smart move. But then, there are the weights. The Triad XE weighs three times as much as the 12-10 – certainly a significant amount. Though it must be remembered that the Triad XE is not just an alcohol stove: it is designed to burn solid fuel tabs (Esbit) as well. So, to be fair, if I switched out the 12-10 with the Triad XE, I would also leave Trail Design’s GramCracker burner at home. But the GramCracker tips my scale at 0.1 oz, so it does not really factor in to the decision much. (I also think that the GramCracker most likely burns fuel tabs slightly more efficiently than the Triad XE, but I haven’t done this comparison yet.)
The other factor in comparing the two stoves is durability. The Triad XE, being made out of titanium is a tough little guy, not phased by the occasional drop or riding around loose in my pack. In contrast, the 12-10 stove is made out of two thin aluminum cans, making it very delicate. Even though it lives within the protective plastic caddy of the Ti-Tri, it has numerous scratches and dents to show for its year in use.
I’m not sure what conclusion to draw. If the Triad XE weighed closer to 1.0 oz, it would be without doubt superior.
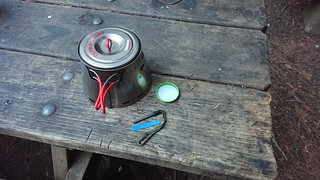
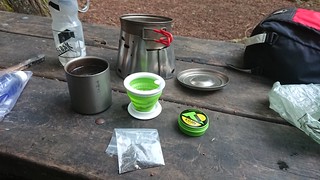
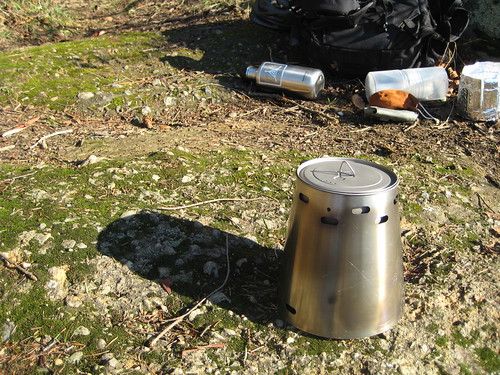
I’ve had a few requests to do a review of the new stove system I’ve been using for the past couple weeks. I don’t feel like I have enough experience with it yet to do a proper review, but I snapped some photos today to let people know what it’s all about.
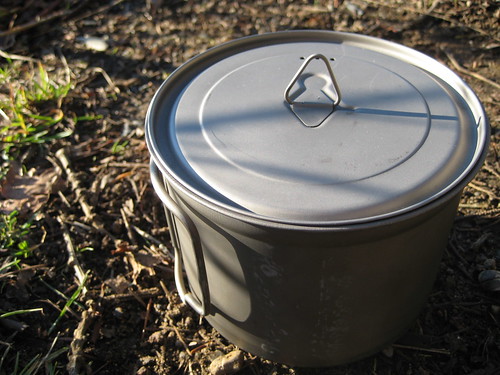
If you already have a pot you’d like to use, you can contact Trail Designs and have them build a cone for you. Elsewise, the Ti-Tri is available with a pot from Titanium Goat. I’ve previously mentioned my love affair with my Snow Peak Trek 700 mug/cup/pot/thing, but I had been thinking of acquiring a larger, 900ml pot for somewhat more extravagant cooking. Because of this, I decided to get the 900ml Ti-Tri from Titanium Goat, rather than have a Ti-Tri built for my Snow Peak mug.
Titanium Goat’s 900ml pot is a basic affair: handles on the body, a decent lid with a thingy on top that allows it to be easily lifted, as well as three holes for venting or draining water. Titanium Goat claims that the pot and mug weigh in at 4.4oz, which seems correct to me.
The Ti-Tri system itself comes inside of the same caddy system as does the normal Caldera. It’s basically two pieces of plastic that screw together. The diameter of the caddy is the same as a 32oz Nalgene, so it will nest in the same cups (such as the aforementioned Snow Peak 700). This is a somewhat bulky way of carrying the system, I find, but the caddy is constructed out of food grade plastic, so both pieces can double as a bowl or mug. It also does a great job of protecting all the components. So far, I’ve been packing everything in the caddy. I haven’t decided if I’ll keep doing it that way or not.
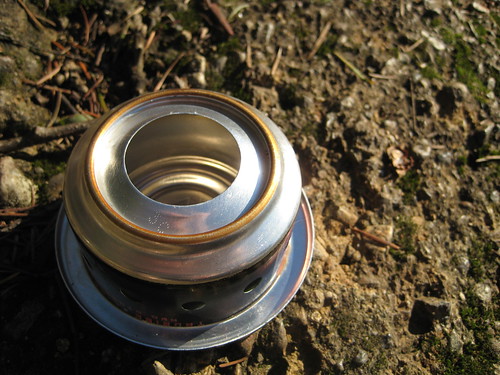
The alcohol stove that comes with the Ti-Tri is a Trail Designs 12-10 which, they claim, has been designed to “perform optimally with the restricted air flow and higher heat retained by the cone during operation.” My expertise in the design of alcohol stoves are lacking and, as I said before, I don’t feel I yet have enough experience with this system to draw a comparison between it and my Vargo Triad XE (which I also haven’t had for all that long), but the 12-10 has seemed extremely efficient so far (and much easier to light).
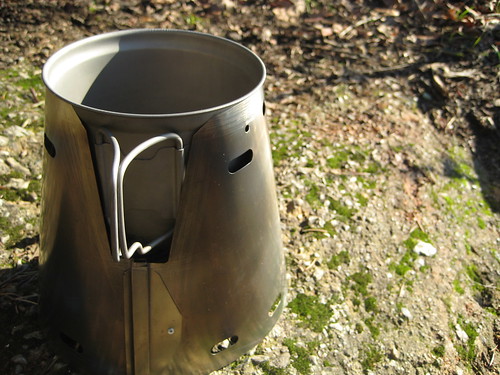
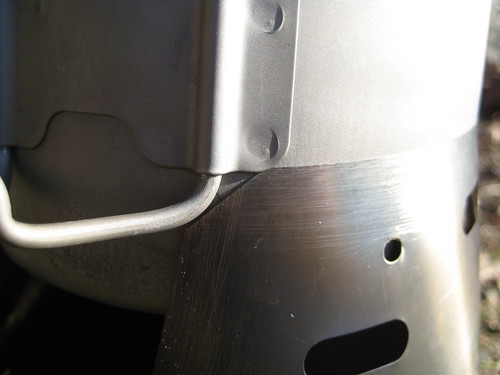
The pot’s lip holds it up. Even with the thinness of the cone’s material, it is a surprisingly sturdy setup. You do have to be somewhat watchful when sliding the pot into the cone, as the pot handle’s mountings will sometimes get caught on the edge of the cone’s opening. I say sometimes, but this actually happens to me the majority of the time. It’s greatly annoying.
If you’re sure to center the handles over the opening in the side of the cone, the handle mountings will not get caught.
The base is an optional addition to the Ti-Tri system to be used for wood burning. It’s simply another piece of titanium foil, slightly larger in diameter than the cone. When burning wood, you set the cone on the base, put the included titanium stakes through the holes in one end of the cone and out the other. These then support the pot higher up, allowing you to shove your fuel in the cone’s side opening.
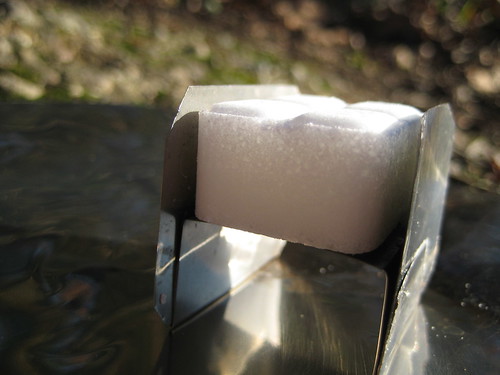
The Ti-Tri’s third fuel option are esbit tabs, which uses Trail Design’s GramCracker. The GramCracker consists of three pieces of titanium: two sides and a stand. The sides pieces are slid into either side of the stand, which then holds the esbit tab.
This setup directs the heat for a much more efficient burn than that offered by a standard esbit stove. (The GramCracker also comes with a small piece of foil to be used as a base, but since I already carry the larger base for wood burning, I leave this smaller piece at home.) With the GramCracker assembled, the cone is placed on top, and the pot is nested just as with the alcohol stove.
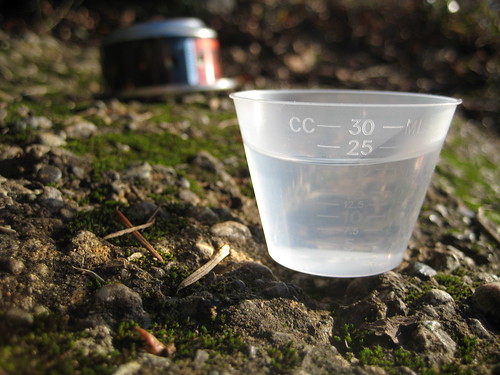
Today, I was planning on using the Ti-Tri as an alcohol stove. Trail Designs claims that the Ti-Tri can bring 2 cups of water to a boil with 15ml of alcohol. I’ve found that 15ml brings 2 cups to more of a simmer. For a boil, you’d want 25ml. I didn’t measure exactly how much water I poured into the pot, so I decided to use a bit over 20ml of fuel.
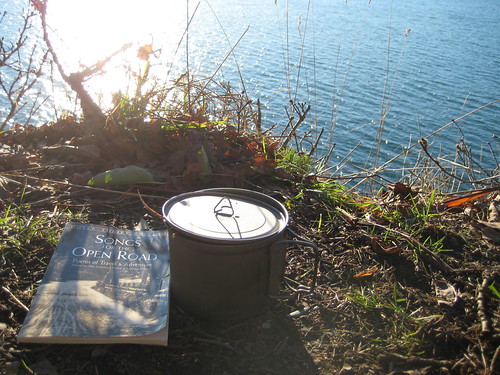
Tea, today, would be Doug Fir and Cedar. After pouring the the fuel from the measuring cup into the stove, I lit the 12-10 with a match, tossed on the cone, settled in the pot (after getting the handle mountings caught on the edge of the cone), and shifted my attentions elsewhere. I didn’t time it this time around, but I think it burned for a bit over 10 minutes. My water was brought to a full, rolling boil – much more than I really needed just for tea, but I was just out for a day-hike, so I wasn’t terribly concerned with fuel conservation. After the burn, I tossed the Doug Fir and Cedar into the pot to steep and settled in for some tea and poetry.
Overall, the Ti-Tri comes in at just under 10oz. It’s not the lightest or most compact alcohol stove setup, but seems to me to be extremely efficient. It’s a bit like the JetBoil of the alcohol stove world. Of course, the Ti-Tri’s primary advantage over other alcohol stoves is that it is not an alcohol stove: it’s an alcohol stove, esbit stove, and wood stove. Having three different fuel options in your pack (and at such a light weight) is quite an invaluable thing. I’m greatly looking forward to further use and testing of what has become my primary cooking system.
The Ti-Tri is a somewhat new product, but has already garnered some positive press, such as a 2008 Backpacking Light Staff Pick. I’m quite curious as to how the system’s wood burning compares to that of the Bush Buddy.
Check out Trail Design’s gallery for photos further photos of the Ti-Tri in use, including at -20 degrees Fahrenheit in the Yukon.
Today’s post brought to you by: that feeling you get when you dangle your legs over a precipice that could probably kill you. And blue skies.
Bed in the bush with stars to see,
Bread I dip in the river --
There's the life for a man like me,
There's the life for ever.
from The Vagabond, Robert Louis Stevenson