Rudy Project offers a replacement lens program wherein they will replace any of their lenses for frames that are in the current year’s product catalog. They require you send in the lens you want replaced, and charge $29.95 per pair.
I just learned about this warranty program a couple weeks ago and thought I’d give it a whirl. I sent in two pairs of lenses for my Rydon spectacles.
One pair was ImpactX Photochromic Black. These were one of the two original sets of lenses I bought with the Rydons in 2011. Prior to my shine job, these were what I kept mounted in the Rydon chassis most of the time, with the RX carrier behind them. The lenses had some noticable scratches on them, I think caused by my face, the RX carrier, ImpactX lens, and other people’s fists all coming into loving embrace.
The second pair was ImpactX Photochromic Laser Red. These are the ones I’ve used almost everyday for the past 4.5 years. These had some minor scratches on them from normal use – nothing that was noticeable when worn, but I figured as long as I was sending a package in for warranty I’d include these.
I classify both of these lenses as critical equipment, so I already had a spare pair of each. I was prepared for a long wait, or for Rudy to reject my claim because both lenses were still usable as is.
I put both lenses in a padded envelope, with a check for $59.90, and dropped it in the mail last Monday. The postage cost me $3.42. Today, nine days later, I received a package with two new lenses.
Purchasing those two lenses would cost $209.98. There’s a lot of ridiculous markup in the eyewear industry, but knowing that I can easily replace my Rudy lenses for about 30% of their MSRP makes me happy to continue to do business with Rudy. In past years I’ve looked at third parties, such as Revant, to expand my lens collection with less money. But now I can’t say that I have any interest in purchasing lenses from anyone other than Rudy.
When I purchased my first smart phone in 2013, I was motivated primarily by the promise of using Open Street Map for bicycle navigation. This does not require, but is greatly assisted by, a mounting system of some sort. I’ve tried a few over the years. Since 2015 I’ve used the Aduro U-Grip Plus Universal Bike Mount, which I think is an excellent design. It uses a ball and socket to provide complete adjustability. It secures the phone with a spring-loaded cradle and silicon band. Between the two, there’s no way the phone is falling out, unless the mount breaks. Unfortunately the whole thing is cheaply made of plastic. Earlier this month, mine finally broke.
After seven years, I feel I got my money’s worth out of the Aduro U-Grip, but when a tool like this fails I want to replace it with something better. Purchasing another of the same just resets the countdown to the next failure. Unfortunately, the bicycle phone mount market seems to be flooded with shit. Either they provide limited adjustability, or they require a special phone case. I have no interest in either. I was disappointed, and about to just order another Aduro U-Grip, until I happened upon Tackform. Their Enduro Mount was advertised for motorcycles, but I figured it ought to work on a real bike.
Tackform’s offering is similar in concept to Aduro’s, with a ball and socket providing complete adjustability, and phone security provided by a spring-loaded cradle and silicon band. But it raises durability to the extreme. I’ve had mine for just a few days. I am impressed.
The only plastic component is the wingnut used to lock the position of the cradle. Everything else is metal. The spring that operates the cradle is no joke. It is capable of operating as an improvised finger guillotine. Yet it is quick and easy to operate one-handed. Tackform includes a silicon band for further security, but in the packaging material they say that you really don’t need it. I believe they are correct. When it is installed in the cradle, I can lift the bike with the phone. The phone doesn’t move at all. It is difficult to imagine a scenario where the phone would escape.
The top of the cradle has a lip to prevent the phone from being pulled out straight up. The sides and bottom of the cradle are lined with a thin rubber to provide some protection to the phone. The outer edges of the cradle are quite sharp, which makes me somewhat nervous about a crash. I have no doubt that the mount would come through, and that the phone would still be secured in it, but my face might not fare so well if it comes into contact with the cradle. But, hey, that’s what eye pro is for.
The primary disadvantage to the Tackform Enduro is that the arm which connects the cradle to the bar mount is tightened with a single wingnut. To rotate the cradle from portrait to landscape mode, you have to loosen this wingnut, which also loosens the connection to the bar mount. So while the ball and socket connection gives you complete freedom to position the phone as you like, it’s the sort of thing where you need to figure out what position you want and then tighten the wingnut to lock it in. You won’t leave the wingnut loose enough to allow for adjustments while riding. With the Aduro U-Grip, the socket is part of the cradle, the ball is part of the bar mount, and I was always able to leave the nut which secures the two just loose enough that I could make minor in-flight positioning adjustments without compromising the security of the system. In practice, I have yet to find this limitation with the Tackform to be something I really care about. But if you want to be able to rotate between portrait and landscape modes without stopping and using two hands, look elsewhere.
The other disadvantage that some riders will identify is weight. I didn’t weigh the components, but what you’re dealing with here is basically just a chunk of aluminum. I imagine the whole system is somewhere around 6 oz, which is significantly more than the plastic competitors. If you have much spandex in your wardrobe, you won’t be happy with Tackform. But my bike is carefully built for what I see as the ideal compromise between performance and durability, and the Tackform mount makes the cut.
Beyond the durability of the system, what endures me to Tackform is that their products really are systems. They are not just selling a few application-specific packages, but have whole series of components. It’s like a grown-up Lego set. I appreciate knowing that I could replace an individual component, or buy just the piece I need to expand the mount’s applicability to different vehicles or environments.
None of Tackform’s products are cheap, but they claim that their products are designed to last a lifetime. After the first 100 miles on this mount, I believe that statement will prove accurate. I suspect that the slab-format pocket terminal will be phased out and become irrelevant well before the Tackform Enduro will fail.
The mount is manufactured in the country of Taiwan, so get yours before China expands its beachfront property.
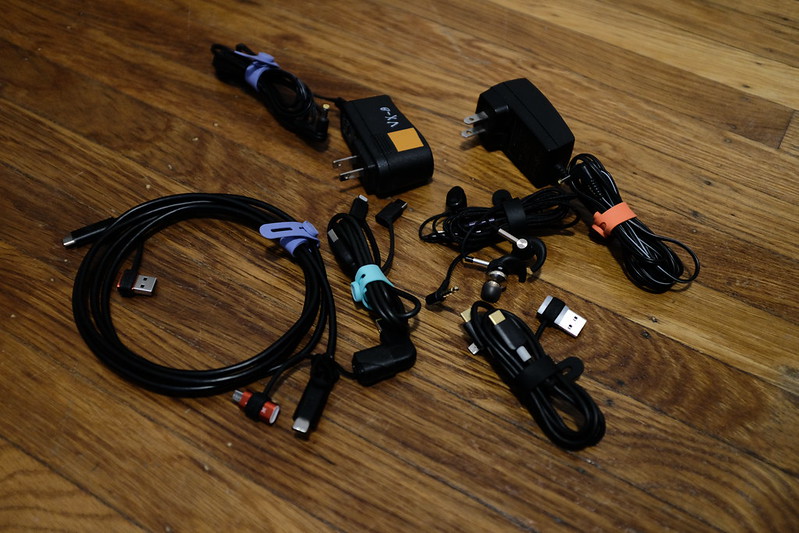
I started carrying the Anker PowerLine II 3-in-1 Cable in the latest iteration of my Electronic Support Package a couple years ago. It has a USB Type-A connector on one end, Micro USB on the other, with a USB Type-C and Apple Lightning adapter that pop on to the Micro USB connector. It makes for a nice little multi-cable to charge all my gadgets and transfer small bits of data around.
As I began to acquire more devices that supported USB Type-C, I found that I desired a multi-cable that was Type-C native. A quick survey of the market offered some options, but nothing that struck my fancy. However, during that search I happened to discover that Cozy (the same company that makes those USB Type-A covers I use on my bike lights) offered something they called LightningCozy which would allow me to put together my own multi-cables. So that’s what I did.
This creates the perfect package for my needs. I can use it to charge all my USB-chargeable things, including the Thinkpad X270. (I have no Apple devices in my life, so I don’t need the Apple Lightning adapter, but could easily add that if I find the need.) The cable doesn’t provide the fastest possible data transfer, but it is more svelte than a fast data cable, and is perfectly acceptable for my incidental data use. It doesn’t do video, but as of yet I have no USB Type-C monitors in my life, so I don’t care. One of these multi-cables is my EDC in the Electronic Support Package.
My second model of multi-cable is built around the Cable Matters USB-C Cable, 100 watt, 6.6 ft. On one end it has a Base Sailor USB C Female to USB Male Adapter attached via a LightningCozy. On the other end it has the same JXMOX adapter as the previous cable, attached via a LightningCozy. It also has a USB-C to Lenovo Slim Tip power adapter I bought a few years ago on AliExpress, attached via electrical tape and a piece of Type 1 Paracord. The cable is bundled with another Ringke Silicon Cable Tie.
I keep this second model in my laptop kit, along with a HyperJuice 66W GaN USB-C Charger. (I also have a Satechi 72W Type-C PD Car Charger I can throw into the kit if I’m going on a trip and think I might be spending a while in a car.) I don’t carry this kit unless I’m also carrying my laptop. This cable allows me to power either of my Thinkpads, or anything else USB-compatible, and gives me more reach than the short EDC cable. Both the X260 and X270 only want 45 watts, so the 100 watt cable is overkill, but it is occasionally useful to have the capacity to deliver more juice to other devices. As with the previous cable, this one doesn’t transfer data at blazing speeds, nor does it do video. I have no need of those capabilities, so I stick with thinner cables.
Back in 2017 one of the ladies at Red Blossom Tea chastised me for not using a tea scale. I went home and ordered an American Weigh Scales SC-2kg, which measures up to 2kg with 0.1g resolution. It seemed adequate for the task, and compact enough that I wouldn’t mind it taking up a little room in a drawer if I ended up not using it frequently.
At the start of 2020 I decided to become an adult and begin to measure all solid kitchen ingredients by weight instead of volume, so the SC-2kg began to see much more frequent use.
That went along swimmingly for about a year, until the beginning of 2021 when I became curious about the accuracy of the scale. Nothing in particular prompted this curiosity. I just enjoy knowing that the tools in my life are both precise and accurate. As helpfully explained by LabBalances, there are a number of different scale calibration systems in the world. All of it is overkill for use in my personal kitchen, but I decided to look into the OIML-M1 class from the International Organization of Legal Metrology.
The calibration procedure for the SC-2kg requires 1kg and 2kg weights. I found a good deal on a set of 2kg, 1kg, 20g and 10g OIML-M1 certified weights on eBay. According to OIML-M1, a 1kg calibration weight must be accurate within 50mg. A 2kg calibration weight must be within 100mg. That’d get me a pretty accurate bowl of rice.
When I received the weights I found that the SC-2kg reported the correct measurement for all 4 calibration weights. I also tried the calibration weights on my MyWeigh UltraShip Ultra-35, which is the scale I’ve had kicking around since 2009 for measuring backpacking gear. It only claims to have 2g resolution up to 1kg, and 5g resolution up to 16 kilograms. I found it to be accurate within its claimed resolution.
So all of this was for naught. Both of my scales were already accurate and not in need of calibration. But I really enjoy having these OIML calibration weights and knowing that my measurements conform to the standards of the universe.
But I’ve become quite smitten with Ringke Silicon Cable Ties. Unlike hook and loop, they don’t stick to things that you don’t want them to stick to. Most importantly, they are easy to open and close while wearing full-fingered gloves. This makes them great for cables you carry around while out and about in meatspace, such as earbuds and power cables. I’ve only been using them since July, so I can’t speak to durability, but I see no reason they should not satisfy in that department.
For thicker cables that need to be restrained with a bit more vigor, I am fond of the new Voile Nano Straps.
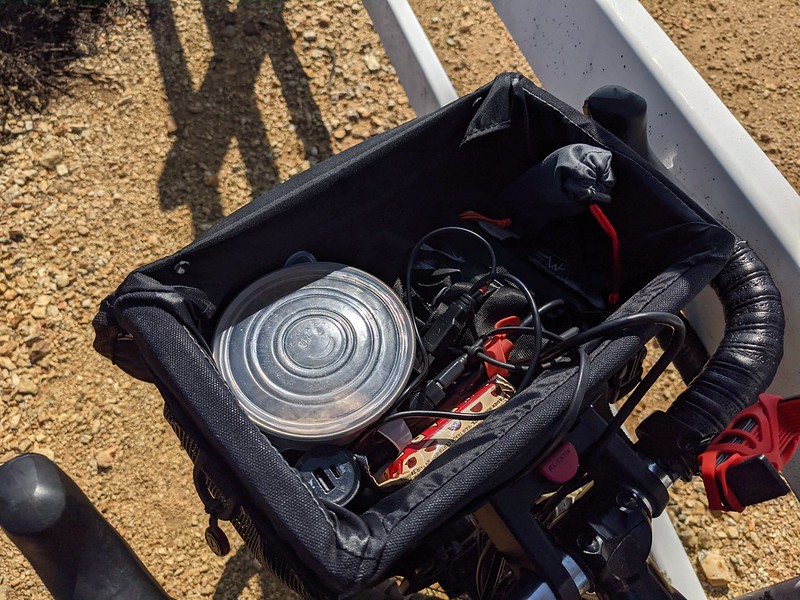
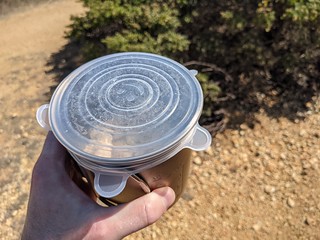
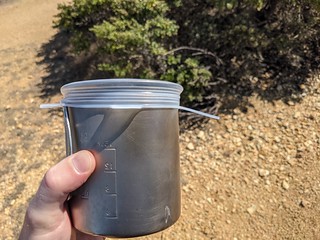
Last January I bought a pack of generic stretch silicone lids. My hope was that one of the sizes in the pack would fit my 16 year old Snow Peak Trek 700. One did. This turns the mug into an excellent fuel transport container. It’s kind of a poor man’s Vargo BOT 700.
I have filled the mug with water, installed the silicone lid, flipped it upside down, and left it standing overnight. In the morning there were no leaks. I’m still hesitant to actually transport liquids using the lid. Mostly because the silicone is extremely thin, and I’m sure it is going to tear eventually. But if you’re into cold soaking food on the trail, and don’t want to carry a dedicated jar, I think this could be an attractive option. For leftovers, it’s perfect.
The lids I bought are no longer available, but there is certainly no shortage of equivalents floating around on Amazon-AliExpress-eBay. Based on the number search results, my impression is that China is drowning in silicone stretch lids.
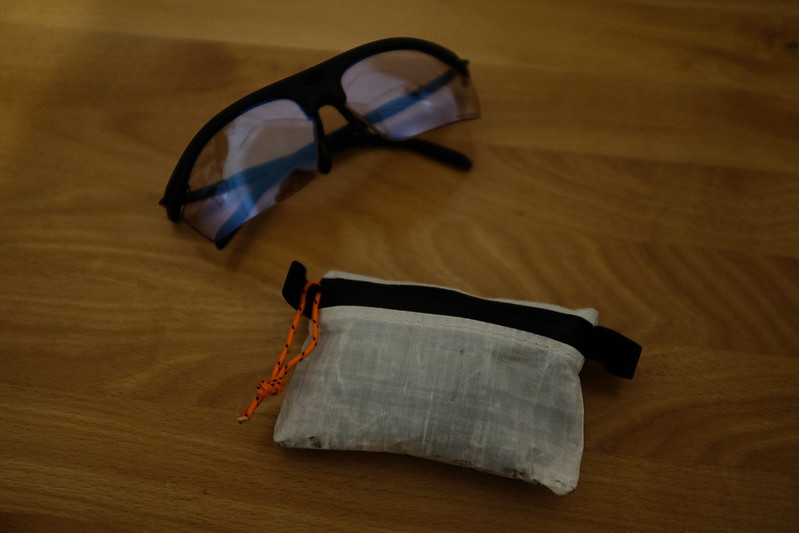
I use an Ultralite Sacks Trail Wallet to carry a few items that support my Rudy Project Rydon eyewear. I have six or eight of these simple cuben fiber zippered pouches floating around for different uses, either from Ultralite Sacks or Zpacks.
I’ve previously mentioned my infatuation with the ImpactX2 Photochromic Laser Red lenses. These remain my lense of choice 99% of the time. But sometimes I want a polarized lens (such as when on water), or one with lower light transmission (such as when the sun is low during the equinox), or one with higher contrast (such as when on snow), or one that is not photochromic (such as when in an enclosed vehicle for an extended period of time). All of these conditions are satisfied by the Polar3FX brown lenses. I carry these in the wallet inside of the small microfiber lens pouch that Rudy provides.
A microfiber bag is useful when I want to put the Rydons inside my pack. The bag doesn’t provide any crush protection, but prevents the lenses from getting scratched. I use the bag that came with my old Revision Sawfly optics.
I also carry a full-size microfiber cloth. This is the same large model I use to protect my laptop screen. It is slightly redundant with the microfiber bag – both can be used to clean the lenses – but I find the larger size of the dedicated cloth useful.
There’s enough room in the wallet to store my Cablz retention strap. I have kept this attached to the Rydons most of the time since purchasing the strap last year, but if I remove it, it goes in the wallet.
The wallet can fit a 5ml spray bottle filled with ROR. That’s not something I carry around on a daily basis, but I’d consider tossing it in for an extended trip.
As you may have gathered, one of my pet peeves is dirty optics. I want to protect my corneas from UV radiation and impact, but I also want vision that is high definition and high fidelity. The Rydons, coupled with this small and lightweight kit, support that objective.