Clothing provides shelter, cultural signaling, and the structure upon which other tools are carried.
I enjoyed EDC Part 0: The Individual Uniform at Swift, Silent, Deadly.
You are currently viewing all posts tagged with edc.
I’ve worn the Casio Pro Trek PRW-3000-1A for the past 1,746 consecutive days. This is probably the longest I’ve worn any watch that doesn’t say “G-Shock” on it.
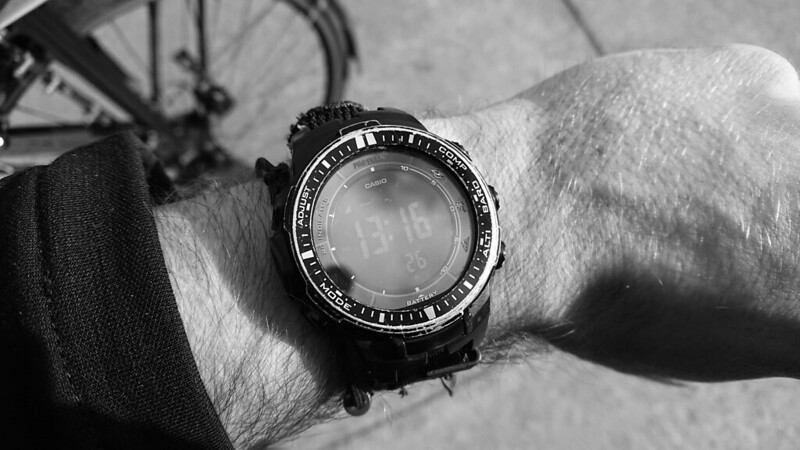
The Pro Trek performs all the basic watch functions you’d expect: it tells time, it provides the current date and day of week, it has a stopwatch, and it has a countdown timer. It supports a second timezone, which I usually keep set to UTC for quick reference but is useful if I’m briefly passing through a different region. It provides sunrise and sunset times for current, past and future dates. These are not exact, but tend to be within 20 minutes of reality, which is close enough for planning purposes. It has four alarms, which I never use.
Beyond those basic functions, the PRW-3000-1A has two characteristics that differentiate it from other timepieces. First, it is both solar and atomic: the battery never needs to be changed, and the time is always accurate. (Eventually, I’m sure, the battery will no longer charge itself, but that doesn’t seem to be imminent.)
The second characteristic is that it is an ABC watch, which means it provides an altimeter, barometer, and compass. Of these three features, the compass is the most useful. It works great for identifying the cardinal directions when you get turned around. It can also store bearings in memory, but using something other than a real compass for actual navigation strikes me as silly. The watch can be configured with declination, but I always leave this off so that the compass points to magnetic north. I apply this strategy to all compasses and GPS receivers, ensuring that they always agree.
The barometer is neat, but not especially useful. I have not found the current atmospheric pressure to be advantageous information. The watch can be told to monitor the barometric pressure over a period, and then alert the user if it sees a rise or fall in pressure, which would indicate a change in weather (very roughly: a rising barometer is good, falling is bad). This is more useful than knowing only the current value, but it only works when altitude remains constant.
The barometer screen also displays a thermometer, but because the watch is worn next to skin I find that this reading is not an accurate representation of ambient air temperature.
The altimeter mode is more useful. The reading is based on barometric pressure. The watch can either convert the barometer readings to altitude based on its stored values from the International Civil Aviation Organization’s International Standard Atmosphere, or it can calculate altitude based on a provided reference value. With the latter option, you tell the watch the current altitude (based on a map reading, survey marker, etc) and the watch then uses changes in pressure to calculate the difference as you ascend or descend. This is how I use the altimeter, and I find the results accurate enough for my purposes (which tend to be “rough navigation”).
The watch features a trip recording mode, where it will periodically record altitude readings and then report back with your maximum altitude, minimum altitude, total ascent, and total descent. I’ve never used this.
I’ve been using the same nylon band that I hacked together 4 years ago. It works great. I repaired it once with my expedition sewing kit.
The watch remains in excellent condition. The bezel is scratched, but that has no practical impact on its function. The face itself has managed to resist all scratching.
The buttons are more exposed than a G-Shock, and they will sometimes activate themselves if I’m doing something like pulling my wrist through a tight cuff. These accidental discharges happen rarely and are only a minor annoyance, but I do wish the Pro Trek was available with the thicker bumper of the G-Shock. (Casio does offer ABC G-Shocks, such as the Rangeman GW9400-1B. I’ve not looked closely at these, but they are probably worthy of consideration.)
Kikuo Ibe’s original G-Shock DW-5000 is the watch against which every other timepiece should be judged. Today I would appreciate the addition of solar atomic functionality, which is available in derivatives such as the G-Shock GWM5610. I purchased the PRW-3000-1A in 2015 for $200, which is a little over twice the common sale price of the G-Shock. I think this has been worth it for the added functionality. Unfortunately the PRW-3000-1A is no longer available. The current equivalent of it seems to be the PRW-3100Y-1. Casio’s list price for this model is $320, which is more than I think the watch is worth. If my watch was lost, I would happily purchase the newer model (or an ABC G-Shock) for $200. If they wanted more than that, I’d likely revert to the solar atomic G-Shock GWM5610 for $80-$100.
I carry earplugs everyday. Other people have written about the regular carry of earplugs – usually to aid sleep in foreign environments – but I tend to disagree with the products they choose. Craig Mod recommends the Mack’s Pillow Soft Silicone Earplugs. Tynan recommends the Howard Leight Laser Lite Foam Earplugs. I recommend the SureFire EP3 Sonic Defenders. Each of these are exemplary of a different style of earplug with different intended applications.
The Mack’s Pillow Soft Silicone Earplugs are different from many other earplugs. Rather than being inserted into the ear canal, they seal the conchal bowl. This makes them very comfortable, as there is no internal pressure in the ear, but also makes them less effective at blocking noise. They have a claimed noise reduction rating of 22 decibels. (When dealing with moldable plugs I assume this number applies when you install them perfectly, and that in common usage they’re probably slightly less effective.) I find this style of plug somewhat finicky to install and retain. If you find you cannot stand the feeling of having something in your ear canal, they are probably a good option. For everyone else, you can do better. I will sometimes use these plugs in the axolotl tanks (because water with such a high concentration of salt can be uncomfortable in the ear). In that scenario, I just want to seal my ears from water, but I don’t really care about the noise reduction. These earplugs work well there. If I regularly patronized a public pool I would use them there (because public pool water scares me). The earplugs are intended to be single use. You can reuse them, but the tackiness of the material means it picks up more dirt and is more difficult to clean than other single use earplugs. I haven’t bothered to reuse them.
The Howard Leight Laser Lite Foam Earplugs are a good option for side sleeping. They have a claimed noise reduction rating of 32 decibels. As with the silicone plugs, I assume they probably perform slightly worse than this in common practice due to imperfect installation. When properly installed these earplugs do block a surprising amount of noise, and they remain comfortable. They stick out of my ears somewhat, but because they’re just foam, any extra pressure placed on the outer end doesn’t translate to uncomfortable pressure in my ear canal. While intended to be single use, you can get a few nights of use out of a single pair. Sometimes I’ve woken up to find that one has fallen out, but I figure they’ve still done they’re job as long as I’m waking up naturally and not because of a disruptive noise.
For music events I have the Etymotic ER20XS Earplugs. They have a claimed noise reduction rating of only 20 decibels, but I feel that they do a good job of reducing sounds to safe levels without distorting the quality of the music. They are not appropriate for times when I want to eliminate as much outside noise as possible, which means they are not useful enough to carry everyday. I’ll often forget to grab them when heading out the door to a show. Or I’ll go to an unplanned show straight from some other location and not have the opportunity to pick up the Etymotics from home. (Prior to these I used EarDial Earplugs in this application. I find them both to perform pretty much the same.)
The SureFire EP3 Sonic Defenders have a claimed noise reduction rating of 24 decibels. I do not question this rating. Unlike with the moldable foam or silicone plugs, there’s really no way to improperly install the EP3.

I first got the idea of carrying the EP3 earplugs everyday a few years ago from a local FBI agent. He keeps them in his bag for unplanned gunfights. The unplanned discharging of firearms is pretty low on my priority list, and if I’m planning on discharging firearms or being in an environment where others are discharging firearms around me, my first choice for ear protection will be my Howard Leight Impact Sport Earmuffs with Noiseighter pads. But it got me thinking: if I was already considering carrying a general purpose, disposable earplug like the Howard Leight Laser Lites (which I had previously kept in my EDC first aid kit), why not just pack the EP3s that would otherwise continue to sit in my box of miscellaneous gun stuff at home?
I don’t think they have quite the fidelity of the Etymotics for music, but they certainly reduce the noise to a safe level, while still allowing me to enjoy the music. And with the filters open I can easily tune in to conversations around me, which I think is critical in environments like nightclubs (for both enjoyment and safety).
I find them comfortable enough to sleep in. They sit fairly flush with my ears, and so while they may not be quite as forgiving as Howard Leight foam plugs for side sleeping, I’ve never woken up after rolling onto my side while wearing them.
On their packaging, SureFire does list swimming as one of the activities for which the EP3 may be used. However, I think that earplugs like the Mack’s Pillow Soft Silicone Earplugs that seal the entire ear, rather than just plugging the canal, make more sense if keeping out water is your primary goal. I’ve never found myself unexpectedly underwater, so I’m comfortable not planning my EDC around this eventuality.
The EP3 earplugs have retention rings, which are sized to fit your conchal bowl. (I wear a size medium, which is what SureFire recommends for most adults.) This makes it very unlikely that the EP3 plugs will fall out, which is as useful for sleeping as much as it is for more exciting activities.
SureFire claims a service life for the EP3 of “6+ months”. My last pair lasted 42 months before I replaced them. Granted, I use them infrequently, but it’s safe to say that this style of ear protection lasts significantly longer than disposable-but-reusable earplugs like the Howard Leight Laser Lite and Mack’s Pillow Soft. I store them in the protective case they come in, and wash them with warm soapy water after use.
SureFire also offers the EP4. These are identical to the EP3 except that they have a triple flange instead of a double. I’ve never used them. I think the only reason to opt for the triple flange is if you have a long ear canal. With the filter closed, the noise reduction rating is the same on both models. With the filters open, the EP3 provide a noise reduction rating of 11 decibels while the EP4 bumps it up to 12. The EP7 has foam tips for a different feel and a higher noise reduction rating.
Earplugs are one of the least frequently used items in what I consider to be my level 2 EDC. If I was seeking to reduce the number of items in my pack, they would be a candidate for elimination. But the reality is that their small size and low weight make them easy to carry in a bag, and when I do need them I am very grateful to have them – whether that is because I’m sleeping elsewhere, enjoying live music, or things are going bang. The SureFire EP3 Sonic Defenders aren’t necessarily the most appropriate ear protection for every environment, but I think they work well in a wide range of applications. Their versatility, coupled with their longevity, is why I choose them over other earplugs.
I build my own patch kits, consisting of a small re-sealable bag which holds:

This is stored in my EDC toolkit which, as previously mentioned also includes two reifenflicken and tire levers. Because these patch kits are so small, I also keep one in the tube roll underneath my saddle.
Rema has been making vulcanizing patches for about a century. They have a long held reputation for being one of the best. I haven’t experimented with much of their competition, but I’ve never had a Rema patch fail, and as a general rule when it comes to bicycle parts and components I find that if the Germans do a thing they probably do it at least as good as anybody else, if not better. So I buy their patches in bulk and I keep an 8 oz can of their fluid for use at home.
A quality vulcanizing patch is a permanent repair. If applied properly, it will leave the tube as good as new. In contrast, “glueless” or “pre-glued” patches have a reputation for being unreliable, temporary fixes. I’ve had good luck with Park Tool’s pre-glued patches from the GP-2 kit, but I still consider them a temporary solution.
The advantage of a pre-glued patch is that it is a nearly instant repair: buff the area with sandpaper, slap on the patch, rub it a bit with your fingers or roll it over your top tube or pump, and you’re ready to go. Patching with a permanent, vulcanizing patch is a longer procedure: buff the area with sandpaper, apply the vulcanizing fluid, wait around 3 minutes for the fluid to become dry and tacky, slap on the patch, rub it in, and then you’re rolling. (Some would argue that you shouldn’t inflate the tube immediately after patching, but I’ve never had a problem doing this. The key is allowing the vulcanizing fluid to sit for enough time prior to applying the patch.) In unpleasant weather, or when you have some place to be, the extra three minutes (or thereabouts) required is unattractive.
Carrying both types of patches, plus a spare tube, provides options. If I get a flat, and it’s a nice day out, and I don’t have any place to be, and I’m in a pleasant area, I’ll fix it with a vulcanizing patch. If conditions are not so idyllic, I’ll quickly swap out the tube and continue on my way. When I get to where I’m going, I’ll patch the punctured tube with a vulcanizing patch, reinstall the newly patched tube and put the new tube away. If I get a second flat before I can fix the tube that was originally punctured, I’ll slap on one of the pre-glued patches until I get to my destination. Then I’ll repair the first tube with a vulcanizing patch, and throw away the tube with the pre-glued patch as soon as I can acquire another spare.
I’ve also successfully used a Park Tool pre-glued patch to repair a leaky Therm-a-Rest mattress. It’s useful to know I can fix a mattress during a multi-day bike trip without needing to remember to pack an additional item.
Of course the best strategy is to not get a flat in the first place. As I am fond of pointing out, I buy good tires, which prevent me from getting a flat more than once or twice per year. A good tube costs around $10, but with proper care and feeding ought to have a service life measured in years.
I carry the Westcott Sewing Titanium Bonded Fine Cut Scissors, 2.5” everyday. Given the choice between a knife and a pair of scissors I’ll choose the knife, but these scissors are small and light enough that I feel I can carry both.

Scissors offer some additional utility compared to a knife. They’re useful for rounding the corners of medical tape to discourage peeling. They can clean up the area around a tear before repair with the expedition sewing awl. They can trim your nails. And they can go places a knife cannot. I’ve flown with these scissors in my carry-on. They are diminutive enough as to not frighten TSA agents.
I’ve tried carrying other scissors in the past. The popular Slip-N-Snip Folding Scissors (and the various knock-offs) are, I think, a piece of junk. They’re too stiff, the scissoring is too rough, and the blades too thick. The Nogent Folding Scissors look great, but are way beyond my price range. The Westcott scissors do not fold, but are still easily carried. Despite the product name, the overall length of the scissors is 3 inches. They weigh 5 grams (0.2 ounces). The blades are 1 inch long, agreeably sharp, pointy and thin. The scissors can disappear into a bag. I keep a small piece of heat shrink tubing over the blades of the scissors to prevent them from poking things. They get stored in my small EDC toiletry pouch.

I first noticed the marks a couple of years ago. I don’t know when they first appeared. They’re asymmetric, so I assume they’re from a hacksaw rather than bolt cutters. This real world, unsolicited testing makes me feel good about my choice of the ABUS GRANIT Plus 640.

I purchased an Elzetta ZFL-M60-CS2D flashlight in 2013. Elzetta updated their product line later that year, replacing the Malkoff M60 LED unit with their new AVS heads and creating a new naming convention for their products. In this new line, I believe my ZFL-M60-CS2D is equivalent to the Bravo B313 model.
In 2014 Elzetta released the single cell Alpha model, which offered the same build quality as the larger 2-cell in a more pocket friendly size. I was quick to purchase the Alpha A323, and for the past 5 years it has remained a fairly constant part of my EDC.


There’s plenty of reviews out there focusing on the technical aspects of Elzetta lights – runtime, candela, lumens, etc. I’m not qualified to discuss those aspects, nor do I find them terribly interesting. I’ll just say that I’m happy with the operation of both my lights.
The modularity of the lights requires the user to make some decisions prior to purchasing. I’ve remained happy with the choices I made when ordering the Alpha.
I bought the Alpha with the crenellated bezel ring. Elzetta’s crenellations aren’t sharp and pointy, but they do have deep grooves. They’re intended to be used in a twisting motion, thus tearing flesh rather than just puncturing it. I’ve never been convinced one way or the other as to the efficacy of bezel crenellations on flashlights, but I lean in their favor simply because the downside of having them seems limited.
The primary downside the crenellated bezel does have is that it makes some people nervous. I’ve flown domestically with the Alpha in my carry-on baggage plenty of times over the years and it has never been given any attention. But I know that there is the potential for the bezel to make some poor TSA agent nervous, and that possibility in turn makes me nervous. I haven’t traveled internationally with the Elzetta due to this concern.
The modular nature of Elzetta lights solves this problem. Recently I purchased the standard bezel ring. When I fly I now install the harmless looking standard bezel and keep the crenellated bezel separate in my bag. After going through security the bezels can be quickly swapped and I’m back to normal. If the crenellated bezel ring by itself scares someone and is stolen, I’m only out $15.
I bought the Alpha with the flood lens. The standard lens is more appropriate for long distance, or concentrating a beam of photons in the optical nerve of a ne’er-do-well. But the flood lens is a better solution for my typical flashlight use. I most often use my everyday carry light indoors – lighting up dark rooms, or dark nooks and crannies. Both applications are best solved by the wide, even dispersion of light provided by the flood lens. At these closer ranges – say within 20 feet – the flood lens is definitely bright enough to get a reaction out of anybody it is aimed at. I’m comfortable using it defensively.
I included the standard lens in my recent purchase of the standard bezel ring and forced myself to use it for a while. It confirmed my suspicions about the best lens for me, and I was quick to move back to the flood lens. The modular design once again proves its worth by allowing me to easily switch between the two lenses.

I bought the Alpha with the high-low tailcap. This is the same interface as on my original ZFL-M60, and I wish it was available on all flashlights. I place a high value on the ability to rapidly turn a light on and off, without that action causing the light to cycle through modes. The high-low tailcap allows me to press the button as much as I want at whatever speed I want. There is no click when pressing the tailcap for momentary on. Applying more pressure results in a near silent click and constant on. The difference between the pressure required for momentary and constant on is great enough that I’ve never accidentally turned the light to constant on when trying for momentary on. A slight counter-clockwise twist in the tailcap switches the light from 415 lumens to 15 lumens. This low output mode is great for close and detailed work in a dark environment (especially with the flood lens) where high output causes too much splash to be comfortable.
There are a number of pocket clips compatible with Elzetta lights. Elzetta offers their own Speed Clip, which features the typical hallmarks of Elzetta design: simple, eminently functional, and butt-ugly. I keep the Speed Clip on my ZFL-M60, but I think there are better options for carrying the Alpha.
For the first two years I carried the Alpha on my belt with the Prometheus Lights Titanium Pocket Clip. This clip is cool because it is titanium, and everything titanium is cool. Functionally, it works fine, but there’s nothing special about it beyond the material.

Back in 2016 I switched to the Raven Concealment Systems Pocket Clip. This has remained my preferred solution. The clip itself works great. I’ve used it to carry the Alpha on my belt and in my pocket without any problem. The finger O-ring allows the light to be retained while using both hands for a different task – an ability which is particularly practical and should not be limited to the tactical light market. When not in use the finger O-ring lays flat and can be ignored. I’ve never had it snag or get in the way of anything.

The Thyrm SwitchBack and Thyrm SwitchBack 2.0 both fit on Elzetta lights, but neither are compatible with the high-low tailcap. They prevent the tailcap from being screwed down all the way, which limits the light to only working in low output mode. I suspect both would work fine with the click tailcap, though possible only in momentary mode.
One of the factors that initially contributed to my purchasing the ZFL-M60 was Colion Noir’s review. In it he likened the light to a cockroach, joking that after a nuclear blast the only things left would be cockroaches and Elzetta lights. It doesn’t seem like too much of a stretch.
The durability of Elzetta lights has been established. The electronics are fully potted, making them waterproof. The body is made from 6061-T6 aluminum. The lens is solid acrylic.
People have abused Elzetta lights by throwing them out of helicopters, shooting them with buckshot, and using them to assault a defenseless coconut. My lack of a southern accent disqualifies me from attempting this type of abuse, but I have used mine as a hammer.
The downside of this durability is that the body design of these lights isn’t exactly svelte. The Alpha is on the fatter side of what I’m willing to keep in a pocket, but it is within the acceptable range. In it’s normal configuration, including battery and Raven pocket clip, my Alpha tips the scale at 110 grams (3.9 ounces).
Both of my Elzetta lights have scratches and small chips (from altercations with concrete), but both still function like new. I’m confident both will outlast me.
I bought a SlimFold Micro Wallet last year. It does a pretty good job of holding some cash, a few cards, and otherwise staying out of the way. The inside of the cash compartment has little wings of the softshell material that create interior pockets for additional cards. The wings also provide access to the two other materials that make up the wallet: foil shields for RFID blocking, and pieces of plastic that provide structure to the wallet. Both of these materials just sit inside the pockets and are easily removed.
The two pieces of plastic are about 85mm x 73mm. At 0.25mm thick, they’re just thick enough to perform their intended purpose, but aren’t all that useful for more nefarious purposes. At the suggestion of a friend, I replaced these two pieces of plastic with shims.
I ordered a set of Super Mica Door Shims from Red Team Tools, which comes with sheets in two thicknesses: 0.35mm and 0.50mm. Using the wallet’s included plastic as a template, I cut out one piece of each thickness and inserted them into the wallet. They make the wallet a little stiffer, which I haven’t found to be either good nor bad. But more importantly, they allow me to open doors similiar to how you might use a credit card. I think it’s a great modification to the SlimFold. As previously suggested, it’s a good travel option.