
Link Log 2022-12-10
How To Develop Good Taste, Pt. 1
Deceased Do Not Contact Registration
Inside the factory that only builds white Toyotas
Cultural observations: The skinfade + northface jacket combo
Stop that! It’s not Tourette’s but a new type of mass sociogenic illness
Thus, this current outbreak of MSMI [Mass Social Media-induced Illness] represents not only the “modern” form of MSI [Mass Sociogenic Illness] motor variant, but can also be viewed as the 21st century expression of a “culture-bound stress reaction” of our post-modern society emphasizing the uniqueness of individuals and valuing their alleged exceptionality, thus promoting attention-seeking behaviours, and aggravating the permanent identity crisis of modern man.

I insulate the handles of my titanium kitchenware with silicon aquarium airline tubing.
I use the tubing recommended in a thread on the Backpacking Light Forum. It isn’t necessary, and adds a couple grams, but it is a nice luxury that allows the mug or pot to be plucked from the stove without additional precaution.

Make sure to use silicon tubing, not vinyl. Application takes some finger strength. Spraying a little soapy water into the tubing first makes it slide a bit easier. The stuff I use has an outer diameter of about 5.8mm and an inner diameter of about 4.2mm. It has been the appropriate size for the handles on mugs from Snow Peak and Boundless Voyage.
I watched a few episodes of Dark Angel for the first time since puberty.
In the pilot episode of the show, the titular hero teams up with a pirate television journalist in the cyberpunk dystopia of Seattle. They broadcast the dirt about a Rich Bad Guy™, and protect a witness from being silenced before she can give her testimony in court. The implication being that facts are meaningful, and that the criminal justice system is functioning.
From the vantage of 2022, the show’s dystopia is looking pretty optimistic.
Link Log 2022-11-23
Special Investigative Report for The Museum of Capitalism: There’s No Such Thing as a Free Watch
If you wish to make a toaster from scratch, you must first invent the universe.
“Just a bunch of idiots having fun” – a photo history of the LAN party
Between Chaos and the Man: How not to become an anarchist
States Mull Limits on Foreign Ownership of Farmland
Love On A Reail Train (Tangerine Dream, 2018)

One of the things that I find refreshing about running an isolated personal blog, as opposed to whatever social hellscape the rest of the online population is participating in today, is not caring about the audience.
Or even knowing if there is one. (I could look at the web server logs, but I don’t.) I post for a hypothetical reader who is me but not me.
When choosing what to write about, I usually think “If I found this post on another site, would I think it was cool?”. And, reader, I do. So fucking cool.
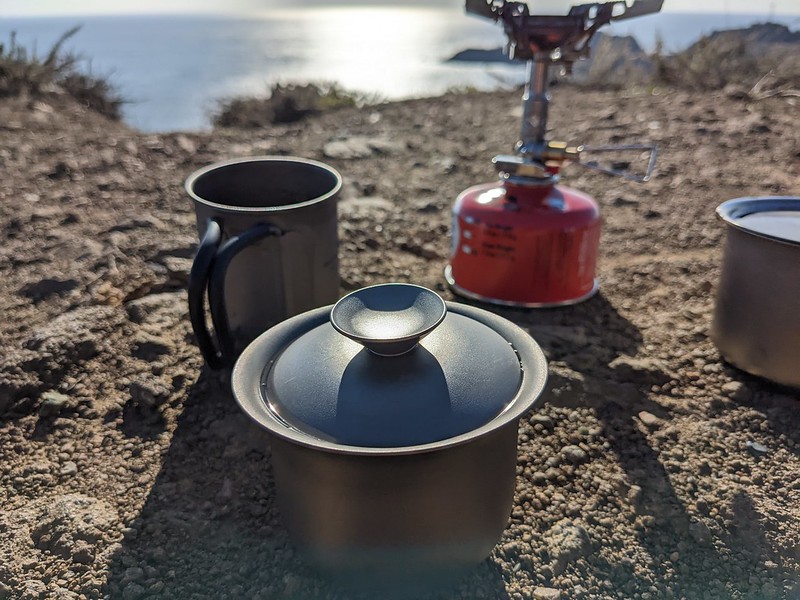
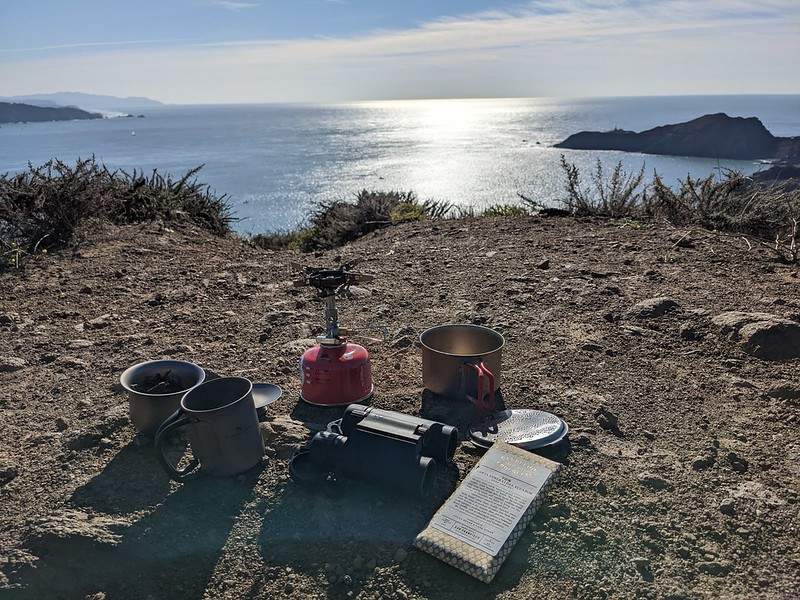
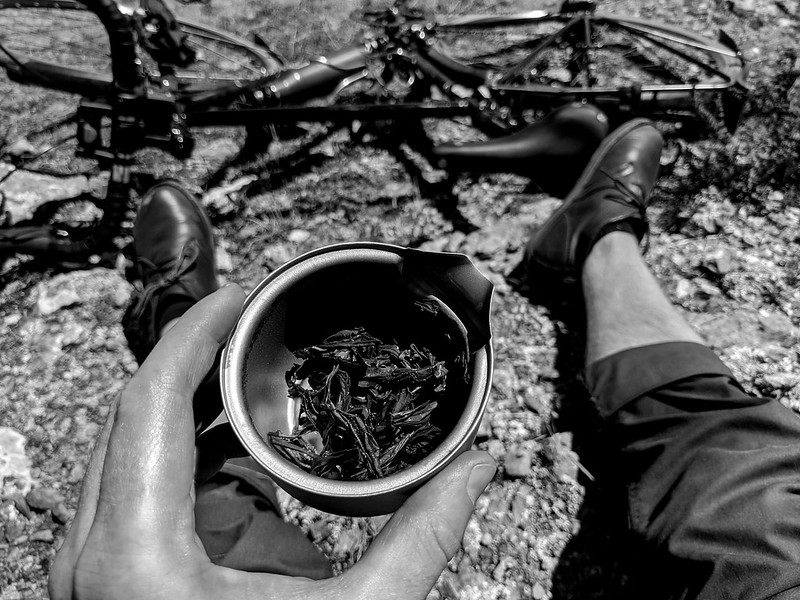
Titanium Gaiwan
Last year I started getting into gongfu – or, at least, brewing tea in a gaiwan. I first bought a normal porcelain gaiwan. After gaining some experience with it and figuring out what properties were important, I went looking for a titanium version, as is my wont. I wanted something I could throw in a bag for brewing tea out in the world, and porcelain – even in a padded container – wasn’t going to cut it.
I’m sure that an expert would criticize the use of a titanium brewing vessel, especially double-walled. I don’t think the metal itself imparts a flavor to the tea, but it has heat retention qualities that differ from more common materials like porcelain, celadon, or glass. Fortunately, I am not an expert, and do not care. The tea I brew in titanium tastes the same to me as the tea I brew in porcelain. And I can abuse my matériel.
I found two options from the friendly capitalists in the People’s Republic of China, and purchased both.
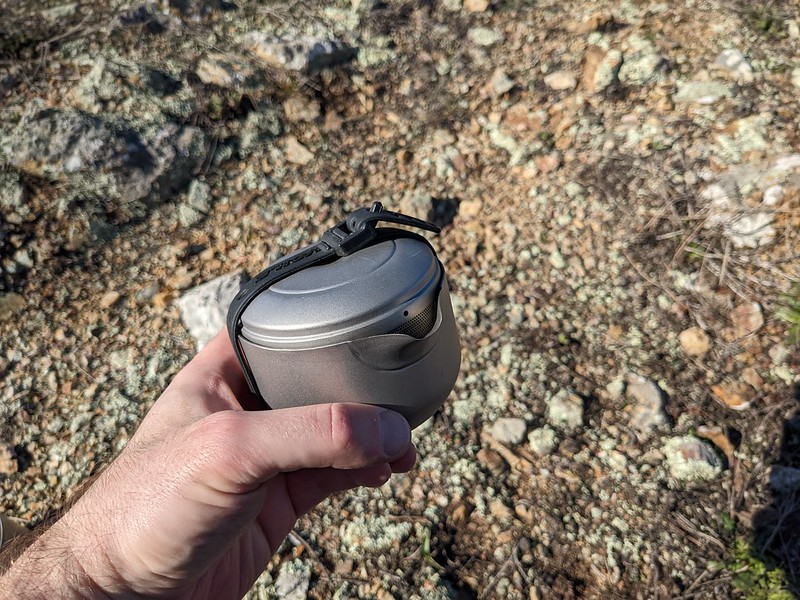
First up, the Tiartisan 130mL Titanium Gaiwan. It weights 71 grams. The stated volume of 130mL is a bit less than a typical gaiwan. My porcelain gaiwan weighs 40 grams and holds 180mL. Both those volume measurements are with water filled all the way up to the rim. In practice, some of that volume is taken up the tea leaf, and you probably stop pouring when the water level is a bit shy of the rim. With the Tiartisan gaiwan, I end up brewing about 100mL of tea liquor. With my porcelain gaiwan, it is closer to 160mL. That’s a significant difference. It means that my porcelain gaiwan is sufficient ordnance for a party of four, where the Tiartisan gaiwan is really only appropriate for one or two people.

The most significant disadvantage of the Tiartisan gaiwan is the diameter of the lid in comparison to the diameter of the bowl at the top of the rim. The lid ought to be ever so slightly larger. Compared to the porcelain set, the titanium lid sits a little deeper in the bowl. This cuts down on the usable volume, since you’re only brewing tea in the bowl up to where the lid sits.
But for the size, it is a nice lid. It rolls within the bowl as it should, allowing you to control the size of the outlet when pouring. All in, the Tiartisan is a great low-volume option. If you’re just brewing tea for one or two people, the volume is adequate.
Next up, the Boundless Voyage Titanium Tea Set. This is a more complete package, consisting of a brewing vessel, a fairness pitcher, a lid that fits on both, and two 40mL cups.
The hypothetical gongfu expert will probably take issue with this set. It isn’t an actual gaiwan. It has a spout to pour from. The lid has a little strainer built in. Still, it brews a great cup (or three) of tea.
The brewing vessel can hold about 185mL of water before it starts to come out the spout. But that is impractically full. The usable volume is closer to 145mL. Some of that is taken by the tea leaf, so in practice you’re brewing about 125mL of tea liquor. That puts it between the Tiartisan gaiwan and my porcelain set. When brewing for one or two people, this difference doesn’t matter. If you want to brew for four people, this Boundless Voyage set still struggles.
Where this set really fails miserably is in the relative size of the brewing vessel and the fairness pitcher. The fairness pitcher only holds about 85mL, and that when it is filled up to the rim, where you’re going to be struggling not to spill anything. But the set allows you to brew about 125mL of tea. So you cannot actually decant directly into the fairness pitcher. You could brew your 125 mL of tea, fill both the included 40mL cups, and then pour the last serving into the fairness pitcher for your two drinkers to fight over. But that sort of defeats the purpose of the fairness pitcher.
So in practice, the fairness pitcher component is garbage. The rest of the set is great, but unfortunately you have to pay for the fairness pitcher to get your hands on the good bits.
The brewing vessel and lid weigh 95 grams. The fairness pitcher is another 50 grams. Each cup is another 20 grams (only two can fit inside the brewing vessel for transport.)
The strainer on the lid is nice for finer, processed teas. I have a genmaicha with matcha that I like, which I cannot brew in a gaiwan (or, at least, I can’t really serve from a gaiwan), but works fine in the Boundless Voyage set. But for most whole leaf teas, neither the spout nor the strainer lid offer much advantage over the traditional gaiwan shape. A real gaiwan takes a little practice, but once you figure it out, it is easy to pour from.

I like both of these options. The Tiartisan gaiwan I keep at work, with a Snow Peak H200 to decant into and drink out of. The Boundless Voyage set I keep at home, usually decanting from the brewing vessel straight into a Boundless Voyage 200mL Titanium Cup. I use both regularly. Since the Boundless Voyage set lives at home, it tends to get thrown in the bag more than the Tiartisan gaiwan for portable tea adventures.

Having both, I’m not sure that I have a strong preference between the two. I paid $32 for the Tiartisan gaiwan, which I think is a fair price for a nice piece of double-wall titanium kitchenware. I paid $80 for the Boundless Voyage set, which is a reasonable price for all the included components, but it is more difficult to justify when I only use the brewing vessel and the lid – not the fairness pitcher, and not the cups (the cups are really nice – and I’ve actually purchased more to have at home – but most of the time I’m just brewing for myself, so I want to decant all the liquor into a single vessel I can sip from). The Tiartisan gaiwan, being an actual gaiwan, is more aesthetically pleasing. And aesthetics are an important part of gongfu.

Airscape Tea Storage
I store tea in Planetary Design Airscape Storage Canisters. The setup consists of an 18/8 stainless steel bucket with two lids. The inner lid is a plunger that evacuates air inside the can down to the level of the contents. The outer lid just sits on top of the canister, providing a platform to allow other canister to be stacked on top. The bottom of the bucket has a silicon pad that improves stackability. All together its a nice system for keeping things fresh.

It comes in two sizes: medium and small. Medium is good for unrolled leaves with body (like Mi Lan Xiang) or something you want to store a lot of (like Hojicha). Small is good for something with leaves that are flat (I like keeping Pre-rain Dragonwell in stock), rolled (might I suggest Jin Xuan), or otherwise compact. I wish there was an even smaller size. Alas.
They are not appropriate for pu-erh, which needs to breathe. But for the teas I like to stock in my pantry, they’re great. I’ve been using them for about three years now, and I do think they help extend the shelf life of my supplies.
Telephone Armor
I’ve never cracked the screen on one of my phones, and I’ve always used a screen protector and case. I don’t know if those facts are related, or what magic pixie dust gets sprinkled on phone glass these days, but I always feel better after up-armoring my telephone.
For my most recent phone, I landed on Armorsuit MilitaryShield. The product name is silly, but somewhere in their marketing I saw a reference to the material being used on helicopter blades. “Oh,” I thought. “It’s just helicopter tape for your phone.” Now that I was aware that was an option, I couldn’t think of a single reason I would not want it. Helicopter tape – or more specifically paint protective film – is so called because it was developed to prevent abrasion on helicopter blades from small flying debris. I use it on my bike frame. I am told it is often used on racing automobiles. The idea is that it protects whatever surface it is covering from being chipped by debris travelling at high velocity, thus protecting the aerodynamic properties (or stylish paint job) of the smooth surface underneath. When applied to the screen of a telephone, the takeaway is that it is pretty tough.
Armorsuit MilitaryShield is offered in matte and clear versions. I bought both. I installed the matte version first because I was curious what that would look like. I find it to be excellent. It diffuses glare, making the screen easier to see outdoors, and doesn’t show fingerprints. I think it makes reading text on the screen more comfortable. It makes it look vaguely like an E Ink display.
After running the matte protector for about five months, I peeled it off and installed the clear version. Having become accustomed to the matte display, the clear version seemed to be designed specifically to amplify glare and attract greasy fingerprints and cheek marks. I removed it after a couple weeks and reinstalled the same matte protector I had previously removed. It went on just as perfectly the second time as it did the first time.
If you do a lot of multimedia editing on your pocket computer, you might not like the diffusion of the matte protector. It makes photos less sharp. But I think it’s great.
In the subsequent two years after I installed the matte protector for the second time, the upper right hand corner of the protector has unpeeled itself slightly. This happened after I dropped the phone on this corner. The edge of the case absorbed the shock but forced up that bit of the screen protector. I could probably remove the case and try to spray a little soapy water into that corner to reactivate the adhesive, but I haven’t bothered. The phone was dropped over a year ago and the corner hasn’t peeled back any more in that time.
The case I use for my phone is the unfortunately named SUPCASE Unicorn Beetle Pro Case. I dislike its chunkiness. But I like that it has port covers, which were builtin to my previous phone. Port covers keep sand out of the charging port (it’s coarse and rough and irritating and it gets everywhere). The Beetle, so-called, consists of two parts. The upper part comes with a terrible glossy screen cover. I addressed this oversight by dropping that part of the case into a pot of not-quite-boiling-water for a minute or so. This softens the glue holding the screen cover to the frame, allowing it to be peeled away cleanly and easily. The result is a pretty alright case, and a great screen cover.
The matte protector is approaching its third birthday now. But for the aforementioned slight peeling on one corner, the protector looks like new. There are no scratches or other marks. The screen underneath it is pristine. I pay no mind to tossing the phone into a pocket or bag with keys, knives, or other sharp and scratchy objects. I expose it to road debris without concern. All is as it should be.
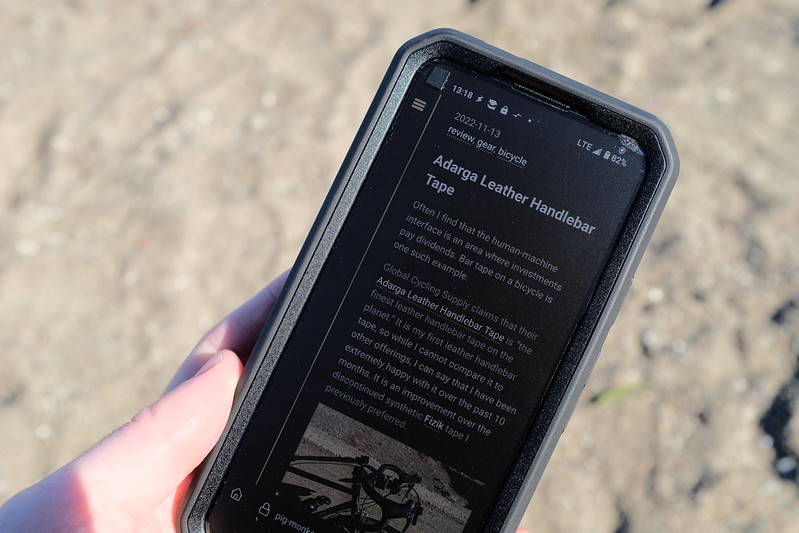
Adarga Leather Handlebar Tape
Often I find that the human-machine interface is an area where investments pay dividends. Bar tape on a bicycle is one such example.
Global Cycling Supply claims that their Adarga Leather Handlebar Tape is “the finest leather handlebar tape on the planet.” It is my first leather handlebar tape, so while I cannot compare it to other offerings, I can say that I have been extremely happy with it over the past 10 months. It is an improvement over the discontinued synthetic Fizik tape I previously preferred.
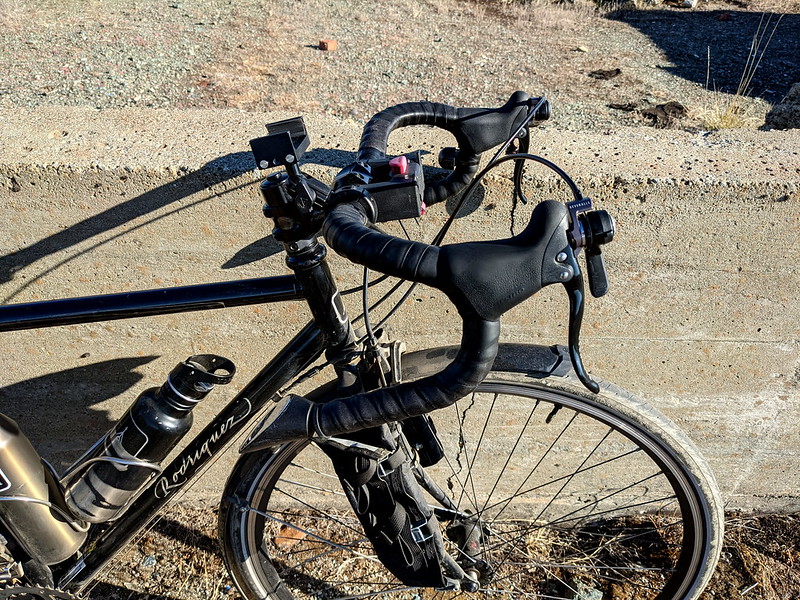
The feel of the tape is very pleasant, both when riding with gloves and gloveless. It has held up well across all the seasons, on pavement and on dirt. It offers comfort, grip and purchase; whether conditions are hot, dry and dusty, or cool, grey and wet.
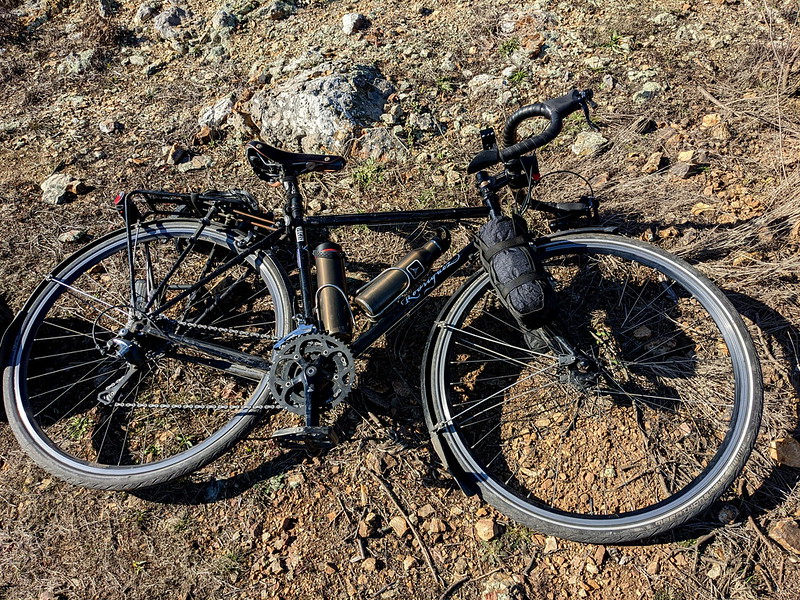
My primary concern when ordering it was the lack of padding. The synthetic tape I used previously was 3mm thick, while Adarga has no padding beyond the minimal thickness of the leather itself. I run the tape on Rene Herse Randonneur Handlebars. My experience so far has been that well designed bars, such as these, make the extra padding unnecessary. I like being able to feel the firmness of the aluminum below the leather, and have found no issues with comfort, even after long days in the saddle on rough roads.
Installing the tape was not too difficult. I was surprised at how tight I had to pull it to get a good wrap – much tighter than I could pull a synthetic tape without tearing it – but once I figured that out, the installation went smoothly. The backside of the tape does include a narrow adhesive strip that helps the tape stay in place during the wrapping process. I didn’t measure the length of the tape, but I ended up snipping off about 6 inches for my 440 mm bars.
Global Cycling Supply is the side-hustle of the owner of Law Tanning. I suspect the guy knows how to make leather and what characteristics are important in a handlebar tape. The Adarga leather formula is billed as being based on a process previously used for British military gloves. I ran the tape for about 6 months before applying a very light coat of Obenauf’s LP. I don’t know if this was necessary, but I end up applying LP to most of the leather things in my life, and it did darken the black tape an aesthetically pleasing amount.
With synthetic bar tape, I find that after 10 months of use the tape is still perfectly functional but has signs of wear. The Adarga leather tape still looks like new. I expect it will provide many years of service.

Recent Chick Flicks
Kimi was described to me as Rear Window crossed with The Conversation. Both are great films. Kimi isn’t as great, but I still enjoyed it. It delivered on that description.
Watcher is another riff on the Rear Window thing. There were a couple times I found myself talking back to the screen because a character did something irrational, but overall I enjoyed it. The two main actors, playing the watcher and the watched, were great. The ending was great.
Emily the Criminal is a film full assholes. But likeable assholes.
A Good Woman Is Hard to Find starts out sort of meh, but then the main character makes an excellent life choice that really kicks off the plot. The score is by Makeup and Vanity Set, and you know how I feel about that.
Swallow shows us that all is not well in soulless bourgeois suburbia. This film was super weird and discomforting, but is exactly what I imagine the lifes of Goop customers to be like.
Catch the Fair One is a perfect film. 10/10. No notes.
I’m not much into boxing films, and this isn’t one, but there’s a sparring scene in the beginning in which I couldn’t identify much in the way of acting. I had to pause the film and lookup the actors who play the main character and her trainer. Either they should be winning Academy Awards or they are professional fighters. Turns out, they’re professional fighters.
Four of these films were scored by Nathan Halpern, who does excellent work.
On Mi Lan Xiang
Mi Lan Xiang is currently my favorite oolong, and probably my second favorite tea after Hojicha.
I’ve found that it doesn’t lend itself too well to the infuser-basket-in-mug method popular with most of us tea drinkers on this side of the Pacific Rim. A gaiwan is needed to get the full experience. Roughly 4 grams of leaf, 4 ounces of 190 degree Fahrenheit water, 30 seconds.
This past summer I frequently brewed it cold, leaving it to sit in a teapot in the fridge overnight and then decanting into a bottle in the morning to take on a bike ride. Since it is just sitting in cold water for multiple hours, I’m less picky about the ratio. I use 24 ounces of water, probably around 8 grams of leaf, left in the fridge for 8 hours or so.
Gevenalle CX Shifters
Gevenalle CX Shifters are the best change I’ve ever made to my bike. I don’t understand how STI brifters have any market share in the world where Gevenalle exist.

The left Gevenalle shifter is friction only. Shifting the front chain ring with friction is objectively superior to indexed. It allows me to make minute trim adjustments based on where I am in the rear cassette. This is especially useful with a triple crank (which I still run, because why wouldn’t I want more gears). With indexed shifting on a triple, you often end up with some gear combinations that cause rubbing front or rear if your cable tension is not perfectly dialed. Not so with friction. Just give it a slight nudge.
The right Gevenalle shifter can switch between indexed and friction shifting. I started out using it in indexed mode. After a few weeks of that I decided to give friction mode a whirl. I had never used friction shifting before. 9 months later, I’m still in friction mode. I do still think there is a place for indexed shifting in the rear, but I enjoy friction and have no current desire to switch back. (I haven’t even thought about cable tension all year!) I do, however, value the ability to switch between the two.
The real magic of the Gevenalle system is being able to jump the cassette between multiple gears with a single movement. An STI shifter may allow you to jump between 3 or 4 gears at once. With Gevenalle, you can dump the entire cassette in one smooth movement. That’s not something I do often, but I absolutely do dump or load about half the cassette at once. They market this as a feature for cyclocross racers, but it applies just as much to anyone who rides with other traffic.
This video is what helped sell me on the shifters when I was considering the purchase. It demonstrates the big cassette movements possible, as well as the ergonomics of using the system. Whether I push or pull the shift levers depends on where they are in relation to the brake lever. It takes a few minutes to get used to, but quickly becomes intuitive. As someone who spends most of the time on the hoods, I found that I didn’t need to change my hand position to actuate the shifters. Shifting from down in the drops is difficult or impossible, but if I’m down there it’s usually because I’m cruising down hill, already at mach 3, and not intending to shift anytime soon.
The Gevenalle shifters can be praised for their functionality. They are lightweight, simple, durable, and rebuildable. They don’t care if they’re caked in mud or bathed in the blood of your enemies or whatever. But they’re also just really fun. I shift a lot more frequently with these than I ever did with STI. They inspire a closer connection to the vehicle, perhaps similar to manually shifting an automobile. Having both visual and haptic feedback on where you are in your gears and how much move movement you have in either direction is fantastic. I refer to the front shifter as my hyperdrive switch. Anytime the rear shifter is moved all the way outboard and I flick the front all the way to the right I know shit is about to get real.
Many of the strengths of the Gevenalle shifters could also be claimed by bar-end or downtube setups, but Gevenalle allows you to keep all your in-flight controls in one place. I value being able to shift, brake, and flick my ding-ding all without moving my hands. I think this is especially important for city riding, when everything else on the road is actively trying to kill you. (And I still like using my bar-ends for mirrors, too.)
With Gevenalle, the brake cables run under the tape. Shift cables shoot out the side, like STI shifters of yore. When I installed them I made sure to cut my cables and housing long enough so that I had enough space to move the cables aside and shove my rando bag or bikepacking harness between them. It hasn’t been an issue. Back when STI shifters had this kind of cable routing, I used v-brake noodles to open up space for a bag. I haven’t found that necessary with Gevenalle shifters.

I’m not sure that I’d ever want to use a non-Gevenalle shift setup on a drop bar bike again.


Rudy Replacement Lens Program
Rudy Project offers a replacement lens program wherein they will replace any of their lenses for frames that are in the current year’s product catalog. They require you send in the lens you want replaced, and charge $29.95 per pair.
I just learned about this warranty program a couple weeks ago and thought I’d give it a whirl. I sent in two pairs of lenses for my Rydon spectacles.
One pair was ImpactX Photochromic Black. These were one of the two original sets of lenses I bought with the Rydons in 2011. Prior to my shine job, these were what I kept mounted in the Rydon chassis most of the time, with the RX carrier behind them. The lenses had some noticable scratches on them, I think caused by my face, the RX carrier, ImpactX lens, and other people’s fists all coming into loving embrace.
The second pair was ImpactX Photochromic Laser Red. These are the ones I’ve used almost everyday for the past 4.5 years. These had some minor scratches on them from normal use – nothing that was noticeable when worn, but I figured as long as I was sending a package in for warranty I’d include these.
I classify both of these lenses as critical equipment, so I already had a spare pair of each. I was prepared for a long wait, or for Rudy to reject my claim because both lenses were still usable as is.
I put both lenses in a padded envelope, with a check for $59.90, and dropped it in the mail last Monday. The postage cost me $3.42. Today, nine days later, I received a package with two new lenses.
Purchasing those two lenses would cost $209.98. There’s a lot of ridiculous markup in the eyewear industry, but knowing that I can easily replace my Rudy lenses for about 30% of their MSRP makes me happy to continue to do business with Rudy. In past years I’ve looked at third parties, such as Revant, to expand my lens collection with less money. But now I can’t say that I have any interest in purchasing lenses from anyone other than Rudy.
Link Log 2022-05-15


Better Payments with Privacy.com
Privacy.com is an excellent service with a terrible name. They provide merchant-locked virtual debit cards. I’ve been using them for about three years. Around 90% of my online transactions go through them (the other 10%-ish is PayPal).
When one of their card numbers is first used, it becomes locked to that merchant. The card will reject transactions from anyone else. This immediately eliminates the problem of stolen card numbers. If a random ecommerce website leaks my card details, I don’t care, because nobody other than the original merchant can place a charge on the card.
When generating cards, Privacy.com also allows you to set dollar limits, either in total or for a period of time. This eliminates the problem of unreliable subscription services. For example, the card tied to my Amazon Web Services account has a monthly usage limit slightly higher than my average monthly bill. If AWS tries to double my bill one month, the transaction will be rejected.
Cards can also be paused. While I use the periodic dollar limit feature for things like subscription services with regular payments, other cards in my Privacy.com account stay paused when not in use. A paused card rejects all new transactions. Before making a purchase on a website, I login to the Privacy.com website and unpause the associated card. I then make the purchase as usual. Placing an order usually results in the merchant immediately placing an authorization on the card for the purchase amount. Existing authorizations can still be captured on a paused card, so at this point I can switch back to my Privacy.com tab and re-pause the card, preventing the merchant from taking any more money than the agreed upon authorization.
Cards can also be closed. Effectively this is the same as pausing a card, except that it is permanent. This is useful for signing up for free trials that still require a method of payment. When the trial is up, if you choose to not continue using the service, inform the provider and simply close the card.
Privacy.com offers software you can install on your telephone. I’ve never used it. I don’t trust my phone enough for it to touch money in any way. They also offer browser extensions, which I also have never used. Their website works great, and I see no need for locally installed software of any sort.
Over my few years of using Privacy.com, I’ve never had a problem with their service. I’ve never had to contact their customer support, so I have no idea how that works. I’ve had merchants issue refunds to my Privacy.com cards half a dozen or so times, and those have always come through and landed in my bank account without drama (even when the original charge was on a card that at the time of refund was paused or closed.
Last year, Swift Silent Deadly posted an in-depth overview of Privacy.com. This provides a good overview of the service. What he wrote matches my experience, with one glaring exception. He mentions giving Privacy.com access to your bank account. I don’t know if he is referencing some shady Plaid bullshit or if he simply means providing them with routing and account numbers and going through ACH. I did neither. When I signed up, Privacy.com allowed me to add my real bank debit card as a funding source. That is the only way Privacy.com has to push or pull funds from me. If they ever become untrustworthy, I can just cancel my real debit card, and Privacy.com will loose all access to my money.
The debit card that I use for this is tied to the checking account that I previously used only for PayPal. This provides an additional layer of defense, in that there isn’t much money hanging around in that account for someone to steal. I usually keep around $100 in it for incidental purchases, and transfer more in from my real accounts when I plan to make a larger purchase.
Privacy.com has free and paid tiers. I am on the free tier. Apparently it has some limitations in terms of number of cards generated per month and total monthly spend. I have never run into these limitations so I have no idea what they are. They claim that they make enough money on us low-volume free tier users by collecting the transaction fees that merchants pay to process debit cards. I would be very unhappy to return to participating in the electronic commerce market without a service like this, so they would probably have a pretty easy time convincing me to move to a paid plan if they ever decided to eliminate the free tier.
I’ve heard some banks offer virtual card numbers somewhat similar to Privacy.com, but perhaps without the merchant-locking and spend limits. While I refer to my “bank” accounts, my accounts are actually with credit unions. Credit unions tend not to be at the forefront of technology, so I need a third-party to provide this functionality.
Privacy.com says that they offer merchant masking to their paying customers. This means that transactions show up in your bank account as “Privacy.com” instead of including the name of the merchant. I suspect this may be where their business name comes from. I suppose that is great if you have a joint bank account and want to hide your Porn Hub subscription from your spouse. But it is not a problem I have, so I maintain that their name is dumb and has nothing to do with their excellent service. If anything they reduce my privacy, since they are now an additional party involved in all of my online purchases. But I’m good with that trade-off.
A Better Phone Mount
When I purchased my first smart phone in 2013, I was motivated primarily by the promise of using Open Street Map for bicycle navigation. This does not require, but is greatly assisted by, a mounting system of some sort. I’ve tried a few over the years. Since 2015 I’ve used the Aduro U-Grip Plus Universal Bike Mount, which I think is an excellent design. It uses a ball and socket to provide complete adjustability. It secures the phone with a spring-loaded cradle and silicon band. Between the two, there’s no way the phone is falling out, unless the mount breaks. Unfortunately the whole thing is cheaply made of plastic. Earlier this month, mine finally broke.


After seven years, I feel I got my money’s worth out of the Aduro U-Grip, but when a tool like this fails I want to replace it with something better. Purchasing another of the same just resets the countdown to the next failure. Unfortunately, the bicycle phone mount market seems to be flooded with shit. Either they provide limited adjustability, or they require a special phone case. I have no interest in either. I was disappointed, and about to just order another Aduro U-Grip, until I happened upon Tackform. Their Enduro Mount was advertised for motorcycles, but I figured it ought to work on a real bike.

Tackform’s offering is similar in concept to Aduro’s, with a ball and socket providing complete adjustability, and phone security provided by a spring-loaded cradle and silicon band. But it raises durability to the extreme. I’ve had mine for just a few days. I am impressed.
The only plastic component is the wingnut used to lock the position of the cradle. Everything else is metal. The spring that operates the cradle is no joke. It is capable of operating as an improvised finger guillotine. Yet it is quick and easy to operate one-handed. Tackform includes a silicon band for further security, but in the packaging material they say that you really don’t need it. I believe they are correct. When it is installed in the cradle, I can lift the bike with the phone. The phone doesn’t move at all. It is difficult to imagine a scenario where the phone would escape.
The top of the cradle has a lip to prevent the phone from being pulled out straight up. The sides and bottom of the cradle are lined with a thin rubber to provide some protection to the phone. The outer edges of the cradle are quite sharp, which makes me somewhat nervous about a crash. I have no doubt that the mount would come through, and that the phone would still be secured in it, but my face might not fare so well if it comes into contact with the cradle. But, hey, that’s what eye pro is for.
The primary disadvantage to the Tackform Enduro is that the arm which connects the cradle to the bar mount is tightened with a single wingnut. To rotate the cradle from portrait to landscape mode, you have to loosen this wingnut, which also loosens the connection to the bar mount. So while the ball and socket connection gives you complete freedom to position the phone as you like, it’s the sort of thing where you need to figure out what position you want and then tighten the wingnut to lock it in. You won’t leave the wingnut loose enough to allow for adjustments while riding. With the Aduro U-Grip, the socket is part of the cradle, the ball is part of the bar mount, and I was always able to leave the nut which secures the two just loose enough that I could make minor in-flight positioning adjustments without compromising the security of the system. In practice, I have yet to find this limitation with the Tackform to be something I really care about. But if you want to be able to rotate between portrait and landscape modes without stopping and using two hands, look elsewhere.
The other disadvantage that some riders will identify is weight. I didn’t weigh the components, but what you’re dealing with here is basically just a chunk of aluminum. I imagine the whole system is somewhere around 6 oz, which is significantly more than the plastic competitors. If you have much spandex in your wardrobe, you won’t be happy with Tackform. But my bike is carefully built for what I see as the ideal compromise between performance and durability, and the Tackform mount makes the cut.
Beyond the durability of the system, what endures me to Tackform is that their products really are systems. They are not just selling a few application-specific packages, but have whole series of components. It’s like a grown-up Lego set. I appreciate knowing that I could replace an individual component, or buy just the piece I need to expand the mount’s applicability to different vehicles or environments.
None of Tackform’s products are cheap, but they claim that their products are designed to last a lifetime. After the first 100 miles on this mount, I believe that statement will prove accurate. I suspect that the slab-format pocket terminal will be phased out and become irrelevant well before the Tackform Enduro will fail.

The mount is manufactured in the country of Taiwan, so get yours before China expands its beachfront property.
How I Flick My Ding-Ding
I use to run my bell on the center top of my handlebars, near the stem. This is a typical bell position, but it requires moving a hand off of the brifters to access it. Situations where one needs a bell are often situations where one also wants to be ready to brake or shift.
A couple years ago, I saw someone position their bell on the hook of the drops. I thought that was a great idea and promptly copied it. The positioning is ideal. It allows me to keep my hands on the hoods and actuate the trigger of the bell with my pinky, while the rest of my fingers interact with the brifters as needed. It is high enough in the hook that it does not interfere with my hand placement while riding in the drops, though it does require releasing the hold on the bar to actuate it from down there. But that is still a smaller movement than reaching from the drop to the center top of the bars. I spend about 90% of my time on the ramps and hoods, so that is the interface I optimize for.

I strongly recommend setting up your cockpit such that you can flick your ding-ding without sacrificing the drive controls.
USB Type-C Multi-Cables
I started carrying the Anker PowerLine II 3-in-1 Cable in the latest iteration of my Electronic Support Package a couple years ago. It has a USB Type-A connector on one end, Micro USB on the other, with a USB Type-C and Apple Lightning adapter that pop on to the Micro USB connector. It makes for a nice little multi-cable to charge all my gadgets and transfer small bits of data around.
As I began to acquire more devices that supported USB Type-C, I found that I desired a multi-cable that was Type-C native. A quick survey of the market offered some options, but nothing that struck my fancy. However, during that search I happened to discover that Cozy (the same company that makes those USB Type-A covers I use on my bike lights) offered something they called LightningCozy which would allow me to put together my own multi-cables. So that’s what I did.

I have one model built around the Cable Matters USB-C Cable, 60 watt, 3.3 ft. On one end it has a Satechi Type-A to Type-C Adapter attached via a LightningCozy. On the other end it has a JXMOX USB C to Micro USB Adapter attached via another LightningCozy. It is bundled with a Ringke Silicon Cable Tie.
This creates the perfect package for my needs. I can use it to charge all my USB-chargeable things, including the Thinkpad X270. (I have no Apple devices in my life, so I don’t need the Apple Lightning adapter, but could easily add that if I find the need.) The cable doesn’t provide the fastest possible data transfer, but it is more svelte than a fast data cable, and is perfectly acceptable for my incidental data use. It doesn’t do video, but as of yet I have no USB Type-C monitors in my life, so I don’t care. One of these multi-cables is my EDC in the Electronic Support Package.
My second model of multi-cable is built around the Cable Matters USB-C Cable, 100 watt, 6.6 ft. On one end it has a Base Sailor USB C Female to USB Male Adapter attached via a LightningCozy. On the other end it has the same JXMOX adapter as the previous cable, attached via a LightningCozy. It also has a USB-C to Lenovo Slim Tip power adapter I bought a few years ago on AliExpress, attached via electrical tape and a piece of Type 1 Paracord. The cable is bundled with another Ringke Silicon Cable Tie.
I keep this second model in my laptop kit, along with a HyperJuice 66W GaN USB-C Charger. (I also have a Satechi 72W Type-C PD Car Charger I can throw into the kit if I’m going on a trip and think I might be spending a while in a car.) I don’t carry this kit unless I’m also carrying my laptop. This cable allows me to power either of my Thinkpads, or anything else USB-compatible, and gives me more reach than the short EDC cable. Both the X260 and X270 only want 45 watts, so the 100 watt cable is overkill, but it is occasionally useful to have the capacity to deliver more juice to other devices. As with the previous cable, this one doesn’t transfer data at blazing speeds, nor does it do video. I have no need of those capabilities, so I stick with thinner cables.
Link Log 2022-02-13
Testing Phone-Sized Faraday Bags
How Miami became the most important city in America
Taiwan: how the ‘porcupine doctrine’ might help deter armed conflict with China
Microgreens for Human Nutrition in Spaceflight
Fonts in Use: Neon Genesis Evangelion
Meditation: Teachers and Technology
Crypto[currency] Games: Report from hell
