When I first bought my scale, I started a spreadsheet containing the weights of various pieces of gear. It seemed like a good idea – I knew I wanted some sort of database to store my measured weights and other notes in – but I never got around to updating it. Data in a spreadsheet is too static. You can’t do much with it. I think that characteristic contributed to my disinterest with the spreadsheet.
So for a while now I’ve had the idea of writing a web application to track my gear. Over the past week, I finally got around to doing it.
Gear Tracker is built on Django, a web application framework. (If you’re not familiar with Django, and you have anything to do with making websites, it’s probably worth your time to learn a thing or two.)
Gear
Gear Tracker’s primary purpose is to track gear.
Each item has a weight and acquisition date associated with it. It can be categorized, tagged, and related to other items. There are fields to input size, a link to the manufacturer’s page, a link to a review, and to upload an image. A text area allows the user to store any notes related to the item.
Items can be archived. This provides a way to not list gear that the user no longer owns, but to keep it in the database for future reference of its weight or other attributes.
Weights
Weights are always input in grams.
The metric system makes the most sense and is the easiest to work with. An item’s weight can be displayed in grams or, if the item weighs more than 1,000 grams, kilograms. But because some of us are crippled and still like to see imperial weights, Gear Tracker can also display the item’s weight in ounces or pounds.
Gear Lists
Gear Tracker can also generate gear lists.
One of the things that has prevented me from doing many gear lists in the past is that they’re a pain in the rear to create. It takes a while to manually write out every item of gear that I take on a trip. If I want to add the weight of each item – well, that’s asking too much! It’s not worth it.
Now, making gear lists is easy. Gear Tracker already has detailed knowledge about each piece of gear. All it takes to create a gear list is to select the item, specify how many of that item I took, and whether the item was packed or carried. The result is an organized, detailed gear list for every trip. Total weights are calculated, of course, and can be output in either metric or imperial units.
Private Gear Lists
Gear lists can be made private.
I generally create gear lists when I’m packing before a trip. But I don’t like to publish the lists until I actually return from the trip and also have a report and photos for people to peruse. So, Gear Tracker allows a gear list to be marked as private.
Download It, Hack It, Use It
I’m running Gear Tracker at /gear, but if you want to grab your own copy and run it yourself, you can! I’ve open-sourced the code under a BSD-license. You can find it at GitHub.
I can’t think of a better way to spend the winter solstice than breaking trail in fresh powder.
Days and months are the travelers of eternity. So are the years that pass by... I myself have been tempted for a long time by the cloud-moving wind -- filled with a strong desire to wander... I walked through mists and clouds, breathing the thin air of high altitudes and stepping on slippery ice and snow, till at last through a gateway of clouds, as it seemed, to the very paths of the sun and moon, I reached the summit, completely our of breath and nearly frozen to death. Presently the sun went down and the moon rose glistening in the sky.
- Basho
A CLO value is a measurement of the warmth provided by a garment. It serves as a means of comparing the relative warmth of various clothing insulated with synthetic materials.
Developed in 1941, [CLO] was the first real attempt to explain the insulation value of clothing so people would know how much clothing they might need to stay warmer or cooler in a given temperature environment. A CLO value of 1 is defined as the amount of clothing required by a resting human (in other words, sitting, lying down or standing, but not moving) to be comfortable at a room temperature of 21 degrees C, or approximately 71 degrees F. That single value of CLO is equivalent to a typical business suit worn by a man -- shirt, undershirt, trousers and suit jacket. The higher the CLO number, the more insulating value is provided.
I recently put together a list comparing the CLO values of various synthetic puffy pants for a forum that I belong to. Some of you may find it useful as well, so I’m posting it here.
All of the weights given are manufacture weights. They might not be entirely accurate. I found the CLO values for the various insulating materials by searching online. Some of them are provided by the manufacturer, some by third parties.
I previously had 782 Gear's Chaps listed as using Climashield Combat. Now I'm told by a retailer that they actually use Primaloft (what type of Primaloft wasn't specified). This agrees with 782's technology page, which lists Primaloft as one of the products that they use. Yet 782 has recently updated the Chaps' product page to specify that the pants use "Climashield" (what type of Climashield isn't specified). Until this is cleared up, I'm leaving the Smokin' Chaps off this list.
As the light increased, I discovered around me an ocean of mist, which by chance reached up exactly to the base of the tower, and shut out every vestige of the earth, while I was left floating on this fragment of the wreck of a world, on my carved plank, in cloudland...
All around beneath me was spread for a hundred miles on every side, as far as the eye could reach, an undulating country of clouds, answering in the varied swell of its surface to the terrestrial world it veiled. It was such a country as we might see in dreams, with all the delights of paradise.
- Henry David Thoreau, A Week on the Concord and Merrimack Rivers
I’ve been vaguely interested in amateur radio for a few years. The idea of decentralized, low-infrastructure communications appeals to me, but knowing nothing about radios, I was somewhat overwhelmed by it all and didn’t know where to start. I didn’t pursue the interest until now. In case anyone else is in the same position, I thought I would outline what worked for me.
A couple weeks ago I saw that the local library had a copy of the ARRL Ham Radio License Manual. The Manual is meant to teach beginners the basics of radio and help them to pass the Technician license exam: a 35-question multiple choice test. The entire question and answer pool is publicly available.
My method for using the book was to read one chapter every morning. Immediately afterwards I would quiz myself on all the relevant questions for that chapter (included in the back of the book). For the rest of the day, I wouldn’t think at all about radios, until the evening, when I would once again quiz myself on all the questions from that day’s chapter. The book consists of nine chapters. I combined chapters seven and eight into one day, and so finished the book in 8 days. Over the course of the ninth day I took a dozen or so practice tests on QRZ.com. The following day I took the real exam.
Thanks to the book, in little more than a week I went from knowing absolutely nothing about radios (and near to nothing about electronics) to being confidently able to ace the Technician exam and earn my amateur radio license.
One could just memorize the question pool and probably easily pass the test the same way. I’m not much interested in licenses. I didn’t start this venture just to be awarded a slip of paper by the FCC. I’m after the knowledge. Using a resource like the book to help me in comprehending all of the relevant topics appealed to me much more than rote memorization of the exam’s answers.
Of course all I possess now is book knowledge. That needs to be supplemented with experience. But once I buy a radio, I feel that I have a solid base from which to leap.
The Alpine Lakes Wilderness is located east of the Cascade crest, over by the town of Leavenworth. A small section of the area, called The Enchantments, became a popular tourist destination a few decades ago, resulting in much overuse. To address the damage the Forest Service instituted a restrictive permit system. To access a normal wilderness area, you generally just fill out a free permit at the trailhead. For the Enchantments, similar free permits are available at trailheads for day use only. To sleep there, you must apply for a permit the previous winter, send in a little cash to grease the wheels, and then hope for the best. Permits are rewarded on a lottery system.
I’m not a big fan of permits. 1 With a system as restrictive as this – and requiring as much forethought as this – it goes without saying that I haven’t spent much time in the Enchantments. But last week I planned a trip in the Alpine Lakes that would begin in the restricted zone.
I arrived at the trailhead near noon, where I met my first setback. The plan was to start out on the Enchantment-area trail to Eightmile lake, take the junction west to Lake Caroline, and head on over Windy Pass, which forms the boundary between the Enchantments and the normal Alpine Lakes Wilderness. I would be in the restricted area for about 6 miles. As I had assumed, day use permits for the Enchantments were available at the trailhead. But normal permits for the Alpine Lakes Wilderness? Of course not! I was slightly perturbed. It wasn’t as if I was planning a cross country trip. I was going in on a trail that started here, at this very trailhead, and continued straight through the Enchantments into the Alpine Lakes Wilderness. Why would they not have permits for the Alpine Lakes here? Is the Forest Service operating under the assumption that nobody is going to walk over Windy Pass on the trail that the Forest Service maintains for that very purpose? Must be. No matter. I wouldn’t feel right about letting a little thing like legality get in the way of my rambling. I took a day use permit and filled it out for the Enchantment part of the trip. On the back I began to write a note telling them of the plan for my trip, the impracticality of trying to control people moving by foot, and the inanity of this system in particular. I ran out of room, so I tore out a few pieces of paper from my journal and attached them. With my public service done for the day, I hit the trail.
I had gotten to the trailhead later than planned, and the permit fiasco set me back a bit further. Since I couldn’t legally sleep till I gained Windy Pass, I set a quick pace and was unable to enjoy much of the Enchantments.
I slowed as I neared the pass. The trail climbing up takes a meandering route through the beautiful basin. Most flowers were gone on this, the last full day of summer, but the bright reds and oranges made up for the lack of scented petals.
Just before gaining the pass, I spotted a very busy (and very fat) marmot. He was scampering all over the basin, yanking out grass with his mouth. A sure sign of the changing seasons. He was no doubt gathering material for his winter shelter.
I paused at the top of the pass. I was now safely out of the Enchantments and could once again safely sleep wherever I wished. 2 It is a comfort.
The trail on the west side of Windy Pass is starkly different from the east. It takes a much narrower and steeper path, heading directly down. Starting in alpine meadows, it quickly enters into forests that continue for the remainder of the descent. It had been sunny and dry the whole day, but the thick bush was still covered in dew, wetting my pants. I was grateful for my gaiters.
Initially I had thought to aim for Trout Lake and make my camp there. But at 7PM I was still north of it. The sun was due to set in another half hour. I decided to camp in a clearing and visit the lake for breakfast the following morning.
I woke once during the night. The thermometer read 25°F.
It seemed like a good morning to sleep in, so I did. I crawled out of the bag at 9:00 AM and left camp a half hour later.
It turns out I was only a mile north of Trout Lake. When I arrived the sun was just climbing over the ridge in the east, melting the frost off the lake’s surrounding meadow, filling the air with mist. A fine start to the equinox.
I attempted to make a breakfast of oatmeal with chia seeds, but accidentally dumped in most of the bag of chia seeds. Breakfast became chia seeds with oatmeal.
With the meal finished and the sun climbing high, it was time for me to continue west. The climb to the top of Jack Ridge offered splendid views of the Trout Creek valley, back towards Windy Pass, and the many peaks of the Alpine Lakes Wilderness.
At the top of the ridge the obvious tread continued south. Had I looked at my map I would have seen that the real trail turns sharply north before beginning its descent down the opposite side – but why take out a map when there is fine tread below my feet?
I lost the trail shortly and decided that it must have been only a game trail. Turning back to scout out the proper path was the obvious solution, but backtracking always seems depressing. Besides, I only needed to descend into the valley on the opposite side of the ridge till I reached Jack Creek and the obvious trail that parallels it. I would make my own way.
At first I was able to find other game trails that seemed to be heading down. But the trouble with deer is that they don’t organize themselves into trail crews to maintain their highways. The paths always petered out. I soon gave up on them in favor of a more direct descent. It was steep, and lacking a trail, I have the tendency to always aim for a direct descent (or ascent, as the case may be), making nary a switchback.
The areas thick with trees slowed progress further. I was glad when I reached a small open meadow. Until I was stung by a bee. At that point my gladness evaporated. I retreated back to the trees. Having been stung before and never experiencing a reaction, I wasn’t much concerned, but the venom still hurt.
The descent continued. I soon noticed that when I clenched my left hand there was some tightness on the outside, near where I had been stung. It was not yet visible, but the area was clearly swelling. There was nothing to do but continue the descent.
The last stage was the steepest. I often fell and slid down on my rear. Two hours after I had left the top of the ridge I spotted a man with a rifle and orange hat. He yelled a hello. I return the greeting and commented that he must be on the trail. The hunter replied with a thumbs up.
It was good to be back on trail. We chatted while I recovered my breath and sucked down a bit of water. Apparently it was high buck season. The hunter lamented that his ruck was much too heavy for this trip. I observed that he still had to pack out the meat – or, at least, hopefully he would. Luckily he had two friends further ahead of him that could help with that job.
Now on the Jack Creek trail, I turned south and resumed my walk. At the junction with Meadow Creek I stopped for lunch and water. My hand was now visibly swollen, but I experienced no other symptoms. The swelling did not appear to be traveling up my arm. To be safe I switched my watch and paracord bracelet to the other wrist. Gazing at the contrast between my two hands, I thought it funny, like I was slowly (or perhaps quickly) becoming fat. Anyway, the hand still worked fine, doing everything that a hand is supposed to do, so I wasn’t worried.
That afternoon I only traveled a few miles further, a bit past the junction with Van Epps Creek. It didn’t make much mileage for the day, but I was tired from the journey down the ridge, and unsure if there would be any decent spots to camp till the opposite side of the upcoming pass.
Off to one side of the trail was a burned area where I was able to find a decently flat spot for the tarp. I enjoyed dinner while watching the sun set in the west, taking with it the last few moments of this year’s summer. It had been well spent, I thought. I brought to mind waking up in the Glacier Peak Wilderness, with the valleys below me filled with clouds and only the snow-capped peaks visible above. Or throwing my bedroll in the dust in the high country of Oregon’s Cascades, spending the whole night watching the Perseid meteor shower, tossing oohs and aahs back and forth across camp. Or yelling at bears down by the Tucannon.
Camp was at a lower elevation that night, and I slept warmer. But the dry spell was broke by a light morning rain. It didn’t matter: Jack Creek was running a hundred feet from my camp and had to be forded first thing, so I was getting wet anyway.
On the other side I exchanged sandals for boots (tying my shoe laces with one still swollen hand). The rain had stopped, but the forest was still damp. I kept my rain gear on.
The trail crossed back to the other side of the creek, then started heading up, aiming for Stuart Pass. It was forested, providing few views of the destination, until a sudden break provided a stunning view of Mount Stuart. “Well, shit,” I thought. I’ve seen a lot of mountains, but Stuart is an awesome sight. One of the largest pieces of exposed granite in the States, carved by multiple ice ages, the only way to describe it is rugged. I had a strong temptation to abandon the trail for the mountain, but time – or, rather, my food supply – was against me. I continued on up to the pass.
Stuart pass connects Mount Stuart to neighboring Ingalls Peak, but by the time I reached the top, clouds had rolled in and obscured both mountains. Snow began to fall. I sat down for a congratulatory lunch.
I was nearly out of the wilderness now, with nothing left to do but descend the pass and walk through the 20 mile valley of Ingalls Creek. I thought I would do only a few more miles today, and save the bulk for tomorrow. But after I left the pass the flatness of the terrain deceived me. At 4:00 PM I was only 5 miles from the end. Not wanting to end the trip that early, I stopped at the next likely spot and made camp, settling in for another warm night.
The sun wakened the valley in the morning, a welcome change from yesterday’s clouds and rain. I set out a few things to dry while the oats boiled and decided to enjoy a bit more of my book before breaking camp.
The last few miles of trail went quickly. I arrived at the trailhead at noon, but the trip wasn’t over: this wasn’t the trailhead where I had parked. The trip was a one way hike, not a loop. So I walked out the small road to where it met US 97 in one mile, stuck out my thumb, and began the second stage of the journey.
Hitchhiking is a completely different experience from wilderness rambling. I’m at ease with solo travel in the middle of nowhere, depending only on myself. I know what I can do, what I can’t do, and I’m comfortable betting my life on it. But thumbing my way down the highway is the opposite. I barely factor into the equation. Instead I’m completely dependent on everybody else.
Before reaching the highway I had put away my trekking pole and taken off the rain gear that I had been forced to wear down the wet trail. This, I hoped, would make me look a bit more normal. Perhaps it worked. I only had my thumb out for 10 minutes before a middle aged couple pulled over and asked me where I was headed. I told them Leavenworth, which is about 8 miles north on US 97 and then 10 or 12 miles west on US 2. They were going to head east on US 2, but offered to take me up to the junction.
They were Seattleites, heading to the east side to escape the rain for a few days. Both were interested in my travels, so I told them a few tales. When we reached US 2 the driver said he’d head into Leavenworth and drop me off wherever I wanted. Great! That was the bulk of the trip over with. Initially I hadn’t been sure how long it would take me to get back into Leavenworth. I planned for an extra day or two in case I needed to stealth camp along the highway, but now it looked like I would reach my own car that same day.
I was dropped off at the western edge of town. Now I had to get 8 miles down Icicle Creek Road. The first mile or two consisted of suburbs, but after that it was only a small country road. I somewhat doubted my chances of getting a ride all the way.
The second ride took longer. This time a whole 15 minutes before a pickup truck stopped. The driver was an old man, probably in his eighties, blasting music from a country music station. After I hopped in I discovered that the seat belt on the passenger side was broken. Whoops.
I had to strain to make out anything he said. He offered me a bottle of whiskey, saying it would keep me warm, but I told him it wasn’t that cold yet. Then he said something about getting me a woman, ogling at a jogger on the side of the road.
Eventually I made out that he lived just a couple miles down the road. He’d just gone into town for the whiskey and was on his way back. But he too decided to go out of his way to drop me off 8 miles down the road. I decided I must be a pretty ok guy.
I had first stuck my thumb out on US 97 two hours ago and was almost at my destination. This last bit was a small, dirt Forest Service road. I doubted if I’d see any cars going in the right direction, but it was only 3 miles and a few thousand feet to the car. I didn’t mind the walk.
A little over halfway I passed a group of guys chopping wood at the side of the road. “That looks like a lot of work,” I said. “I think I’ll just keep on walking.” One of them joked that he’d give me a ride back down if I wanted to help, but I told him my car was at the top of the hill. “I need a ride in the other direction!” The man replied that they were almost done with the wood and he’d give me a ride up there anyway, but I only had another mile to go and was enjoying the walk. I declined.
Three hours and about 30 miles after leaving the wilderness I was back at the car.
Notes
↵ Regardless of the benefits of permits, or the political ideas behind them, I find them to be completely impractical for wilderness areas. Controlling people in cars is easy, since, for the most part, they're limited to roads. But controlling people on foot? Not so much. (Hence why I equate mobility with freedom.) You can place a permit station at the trailheads closest to the area you want to control. That covers people driving to it. And how about those of us who walk in? Now you need permit stations on every trail leading into the area. But wait! Why assume that foot travelers are limited to trail? To effectively control access, you either need to have permit stations dotted across the entire border every quarter mile or so, or you need to surround the area with a large, unscalable wall or fence with only a select few entrances. Impractical, you say? I agree. (Incidentally, the same thing goes for national borders. They seem to operate on the premise that everybody trying to cross will do so on the roads that you ask them to cross on. As if people are sealed in their tin cans and can't, you know, walk.
↵ Of course there were no signs up here, warning travelers heading in the other direction that they were now entering an area were they were not allowed to lay their head. Once again: the impracticality of wilderness permits.
"Anyhow, let's get down to it, Hig," Mack went on. "I don't understand. What is it that really tempts you? What's the trouble with there?"
"There? Well, I figure this way. There is there all right, until a man gets to it. Then it ain't there. It's here, and here is what you wanted to get away from in the first place."
Mack shook his head. "The only way out that I can see for you is for you to shoot yourself."
"Not as long as there's trails I never took. Not while there be yonders and yonders."
- A.B. Guthrie, Jr., Fair Land, Fair Land
Cleaning my pot in the wilderness has always proved a challenge. I’m not hugely concerned with completely sanitizing it – that would not be realistic – but I do like to get all the food remnants out of the pot after every meal. A few extra ants in my ramen? No problem. Fungi and bacteria in the oatmeal? I’d rather avoid that.
Getting every last bit of food out of the pot with a spork doesn’t work. If I’m in a desert or on the beach, sand can be used to scrub the pot. The Equisetum family (Horsetails) are also good scrapers, due to their high silica content. But neither sand nor Horsetails are available frequently enough on my trips to make them realistic solutions. As well, cleaning the pot with those means that I’m dumping food remnants onto the ground, rather than into my belly. If I’ve humped it, I’d rather eat it.
I used to carry a piece of a green scouring pad. Those work great when the sun is available to dry them out after use. Here in Cascadia that means they work about 3 months of the year. The other 9 months – especially in winter – it proves a challenge and a hassle to dry them fully. I don’t like storing the pad with any moisture in it. Doing so would create the perfect incubator for bacteria.
Clean pot with spatula, licking food remnants off of spatula as you go
Boil water in pot
Pour heated water from pot into bottle for tea
The pot is cleaned with the spatula. Afterward, boiling water in the pot helps to kill any nasties that might be hanging about.
I discovered this idea on Crow’s blog about a year ago. At first I took a small kitchen spatula and cut the handle off. It worked, but there was about 2” of the plastic handle inside of the head that couldn’t be removed, which translated to dead weight. Later I discovered that people actually sell spatulas with removable heads (to make them dishwasher safe, I think). I bought one of those online, but when it arrived the head was a little too small for my tastes. (In the wilderness I always treat my hands as dirty. If I’m licking the spatula, I want it to be big enough where I can hold it with my fingers near the top and lick near the bottom. I do not want to lick where my fingers are.)
About a month after I had started to use the sawed-off spatula, I discovered that GSI made exactly what I wanted: a compact scraper.
At 16 grams (0.5 oz), it’s not the lightest possible solution. But it’s lighter than my first attempt, and the perfect size for my needs. The blue part is a soft rubber, like a normal spatula head. The white bit is hard plastic, meant for scraping burnt foods. (Burning your meal, I think, is a mistake you only make once. So far I’ve not actually used the white part to scrape the pot. It’s where I keep my fingers.)
My method of using the scraper differs slightly from Crow’s. I eat the meal with my spork, attempting to get as much of the food as possible. Afterward, there will still be plenty left in the pot.
When the spork is of no more use, I pour some water into the pot, swish it around, and drink. (A habit I picked up in southern Idaho’s desert. Water was scarce, so if you used it to clean your pot, you still had to drink it afterward. The taste is not always entirely pleasant, but you get used to it, and are wasting no resource.) This takes care of some of the left over food, but with meals like oatmeal, there’s still gunk left over.
After this precursory cleaning, I go to work with the scraper: scraping the pot clean, licking clean the spatula as I go (leave no calorie behind, I say). The pot will then be visibly clean.
At this point, I may or may not boil water in the pot. If I have brought enough fuel for an after-meal drink, I’ll boil the water in the pot to finish cleaning it, then dump the water into an old Vitamin Water bottle for a drink. Most of the time I don’t plan on warm drinks. Either way, at the end of the process the pot will still have a little moisture in it. If I’ve just had dinner, the cleaning is complete: I’ll leave the pot till breakfast. On the other hand, if I’m moving again after the meal, I don’t like to pack my pot away wet, so I’ll wipe it down with a small piece of an absorbent camp towel.
The GSI Compact Scraper is now a permanent part of my kitchen. Since I started using it at the end of last year, it’s also the piece of gear that people request to borrow the most! (It goes in my mouth. I never lend it.) I’d recommend any wilderness traveler pick up some sort of cheap spatula or scraper.
I carried the Spec-Ops THE Wallet Jr for four or five years. It’s certainly well made and, other than the tags I cut off of it, looks the same as the day I bought it. But it’s bulky, heavy, and carries more than I need. Primarily because of the bulk, I went looking for a slimmer wallet, settling on the Eagle Creek Slim Wallet (which now seems to be a discontinued product). In another couple months it will have seen a year of use.
The Slim Wallet is made out of 420D Double Box HT nylon, which so far seems tough enough to survive my pocket: there is, as of yet, no noticeable damage to the wallet. It’s simple interior consists of a billfold, clear pastic ID window, and three card slots. There are actually three additional slots inside the wallet. I don’t think these were intended as such (instead they seem to just be byproducts of how the wallet was sewn), but they work to carry additional cards or hide small items.
As the name implies, the wallet is incredibly thin. Perhaps not as thin as an ALL-ETT wallet (I considered one of those, but wasn’t convinced as to the durability), but a huge improvement over the Spec-Ops wallet. This took some getting used to. After years of carrying a bulky wallet, I was accustomed to feeling the wallet in my pocket, which provides some sense of security. The Slim Wallet is slim enough so that you don’t always notice that it’s there.
My only complaint about the wallet is that the billfold is just as wide as a Federal Reserve Note, which makes it somewhat tricky to get the bills in there. If the wallet was half an inch or so wider, bills could be more easily slid inside.
I carry a few items in the wallet in addition to the normal cash, few cards, and ID.
There is a small repair kit, which consists of a #17 sailmaker’s needle, a #5 crewel needle, kevlar thread, a small safety pin, and a very small misch-metal ferro rod.
In addition to the repair kit are two AquaMira water purification tabs, two emergency $20 bills (to be used only if I’m lying half dead in a ditch), and a small piece of Rite-in-the-Rain paper with my GPGkey fingerprint. (If this sounds familiar, it’s because I keep almost identical items in my hat.)
All of these items tuck nicely inside the wallet’s hidden slots and add no noticeable weight or bulk.
For more ideas about urban wallet survival kits, check out TEOTWAWKI blog.
I’ve had a few requests to do a gear list for some of my recent trips. Since it’s been over a year since the last one, I thought I would acquiesce. What follows is the list from my recent journey to the Goat Rocks. Though that was a short trip, my gear has varied very little on any trip this year. I’ll take warmer clothing earlier (and later) in the year, and of course the amount of food varies based on the length of the trip, but most everything else remains static. This is quite the change from even just a year ago, where it seems like my gear would change drastically from trip to trip! Perhaps I know what I’m doing a little better now.
Some of the gear is light, some of it isn’t. Regular readers know that I always struggle to find a balance between lightweight, functionality, and durability. Certain items that I carry – like, say, the saw – are not likely to be found in the pack of an average backpacker, but are suited to my method of travel. In all, my base weight for this trip was right at 20lbs. I’m not too ashamed of that. In fact, considering that my pack alone weighs 6lbs when empty, that base weight is pretty darn good.
If you have any questions or comments about the items, feel free to get in touch.
I’ve never found any appeal in general social networking sites like MySpace or Facebook. They seem pointless. Sites that primarily serve some actual function and secondarily offer social networking features make more sense to me – something like Flickr: a photo hosting site that happens to offer social networking features. And now I’ve signed up for LibraryThing: a book catalog service that happens to have some social networking.
A friend recently told me about LibraryThing. It appealed to me as a way to keep track of all my books, and I thought it might be interesting to see who else owned copies of some of the more obscure books in my collection. I intend only to add books that I actually own to LibraryThing – not all the books I’ve read, which would take far too long. This makes LibraryThing’s recommendation service rather irrelevant for me, since most of the books it currently recommends are those that I have read, but do not own.
It appears that I currently own 160 books. Over the past year I’ve been heavily pruning my library, getting rid of a great many books. The remainder is probably one quarter the size of what it used to be. It is made up of books that I like and reread frequently, or that I find significant, or that serve as reference material. I’ve tried to do away with all the books I owned that I didn’t think I’d ever read again (no matter how much I like them). Now that I have an accurate count of my books, I think I’ll continue pruning till I get the collection down to 100 (quite a ways away from the cult of less or 100 things challenge, but I’m getting there.) It promises to be difficult!
It used to be that I didn’t have a bookshelf. All my books were just in stacks on the floor. I still don’t have a bookshelf, but a few years ago I came up with a solution while reading The Dharma Bums. Japhy Ryder – the character based on Gary Snyder – is described as owning little other than mountaineering equipment and books. The books he stores in crates. I thought it was a great idea, and promptly went out to acquire a collection of milk crates for my own. The crates can be stacked against a wall to function as a bookshelf and, when moving, all the books are already boxed and ready for transport! Multifunction.
About a mile from there, way down Milvia and then upslope toward the campus of the university of California, behind another big old house on a quiet street (Hillegass), Japhy lived in his own shack which was infinitely smaller than ours, about twelve by twelve, with nothing in it but typical Japhy appurtenances that showed his belief in the simple monastic life – no chairs at all, not even one sentimental rocking chair, but just straw mats. In the corner was his famous rucksack with cleaned-up pots and pants all fitting into one another in a compact unit and all tied and put away inside a knotted-up blue bandana… He had a slew of orange crates all filled with beautiful scholarly books, some of them in Oriental languages, all the great sutras, comments on sutras, the complete works of D.T. Suzuki and a fine quadruple-volume edition of Japanese haikus. He also had an immense collection of valuable general poetry. In fact if a thief should have broken in there the only things of real value were the books. Japhy’s clothes were all old hand-me-downs bought secondhand with a bemused and happy expression in Goodwill and Salvation Army stores: wool socks darned, colored undershirts, jeans, workshirts, moccasin shoes, and a few turtleneck sweaters that he wore one on top the other in the cold mountain nights of the High Sierras in California and the High Cascades of Washington and Oregon on the long incredible jaunts that sometimes lasted weeks and weeks with just a few pounds of dried food in his pack.
The Goat Rocks are an alpine wonderland situated between Mount Adams and Mount Rainier. The result of volcanic explosions and glacial carving, the area is high and rugged; the way mountains are supposed to be.
My entry into the area was via the Packwood Lake Trailhead. It’s a popular trailhead, leading to the equally popular day-hiking destination of Packwood Lake. The hike is about 4.5 miles to the lake along flat and well maintained trail.
At over 1.5 miles long, the lake itself is fairly large. Near the head of the lake are three different structures: a guard station (guarding what from what, I wonder?), an old ranger station, and, down the drainage a way, a dam for generating electricity. The lake itself is not in the wilderness area, but surrounded by it.
I stopped at Packwood Lake to munch on a bit of trail mix, then donned my pack and began the climb along the northern ridge. My destination for the day was Lost Lake, another 3.5 miles from Packwood. It’s a steep walk, gaining about 2,000 feet in 2 miles. Near the top the trail breaks out of the trees into a pleasant meadow.
I hadn’t eaten much yet during the day, so I stopped in the meadow for a late lunch.
I arrived at Lost Lake near 7 PM. There was one small group with horses near the eastern end of the lake. At the northwest shore I found a nice and secluded spot. I could still hear the horses whinnying occasionally, so I figured that they would act as my bear detection system for the night.
After pitching the tarp I gathered a bit of wood for the fire, cooked dinner, and settled in to watch the sunset.
It was a full moon and another clear night. My headlamp wasn’t necessary to find the bushes when I got up around 2 AM to make water. Before going back to bed, I wandered around a bit, playing in the moon shadows and watching the reflections on the lake.
There was no rush the following morning. I took my time enjoying the oats and watching the sunrise. When I decided to go, it took only a few minutes to break camp.
The plan for the day was to walk along Coyote Ridge to Packwood Saddle, then up to Elk Pass where I would get onto the PCT and head south aways. The trail along Coyote Ridge went through trees, and sometimes across steep, narrow and rocky ridges. Good mountain trail.
It occasionally offered views to the north, south and west.
The day had dawned clear, but clouds were slowly rolling in. By the time I got to the exposed ridge at the southern end of Coyote Ridge, the sky had filled up and strong winds were blowing in from the west. I’d debated packing it beforehand, but now I was glad to have a wind shirt with me.
From this part of the trail I could look further south to Egg Butte, Old Snowy Mountain, and Johnson Peak. This is where the trail would lead me after climbing up to Elk Pass. But the tops were all in clouds. I could tell there would be no visibility up there. Near Old Snowy Mountain I would have to traverse the tops of two glaciers, and the trail often went along steep ledges. I would have preferred the ability to see where I was going.
At Packwood Saddle I stopped for a lunch break and to ponder the situation. I waited for near an hour, but the clouds were only getting thicker. The decision was made that it wouldn’t be safe for me to continue to get higher. Instead, I would cut over to the Upper Lake Creek Trail and head back down to Packwood Lake.
From the saddle the trail descends steeply along a forested ridge before reaching the Upper Lake Creek at the bottom. The creek itself is a small, meandering affair that drains glaciers in the high country. I can’t imagine that it ever gets enough water to fill the entire gravel bar – if it did, it would be quite the torrent. I think it’s more likely that the wide area was caused largely by avalanches.
The trail washed out about halfway down the creek, forcing me to balance over a few thin, slippery logs to the gravel on the other side of the water. From the gravel I turned around to look back up the drainage. The clouds had indeed come in lower and thicker. I could no longer see even the saddle I had descended from an hour earlier.
It was near 5 PM when I arrived at the southeast head of Packwood Lake. There was a spot along the shore that looked like a good camp, so I dropped my pack and gathered wood for a fire.
The wind had followed me down. It blew strong gusts across the water, causing white caps and blowing my fire all over the place. I kept it small and low so as to not start any unwanted blazes. Once or twice the sun peaked out, but clouds dominated the sky.
Sitting around in the wind for a few hours takes a mental toll. I was glad to retreat to the shelter of the tarp just after the sun went down. When pitched properly, I sometimes think it would take a hurricane to blow that thing away.
The wind blew the rest of the night, but didn’t bother me. I was woken once before dawn by an owl who saw fit to hoot away in a tree above my camp.
The wind abated in the morning. The clouds remained. I breakfasted, began to pack, then thought better of it and instead warmed up water for hot chocolate. Finally I broke camp and got back on the trail at 10:30 AM.
I had thought there was no one else at the lake, but as I walked along the shore I spotted a tarp pitched on a point along the northeastern edge. For some reason, tarp campers seem rare in these mountains, so I thought to stop by and congratulate the owner on not having a tent.
The occupant was one solitary man, cooking chili over the fire in a blackened old pot. We exchanged greetings and the necessary remarks about where we had been and where we were going. It turns out he had been out for a bit.
He was an older guy, in his early fifties. He’d spent a few years in the Marines, and camped at a state park now and again (“that’s not real camping,” he admitted), but had never been in real wilderness or backpacked before. In June he decided to load up a rucksack and head out into the desert around Yakima for a week long trip. That was too hot, so he walked into the mountains. He’s now finishing up his third month.
We chatted, about wilderness, long term mountain living, and the silly world below. Over the course of the summer he’s been all over the Cascades in the southern half of the state. His routine was to walk into a town, quickly load up on as much food as he could carry, and then retreat back into the mountains. He doesn’t like to spend more than a couple nights in the same spot, and never likes to walk the same trail twice. Since he had no experience backpacking before this summer, all of his gear was spartan – things found at campsites, military surplus, and a few items from general camping stores. He didn’t like to carry anything that ran out or could become dead weight: no stove, because he didn’t want to mess with fuel. Other than the clothes on his back, he had one tarp to sleep under, one to sleep on, an old sleeping bag, some rain gear, one pot, one pan, a grill, knife, a pocket fishing kit (he wished he had a pole), a pair of sandals, ripped out pages of the DeLorme Atlas for Washington, a couple Klean Kanteens and a scavenged plastic water bottle. (He used to have a cell phone, but lost that when he fell into a river near the beginning of his trip. Figured the battery was almost dead anyway. It was just useless weight.) His gear took up less than a quarter of the volume of his large pack, leaving the rest to store food in.
When I first asked him how much longer he thought he might stay out, he said another month or so. But after we talked for a while, he looked at me, smiled, and said “Actually, I was thinking of trying to spend a year.” He’d had enough close encounters with deer and elk that he figured with a rifle he could easily take care of the food problem. I showed him on his maps where I knew there were old cabins that could serve as a shelter. The cabin at Eagle Lake, with its wood stove, appealed to him.
We talked for a few hours. I think he was glad to find an eager listener. Most of the hikers he ran into thought he was crazy and wouldn’t stick around him. He’d been on the PCT some, but couldn’t talk to thru-hikers because they wouldn’t slow down and “didn’t carry nothing.” Resupplying every 5 days wasn’t his style. He liked to get a couple weeks worth of food in his pack and wander aimlessly. If he found a good view, he’d stop and sit for a while. He wasn’t walking to get anywhere.
"Summers didn't guess his heart was as troubled as some. There wasn't any bur under his tail. He was a mountain man, or he had been, and traveled with hunters who never gave thought to soil and timber and tricks to pile up money but went along day by day taking what came, each morning being good in itself, and tomorrow was time enough to think about tomorrow. That was how Summers felt yet, but the movers were different. They traveled to get some place, as they lived life. Chances were they couldn't enjoy a woman and a bed for thinking what they had to do next... They were family men, settled with their women and easy with their children, the hard edges worn smooth, the wildness in them broke to harness. They looked ahead to farms and schools and government, to an ordered round of living."
- A.B. Guthrie, Jr., The Way West
I recommended a few authors that I thought would be up his alley (Abbey and Proenneke, especially). He had been trying to learn a few wild plants that could be useful foods and medicines. I pointed out a couple more to him.
It was near 2:30 PM when I left him. His plan is to head north and check out the country up this way, so we’ll probably run into each other again.
As for myself, I had another 5 miles back to the trailhead and the world below.
It’s been about a year since the last one, so today I did another dump of what is currently in my pockets and bag. Everything that I am carrying today is representative of what I carry most every day. Much of it is the same as last year.
Some things occasionally change: I frequently switch between the Emerson Mini-Commander and the Izula (I probably carry the Izula more frequently than the Emerson). If I need more stuff, I might change the bag to my TAD Gear FAST Pack EDC or the Kifaru E&E.
As usual, you can visit the Flickr photo pages for identification of every item.
Dick Summers thought lazily that these were different from mountain men. These couldn't enjoy life as it rolled by; they wanted to make something out of it, as if they could take it and shape it to their way if only they worked and figured hard enough. They didn't talk beaver and whiskey and squaws or let themselves soak in the weather; they talked crops and water power and business and maybe didn't even notice the sun or the pale green of new leaves except as something along the way to whatever it was they wanted to be and to have. Later they might look back, some of them might, and wonder how it happened that things had slid by them. They would remember, maybe, a morning and the camp smoke rising and the sun rolling up in the early mist and the air sharp and heady as a drink, and they would hanker back for the day and wish they had got the good out of it. But, hell, a man looking back felt the same, regardless. There wasn't any way to whip time.
- A.B. Guthrie, Jr., The Way West
Having been back from the Glacier Peak Wilderness for near a week, I felt a need to return to the mountains. The maps suggested a few possibilities, but one didn’t commend itself to me over the others. I thought to contact Avagdu, who was still in Washington, to see if he had time for another walk before returning to California. He did, so I gave him the options I had come up with and asked what he would prefer.
We settled on heading into the Wild Sky Wilderness. I would lead him back to Eagle Lake, where we would spend the first night. The next day we would climb the ridge of Townsend Mountain, descend down the opposite side, and make our way to Sunset Lake for our second night. From there, we would hike out on the third day.
When we arrived at the trailhead in the early afternoon it was hot – somewhere in the upper 80 degrees Fahrenheit. Too hot for hauling around a pack, but luckily the short, flat hike to the first destination of Barclay Lake was mostly in the shade. From there we would head up, and I hoped the higher elevations would be cooler.
I’ve traveled to Eagle Lake via Barclay Lake a half dozen or so times, but the sight of the steep north face of Mount Baring jutting up from the lake basin never fails to impress. On the drive over I had told Avagdu that only yesterday a base-jumper had died leaping off Baring when her parachute failed to open. The death is tragic, but still, I felt, like Ed, the need to congratulate her taste.
Looking out on this panorama of light, space, rock and silence I am inclined to congratulate the dead man on his choice of jumping-off place; he had good taste. He had good luck -- I envy him the manner of his going: to die alone, on rock under sun at the brink of the unknown, like a wolf, like a great bird, seems to me very good fortune indeed. To die in the open, under the sky, far from the insolent interference of leech and priest, before this desert vastness opening like a window onto the eternity -- that surely was an overwhelming stroke of rare good luck.
- Edward Abbey, Desert Solitaire
At Barclay Lake, the official trail ends. We turned north and headed up the steep slope to Stone Lake, which sits in a small saddle at the top of the ridge. The first half of the route is through forest. It’s a popular route, so a trail made by the many feet of travelers is vaguely visible. The way is also marked by occasional flagging, which I always have a difficult time spotting on the way up. (On the way down, sticking to the route is easy.)
After breaking out of the trees we entered the boulder field. Here the route is marked by cairns, but at this point the way is obvious enough that the markers aren’t really needed – at least, the way is obvious enough to me after having ascended and descended the field a few times before!
At Stone Lake we stopped for a breather. We had gained enough elevation that the temperature was no longer uncomfortably hot, but still pleasant. While waiting for Avagdu to reach the lake, I ate an apple that I had been carrying.
From Stone Lake it was only a short 15 minute walk through Paradise Meadow to our day’s destination of Eagle Lake. I warned Avagdu that the meadow would be extremely muddy, but in fact it was surprisingly dry. I had been in the area earlier in the year and later in the year, but never had I visited in late July, so clearly my predictions were off.
I enjoyed the pleasant walk through green grass, trying to avoid the occasional mud patch, and jumping over the creek as it meandered through the meadow. We spotted a few frogs jumping around, and one or two small trout in the creek.
As we approached Eagle Lake I saw a tent in the clearing on the edge of the lake at the south side of the creek. There was no one there, so we ventured over to the cabin to see if anyone was about. At the cabin was a family of three fishing the lake. They had spent the previous night at the lake and were planning on one more at the same site before heading out in the morrow. There had been no luck fishing, which surprised me as you usually can barely throw a rock into the lake without hitting a trout. We talked about Townsend and what lay on the other side before I suggested Avagdu take a look inside the cabin.
It’s a neat place. I don’t enjoy spending the night inside: it’s small and dark and smelly and the mice always want to share the bed – much better to spend the night under the stars – but I enjoy visiting. The cabin looked to be in good repair and was cleaner than the last time I visited (in early February of this year). One new addition that caught my eye was a small inner tube tucked away in the corner. I had visions of floating about the lake, followed by visions of being extremely cold. But the latter was not enough to deter me. I knew that I could not echo the timeless lament of Shaquille O’Neal (particularly since I had used that quote as my email signature for the better part of a year and even had the piece of zen wisdom inscribed on a bright yellow pin).
We left the cabin to go make camp. My preferred site was on the opposite side of the creek that drains the lake. There was one clear, flat spot that I usually used for my tarp, but no other spot that was ideal for Avagdu. Since I intended to pitch the tarp in an elevated manner, we decided that there would be plenty of room for both of us to sleep below it. The chance of rain that night was slight, anyways.
Having made camp and filled up on water, I returned to the cabin to grab the inner tube. It was about 5 PM. I figured that I had enough time to kick around the lake for a bit and then dry off before the sun was lost behind Merchant Peak.
The tube, it turned out, was a little small. It floated, but after putting my weight on it, it sunk in about halfway. With my butt hanging down the middle, I was submerged up to my navel. Still, the water was actually pleasant after getting over the initial shock – much warmer than some of the icy cold rivers and alpine lakes I’ve jumped into in the past. I kicked around for a bit and thought to use the opportunity to try out a small pocket fishing kit I had put together a few months ago, but I was unable to efficiently cast with it. After seeing that I hadn’t died of shock from the water, Avagdu decided to join me. He slowly made his way in until the water was up to his neck. I suggested that, since my small kit had failed, he could swim down the shore to the cabin and pick up the spinning rod that was hung on one of the rafters. He had had the same thought.
As Avagdu swam, I slowly attempted to follow, but it was difficult to propel the tube in the direction I wanted to go. After he got the rod, Avagdu walked back down along some of the logs that cluttered the shore and we managed to meet about halfway. I had him hold out the tip of the rod to me as I tied on a rooster tail lure that I had spotted in the water near where I had gotten on the tube. “Okay, you’re fishing!” I announced.
We figured out how the spin-cast reel worked and, after only a couple tips, Avagdu was casting out to the lake. I gave it a couple shots as well, but neither of us had any bites.
Soon the sun fell beneath the peak of Merchant. Though there were still many hours till dark, neither of us wished to be standing around wet without the direct warmth of the sun. We walked back to camp.
I had gotten in the lake in my underwear and pants. Dry underwear and merino long johns awaited me in my pack, so I wasn’t concerned about that. The pants were quick drying, but in the meantime I didn’t want to put them on and wet out my dry underwear. So I was walking around camp in my long johns, which I was concerned about: being made of a lightweight merino wool, they are somewhat delicate. I didn’t want to sit down directly on the ground or on a log without some other layer of protection, out of fear of snagging them. Before leaving for the trip I had taken my normal rain pants out of the pack to save weight, but had tossed in a garbage bag rain skirt on the off-chance that rain did occur. So, as a bit of protection until my pants dried, I donned the stylish garbage bag skirt.
We both wanted a fire to dry our things. Easy to gather wood was scarce in the area, but soon enough we had a merry blaze.
As the sun set the bugs came out in force. They bothered me a bit, but were bearable. Avagdu, however, they loved. He couldn’t go more than a minute without waving his hands around and slapping himself. I had packed along a bottle of a natural insect repellent that I was skeptical of, but wished to test further. After trying it out, Avagdu concurred with my conclusion that the repellent worked great for ten or fifteen minutes, but then failed. Still, we had the smoke of the fire to protect us.
The following day we rose around 7 AM, breakfasted, and broke camp. Shouldering our packs, we headed for the ridge of Townsend Mountain that lay along the north side of the lake.
The first part of the route was through thick bush, but this quickly led to an easy climb up a small talus field. As with the previous day’s walk, there was no official trail, but people did sometimes come this way and cairns occasionally suggested a route.
After the talus it was back into the bush. I enjoy off-trail travel, but the trouble is that when making my own way, I have a tendency to always go straight up and make nary a switchback. A defect in my character, perhaps. No matter. Switchbacks are luxuries, not necessities.
Breaking through the bush we entered an open area of rock. This was a little over halfway up the mountain. We stopped for a breather and to enjoy the view.
Observing the face of the mountain from below I had pointed out this large face of rock to Avagdu, saying “See that rock? We don’t want to go up it, so we’ll just hug the edge and make our way around. We’ll come above it and then have only a short skip to the top.” A good plan. But near the rock on which we sat I spotted a cairn, and another beyond it. This seemed to suggest that there was a safe route across the field. Okay, I said to myself. I had never been up here before, so thought to trust to the judgment of my predecessors on the mountain. We donned our packs, and I led Avagdu off in the direction of the markers.
The route started out easy, but progressively got steeper. I couldn’t spot any more cairns, so I observed the rock and picked my own route. We moved from scrambling to what was basically rock climbing – but with full packs, boots, and no ropes or other safety equipment. This was my idea of fun. I was quite enjoying myself. Avagdu was making his way, but struggling a bit and falling behind. As I was waiting on a small ledge for him, he called out that he would need some help. I stashed my pack in a crack and, after making sure that it was secure, went back down to him. It was his pack that was slowing him down, so I threw it on my back, climbed back up, and stashed it with my own. Then I guided him to the ledge where I waited.
Directly above us the way looked more technical. We would have had more difficulty climbing that with our packs. But off to one side I spotted another cairn on an angle of the slope. Studying the rock, I saw what would make a decent enough path for us to use to traverse over to the cairn. Due to the angle I couldn’t see what lay on the other side, but I assumed that since there was a marker it would lead us back onto a more manageable route. I pointed out the cairn to Avagdu and the path that I meant to follow. He wisely queried how we would get from where we were to the ledge that started the path. I replied “I don’t know. Just follow me.” I was making this up as I went!
Getting to the path wouldn’t have been much trouble, but for the water. Most of the rock between it and where we were was wet from a trickle that came down from the top of the mountain (from snow melt I thought, since the map showed no other water source up there). It made the rock slick and extremely difficult to get any purchase on. I managed to traverse a few feet laterally from where Avagdu stood till I got myself jammed in a crack. I hoped to be able to make my way down the crack to where the path started below. But there was water in there as well and I couldn’t get enough holds. About halfway down I decided that this wasn’t going to work. There was a slope to the crack and I had been making my way down it facing out. With my pack on again, I couldn’t turn around and face into the mountain to climb back up. I tried inching my way back up while still facing out, but that didn’t work either: I had no holds for my feet and I couldn’t spot where I should be placing my hands. There was no going anywhere with the pack on.
I pushed out on either side of the crack with both my legs so that I could temporarily take my hands off the rock and slip out of my pack straps. Then I slowly moved my body forward and down to see if the pack was jammed in enough to stay where it was. I had to move only a couple inches before realizing that the pack was coming too. That wouldn’t work. I yelled back up to where Avagdu was watching and asked if he had any paracord. He did, so I told him to throw me one end and keep the other. He got it out and untangled it as I thought to myself “Does he have to take forever with this?” I’m sure it was only 15 seconds or so, but my feet had slipped, and I was holding up both my body and my pack with only my locked out arms.
Eventually he tossed the end to me and I was able to get enough purchase with my feet again to temporarily remove my hands and tie the cord in a quick knot around one of the shoulder straps of my pack. Having done this, I instructed Avagdu to slowly start to pull in the cord until it was taut. “Okay,” I said. “You have my pack.” I moved forward away from the pack, but found that even without the extra weight on my back, I wasn’t going to be able to make it along this route to where the path started. I was able to get out of the crack and onto the rock face on the opposite side from Avagdu and scrambled back up till I was level with him. I asked him to hold onto the cord for a bit longer until I could figure out what to do, and then went scrambling around, trying to find a route. There wasn’t much of promise. I scrambled up a little higher along a slick face till I couldn’t go up anymore, and then found that I couldn’t get back down. “Whoops,” I thought to myself and announced out loud that I was stuck (which probably didn’t do much good for Avagdu’s morale). But I found that by laying down on the rock so that my whole body was in contact I was able to generate enough friction to slowly slide and inchworm my way back down to a more secure area.
Avagdu suggested that we turn around. The way showed no signs of easing up and since I was having such difficulty I knew that Avagdu would probably not enjoy this next bit, even if he could do it. So I agreed. I was disappointed that we wouldn’t make the top and see what was on the other side, but it was my fault for trying to go up along these rocks rather than trusting my original plan of hugging the edge and going around them.
But there was still that cairn that I had spotted over in the distance. The way we took up was certainly not the intended trail and would be no easier going down. If that cairn marked the trail, it would probably offer a better path back down to the lake. I stilled wanted to reach it.
I thought to try the crack again. I made my way back down till I was above the pack and, making sure that Avagdu still had a good hold on the cord, gave it a slight kick till it swung out of the way. With the crack cleared, I eventually made it down to the path that I had been aiming for. I walked along it a ways toward the cairn, but I didn’t like what I saw between us and it. And I didn’t like what I couldn’t see, on the other side of the angle. I decided to take the known challenge offered by the route that we had come up, rather than risk the unknown.
Back at the bottom of the crack I had come down on, I found that I couldn’t make it back up to where Avagdu sat. I spotted what looked like a doable route below me and announced to Avagdu that I would make my way down a bit, traverse to the other side, and then climb back up to where he was. He assented, though I’m sure he was tired of holding up my pack by a single piece of paracord at this point. He probably was thinking that I would fall off and die and there would be no one to get him off the mountain.
I have thought briefly about getting caught in rock slides or falling from a rock face. If that happened, I would probably perish on the mountain in much the same way many of the big animals do. I would be long gone before anyone found me. My only wish would be that folks wouldn't spend a lot of time searching. When the time comes for man to look his Maker in the eye, where better could the meeting be held than in the wilderness?
- Richard Proenneke, One Man's Wilderness
Getting down and over was easy. The way back up proved more challenging. There were handholds, but with my boots on, I couldn’t get my toes into anyplace where they needed to be. So I basically pulled myself back up the mountain with just my arms.
I had almost reached Avagdu, but then found that, on this side, I could actually get to where my pack was hanging and take that off his hands. So I headed over there, got a hold on it, and had him drop the cord. Then I traversed off in the other direction a bit till I found a spot where I could securely stash the pack. I untied the paracord from it, wrapped it around my hand, and went back to the spot where the pack had previously been dangling, right below Avagdu. Tossing one end of the cord back up, I instructed him to tie it onto his pack. He did so, and I said that he should then slowly lower the pack down to where I was. I would hold onto the end of the cord and he would lower from above, acting as a sort of pulley in the three-point system. He lowered it down till I could grab it. I put it on my back and had him drop the cord, then traversed back over to my pack and stashed his next to it.
Avagdu came over till he was directly above me and I guided him down to where I was. He wasn’t comfortable moving down the mountain with his pack on, so I donned my own and climbed down 30 feet or so till I found another spot where I could take it off and stash it. Then I had him slowly lower his own pack to me via the paracord. When I could grab it, he would drop the cord and I would stash his pack with mine and wait for him to make his way down.
We repeated this procedure a couple times till the slope of the rock eased up again and the going was simpler. I figured he could make it down easily enough with the pack on. I made my own way down to a sort of mini-cirque where I could stand comfortably and wait for him.
Avagdu made his way down, dragging his pack along side him. Above where I was standing he announced that he was going to drop his pack. I assumed he meant that he would hold on to one end of the cord that was still tied to the pack. I got out of the way and saw him toss down the pack without holding onto the cord. Turning around, I watched the pack tumble off the cliff behind me and vanish from sight.
Luckily Avagdu could watch it fall down the mountain from his higher vantage point. He saw it land in a finger of greenery that shot up into the rocks from the treeline below. It was a bit off from the path that I had intended to follow back down.
We went down a ways before I dropped my pack and said that I would go down into the bushes and retrieve his. I knew he was physically tired at this point and the fact that he had just thrown his pack off a mountain suggested that he was somewhat mentally exhausted. I didn’t think he needed to climb down, beat around the bushes for a bit, and then climb back up till where we could continue our planned descent.
The bushes were thick. I poked around a bit and, not finding anything, climbed back up till where I could see Avagdu. I yelled up to him, asking exactly where he saw the pack come in. He replied that he couldn’t be sure from the spot where he was. I silently thought to myself “Well you need to be fucking sure! I can’t scour this whole mountain for the pack that you threw off it.” But rather than voicing my thoughts, I turned around and dived into another spot in the bushes and small trees. Pushing my way through, I stumbled upon the pack. I looked it over briefly and nothing appeared to be broken, so I threw it on my back and began the hard climb back up to where Avagdu waited. “Don’t do that again,” I suggested as I returned his pack.
I knew that my internal frustration toward Avagdu was unjustified. I was supposed to be the experienced one who was leading this little venture. I could only blame myself for anything that occurred. It pointed at my own mental exhaustion. We both needed to sit down, hydrate, and eat something. In the distance below us I could spot the rock that we rested on as soon as we had broken out of the tree line on the way up. I took off for that.
From there it was only an hour’s easy climb back down to the lake, so I didn’t have any problem draining my last liter of water. After drinking, I threw down a Clif Bar. Feeling much better after that, I yelled out a bit of guidance to Avagdu, who was a little ways behind me but doing a good job of making his way down. As he approached, he teased me, saying my problem was that I confused backpacking with mountaineering. I smiled, but replied honestly that in my book they were the same thing. I couldn’t spot a difference. Later, I reminded him that before heading out I had told him that this would be an easy, mellow trip. “I’m a man of my word,” I said.
After Avagdu had drank and eaten something, I led the way back down. I broke off from the marked route after a few hundred feet, favoring what looked like a more direct path. It went through a bit thicker bush, but I still think it ended up being a quicker descent.
Since the family of three had gone, we decided to make camp in the larger clearing opposite the creek from where we had camped the previous night. I quickly threw up my tarp, filled up my water containers, gathered some firewood, and cooked an early dinner while Avagdu was still pitching his own tarp. It was about 5 PM. We were both glad to be back at the lake, and I had my mind set on that inner tube and fishing rod again. After Avagdu pitched his tarp, he helped to gather a bit more wood before filtering water for himself. I had finished my rice before he started to cook his own meal, but I waited around for a bit to get a little digestion happening before getting into the lake.
When I jumped on the tube, the cold water was invigorating and refreshing. I kicked around the lake a little bit while Avagdu ate his meal. Eventually I tired of that and thought I would see what I could do about getting some line wet.
On the second or third cast I noticed a small trout investigating my scavenged lure, but he wouldn’t bite. I tried to get the next cast in that general area and, by luck, succeeded. As soon as it hit, I felt the bite and started to reel it in. But the line snapped and the little guy made off with my hook. I have no idea what type of line was in the reel or what its age or condition was, but it also might have been the fault of my knot. I tried casting a few more times with a couple of the different hooks and lures that I had in my pocket kit, but had no luck. All the fish were jumping for the bugs on top of the water, but none but the one who had taken my lure seemed interested in anything under the surface. A fly rod would probably have been the weapon of choice.
Avagdu and I hung out on the logs on the shore of the lake until the sun dipped below Merchant Peak once more. As the sun left, the mosquitoes appeared. We decided to return to the camp and light up the fire to smoke all the bugs out.
On the way down the mountain, Avagdu had ripped out the stitching on one of the bottom compression straps on his pack. It was his first field repair, so I loaned him the kit from my hat to sew it up. I advised an X-ed box stitch. After preparing my second dinner, I looked back to his sewing and saw his creative interpretation of a box stitch. We both laughed as I pointed out what I had meant by a box stitch. His stitching looked plenty strong for the job, so it didn’t much matter. Embolden by his sewing success, Avagdu decided to use the Reflectix material I had given him to make his first pot cozy.
The rest of the evening was spent talking around the fire. There had been a few thick logs stacked next to the fire ring. After our fire had got good and hot I was able to arrange three of the thick logs into a tripod and had them burning strongly in a manner that probably would have heated us all night, had we wanted it. Around 11 PM we retired to our bags for sleep.
I awoke once at 2 AM to get up and pee. The fire was still burning brightly.
Next morning I slept in, awakening at 8 AM to find Avagdu already tending the fire and cooking breakfast. We had a slow morning, eating, talking, and packing. Late in the morning we left Eagle Lake and returned through Paradise Meadow to Stone Lake. Then, it was an easy hike back down to Barclay Lake.
It was the hottest day of the trip. When we reached Barclay Lake I took off my shirt and jumped in (much to the the chagrin of some of the family day hikers who were there, I think). I swam for about a minute before getting out and eating a little beef jerky followed by granola while drying off. After Avagdu had eaten something we hit the trail again for the final stretch back to the trailhead.
Avagdu had a bus to catch late that afternoon, so I set a 4 mph pace. We reached the trailhead in good time and, after refreshing ourselves, traded the safety of mountains for the hazards of urbanity.
We are vagabonds of a peculiar type. Our chief pleasure is in roving about the mountains. Each of us has a month's wages -- forty-five dollars -- and consequently we feel wealthy. Our lives are free from care, therefore we have but to enjoy ourselves.
- Pat Quayle, quoted in Gary Ferguson's Walking Down the Wild
I’m a big fan of fancy hats. I discovered the joy of a well-made and stylish hat a couple years ago with the Duluth Oil Cloth Packer Hat. After that hat died, I tried others. My current favorites are the Tilley T3 and the (locally made) Filson Tin Cloth Packer. But as great as those hats are, sometimes it’s nice to get back to basics.
If all you want to do is keep the sun off, it’s hard to beat the boonie hat. It’s lightweight, cheap, and compresses down to fit into a pocket.
Being cotton, I find these hats to be useless in the rain, but I do tend to have a hooded hard shell with me for that purpose.
This particular boonie hat happens to be MultiCam. I bought it back when MultiCam was new and I could fool myself into thinking that it was low-profile. “Hey, nobody actually issues MultiCam, so it’s not like this hat looks very military-like. If anything it makes me look like a harmless airsofter.” Something along those lines. Now that everybody and their grandma is issuing MultiCam, it’s maybe a little more military looking. I sewed a Rebel Alliance patch on the top to make me feel better about it (and because rebelling against empires is always the cool thing to do).
The other modification I made to this hat was to sew a littlevelcro on the pocket. After getting my Tilley hat, I became somewhat addicted to having a pocket in the top of my hat. Most boonie hats have them, but they’re just a slit, with no sort of closure. I don’t trust them to hold small items. Having added the velcro, I can feel sure that whatever I put in there won’t fall out.
What I keep in all my hats that have pockets in them is the same: in one ziploc bag, an emergency $20 bill (using this is to be avoided as much as possible). In another ziploc bag, I keep four AquaMira water purifying tabs and a repair kit.
This particular hat weighs 122 grams (4.3 oz) with added patch and velcro. Including the contents of the pocket, the total weight is 134 grams (4.7 oz). A nylon hat like a Tilley LT5B could save me an ounce, but for the money it’s hard to beat the boonie.
My favorite food to toss in the dehydrator are bananas. The sugars caramelize as the slices heat up. I’ll leave them in for 7-8 hours if I want them to dehydrate fully, so that the final product is like a chip. But my preference is to leave them in for only 6-7 hours, so that they’re still a bit chewy, like candy. Starburst doesn’t have anything on these!
On our recent trip, Kevin mentioned how much he liked the dehydrated strawberries that he recently had. I thought I’d give them a shot.
I cut them up in 1/4” slices, which is the same as I do for bananas, but they turned out too thin after coming out of the dehydrator. Mary Bell’s Complete Dehydrator Cookbook claims that strawberries are 90% water, whereas bananas are only 76%. So in retrospect it makes sense that the strawberry slices would shrink down a bit more.
No matter. They’re still tasty! But the bananas remain my favorite.
Indian hellebore is one of the most violently poisonous plants on the Northwest Coat, a fact recognized by all indigenous groups. This plant was, and still is, highly respected, for even to eat a small portion of it would result in loss of consciousness, followed by death. It is sometimes known as 'skookum' root, the Chinook jargon for 'strong, powerful.' This plant was an important and respected medicine, used by most northwest coast groups. The Tlingit used an Indian-hellebore medicine for colds. The Nisga'a used small quantities of the root for toothache. There is one report of a Haisla who was cured of tuberculosis by placing a lozenge of dried Indian-hellebore root under his tongue for a day. It is said that his face went numb, but he recovered. The Haida made a poultice for sprains, bruises, and rashes, and a medicine for colds. It was believed almost any disease could be cured with Indian hellebore. The Haida also treated kidney and bladder troubles and acute fevers with this plant. The Nuxalk made preparations for chronic coughs, gonorrhea, constipation, stomach pains, chest pains, heart trouble and for toothache or rotting teeth. The Kwakwak'wakw made medicinal preparations for constipation, internal back and chest pains, colds and to abort pregnancy. The Nuu-chah-nulth rubbed the mashed root on sores or rheumatic areas to stop pain, and as a general liniment. Among the Coast Salish this plant was utilized by the Quinalt, Squamish, Sechelt, Mainland Comox, Southern Vancouver Island Salish and other groups for similar cures.
Some species of this genus are powdered to form the garden insecticide 'hellebore.' People who drink water in which hellebore is growing have reported stomach cramps. Other symptoms of hellebore poisoning include frothing at the mouth, blurred vision, 'lockjaw,' vomiting and diarrhea.
- Jim Pojar, Plants of the Pacific Northwest Coast
This past week, Kevin arrived in Seattle for the last leg of his America trip. I couldn’t let him come all the way from Scotland without seeing a few mountains, so we had planned a four day trip into the Glacier Peak Wilderness. Avagdu‘s schedule had recently opened up, allowing him to come up from California to join us. I had planned a loop of about 47 miles around the ridges just southwest of Glacier Peak.
We arrived at the North Fork Sauk River trailhead late in the morning and, after quickly adjusting gear, hit the trail at 11:30 AM.
The trail paralleled the north fork of the Sauk and led into forests of old-growth cedar, with forest floor covered in Skunk Cabbage and Devil’s Club.
We quickly reached the junction with the Pilot Ridge trail, which heads south, cuts over the river, and begins to climb the ridge. Originally I had thought we would have to ford the river at this point, but there were a few logs laying across that allowed us to easily avoid getting wet.
The trail up to Pilot Ridge gains about 3,000 feet in 2 miles. That qualifies as steep by most definitions. It’s times like that when all the physical training (particularly on Mailbox Peak) really pays off. I find that the easiest way to tackle a steep climb like that is to set a slow pace and keep on climbing with a minimal amount of rest stops – stopping and starting sucks a lot of energy. Kevin was able to keep up a pretty good pace for most of the steep part of the climb. Avagdu lagged behind a bit, but did much better than the last time we went on a hike. I wanted to keep both of them in sight, which meant extra work for me. I would walk with Kevin, then stop and stand around for a few minutes, waiting for Avagdu to catch up. After walking with Avagdu for a bit, I would cruise on ahead, catch up with Kevin, and walk with him for a time before stopping and waiting for Avagdu again.
Luckily the steepest section of switchbacks quickly led to a more gradual climb, so I didn’t have to maintain my inefficient pacing for too long. As the trail leveled off a bit, I would walk ahead and find the path so that the other two didn’t have to worry about navigating.
We hit our first small patches of snow at around 4,200 feet. Near 4,500 feet the patches became larger and began to obscure the trail. The snow slowed the pace of the others a little bit, which provided time for me to go ahead and find where the trail came out on the other side of the snow.
We came out of the trees at 5,100 feet and were greeted by views of Glacier Peak in the east, Sloan Peak in the west, and Mt. Rainer far away to the south. I could just make out the top of Mt. Baker sticking above the clouds in the north.
The snow fields became more constant at this point, so we donned gaiters before continuing further. When we did move on, the trail dropped a couple hundred feet down into the trees again for a short time before regaining the elevation and opening up to a beautiful alpine traverse of the ridge. At this point we were walking the wilderness boundary, with one foot in the Henry M. Jackson Wilderness and the other in the Glacier Peak Wilderness.
What was supposed to be open meadows filled with wildflowers atop the ridge turned out to still have significant snow fields on it. Many of these were too steep for us to safely walk directly across, so we would have to either go above or below them. Either way it was steep going.
When we would reach a large snow field, Kevin and Avagdu would wait on the trail while I went ahead and cruised above, below, or across it (or all three), searching for where the trail came out and the best route to the other side. It was nerve racking when we were unable to avoid the snow fields, as neither Kevin or Avagdu had much experience in that kind of mountain travel. I would go first and kick steps as they continued behind. I think it’s safe to say that they both now have more snow experience than the average recreational backpacker. They’re both well on their way to becoming certified mountain goats!
Our intended destination for the first day was Blue Lake. We had gotten a later start than I had planned and the steep climb mixed with snow had slowed our pace some. At 8:30 PM we were still about a mile and a half from the lake. There had been no running water since climbing the ridge, so all three of us were thirsty. As I climbed to the top of one snow field to scout out the route I noticed a few dry and flat spots at the top of the ridge. After glissading back down I put it to the others that we could continue to the lake, which at our pace and given the snow we wouldn’t reach till probably a little after dark, or we could spend a night on top the ridge. Water would be the issue on the ridge – it would take us some time and work to gather enough of the sparsely available wood to build a good fire and melt enough snow. They elected to spend the night on the ridge, which I thought was a good choice.
I had climbed back up and was waiting for the others when I heard a yell from behind. Turning around I saw a solitary fellow standing a couple hundred feet away. It was a surprise to see anyone else out here in this remote area – particularly since we were off the trail at this point – so I walked over to say hello. It turns out he was a local hunter who was up there to glass the slopes. He had his tent setup in a bare spot behind a clump of trees. When I told him our predicament he invited us to camp there with him. Kevin and Avagdu had made it up at this point, so we all introduced ourselves and prepared to make camp. When I mentioned that we were hoping to melt snow for water, the hunter said that just over on the other side of the ridge were a few small puddles of snow melt that he had used to fill his bottles. I left to go pump water for the three of us. With Avagdu’s Dromlite and my Platypus we had 8 liters, which was enough for that evening and the following morn.
When I returned Kevin and Avagdu had their tarps up and the hunter had a small fire going. I threw on a couple warmer layers of clothing and pitched my own shelter. Kevin quickly cooked a bit of dinner on his stove and went straight to bed. Avagdu and I stayed up a bit later eating dinner and chatting with the hunter. He knew the area pretty well and showed me on the map where I could find a few unmarked hunting trails. We also talked a bit about Kifaru packs and tarps, both of which he wanted for himself. He crawled into his tent to sleep and Avagdu and I retreated to our tarps soon thereafter.
I slept in a bit, waking around 7 AM to find Kevin and Avagdu both already awake and starting on breakfast. The hunter had been up early with his binoculars. He hadn’t seen much and was breaking his camp, preparing to head back down to the trailhead.
Temperatures that night probably dropped to a few degrees below freezing. I slept well in my cozy 20°F bag, but the others didn’t have so restful a night. Both had been cold, and the ground that Avagdu had pitched on turned out to have a slight angle so that he was slowly sliding off the mountain all night.
That morning there were clouds filling the valley on either side of the ridge. We were cut off from the world below, isolated in the mountains.
After breakfast we went down the slope to where we had left the trail the previous evening. As we did so the clouds moved in from the valley below, covering us in fog. I went ahead to scout out the route, but couldn’t see more than a hundred feet in any direction. We were in a white out. It wasn’t safe to travel, so we stopped where we were and had a sit, waiting for the clouds to burn off.
The clouds did burn off in about an hour and we once again had blue, sunny skies. We continued on much as the last day, doing our best to avoid dangerous snow fields, which inevitably meant steep going, both up and down.
We were coming to the end of the ridge. As I scouted ahead I was able to see a good deal of our future route. It looked like we would be able to get to the lake without much trouble, but past that the snow got worse. I would have continued on if I was by myself, but I felt responsible for the others and didn’t feel comfortable leading them on into even more difficult terrain. When I returned to where they were resting I told them that the original plan was out. I proposed that we could continue to the lake and spend a night there before turning around, or spend another night at the camp from last night, or head back down to the north fork of the Sauk and spend a night or two down there. They decided to turn around and head back to the river.
Since we knew that the next stretch would be dry, we first stopped by last night’s camp and filled up our water containers with the snow melt.
After snacking a bit, we headed out once more to retrace our route from yesterday. It was now near noon.
Heading back across the ridge was easier going than the previous day. I knew the land now and could lead them across a more efficient route. Plus, we were rested, and, going down hill, there were lots of opportunities for quick and fun glissading. Soon we were back in the trees.
We stopped for lunch at about 4 PM before heading onto the steep switchbacks that lead down to the bottom of the valley.
We reached the river around 7PM. Both Avagdu and Kevin had wet feet from traversing the snow, so I had collected a bunch of firewood on the way down and strapped it to my pack. After crossing the river we pitched our tarps and I went to go pump another 8 liters of water for us. We all processed the wood I had brought down and quickly had a bright fire burning. That night we all went to bed an hour or so after dark.
The next morning I woke around 6 AM and peeked out of my tarp to see if anybody had the fire going. No one was up. I continued to sleep a bit and look out every 30 minutes, until 8 AM rolled around and finally I decided that I better get up. There weren’t enough hot coals left in the fire to blow it back to life, so I started it again with a cotton ball. The others came over soon after I had thrown a few pieces of wood on the blaze.
That day we didn’t have any plans. Late in the morning I jumped in the river to rinse off the previous two days worth of sweat and sunblock. I couldn’t convince Kevin to get in, but Avagdu braved the water for a few seconds before declaring it too cold.
I collected a bunch more wood for the evening’s fire. Avagdu and I spent a while splitting it all down till we had a nice pile.
That afternoon Kevin taught Avagdu how to weave a paracord bracelet while I used some of the nearby cedar to throw together a quick bow drill for the other guys to play with.
Kevin got close to getting a coal a couple times.
Avagdu struggled a bit more.
Another night, another fire. Kevin went to bed a bit after dark. Avagdu and I stayed up another half hour or so, till the fire was burned down to glowing coals.
We left camp the next morning and made it back to the trailhead at 10 AM. I was refreshed and ready to brave the cities for a few more days.
Those chain cleaning tools sold at most outdoors stores tend to pretty useless in my experience. They run around $30, but end up being cheap and ineffective pieces of plastic. I’ve given up on them in favor of cleaning my chain manually via a method discovered on Sheldon Brown’s chain maintenance page (any man with a beard like that must be infallible).
All that’s needed is a chain tool, a bottle, some sort of degrease-ing dish soap, and water.
The process is simple. Break the chain with the chain tool and drop it into the bottle. (I use an old Gatorade bottle.) Then put in a small dollop of the soap. Fill up the bottle with water, shake it around a bit, and let it sit. The water becomes black immediately. After it has sat for about 15 minutes I’ll dump it out, rinse off the chain, and put it back into the bottle with fresh soap and water. I do this until the water stays clear, which generally takes about 3 cycles.
When it’s done, you should have a chain that’s relatively clean-ish. Dry it, toss it back on the bike, lube up, and start cruising! If the chain was really dirty, you might also want a cheap brush to scrub it down.
Needs? I guess that is what bothers so many folks. They keep expanding their needs until they are dependent on too many things and too many other people. I don't understand economics, and I suppose the country would be in a real mess if people suddenly cut out a lot of things they don't need. I wonder how many things in the average American home could be eliminated if the question were asked, "Must I really have this?" I guess most of the extras are chalked up to comfort or saving time.
Funny thing about comfort -- one man's comfort is another man's misery. Most people don't work hard enough physically anymore, and comfort is not easy to find. It is surprising how comfortable a hard bunk can be after you come down off a mountain.
- Richard Proenneke, One Man's Wilderness
Although I have misgivings about their durability, Platypus‘ 2L+ bottles remains the primary water reservoirs in my pack. It’s been a bit over a year now since I started using them. At the same time I switched over to Platypus, I also started treating my water with chemicals rather than filtering it. Both methods of treatment have their advantages and disadvantages, but lately I have been using chemicals almost exclusively.
A water filter, of course, filters out not only the invisible nasties that upset the stomach, but also the visible things things that don’t cause much harm but aren’t altogether pleasant: dirt, dead bugs, small rocks, and the like. When I moved to using chemicals I was just dumping the water into my drinking vessel direct from the source. Without any sort of filter, the water could sometimes be a bit gritty. Too textured for my taste.
As a first attempt to solve this I started to place a bandanna over the opening of the Platypus, and then poured the source water over that. That worked great for getting out the sediment, but then I had the problem of having a wet rag. If the sun is out, it dries, but the other 307 days of the year, the bandanna – even a synthetic Buff – became a bit of a hassle to dry. I wanted some sort of pre-filter that I could get wet without worrying about it.
The solution (like more than a few before it) came while browsing the BackpackingLight forums.
A filter washer is a rubber washer with a mesh screen in the middle. Apparently they’re used in garden hoses and washing machines to remove sediment. I was able to find them easily in the plumbing section of a local hardware store.
I took an old Platypus cap and drilled out the center of it. Then, with a little Gorilla Glue, glued the filter washer onto the cap. That’s all there is to it! The new pre-filter cap weighs 2 grams (0.07 oz) and shouldn’t cost much more than $1 to make.
The downside to the pre-filter cap is that it does noticeably decrease the flow rate of the water. To fill the Platypus, I use a scoop made out of an older Platypus bottle with the top cut off. Without the pre-filter cap, it takes all of 30 seconds to fill the Platypus bottle. With the pre-filter cap, it takes something more like 2 minutes to fill up the bottle. I have to pour the water out of the scoop much more slowly. Because of this I’ll sometimes forgo using the pre-filter cap if the water looks very clean, but the majority of the time I do use the cap. It’s become a permanent addition to my pack.
A large populace held in check by a small but powerful force is quite a common situation in our universe. And we know the major conditions wherein this large populace may turn upon its keepers --
When they find a leader. This is the most volatile threat to the powerful; they must retain control of leaders.
When the populace recognizes its chains. Keep the populace blind and unquestioning.
When the populace perceives a hope of escape from bondage. They must never even believe that escape is possible!
Yesterday I headed out to Monte Cristo for a quick night out. I was in this area last fall when I visited Gothic Basin, but had not continued all the way down the main trail to the town site.
Monte Cristo is an old mining town that was founded in the 1890s and lasted until 1907. It’s now a ghost town, maintained by the Monte Cristo Preservation Association. The trail into town is an easy hike along the old railroad grade. Most of the buildings in the town itself have burned down or were long ago dismantled, leaving only a few remnants. More interesting than the buildings are the metal artifacts strewn about the site.
From Monte Cristo, my plan was to head up to Glacier Basin in the Henry M. Jackson Wilderness (just the other side of Cadet Peak from Goat Lake) and see what the snow was doing. The hike up to the basin goes uphill alongside a waterfall that carries away the melting snow, as well as melt from Columbia Glacier.
The whole drainage, including the trail, had been hit by at least one major avalanche somewhat recently, leaving lots of debris and snapped trees for me to climb over. The hike was hot, but enjoyable. I encountered no snow until just before the basin at 4,500 feet. Before venturing further, I stopped to put on my gaiters, take out my other trekking pole and put the snow baskets on both. I almost always forget to pack the snow baskets for my poles, so I was excited to have remembered them this time around. Heading on into the snow, my pace slowed. It was now late afternoon – just about the worst time to attempt to traverse a snow field on an inclined slope. The sun had been beating down on the snow all day, making it soft and prone to slipping. I managed not to fall off any mountains, but, due to my lack of snowshoes, did posthole up to my crotch two different times. Soon enough I made it to a scree field just inside the basin.
My original plan had been to spend the night up here, but it didn’t look very promising. I dropped my pack in order to be a little lighter on my feet and took off to survey the basin. Most of it was still covered in the same deep, wet snow that I struggled through at the entrance. I didn’t fancy sleeping on this. The areas that were melted were rocky and devoid of any flat spaces. I imagine it will be mostly cleared up in another couple weeks, but for now I decided to turn around and spend the night at a lower elevation.
I managed not to sink or slip on the snow field on the way out. Retracing my steps, I made my way back down along the waterfall. The avalanche had exposed a lot of smooth rock that, wet with snow melt, made for slippery going. Near the bottom I slipped and slid down about ten feet on my side, slicing open my left knee. It was a 3” long incision across the front of the patella, but not very deep. I continued on the trail for a bit, letting it bleed. As long as it’s not a gusher, letting wounds ooze a little blood helps to clean them out.
Five minutes further down I found a nice rock sit on. I dropped my pack, grabbed the first aid kit, and pulled out my syringe. It took just under a liter of water to fully clean the cut. I had noticed a patch of yarrow further up the trail, but there didn’t seem to be any around my rock. Instead, there was a large hemlock tree that must have been knocked down by the recent avalanche. It still looked green and alive. When I punctured it with my knife, it oozed sap. I used this to cover the cut. The sap is antiseptic and forms a barrier to keep dirt or anything else from the wound. Plus, it smells good! After the sap had dried, I bandaged it and carried on down the trail, arriving back at Monte Cristo at 7PM. I had dinner in the town and took advantage of the long summer evening to scout out an agreeable place to sleep in the surrounding forest.
The following morning I breakfasted and started to head back to the trailhead. On the way out I decided to make a short detour up to Gothic Basin. As with neighboring Glacier Basin the climb was mostly clear, but I hit deep snow just at the entrance. After looking around a bit I climbed back down and finished the walk back to the road, arriving at the trailhead late that morning.
This past week I read Dominic Reeve’s Smoke in the Lanes. The book is a first-hand account of the lives of Romani in England during the mid-1950s, which marked the end of the era of horse-drawn wagons. It’s an interesting read if you’re at all interested in itinerant lifestyles.
Toward the end of the book the author describes lighting his daily fire in very wet conditions:
Nobody had collected any wood for the morning's fire, so I scrambled into the middle of a tangle of thorn-bushes, the limbs of which were heavy with rain that showered down on me; and within a matter of minutes I was completely soaked. I did not possess a raincoat and my old jacket and cord trousers were inadequate to withstand the water. Nevertheless, I managed to gather quite an imposing amount of dead wood, all sodden, and I returned with it to the site of the previous night's fire. I took a stump of candle from my pocket and broke it in half, then I lit one half and set it upright in the watery ashes, piling some twigs and small wood round and above it. When I had placed sufficient twigs above the tiny flame I laid the other half of the candle stump in the wood directly above the flame so that the heat from below gradually rose upwards, melting the wax which then caught fire and ignited the soggy twigs. It is an old Romani trick, and a very successful one.
Le Loup often talks about carrying a beeswax candle in his 18th century fire kit. I always assumed that this would be used to keep a flame below damp tinder to dry it out, similar to how today we might take advantage of the long burn time of cotton balls soaked in petroleum jelly to light slightly damp materials. It never occurred to me to break the candle in two and melt the second half above for even more heat. Neat trick!
None but the Romanies, or perhaps the few remaining tramps, can know how great a comfort is afforded by a fire. Once its warming tongues lick upwards into the pile of sticks and one's tingling, numbed fingers are eased in its glow, one experiences great pleasure and satisfaction. It is a creative, aesthetic, pleasure. On countless grey winter mornings, often in company with other travellers, I have sat huddled close to an immense [fire], my front glowing and steaming with heat and my back running with rain or heaped with snow. The fire is everything to us. With it we can cook, eat, survive and live: without it we should perish.
I went on a lengthy bike ride around the Seattle area yesterday. There were a couple of errands I wanted to run in the city and I thought I’d use them as an excuse to test out Google Maps new bicycle directions feature, which I had yet to use.
The Interurban Trail runs through Snohomish and King Counties, forming a highway for human powered transport. At least, that’s the idea. Parts of the trail are on old railway routes and parts are on normal city streets. The part of the trail in King county is great, but the Snohomish county trail is very poorly signed and notoriously difficult to follow as it moves between trail sections and streets. If you’ve never ridden it before, you’re guaranteed to lose it. Since the trail parallels I-5 and 99, it’s difficult to actually get lost – just keep heading north or south and you’ll eventually get where you’re going – but it’s nice to be able to stay on the trail itself as the Interurban’s route is generally the friendliest to non-motorized vehicles.
I was very impressed with Google’s ability to keep me on the trail. The directions only once told me to turn onto a non-existent road. Other than that, they proved accurate. I also had with me photocopies of the relevant route directions taken from Biking Puget Sound. The directions from both were very similar, but where they differed, I found that Google’s route was superior.
Of course, the whole trip couldn’t be on the trail. I had to get on the Interurban at the beginning of my ride and off it at the end. For that bit, I was also happy with Google’s directions. The route on and off the trail was not as direct as the one I would have chosen myself, but Google seemed to go out of their way to keep me on smaller streets with less traffic. It’s clear that Google takes topography into account, as well, as the streets that Google suggested were flatter than those on the more direct route that I would have chosen.
The downside to Google’s route was the number of turns. The directions were 7 pages long for the full trip (both to my destination and from the destination back to my starting point). I think the longest section I had without a turn was about 2 miles. I would make a turn, pull the directions out of my pocket to see how long I had on this stretch and what the next turn would be, shove the directions back into my pocket, go on for a bit, make the turn, and repeat the process. It was a bit inconvenient, shoving the directions into my pocket and pulling them out so frequently, and the directions got crinkled and difficult to read. I need to figure out someway to mount them on my handlebars. The other problem with the directions was that, because much of the Interurban is on the old railway that doesn’t have street names, Google would occasionally give a direction like “Turn left in 58 feet”. Turn left? Turn left where? In this driveway? That business parking lot? The lake? With the infrequent signage on the trail itself, I would often miss these mysterious left turns. When that happened I would look a couple steps ahead on the directions till it had me turning onto a street with a number. I could make my way to that numbered street along normal roads and soon find myself back on Google’s route.
Overall I was pleased with the directions and will definitely be taking advantage of Google again for future trips – though if it’s in an area that I have no familiarity with, I would probably want to supplement them with a good road map for added security. I’ll also be curious to see how they do in other cities, or outside of urban areas altogether. I’m told that the team who developed the bike route feature is based in Seattle, so it would make sense that that city would have the most accurate directions.
In Seattle I made a bit of a tour. I went past Woodland Park and cruised around Green Lake a bit before stopping in the center of the universe to refuel. From there I went over the Ship Canal and decided to torture myself by pedaling up the hill to Queen Anne before heading down to Pike Place. At the market, I paid a visit to Left Bank Books to browse the zine collection before heading over to Metsker Maps. I have something of a map fetish, so Metskers is one of my favorite shops in that area. I spent 45 minutes in there pouring over various topos that are difficult to acquire anywhere else.
Outside of Pike Place I saw somebody with what looked like a TAD FAST Pack. I don’t see those around very often, so I went up to the guy to congratulate him on his taste in bags. But on closer inspection I saw it was one of those cheap Japanese airsoft knock-off designs.
After walking the bike around downtown and doing more people-watching, I started to head back north. I decided to take a different route and go the long way around Lake Union. Eventually I picked up the Burke-Gilman Trail and ended up back in Fremont. From there I made a slight detour over to Ballard (nope, it isn’t free yet) and visit Second Ascent. They’re one of the best independent (i.e. non-REI) gear shops in the area and usually have a good selection of used gear. Once there I spent another half hour looking at maps – this time aided with some of the guide books they had – and happened upon a nice 50-ish mile loop in the Glacier Peak Wilderness, which is something that I’ve been looking for lately.
From Ballard, it was back to Fremont where I made a quick stop at PCC for some dolmas and a couple of cookies before retracing my route back home.
The route that I took was supposed to be 50 miles, but for all my detours and added explorations, it was probably closer to 70. My butt cheeks hurt, despite my padded panties.
If I could only carry one first aid specific item in the wilderness, it would be an irrigation syringe.
There’s a lot that can be done with bandannas, duct tape, and paracord. A multitool, spare clothing, sleeping pad, tarp, poles – pretty much everything in a pack, including the pack itself, can be fashioned into some kind of medical implement with a little ingenuity. But cleaning a wound will always remain difficult. It also remains extremely important. Infection is both very common and very inconvenient in the wilderness, where you’re well away from definitive care.
Clean water should always available and irrigation is a simple and effective method of cleaning a wound. But water just poured over a wound won’t do much good. Pressure is needed. Occasionally you might hear people claim that you can fill up a ziploc bag with water, cut or poke a hole in one corner, and squeeze the bag to force out a stream of water. That’s certainly better than nothing, but in my experience the pressure from that is not comparable to the pressure from a syringe. With an irrigation syringe, you can take the cleanest water available (usually your drinking water) and shoot it into the wound. Pressure washing the wound like this allows you to easily clean out all the grit and dirt. There’s no need to go poking around in there with unsanitary tools, probably causing more harm than good. A 12cc syringe like the one I carry costs $1, weighs 8 grams (0.28 oz), and takes up very little room. I can’t think of a reason not to have one in your pack!
Remember: a clean wound is a happy wound. You can put all the effort you want into the perfect bandage, but if the wound isn’t clean, you’re going to have some problems down the line.
After taking the photos I wanted for today’s stuff sack review, I spent the rest of the afternoon watching tadpoles, walking along railroad tracks, and looking at clouds.
"Then one day it dawned on me that... you can't rely on the accomplishment of goals or journeys -- however great or small -- for your happiness, because the completion of a goal is only a temporary gratification. If you want to be happy then you must enjoy it all, at whatever point your are at, from the beginning to the end, because happiness it the acceptance of the journey as it is now, not the promise of the other shore."
- Stevie Smith, Pedaling to Hawaii
(Originally, this post was titled Just Another Wednesday, but I have now been informed that today is, in fact, Tuesday.)
I love my Sea To Summit Ultra-Sil Dry Sacks. They’re made out of a thin and slippery silnylon Cordura, which makes them tough, light, and easy to slide in and out of a pack. The Hypalon roll top closure means no water can get in or out. All the seams are double stitched and taped on the inside. In all, the Ultra-Sil sacks are some of the lightest weight dry bags out there that still maintain a good level of durability. I’ve had an 8 liter and 2 liter model for about three years. Last Fall, I picked up a 13 liter model.
8L Ultra-Sil
The 8 liter model is my most used bag. I use it primarily to carry clothing. For me, it’s the perfect size for 3 season use. During the winter, when I’m carrying more puffy clothing, I sometimes have to supplement it with a secondary sack. I’ve had the whole thing accidentally submerged multiple times and never came out with wet contents.
The 8 liter sack also functions as my pillow at night. This is a bit tough on the sack, since as a pillow it normally sits directly on the ground above my sleeping pad and so gets rubbed around on the dirt and rocks. In the 3 years that I’ve used it as a pillow, I’ve only ever had one failure – and that one just after this last trip. There was a small abrasion near the seam in the middle of the bag that I noticed dripping water when I was cleaning the bag. A dab of Mcnet Silnet on the inside and the outside of the bag sealed that right up and the sack is once again waterproof.
2L Ultra-Sil
The smaller 2 liter bag has seen a variety of duties. It’s held a first aid kit, notes, and small clothing items like gloves and a hat. For the past 6 months it has functioned as my camera case. You may remember that back when I did an EDC post I mentioned in the photo notes for my level 2 items that I wrapped my camera in a bandanna for padding and then put that in a waterproof Aloksak. The problem with that setup is that Aloksaks aren’t incredibly durable, nor are they cheap. I can’t afford to replace them every time they fail. So I moved to putting the bandanna-wrapped camera in the 2 liter Ultra-Sil sack. It’s just as waterproof (if not more so), but also more durable. The other benefit to using the Ultra-Sil is that I have plenty of room left over in the sack to dump in my cell phone when traveling in the wilderness.
13L Ultra-Sil
The 13 liter Ultra-Sil I bought last Fall to hold my sleeping bag. Prior to this I used a Kifaru Compression Stuff Sack. The Kifaru sacks are great at compressing bulky items down. Patrick developed them to compress around the circumference of the item, rather than length wise, so that they actually fit in the bottom of a pack (strangely enough, a novel idea). They’re made of a lightweight and waterproof material, but only close with a drawstring closure. This means that water can potentially creep inside. I’ve used one of these sacks in some capacity since 2007 and never once had an item get wet, but it’s always a risk. The other issue for me is that I rarely ever max out the capacity of my pack. I can afford the space for bulky items and don’t need to compress them. So I decided to start using the Ultra-Sil sack for my sleeping bag. They don’t compress, but they guarantee that my sleeping bag will always stay dry and, due to the lack of compression straps, the Ultra-Sils are lighter than the Kifaru sacks. (The small Kifaru compression sack – which I use for both my 20F bag and my 40F bag – weighs 68 grams, or 2.4 oz.) The 13 liter is a good size for my 20F bag. The 8 liter is a better size for my 40F bag, but because I only have one 8 liter sack and it’s always used for clothing, I usually end up using the 13 liter sack when carrying my 40F bag as well.
The only thing that I don’t like about the Ultra-Sil sacks is lack of a grab handle on the bottom. When I stuff my sleeping bag into the sack and purge out the air, it gets packed in there pretty well. To remove it I have to hold the bottom of the sack. Since there’s no grab loop, that means that I have to pinch the bottom, which also means pinching the sleeping bag itself. It’s not a big deal, but a grab loop on the bottom would make removing the sleeping bag ever-so-slightly easier.
If you’re looking to keep gear dry without a large penalty in weight, I would strongly recommend picking up two or three of the Ultra-Sil Dry Sacks.
I’m always looking to shed a gram or two from my pack without sacrificing too much functionality. One of the categories of gear that I have been focusing on of late are my tarp stakes. For the past year and a half I have attempted to discover what works best by experimenting with four different types of stakes in a wide variety of ground conditions. The stakes I’ve used are Durapegs (6”), Tite-Lite Titanium Stakes (6.5”), Easton Aluminum Stakes (6.25”), and Big Agnes X-peg Stakes (7”).
Big Agnes X-peg Stakes
The X-pegs measure 7” in length, are made of aluminum, and tip the scale at 11 grams (0.38oz). They came with my old Seedhouse SL1, which was the last tent I bought before moving to tarps. The four-sided design gives them a lot of grip in the earth and the notched top securely grabs cordage or a webbing tie out. It’s a pretty basic design, but effective in many types of earth. I’ve beat on these stakes for some time and haven’t bent or broken one in any use.
Easton Aluminum Stakes
The Easton stakes are 6.25” long, also made of aluminum, and weigh 8 grams (0.28oz). These are popular stakes with lightweight backpackers. They have a nice flat head to hammer on with a rock and a small cordage loop at the top to make pulling them out of the ground very easy.
At first glance, one would expect the Easton stakes to be inferior to the X-pegs. Though both are made of aluminum, the Easton stake is hollow, which makes it lighter but easier to break. The body of the Easton stake is cylindrical and smooth so that it doesn’t grip in the earth as well as the four-sided X-peg. Despite all this, I have yet to break or bend an Easton stake. I have also never had one accidentally pull out.
Tite-Lite Titanium Stakes
The Tite-Lite is a 6.5” titanium stake that weighs only 6 grams (0.2oz). It’s a simple stake in the classic shepherd hook design. Though the weight is great, this is the least functional and my least favorite of the bunch. Because of the small diameter it will go into most any ground, but it will also pull out. I’ve had these stakes come out in the middle of a windstorm, forcing me to get up three or four different times during the night to replant them (the Easton stakes and Durapegs were also in use at the same time and never once came out). They twist in the ground fairly easily, allowing cordage and webbing tie outs to slip off. And in very rocky ground, they will bend.
For me, there’s too much functionality sacrificed for the savings in weight. I no longer use these.
Durapeg
The Durapeg is 6” long, made of ABS plastic, and weighs 14 grams (0.49oz). These are the stakes that Kifaru sells with all their shelters. Similar to the X-peg, they are four-sided and have wide indents on two sides to grip the dirt. There’s a flat top for pounding on and a good hook to hold a tie out. Once you put these things in the ground, they don’t tend to move. Despite the fact that they’re the heaviest of the bunch, they’re also my favorite. They simply have proven themselves to be the most effective stake in the widest array of ground conditions. The wide indentations on either side eat a whole lot of ground, making them better in snow and sand than the X-pegs (though they certainly aren’t the best option for a dedicated snow stake).
I have had a Durapeg bend in very rocky ground but, unlike with the Tite-Lite, the bend in the Durapeg was not enough to affect the functionality. Still, the bent Durapeg has been removed from my rotation. I have yet to have any of these break, but I’m afraid that the bend will be enough to snap the Durapeg if I tried to pound that particular stake into really hard ground again.
The top of the Durapeg does get chewed up a bit after being beat on with a few rocks. So far this hasn’t proved to weaken or in any other way damage the stake overall. I’ve also had some pitting occur on the flat head of the Easton stake due to being driven in with rocks.
Current Carry
My Kifaru Paratarp has 12 different tie out points. Using all of these allows one to get a real tight pitch, but I find is almost always unnecessary. When I’m pitching the tarp in an elevated manner by tying it out to trees, the most that I’ll need are 4 stakes – one for each corner. When pitched in the normal manner with trekking poles, I find that 7 stakes are all that are needed for a good pitch. An eighth stake placed in the webbing tie out between the front and middle tie out on whichever side I’m sleeping on will widen out the shelter a bit and give me more head space. I carry 8 stakes. Currently those 8 stakes consist of 6 Durapegs and 2 Eastons. Also in the bag are 4 Nite-Ize Figure 9s which help me to pitch the tarp from trees or toss up a clothesline or a place to hang a water bladder. The bag itself a lightweight silnylon thingy that came as the stake bag with the Big Agnes Seedhouse SL1.
The whole package – bag, stakes, and Figure 9s – weighs 122g or 4.3oz. With this (and a couple hanks of paracord) I find that I can throw up a secure and comfortable shelter in just about any condition. Occasionally I’ll switch out a couple of the Durapegs for a couple X-pegs, but currently I prefer the greater holding power of the former.
I do still have two of the lightweight Tite-Lite stakes that I carry with my Ti-Tri. These serve to elevate the pot in wood-burning mode. If I want to I can use these when pitching the tarp to bring up the total number of stakes to 10, but I rarely do.
If anybody has a favorite stake different from the ones discussed here – and it weighs 14g or less – let me know about it! I’m always looking to improve the package.
I’ve decided that I don’t like pulling individual tweets into the blog as uniquely styled posts. For now, that behavior has been disabled. I’ve moved to a single weekly aggregate post including all the previous week’s tweets. We’ll see how that goes.
Since individual tweets are no longer being pulled in, I’ve put a list of the most recent tweets down in the footer. Next to that you’ll also find a new list of the week’s most popular posts. Fancy!
I arrived at the Panjab trailhead in the Tucannon canyon at around 3PM on Saturday. The plan for the day was to take a short walk and spend the night at Dunlap Spring, a distance of about 6 miles. The Panjab trail proved uneventful, with no interesting sightings. I reached the meadow above the spring at 6PM and was happy to see it free of snow. The meadow sits at 5,700 feet (around 2,500 feet higher than the trailhead) which was not the highest elevation I would be reaching during the loop, but close. It seemed a safe bet that I wouldn’t be post holing the whole trip, which is always good news.
As I walked down the meadow toward the spring, I ran into my first local. A black bear with a nice brown coat was having his supper about a hundred feet away. He had his butt toward me and his head down. I yelled a greeting. He didn’t budge. Not exactly the response I was hoping for. I yelled a bit more and he looked around but was either blind or uninterested in the biped waving frantically at him. After a minute, though, the wind shifted direction and brought my scent to him. He turned his head to look right at me, then ran off into the trees. Thanking him, I went on my way.
I found the spring without any trouble and filled up my water bladder. After pitching my tarp in a nice spot in the trees a little ways away, I started to think about dinner. The sky was clear that evening and there was a spot up on the meadow that would provide a nice seat to watch the sun as it set into the West. I grabbed my food, stove, and water and headed on up. Along the way I grabbed a few small sticks and twigs to fuel the stove. After dinner and the show I headed back down into the trees and climbed into bed at 9:30PM.
Sunday morning I awoke to a light sprinkle. No matter. I thought it’d be good to get a few miles under my belt before breakfast. I got out of bed and topped off my water at the spring. Just as I was about to start breaking down my small camp, the rain really started coming down. Maybe breakfast later on down the trail wasn’t such a good idea. It seemed like a better option to crawl back under the tarp and do a little breakfast from bed.
That proved a good choice. Just as I was finishing my noodles the rain stopped. I took advantage of the lull to quickly break camp and get on my way. Most of the day’s walk was along high meadows that should have provided good views to either side, but everything was covered in cloud and I was unable to see more than a hundred feet or so in any direction for all the mist.
Occasional small breaks in the cloud provided a hint of the country I was traveling through and I did manage to spot a herd of seven elk having breakfast further down the meadow.
The trail was gaining elevation and started to enter a few trees. Snow covered the ground. It was only a few inches deep and pretty crusty so I didn’t sink in, but it obscured the trail. I was looking around trying to decide where the trail might have gone when I spotted a pair of really big bear tracks. “Aha,” I thought. “Those are heading in the right direction. I’ll follow them.” The tracks led on through the trees and I followed (hoping not to meet the fellow who left the tracks). Eventually the tracks led out of the trees and deposited me on the trail at exactly where I wanted to be: the aptly named Bear Wallow Spring.
From then on whenever I lost the trail in the snow I would just follow the tracks of bear or elk. They always seem to know where they’re going and tend to take the most efficient route to get there.
The trail continued east along the ridge, with a steep drop-off on the south side. At its highest point it got to around 6,200 feet, but there still was no more than a few inches of snow. The trail passed Squaw Spring, which was a disgusting mess of a hunter’s camp, and Sheephead Spring before finally reaching the high point at Diamond Spring. From that point my route turned south as I began a long, slow descent down into the canyon toward Oregon. I had been in fog all day and just as I started to descend the canyon I heard thunder off in the west. Whoops! That high open ridge was about the last place I wanted to be. I picked up the pace a bit and started to loose elevation. Safely back in the trees I spooked another elk, grazing all by his lonesome.
As I slowly (very slowly) lost elevation I began to get underneath the clouds and started to see a bit more of the country. Lots of canyons all around, and somewhere down there to the south the Wenaha River. Oregon Trail country. (Briefly, I relived childhood fears of dying of dysentery.)
At one point I misplaced my foot and starting to slide down the slope to my right. Throwing out my left hand I was able to stop myself but scraped up the palm of my hand in the process. Right where I fell was a patch of yarrow, which I grabbed and put on my palm as a poultice. After walking for another half hour or so I found a good spot to stop and properly clean and bandage the wound.
Continuing on, the trail finally finished its descent into the canyon and met up with Melton Creek. At 7PM I stopped to cook up dinner. The local ants were apparently of the mind that my meal was lacking in protein: a few of them crawled into the pot and ended up in my tummy. As I was eating dinner I spotted movement on the opposite side of the canyon. At first I thought it was an elk, but it turned out to be another black bear, this time with a light brown coat of fur around the body and dark fur around the neck and head. Just like an elk! Neat.
Another few miles down the trail and I finally arrived at the confluence of Melton Creek and Crooked Creek, where I intended to camp. After filling up my water supply and cleaning the pot from dinner, I pitched my tarp and crawled right in. It was a little after 9PM. I had walked around 17 miles that day.
Monday morning it was raining. It was to be a short day – I had only about 7 miles to go – so I decided I would wait it out. The rain fell for a good while as I killed time in the tarp.
Finally it stopped and I got out of bed, hitting the trail near 11AM. Just a few steps down the trail I had my first water crossing of the trip. I had to get to the other side of Melton Creek just north of where it joins with Crooked Creek. The water was cold, but only about knee deep. Another mile down the trail was another crossing, so I just left my sandals on and my shoes hanging around my neck.
When I got to it, First Creek proved to be a bit deeper and very fast moving. Had I slipped and fallen in Melton Creek I would have been cold and wet and might have come out with a bruised bum or stubbed toe, but it looked like if I was to fall here in First Creek I could actually get swept down it a ways.
The creek was waist deep. I made it across with no more trouble than frozen privates – which was trouble enough – but the creek also proved to be the boundary between winter and summer. Just as I got to the other side the sun popped out and the temperatures were soon in the mid-70F degrees. A bit downstream from the crossing was an old cabin and horse corral. I headed over there to cook up a brunch and dry out in the sun.
Back on the trail, the bush got really thick as I headed south down the side of Crooked Creek. I might as well have been bushwhacking, but the sun was out and there wasn’t a cloud in the sky so it didn’t much matter. A mile or so down the “trail” I ran into a mule train. They had just packed in an SCA crew down at the Oregon border who would be spending the summer working on this trail. Good luck! In a couple weeks it’ll be getting way to hot for me down in that canyon, but I’m glad that somebody will be working the trail. The guy at the head of the mule train seemed impressed when I told him my route – more so because I was solo. “That’s quite a walk!” he said. Before I had gotten on the trail, I was in the town of Pomeroy where I ran into a couple locals. They described the Wilderness as “bumfuck nowhere” and tried to discourage me from going in by myself. Apparently people who live in the region don’t venture into the Wenaha-Tucannon very often. Seems strange to me.
Soon after passing the mules I reached the Oregon border. Just off in the trees I found the trail crew having lunch. I headed over to say hello and swap stories about the SCA. Since this was their very first day, they were all still looking pretty neat and clean. One of the girls even had makeup on! I imagine they’ll look a bit different come August. Anyway, I wished them good luck and continued on my way, soon reaching the point where Melton Creek drains into the Wenaha River. Here, my route turned west and headed upstream along the river.
The Wenaha River and its canyon really are beautiful. It’s not the sort of area I associate with the Northwest, instead seeming like it belongs somewhere in Montana. At this point the day had warmed up till it was somewhere around 80F which seemed to please the two rattlesnakes I found hanging out in the middle of the trail.
I reached Fairview Bar just after 5PM and, after dropping my pack, stripped down and jumped in the river. It wasn’t any warmer than the ball-freezing First Creek, but was refreshing after the hot hike. After getting out of the Wenaha I threw up the tarp and collected water while drying off in the sun. I dressed as the sun began to sink below the canyon wall. Then, laying my pad out on the ground, I had a good sit. It lasted about 3 hours. During that time I cooked up dinner and paid a little attention to my feet, which were hurting due to the new footwear I was trying out.
While I was digging in my food bag for dinner I came across the chocolate bar I packed. I always like to pack a bar of chocolate in the cooler months when it won’t melt. Emergency Chocolate, I call it. Not only is it tasty and mentally comforting, but it provides a great energy boost and can be helpful in warding off hypothermia. When I pulled it out of the bag it was still firm, but I said to myself “Self, look at this here chocolate bar. With warm temperatures like today, it’s going to melt in no time! We better eat it before that happens.” To which I replied “I like the way you think, Self” and proceeded to eat the whole thing.
The next day I woke determined not to lounge around in bed that morning, but to get an early start on the day. I had a long and steep climb north out of the canyon ahead of me and wanted to get most of it done before the sun started beating down. Quickly breaking camp, I threw on my pack and started heading uphill just past 6AM. Sunrise in the Wenaha is a wonderful time. Undoubtedly, that leg of the trip had the best scenery.
Around 7:30AM I reached the trees and stopped to cook breakfast at the base of an old pine. I spotted two ospreys flying over head.
After that, my hike was through forest. Soon I was back in Washington. I lost the trail a couple times and stumbled upon another hunting camp, but found my way up out of the trees without much trouble.
There are some great grassy ridges up there around Moore Flat and Smooth Ridge that demand one to at least have a sit on them, if not take a nap. I did a bit of both.
Soon I reached the top of Weller Butte and the highest point of elevation for the day. Lodgepole Spring, where I planned to spend the night, was just another few miles north of that.
Lodgepole Spring was a bit disappointing when I got there. It was fairly muddy and finding a good spot to put the tarp was difficult. Despite the day’s perfect weather, some clouds had started to move in and it was looking like rain. Eventually I found a spot a bit above the spring that was sort of flat and had a few trees around it to help protect from any wind. Most of an Elk skeleton lay beside it.
The wind did pick up and got pretty strong that night. I was cozy inside my tarp, but I had pitched the front left side a little sloppily which meant that it was making a lot of noise as the slack got blown back and forth in the wind. It woke me a couple times, but I was too comfy inside my bag to get up and do anything about it.
The next morning was rainy and windy. Still, I didn’t want to hang out in the tarp all morning. I broke camp, filled up on water at the spring, and headed on my way. Around 10AM the sky cleared up and the sun came out for another fine summer day.
As I headed north, I was gaining elevation. I went along the narrow ridge along Danger Point and a bit further on reached Oregon Butte – at 6387 feet, the highest point in the Wilderness area. Just north of Oregon Butte I reentered the snow and lost the trail. There was a confusing intersection with three or four trails heading off in different directions at that point and I wanted to make sure I got on the right one. I spent 20 minutes looking around for the correct trail – or even an area where the trail might be likely to go – but couldn’t find anything. Finally I gave up and just started heading cross country via map and compass along the route that the trail should have gone. About a mile further I had lost enough elevation for the snow to disappear and I found the trail again. I was only off by about 10 feet in my route calculations.
Just after noon the sky started to fill up with clouds again and darken. “More rain!” I thought. Then I heard a rumble. And another. And another. The storm was just northwest of me and heading in my direction. Once again I was up on top of an exposed ridge, the highest thing all around. I dropped off the trail and heading down to the tree line. Picking up my pace a bit, I paralleled the trail and kept my eyes open to see what would happen. I hadn’t seen any lightning yet, but the thunder was getting nasty.
Originally my plan had been to spend the night at Dunlap Spring again and then head out back to the trailhead the next morning. If the storm kept up though, I didn’t want to spend the night that high. I reached the meadow above the spring at 3PM. Just as I came out of the trees it started to hail. The thunder sounded like it was right on top of me at this point and I saw a flash or two of lightning. I decided I needed to get down. I started to half walk, half run toward the Panjab Trail that heads down into the trees toward the trailhead. Just before I reached the meadow I encountered another bear. This one was about 50 feet away, oblivious to my presence. I yelled at him. He didn’t budge. I was anxious to get down, but this guy was standing right where I wanted to go. Yelling at him again, he looked up at me and shook his coat, throwing water all over. “Yeah,” I yelled “it sure is wet up here, isn’t it? I bet it would be nice and dry in those trees down there! Wink wink nudge nudge.” Apparently bears don’t understand winks because he didn’t take my hints. He just kept doing what he was doing. More yelling and waving my arms around finally got him to look at me again. He cocked his head as if to express his displeasure at this disruption of his schedule and slowly turned around and waddled off into the trees.
I reached the trees myself soon thereafter. Just as I left the meadow the hail stopped and the storm passed on further east. The clouds hung around and only allowed a few sun breaks the rest of the afternoon, but I was able to dry out. I continued down the trail to just a bit northeast of the trailhead and found a good spot to camp for the night. That evening the sky cleared and I was allowed a view of the awe-some golden sunset in the Tucannon Canyon.
Beyond a critical point within a finite space, freedom diminishes as numbers increase. This is as true of humans in the finite space of a planetary ecosystem as it is of gas molecules in a sealed flask. The human question is now how many can possibly survive within the system, but what kind of existence is possible for those who do survive.
- Frank Herbert, Dune
About 3 years ago I bought a Celestial Jacket from Outdoor Research. It’s a very lightweight hardshell made out a 15 denier Gore-Tex Paclite material. When I first got it, I was surprised at how thin it was – paper thin – and had many doubts about the jacket’s durability. But I found myself pleasantly surprised: in the 3 years that I’ve had it, the jacket sustained only one small rip in the lower back area. This was easily patched.
About a month ago, the jacket failed at another point. The hood has an adjustable shock cord going through it behind the brim that helps to frame the face. This channel that the shock cord goes through (made of a lightweight nylon material, not Paclite) ripped out. I had heard of OR’s Infinite Guarantee, which claims that any product can be returned or exchanged “forever”, but had never before used it. I figured there would probably be some sort of catch or fine print, but thought it worth the try.
So today I went into the Outdoor Research Retail Store to see what would happen. I showed them the failure in the jacket and asked if it could be repaired. No, they said, they didn’t think that part of the hood could be fixed and they didn’t make that same jacket anymore, but they could give me credit for it or I could choose to trade it for any jacket in the store. Well then. That was easy.
I spent about an hour going through all of their hardshells. They didn’t have anything equivalent to the 10oz weight of the Celestial Jacket. Their Helium Jacket was even lighter at 6.8oz, but the hood wasn’t very adjustable and the jacket lacked pit zips. Most of the other jackets were ruled out because of being too heavy and not breathable enough. Eventually it came down to the Revel Jacket and the Foray. At 13.7oz the Revel is the lighter of the two but it’s made out of Pertex Shield which I have no experience with. The Foray was heavier at 15.7oz but made out of the same Gore-Tex Paclite as my old jacket – though the Foray uses 40 denier material, so is a good deal thicker and more durable than the old Celestial. I was having trouble deciding if I wanted to get the lighter jacket and risk trying the Pertex material or if I should stick with tried and true Gore-Tex. I already have a Marmot Precip jacket, which at 11.6oz fills the lightweight niche nicely, so I eventually decided to get the slightly beefier Foray jacket.
The guy who was helping me cut off the tag, handed me the new jacket, and I was out the door. In my book that’s a free $200 jacket. It’s refreshing to find a company that stands behind their products 100%. No partial refunds, or limited warranties, or memberships required. After today’s experience, I will certainly be doing more business with Outdoor Research in the future.
Update
And now I find that the Foray Jacket actually weights 13.9oz on my scale. An even better deal!
When I purchased my Trail Designs Ti-Tri Titanium Stove System, I bought it with a 900mL pot from Titanium Goat. I like the pot, but it has one shortcoming: there are no measuring marks on it. I’m not comfortable just pouring a little water into a pot and saying “Well, that looks like 2 cups.” I prefer a slightly higher level of accuracy.
Originally I addressed this by scoring the handle of my spork to mark 1, 2, and 3 cups measured in the pot – an idea which I think originally came to me from somewhere on the BackpackingLight Forums. This method works ok – though making the marks deep enough to be visible on the titanium was a bit tough with my knife – but I’ve never felt that it is very accurate. It will tell me if I have roughly 1 cup of water in the pot, but I could really be anywhere between 3/4 of a cup to 1 1/4 cups. That’s the difference between nice, fluffy couscous and overly soggy (or dry and undercooked) couscous, you know.
As a more accurate replacement, I came up with the idea for the Water Measuring Doohicky: a piece of paper with marks on it. Ingenious, isn’t it?
For the paper, I chose a cut a piece out of a page in one of my Rite in the Rain notebooks. Then I put 1/2 cup of water into the pot, set in the paper, noted the water line, took out the paper and marked the water line. This was repeated at 1/2 cup increments up to 3 cups. (The pot holds 4 cups when filled to the rim, so 3 cups is the most I would ever want to cook with.) After I had all the marks determined, I cut an identical piece of paper and put marks at the same levels. Then I tossed the soggy paper and was left with a fresh, dry piece of waterproof paper with the appropriate marks.
As a poor-man’s lamination, I wrapped it with clear packing tape. Even though the Rite in the Rain paper is waterproof, it gets a little soggy when submerged and takes a while to dry out. Water doesn’t cling to the tape at all. I can give it a shake or two after taking it out of the pot and it is immediately dry. The tape also adds a little stiffness, which helps achieve more accurate measurements.
I made two of these doohickeys at the same time, but have been using only one since last Fall. It works great. I am somewhat embarrassed it took me almost a year to come up with the idea. Even though I only made marks at 1/2 cup increments, the grid on the paper allows me to easily measure with 1/4 cup accuracy. As opposed to the marks on the spork, this paper is one extra thing to carry, but when placed on my scale it doesn’t register. I don’t think it weighs me down any.
I had done the lamination before I thought of this, but next time around I think I will write common cooking ratios on the back: water to couscous, water to dehydrated brown rice, etc. Usually I write those ratios on the ziploc freezer bags that hold my food, but the bags get replaced and rotated fairly frequently. The Water Measuring Doohickey has proved that it will last for a longer period of time.
Here’s an idea I stole from the excellent BFE Labs: hacking a Rite in the Rain notebook to include a retention strap. The original idea at BFE was just a strap to keep the notebook closed and contain loose leafs that were shoved inside, but while making the strap he accidentally cut the webbing too short. To solve this he sewed on another piece of webbing as an extension and found that the overlap between the two pieces made a good pen holder.
I thought this was a neat idea, but the tri-glide fastener used in BFE’s version seemed a little cumbersome. I knew I would want some sort of quick release buckle. A traditional side release buckle would be too bulky for my tastes, particularly when the notebook is shoved in a pocket. The other thought I had was that using elastic webbing for the pen loop might increase the versatility of the strap, since it could expand to fit different sized tools.
I didn’t have any 1” elastic webbing hanging about, but I did have some spare webbing and an old buckle from a previous project. With those two things along with a knife and my repair kit, I set out to see what I could do about whipping up some kind of strap.
My initial intention was to create the pen loop the same way as the BFE strap: cut one strap short and sew on an extension piece with a bit of an overlap. But before I got to that part, I had to sew one end of the buckle onto the webbing. In preparing to do this, I realized that I would already be sewing a loop right there. I could just pull a bit more webbing through the buckle to create my overlap, throw in a stitch to hold down the end of the webbing, another stitch closer to the buckle, and between the two I would have the perfect loop for my pen. Simple.
On the back of the notebook I created two slits for the webbing to pass in and out of, just like in the BFE hack (except I used my knife rather than a Dremel tool).
I’m happy with how this hack came out and will probably perform it on my other Rite in the Rain notebooks. The whole process takes only a few minutes and does not strain my juvenile sewing skills. My one complaint is with the buckle that I happened to choose. I appreciate the low profile, center-release design, but the male end of it doesn’t grip the webbing very well. This means that while it is adjustable, it doesn’t hold much tension, and so the buckle doesn’t snap open as much as it should when I release it. I’m thinking of sewing the webbing down on the male end of the buckle just like I did on the female end. The strap would no longer be adjustable, but I could be guaranteed the proper tension and that the buckle would open with the speed and ease which I desire. This would also present the opportunity for me to create another loop to hold a second tool. Perhaps a pencil or a highlighter to go along with the pen.
I bought one of the newer 27oz wide mouth Klean Kanteens back in March. My favorite bottle is still the old 40oz Klean Kanteen that I keep in my EDC bag, but I’ve been wanting something a bit skinnier that could fit in the bottle cage on my bike. I also was looking for an excuse to try out one of the newfangled wide mouth Klean Kanteens. I prefer a wide mouth opening on my bottles, but my 40oz Klean Kanteen (despite being beat on fairly heavily for the past few years) is in too good a shape to justify replacing it with a 40oz wide mouth. A new 27oz wide mouth bottle that would fit on my bike (not to mention in most car cup holders) and so supplement the 40oz bottle was easier to talk myself into!
To go along with the wide mouth bottle, I also purchased a humangear capCAP. This product of questionable capitalization addresses the same problem as Guyot Design’s Splashguard: how to drink from a wide mouth bottle while moving without ending up with half the bottle’s contents on your face and the other half up your nose. The capCAP allows the user to take advantage of the wide mouth for filling and cleaning (as well as water filter integration), but also provides a smaller opening for drinking.
The wider cap has indentations on it making it easy to grab and turn. The smaller cap, in addition to the indentations of the larger cap, is made of rubber, which makes for an easy grip while wearing gloves. The rubber has a tendency to pick up small amounts of dirt and sand, but so far I have not found this to be an annoyance.
My habit in unscrewing bottle lids is to hold the body of the bottle in my left hand and unscrew the lid with my right. The problem with doing this with the capCAP is that attempting to unscrew the small lid tends to start to loosen the larger lid as well. All that’s needed to rectify this is to hold the larger cap in my left hand rather than the body of the bottle itself. This forces a change of habit, which took me a couple weeks to get used to, but I now grab the larger cap with my left hand while unscrewing the smaller cap without thinking. I haven’t had a problem with it since.
When using the capCAP with my wide mouth Klean Kanteen, I find that it does leak slightly. If the bottle lays down on its side for a bit, a couple drops of water will escape from underneath the larger cap. The threads on the bottle’s lip must not match up perfectly with those on the capCAP. If the bottle was to be thrown loosely into the body of the pack where it could shift around and potentially get a drop or two on some form of paper, I would opt for the more secure closure of the standard Klean Kanteen lid. But when the bottle is in the cage on my bike or stored upright in a pouch on my pack’s waist belt, this small leak is no problem.
The capCAP can of course be used on other wide mouth bottles. I also use it on my 32oz HDPE Nalgene as well as my 32oz Guyot Designs Backpacker and have not noticed any leaking with those bottles. It’s a pretty neat product that I think makes a great addition to any wide mouth bottle.
Here are the weights of various lids, measured on my scale:
My last trekking poles were a pair of REI Peak UL Carbon Compacts. I was quite fond of them. At 11 oz for the pair, they were one of the lightest pair of telescoping poles available. Sadly, I broke them last January. A lot of folks who have only used aluminium poles cast a critical eye on those made of carbon fiber, thinking them flimsy and weak, so I think it is important to point out that it was a piece of the plastic locking mechanism that broke, not the carbon fiber pole shafts. I think that carbon fiber is a perfectly adequate material for trekking poles and should stand up to all reasonable abuse.
When my old poles broke, I took them into REI hoping that there might be some way to repair them. We spent an hour or so going through all their spare parts and trying to hack something usable back together, but in the end we couldn’t come to a solution that I was satisfied with. The fellow I’d been talking with mentioned that he could give me credit for the broken poles, which surprised me. I’ve returned plenty of used gear to REI, but never an item that was actually broken (and broken, as far as I’m concerned, due to user error and not any fault in the product itself). I guess they’re serious about that guarantee.
The credit was certainly welcome. I took it, but now I had to decide what to replace the poles with. REI no longer makes the Peak UL Carbon Compact trekking poles, so I couldn’t get another pair of the same. I started to look around to see what was on the market. My first limiting factor in the search was that I needed telescoping poles. I use trekking poles to pitch my Kifaru Paratarp. For the tarp, the needed height of the rear pole is 26”. This rules out a lot of poles that only collapse to something closer to 30”, such as those from Titanium Goat and Gossamer Gear. The other big factor was weight. Ideally, I wished to stay as close as possible to the 11 oz weight of the old poles. A quick look around told me that I would have to come to terms with at least some weight gain, as there didn’t seem to be anything to compete with the weight of the Peak UL Carbon Compacts. Some poles weighed 20 oz or more for the pair, which was just ridiculous! Leki had a few poles in the 14-16 oz neighborhood. A decent weight, I thought, but none of the poles really jumped out at me.
Eventually I came upon the offerings from Black Diamond. Their poles use the FlickLock locking mechanism, which I had heard of before. It had always intrigued me but I’d been turned off by the extra weight associated with it. Most of the big names in trekking poles, like Leki and Komperdell use a twist-lock mechanism which, as anybody who has ever used such poles can attest, is finicky at best. 1
After a bit more research, I decided that the greater functionality of the FlickLock system would be worth the weight gain. I landed on the Black Diamond Alpine Carbon Cork trekking poles. At 17.5 oz they were a good deal heavier than my old poles, but I thought I would give them a chance.
As the name implies the Alpine Carbon Cork poles have a cork handle and three shafts made of carbon fiber. They collapse down to 25” and expand to 51”.
FlickLock
The FlickLock mechanism operates as basically a clamp. When shut, it compresses the outer shaft, which prevents the inner shaft from moving. The tightness of the clamp can be adjusted with a single screw. It is simple, effective, and works in all conditions. There is no messing around with twisting one shaft to expand some little doohickey that you can’t see in the hopes that pressure will be built up against the inside of the outer shaft, no sitting around twisting one pole in the proper direction for 5 minutes wondering if the thing will ever lock, and there is little chance that shafts will accidentally collapse while in use. 2 Beyond the fact that the FlickLock mechanism actually works on a reliable basis, the next advantage is the speed of use: flick it open, adjust, and flick it closed. The main idea behind adjustable poles is that you can alter the length to meet the terrain: make the poles shorter for going uphill, longer for going downhill. With my previous twist-lock poles, I never did this. I only set the length once before setting out for the day. Periodically adjusting the poles was too risky (there was a likely chance I’d unlock them to adjust and spend countless minutes trying to get them to lock again) and even if I could be assured that the locking mechanism would work it still took a few seconds longer than I liked. Now with the FlickLock poles, I find myself merrily adjusting the poles to suit the terrain all day.
Baskets
As with any decent trekking poles, the Alpine Carbon Corks come with both dirt and snow baskets. The snow baskets are nothing special, but I was surprised at how small the dirt baskets were. I’m not sure why they chose to make the baskets with so small a diameter. So far I have no noticed no difference in how they work. I’m probably not the best judge of that though, as I find all kinds of baskets to be unnecessary when there isn’t any snow. (I had a habit of losing baskets with all my old poles, but since I noticed no difference without the baskets I never spent the money to replace them.)
Rather than just sliding on the pole and being secured with a nipple and indentation, the baskets on the Black Diamond poles are actually threaded. You slide them on and then screw them down over the threaded area. This seems like a much more secure system. I think it unlikely that I’ll inadvertently loose these baskets.
Handles
The cork handles on these poles are new to me. My previous poles have always had foam handles. I’ve heard claims that cork handles are more comfortable than foam, but so far I have noticed no difference in that department. Still, I have only had these poles for the cooler part of the year. Perhaps in the summer heat with sweaty palms I will appreciate more of a difference. I am curious to see if there is much difference in the durability of the cork. I’ve already had a couple small pieces chip off – not enough to raise too much concern, but I’ll keep an eye on it.
The ergonomic shape of the handle is fine, but I don’t use it much. Rather than grasping the poles properly, my preferred method of use for trekking poles has always been to rest my wrist in the strap and lightly hold the lower part of the handle in the fleshy part of my hand between thumb and forefinger. I don’t think this is the most efficient way of doing things – placing all the weight on the wrist doesn’t seem the best thing to do – but it has always been most comfortable and natural to me. It allows me to freely swing the pole back and forth as I walk without much movement of the arm. (I say pole, not poles because though I always carry two to setup my tarp, I rarely hike with more than one pole. I like to have one hand free and find two poles cumbersome and unnecessary except for going down the steepest of hills.)
Below the cork handle, the upper part of the shaft has a foam grip, which I appreciate it. My old REI UL Carbon Compact poles lacked this (because of the extra weight it would entail, no doubt) and I found that I missed the feature. It’s nice to have a comfortable spot to grip when you are climbing up a short steep hill and don’t want to adjust the length of the poles.
StickPic
Of course, with a new pair of poles I needed a new StickPic. My old models wouldn’t fit on the tip of the Black Diamond Alpine Carbon Corks. I tried to buy a new one, but Rodney Java refunded my money. That’s three now he’s given me for free. Someday I’ll track him down and shove the money under his door.
Impressions
I’ve been using the Black Diamond Alpine Carbon Cork for about 4 months now and they have exceeded my expectations. I was wary at first about not getting a return for the significant increase in weight. Of course I still would like them to be lighter, but I feel that the increased functionality has justified the increased weight. 3 I am very pleased with the poles.
Notes
↵ I had heard that Leki would be releasing a line of poles this spring using a new external locking mechanism similar to Black Diamond's FlickLock. They since have, and call it the SpeedLock, but this was back in winter and I couldn't wait the few months till the release. I haven't seen the new SpeedLock in person yet. It sounds like a good replacement of the old twist-lock system, but I'm not sure how it stacks up against Black Diamond's FlickLock. The closest Leki poles to compare with the Black Diamond Alpine Carbon Corks seem to be the Corklite Aergons.
↵ Ok, ok, the twist-lock isn't really that bad. It works most of the time -- but we're talking like 75% of the time, not 99%. Sometimes it made me want to beat the poles against a tree.
↵ The weight I gave for the poles includes the straps and dirt baskets. The straps weigh about 1 oz and the dirt baskets 0.3 oz, so a bit of weight could be saved by ditching those.
This kit is kept in the lid of my rucksack, which also functions as a man-purse for short trips away from camp. It is intended for emergencies only, and so is secondary (or even tertiary) to my normal fire starting equipment: ferro rod(s), rubberized BIC lighter, matches, and a fair amount of cotton balls covered in petroleum jelly. The kit here is to be used only when these other methods of starting fire have for some reason failed.
It is quite simple and is probably nothing unique. Everything is kept together and dry inside of a small aLOKSAK (measuring 5”x4”). It weighs 2.8 oz. The contents are as follows:
That’s a whole lot of fires that I can start with just this small kit, and I don’t even have to start messing around with natural tinder or making char-cloth yet!
Previously the envelope held a small ferrocerium rod and striker in lieu of the Spark-Lite. I’ve never been too impressed with the Spark-Lites: the sparks produced are relatively small and weak. They are fine for starting a fire with prepared tinder such as cotton balls or those commercial products included in this kit, but trying to get a natural tinder to take with them can be a bit of a pain. As for the whole one-handed fire starting thing – well, I have never broken my arm or hand. I have been cold enough to not have the fine motor control needed to reliably operate a Bic lighter or Spark-Lite. So for me, given the choice between a normal ferro rod and a one-handed Spark-Lite, I’d go for the normal rod. It requires a gross movement that I know I can always achieve, even when cold.
I decided to remove the ferro rod and add the Spark-Lite to this kit because I figure that I have enough ferro rods stashed here-and-there (including at least one tethered to my body) that the chances of me losing all of them are very slim. (I would be more likely to lose this kit, which is kept in my pack, not on my body.) I should never have to depend on whatever spark-making tool I keep in the envelope, but by opting to make that tool a Spark-Lite, I do give myself the possibility of one-handed fire making (without depending on lighters or trying to light a match held in my teeth). Doug Ritter would be proud.
Occasionally I get asked what motivates me to run on a regular basis. For me, running is fun. I wouldn’t do it if it wasn’t. During the run, I take pleasure in partaking in an activity that I believe Homo sapien sapien was designed to do, and after the run my body feels better.
If that’s not enough, try this: In his autobiography Mad, Bad & Dangerous to Know, Sir Ranulph Fiennes said that, now in his late sixties, the only way he can manage to keep up a decent level of fitness is to run at least 2 hours every other day. I’ll not be physically bested by an old man, even one such as Fiennes!
Sealed in their metallic shells like molluscs on wheels, how can I pry the people free? The auto as tin can, the park ranger as opener. Look here, I want to say, for godsake folks get out of them there machines, take off those fucking sunglasses and unpeel both eyeballs, look around; throw away those god-damned idiotic cameras! For chrissake folks what is this life if full of care we have no time to stand and stare? eh? Take off your shoes for a while, unzip your fly, piss hearty, dig your toes in the hot sand, feel that raw and rugged earth, split a couple of big toenails, draw blood! Why not? Jesus Christ, lady, roll that window down! You can't see the desert if you can't smell it. Dusty? Of course it's dusty -- this is Utah! But it's good dust, good red Utahn dust, rich in iron, rich in irony. Turn that motor off. Get out of that piece of iron and stretch your varicose veins, take off your brassiere and get some hot sun on your old wrinkled dugs! You sir, squinting at the map with your radiator boiling over and your fuel pump vapor-locked, crawl out of that shiny hunk of GM junk and take a walk -- yes, leave the old lady and those squawling brats behind for a while, turn your back on them and take a long quiet walk straight into the canyons, get lost for a while, come back when you damn well fell like it, it'll do you and her and them a world of good. Give the kids a break too, let them out of the car, let them go scrambling over the rocks hunting for rattlesnakes and scorpions and anthills -- yes sir, let them out, turn them loose; how dare you imprison little children in your goddamned upholstered horseless hearse? Yes sir, yes madam, I entreat you, get out of those motorized wheelchairs , get off your foam rubber backsides, stand up straight like men! like women! like human beings! and walk -- walk -- WALK upon our sweet and blessed land!
-Edward Abbey, Desert Solitaire
I was up around Lake Twenty Two yesterday, further exploring the area and testing small changes to my gear load out. I was surprised at the amount of snow I encountered. There was a good foot of it around the lake, whereas at the end of January there was only a dusting. Winter and Spring seem to have gotten themselves confused.
It’s been nearly two years since I last redesigned this site. Don’t let me go that long again! The web is supposed to be a dynamic place, you know. Anyway, here’s the new look.
It isn’t drastically different from the old one. I’m still keeping it clean and simple, and the base colors are the same.
You might notice the rounded corners on some things. Yeah, that’s right. Web 2.0, here I come! I think rounded corners are only acceptable if accomplished with simple CSS. CSS3 is slated to include the border-radius property to achieve rounded corners. The specifications are not yet finalized, but Mozilla browsers have implemented the property with -moz-border-radius and WebKit browsers with -webkit-border-radius. Those are the properties that I’m using. That means you’ll get rounded corners in browsers like Firefox and Safari. Opera seems to work too. Internet Explorer, not so much. (Come on, IE has a hard enough time complying with current standards. You can’t expect it to look to the future!)
If you notice any bugs or would like to suggest any changes, let me know. After all, the site is really for you, dear user.
(I did briefly look at everything on a Windows box running IE8. It seemed to work – other than the rounded corners, of course – but if you notice any bugs in that particular browser, you know the drill.)
Two of the things that really spurred this design are Readability and Clippable. For about a month now, I’ve been using these bookmarklets while reading longs articles online. They help a lot. But it’s really a problem with the design of some sites that I feel the need to use them. I decided that I wanted to redesign my site with typography in mind.
I’m also now integrating Twitter posts into the blog. We’ll see how that goes. They’re styled differently, so there is a visual distinction between a tweet and a normal post. The idea is that I’m now just using twitter as a back-end to create short posts. If I want to, I can switch to some other microblogging service and you, the user, need never know the difference. (I could even just use Wordpress to create short posts! But that might get me kicked off the interwebs…)
Tweets integrated into the blog means tweets in the RSS feed, as well. That makes my RSS mash-up a bit irrelevant. If you currently subscribe to that, I’d recommend changing your subscription back to the normal feed. For those who don’t want to change, I’ve removed the Twitter feed from the mash-up’s input. That way you won’t have to read each of my tweets twice. The mash-up feed will now only include the blog and Flickr stream.
Blueprint
This design is built upon the Blueprint CSS framework. I’ve used it a handful of times before, but never properly. My method was always to link to the three Blueprint CSS files (screen.css, print.css, and ie.css) in the header and then toss in a link to my own stylesheet underneath them. I never used the compressor.
The idea behind the compressor is pretty simple. It allows you to maintain one central instance of Blueprint and use that to generate the CSS needed for each individual project.
When I first head about this, I though that the compression bit was all well and good, but I’ve never been really adamant about optimizing CSS for speed in the first place. I’m more concerned about compliance with standards and readability. Maintaining a central Blueprint instance didn’t appeal to me much, either. What really stood out is the ability to have custom semantic selectors.
CSS frameworks are neat. I’ve used a handful. Like any other tool, they’re not always appropriate. When they are, they have certain advantages and disadvantages. One of the main things that I dislike about them is that they encourage you to clutter your code with framework-specific junk. If you’re using 960.gs you’re going to have elements with classes like “container_x”, “grid_x”, “omega”, and “suffix_x” all over the place. With Grids you’ll have “yui-g”, “yui-b”, “yui-main”, and the like. Readability of code is diminished and you’ll probably end up suffering from a case of div-itis. Not to mention, you can forget about a strict separation of markup and styling. Sure, you could copy the style definitions for the specific framework classes into the classes or IDs of your own elements, but how many folks actually take the time to do all that copying and pasting? I sure don’t! The appeal in a CSS framework is to save time, not make the process of building a site longer. Plus, there’s an appeal in having the framework-related styling separate from the normal site styling. Such a separation makes the framework easy to update.
This is where Blueprint’s semantic classes comes in. It allows you to tell Blueprint to take one of your classes (or IDs) and apply to it the properties of one of Blueprint’s classes. A-mazing.
As an example, the header of this page might look something like this if built on Blueprint without the compressor:
Clean as a whistle! No useless divs, all elements semantically named, and not dependent on any framework.
As great as the compressor is, I do have a couple problems with it. When using the compressor, Blueprint intends that you only have 3 final (compressed) stylesheets: screen.css, print.css, and ie.css. Wordpress, of course, requires a style.css file to define the template. That’s no problem. I just a create a style.css file that has the theme information in it and then toss in a @import url(‘blueprint/screen.css’). Then in the Wordpress header I can put a link to style.css, print.css, and ie.css. Everybody’s happy.
Styling a website basically boils down to making a small change to the stylesheet and refreshing the page to see how that looks. Running the compressor after each change to combine the custom stylesheet with the screen.css file is not productive. So for the development process I tossed a @import url(‘blueprint/custom.css’) into the main style.css file. That works fine.
Then I finish building the theme. I’m ready to compress the stylesheets, so I remove the call to the custom stylesheet in style.css. I tell the compressor where the custom stylesheet is and have it combine it with the screen.css file. I run the compressor, reload the site, and everything explodes.
Just when I thought I was done!
The problem is that in the stylesheet the compressor generates, it puts my custom styles above the semantic classes. Throughout the development process, I was calling the screen.css file (which includes the semantic classes) before the custom stylesheet. As you no doubt know, stylesheets cascade. You can’t just switch up the order of elements without breaking stuff.
Oh well, I thought. At this point I was tired working on the site and didn’t care enough to fight it. I just put the line to call the custom sheet back in style.css after Blueprint’s screen.css file. I still feel like the whole semantic classes bit is enough of a reason to use the compressor, even if I’m not actually compressing my main stylesheet!
In the past, I used Camelbak bladders as my primary water reservoir. I’ve had three of their military hydration systems and never experienced a leak – except once when I neglected to fully close the bladder’s lid. In snowy, alpine conditions I would chuckle at others whose hydration hoses were frozen shut, while I confidently sucked on my insulated Camelbak hose. The Camelbak mouthpiece always insured a high flow-rate, unlike some other brands, and the hose could be shut off at either end, providing further protection against the accidental leaks that have been known to plague other bladders.
But the Camelbak’s durability comes at a price. My 100oz Omega Reservoir (including bite valve and insulated tube) weigh in at 10oz. Not exactly light. So last year, I decided to give Platypus bladders a shot. I had been critical of their toughness in the past, but their 2 liter bottle weighed in at only 1.4oz. With optional drink tube kit and bite valve cover, the full system weighed 3.6oz. It had been referred to as the “gold standard” in ultralight bottles. Too enticing not to pick up.
Of course, the low weight of the Platypus system also comes at a price. The small opening makes the bladder less convenient to fill. The tube is uninsulated, and so inappropriate for much cold weather use. The bite valve has a low flow rate and is prone to leaking. The bite valve cover is cumbersome and difficult to close. And the bladder itself is made of a much thinner and less durable plastic than the Camelbaks. Still, I have been very happy overall with the 2L Platypus bottle. I have not touched the Camelbak once since making the conversion.
But now my Platypus has begun to leak. I’ve patched it with Gorilla Tape, which seems to be an effective fix, but it is only temporary. I need to replace the bottle. Nowadays, all the rage seems to be for the new bottles with their ugly colors. The largest of these is 1 liter, and so not an option for me.
Platypus also now offers two newer hydration systems. The first is the Hoser, which is similar to the old bottle, but with a grab loop at one end and an angled port at the other. The manufacturer’s weight for this system is 3.6oz, which is the same weight that I have measured for my old bottle, hose, and valve. The trouble with the Hoser is that the bottom does away with the traditional expanding bottom of the old bottles in favor of a grab loop. Because of the small opening of the bladders, the best way that I have found to fill it is to scoop up water with something else and pour it into the standing bladder (a method made popular by Jason Klass). For one person to achieve this, the bladder has to stand on its own. The Hoser bladder will not, so it isn’t an option for me.
The other new offering from Platypus is the Big Zip SL. The zipper closer on this addresses the difficulty of filling. The manufacturer’s listed weight is listed at 5.5oz (though I’ve heard reports that it is actually heavier): still a good deal lighter than the Camelbak, but significantly heavier than the old bottle system.
I could go back to the old Camelbak, but the weight deters me. It is also difficult to pour precise amounts of water out of the Camelbak bladder for cooking, which is a disadvantage now that I’m used to the Platypus bottles.
The other option is a bladder from Source. I first heard of these with MilitaryMoron’s review. They have many features that are attractive to me, but I haven’t seen anybody post an accurate weight. Source themselves list their 2L bladder at 0.53lbs (8.48 oz), but they have the same weight listed for the 1.5L and 3L bladders. It seems highly improbable to me that three different sized objects weigh exactly the same. More likely, the manufacturer’s listed weights are inaccurate. I am assuming that the Source bladders will be heavier than the comparable Platypus Big Zip SL and that they have the potential to be slightly lighter than a Camelbak, but that is only a guess. I would rather not purchase a Source bladder without knowing an accurate weight.
For now, I think I will buy another 2L Platypus bottle to replace my leaky one. Despite the durability issues, they seem to be the best mix of price, performance, and weight. They must be thought of as disposable, but that is true of all plastic water carriers. I’m not sure why they have lately become more difficult to acquire from large retailers.
Does anybody know of any other options that I have overlooked?
ITS Tactical is a site that, in their words, is dedicated to living better on the tactical side of life. The site only launched in April of 2009, but with its tutorials, gear reviews, and other articles, has already established itself as mainstay in the community. I first discovered ITS last summer, and it immediately became one of my daily reads.
Last week, Bryan, the editor-in-chief, contacted me and said that he was interested in featuring my work with the DIY Tyvek Stuff Sacks on ITS. I had been meaning to rewrite that article, anyways, in order to demonstrate my new method for constructing the sacks. So I jumped at the opportunity to be a guest writer for ITS. You can see my article on ITS right here, and all the photos are of course available on Flickr.
I decided that I wanted to do something useful with my links page, so I’ve updated it to list those blogs that I subscribe to with my feed reader. Currently, there are 59 links. I’ll try to keep the list updated as I stop reading old blogs or start to read new ones.
Remember Mailbox Peak? The mountain that was supposed to provide one of the most difficult, thigh-burning day hikes in the region? When I climbed it last October my reaction was a cocky “Psch. That ain’t no challenge! Maybe will a full pack it’d cause some pain.” Yesterday, I climbed it again. This time with a 60lb rucksack on my back.
Reaching the summit took three exhausting, slow hours. I allowed myself only one 10 minute break each hour. For the last quarter of the hike I was just stumbling along, slowly plodding my way up higher and higher (thinking “Whose bright idea was this?”). The trail near the top was too covered with snow and ice to make it smart to attempt without some sort of traction device, so I opted for the neighboring boulder field. Scrambling up that required more leg power, balance, and mental facilities than I had left at the time, but I managed to make it.
Upon reaching the summit, I immediately dropped my pack and sat down. I could only relax for a minute before realizing that I was freezing. And so I had to exert myself further by grabbing more layers from my pack and tossing them on.
I realized that I was dizzy, shaking, and – despite having been constantly sucking on my hydration hose on the way up – not sweating as much as I felt that I should have been, so I took a packet of Emergen-C from my first aid kit, dumped it into one of the 1 liter water bottles I had been using for weights, and forced myself to drink it all down before starting my descent.
I felt better after that and, munching on some granola, wandered around the summit, enjoying the view. It had been a spring-like day, with only a few clouds and temperatures around 50F at the bottom. Gazing at the other peaks with their light dustings of snow, I decided that the hike had been worth it.
There was only one mailbox up there this time. The black one must have blown away.
I decided to head down. The boulder field was tricky going, but, afterward, it was just a slow and steady plodding down the mountain. Near the bottom I had to poo, but, upon assuming the position, discovered that I didn’t have the length strength left to squat.
Finally, I made it back to the trail head, around two and a half hours after leaving the top. That night I had energy only to shower and eat a double serving of oatmeal before crashing. Today, I am stiff, but not as sore as I thought I would be.
I took the day to climb to the top of Mount Pilchuck today. The road to the trail head is usually closed and impassable in the winter, but this year it was open and free of snow. From the trail head, it’s only about 3 miles and 2,500 feet to the 5,324 foot summit and the old fire lookout tower. This is the first day hike of the year that I took only a small day pack on, rather than loading up my large rucksack with weights, heavy books, and water. I practically flew up the mountain!
It was a clear day today, without a cloud in the sky. Snow started about a mile up the trail. First, just a little ice and packed slush, but it soon grew to about 5 feet deep. Plenty of people had been up the mountain this winter, leaving me a trail of compacted snow to follow and making crampons or snowshoes unnecessary for the way up.
For the most part, it was easy going, until the trail climbed a slope up onto the ridge of the mountain. It was a little steep. I had to climb with both hands, occasionally punching or kicking holds for hands and feet.
From then on, the trail followed the ridge, but occasionally meandered slightly down onto the south side of the mountain. The sun had been beating on the snow pretty hard over there, turning what was nice crusty snow on the north side to a wet, slushy mixture. It required careful footing to make my way without sliding down the whole face.
I summited and arrived at the lookout at about 1:30PM, two hours after leaving the trail head. The sky was still clear, allowing me to see to Mt. Rainier in the south, Mt. Baker in the north, Glacier Peak in the East, the Puget Sound and the Olympics to the West, along with everything in between. I opened up a few of the heavy shutters on the tower and spent some time trying to identify various peaks in the visible wilderness areas where I have traveled.
I wasn’t looking forward too much to the way down, knowing that without crampons and an ice ax it might mean a tricky brush with death. I put it off a bit longer by cooking up some ramen and jerk. But, after lunch, I had to turn around and head down.
Where the trail along the ridge deviated onto the southern face, I had no choice but to squat and slide down on my feet and butt, doing my best to control my decent with a trekking pole. Occasionally this worked. Occasionally I was able to dig my feet in to stop before going off the edge. Other times I just had to aim for trees, using them as breaks to stop me from taking the quick way off the mountain, then turn around and climb back up to the trail that I had slid past.
The near vertical slope I climbed on the way up was on the north face of the mountain. The snow there was hard and crusty, so I was able to climb my way back down using the holds I had previously made.
From then on, it was fairly easy going. I spotted one storm cloud, but the way down was otherwise uneventful.
Man is not adapted to live in a mirror-lined box, generating his own electric light and sending for selected images from outside when he happens to need them. Darkness and a bad smell are all that can come of that. We need the vast world, and it must be a world that does not need us; a world constantly capable of surprising us, a world we did not program, since only such a world is the proper object of wonder.
-Mary Midgley
I wandered into the Henry M. Jackson Wilderness this morning, taking a 10 mile walk with full pack to Goat Lake. The lake is a popular destination for day trippers in the summer, which has always caused me to avoid the place. I figured the warm winter might give me a chance to enjoy the area with a few less bipeds around.
The trail was deserted, making it an enjoyable jaunt. As per usual for this unusual year, no snow nor ice was encountered. There was quite a bit of blow-down and a few land slides, most likely from this year’s storms, which caused me to misplace the trail now and again, but it was otherwise uneventful.
I’ll say one thing about old Hank: he’s got some big cedars in his country. I mean, big. Some looked like they may almost match a sequoia. The going was slow, as every 10 feet or so I encountered another that required a pause, a bend of the neck, and a moment’s consideration. There was also evidence of past logging, such as Tree On a Stump. A nice little “fuck you” to humans from the forest, I thought.
From one particularly aged and gnarly specimen, I cut a branch of needles. I planned to make tea later and perhaps infuse some of that 1,000 vitality into myself.
The lake itself had no ice, but Cadet Peak above was topped with snow. It was difficult to tell where mountain ended and sky began, for all the white clouds in the afternoon sky.
Lunch was intended to be couscous with a bit of curry, but ended up being curry with a bit of couscous. Afterward, I washed it down with warm cedar tea and a few chunks of dark chocolate – a combination most pleasing to my tongue.
Then: a walk back home as the sun set.
I don't know what the answer is. In time man gets used to almost anything, but the problem seems to be that technology is advancing faster than he can adjust to it. I think it's time we started applying the brakes, slowing down our greed and slowing down the world.
I have found that some of the simplest things have given me the most pleasure. They didn't cost me a lot of money either. They just worked on my senses. Did you ever pick very large blueberries after a summer rain? Walk through a grove of cottonwoods, open like a park, and see the blue sky beyond the shimmering gold of the leaves? Pull on dry woolen socks after you've peeled off the wet ones? Come in out of the subzero and shiver yourself warm in front of a wood fire? The world is full of such things.
- Richard Proenneke, One Man's Wilderness
The ideal off-road journey? I'll tell you: under water. I would like to see every four-by-four on earth, every three-wheeler, every dirt bike, trail bike and Big Foot truck driven straight into the Marianas Trench, three thousand feet below the surface of the Pacific Ocean, and parked there -- left there -- for the duration.
For the duration of what? For the duration of this techno-industrial-commercial slime-mold that is transforming our planet into one vast battleground of Cretins against Nature. With the Cretins winning.
What's wrong with the horse? Or the burro? Or the bicycle? Or even, God help us, the human foot? Why should not Americans especially learn to walk again? There is this to be said for walking: it is the one method of human locomotion by which a man or woman proceeds erect, upright, proud and independent, not squatting on the haunches like a frog.
Little boys love machines. Grown-up men and women like to walk.
-Edward Abbey
I tossed another 10lb weight in my pack and headed out to the Mount Pilchuck area. I ended up walking out to (the creatively named) Lake Twenty Two at the base of Pilchuck and bushwhacked around the research natural area a bit.
There was very little snow. It’s going to be a dry summer.
I’ve been doing a few training hikes lately: loading the old rucksack up with 55-60lb, walking through forests and scrambling up peaks. The winter has been unusually warm, which has allowed me to access places that are usually off-limits this time of year without technical equipment. Yesterday I ventured out to Lake Serene, at the base of Mt. Index (just the other side of the Skykomish valley from Baring Mountain).
At a little over 7 miles (round trip) and only 2,000 feet elevation gain, this was a relaxing walk; a bit of an award to myself for completing the other, more difficult climbs.
The trail was snow free till about a mile or so before the lake. After that, there was a dusting of crusty snow – no more than an inch – and quite a bit of ice.
I ate lunch at the frozen lake, watched an avalanche on Index’s north peak, and raced the sun back home.
"...a well-lived life means striving for personal, moral, and physical autonomy: self-direction, intellectual and spiritual independence, self-control, self-responsibility -- in sum, self-realization through self-determination. As a dues-paying member of this unintentionally masochistic minority, I can testify that the price of personal freedom and soulful individuality today -- the cost of living a self-determined life -- is often social, material, physical, and even geographical marginalization all of which can act themselves out in a big city as well as a small town or a rural homestead and must be construed as culture's punishment for being different. Or perhaps, as some will say, such are the just deserts of freaks and other sinners. Humankind, said Henry through its own inventions and lust for comfort is invariably driven to desperation. Misery loves company and the dominant culture, jealous of those who evade desperate angst, is never happy with mavericks, those of us who, even in the most liberal social realms, are barely tolerated."
-David Peterson, On the Wild Edge: In Search of a Natural Life
This past summer, I reviewed the StickPic, which Rodney Java, the inventor, was kind enough to send me. Last week Rodney sent me one of his new and slightly improved StickPic models.
The first change is in how the markings are applied to the StickPic. According to Rodney,
We now have a new machine shop producing the StickPic who cnc engraves our name and model numbers. In the past, we used a metal die stamp and stamped every StickPic by hand. This produced inconsistent results.
The difference is noticeable. In the old model, pictured on the left, you can see how the thickness of the lettering varies. The new engraving looks more professional, but this is only a cosmetic difference, and not one that I think really matters.
The next immediately noticeable difference is the nut:
A new 8 star jam nut is now used which allows the user, while wearing gloves, to easily attach the StickPic to the camera.
This is certainly a more significant change than the engraving. I find that it makes the StickPic easier to both attach and deattach even when not wearing gloves. The new nut is not only easier to grab, but it also spins more freely than the old.
The third and final change is the hole itself:
The through hole on the new model is also slightly tapered to ensure it stays on the trekking pole more securely; it wedges in a little better.
You can see in the photos that the new Stickpic slides much further down the tip of the pole than does the old one. I’m not sure how much this contributes to security: I installed both StickPics on either one of my poles and shook them around violently. Neither came off. Granted, I didn’t have the extra weight of a camera attached to either StickPic. But I’ve also never had my camera fall off the pole during normal use with the old StickPic.
The weight of the new StickPic has been slightly increased – probably due to the winged nut. My scale puts the old model at 8 grams and the new one at 10 grams. (Though my scale is only accurate down to 1 gram, so it isn’t the best for measuring such lightweight items.) Personally, I think the new nut is worth an additional 2 grams!
I think that all three changes to the StickPic are marked improvements, with the new nut being the most significant of the lot. I do not think that any of the changes are enough to warrant purchasing the new model if you are happy with the old one, but they will improve the device for new users.
Note:
In the above photos, the new StickPic is installed on a trekking pole without a basket. It is not necessary to remove the pole’s basket to use the StickPic. I simply lost the basket for that pole a while back and never replaced it. Even though it slides much further down the tip of the pole than does the old model, the new StickPic will fit on the other pole without interfering with the basket.


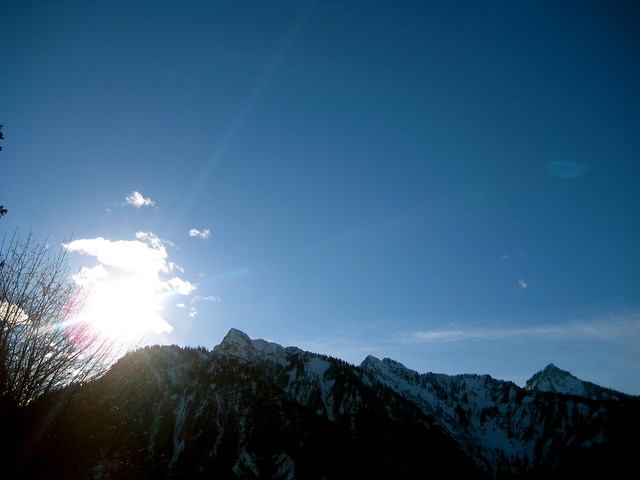
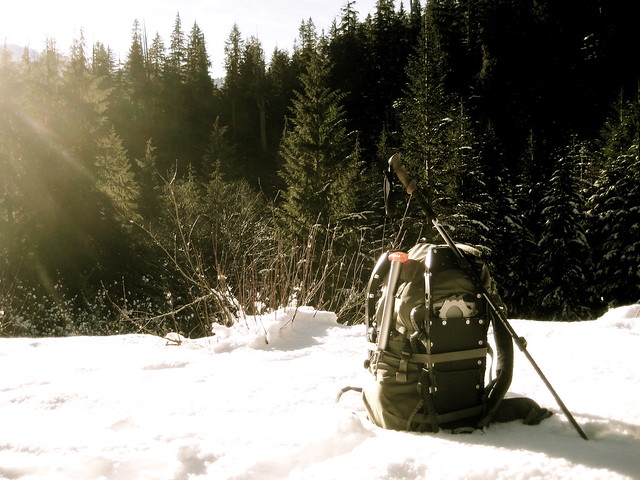
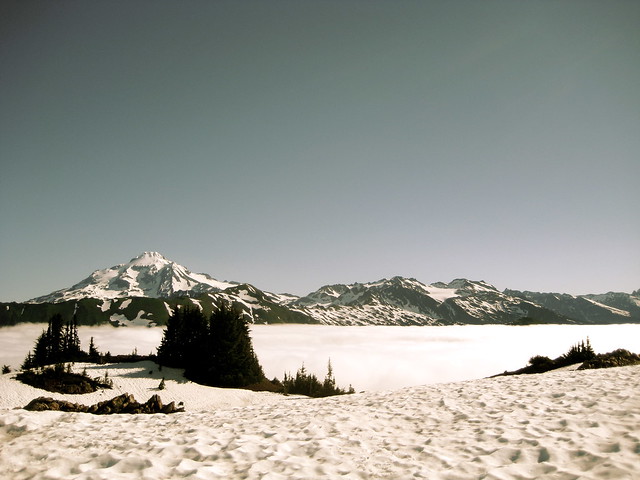
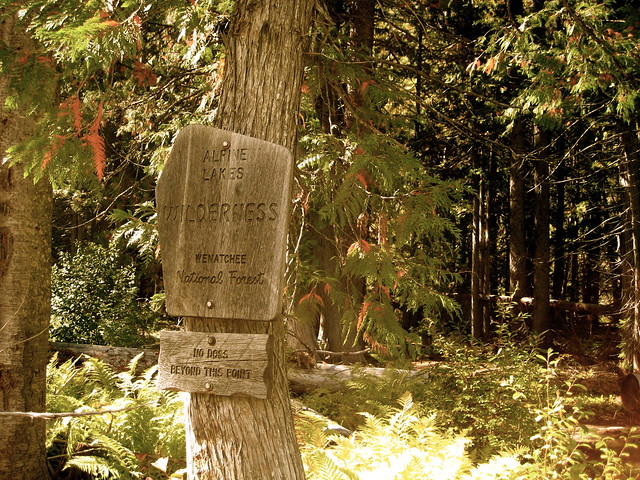
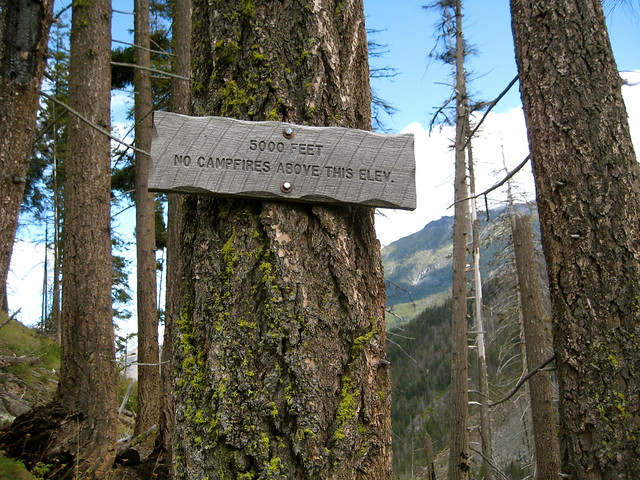
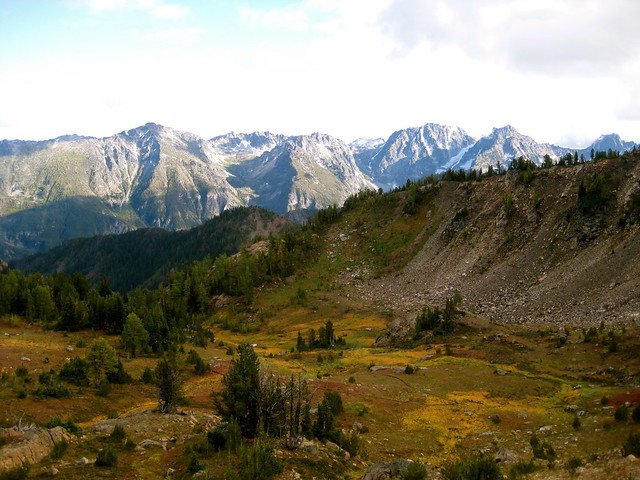
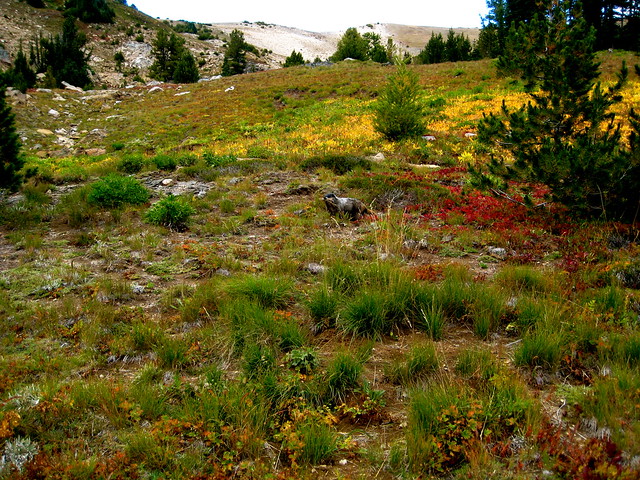

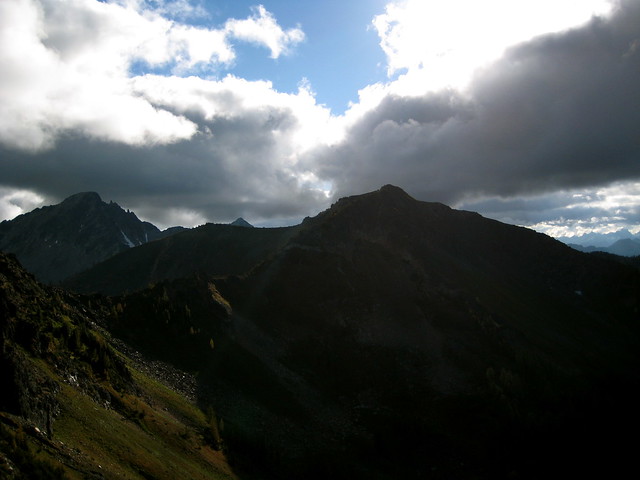
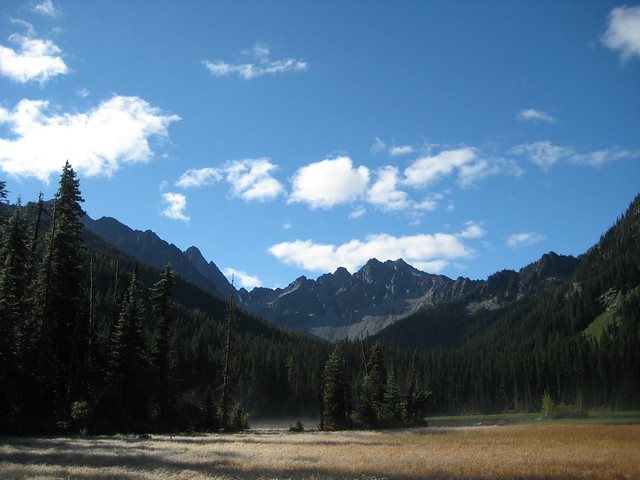
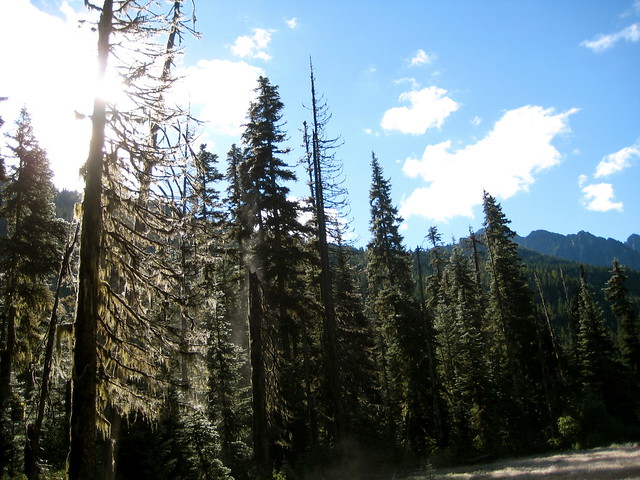
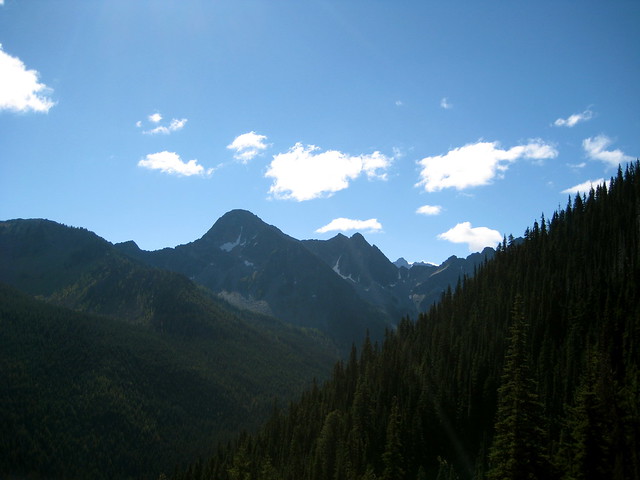
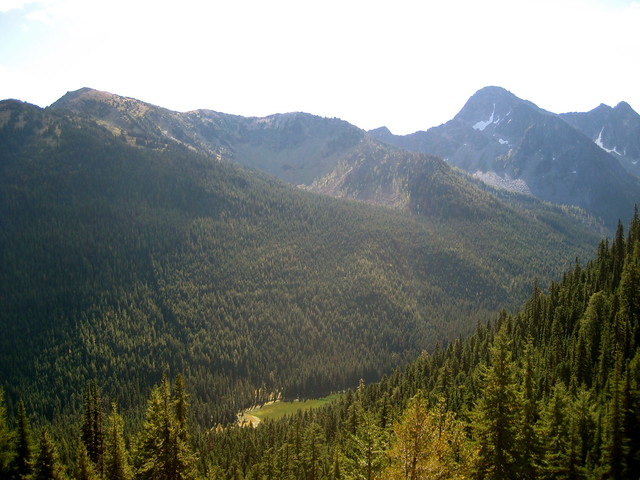

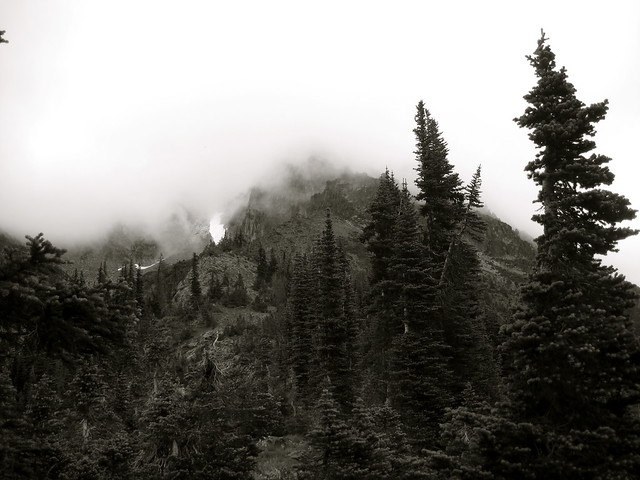
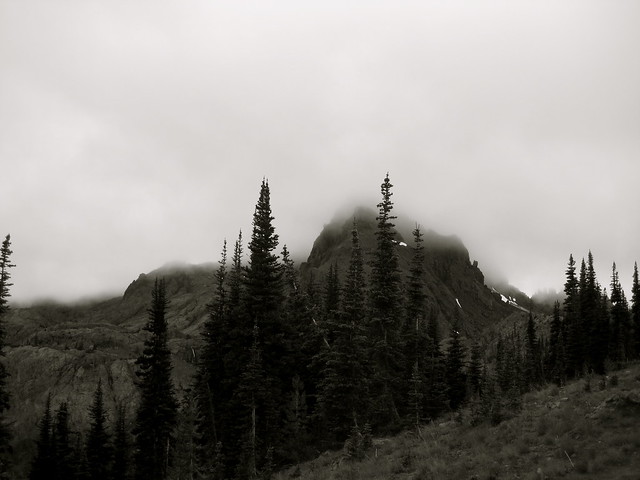
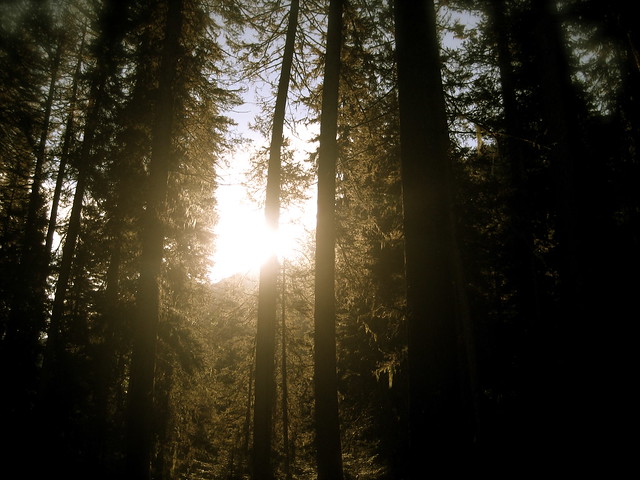
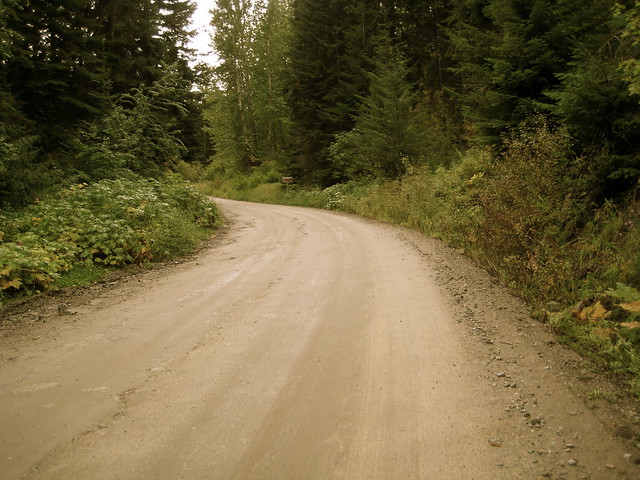
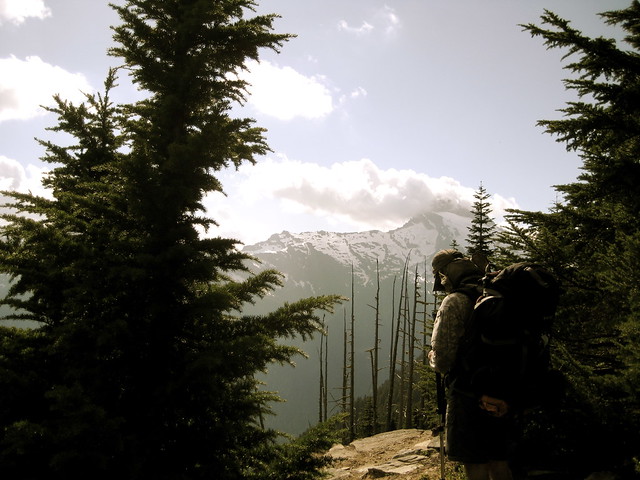
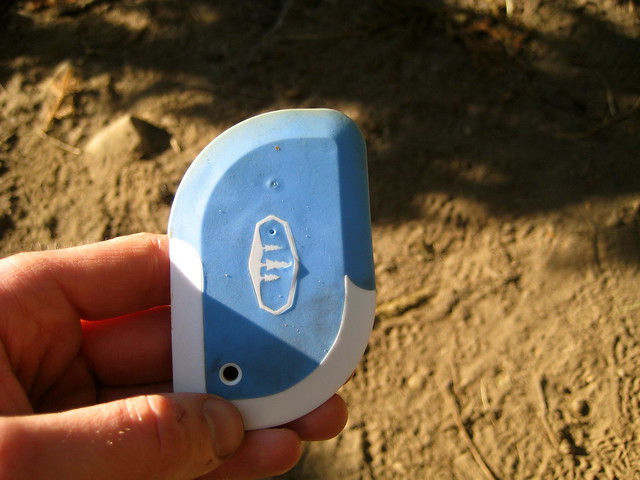
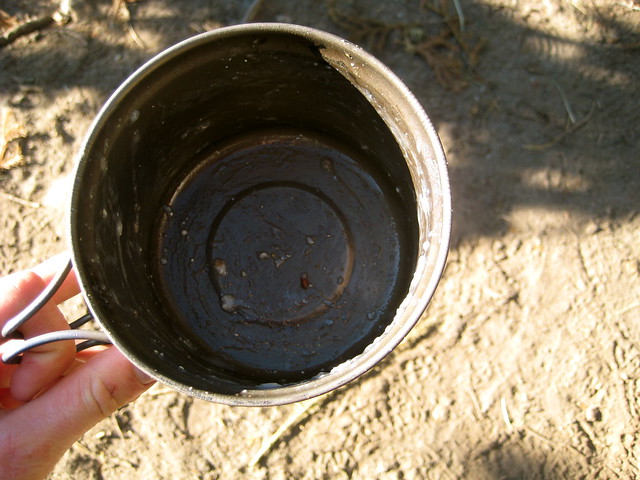
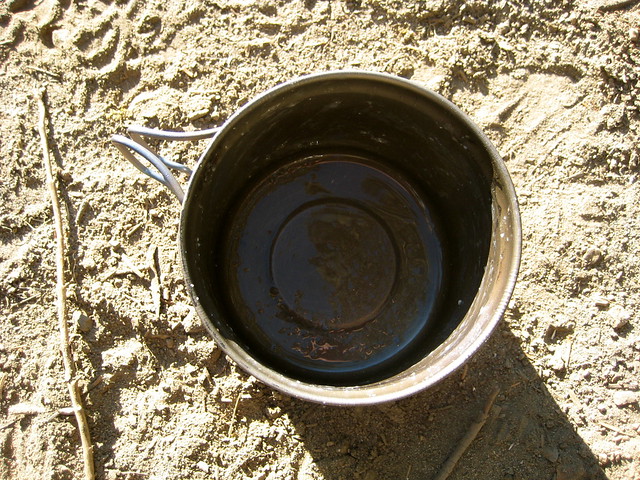
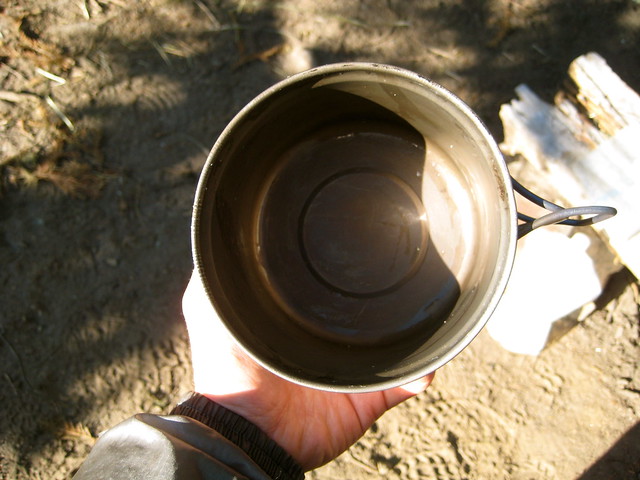
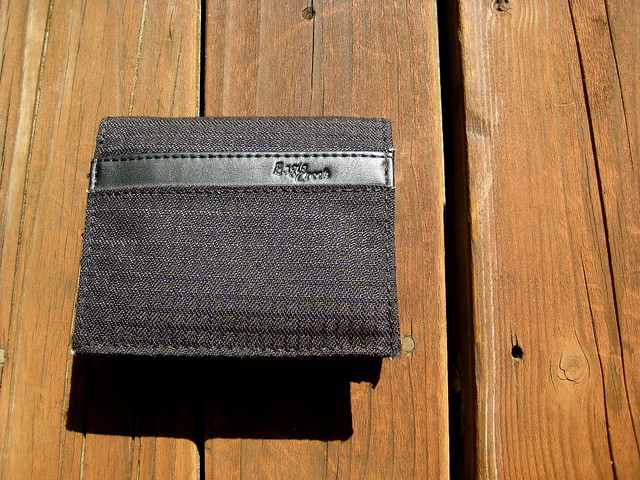

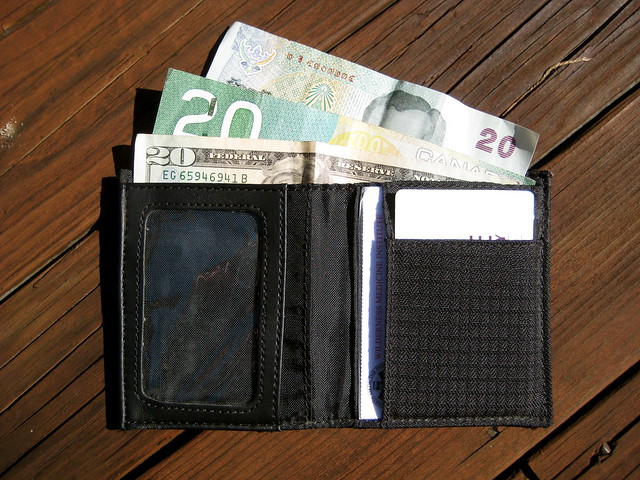

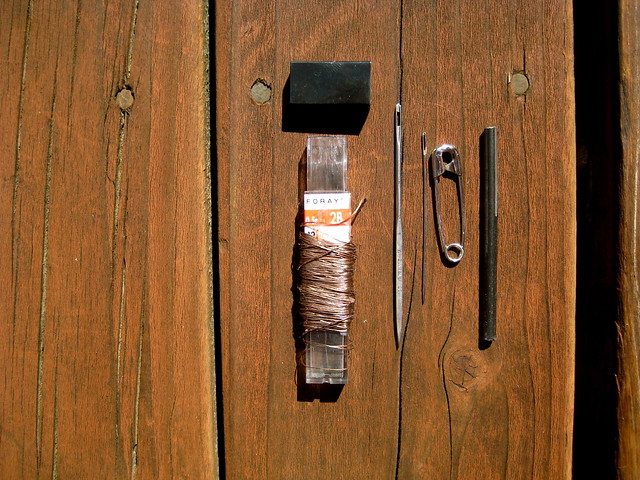

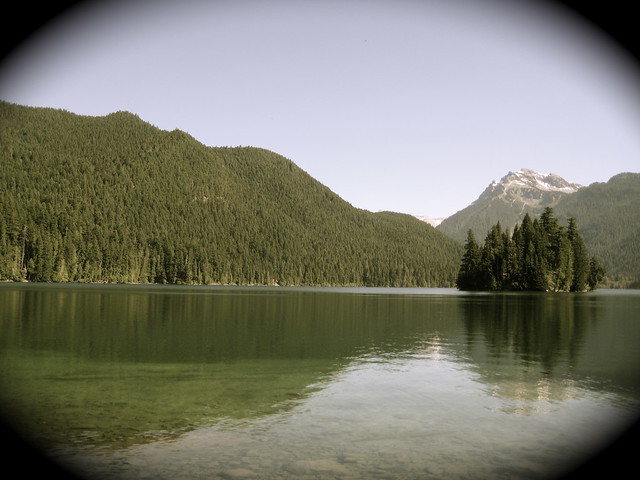

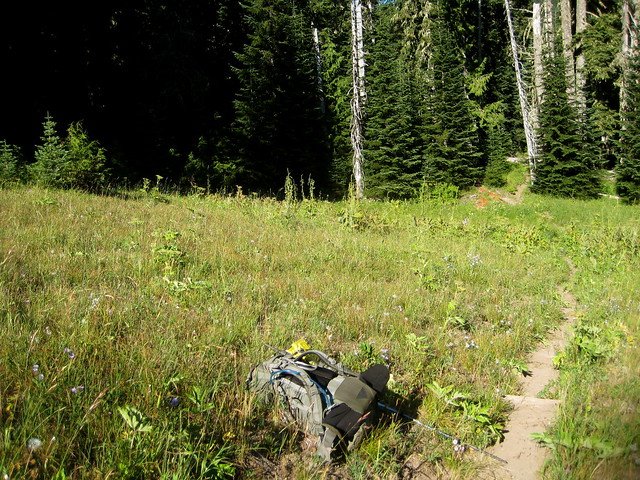
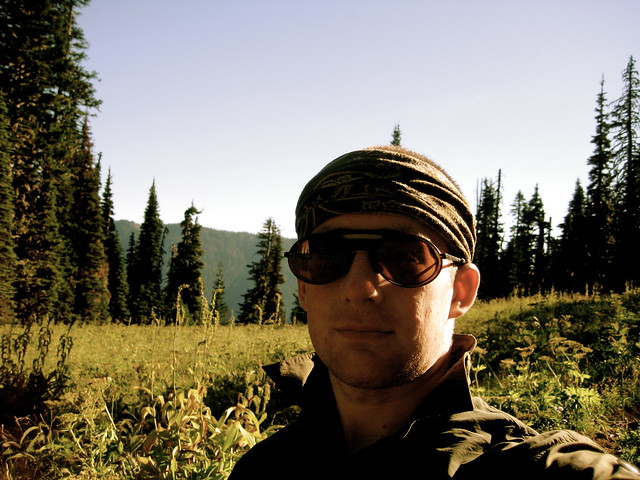
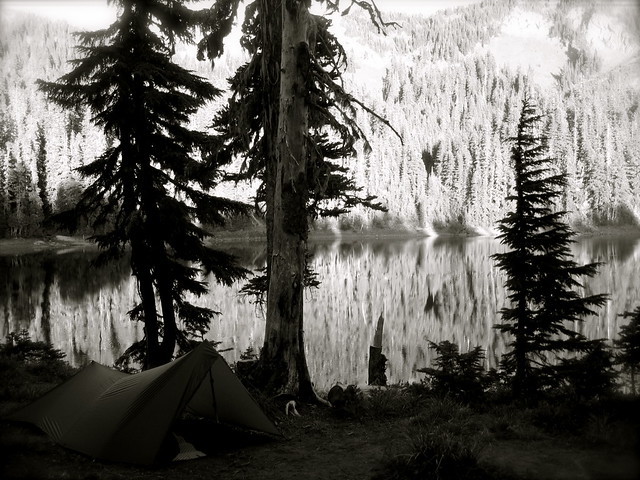
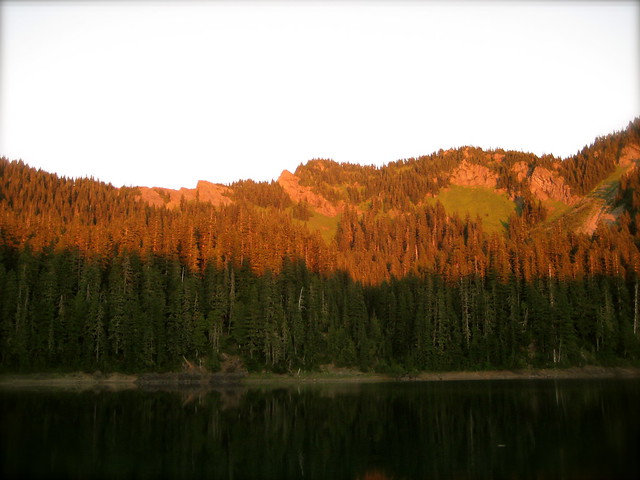
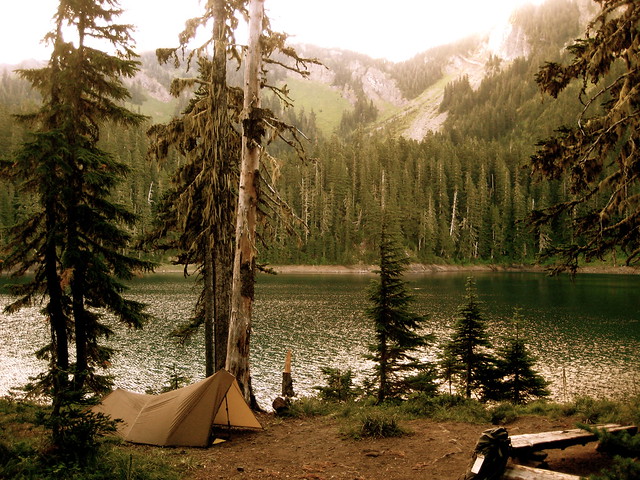
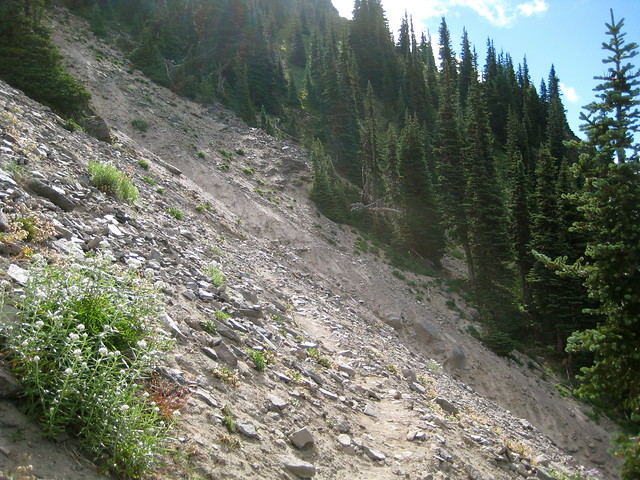

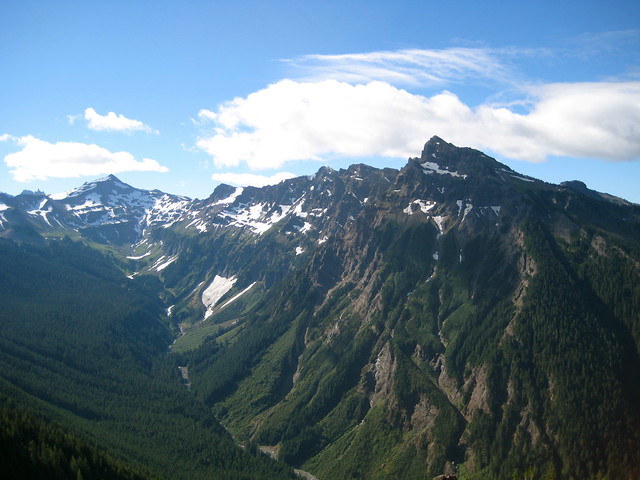
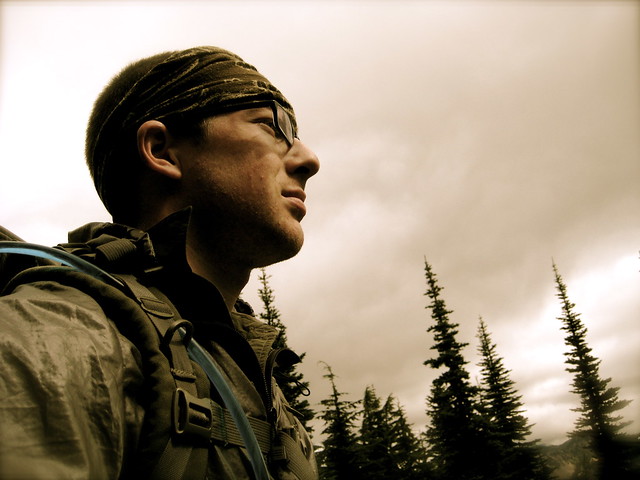
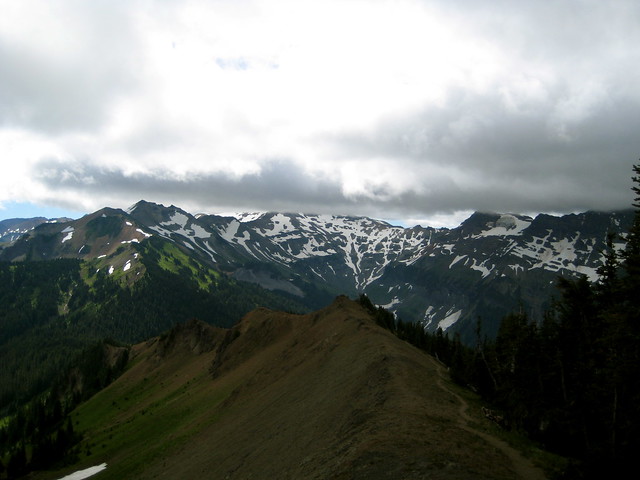
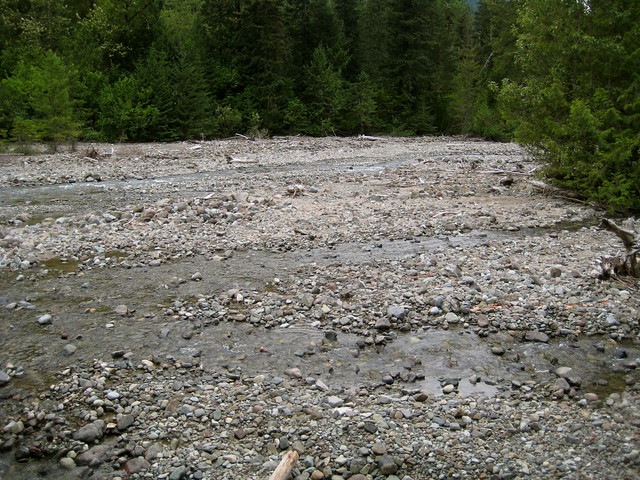
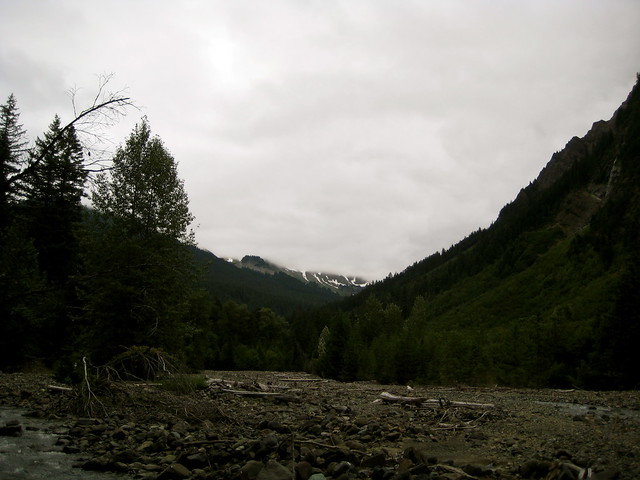
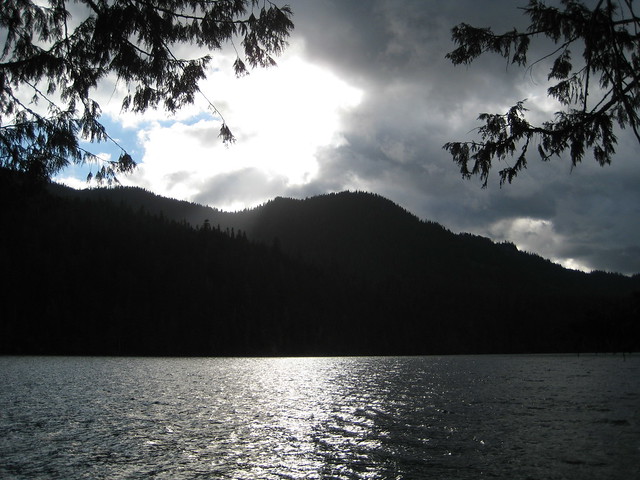
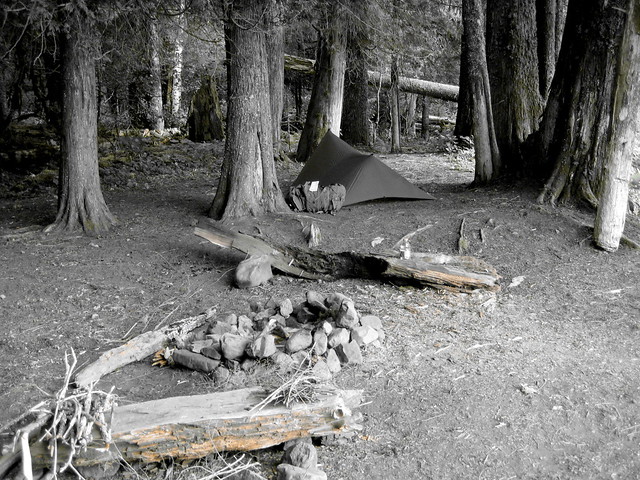
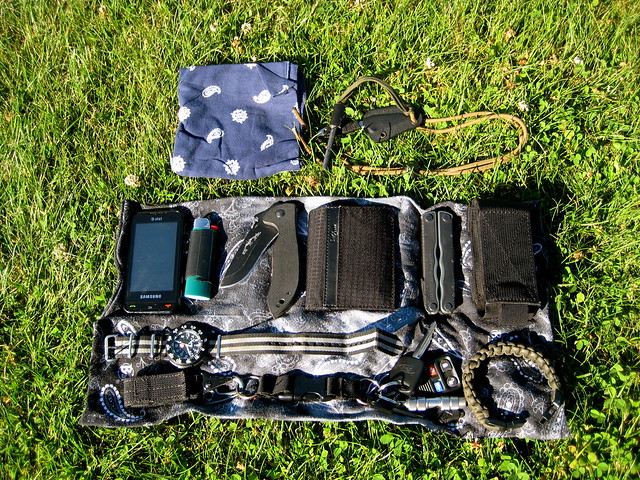
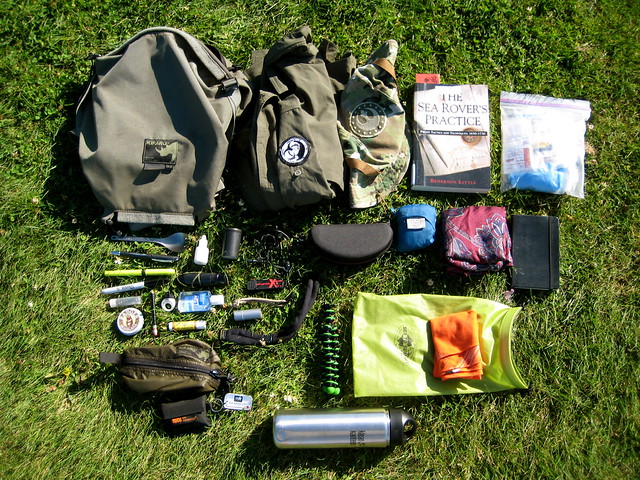
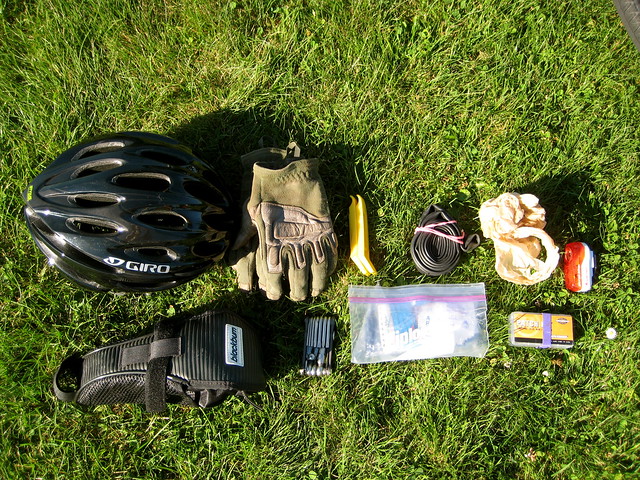

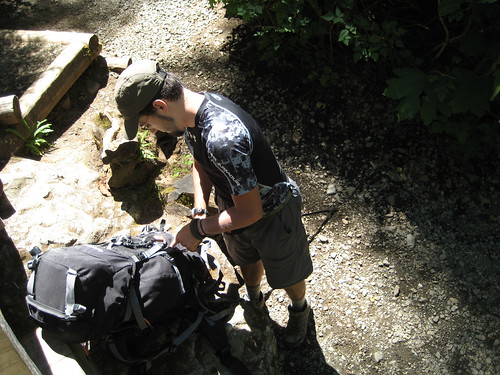
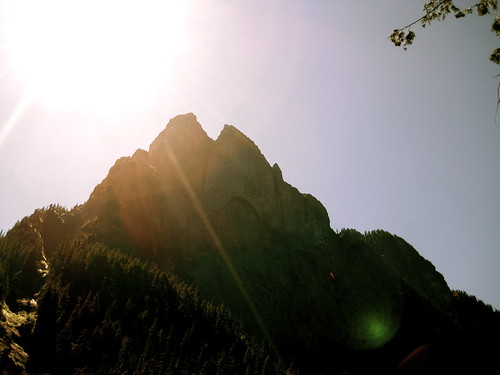
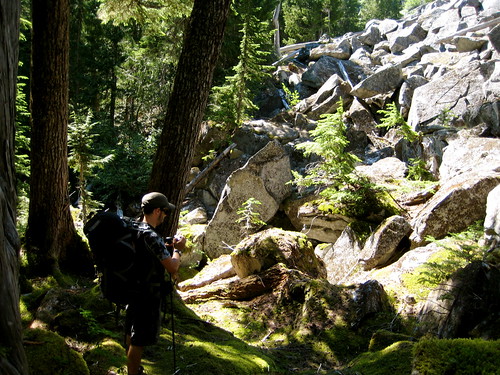

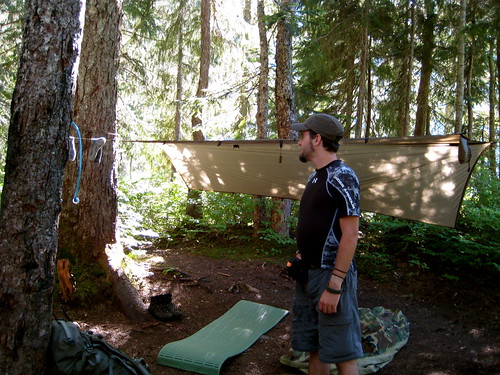

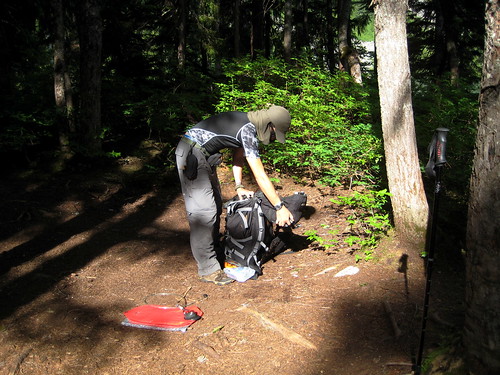

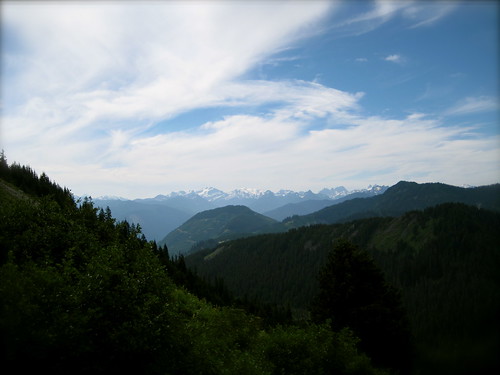
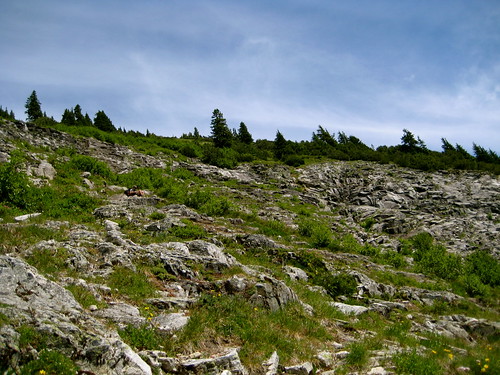
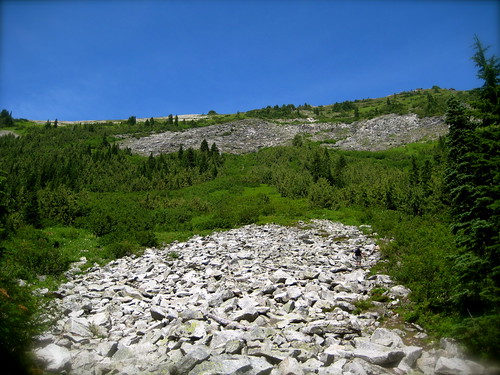
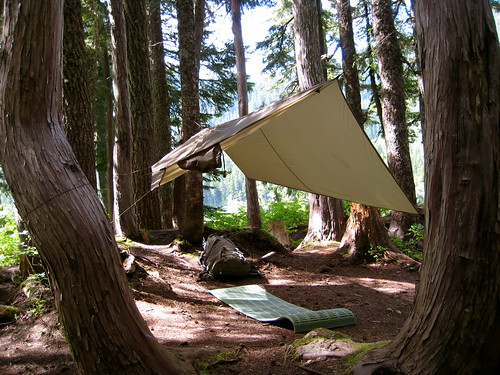

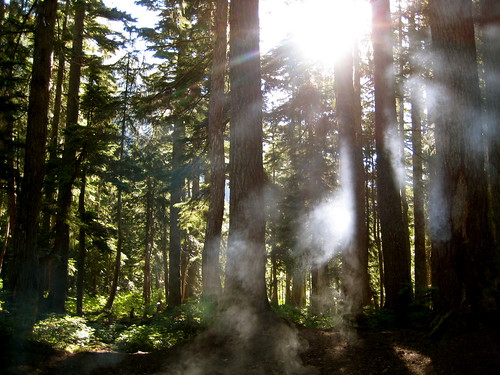


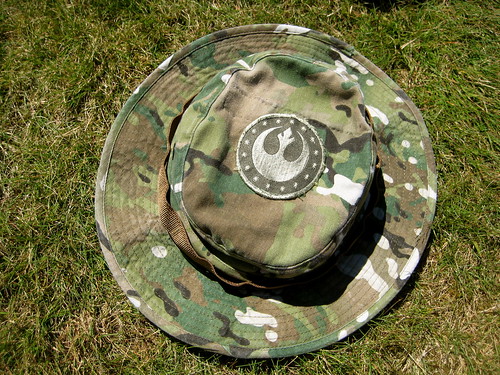
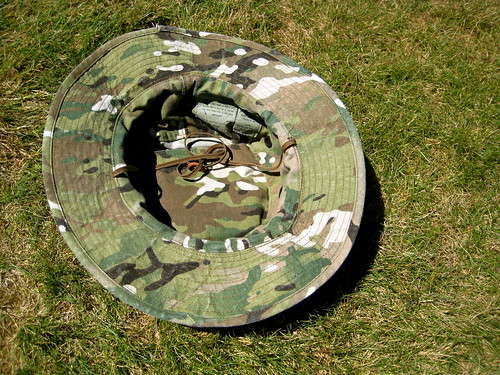
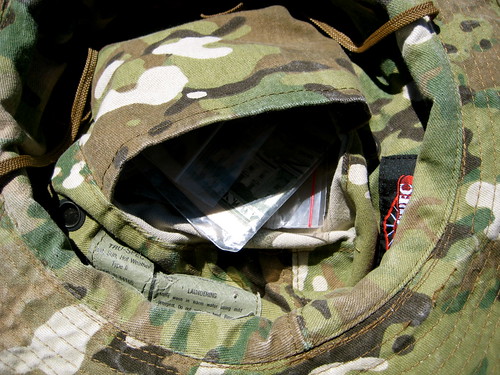
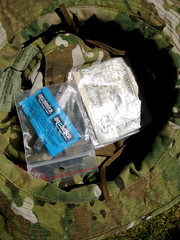

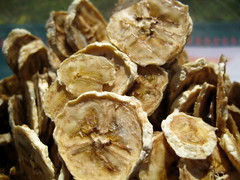
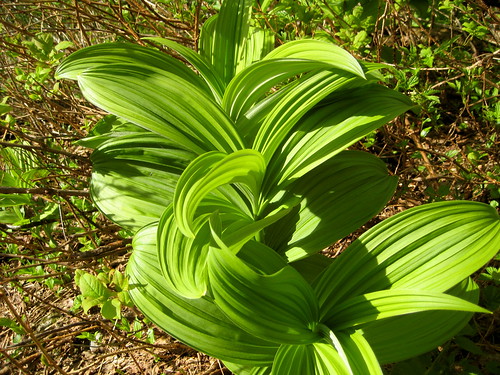
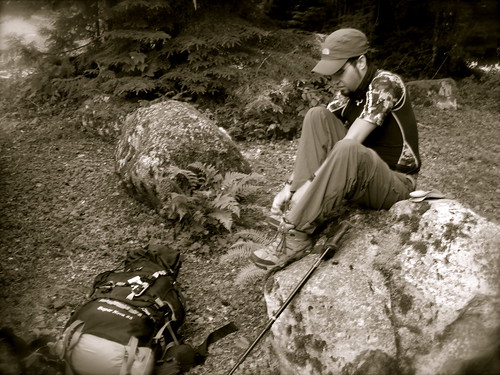


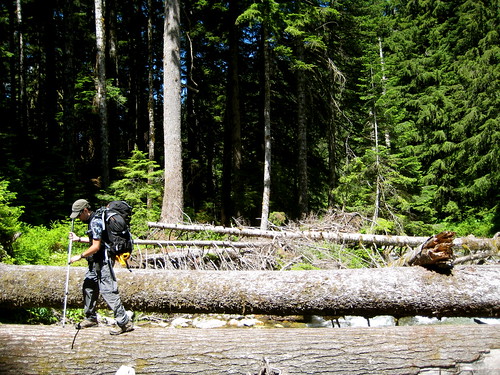
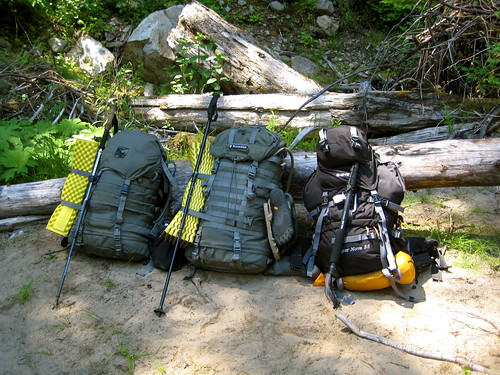
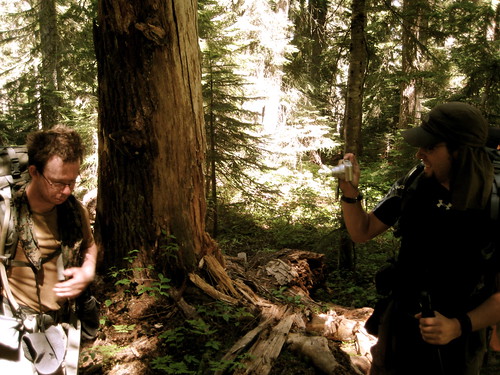
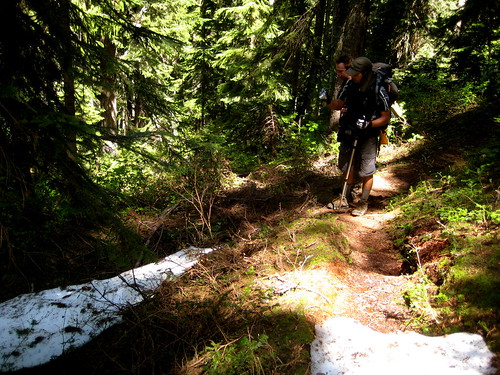

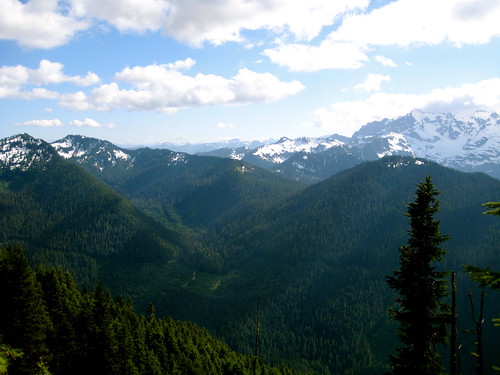

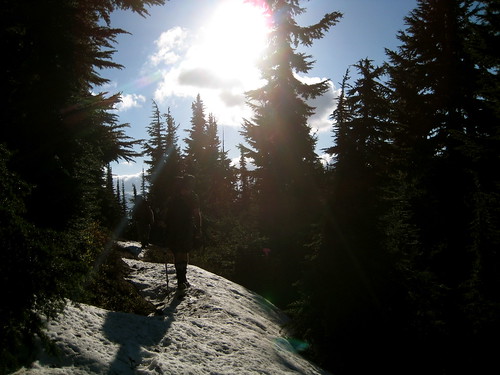
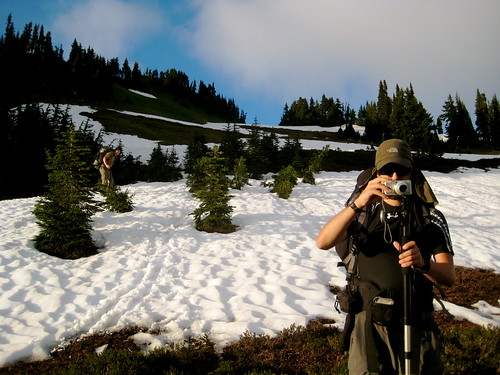
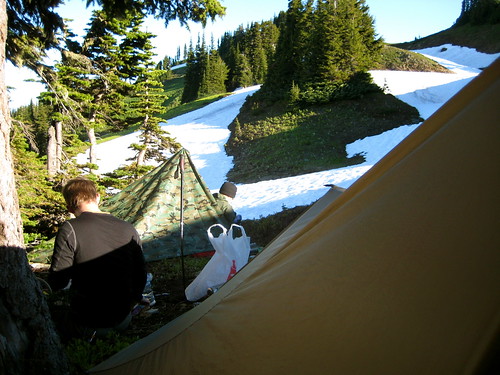
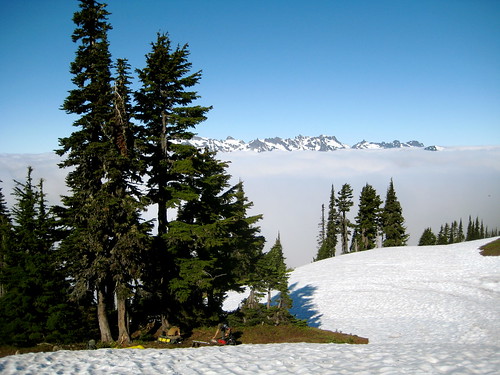
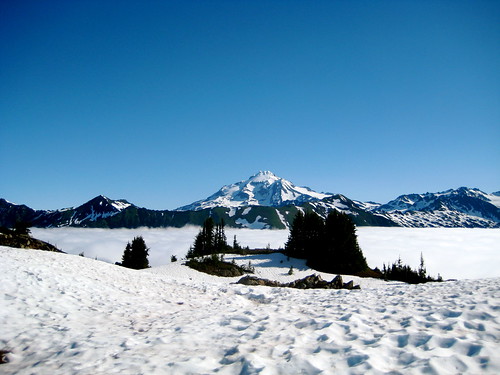
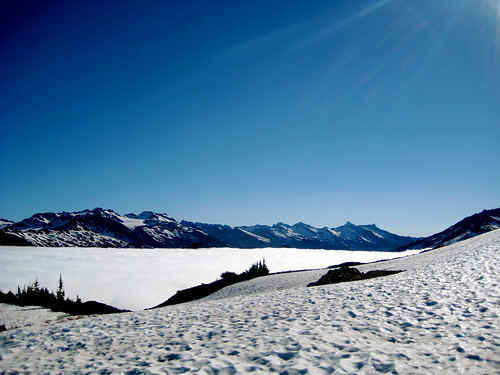


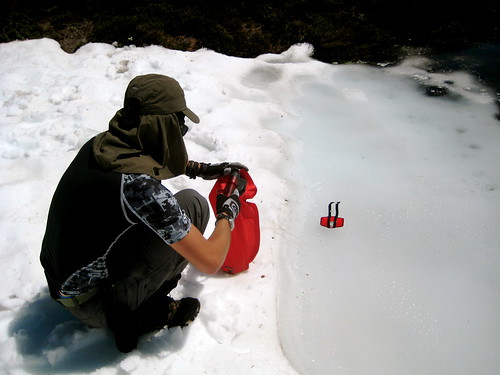

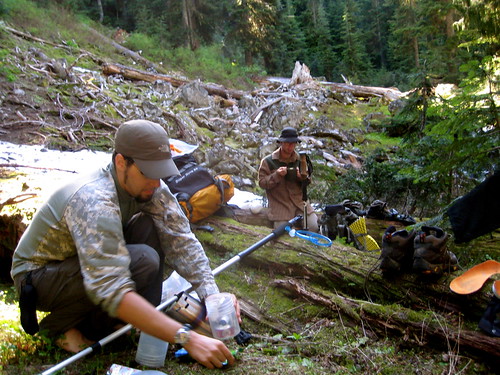

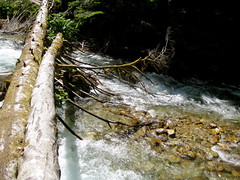
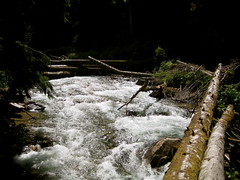


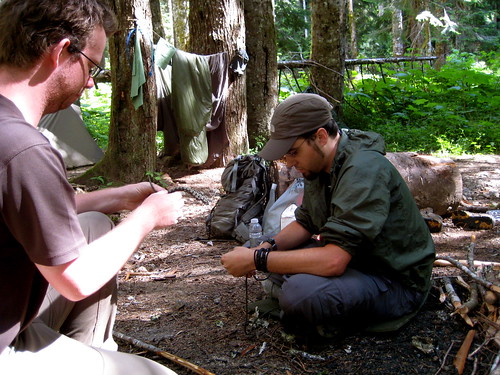
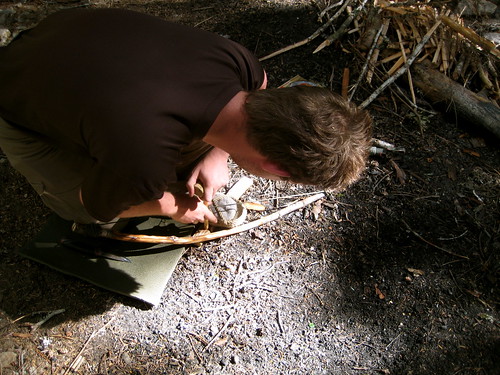
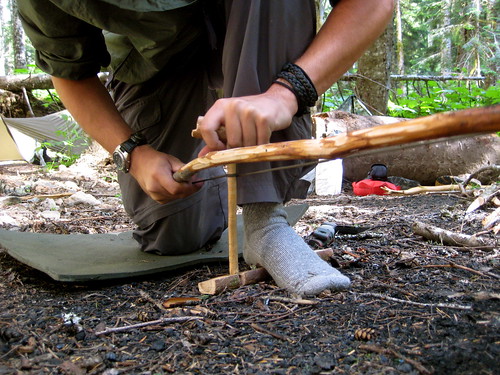

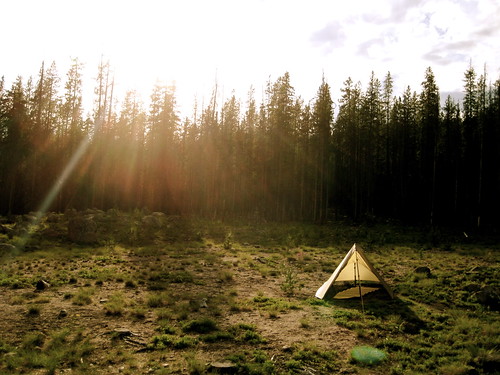

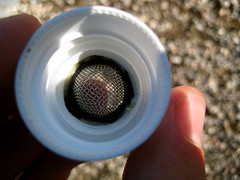

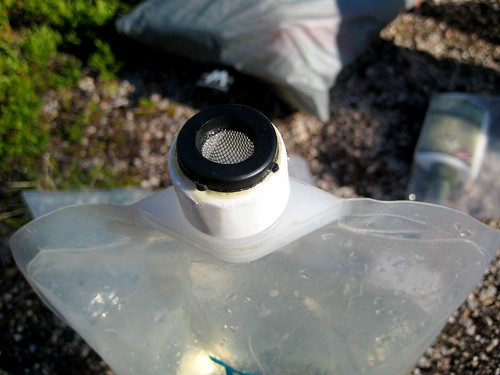
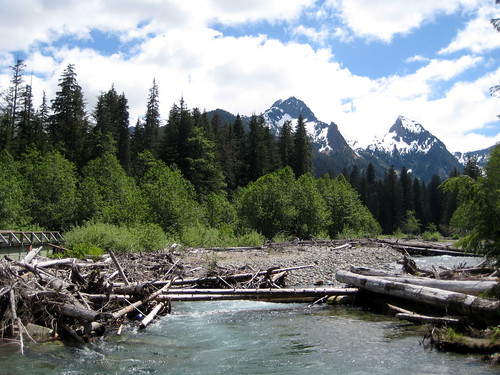
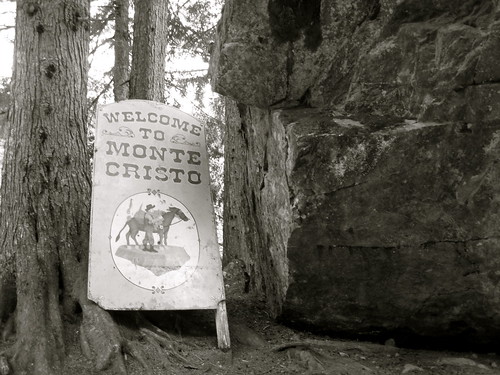
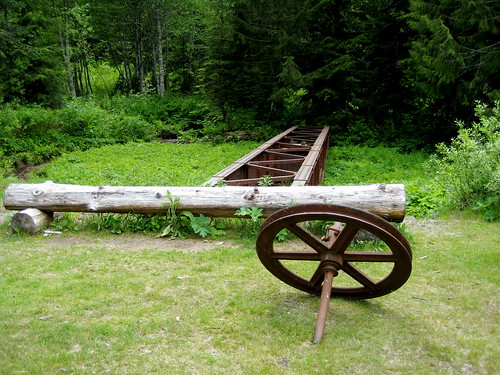
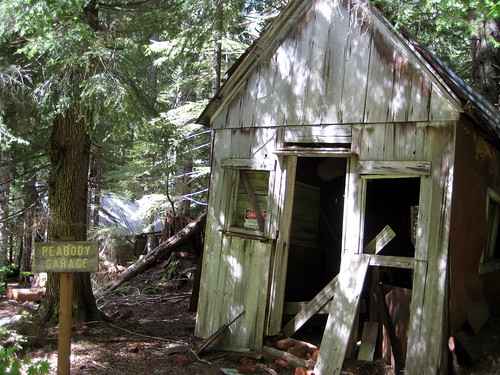
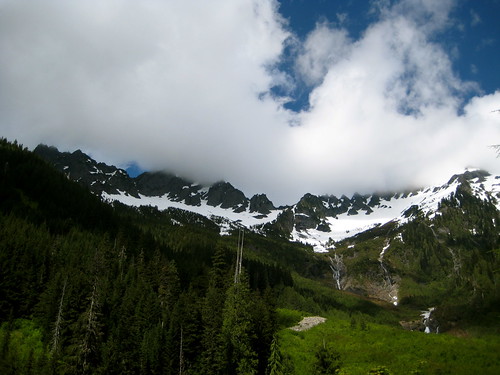

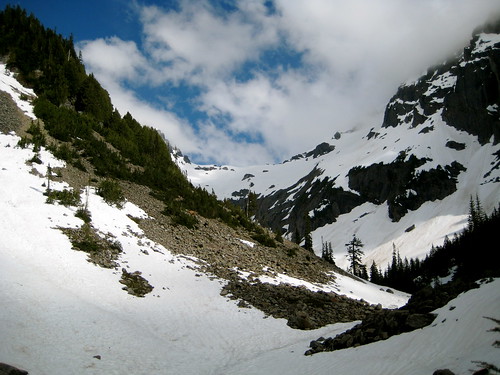
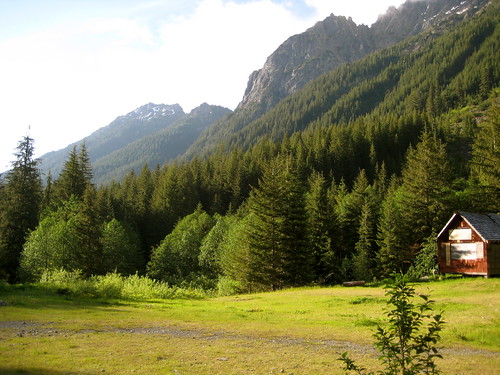
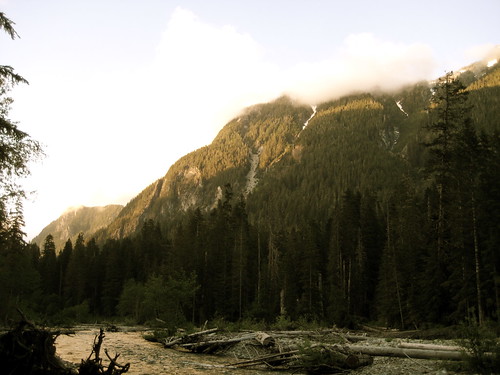
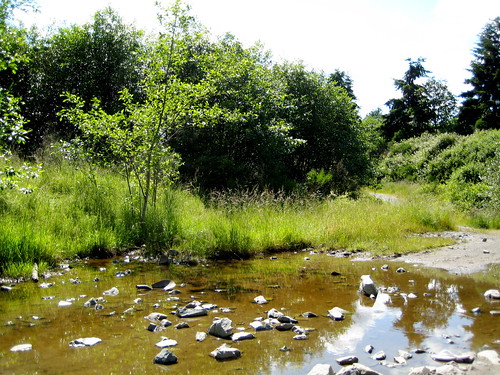
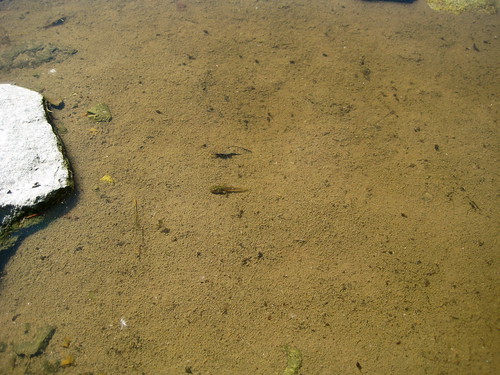
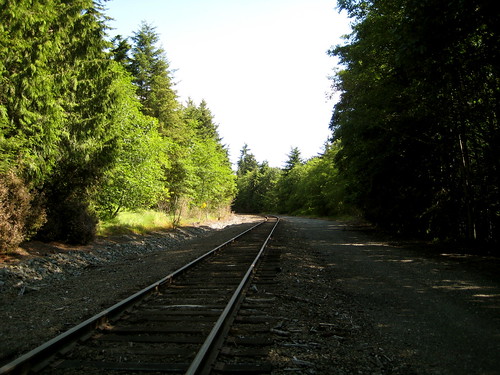
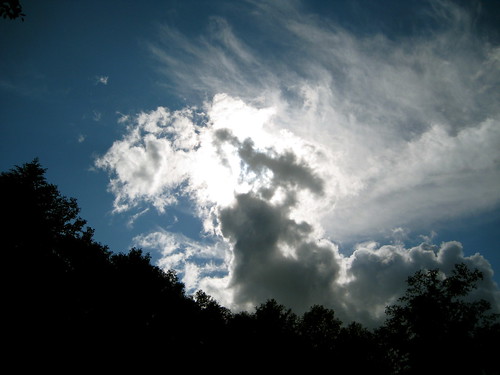

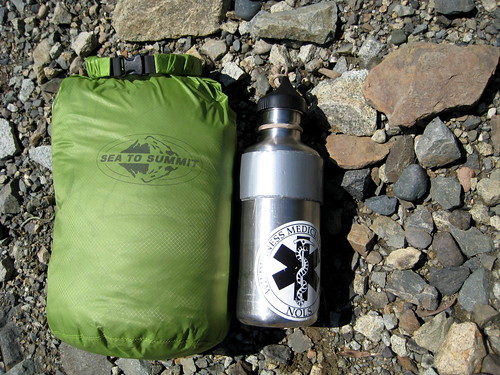


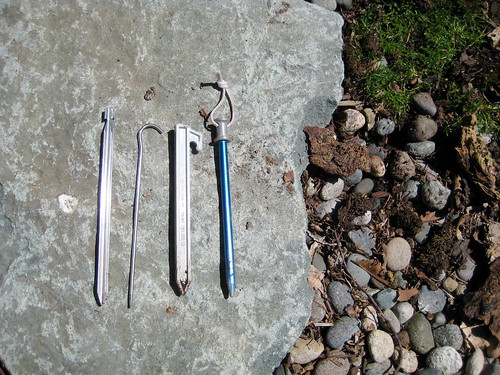
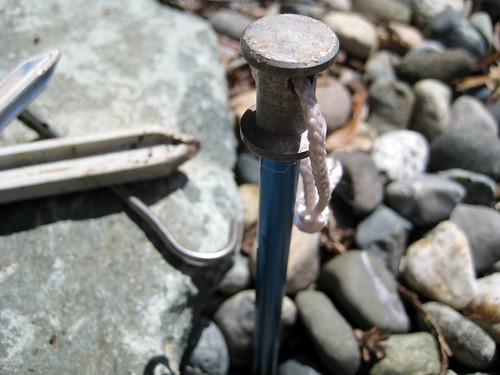

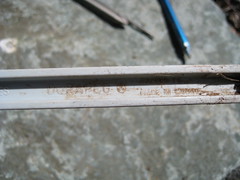


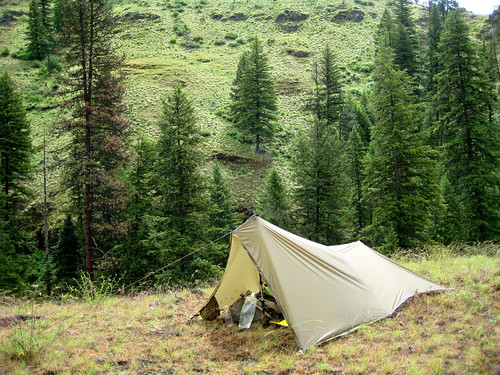
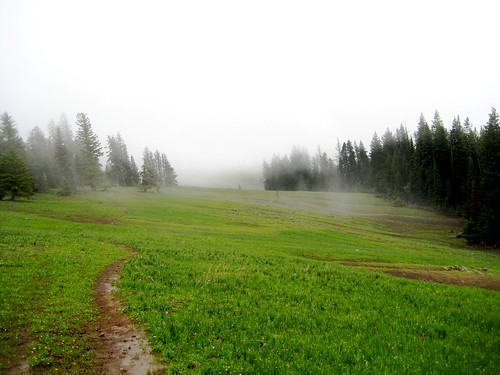
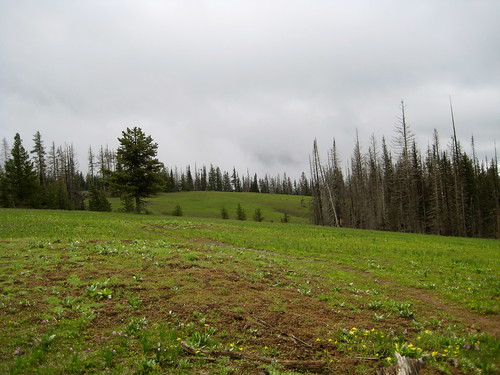

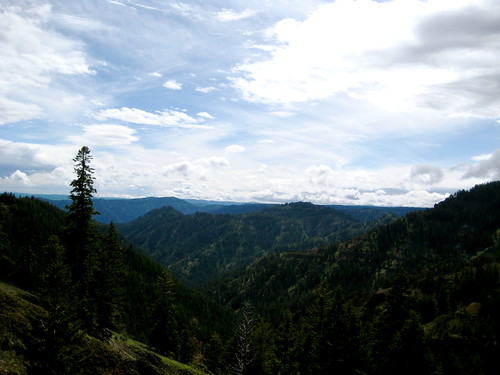

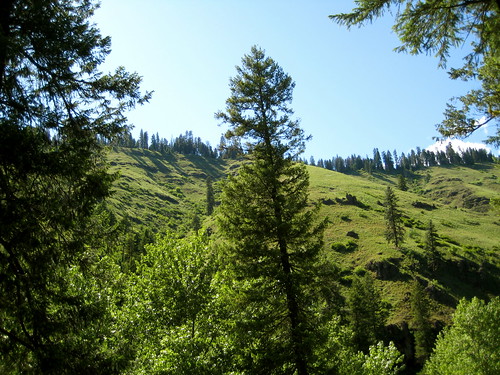

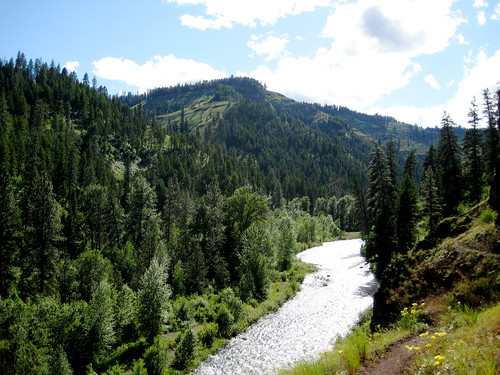
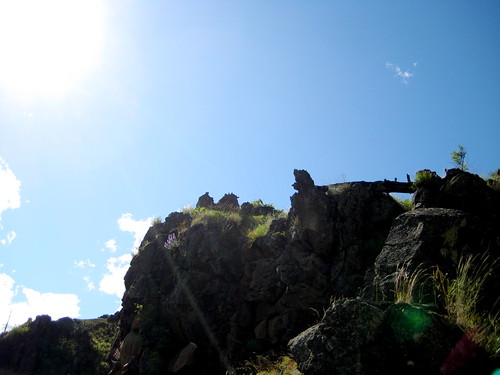
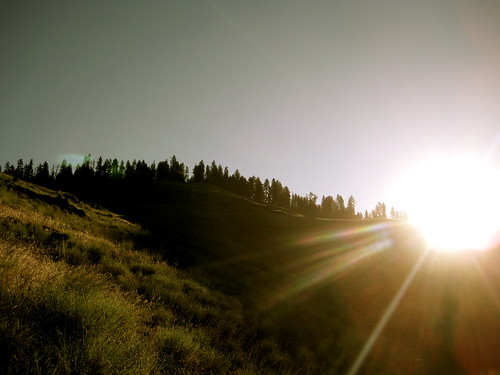
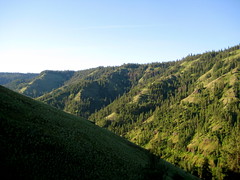
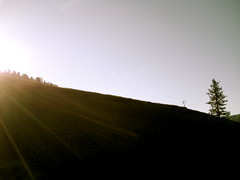
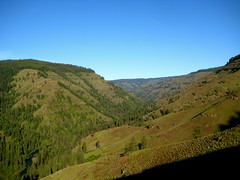

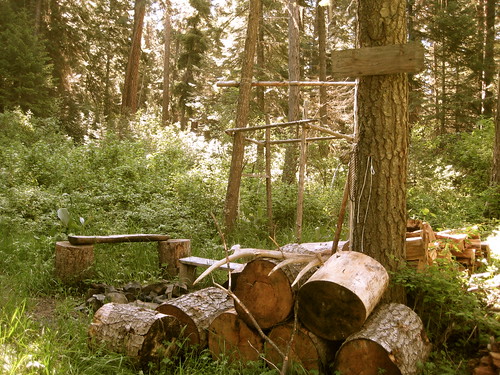
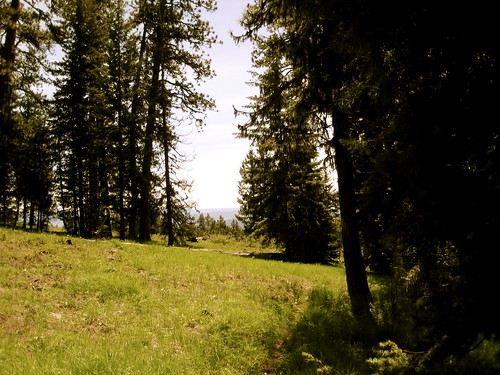

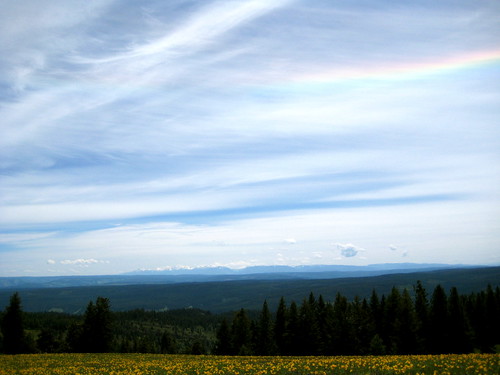

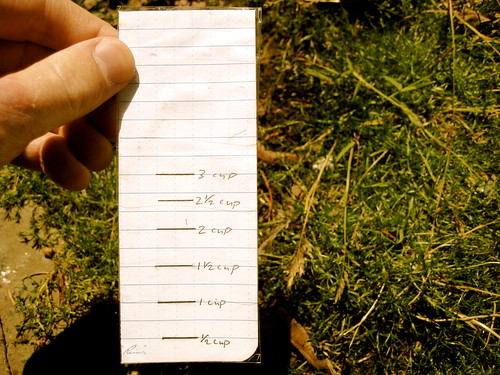
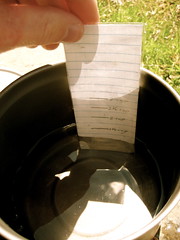
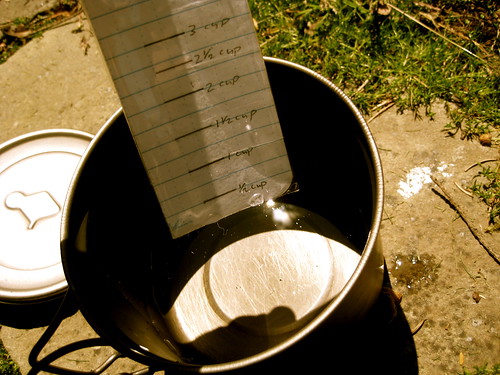
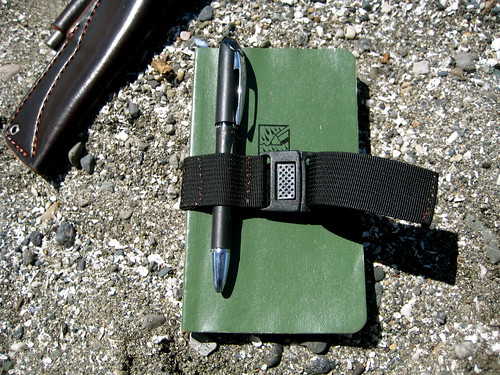

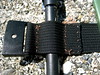


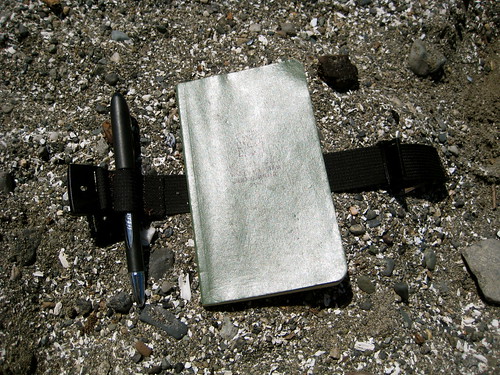

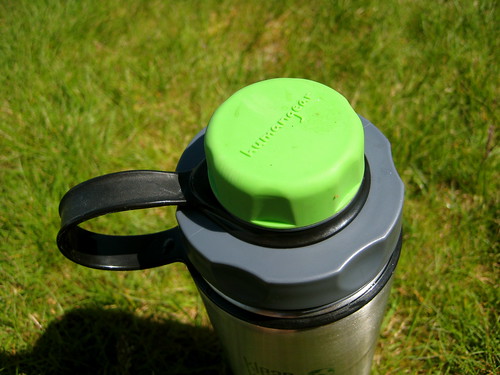
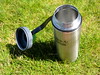
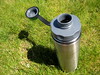
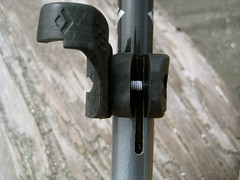
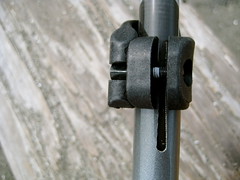
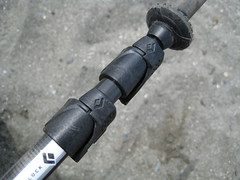
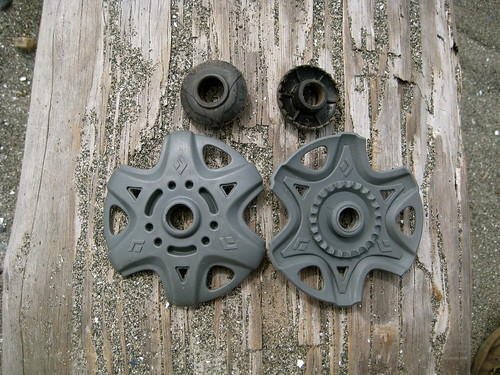
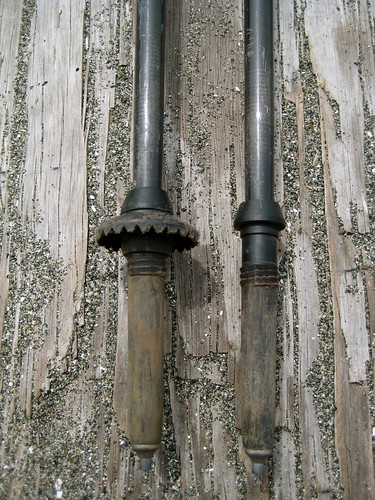

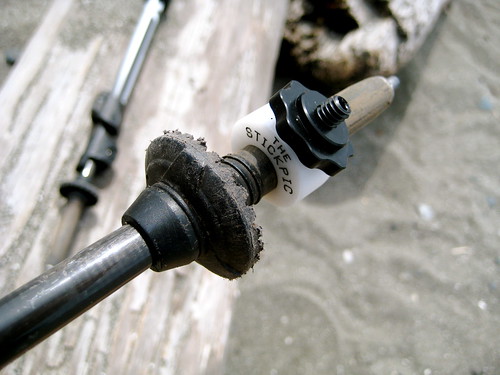
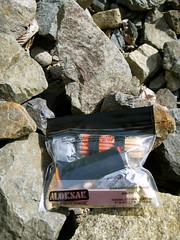
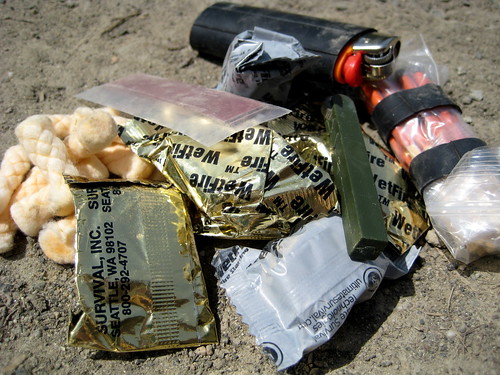
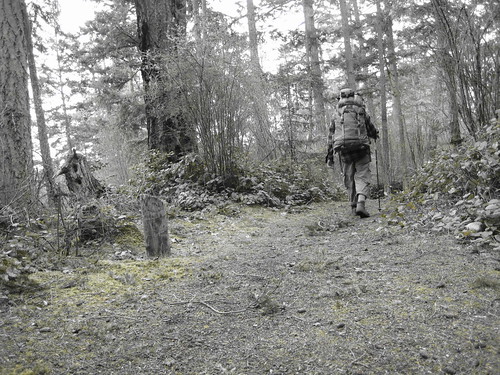


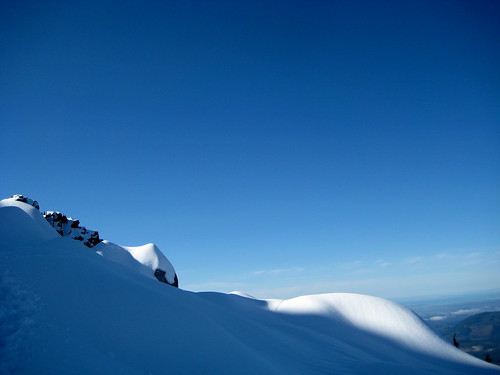
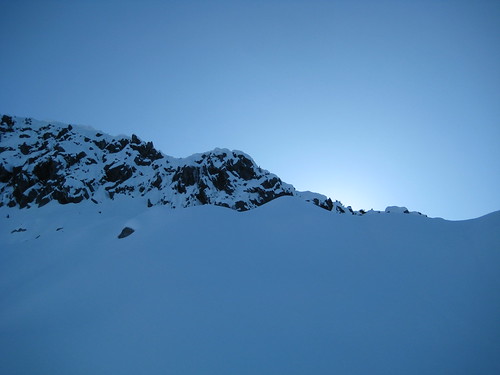
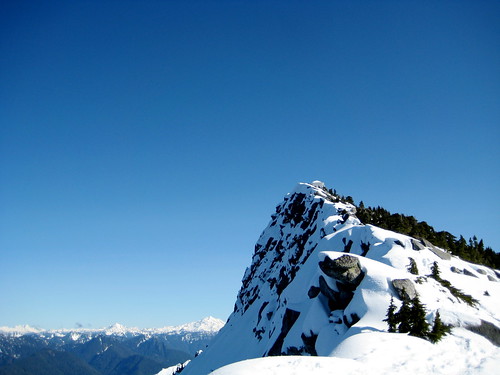
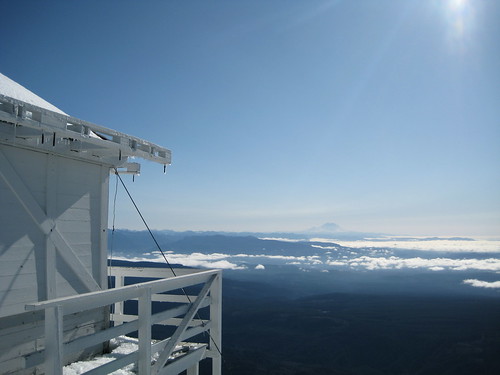
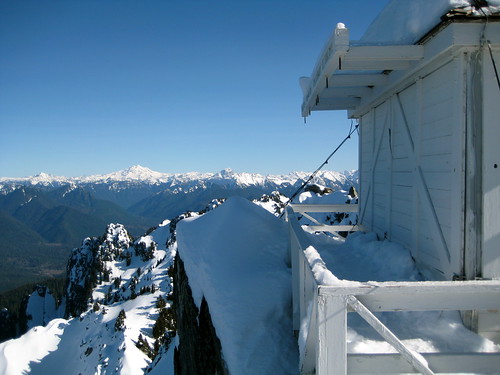
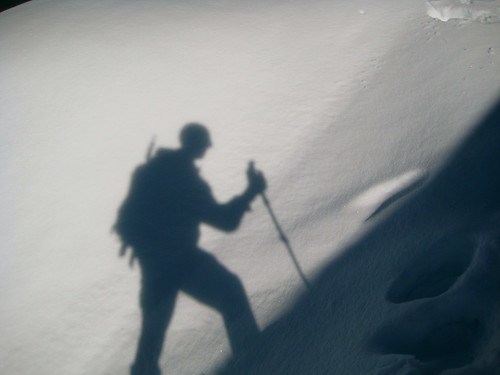
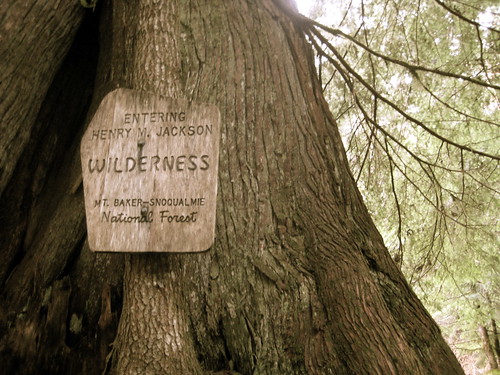
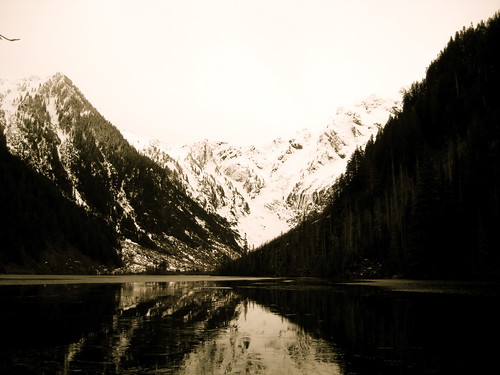
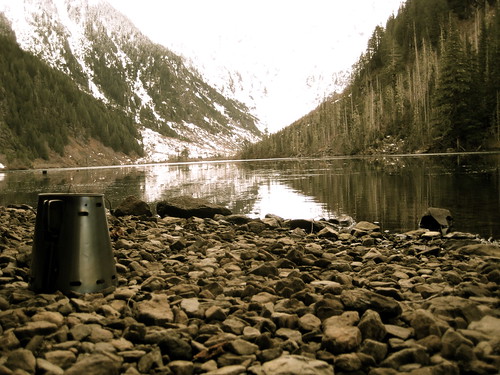
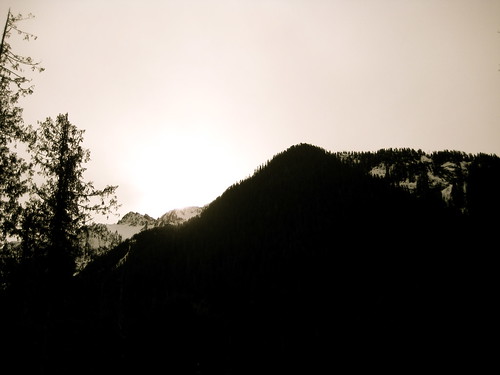
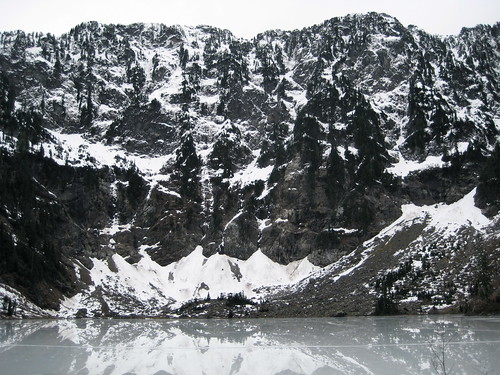
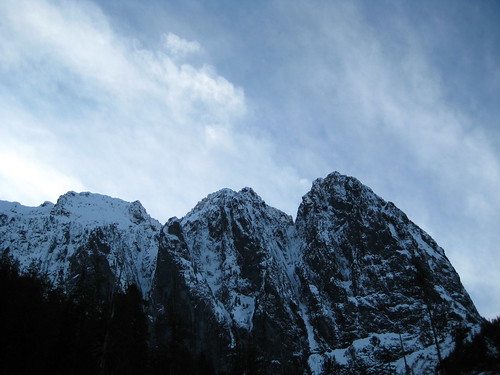

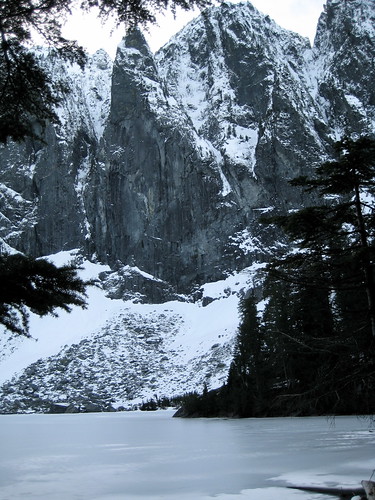
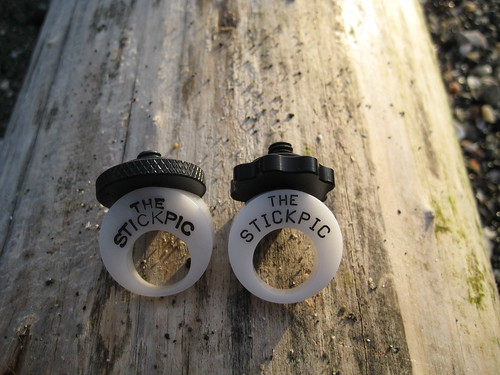
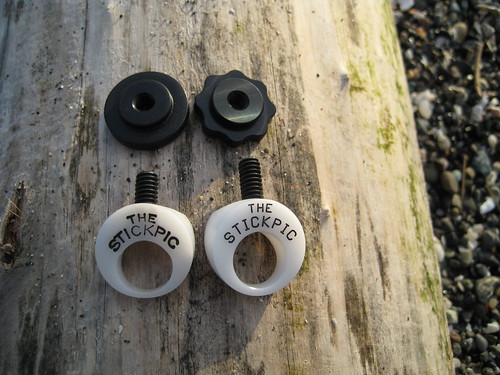
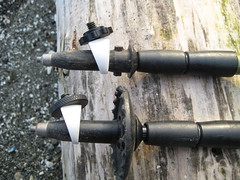