Apparently this is a phenomena wherein the twatter submits a series of short tweets, each preceded by a sequence number, which when run strung together resembles something that is almost, but not quite, entirely unlike a paragraph, and nearly manages to communicate a complete thought. It is unclear whether users demonstrating this symptom are unaware that there are places on the internet without arbitrary character limits, or if their identity is so heavily invested in a third-party platform that they are simply unable to communicate outside of it. Needless to say, I retreated to saner shores.
They must offer impact protection. Not protecting my eyeballs has always seemed dumb. Not protecting them after I’ve sunk a few thousand dollars into my cornea would be even dumber. ANSI Z87.1 is a good standard for impact protection, but I will of course happily accept MIL-PRF-31013.
They should offer interchangeable lenses. This is not critical, but it is nice to have. Different lens colors are appropriate in different environments. Good eyewear is usually expensive, which can make purchasing multiple pairs prohibitive. If you do purchase multiple pairs, you still have to carry them, which is much less attractive than carrying one pair of frames and different lenses. Photochromic lenses make the single-lens option more palatable, until you realize that the alternative is interchangeable photochromic lenses.
They should not be butt-ugly.
Prior to PRK, the fourth and most important criteria was that they somehow be prescription compatible. I always assumed this was the most limiting criteria. While recovering from my shine job I lay in bed thinking about eyewear, and assumed that there would be a much wider range of options available to me when I could see again.
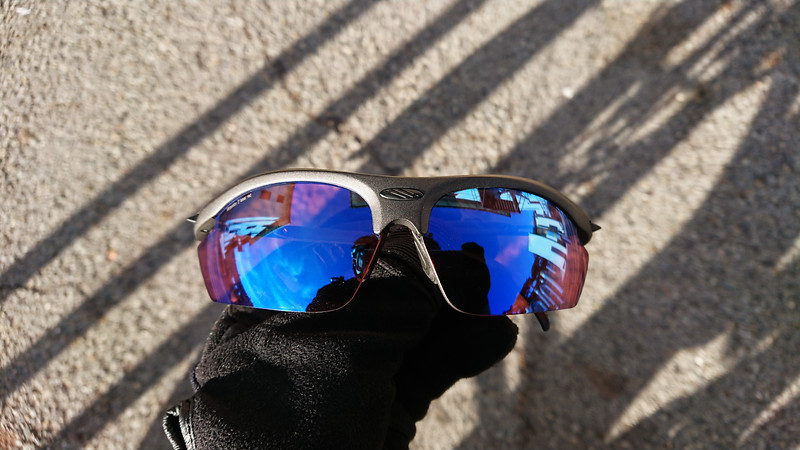
Imagine my disappointment when, after I recovered enough to see a computer, I found that there were actually no compelling new options. Even without the need of prescription lenses, the Rudy Rydon Stealth are still the best thing out there.
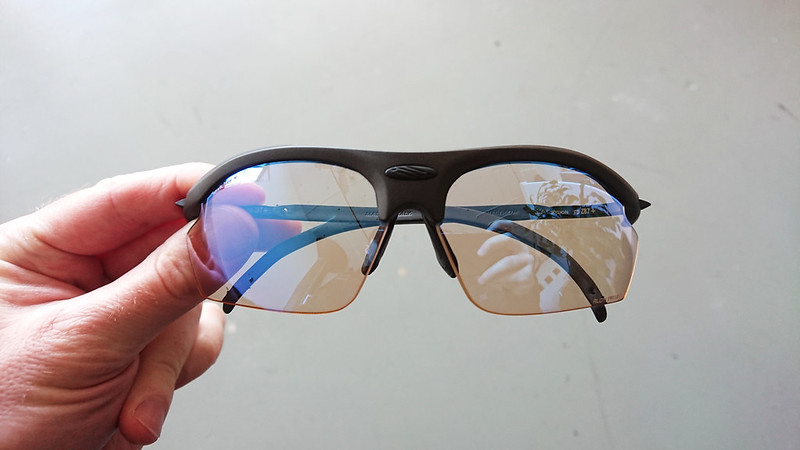
Determined to not be so easily dissuaded from spending money, I decided to treat myself to a new pair of lenses for the Rydons. After some consideration I landed on the ImpactX2 Photochromic Laser Red. Red lenses provide excellent contrast and visual depth. I have owned a pair of Rudy’s non-photochromic Racing Red lenses for a while and found them to be the ideal option for overcast days, but their static nature gave them a more narrow window of effectiveness which limited their actual use. The Photochromic Laser Red take the same excellent color and add the dynamism I’ve come to enjoy: the lenses offer 75% light transmission on the clear side and 16% light transmission on the dark side. On the light side that’s actually 1 point higher than the same generation clear-to-black lenses, making them even more appropriate for indoor or night work. On the dark side, that’s right in the middle of the transmission range typical of most sunglasses. The “laser” in the name refers to a light mirrored coating. These aren’t the mirrorshades Bruce Sterling promised you, but the lasering does serve to reduce glare and eye strain by reflecting some of the light away rather than absorbing it. It also adds an attractive bluish sheen.
I bought these lenses last December and I’ve removed them from the Rydons in exactly two situations: on water and on snow. In those environments I think a good, dark polarized brown lens is hard to beat. I opt for the Rudy Polar 3FX. In every other environment I’ve been in over the past year, my preference has been for the Photochromic Laser Red. I wear them whenever I’m on the bike. Even if I’m riding past midnight and it is pitch black, they transmit enough light that I barely notice I have them on. I wear them indoors when things are going bang. I wear them during the equinox when the sun is low on the horizon, pointing directly into my eyes. Like all photochromic lenses, they react to UV light, and so are suboptimal in cars. They will darken, but not completely. I tend to only spend a collective handful of hours per year in cars, so this isn’t a consideration for me.
If I was only going to have one pair of lenses, it’d be these. (But I like interchangeable lenses so I keep the brown lenses in my pack too.)
PRK is a similar procedure to the more popular LASIK. In LASIK a flap is cut in the cornea and set aside, the correction is performed underneath, and the flap is then placed back over the insulted area, providing a natural bandage. The scar from the flap never entirely heals, which is not a problem for most people most of the time. It is a concern if you get punched in the face. I box, which is to say I get punched in the face. In PRK the epithelium is abraded away, the correction performed, and then you just sort of hang out for a few weeks or a few months waiting for the epithelium to regenerate and shed and regenerate a few times – after which point there is no residual effects and you can go back to getting punched in the face, with no more concern than getting punched in the face normally warrants. LASIK was only approved by NASA in 2007, and is still frowned upon at SF HALO and SCUBA schools. The message is clear: if you want to keep the space marine option available, opt for PRK.
I have at times described it as being as if China Miéville had written a book in the Bridge trilogy, with plot devices contributed by Neal Stephenson. Other times I’ve just described it as my favorite William Gibson novel this millenium. Both of which I think communicate the tone of the book and the high regard in which I hold it. With Void Star, Zachary Mason created a sort of ethereal cultural exploration, very Gibsonian in nature, and you won’t like it if you’re reading it for the plot.
The audiobook is also very good. I say this as someone who dislikes audiobooks. Neither audio books nor podcasts fit into my life, and I can count the number of audiobooks I have ever listened to on two hands. But the actors who perform the three main characters of Void Star – especially the woman who voices Irena, who I wish would perform Pattern Recognition – are all perfect in their roles and somehow manage to capture how I imagined the characters when I read the book, which is a thing that I think rarely happens in any adaptation of a book into a different medium. Zachary Mason imbues the prose of his novel with a sort of poetry and rhythm that the actors all capture perfectly. I read the book a second time months after listening to the audiobook and found myself reading it in their voice, emulating their pacing.
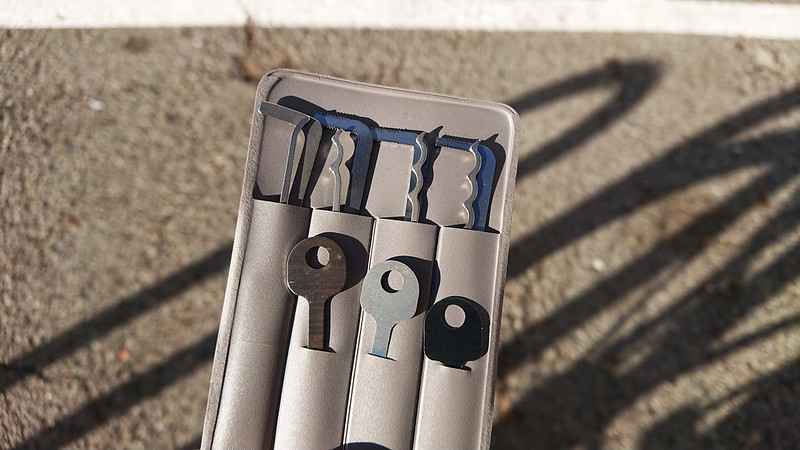
I flew through El Dorado International Airport four times last month. On the final trip security was none too pleased when they spotted the Bogota Pi toolset in my pack. The normal Bogota Titans in my wallet were either missed or deemed not problematic. I found the experience ironic.
The Sparrows Mini Jim met with suspicion, but I just did my smile-nod-no-hablo-español routine and they put it back. One could make a convincing argument that Super Mica Shims are more appropriate for travel.
I first began to use the Schwalbe Marathon Supremes six years ago. Since then I have tried a few other tires, but within a couple months I invariably end up coming back to the Marathon Supremes. They ride well, only get maybe one or two flats per year, and I appreciate the visibility of the reflective sidewall. I tend to replace them after somewhere around a year of use – I think the set I removed today were in service for 15 months. I don’t track miles, so I don’t know what sort of distance the tires get me, but it’s up there. They aren’t cheap, but they’re worth it for the contribution they make to my everyday mobility.
I signed-up for Pinboard in 2014. It provides everything I need from a bookmarking service, which is mostly, you know, bookmarking. I pay for the archival account, meaning that Pinboard downloads a copy of everything I bookmark and provides me with full-text search. I find this useful and well worth the $25 yearly fee, but Pinboard’s archive is only part of the solution. I also need an offline copy of my bookmarks.
Pinboard provides an API that makes it easy to acquire a list of bookmarks. I have a small shell script which pulls down a JSON-formatted list of my bookmarks and adds the file to git-annex. This is controlled via a systemd service and timer, which wraps the script in backitup to ensure daily dumps. The systemd timer itself is controlled by nmtrust, so that it only runs when I am connected to a trusted network.
This provides data portability, ensuring that I could import my tagged URLs to another bookmarking service if I ever found something better than Pinboard (unlikely, competing with Pinboard is futile). But I also want a locally archived copy of the pages themselves, which Pinboard does not offer through the API. I carry very much about being able to work offline. The usefulness of a computer is directly propertional to the amount of data that is accessible without a network connection.
To address this I use bookmark-archiver, a Python script which reads URLs from a variety of input files, including Pinboard’s JSON dumps. It archives each URL via wget, generates a screenshot and PDF via headless Chromium, and submits the URL to the Internet Archive (with WARC hopefully on the way). It will then generate an HTML index page, allowing the archives to be easily browsed. When I want to browse the archive, I simply change into the directory and use python -m http.server to serve the bookmarks at localhost:8000. Once downloaded locally, the archives are of course backed up, via the usual suspects like borg and cryptshot.
The archiver is configured via environment variables. I configure my preferences and point the program at the Pinboard JSON dump in my annex via a shell script (creatively also named bookmark-archiver). This wrapper script is called by the previous script which dumps the JSON from Pinboard.
The result of all of this is that every day I get a fresh dump of all my bookmarks, each URL is archived locally in multiple formats, and the archive enters into my normal backup queue. Link rot may defeat the Supreme Court, but between this and my automated repository tracking I have a pretty good system for backing up useful pieces of other people’s data.
A metaphor can help understand the role of sleep and why alarm clocks are bad. We can compare the brain and its NREM-REM sleep cycles to an ordinary PC. During the day, while learning and experiencing new things, you store your new data in RAM memory. During the night, while first in NREM, you write the data down to the hard disk. During REM, which follows NREM in the night, you do the disk defragmentation, i.e. you organize data, sort them, build new connections, etc. Overnight, you repeat the write-and-defragment cycle until all RAM data is neatly written to the disk (for long-term use), and your RAM is clear and ready for a new day of learning. Upon waking up, you reboot the computer. If you reboot early with the use of an alarm clock, you often leave your disk fragmented. Your data access is slow, and your thinking is confused. Even worse, some of the data may not even get written to the disk. It is as if you have never stored it in RAM in the first place. In conclusion, if you use an alarm clock, you endanger your data.