In 1891, Thomas Gaskell Allen and William Lewis Sachtleben set out from St. Louis, Missouri to ride their bicycles around the world. Across Asia on a Bicycle is the account of the Asian leg of their 15,044 mile journey – from Constantinople to Peking. It is an excellent read and, along with Journey to the Centre of the Earth, sits as my favorite cycling book.
Despite their journey having taken place over 100 years ago, when the safety bicycle was little more than a decade old, their luggage is recognizable as a modern bikepacking setup: a framebag, small seatpost bag, and a bedroll strapped to the handlebars. In preparation for their ride through the Gobi into China, they stripped their load down further.
Our work of preparation was principally a process of elimination. We now had to prepare for a forced march in case of necessity. Handle-bars and seat-posts were shortened to save weight, and even the leather baggage-carriers, fitting in the frames of the machines, which we wourselves had patented before leaving England, were replaced by a couple of sleeping-bags made for us out of woolen shawls and Chinese oiled-canvas. The cutting off of buttons and extra parts of our clothing, as well as the shaving of our heads and faces, was also included by our friends in the list of curtailments. For the same reason one of our cameras, which we always carried on our backs, and refilled at night under the bedclothes, we sold to a Chinese photographer at Suidun, to make room for an extra provision-bag.
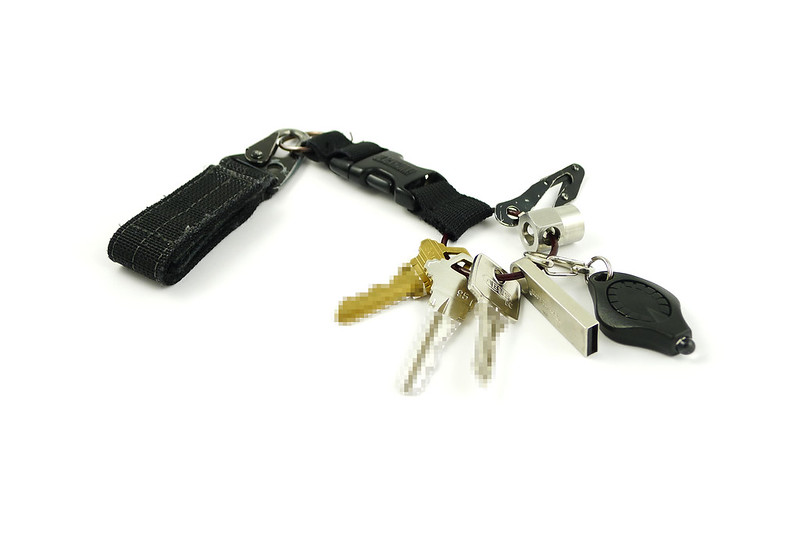
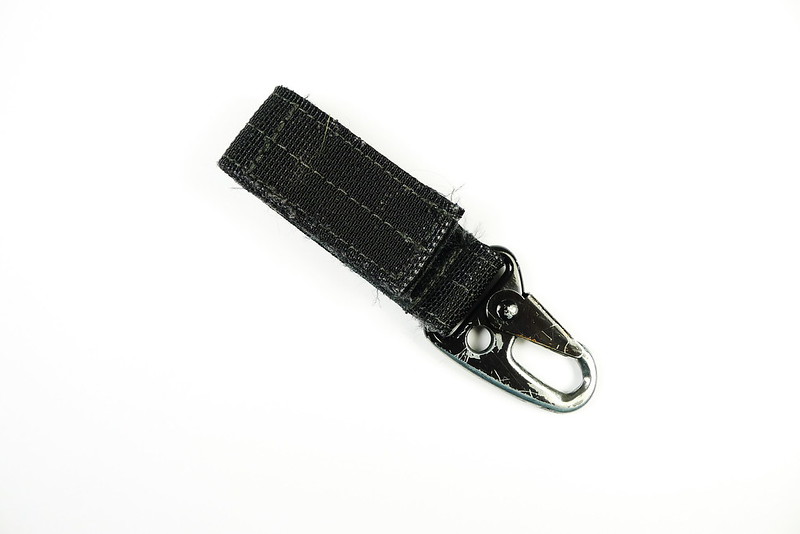
Below the Maxpedition Keyper I connect a quick-release fob. This adds enough length to the setup that the keys can be silenced in my pocket, but still securely attached to my belt via the Keyper. The side-release buckle provides easy, one-handed access. The fob attaches to the Keyper via a normal split ring.
For most of the 8 years that I’ve used the fob, I’ve attached the keys to it via another split ring. I tried a cable ring from CountyComm for some time, but it was too large and the closure unscrewed itself frequently. Later, when the FREEKey came out, I gave it a shot. It worked well enough but I found that it offered no practical advantage over a normal split ring. Finally, last March I learned about the Flex O Loc Key Ring from Brian Green. I bought a pack of them and have been using one on my keychain ever since. I find that they’re perfect: the right size, easy to open, and secure when closed.
On the keychain itself I carry three keys: an apartment key, a work key and a bike lock key. Next to the keys is a Kingston DataTraveler SE9 (16GB). I find that the DataTravelers are a good combination of performance, durability and price. I consider this my “dirty” stick: it holds no personal information and is formatted with FAT32. I’ll stick it in pretty much anything. It used to hold Liberté Linux, but unfortunately that project seems largely abandoned now. Next to the USB stick is a Photon Freedom Micro LED light with a green beam. I’ve lost count of how many years I’ve had this. It doesn’t produce a significant beam, but it frequently comes in handy. I like to know that I always have a light source attached to me. Next on the ring is the pit for my Pitlocks. This is a specially keyed nut that is needed to remove the Pitlock skewers on my bike. It increases the difficulty of stealing a wheel. The final item is a SERE V Cutter. I consider this more of a toy than a tool. It does cut cord very well, but so does a knife. I wouldn’t buy it again, but as long as I have it I figure I might as well use it, and it is small and light enough that I can put it on my keychain and forget that it’s there.
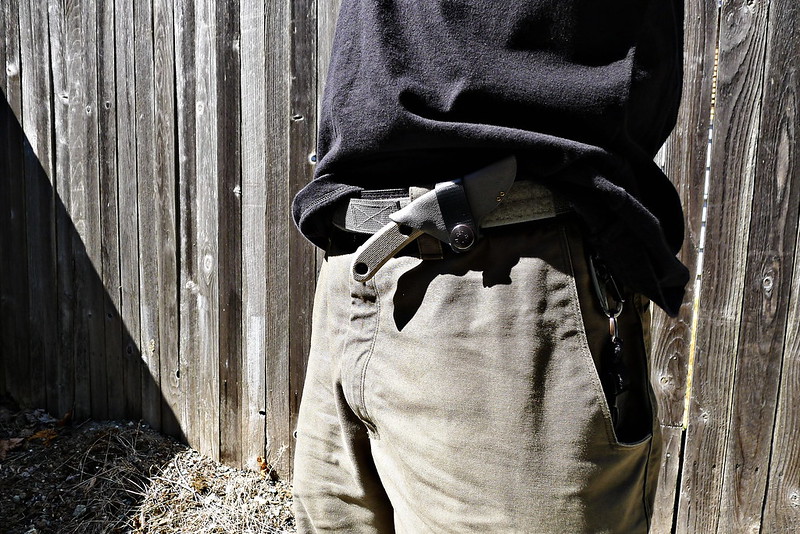
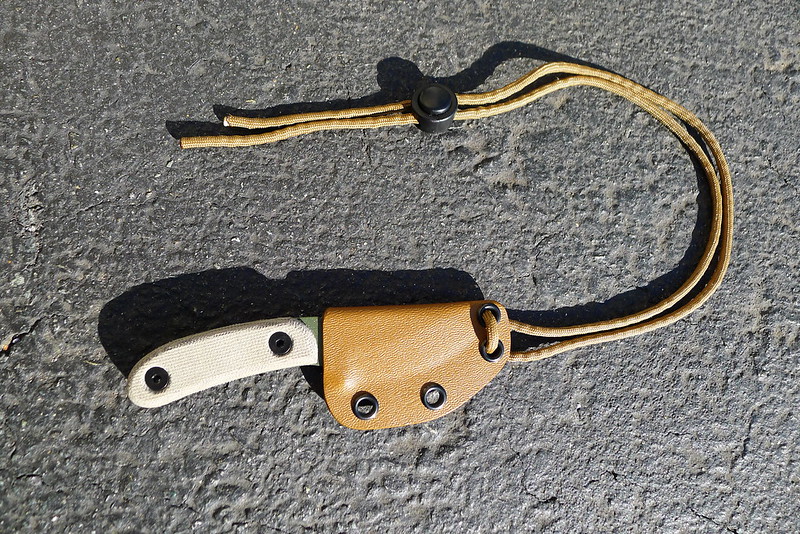
In fact, it is a great little knife. Unfortunately the only sheath that the Candiru comes with is a simple Cordura pouch. I threw this away immediately upon receiving the knife and replaced it with a horizontal belt sheath from Dark Star Gear. The Dark Star Gear sheath first came to my attention on pistol-forum.com. At the time I hadn’t purchased the Candriu, but horizontal carry of a small fixed blade at about 11:00 on the belt impressed me as a great idea. I knew I wanted to give it a shot.
I considered ordering the sheath for my Izula, which is the knife I usually carry when I want a fixed blade, but I was concerned that it would be a little too big to conceal horizontally on my waist1. Instead I decided to purchase the ESEE Candiru, which Brian Green had raved about last year, just for this carry method. (I actually ordered the sheath before I ordered the knife.)
I’m extremely pleased with both purchases. The Candiru is not quite as general-purpose as the larger Izula, but it performs all the functions that I require of an urban EDC blade, and provides yet another option for an EDC fixed blade. This is something that I have come to prefer over a folder since I purchased the Izula about 4 years ago. The Dark Star Gear sheath allows me to carry it comfortable and conceal it with nothing more than a t-shirt, while still providing for a quick draw. The sheath has also exposed me to the idea of carrying at 11:00, which is a very nice piece of real-estate on the belt that I have previously overlooked.
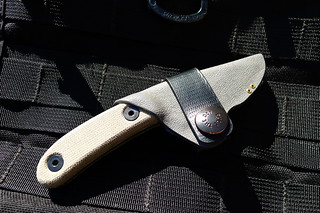
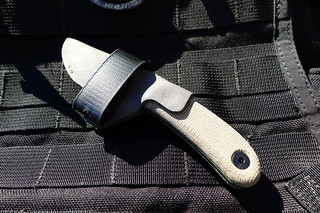
I have carried the Candiru in the Dark Star Gear sheath as my primary knife for about 2 months now. Up until a few days ago the Candiru’s handle had been cord wrapped2. I just recently purchased and installed the optional Micarta slabs. The Candiru does suffer from a small handle – a necessary evil for a knife this size. It can use all the extra bulk it can get. My initial impressions of the Micarta slabs are that they greatly improve the feel of the knife in the hand without any negative impact on the ability to easily conceal the knife in the Dark Star Gear sheath.
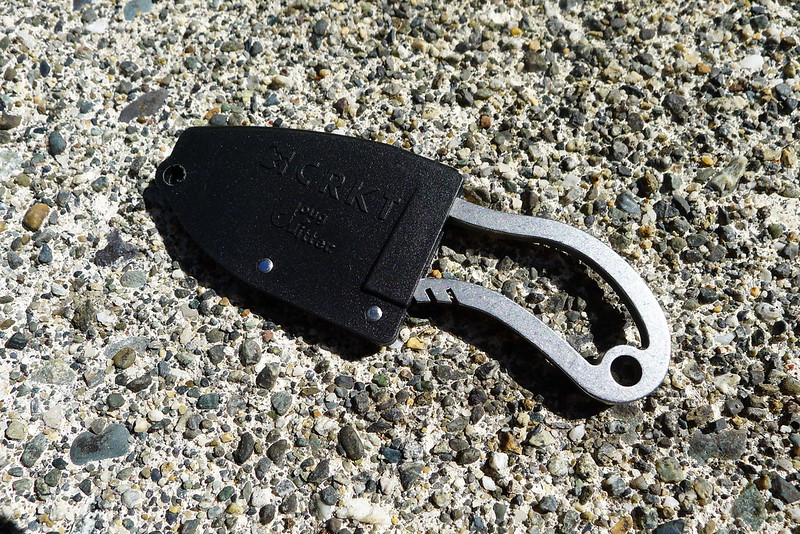
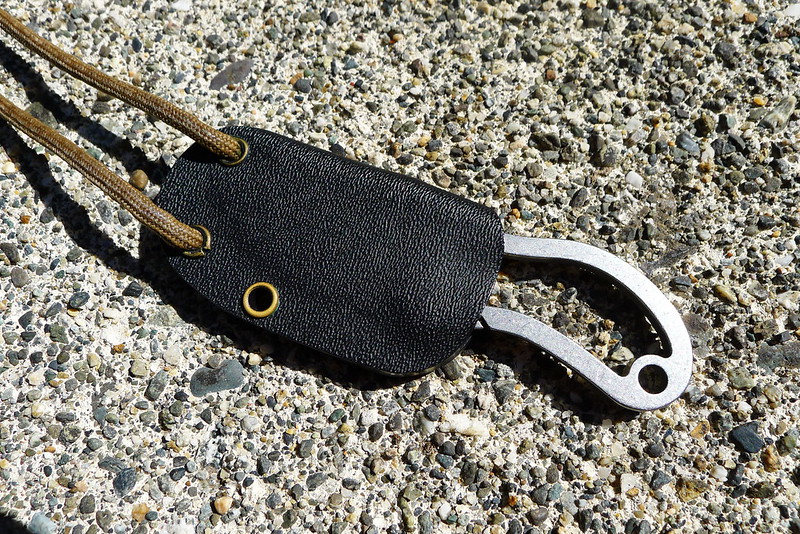
For a second carry option I also purchased a Kydex neck sheath for the Candiru. This is the sheath that the Candiru should ship with. The size of the knife makes it a great option for those who find the Izula a bit too large for comfortable carry around the neck3, but still want something a bit more functional than a tiny CRKT RSK Mk5 or Nemesis Hellion. I carry the knife around my neck when I run, since for that activity I’m not usually wearing a belt appropriate for the Dark Star Gear sheath. Adding the Micarta slabs does make the Candiru a bit heavier and bulkier around the neck. If you intend to use the Candiru primarily as a neck knife, I would stick with a cord wrap on the handles.
Notes
↵ While bigger folk could probably conceal an Izula in the Dark Star Gear sheath, I'm confident that this was the right choice for me. I feel pretty sure that the Izula handle would stick out too far on my small waist.
↵ The handle was wrapped with Technora Four Hundred Cord. I had bought a hank of this cordage a while ago to play around with and found that the smaller diameter worked better than paracord (gutted or non) on the Candiru's small handle.
↵ The Izula is at the upper-end of my size range for comfortable neck carry.
The CRKT RSK Mk5 is a nice knife cursed by a terrible sheath.
I’ve been EDCing the knife since my Nemesis Hellion was lost last November. Unfortunately, the “glass filled nylon” sheath that the RSK Mk5 ships with is a poor design. The grommet in the tip is too small to accept a piece of paracord. This was done to keep the overall size of the sheathed knife small enough to fit inside an Altoids tin. I have never understood the obsession with the Altoids tin survival kit. I prefer to carry a knife about this size around my neck.
Some time ago I purchased a new sheath for my RAT Izula from a fellow on eBay who goes by lemonwoodgallery. I was pleased with that purchase, so as soon as I bought the RSK Mk5 I shipped it to him to make me a custom kydex sheath. It’s nothing fancy – just your standard taco style sheath with two grommets at the top for a piece of paracord and one on the side for retention. This is the same design as the sheath for the Nemesis Hellion, which served me well for 6 years. The new sheath has held the RSK Mk5 around my neck for about 8 months now. It’s a much appreciated upgrade.
In the book Mazzetti tracks the CIA’s re-entry after 9/11 into the business of killing people, and the resulting decline in their ability to perform intelligence work. It is a good companion to Eric Schmitt’s Counterstrike.
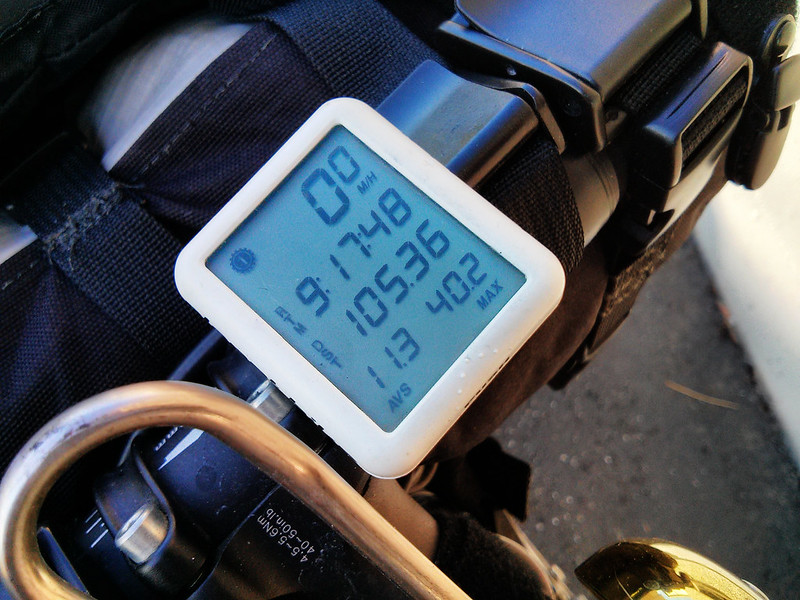
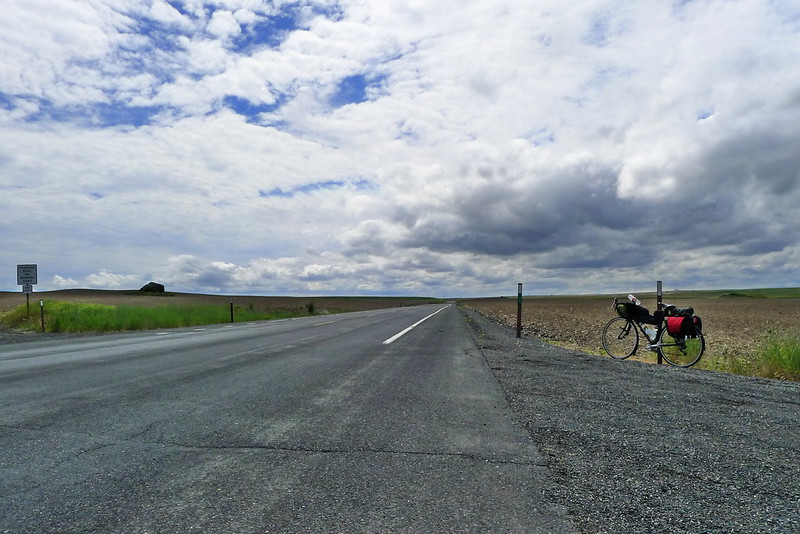
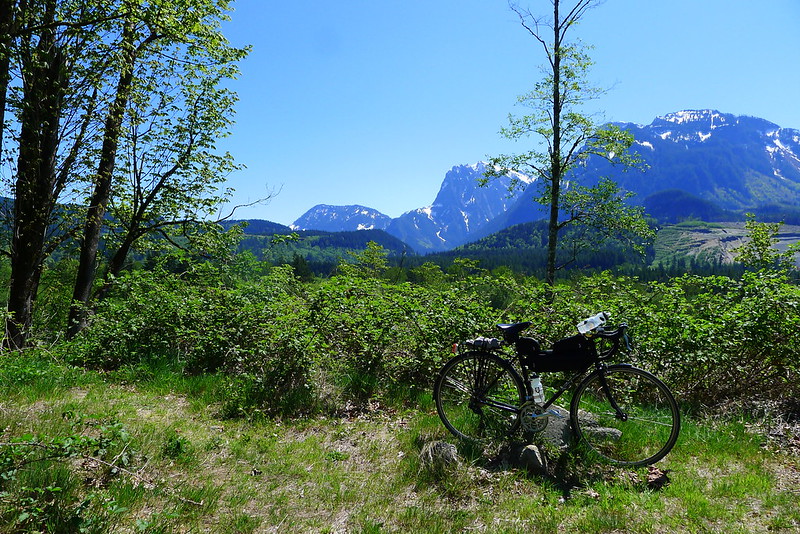
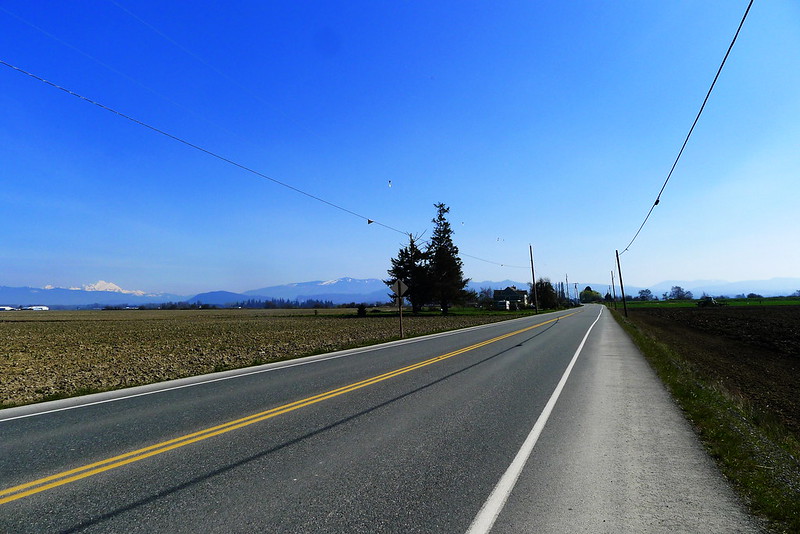
On the eleventh day of my Northwest tour I rode 101.3 miles. On the final day I rode 105.4 miles – with my touring load, through a thunder storm, over a mountain pass, in temperatures reaching the mid-90°s Fahrenheit. It never gets easier, you just go faster.
The combination in Kim of self-discovery across India and espionage of the Great Game in reads like the mixing of Siddhartha with a John le Carré novel.
I have done a handful of bike tours ranging from two to four days, but nothing longer. During the winter I had a notion to do a longer ride this June while waiting for the snows to melt out the backcountry. The idea began as a ride to Idaho, then lengthened to include Montana, and then in practice reverted to the original Idaho idea.
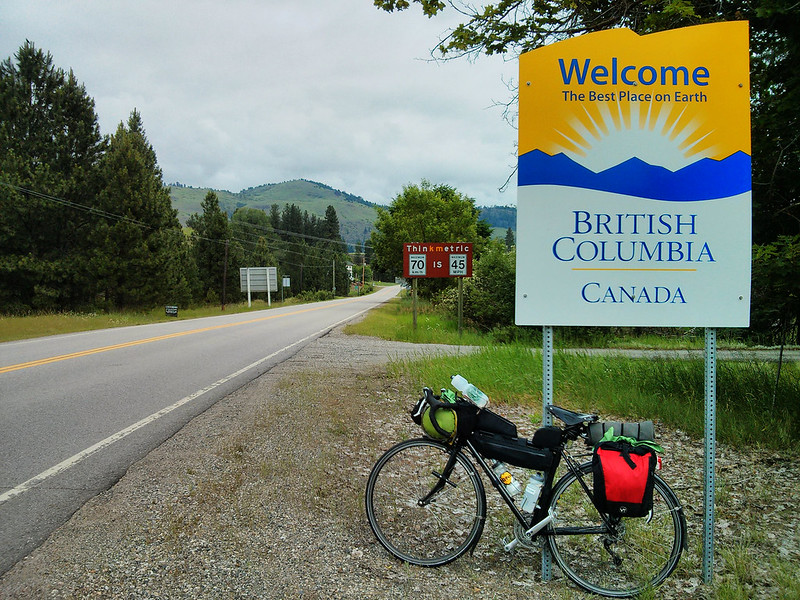
I left on Monday, June 17th and took the first day getting up to Marblemount. From there I picked up the Adventure Cycling Association’s Northern Tier. I followed that route to Sandpoint, Idaho, with a detour through Grand Forks, BC to avoid Sherman Pass. I had intended to use the Ride Idaho route to head to Thompson Falls, Montana and then loop back through Idaho, but I was concerned about running out of time. Instead, from Sandpoint I took back roads and a highway down to Spokane. There I picked up US 2, which took me back home via Stevens Pass. The route looked roughly like this.
Along the way I camped where I could, stayed at Warm Showers when available, and even did a couple motels. I packed my Seek Outside Lil’ Bug Out Shelter to provide a bit more luxury than my normal tarp.
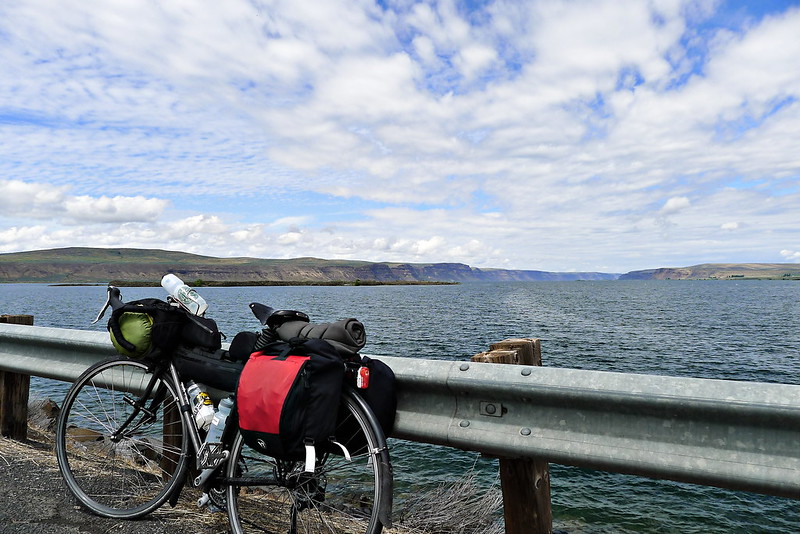
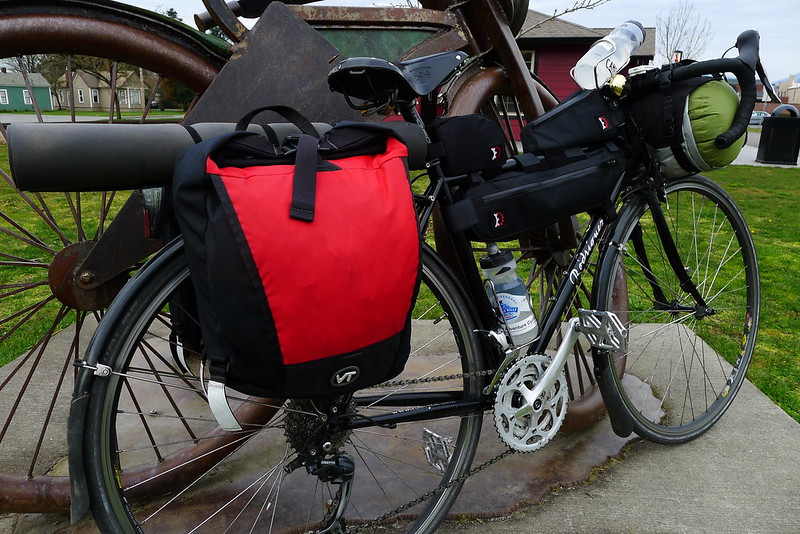
Luggage-wise I used the same setup that I have developed on my shorter trips: a combination of bikepacking gear from Revelate Designs and Cleaveland Mountaineering, with small custom panniers from Velo Transit. This kept me fast and light, without the sacrifice in functionality that I think a strict bikepacking setup necessitates. I ran into other tourists along the Northern Tier, most of whom had heavier setups that they regretted when climbing mountains.
I had no mechanical failures on the trip. Not even a flat. I’m still running the same pair of Schwalbe Marathon Supremes that I purchased last December. I don’t know how many miles I have on them now, but it is somewhere north of 4,000. They have yet to have a flat and the tread, while worn, is still going strong.
Statistics
Day One: 83.8 miles
Day Two: 78.6 miles
Day Three: 60 miles
Day Four: 32.5 miles
Day Five: 53.9 miles
Day Six: 87.2 miles
Day Seven: 88.4 miles
Day Eight: 36.6 miles
Day Nine: 87 miles
Day Ten: 70.3 miles
Day Eleven: 101.3 miles
Day Twelve: 24.8 miles
Day Thirteen: 105.4 miles
Total mileage: 909.8 miles
Average daily mileage: 70 miles
I have no record of elevation change, but the trip took me over five mountain passes. I bypassed the sixth by detouring into Canada.
Magnouloux spent 5 years cycling around the world. He crossed paths with Richard and Nicholas Crane in Lhasa, and this book has some echoes of their Journey to the Centre of the Earth.
I store my photos in git-annex. A full copy of the annex exists on my laptop and on an external drive. Encrypted copies of all of my photos are stored on Amazon S3 (which I pay for) and box.com (which provides 50GB for free) via git-annex special remotes. The photos are backed-up to an external drive daily with the rest of my laptop hard drive via backitup.sh and cryptshot. My entire laptop hard drive is also mirrored monthly to an external drive stored off-site.
(The majority of my photos are also on Flickr, but I don’t consider that a backup or even reliable storage.)
All of this is what I consider to be the bare minimum for any redundant data storage. Photos have special value, above the value that I assign to most other data. This value only increases with age. As such they require an additional backup method, but due to the size of my collection I want to avoid backup methods that involve paying for more online storage, such as Tarsnap.
I choose optical discs as the medium for my photo backups. This has the advantage of being read-only, which makes it more difficult for accidental deletions or corruption to propagate through the backup system. DVD-Rs have a capacity of 4.7 GBs and a cost of around $0.25 per disc. Their life expectancy varies, but 10-years seem to be a reasonable low estimate.
Preparation
I keep all of my photos in year-based directories. At the beginning of every year, the previous year’s directory is burned to a DVD.
Certain years contain few enough photos that the entire year can fit on a single DVD. More recent years have enough photos of a high enough resolution that they require multiple DVDs.
Archive
My first step is to build a compressed archive of each year. I choose tar and bzip2 compression for this because they’re simple and reliable.
12
$ cd ~/pictures
$ tar cjhf ~/tmp/pictures/2012.tar.bz 2012
If the archive is larger than 3.7 GB, it needs to be split into multiple files. The resulting files will be burned to different discs. The capacity of a DVD is 4.7 GB, but I place the upper file limit at 3.7 GB so that the DVD has a minimum of 20% of its capacity available. This will be filled with parity information later on for redundancy.
1
$ split -d -b 3700M 2012.tar.bz 2012.tar.bz.
Encrypt
Leaving unencrypted data around is bad form. The archive (or each of the files resulting from splitting the large archive) is next encrypted and signed with GnuPG.
The encrypted archive and the detached signature of the encrypted archive are what will be burned to the disc. (Or, in the case of a large archive, the encrypted splits of the full archive and the associated signatures will be burned to one disc per split/signature combonation.) Rather than burning them directly, an image is created first.
If the year has a split archive requiring multiple discs, I modify the sequence number in the volume label. For example, a year requiring 3 discs will have the label Photos: 2012 1/3.
Parity
When I began this project I knew that I wanted some sort of parity information for each disc so that I could potentially recover data from slightly damaged media. My initial idea was to use parchive via par2cmdline. Further research led me to dvdisaster which, despite being a GUI-only program, seemed more appropriate for this use case.
I use dvdisaster with the RS02 error correction method, which augments the image before burning. Depending on the size of the original image, this will result in the disc having anywhere from 20% to 200% redundancy.
Verify
After the image has been augmented, I mount it and verify the signature of the encrypted file on the disc against the local copy of the signature. I’ve never had the signatures not match, but performing this step makes me feel better.
The final step is to burn the augmented image. I always burn discs at low speeds to diminish the chance of errors during the process.
1
$ cdrecord -v speed=4dev=/dev/sr0 2012.iso
Similar to the optical backups of my password database, I burn two copies of each disc. One copy is stored off-site. This provides a reasonably level of assurance against any loss of my photos.
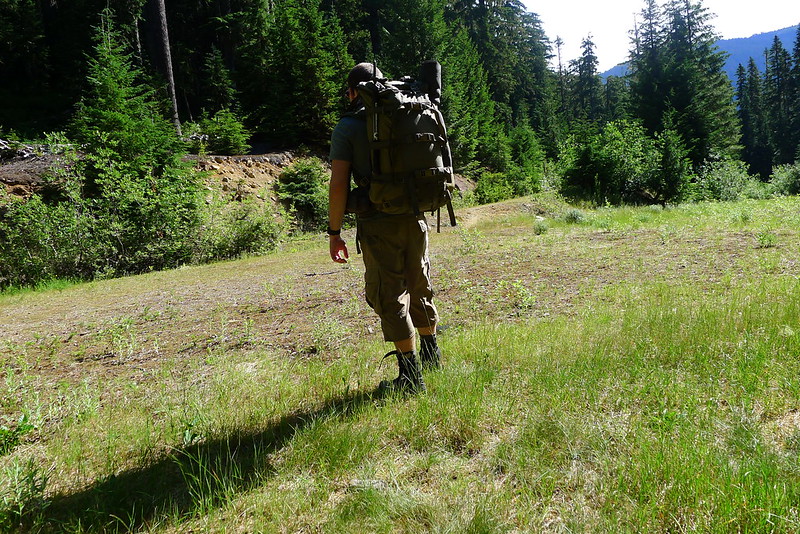
… [T]he modern woodsman is a person who is able to undertake long term trips, deep into the wilderness, only with supplies one could carry and what could be gathered from the surrounding environment… He uses technology, skills and equipment based on efficiency and practicality. He applies modern hunting techniques, modern understanding of nutrition, and modern climbing, mountaineering, and packrafting techniques. His equipment includes tools that are best suited for the task without consideration for nostalgia and sentimentality.
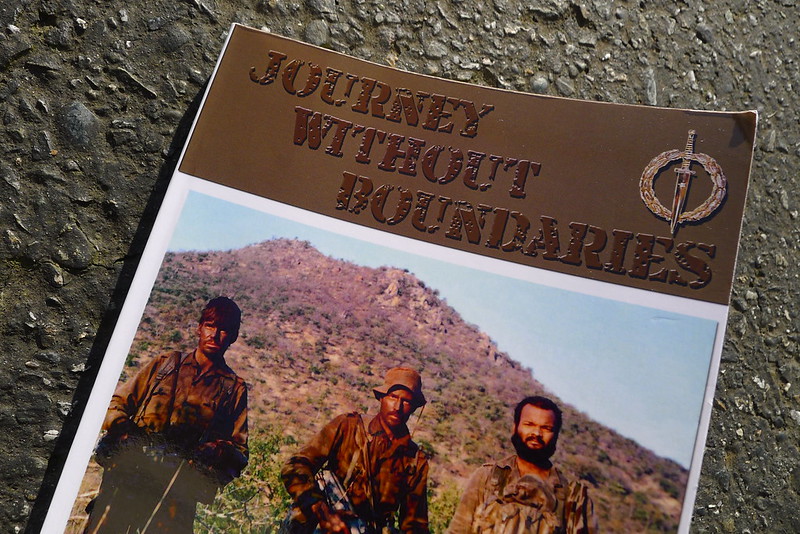
I believe that maintaining an interest in asymmetric warfare is a healthy habit. The Rhodesian Bush War and South African Border War are particularly interesting, as both sides employed direct, unconventional means.
I am currently reading Journey Without Boundaries: The Operational Life and Experiences of a SA Special Forces Small Team Operator, the memoirs of Colonel Andre Diedericks. Diedericks joined the South African Defence Force in 1974 and served in their Special Forces for two decades. Taking inspiration from Rhodesia’s Selous Scouts, he was largely responsible for developing and implementing small team tactics in the South African Recces. These “small teams” are not the 12 man ODAs we think of with our Special Forces today. Diedericks’ small teams consisted of only two men. Their missions would last a month or longer, during which time they would be completely self-sufficient and travel hundreds of kilometres on foot. Their operations were deniable, which required them to remain completely hidden from both the enemy force and local population.
Journey Without Boundaries joins The Jedburghs by Will Irwin and The Phantom Major by Virginia Cowles as being an excellent read for tracking the development of unconventional warfare.
In the past I’ve used OpenShot, but I was hit with some bugs that made me search for alternatives. Now I use Kdenlive, which I’ve found to be very capable. OpenShot currently has a Kickstarter campaign on to fund further development. Even though I’m no longer a user, I happily backed the project.
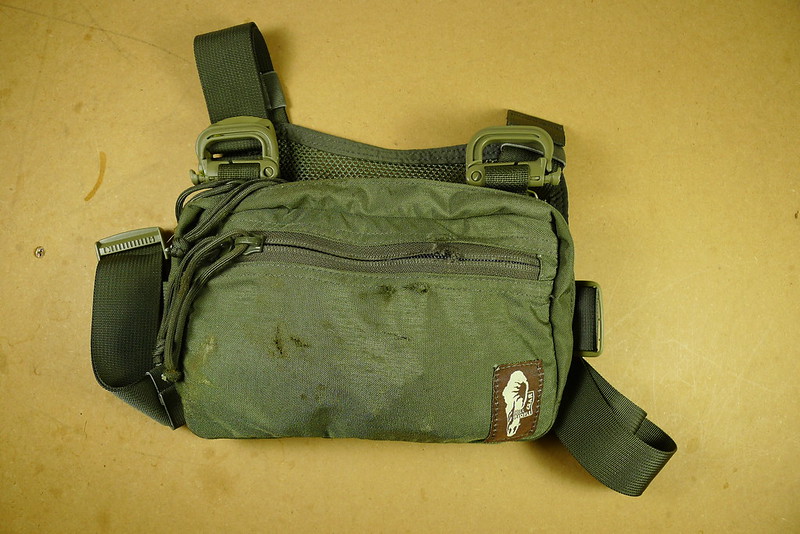
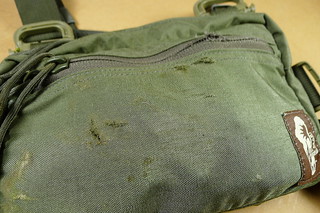
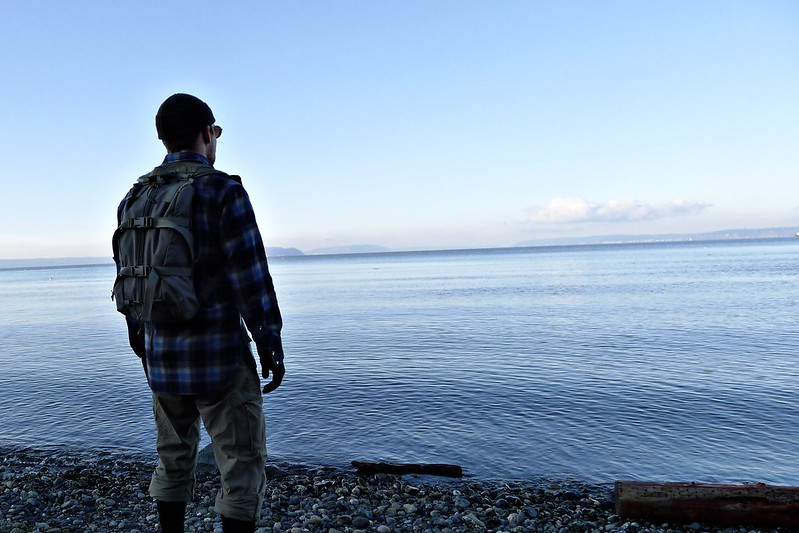
I crashed my bike this morning. I landed on my chest and skidded a few feet on the concrete. Luckily I was wearing my Hill People Gear Snubby Kit Bag. The front of the Kit Bag was torn. It saved my chest (and my nice merino shirt) from the same fate. Thanks HPG!
The Defeet Wool Duragloves also handed themselves admirably. The right-hand glove is fine. The left-hand glove has a hole in the palm. I expect this low amount of damage is due to the 40% Cordura composition. I would not expect 100% wool gloves to hold up as well.
The paint is chipped. There is a little rust on the gate. The hook has been reshaped by almost a decade of rubbing by a split ring. It still works as good as the day I bought it.
If you need to hang something off your belt, seriously consider the Maxpedition Keyper.
The first password manager I ever used was a simple text file encrypted with GnuPG. When I needed a password I would decrypt the file, read it in Vim, and copy the required entry to the system clipboard. This system didn’t last. At the time I wasn’t using GnuPG for much else, and this was in the very beginning of my Vim days, when the program seemed cumbersome and daunting. I shortly moved to other, purpose-built password managers.
After some experimentation I landed on KeePassX, which I used for a number of years. Some time ago I decided that I wanted to move to a command-line solution. KeePassX and a web browser were the only graphical applications that I was using with any regularity. I could see no need for a password manager to have a graphical interface, and the GUI’s dependency on a mouse decreased my productivity. After a cursory look at the available choices I landed right back where I started all those years ago: Vim and GnuPG.
These days Vim is my most used program outside of a web browser and I use GnuPG daily for handling the majority of my encryption needs. My greater familiarity with both of these tools is one of the reasons I’ve been successful with the system this time around. I believe the other reason is my more systematic approach.
Structure
The power of this system comes from its simplicity: passwords are stored in plain text files that have been encrypted with GnuPG. Every platform out there has some implementation of the PGP protocol, so the files can easily be decrypted anywhere. After they’ve been decrypted, there’s no fancy file formats to deal with. It’s all just text, which can be manipulated with a plethora of powerful tools. I favor reading the text in Vim, but any text editor will do the job.
All passwords are stored within a directory called ~/pw. Within this directory are multiple files. Each of these files can be thought of as a separate password database. I store bank information in financial.gpg. Login information for various shopping websites are in ecommerce.gpg. My email credentials are in email.gpg. All of these entries could very well be stored in a single file, but breaking it out into multiple files allows me some measure of access control.
Access
I regularly use two computers: my laptop at home and a desktop machine at work. I trust my laptop. It has my GnuPG key on it and it should have access to all password database files. I do not place complete trust in my machine at work. I don’t trust it enough to give it access to my GnuPG key, and as such I have a different GnuPG key on that machine that I use for encryption at work.
Having passwords segregated into multiple database files allows me to encrypt the different files to different keys. Every file is encrypted to my primary GnuPG key, but only some are encrypted with my work key. Login credentials needed for work are encrypted to the work key. I have no need to login to my bank accounts at work, and it wouldn’t be prudent to do so on a machine that I do not fully trust, so the financial.gpg file is not encrypted to my work key. If someone compromises my work computer, they still will be no closer to accessing my banking credentials.
Git
The ~/pw directory is a git repository. This gives me version control on all of my passwords. If I accidentally delete an entry I can always get it back. It also provides syncing and redundant storage without depending on a third-party like Dropbox.
Keys
An advantage of using a directory full of encrypted files as my password manager is that I’m not limited to only storing usernames and passwords. Any file can be added to the repository. I keep keys for backups, SSH keys, and SSL keys (all of which have been encrypted with my GnuPG key) in the directory. This gives me one location for all of my authentication credentials, which simplifies the locating and backing up of these important files.
Markup
Each file is structured with Vim folds and indentation. There are various ways for Vim to fold text. I use markers, sticking with the default {{{/}}} characters. A typical password entry will look like this:
Each file is full of entries like this. Certain entries are grouped together within other folds for organization. Certain entries may have comments so that I have a record of the false personally identifiable information the service requested when I registered.
12345678
Super Ecommerce{{{
    user:   foobar
    pass:   g0d
    Comments{{{
        birthday:   1/1/1911
        first car:  delorean
    }}}
}}}
Following a consistent structure like this makes the file easier to navigate and allows for the possibility of the file being parsed by a script. The fold markers come into play with my Vim configuration.
Vim
I use Vim with the vim-gnupg plugin. This makes editing of encrypted files seamless. When opening existing files, the contents are decrypted. When opening new files, the plugin asks which recipients the file should be encrypted to. When a file is open, leaking the clear text is avoided by disabling viminfo, swapfile, and undofile. I run gpg-agent so that my passphrase is remembered for a short period of time after I use it. This makes it easy and secure to work with (and create) the encrypted files with Vim. I define a few extra options in my vimrc to facilitate working with passwords.
""""""""""""""""""""" GnuPG Extensions """""""""""""""""""""" Tell the GnuPG plugin to armor new files.letg:GPGPreferArmor=1" Tell the GnuPG plugin to sign new files.letg:GPGPreferSign=1
augroup GnuPGExtra
" Set extra file options.
autocmd BufReadCmd,FileReadCmd *.\(gpg\|asc\|pgp\)call SetGPGOptions()" Automatically close unmodified files after inactivity.
autocmd CursorHold *.\(gpg\|asc\|pgp\) quit
augroup END
function SetGPGOptions()" Set updatetime to 1 minute.setupdatetime=60000" Fold at markers.setfoldmethod=marker
" Automatically close all folds.setfoldclose=all" Only open folds with insert commands.setfoldopen=insert
endfunction
The first two options simply tell vim-gnupg to always ASCII-armor and sign new files. These have nothing particular to do with password management, but are good practices for all encrypted files.
The first autocmd calls a function which holds the options that I wanted applied to my password files. I have these options apply to all encrypted files, although they’re intended primarily for use when Vim is acting as my password manager.
Folding
The primary shortcoming with using an encrypted text file as a password database is the lack of protection against shoulder-surfing. After the file has been decrypted and opened, anyone standing behind you can look over your shoulder and view all the entries. This is solved with folds and is what most of these extra options address.
I set foldmethod to marker so that Vim knows to look for all the {{{/}}} characters and use them to build the folds. Then I set foldclose to all. This closes all folds unless the cursor is in them. This way only one fold can be open at a time – or, to put it another way, only one password entry is ever visible at once.
The final fold option instructs Vim when it is allowed to open folds. Folds can always be opened manually, but by default Vim will also open them for many other cases: if you navigate to a fold, jump to a mark within a fold or search for a pattern within a fold, they will open. By setting foldopen to insert I instruct Vim that the only time it should automatically open a fold is if my cursor is in a fold and I change to insert mode. The effect of this is that when I open a file, all folds are closed by default. I can navigate through the file, search and jump through matches, all without opening any of the folds and inadvertently exposing the passwords on my screen. The fold will open if I change to insert mode within it, but it is difficult to do that by mistake.
I have my spacebar setup to toggle folds within Vim. After I have navigated to the desired entry, I can simply whack the spacebar to open it and copy the credential that I need to the system clipboard. At that point I can whack the spacebar again to close the fold, or I can quit Vim. Or I can simply wait.
Locking
The other special option I set is updatetime. Vim uses this option to determine when it should write swap files for crash recovery. Since vim-gnupg disables swap files for decrypted files, this has no effect. I use it for something else.
In the second autocmd I tell Vim to close itself on CursorHold. CursorHold is triggered whenever no key has been pressed for the time specified by updatetime. So the effect of this is that my password files are automatically closed after 1 minute of inactivity. This is similar to KeePassX’s behaviour of “locking the workspace” after a set period of inactivity.
Clipboard
To easily copy a credential to the system clipboard from Vim I have two shortcuts mapped.
12345
" Yank WORD to system clipboard in normal mode
nmap <leader>y "+yE

" Yank selection to system clipboard in visual mode
vmap <leader>y "+y
Selections are “owned” by an application, and disappear when that application (e.g., Vim) exits, thus losing the data, whereas cut-buffers, are stored within the X-server itself and remain until written over or the X-server exits (e.g., upon logging out).
The result is that I can copy a username or password by placing the cursor on its first character and hitting <leader>y. I can paste the credential wherever it is needed. After I close Vim, or after Vim closes itself after 1 minute of inactivity, the credential is removed from the clipboard. This replicates KeePassX’s behaviour of clearing the clipboard so many seconds after a username or password has been copied.
Generation
Passwords should be long and unique. To satisfy this any password manager needs some sort of password generator. Vim provides this with its ability to call and read external commands I can tell Vim to call the standard-issue pwgen program to generate a secure 24-character password utilizing special characters and insert the output at the cursor, like this:
1
:r!pwgen -sy241
Backups
The ~/pw directory is backed up in the same way as most other things on my hard drive: to Tarsnap via Tarsnapper, to an external drive via rsnapshot and cryptshot, rsync to a mirror drive. The issue with these standard backups is that they’re all encrypted and the keys to decrypt them are stored in the password manager. If I loose ~/pw I’ll have plenty of backups around, but none that I can actually access. I address this problem with regular backups to optical media.
At the beginning of every month I burn the password directory to two CDs. One copy is stored at home and the other at an off-site location. I began these optical media backups in December, so I currently have two sets consisting of five discs each. Any one of these discs will provide me with the keys I need to access a backup made with one of the more frequent methods.
Of course, all the files being burned to these discs are still encrypted with my GnuPG key. If I loose that key or passphrase I will have no way to decrypt any of these files. Protecting one’s GnuPG key is another problem entirely. I’ve taken steps that make me feel confident in my ability to always be able to recover a copy of my key, but none that I’m comfortable discussing publicly.
# Set the password database directory.PASSDIR=~/pw
# Create or edit password databases.
pw(){cd"$PASSDIR"if[ ! -z "$1"];then$EDITOR$(buildfile "$1")cd"$OLDPWD"fi}
This allows me to easily open any password file from wherever I am in the filesystem without specifying the full path. These two commands are equivalent, but the one utilizing pw() requires fewer keystrokes:
12
$ vim ~/pw/financial.gpg
$ pw financial
The function changes to the password directory before opening the file so that while I’m in Vim I can drop down to a shell with :sh and already be in the proper directory to manipulate the files. After I close Vim the function returns me to the previous working directory.
This still required a few more keystrokes than I like, so I configured my shell to perform autocompletion in the directory. If financial.gpg is the only file in the directory beginning with an “f”, typing pw f<tab> is all that is required to open the file.
Simplicity
This setup provides simplicity, power, and portability. It uses the same tools that I already employ in my daily life, and does not require the use of the mouse or any graphical windows. I’ve been happily utilizing it for about 6 months now.
Initially I had thought I would supplement the setup with a script that would search the databases for a desired entry, using some combination of grep, awk and cut, and then copy it to my clipboard via xsel. As it turns out, I haven’t felt the desire to do this. Simply opening the file in Vim, searching for the desired entry, opening the fold and copying the credential to the system clipboard is quick enough. The whole process, absent of typing in my passphrase, takes me only a couple of seconds.
Resources
I’m certainly not the first to come up with the idea of managing password with Vim. These resources were particularly useful to me when I was researching the possibilities:
I’m new enough to bicycle touring that it holds a certain novelty which is lost to me with backpacking. Last week’s 4-day trip is the longest I’ve completed on a bike. Much of the skills and gear crosses over from backpacking to bicycle touring, but there are some differences.
When backpacking, any extra weight is noticeable but I rarely fill my pack. On the bike I find that I’m much more concerned about bulk than weight. A few extra ounces – or even a pound – of weight makes no difference to me when riding a bike, but I do always fill my bags.
Bikepacking bags make sense and I’m a firm proponent of their use. Using them exclusively, without a rack, seems silly to me. A bike without a rack is like a pack without a frame. It may save a small amount of weight, but the trade-off is an unnecessary limitation on your carrying ability.
Last week’s tour was the first in which I used panniers to supplement the bikepacking luggage. I opted for a small set (custom built by a local company) that are actually intended as front panniers. The smaller size was much more appropriate for my needs than standard sized rear panniers. I foresee them being used on all future trips.
A couple weeks ago I swapped out my crank. My old crank had the standard 30/42/52 gearing that you’ll find on most road triples. When you stop to think about it, it isn’t a very practical combination. I swapped it for a Sugino XD-600 with 26/36/48 chainrings. Paired with my 11-32 9-speed cassette, this has proven itself to be perfect. On my commute I can race along in the 48-tooth ring, smoking latex-clad roadies. When confronted with mountains on a loaded bike I can drop down to the 26-tooth ring and spin merrily to the top.
I feel like I have a pretty decent grasp on most of the backcountry around here thanks to travel on foot. My bike is allowing me to build a similar mental map of the backroads. And the eating is better.
Published in 1983, the book paints an inspiring picture of the Swiss Army and Switzerland’s strategy of defense – the Swiss “aptitude for war”. They have combined their country’s topographic barriers with careful planning to “prevent war with a price of entry that is too high.” McPhee calls it the “Porcupine Principle”.
To interrupt the unity of bridges, tunnels, highways, railroads, Switzerland has established three thousand points of demolition. That is the number officially printed. It has been suggested to me that to approximate a true figure a reader ought to multiple by two. Where a highway bridge crosses a railroad, a segment of the bridge is programmed to drop on the railroad. Primacord fuses are built into the bridge. Hidden artillery is in place on either side, set to prevent the enemy from clearing or repairing the damage. All purposes included, concealed and stationary artillery probably number upward of twelve thousand guns… Every railroad and highway tunnel has been prepared to pinch shut explosively. Nearby mountains have been made so porous that whole divisions can fit inside them. There are weapons and soldiers under barns. There are cannons inside pretty houses. Where Swiss highways happen to run on narrow ground between the edges of lakes and the bottoms of cliffs, man-made rockslides area ready to slide.
Over at Cold Thistle Dane has reposted a piece by Mark Twight on the impact of cheating. It specifically concerns the use of supplemental oxygen in mountaineering, but applies to all aspects of life.
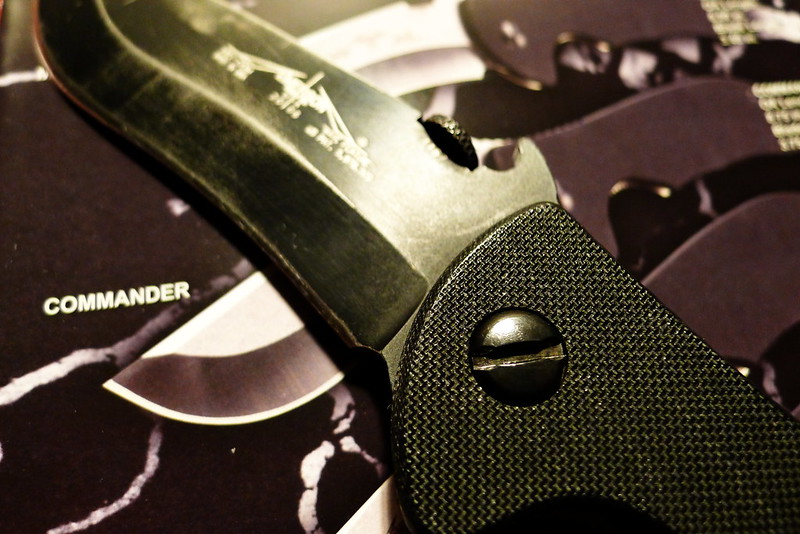
I somehow managed to loose the pivot screw from my Emerson Mini-Commander. Last week I ordered a replacement, which arrived today. Rather than just installing the new screw, I decided to strip the entire knife to clean and lubricate it.
I had never done this before. The knife was purchased in 2006 and has seen some (ab)use. I was surprised at how clean it was in there. But for a little wear around the pivot point the liners could have been new. I wiped everything down with a towel and some rubbing alcohol, dropped a little ProLink on the washers, and screwed everything back together.
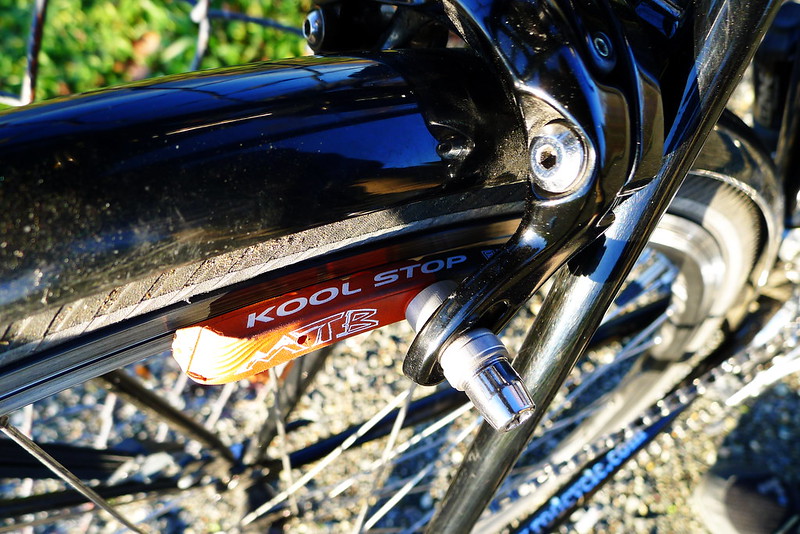
The salmon compound of the Scott-Mathauser shoes is excellent, but I think the design of the Kool Stop pads will be superior in inclement conditions. They offer dual compound pads that include both the salmon compound and a softer black compound to reduce squealing. I went with Mountain Pads in the rear and Dura Road Pads up front.
Mako has published a short essay in which he argues in favor of a conceptual shift, referring to “free users” rather than “free software”. It draws attention to the larger societal impact of proprietary software, and points out that software that is free-as-in-freedom can still create dependent and vulnerable users when used as a 3rd party service in the cloud.