You are currently viewing all posts tagged with review.

Alternative Carry of the ESEE Candiru

The ESEE Candiru is another nice knife that suffers from a terrible sheath.

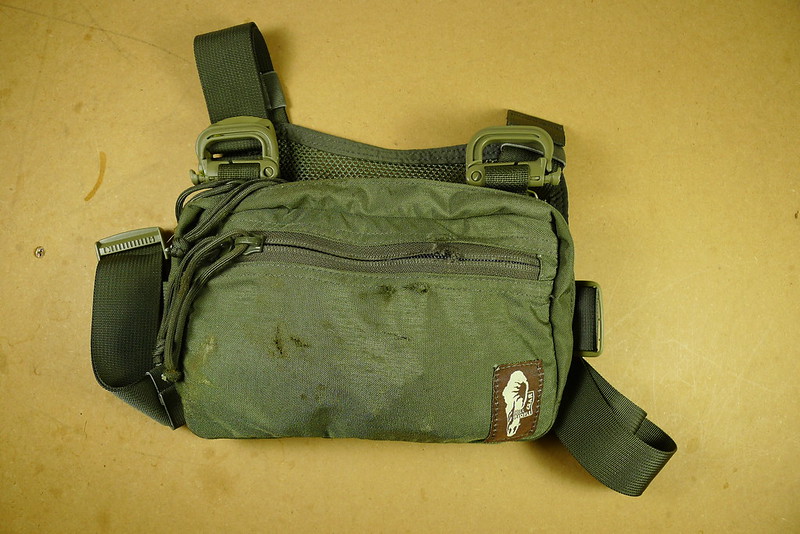
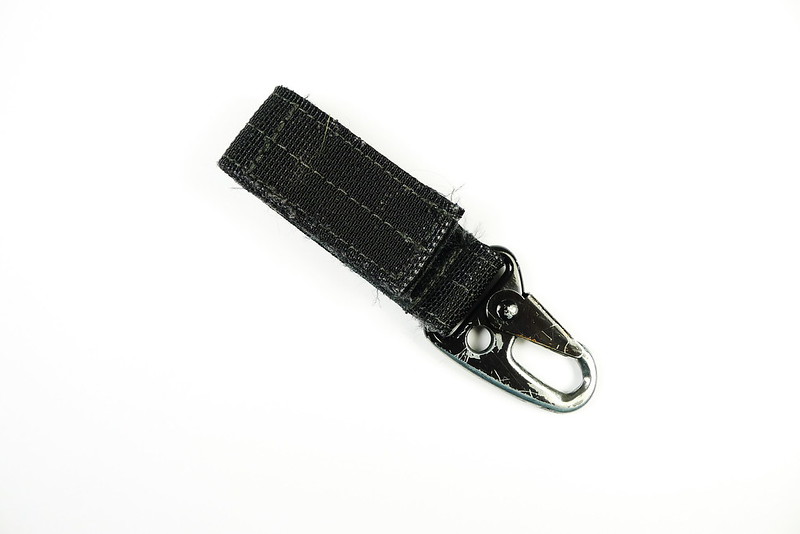
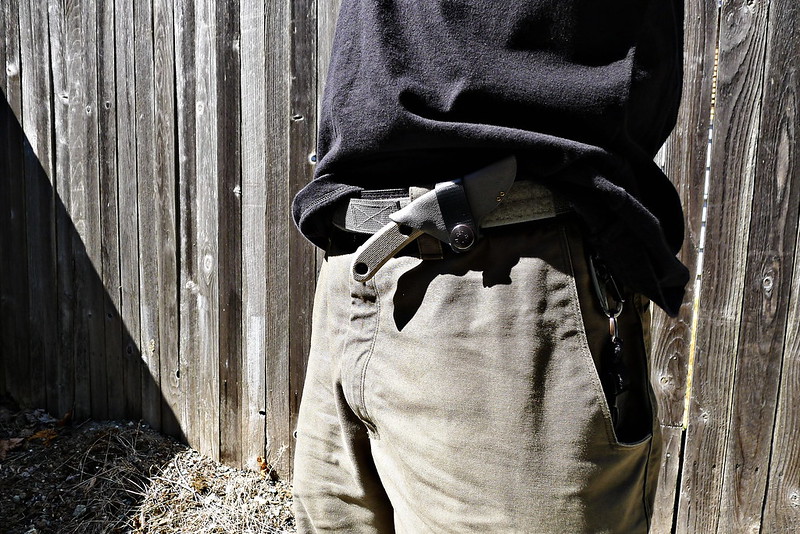
In fact, it is a great little knife. Unfortunately the only sheath that the Candiru comes with is a simple Cordura pouch. I threw this away immediately upon receiving the knife and replaced it with a horizontal belt sheath from Dark Star Gear. The Dark Star Gear sheath first came to my attention on pistol-forum.com. At the time I hadn’t purchased the Candriu, but horizontal carry of a small fixed blade at about 11:00 on the belt impressed me as a great idea. I knew I wanted to give it a shot.

Dark Star Gear Sheath

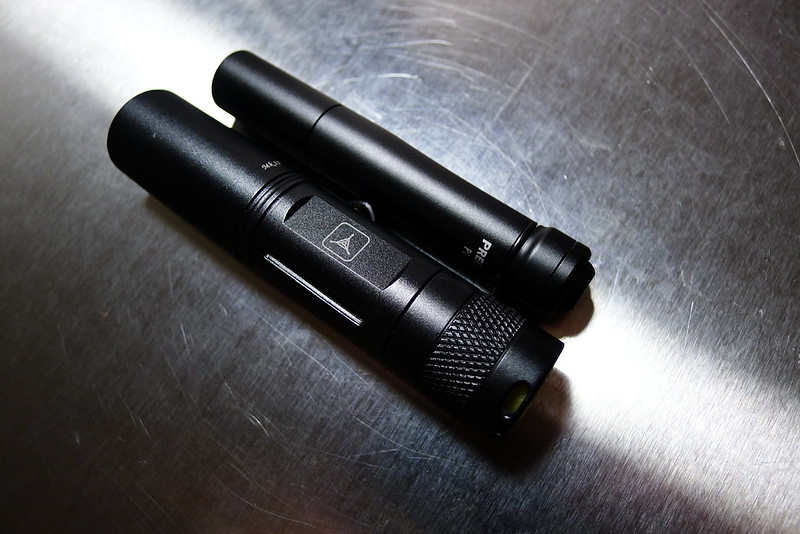
I considered ordering the sheath for my Izula, which is the knife I usually carry when I want a fixed blade, but I was concerned that it would be a little too big to conceal horizontally on my waist1. Instead I decided to purchase the ESEE Candiru, which Brian Green had raved about last year, just for this carry method. (I actually ordered the sheath before I ordered the knife.)

I’m extremely pleased with both purchases. The Candiru is not quite as general-purpose as the larger Izula, but it performs all the functions that I require of an urban EDC blade, and provides yet another option for an EDC fixed blade. This is something that I have come to prefer over a folder since I purchased the Izula about 4 years ago. The Dark Star Gear sheath allows me to carry it comfortable and conceal it with nothing more than a t-shirt, while still providing for a quick draw. The sheath has also exposed me to the idea of carrying at 11:00, which is a very nice piece of real-estate on the belt that I have previously overlooked.

ESEE Candiru / Dark Star Gear Sheath

  • ESEE Candiru / Dark Star Gear Sheath
  • ESEE Candiru / Dark Star Gear Sheath

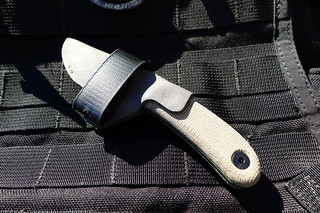
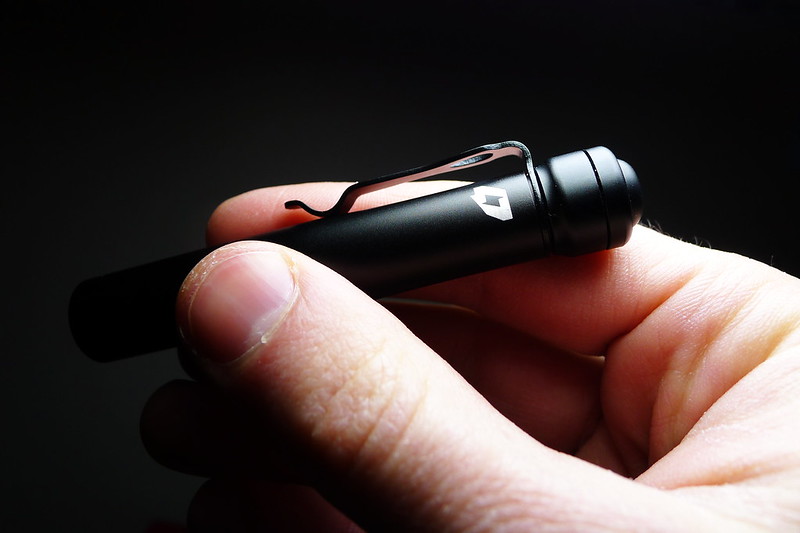
I have carried the Candiru in the Dark Star Gear sheath as my primary knife for about 2 months now. Up until a few days ago the Candiru’s handle had been cord wrapped2. I just recently purchased and installed the optional Micarta slabs. The Candiru does suffer from a small handle – a necessary evil for a knife this size. It can use all the extra bulk it can get. My initial impressions of the Micarta slabs are that they greatly improve the feel of the knife in the hand without any negative impact on the ability to easily conceal the knife in the Dark Star Gear sheath.

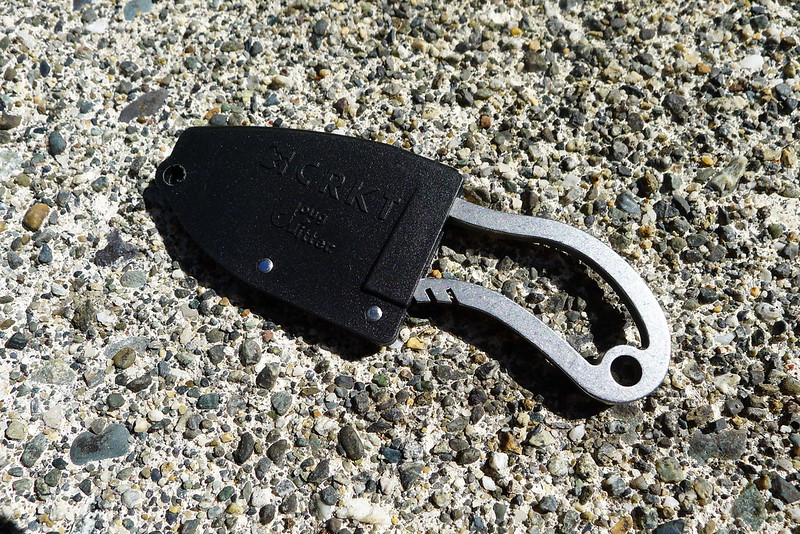
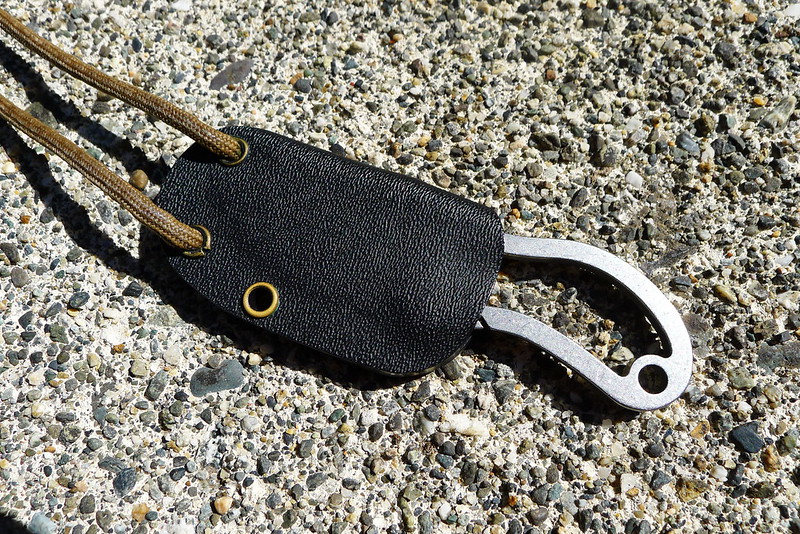
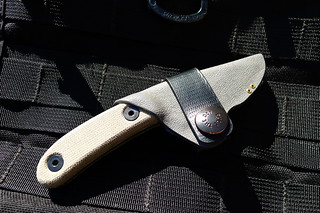
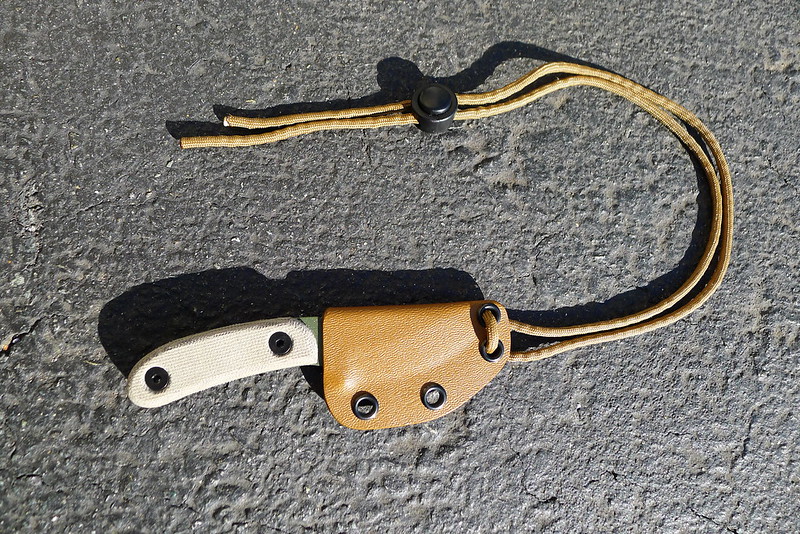
For a second carry option I also purchased a Kydex neck sheath for the Candiru. This is the sheath that the Candiru should ship with. The size of the knife makes it a great option for those who find the Izula a bit too large for comfortable carry around the neck3, but still want something a bit more functional than a tiny CRKT RSK Mk5 or Nemesis Hellion. I carry the knife around my neck when I run, since for that activity I’m not usually wearing a belt appropriate for the Dark Star Gear sheath. Adding the Micarta slabs does make the Candiru a bit heavier and bulkier around the neck. If you intend to use the Candiru primarily as a neck knife, I would stick with a cord wrap on the handles.

ESEE Candiru / Kydex Neck Sheath

Notes

  1. While bigger folk could probably conceal an Izula in the Dark Star Gear sheath, I'm confident that this was the right choice for me. I feel pretty sure that the Izula handle would stick out too far on my small waist.
  2. The handle was wrapped with Technora Four Hundred Cord. I had bought a hank of this cordage a while ago to play around with and found that the smaller diameter worked better than paracord (gutted or non) on the Candiru's small handle.
  3. The Izula is at the upper-end of my size range for comfortable neck carry.

CRKT RSK Mk5 Sheaths

The CRKT RSK Mk5 is a nice knife cursed by a terrible sheath.

I’ve been EDCing the knife since my Nemesis Hellion was lost last November. Unfortunately, the “glass filled nylon” sheath that the RSK Mk5 ships with is a poor design. The grommet in the tip is too small to accept a piece of paracord. This was done to keep the overall size of the sheathed knife small enough to fit inside an Altoids tin. I have never understood the obsession with the Altoids tin survival kit. I prefer to carry a knife about this size around my neck.

CRKT RSK Mk5: Standard Sheath

Some time ago I purchased a new sheath for my RAT Izula from a fellow on eBay who goes by lemonwoodgallery. I was pleased with that purchase, so as soon as I bought the RSK Mk5 I shipped it to him to make me a custom kydex sheath. It’s nothing fancy – just your standard taco style sheath with two grommets at the top for a piece of paracord and one on the side for retention. This is the same design as the sheath for the Nemesis Hellion, which served me well for 6 years. The new sheath has held the RSK Mk5 around my neck for about 8 months now. It’s a much appreciated upgrade.

CRKT RSK Mk5: Custom Sheath

Hill People Gear Chest Armor

I crashed my bike this morning. I landed on my chest and skidded a few feet on the concrete. Luckily I was wearing my Hill People Gear Snubby Kit Bag. The front of the Kit Bag was torn. It saved my chest (and my nice merino shirt) from the same fate. Thanks HPG!

The Defeet Wool Duragloves also handed themselves admirably. The right-hand glove is fine. The left-hand glove has a hole in the palm. I expect this low amount of damage is due to the 40% Cordura composition. I would not expect 100% wool gloves to hold up as well.

HPG Snubby Kit Bag Damage

  • HPG Snubby Kit Bag Damage
  • Defeet Wool Duragloves Damage

I've been using the same Maxpedition Keyper for 8 years.

The paint is chipped. There is a little rust on the gate. The hook has been reshaped by almost a decade of rubbing by a split ring. It still works as good as the day I bought it.

Maxpedition Keyper

If you need to hang something off your belt, seriously consider the Maxpedition Keyper.

I reviewed the Hill People Gear Tarahumara on ITS Tactical.

As with the Kit Bag, my opinion of the Hill People Gear Tarahumara is high. It stands strong on its own, and has proved a versatile addition to a pack system.

Tarahumara at the Beach

Defeet Wool Duragloves

I first heard of the Defeet Duragloves when Andrew Skurka included the wool gloves in his gear list for the Alaska-Yukon Expedition back in 2010. I was impressed that he chose to carry only one pair of seemingly thin gloves for all but the coldest portions of the trip. At the time I had an old pair of Outdoor Research PL 400 Gloves that I was happy with for winter backcountry use, but I kept the wool Duragloves in the back of my head as a possible replacement when the time came.

I still have Outdoor Research PL 400 Gloves and I am still pleased with the warmth they provide for cold weather hiking, but I’ve never been satisfied with them on the bike. Even in cold temperatures, I always manage to work up a sweat when cranking on the pedals. The PL 400 gloves are just too warm for that application. This past October I decided to purchase a pair of the wool Duragloves to see if they would be better suited to fill that niche.

Defeet Wool Duragloves

The wool Duragloves are a blend of 40% merino, 40% Cordura, and 20% Lycra. Their thickness is that of your typical liner glove. The palm and fingers are covered with rubber grippy things. My medium sized pair weigh exactly 2 oz.

The gloves are designed specifically to address the problem that I was having. They are meant as a cool weather cycling glove that don’t cause your hands to overheat and sweat on hard hill climbs, but still keep you warm on the descent.

Duragloves are not made to climb Mt. Everest. They are made to climb mountains at a hard pace, descend the other side, and do it over and over until your ride is done. Thin enough to ride at your maximum effort and still give you dexterity to fiddle around in your jersey for food. Thick enough to keep frostbite off your fingers at 50mph down alps still laden with snow.

Push Off

I’ve worn my pair on every commute for the past three months and can report that they do exactly what they claim to do. Temperatures this winter have been anywhere between 30° and 45° Fahrenheit and raining more often than not. Throughout it all the Duragloves have kept me warm and comfortable, even when wet, and I’ve never felt the desire to take them off to cool down. The thinness of the glove means that very little dexterity is lost. I do not need to remove the gloves to manipulate objects with my hands. I’ve had them for too short a time to comment on durability – and, until a crash, riding a bike tends to not be very demanding of a glove’s durability – but given the blend of wool and synthetic materials, I’m confident that the gloves will fully satisfy my demands in that department.

Defeet Wool Duraglove: Fingers

I have tried using the gloves on backcountry trips. I still prefer the Outdoor Research gloves for that application. Walking does not consistently get my heart-rate up to the extent that riding a bike does, and the Duragloves are simply not warm enough to keep my hands comfortable during that activity. Used as a liner with an insulated mitten I’m sure they would be adequate, but I prefer to use a thicker glove with an uninsulated shell mitten.

My only complaint concerning the Duragloves are the rubber grippy things. They could be grippier. When wearing the gloves it is difficult for me to twist the bezel of my Fenix LD20 headlights to adjust their mode. This is not the case on a more general-purpose glove, such as Mechanix gloves or Kuiu Guide Gloves. Even the grippy things on my Outdoor Research PL 400 gloves, despite having been worn down for years, do a better job adjusting the lights.

Defeet Wool Duraglove: Palm

I can work around the lack of grip (adjusting the lights is the only application where this has come up) and everything else about the gloves is close to perfect. They are an affordable, American-made glove intended for aerobic activity in cool conditions. If you’re looking for a glove in that department, the Duragloves are well worth your consideration.

Evaluating the Marathon Supremes

Last March I bought a pair of Continental Ultra Gatorskin tires. Their flat protection proved to be excellent – I have not had a single flat with them – but I found the durability of the tread to be wanting. They are now worn down to the point where they are basically racing slicks, which, while fun, is certainly not appropriate for wet weather riding. I don’t own a cycling computer or keep track of my miles in any other way, so I’m not sure how many miles the tires have on them. I think it’s fair to say that I average about 500 miles a month. The tires are likely to be just shy of 5,000 miles. For a pricey tire like the Gatorskins, I’d prefer to see a bit more longevity.

The various tires in the Marathon series from Schwalbe have an excellent reputation among long distance riders, both in terms of flat protection and durability. Peter White maintains a description of the various models which helped me to understand the differences between them. I decided that the Marathon Supremes would be a good fit for my needs. They are normally absurdly expensive, but I was able to find a good deal and pick up a pair of them for about the same as what the Gatorskins would cost.

Schwalbe Marathon Supreme Tires

I’ve been using the Marathon Supremes for a week of wet riding now and I’m very pleased with them. They certainly offer better grip than my worn-down Gatorskins. I feel more confident when aggressively cornering with them. The reflective sidewall is a welcome addition to my dark commutes. Despite the Gatorskins being considered a “race” tire and the Marathon Supremes more of a general road-riding/commuting tire, I haven’t noticed a significant difference in speed or rolling resistance. With the Marathon Supremes, I’ve gone back to a 700x28 tire in place of the skinnier 700x25 size of my Gatorskins.

The Marathon Supremes were much easier to get on my rims than the Gatorskins, which makes me feel a little better about the prospect of fixing a flat with these tires. Of course, if I get a flat anytime within the next 5,000 miles, the tires will receive a negative mark in comparison against the Gatorskins.

The real question about the Marathon Supremes is durability. I’m looking forward to see how they handle this winter and how long they last into 2013.

Schwalbe Marathon Supreme Tires

Impressions of the Preon P1

I use two Fenix LD20 lights mounted to my handlebars via Twofish Lockblocks as headlights. An old TAD-branded JETBeam Jet 1 MkII is mounted on my helmet. As a result, whenever I have my bike – which is the majority of the time – I have a light. When I’m not around my bike, I tend to be left in the dark. I do carry a Photon Freedom Micro on my keychain, which is a great little device, but no replacement for a hand-held torch. A more substantial light has not been part of my on-body EDC for a few years.

Last month I decided to change that. I wanted to find a small, unobtrusive LED light that I could carry in a pocket. My JETBeam helmet light is powered by a single AA battery. While the height on that light is about right, I felt the diameter was too large for what I had in mind. I decided to look for a light powered by a single AAA. Two options presented themselves: the Maratac AAA Rev 2 and the Foursevens Preon P1. They both have similar specifications and both seem to earn equally positive reviews. The Maratac light is less expensive and features a knurled body, as opposed to the Preon P1’s smooth body, which made me initially favor the Maratac. Unfortunately, both lights are twist-activated. One of my requirements for any light is that it can be activated with one hand. That necessitates a clicky tailcap.

A review of the Preon P1 on ITS presented a solution. The Preon P1 is compatible with pieces from the Preon P2, which is a double-AAA flashlight that does have a clicky tailcap. I could purchase a replacement Preon clicky tailcap and install that on a Preon P1 to get the light I wanted. The Preon P1 and the tailcap cost $45. That’s a lot for a small light, and quite a bit more than the $25 price of the Maratac light, but it would make for a system that fit my requirements. I chose to purchase the Preon.

Preon P1

I have been carrying the Preon P1 for a couple weeks now. At a height of about 3 inches and a diameter just over half an inch, I can clip it in my pocket and completely forget that it is there until I need it, which is exactly what I was looking for. All the various modes of the light can be cycled through by clicking the tailcap, although I don’t particularly care about them – I only use the light with its standard output setting.

The clicky tailcap could be improved. I’m accustomed to tailcaps being inset into the light slightly. The Preon tailcap juts out from the top of the body of the light, which I think increases the chances of it accidentally being clicked on and draining the battery. It also has an amount of free movement in it. The button can be depressed about halfway before it actually hits the clicky part of the mechanism, which makes the button feel a bit loose. I don’t know that this affects the functionality of the tailcap, but it does make it feel cheaper.

Preon P1 (AAA) vs JETBeam Jet1 MkII (AA)

Despite the less-than-perfect tailcap, I’m happy with the light. The runtime isn’t incredible, but that’s acceptable for my use. I intend to use the light only as a backup to those on my bike. When the battery does die, I just throw it in the charger and install another Eneloop. If you’re looking for a small EDC light, the Preon P1 is worth consideration.