I reviewed the Hill People Gear Kit Bag on ITS Tactical.
Read the review and then go give your money to Hill People Gear.
You are currently viewing all posts tagged with gear.
Read the review and then go give your money to Hill People Gear.
My first experience with a field message pad was in 2005. I carried a Field Message Pad Cover by Canadian Peacekeeper – now CP Gear – filled with the Canadian military standard issue pad. I was introduced to the concept by one of the early episodes of Patrolling with Sean Kennedy. The idea of having a cover for one’s notepad, which not only protected the pad but also contained pens and the other tools necessary for a dead tree data dump, simply made sense. The system was a pleasure to use, but after filling my last Canadian pad in 2006, I left it in favour of more conventional notepads. The refill pads, being available only from Canada, were difficult to acquire, and all the cool kids were using Moleskines and similar products. I forgot about the old field message pad until this year.
I keep a box that holds all of my filled notepads. Last March I was digging through the box, looking for a particular note (sadly, you can’t grep dead trees), when I came across the Canadian pad and cover. I was reminded of the pleasure the system previously provided me, and the practicality of it. No more digging around for a pen – if you have your notepad, you have your pen. Need to toss your pad into the dirt to free both hands? No problem, it’s protected by the cover. I decided that I would like to revisit the system, but perhaps with a more commonly available pad, and a more mature eye brought to the market’s current offerings.

One of Sean Kennedy’s original requirements for the notepad was that the paper was gridded. I agree with that. Graph paper can be incredibly useful in certain circumstances, and the rest of the time holds no disadvantage for me. The original Canadian pads were gridded, but only on one side of the paper. That made the back of each page less useful, and seemed wasteful to me.
The size of the Canadian pad was acceptable, but a little larger than my ideal. Particularly when the cover was added, it made for just a little bit too much bulk and was sized slightly too large for some cargo pockets. I’d used plenty of the pocket-sized Moleskine notepads. Their size is also acceptable, but if I’m being picky: they’re just a tad too small. Ideally, I would like something sized in between the two.
My third requirements was the the notepad was top-bound. I prefer that over a side-bound pad, as I find them to be easier to access quickly. The binding should be spiral, as that allows the pad to lay open.
It’s a fairly simple criteria, but I was surprised at how difficult it was to accommodate.
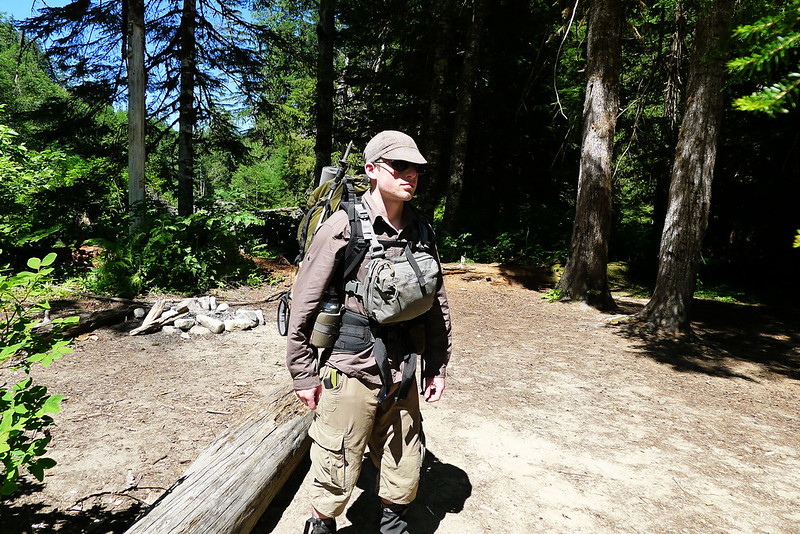
The only pad I could find that met the requirements was from Rite in the Rain. Specifically, the 146 (or 946 or 946T for tacticool colors). It is gridded on both sides, is spiral bound on the top, and measures in at 4” x 6” – just slightly larger than a Moleskin, and a bit smaller than the Canadian pad. Rite in the Rain makes an excellent product. I always carry one of their pads when in wilderness environments, but I prefer not to carry them around town. Their waxy paper is unpleasant to write on. If I do not need to worry about the paper getting soaking wet, I prefer to carry a normal notepad. It makes the act of writing more pleasant, which encourages me to write more often.
The nice thing about Rite in the Rain pads, though, is that covers are readily available for them. Tactical Tailor makes a line of covers that Rite in the Rain sells. Maxpedition produces their own. The Tactical Tailor / Rite in the Rain cover for the 146 notepad is the C946. Maxpedition offers a similar cover. They looked great and encouraged me to revisit the notepad search, this time armed with a specific size: 4” x 6”.
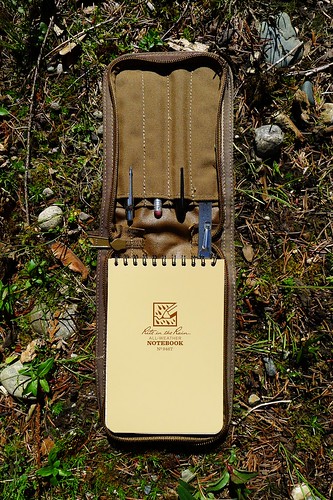
Having the dimensions to narrow the search made all the difference. I quickly came upon the Rhodia 13500. It is gridded, 4” x 6”, and top-bound. The exact same as the Rite in the Rain 146, but with normal paper.
These findings allowed me to put together my new field message pad system: a Rite in the Rain pad, Rhodia pad, and a cover. I chose the Tactical Tailor cover simply because it is made about 60 miles from me, where Maxpedition claims that their covers are “imported”. With that cover and two identically sized pads, I could swap in whichever pad was more appropriate for my environment. Around town I carry the Rhodia pad. When I’m heading to the mountains I install the Rite in the Rain pad. Inside the cover I carry a pen (I’m partial to a Parker Jotter with a gel cartridge), a No. 2 pencil, a Sharpie, and a ruler. When I swap the Rhodia pad for the Rite in the Rain, I sometimes also swap the Parker pen for a Fisher Space pen, but in general I don’t like the way the ink comes out of the pressurized cartridges (and I already carry the pencil, which is field-serviceable and is able to write in inclement conditions just as well as the space pen).

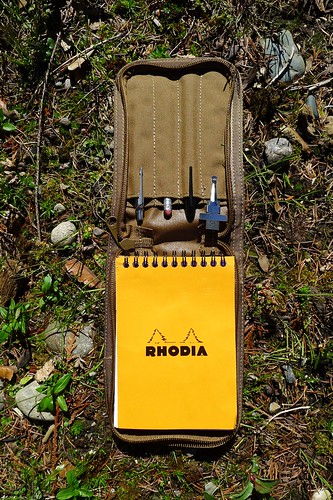

I’ve been using this system since April. It is both versatile and functional, and has proved itself perfect for my needs. It is large enough to write on without feeling cramped, and small enough to place in the cargo or ass-cheek pocket of my pants when running around the woods in the middle of the night setting up dead-drops. The cover, Rite in the Rain pad, ruler, Sharpie and pencil are all made in the US. The Parker pen and Rhodia pad are made in France.
Photo comparisons between this and the Canadian system are available on Flickr.
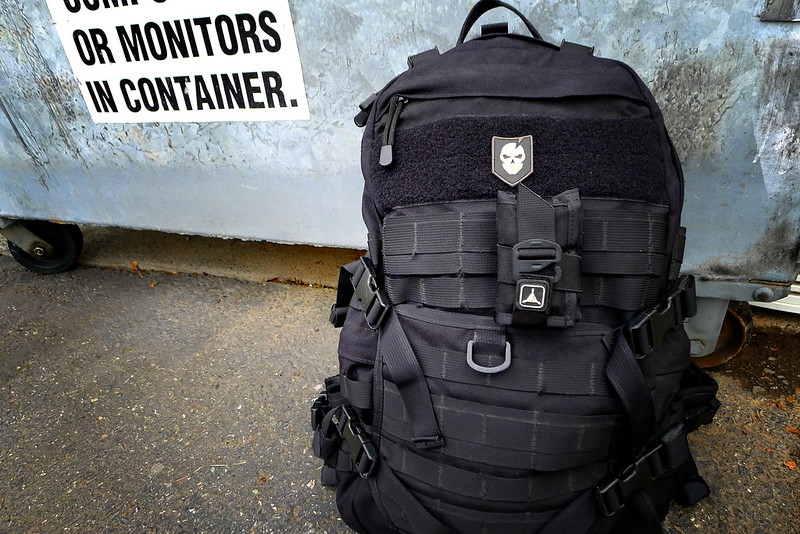
I wish someone would make a tactical messenger bag.
Plenty of companies make what they claim to be a tactical messenger bag: 5.11, Spec-Ops, ITS, TAD, and Maxpedition to name a few. None of these fit the bill. Those bags are all what I would refer to as a side bag or a man-purse. I don’t use that term in a derogatory sense – they’re fine bags, but they’re not messenger bags.
For me, the defining characteristic of a messenger bag is that it designed to be worn on the back, not hanging down on one’s side. Timbuk2, Chrome, Seagull, and R.E.Load are examples of companies that make messenger bags. I want one of those bags, but with the excellent, so-called “tactical” features that the aforementioned companies bring to the market: appropriate use of PALS webbing1, ability to support concealed carry, a quick-access medical compartment2. (Oh, and velcro for my tacticool patches, of course.)
Try riding a bike with a tactical man-purse, and then try riding a bike with a messenger bag. It’s easy to see why anyone with “messenger” in their job title carries an actual messenger bag. The practicality of such a bag isn’t limited to just the bicycle market: try running, or performing any physical activity (particularly a violent one, as might be required by someone with “tactical” in their job title) with a bag flapping on your side. It doesn’t work. Some companies have tried to address this by adding a stabilizing strap to help lock the bag in place. That’s a fine addition, but it is no replacement for a bag that is properly designed in the first place.
I can’t recognize any advantages that the man-purse offers over the messenger bag. The messenger bag, on the other hand, offers distinct advantages over the man-purse.
As I mentioned previously, there was quite a lot of swag given out to attendees of the ITS Tactical Muster. My favorite piece was the Micro SERE Kit put together by SerePick and Triple Aught Design.
Matt from SerePick donated a set of Bogota entry tools, a diamond wire blade, a folding tool that includes a saw and razor, a small button compass, two universal handcuff keys, two handcuff shims, a small ceramic razor blade, Kevlar cord, and steel wire. [The additional items were purchased by ITS for the kits, not donated by SerePick.] TAD Gear (who also provided two students, in the form of Brett, their CEO, and Anthony, their Art Director) added to this kit their brass Survival Spark and four Tinder-Quick tabs.
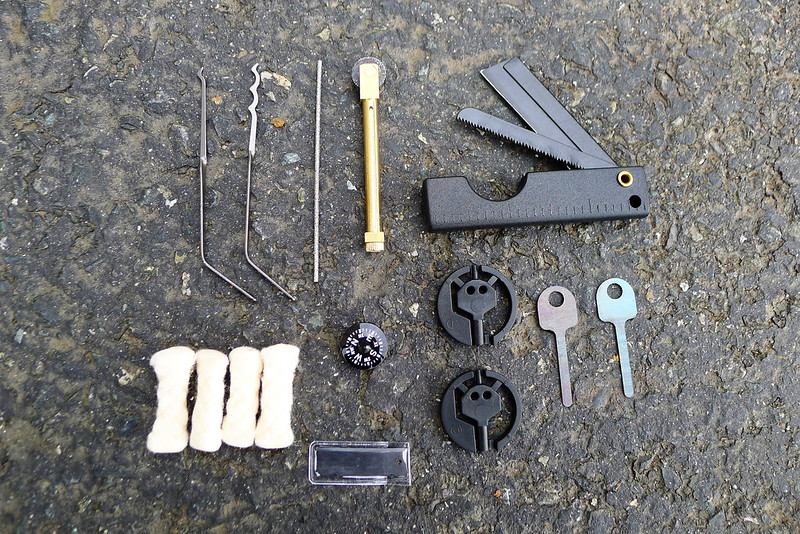
TAD also developed a custom pouch to hold this kit. It’s similar to a bicycle tool roll, but on a smaller scale. The closure strap allows the pouch to be mounted to any webbing, whether it be a belt or PALS. I think it would be great to see this become a regular product, perhaps co-branded between TAD, ITS and SerePick, but for now the pouches are exclusive to alumni of the ITS Muster.

I began to read his blog last summer, when he was riding from Anchorage down along the continental divide. It’s a great blog, and his gear is clearly heavily used and carefully chosen. Recently, he has discussed his cook kit, tools, luggage, clothing, electronics, and his bike and the changes it has gone through.
I go through batteries at a fairly high rate. Electronic devices for the wilderness, such as my headlamp and GPS, see regular use. At home, things like my wireless mouse need power. The biggest drain are my lights – particular in the winter, when they are used to light my regular commute.
This last spring I decided to invest in a set of rechargeable batteries. Although some of my devices run on CR123 batteries, most use AA or AAAs. To start with, I was concerned only with being able to recharge the AA and AAA batteries. Years ago I had a set of rechargeable batteries, but I think the technology was not very developed back then. They seemed to drain quickly and not hold many charges. Today, the market is different. Some brief research showed that there were many options out there, with positive reviews for most of them.
What most reviews seemed to suggest was that the majority of the offerings were all of equal quality, with most differences unlikely to be noticed outside of a laboratory. The most popular, though, seemed to be the Sanyo Eneloop and Maha Powerex batteries. I found some claims that, between the two, the Eneloops held a charge longer while on the shelf.
I decided to try the Eneloop batteries, and purchased a package that included a charger, 8 AAs and 4 AAAs. The charger can charge up to four batteries at once, either AAA or AA, but it must be done in pairs. It cannot charge one battery at a time, or three. This has turned out to be an occasional inconvenience. I have some devices that use three batteries, and some that need just one. To charge the batteries for those devices I always have to give the charger an extra battery.
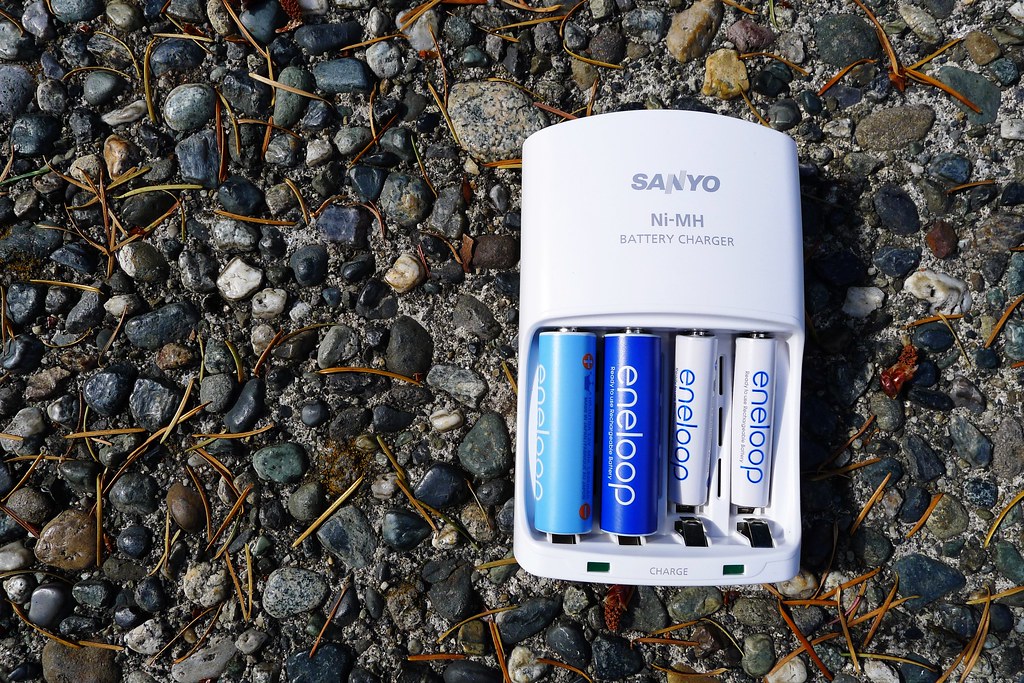
The charger takes around five hours to bring a dead battery up to a full charge. I have read that the Maha Powerex MH-C9000 charger can charge the batteries in a shorter period of time. It also gives the user more control over the charge, which has the potential of increasing the life of the batteries.
The batteries themselves I have been very happy with. I don’t have the knowledge to provide any objective information on their chemistry or electronics. Suffice it to say that they work. They seem to last longer in the same devices than their non-rechargeable counterparts did. I have not noticed any degradation in those batteries that I have recharged. That is not surprising. Sanyo claims the Eneloop batteries can be recharged 1,500 times – a number I have not come anywhere near to approaching.
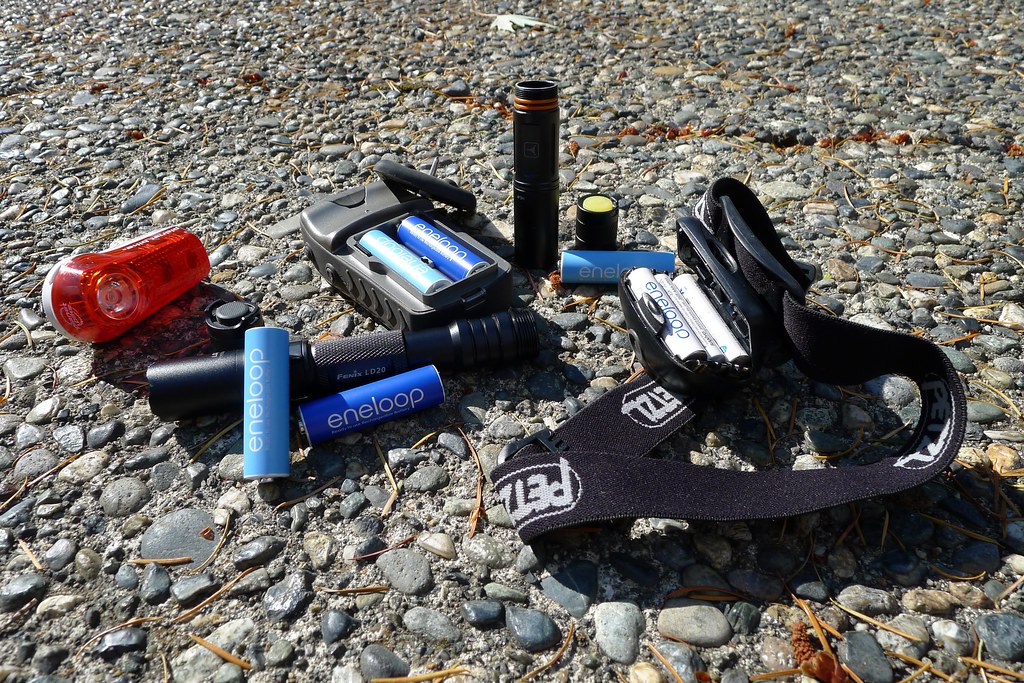
Since the initial purchase, I have bought two more packs of AA and AAA Eneloops. All of my electronics now run on rechargeable batteries, save for those few that require CR123 batteries. The batteries themselves are an expensive investment, but they have payed off. Now that I have a good number of both AA and AAA sizes, and am happy with the Eneloop brand, I would like to purchase a more specialized charger, such as the aforementioned C9000.
If you use any non-rechargeable AA or AAA batteries in your electronics, I recommend giving Eneloops a try. The financial savings alone is enough of a benefit to justify their use.
I purchased a pair of Outdoor Research Flex-Tex Gaiters last spring. I had owned the full-length Rocky Mountain High Gaiters from Outdoor Research for a year, and was a big fan of them. They are not completely waterproof, but are highly water-resistant, and still maintain a level of breathability that makes them appropriate for year-round use. I find them adequate for protecting my legs when bushwhacking and for keeping me warm and dry when traveling in rain and snow – but I’m always looking to loose weight. My eye had been on the Flex-Tex gaiters for a while. I thought that they would be a good alternative to full-length gaiters during the warmer months: something lighter and cooler which could provide protection from debris but would also handle the wet and snow that is often found in the alpine summer.
When I went to purchase the gaiters, I found that sizing was an issue. Unlike Outdoor Research’s other gaiters, the Flex-Tex do not come in normal sizes. They are offered only in the combination sizes of Small/Medium and Large/Extra Large. In the Rocky Mountain High gaiters I wear a medium. The Small/Medium Flex-Tex gaiters were far too small for me to even get on. The Large/Extra Large gaiters fit well around my footwear, but were loose at the top around my calf. Unlike other gaiters from Outdoor Research, the Flex-Tex had no adjustment to tighten the fit.
I purchased them anyway, thinking to give them a shot. After using them on an early season trip in the snow, it was evident that they would not work. The loose top allowed too much snow to enter the gaiter.
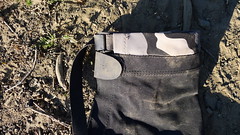
Rather than giving up on the gaiters and immediately returning them, I held on to them for a while. I thought that it would be simple enough to modify the gaiters by adding a new cuff on top of the gaiter, creating a channel of material through which could run a thin piece of webbing. The webbing could be cinched down around the leg and secured with a camlock. This would provide the same adjustment mechanism as that found on my full-length gaiters. It would not be a perfect seal, but short gaiters will never keep out as much debris as tall ones.
The gaiters lay neglected for a while. A few months later I found myself in Seattle Fabrics and wound up purchasing the needed webbing, as well as some stretchy Lycra material which I thought would serve as the added cuff. Then I forgot about the project again.
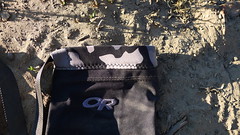
Eventually, I remembered the gaiters, and wanted to get them done. At that time I had some material left over from hemming a new pair of Kuiu Attack Pants. The Kuiu pants are made out of Toray Primeflex, an impressive soft-shell which I discussed in my review of the Kuiu Guide Gloves. While heavier than the Lycra, I thought that Primeflex would provide more durability and be a better match to the soft-shell of the Flex-Tex gaiters.
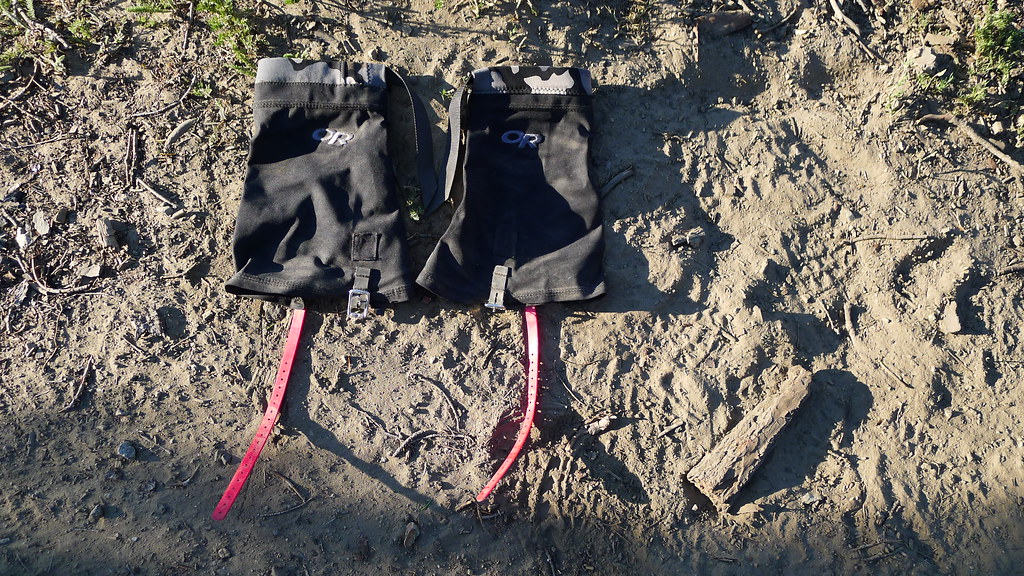
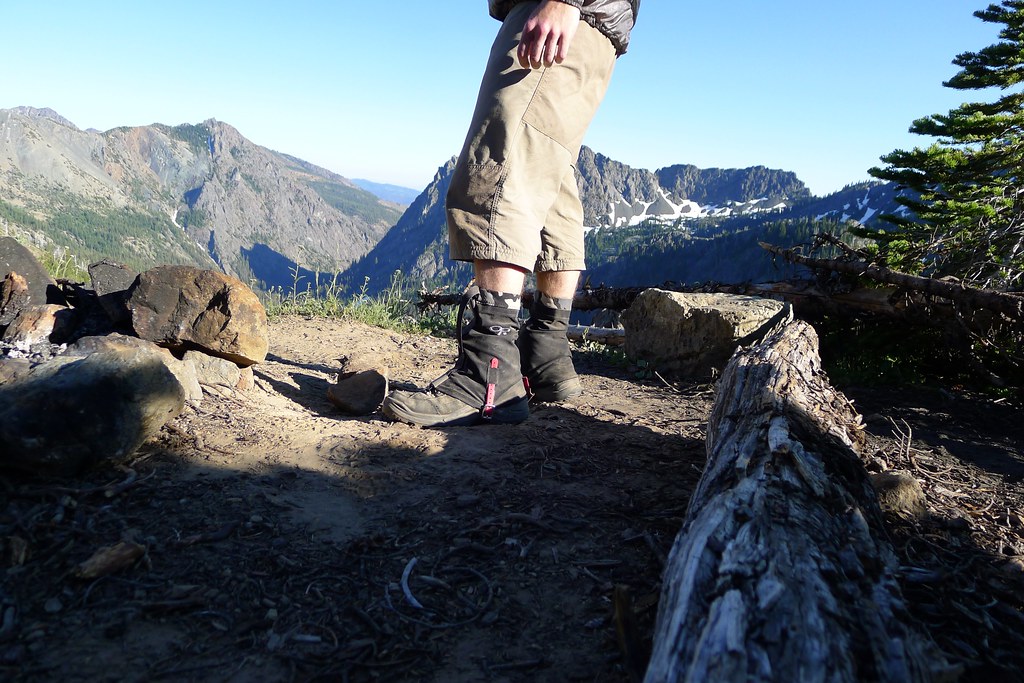
The project was a success. With the Primeflex cuff sewn atop the gaiters’ normal cuff and a piece of webbing put through it, I can cinch down the top of the gaiter around my calf and secure it with the camlock buckle. Because the top of the gaiter has not been modified to be permanently smaller, I can still wear the gaiters over pants – although I almost always wear them next to skin. I have not done much post-holing in snow this summer, but the new cuff has provided a tight enough seal to keep out flying snow that comes from glissading down snowy slopes and kicking steps on the way up. Neither rocks, dirt, nor twigs have yet to find their way in.
Now that I have a proper fit, the Flex-Tex gaiters have become my preferred wear. They are breathable, water-resistant, and tough. At 5.29 ounces, the modified gaiters are only slightly lighter than the 6.98 ounces Rocky Mountain High gaiters. It is not a huge difference, but I find that I still prefer the Flex-Tex gaiters. The Rocky Mountain gaiters I never wore specifically for debris. They stayed in my pack until I encountered wet or snow. The Flex-Tex gaiters are comfortable and breathable enough to wear all the time – even when gaiters are not necessarily needed – which makes them more efficient at keeping out debris. For my type of travel, I find the Flex-Tex gaiters more functional than short gaiters that I’ve tried from other companies, such as Integral Designs and Dirty Girl.
I reviewed the Kuiu Guide Gloves on ITS Tactical. Check it out. Or just go straight to Kuiu and buy a pair. They’re that good.
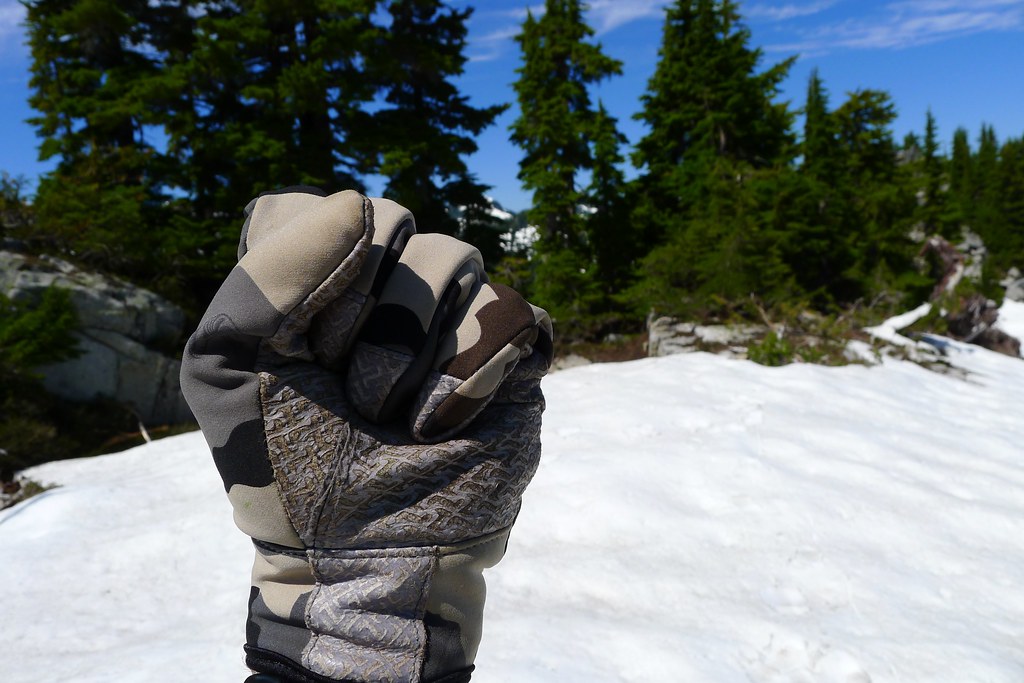
At 2.6 ounces (74 grams), the Guide Glove weighs only 0.3 ounces more than a pair of Mechanix Original Gloves of the same size – an impressive feat, considering that the Guide Glove is made of much more substantial materials. In every way, the gloves have exceeded my expectations. They are more breathable, more water repellent, and provide a higher dexterity than I expected.