I bought my Carradice Super C Handlebar Bag sometime in 2010 or 2011. I think I learned about it while reading one of the blogs of Emily Chappell as she was preparing to leave her London courier job to ride around the world.

There’s no shortage of bicycle handlebar bags out there. Most of them have more intriguing designs than the Super C. The Super C is a simple box. The sides and bottom are rigid (with corrugated plastic). Inside, it has two open top pockets on either side and a zippered pocket near the back. On the outside, either side has mesh pockets. These do not expand much. I move my shoulder mounted OC to one of these when I am not wearing a backpack, but otherwise these external side pockets are mostly useless.
The Super C has two killer features that I think make it superior to the vast majority of its competition.
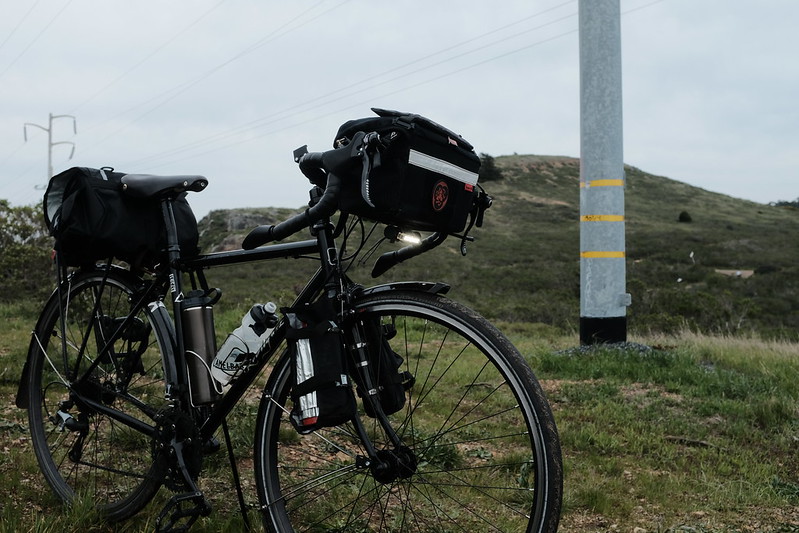
First, it mounts with a Rixen & Kaul KLICKFix bracket. This piece of Teutonic wizardry allows the bag to be attached or detached from the bike in about two seconds. Most other bags utilize straps of some sort, which are fine if you’re out in the back of beyond, but fiddly for frequent donning and doffing. In an urban environment, I want to be able to quickly pop the bag off my bike and throw the strap over my shoulder whenever I park. When disembarking a ferry or train, I want to pop the bag back on the bike immediately so that I’m not causing people to stack up behind me and wait while I’m routing straps. When I’m walking around with the bag over my shoulder, I don’t want to worry that I may discover a loose strap fell out when I get back to the bike. The KLICKFix addresses all of these concerns. When the bag is on the bike, it is held securely. I’ve had the Super C on plenty of miles on bumpy gravel with my skinny 32mm tires, and never had an issue. I’m sure there is some maximum recommended weight limit for the bracket, but I’ve never thought about it. As long as you aren’t loading the Super C with lead, it’ll probably be fine.
Second, the Super C has a detachable light bracket on the bottom. Either because of their height or how much real estate they take up on the bars, most handlebar bags (including the Super C) are not compatible with lights mounted on the handlebar. Most bags do not provide any alternative solutions for a headlight, instead expecting the user to workaround the problem with some sort of fork mount solution or an accessory cockpit bar mounted above the handlebars. Those alternatives work, but I find them annoying. The Super C provides a simple bracket that pops into the bottom of the bag. Anything that can mount to a handlebar can mount to the bracket. If you don’t need the bracket, you can twist it off and leave it at home.

The rest of the Super C is pretty basic. I’ve made a few modifications that make it more useful to me.
A D-ring on either side of the bag allows a shoulder strap to be mounted. I keep Peak Design Anchor attachments on mine, to which I usually keep attached the original model of the Peak Design Leash. When I’m out on a weekend ride, I’ll often have a camera or binoculars in the bag. Both of those have Peak Design Anchors on them. Keeping Anchors on the bag as well allow me to have a single strap I can move around to whatever thing needs it.
The lid of the Super C sports a removable map case. It attaches via two snaps near the handlebar-side of the bag, routes under a piece of webbing on the opposite side of the lid, and then folds back over itself. This was a key feature in the pre-pocket-computer-age when I bought the bag, but these days I rarely attach the map case. Instead, I used my awl to add what I will optimistically call bartacks on either side of the webbing, just a few millimeters from the edge. This provides a channel which allows me to slip in a Duraflex Siamese Slik Clip on either side. That, in turn, allows me to attach a simple zippered pouch on the top. I appreciate having something like this for small items I may want while underway.

On the underside of the lid, I added a similar length of webbing with clips on either side. This allows me to run another pouch inside, which won’t get buried in the main compartment. I frequently clip my first aid kit in here.
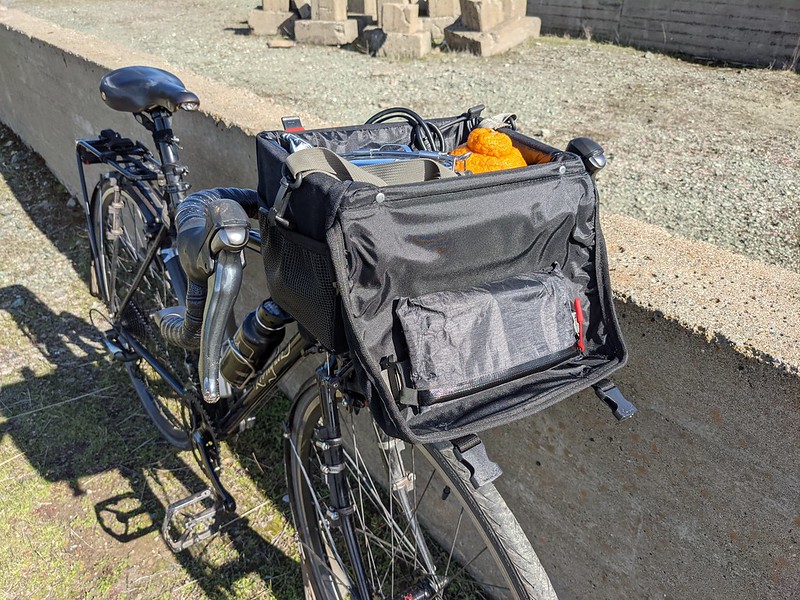
The lid of the Super C closes with two side release buckles. These are very inconvenient to open or close when underway. You can do it if you’re motivated, but it takes concentration of effort. This shortcoming is where the Super C differs from most randonneuring bags on the market, which usually close with a piece of shock cord that gets pulled back and looped around the stem. Fortunately this is easy to add. I routed shock cord through the webbing that the buckles attach to, and ran an ITW GTSP Cordlock through either end. This works great to secure the lid, and makes it easy to get into the bag midflight.

I left the shock cord much longer than it needs to be to wrap around my stem. The front of my bag has a JK/47 Cyberpunk pin, secured via locking pin backs. If I close the lid with the buckles rather than the cord, I can use the cordlock to extend the length of the loop enough to run underneath this pin. That gives me a “V” of shock cord on the top of the bag which I can use for extra carrying capacity. I use this to carry lightweight but bulky things, such as a puffy jacket in an UltraLiteSacks Zippered Cube Ditty Bag.
The front of my Super C also features a panel of loop velcro. Since the bag has a hard liner, I glued it on instead of sewing it. I think I used Fabri-Tac. Originally I thought I’d use this to mount my Orfos Pro light, but later I decided that using shock cord to attach the light to the Super C’s light bracket was a better option. Now the loop panel is just used for fun morale patches – mine usually sports the emblem from Ghost Dog: The Way of the Samurai.
Carradice products are handmade. They include a tag where the maker writes their name. My Super C was made by Kelly.