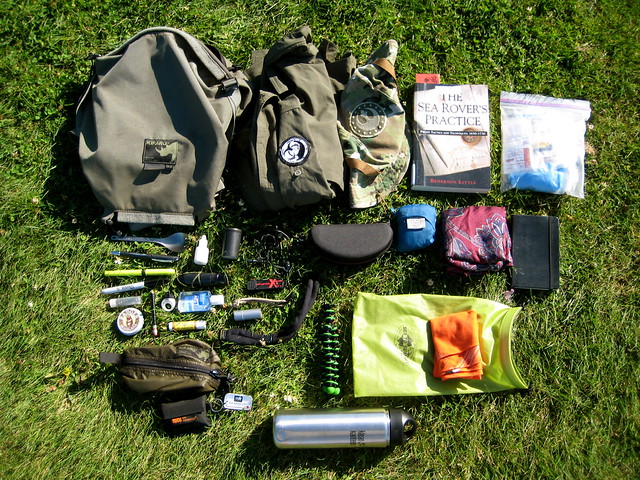
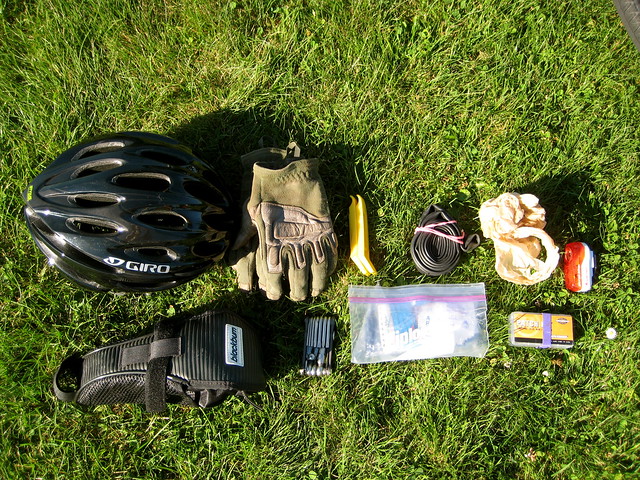
I’ve had a few requests to do a gear list for some of my recent trips. Since it’s been over a year since the last one, I thought I would acquiesce. What follows is the list from my recent journey to the Goat Rocks. Though that was a short trip, my gear has varied very little on any trip this year. I’ll take warmer clothing earlier (and later) in the year, and of course the amount of food varies based on the length of the trip, but most everything else remains static. This is quite the change from even just a year ago, where it seems like my gear would change drastically from trip to trip! Perhaps I know what I’m doing a little better now.
Some of the gear is light, some of it isn’t. Regular readers know that I always struggle to find a balance between lightweight, functionality, and durability. Certain items that I carry – like, say, the saw – are not likely to be found in the pack of an average backpacker, but are suited to my method of travel. In all, my base weight for this trip was right at 20lbs. I’m not too ashamed of that. In fact, considering that my pack alone weighs 6lbs when empty, that base weight is pretty darn good.
If you have any questions or comments about the items, feel free to get in touch.
I’ve never found any appeal in general social networking sites like MySpace or Facebook. They seem pointless. Sites that primarily serve some actual function and secondarily offer social networking features make more sense to me – something like Flickr: a photo hosting site that happens to offer social networking features. And now I’ve signed up for LibraryThing: a book catalog service that happens to have some social networking.
A friend recently told me about LibraryThing. It appealed to me as a way to keep track of all my books, and I thought it might be interesting to see who else owned copies of some of the more obscure books in my collection. I intend only to add books that I actually own to LibraryThing – not all the books I’ve read, which would take far too long. This makes LibraryThing’s recommendation service rather irrelevant for me, since most of the books it currently recommends are those that I have read, but do not own.
It appears that I currently own 160 books. Over the past year I’ve been heavily pruning my library, getting rid of a great many books. The remainder is probably one quarter the size of what it used to be. It is made up of books that I like and reread frequently, or that I find significant, or that serve as reference material. I’ve tried to do away with all the books I owned that I didn’t think I’d ever read again (no matter how much I like them). Now that I have an accurate count of my books, I think I’ll continue pruning till I get the collection down to 100 (quite a ways away from the cult of less or 100 things challenge, but I’m getting there.) It promises to be difficult!
It used to be that I didn’t have a bookshelf. All my books were just in stacks on the floor. I still don’t have a bookshelf, but a few years ago I came up with a solution while reading The Dharma Bums. Japhy Ryder – the character based on Gary Snyder – is described as owning little other than mountaineering equipment and books. The books he stores in crates. I thought it was a great idea, and promptly went out to acquire a collection of milk crates for my own. The crates can be stacked against a wall to function as a bookshelf and, when moving, all the books are already boxed and ready for transport! Multifunction.
About a mile from there, way down Milvia and then upslope toward the campus of the university of California, behind another big old house on a quiet street (Hillegass), Japhy lived in his own shack which was infinitely smaller than ours, about twelve by twelve, with nothing in it but typical Japhy appurtenances that showed his belief in the simple monastic life – no chairs at all, not even one sentimental rocking chair, but just straw mats. In the corner was his famous rucksack with cleaned-up pots and pants all fitting into one another in a compact unit and all tied and put away inside a knotted-up blue bandana… He had a slew of orange crates all filled with beautiful scholarly books, some of them in Oriental languages, all the great sutras, comments on sutras, the complete works of D.T. Suzuki and a fine quadruple-volume edition of Japanese haikus. He also had an immense collection of valuable general poetry. In fact if a thief should have broken in there the only things of real value were the books. Japhy’s clothes were all old hand-me-downs bought secondhand with a bemused and happy expression in Goodwill and Salvation Army stores: wool socks darned, colored undershirts, jeans, workshirts, moccasin shoes, and a few turtleneck sweaters that he wore one on top the other in the cold mountain nights of the High Sierras in California and the High Cascades of Washington and Oregon on the long incredible jaunts that sometimes lasted weeks and weeks with just a few pounds of dried food in his pack.
The Goat Rocks are an alpine wonderland situated between Mount Adams and Mount Rainier. The result of volcanic explosions and glacial carving, the area is high and rugged; the way mountains are supposed to be.
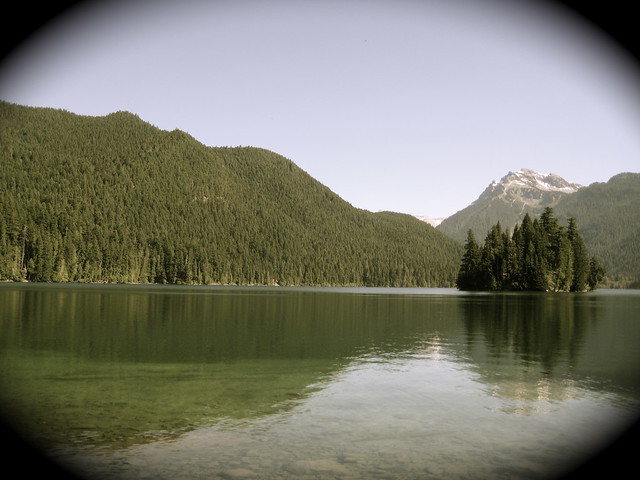
My entry into the area was via the Packwood Lake Trailhead. It’s a popular trailhead, leading to the equally popular day-hiking destination of Packwood Lake. The hike is about 4.5 miles to the lake along flat and well maintained trail.
At over 1.5 miles long, the lake itself is fairly large. Near the head of the lake are three different structures: a guard station (guarding what from what, I wonder?), an old ranger station, and, down the drainage a way, a dam for generating electricity. The lake itself is not in the wilderness area, but surrounded by it.
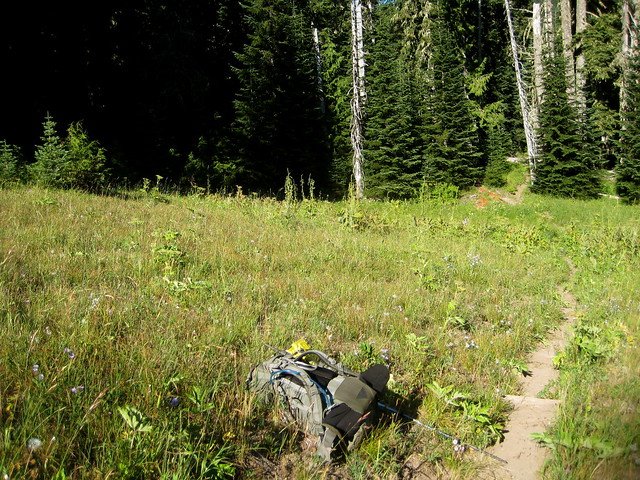
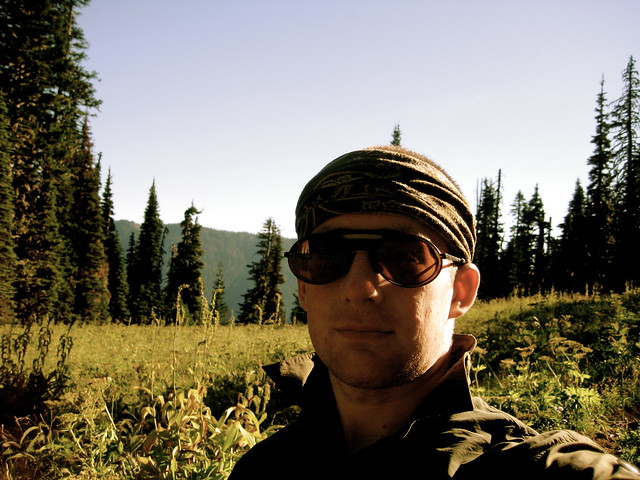
I stopped at Packwood Lake to munch on a bit of trail mix, then donned my pack and began the climb along the northern ridge. My destination for the day was Lost Lake, another 3.5 miles from Packwood. It’s a steep walk, gaining about 2,000 feet in 2 miles. Near the top the trail breaks out of the trees into a pleasant meadow.
I hadn’t eaten much yet during the day, so I stopped in the meadow for a late lunch.
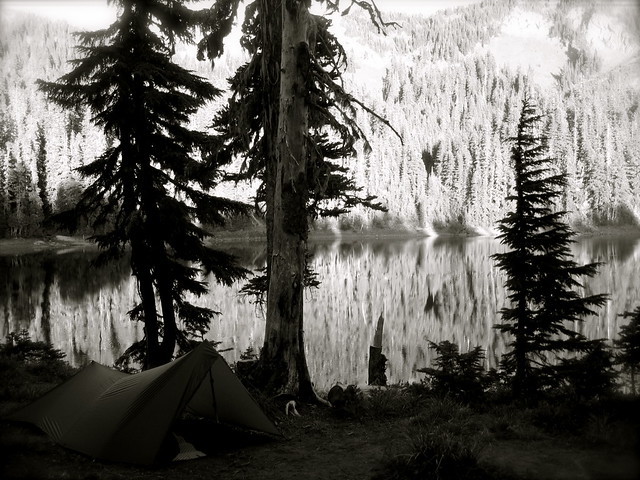
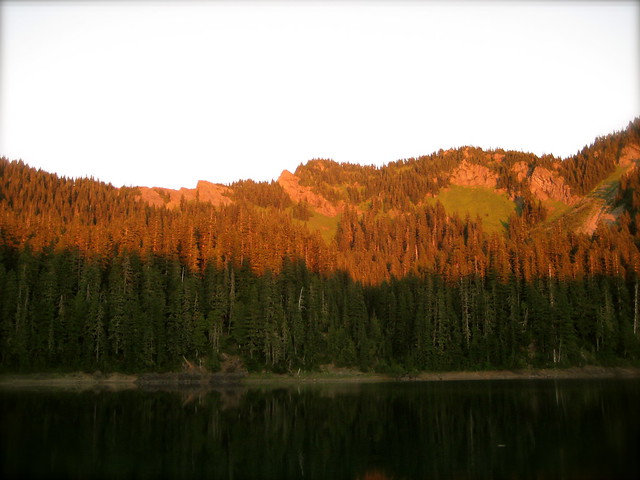
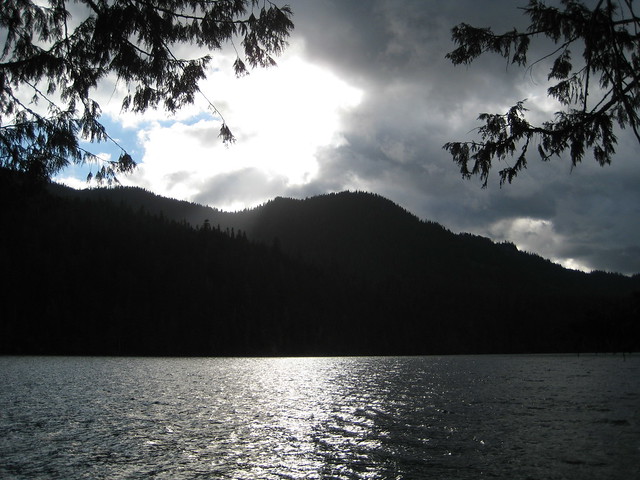
I arrived at Lost Lake near 7 PM. There was one small group with horses near the eastern end of the lake. At the northwest shore I found a nice and secluded spot. I could still hear the horses whinnying occasionally, so I figured that they would act as my bear detection system for the night.
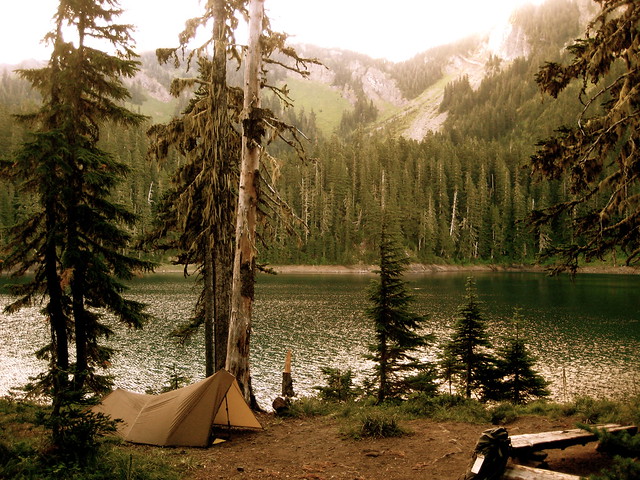
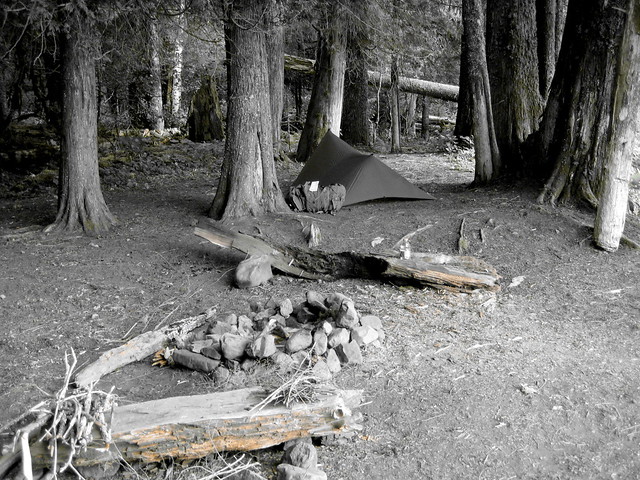
After pitching the tarp I gathered a bit of wood for the fire, cooked dinner, and settled in to watch the sunset.
It was a full moon and another clear night. My headlamp wasn’t necessary to find the bushes when I got up around 2 AM to make water. Before going back to bed, I wandered around a bit, playing in the moon shadows and watching the reflections on the lake.
There was no rush the following morning. I took my time enjoying the oats and watching the sunrise. When I decided to go, it took only a few minutes to break camp.
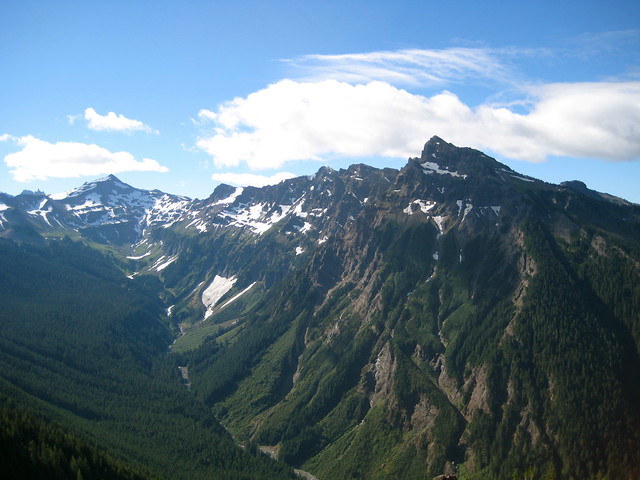
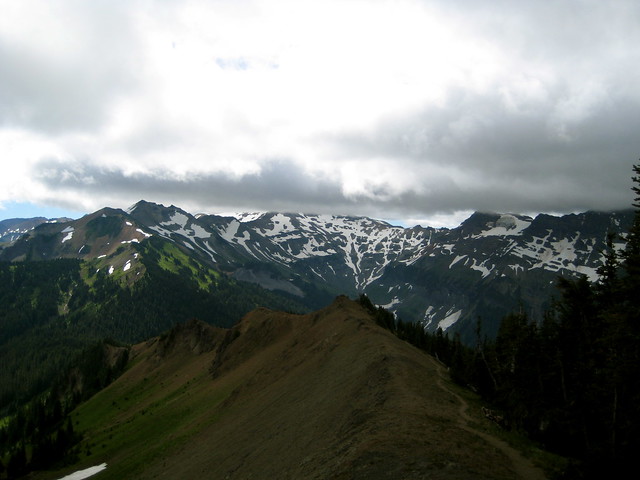
The plan for the day was to walk along Coyote Ridge to Packwood Saddle, then up to Elk Pass where I would get onto the PCT and head south aways. The trail along Coyote Ridge went through trees, and sometimes across steep, narrow and rocky ridges. Good mountain trail.
It occasionally offered views to the north, south and west.
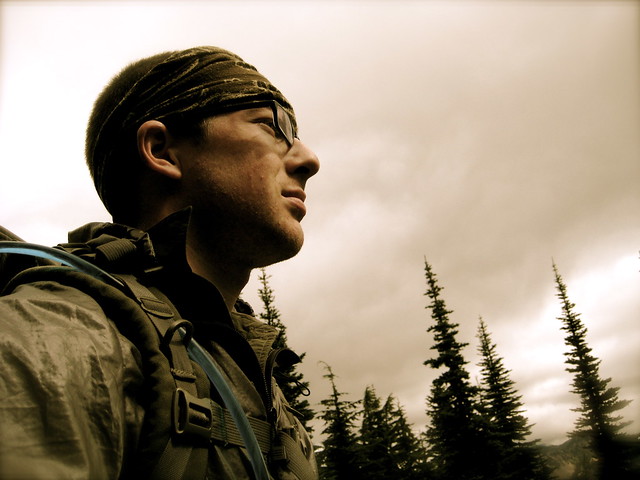
The day had dawned clear, but clouds were slowly rolling in. By the time I got to the exposed ridge at the southern end of Coyote Ridge, the sky had filled up and strong winds were blowing in from the west. I’d debated packing it beforehand, but now I was glad to have a wind shirt with me.
From this part of the trail I could look further south to Egg Butte, Old Snowy Mountain, and Johnson Peak. This is where the trail would lead me after climbing up to Elk Pass. But the tops were all in clouds. I could tell there would be no visibility up there. Near Old Snowy Mountain I would have to traverse the tops of two glaciers, and the trail often went along steep ledges. I would have preferred the ability to see where I was going.
At Packwood Saddle I stopped for a lunch break and to ponder the situation. I waited for near an hour, but the clouds were only getting thicker. The decision was made that it wouldn’t be safe for me to continue to get higher. Instead, I would cut over to the Upper Lake Creek Trail and head back down to Packwood Lake.
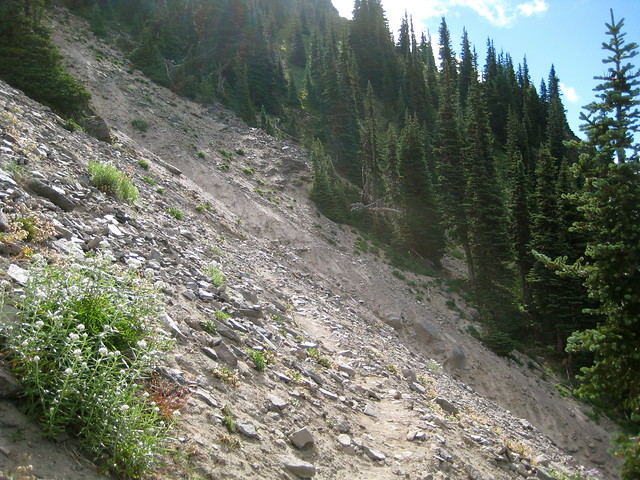
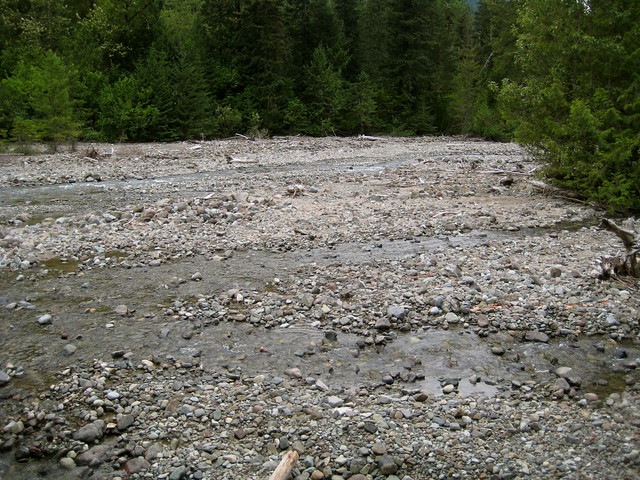
From the saddle the trail descends steeply along a forested ridge before reaching the Upper Lake Creek at the bottom. The creek itself is a small, meandering affair that drains glaciers in the high country. I can’t imagine that it ever gets enough water to fill the entire gravel bar – if it did, it would be quite the torrent. I think it’s more likely that the wide area was caused largely by avalanches.
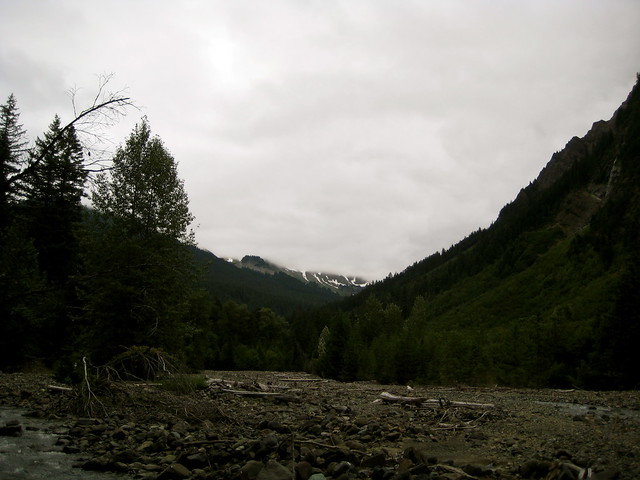
The trail washed out about halfway down the creek, forcing me to balance over a few thin, slippery logs to the gravel on the other side of the water. From the gravel I turned around to look back up the drainage. The clouds had indeed come in lower and thicker. I could no longer see even the saddle I had descended from an hour earlier.
It was near 5 PM when I arrived at the southeast head of Packwood Lake. There was a spot along the shore that looked like a good camp, so I dropped my pack and gathered wood for a fire.
The wind had followed me down. It blew strong gusts across the water, causing white caps and blowing my fire all over the place. I kept it small and low so as to not start any unwanted blazes. Once or twice the sun peaked out, but clouds dominated the sky.
Sitting around in the wind for a few hours takes a mental toll. I was glad to retreat to the shelter of the tarp just after the sun went down. When pitched properly, I sometimes think it would take a hurricane to blow that thing away.
The wind blew the rest of the night, but didn’t bother me. I was woken once before dawn by an owl who saw fit to hoot away in a tree above my camp.
The wind abated in the morning. The clouds remained. I breakfasted, began to pack, then thought better of it and instead warmed up water for hot chocolate. Finally I broke camp and got back on the trail at 10:30 AM.
I had thought there was no one else at the lake, but as I walked along the shore I spotted a tarp pitched on a point along the northeastern edge. For some reason, tarp campers seem rare in these mountains, so I thought to stop by and congratulate the owner on not having a tent.
The occupant was one solitary man, cooking chili over the fire in a blackened old pot. We exchanged greetings and the necessary remarks about where we had been and where we were going. It turns out he had been out for a bit.
He was an older guy, in his early fifties. He’d spent a few years in the Marines, and camped at a state park now and again (“that’s not real camping,” he admitted), but had never been in real wilderness or backpacked before. In June he decided to load up a rucksack and head out into the desert around Yakima for a week long trip. That was too hot, so he walked into the mountains. He’s now finishing up his third month.
We chatted, about wilderness, long term mountain living, and the silly world below. Over the course of the summer he’s been all over the Cascades in the southern half of the state. His routine was to walk into a town, quickly load up on as much food as he could carry, and then retreat back into the mountains. He doesn’t like to spend more than a couple nights in the same spot, and never likes to walk the same trail twice. Since he had no experience backpacking before this summer, all of his gear was spartan – things found at campsites, military surplus, and a few items from general camping stores. He didn’t like to carry anything that ran out or could become dead weight: no stove, because he didn’t want to mess with fuel. Other than the clothes on his back, he had one tarp to sleep under, one to sleep on, an old sleeping bag, some rain gear, one pot, one pan, a grill, knife, a pocket fishing kit (he wished he had a pole), a pair of sandals, ripped out pages of the DeLorme Atlas for Washington, a couple Klean Kanteens and a scavenged plastic water bottle. (He used to have a cell phone, but lost that when he fell into a river near the beginning of his trip. Figured the battery was almost dead anyway. It was just useless weight.) His gear took up less than a quarter of the volume of his large pack, leaving the rest to store food in.
When I first asked him how much longer he thought he might stay out, he said another month or so. But after we talked for a while, he looked at me, smiled, and said “Actually, I was thinking of trying to spend a year.” He’d had enough close encounters with deer and elk that he figured with a rifle he could easily take care of the food problem. I showed him on his maps where I knew there were old cabins that could serve as a shelter. The cabin at Eagle Lake, with its wood stove, appealed to him.
We talked for a few hours. I think he was glad to find an eager listener. Most of the hikers he ran into thought he was crazy and wouldn’t stick around him. He’d been on the PCT some, but couldn’t talk to thru-hikers because they wouldn’t slow down and “didn’t carry nothing.” Resupplying every 5 days wasn’t his style. He liked to get a couple weeks worth of food in his pack and wander aimlessly. If he found a good view, he’d stop and sit for a while. He wasn’t walking to get anywhere.
"Summers didn't guess his heart was as troubled as some. There wasn't any bur under his tail. He was a mountain man, or he had been, and traveled with hunters who never gave thought to soil and timber and tricks to pile up money but went along day by day taking what came, each morning being good in itself, and tomorrow was time enough to think about tomorrow. That was how Summers felt yet, but the movers were different. They traveled to get some place, as they lived life. Chances were they couldn't enjoy a woman and a bed for thinking what they had to do next... They were family men, settled with their women and easy with their children, the hard edges worn smooth, the wildness in them broke to harness. They looked ahead to farms and schools and government, to an ordered round of living."
- A.B. Guthrie, Jr., The Way West
I recommended a few authors that I thought would be up his alley (Abbey and Proenneke, especially). He had been trying to learn a few wild plants that could be useful foods and medicines. I pointed out a couple more to him.
It was near 2:30 PM when I left him. His plan is to head north and check out the country up this way, so we’ll probably run into each other again.
As for myself, I had another 5 miles back to the trailhead and the world below.
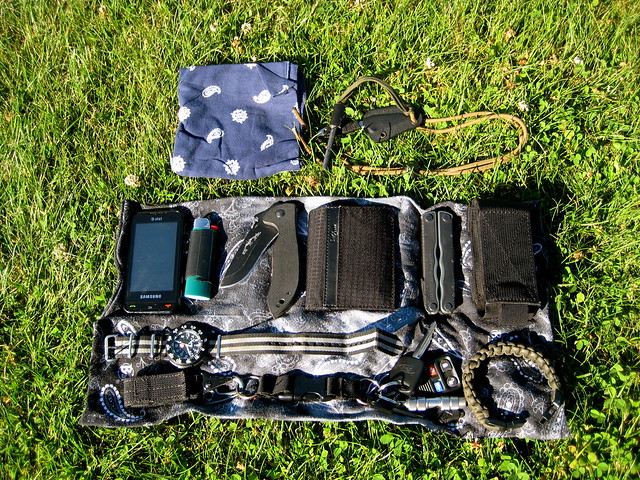
It’s been about a year since the last one, so today I did another dump of what is currently in my pockets and bag. Everything that I am carrying today is representative of what I carry most every day. Much of it is the same as last year.
Some things occasionally change: I frequently switch between the Emerson Mini-Commander and the Izula (I probably carry the Izula more frequently than the Emerson). If I need more stuff, I might change the bag to my TAD Gear FAST Pack EDC or the Kifaru E&E.
As usual, you can visit the Flickr photo pages for identification of every item.
Dick Summers thought lazily that these were different from mountain men. These couldn't enjoy life as it rolled by; they wanted to make something out of it, as if they could take it and shape it to their way if only they worked and figured hard enough. They didn't talk beaver and whiskey and squaws or let themselves soak in the weather; they talked crops and water power and business and maybe didn't even notice the sun or the pale green of new leaves except as something along the way to whatever it was they wanted to be and to have. Later they might look back, some of them might, and wonder how it happened that things had slid by them. They would remember, maybe, a morning and the camp smoke rising and the sun rolling up in the early mist and the air sharp and heady as a drink, and they would hanker back for the day and wish they had got the good out of it. But, hell, a man looking back felt the same, regardless. There wasn't any way to whip time.
- A.B. Guthrie, Jr., The Way West