The K & M Industries Match Case has long been considered one of the top waterproof match cases available. Each case is hand made in the Elk River, Idaho garage of Keith and Marge Lunders.
The match cases are available in either brass or aluminum and come in two different sizes. The standard length cases are 3 7/8”, designed to fit 2 3/8” strike-anywhere matches. The long length cases, measuring in at 4 1/4”, are designed for REI Storm Proof Matches. Aluminum cases are available in black, silver, green, or red.
Last winter, I bought a standard length, black aluminum case. It has been part of my wilderness EDC for close to a year.
Though I don’t always use them, I always carry matches into the wilderness, in addition to at least one BIC lighter and a multitude of ferro rods. Ferro rods are my primary means of starting fire – usually with some synthetic tinder, such as Vaseline soaked cotton balls. It’s also my primary way of starting my alcohol stoves. If I’m not having luck with the rod, or all my tinder is wet, I can move to a lighter or a match to get the fire going. I’ve also found that when it gets to about 20 degrees Fahrenheit or below, denatured alcohol does not like to take a spark – instead requiring a match or lighter to start my stove.
A lighter is of course the easiest way of starting a fire, but because I carry a BIC lighter, it is not always dependable. If it was submerged, it will need some time to dry out before working. If there are high winds, the flame will no doubt get blown out. I have previously carried waterproof, windproof butane lighters, but those seem to eat through the fuel way too fast to be practical wilderness devices. It is difficult to justify the huge price increase in one compared to a BIC lighter. The other problem with BIC lighters is that it can be hard to determine how much fuel you have left. You can judge the weight, shake it around next to your ear and listen, but it’s a rough estimate at best. That’s what I like about matches: you can count how many you have. For this simple reason, I am sometimes likely to go to my matches rather than my lighter when I need ready-made flame.
Carrying the aforementioned REI Storm Proof Matches also addresses some of the other concerns of the BIC lighter: they will light when wet (if lit and then submerged, they will quickly relight themselves after you remove them from the water) and are nigh impossible to blow out. This makes them a great emergency fire source, but, like the fancy butane lighters, are relatively expensive compared to standard strike-anywhere matches. Because of this, I carry both: normal strike-anywhere matches for general use and REI Storm Proof Matches for when the elements are against me. The REI Storm Proof Matches, being pretty darn waterproof, aren’t in much need of a waterproof case (I imagine that they will get soggy and useless if they’re kept underwater for a long period of time, but if you accidentally take a bath during a river crossing and crawl out within a couple minutes, the matches should be fine). Strike-anywhere matches, on the other hand, do need extra protection. Hence why I decided to start with the standard size K & M case.
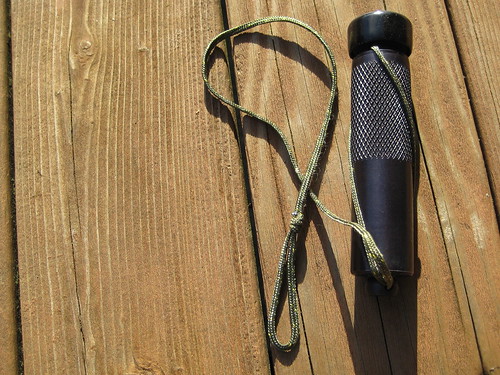
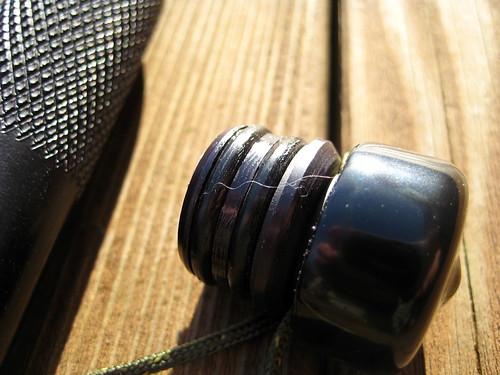
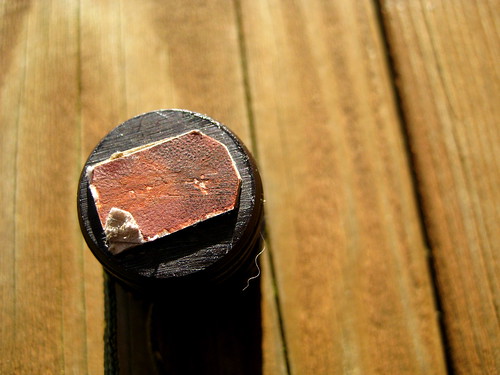
All K & M match cases feature a unique closure system. The lid itself has two o-rings on it to prevent any water leakage (guaranteed to 2000 psi of water pressure). It’s not a screw on lid, but simply pressed onto the case. After the lid is on, you then twist the cap, which in turn twists and tightens the thin nylon lanyard around the body of the case, ensuring that the fit remains tight. Ingenious, simple, and effective.
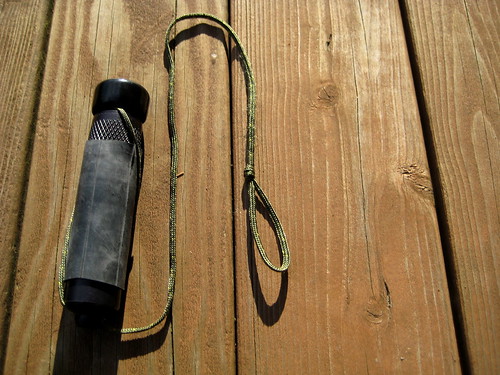
The body of the case itself is about 3” (not including the cap). The bottom half is smooth, while the top bit is etched with a pattern that ensures a good grip can be had on the case, even when you and it are soaked.
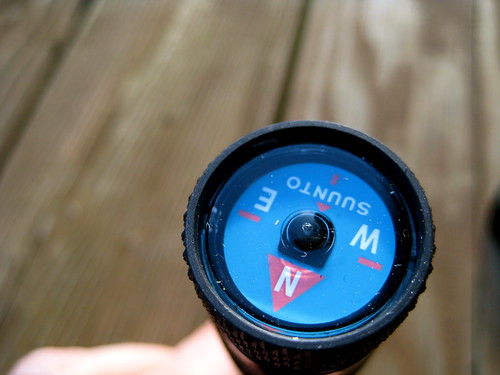
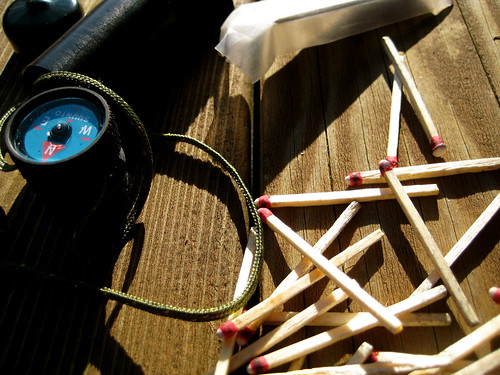
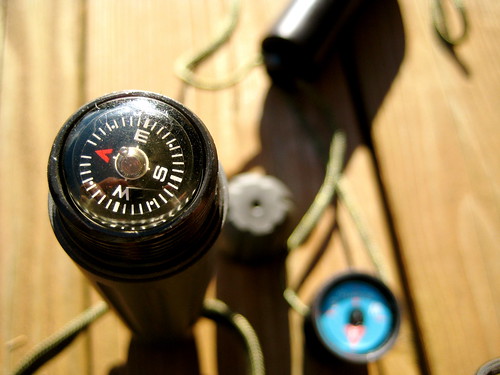
The top of the lid sports a small Suunto compass for general direction finding, greatly increasing the utility of the item. This isn’t some cheap, $1 knock-off button compass, either. Suunto compasses can be depended upon.
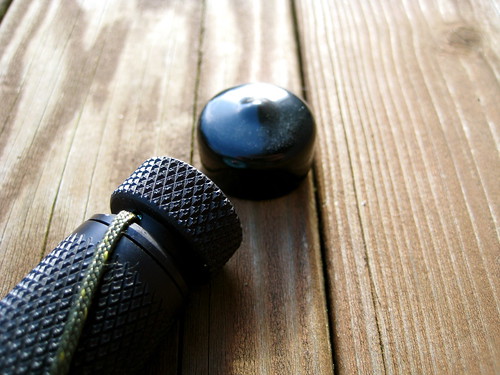
The outer rim of the lid has been etched in the same manner as the top half of the body for grip, but the case also comes with a small protective piece of plastic that slides snugly over the lid, protecting the face of the compass. With this installed, you loose the extra grip on the lid. This may be a problem in some conditions.
The lanyard, after it does its thing tightening the lid, extends down past the body of the case for about 12”, terminating in a loop, which allows the case to be securely fastened to your person.
The inside of the lid is roughened, which is supposed to provide a surface for striking the matches. Perhaps I don’t know how to strike a match, but it’s never worked for me. In fact, as a general rule, I find strike-anywhere matches to actually be strike-anywhere-there-is-a-commercial-match-striking-surface matches. I never have luck attempting to strike matches on any old rough surface. But that’s not a problem: all REI Storm Proof Matches come with extra striking surfaces inside the box. They’re pretty heavy duty, work with all types of matches, and come sealed in plastic. I tend to collect them and stash them everywhere. For the K & M match case, I cut off a small piece that would fit on the bottom of the lid and super-glued it on. This guarantees me a working surface to strike my matches.
The rest of the striker I put back in it’s plastic cover and store in the body of the case, for use as a backup. The plastic prevents it from striking and lighting any of the matches.
Because of the striking surface on the lid, I store all the matches tip down, so that they won’t accidentally light and turn the case into a bomb. With the the extra striker stored, I can jam in about 25 matches, give or take a few. You could fit in more if you removed the striker. The match case is also a nice place to carry a pre-threaded needle or two for emergency repairs.
Around the outside of the case, I keep a length of that same 700x35 bicycle inner-tube that I have around my BIC and a couple of my Moras. The inner-tube, along with matches that are guaranteed to be dry, gives me a sure-fire method of fire starting.
Both the brass and aluminum cases sell for $19 each. That may seem like a lot of money for a simple match case, particularly when you can pick up a cheap-o plastic one for $1.75, but I think it is well worth the money. The brass case looks a lot nicer and is more durable, but is a good deal heavier than the aluminum.
Some day I would like to acquire one of the long aluminum cases for my REI Storm Proof Matches, even though it is not strictly necessary.
I also own a TAD Gear Life Capsule O.K., which makes a good match case. The TAD Capsule is equally waterproof and also includes a compass in one end (albeit a cheaper one), but because of the significantly increased weight of the TAD capsule over the K & M case, I think the K & M is a superior product.
Another review of the case, along with some discussion of matches, can be found at British Blades. I thought I remembered Schwert doing a review of the case on the now defunct Outdoors Magazine, but I cannot find it in the archives.
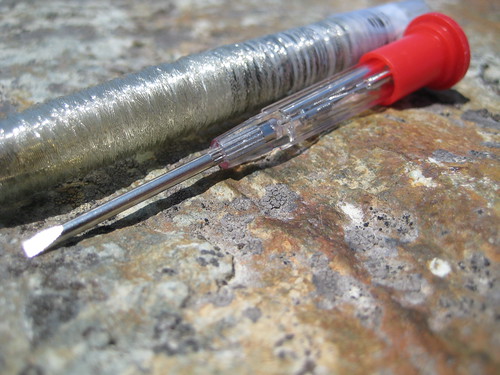
My primary EDC knife for the past few years has been a plain-edge Emerson Mini-Commander. It’s a great little knife: an ideal size for EDC and extraordinarily tough for a folder. I’ve used it as a pry-bar a few different times on objects that I would be afraid to pry with some fixed-blade knives. The Mini-Commander is no worse for the wear.
Still, I’ve often thought that I would like to EDC a fixed blade. After all, despite it’s toughness, the Mini-Commander is a folder and that gives it some limitations. I’ve also found that the grind and shape of the blade is not ideal for some wood-working and wilderness survival tasks. Making feather sticks with it isn’t easy.
I have carried a small Nemesis Hellion around my neck most every day for the past couple years. It’s a fixed blade, but quite small. As I’ve stated elsewhere, I think of the Hellion as a novelty item and a fun toy more than a tool. It’s extremely concealable due to its size, but could by no means replace the Mini-Commander.
Folding knives are fairly common and tend not to frighten many people. Fixed blades, on the other hand, are not so common out of the wilderness and rural areas. Now, I’ll admit that I have no idea concerning the legality of carrying a fixed blade in urban environments. I tried reading up on knife laws a number of years ago and quickly gave up – they are so convoluted and contradictory as to be meaningless. And so, for me, they are. I ignore them. So far that seems to work out pretty well. I don’t seem to recall granting any government the right to regulate a tool such as a knife, anyways. Still, I do concern myself with other people’s feelings and, as odd as it is, some people feel nervous around folks with fixed blade knives strapped to their hips. Even something like a nice 4-5” bushcraft blade on the belt doesn’t seem to fly in a city. I needed something more concealable, but still of a size large enough to be of some use.
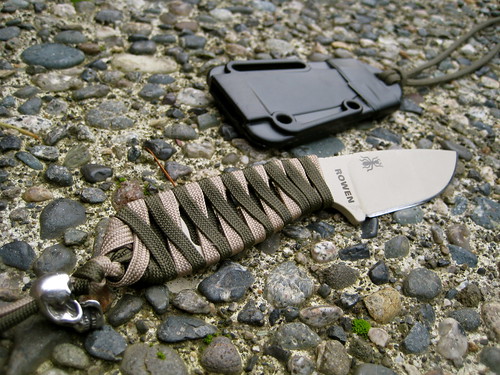
Two products immediately jump out as a perfect solution (well, three, but I can’t afford another Chris Reeve knife): the RAT Izula and the Becker Necker. Both knives are small and flat, which lends them to a number of different carry options, but large enough to function as utilitarian tools. The Izula is 6.25” over all, with a 2.88” blade and 3.37” handle. The Becker Necker comes in with a larger 3.25” blade and 3.5” handle for an overall length of 6.75”. For the slight difference in overall length, one would think that jumping on the Becker Necker for the larger blade would be the way to go. After all, that extra .37” of blade could equate to more utility. But in searching around the internet and reading a number of comparisons, it became evident that the RAT Izula was the favored knife. It seems to be the consensus that, comparatively, the Becker Necker has too little handle for its length of blade. I don’t consider my hands to be large, but they certainly aren’t small, and I know that having too small a handle could completely ruin a knife for me, regardless of the quality of the blade. So, I chose the Izula.
Izula Options
The Izula can be purchased in two different packages: either the standard knife and sheath, which RAT asks around $80 for (way overpriced) but can easily be got for closer to $50 (a reasonable price) or as part of a “survival kit”. The “survival kit” starts with the same knife and sheath, but also includes a MOLLE lock, paracord, cord lock, snap, split ring, ferro rod, and whistle. RAT asks $100 for this complete kit (crazy) though $60-$70 seems the going rate for most merchants. The “survival kit” did not appeal to me. I already have paracord, ferro rods, cord locks, and split rings. The only useful item in the kit seemed to be the MOLLE lock. I decided to save the money and get only the basic knife and sheath.
The Izula also comes in four different colors, which is a bit fun: black, desert tan, olive drab, and, best of all, pink. I was quite tempted to get the pink, especially given my concern over other people’s feelings of fixed blades. Who could be afraid of a man with a pink knife? But it turns out that I was able to find the desert tan knife for less money on eBay than I could get the pink knife for, so I went with tan.
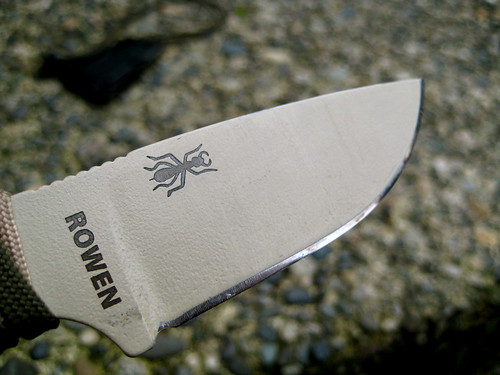
Edge
The flat ground 1095 steel takes an edge very easily on my Japanese water stones. With the stones and a leather strop, I can get Izula as sharp as my high-carbon, scandi-grind, bushcraft blades. Scary sharp. In fact, the knife is very, very impressive in what it can do. Its only limitation is its short blade and, for longer sessions of use, the bare, skeletonized handle.
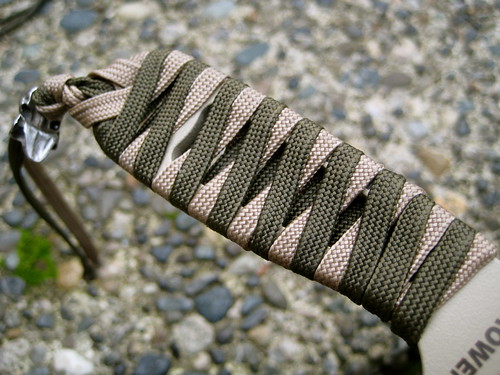
Handle
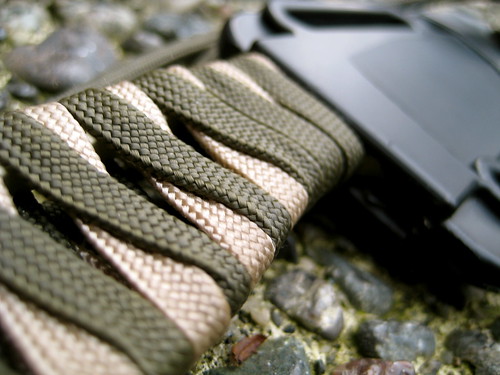
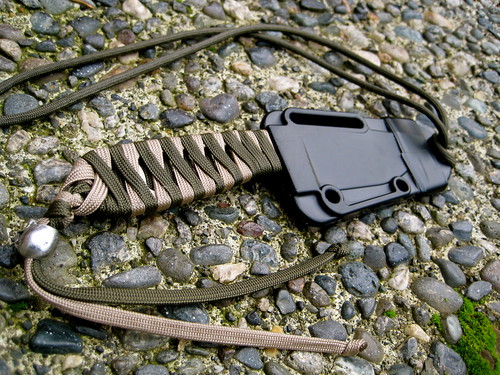
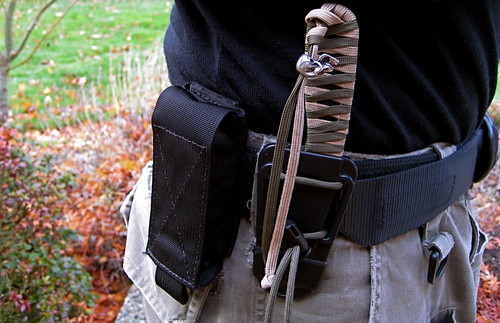
When I first got the knife, I took some olive drab paracord and wrapped it in the way instructed on the back of the Izula instruction sheet. The current paracord wrap that I have on the handle is a 180 degree katana wrap. I first did this with normal paracord, but found that it made the handle a little too thick, so I went back and did it again with gutted paracord. That worked out better, but, being gutted, the paracord does not add a whole lot of extra padding. At the end of the day, the katana wrap is more for looks. The wrap that RAT recommends is a more practical way to pad the handle and carry spare paracord, but it doesn’t look anywhere near as cool!
At the end of the handle, I finished the wrap with a simple overhand knot. I had a unused skull bead laying around, so I decided to leave the two tail ends of paracord a bit long and thread the skull bead through them. By sliding the skull bead to the end, I create a loop for my wrist. Rather than tying the ends of the cord together, I tied an overhand knot in each one separately, which prevents me from accidentally pulling the bead off, but also means that I can slide the bead to the top and just have two loose ends of cord, rather than a loop that will no doubt get caught on things. Honestly, I’m not a big fan of wrist lanyards on knives. I rarely ever use them. But I am a fan of skull beads. Like the rest of the wrap, this lanyard bit is on there just because it looks cool.
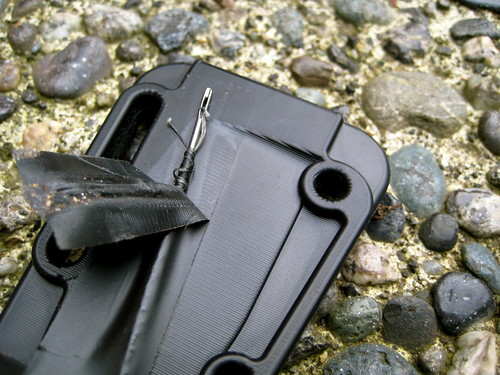
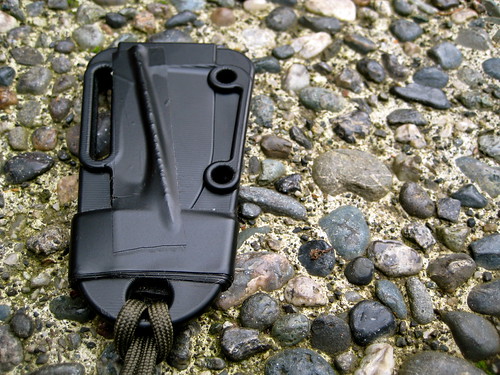
Sheath
The sheath itself was the surprise in this whole package. It is some sort of “injection molded thermoplastic” that is supposed to be more cold tolerant than Kydex. I’ve never had a problem with Kydex in the winter, but apparently extreme cold makes the Kydex brittle and prone to crack. The fit of the sheath was what most impressed me. It is, without doubt, the best fitting sheath I have ever had for a knife. The knife pops right in there and is completely locked – no wiggling or movement what-so-ever.
Mods
I’ve taken a size 14 sail-making needle pre-threaded with a length of black Kevlar thread and taped this to the back of the sheath with a piece of electrical tape. Dave Cantebury did this in a video on a Mora knife sheath a few months back. I thought it was a great idea.
It doesn’t add any noticeable weight. Even though I carry a sewing kit in my possibles pouch, I’ve since taped a prethreaded needle to the back of all my plastic knife sheaths. (Tape doesn’t stick too well to leather, so I haven’t figured out how to carry a needle on my leather sheaths). Around the bottom of the sheath, I wrapped a bit more electrical tape (I was out of 1” duct tape at the time). There probably isn’t more than 2 or 3 feet. It never hurts to carry extra tape!
Carry Options
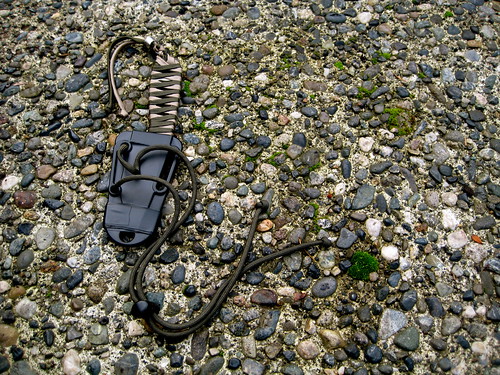
Some people have complained about the sheath because it doesn’t come with a belt clip of any sort. This worried me as well. I wasn’t sure that I would want to carry it around the neck all the time and, since I didn’t go for the expensive kit that included the MOLLE clip, I did not know what other mounting options I would be able to come up with. It turns out that with only a cord lock (self supplied out of my repair box, since I didn’t get the “survival kit”) and a little over two feet of paracord, the sheath becomes remarkably configurable.
Neck Carry
To carry it around the neck, I simply slide the cord lock over both ends of the paracord, put the cord through the top hole in the sheath, and loop it through itself. The cord lock allows me to adjust how high or low it sits on my chest. As with the wrist lanyard, I put an overhand knot in each end of the paracord to prevent me from accidentally pulling the cord lock off, but refrain from tying the two ends of cord together. I don’t want to create a secondary, smaller loop on the back of my neck for things to get caught on when I adjust the cord lock up.
As I mentioned above, I initially thought that I might not want to carry the Izula around my neck. It’s a good deal bigger, heavier, and bulkier than the Nemesis Hellion neck knife that I’m used to. But I was pleasantly surprised. The profile of the knife is slim enough so that it can almost completely disappear under only a t-shirt. Unlike the Hellion, you are probably not going to forget that it’s there because of the weight, but it is by no means uncomfortable.
A lot of folks who carry a neck knife go on about the danger of using knotted paracord as a lanyard. Paracord is very strong. Someone sneaking up from behind could grab the cord and strangle the wearer rather easily. If this concerns you, you could use some weaker cord (or chain), tie a slip knot, or invest in some sort of break away device. Personally, I’m more concerned with the security of the knife around my neck (which sort of rules out slip knots) and I like the simplicity of this system. In the years that I have been carrying the Nemesis Hellion around my neck on gutted paracord, I have yet to be strangled. But it is something to be aware of – especially if you find yourself getting in a tussle fairly frequently. Do remember, though, that the paracord around you neck is attached to a knife, and knives cut things.
Front Pocket (TAD style)
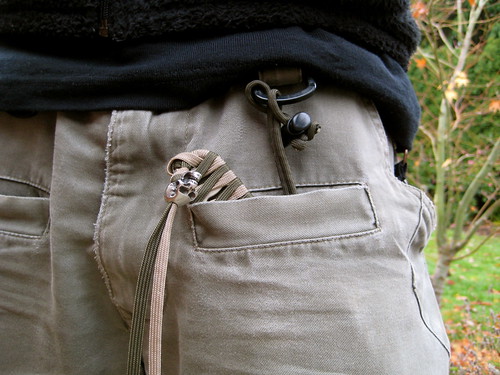
My favorite way to carry the Izula is in one of the two front pockets that Triple Aught Design places on their pants. In my Legionnaires, I carry the knife in the left front pocket. It sits in the pocket rather securely, with only the top half of the handle exposed, leaning to the right. This allows for a very fast, right-handed cross draw. I have the paracord and cord lock setup and attached to the sheath the same as in the above neck carry option, but in this setup I’ll put the cord through the plastic D-ring above the front pocket and loop it through itself so that the sheath and knife are securely attached me. Normally, when I draw from this setup, I’ll grab the handle and push against the sheath with my thumb, popping the knife free. But because the cord is attached to the D-ring, I can also just grab the handle and yank it to my right, extending the cord till it reaches its full length and pops the knife free. Personally, I feel that this is too obtuse a movement, so I prefer popping the knife free of the sheath with my thumb. If you prefer the latter option of yanking the knife, you could move the cord lock a few inches up the cord, thus shortening the distance you have to pull before fully extending the cord and popping the knife free. I will usually leave the cord lock all the way against the knots at the end of the cord and stuff the excess amount of cordage in the bottom of the same front pocket.
Side Pocket
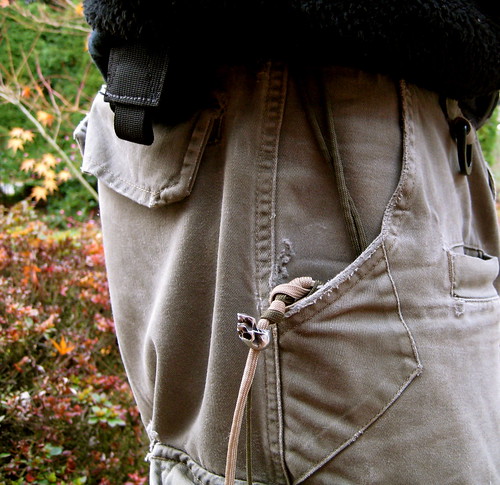
As much as I prefer the above option, not all of us wear TAD pants every single day. When wearing another pair of pants, I will carry the Izula in the right side pocket, tip down. I found that most pockets are sized so that the tip of the sheath reaches the bottom of the pocket with only about the top 1/4” of the handle sticking out. Again, I keep the paracord and cord lock attached as before, with the cord lock slid all the way against the knots at the end, creating a big loop. This loop I run through my belt, guaranteeing the the sheath and knife are securely attached to me. To draw, I reach my hand in the pocket, grab the handle, and push against the sheath with my thumb, popping free the knife. I’m required to get my whole hand into the pocket to grasp the handle, which makes the knife slightly slower to draw than a folding pocket knife clipped into the same pocket (especially compared to an Emerson with the wave feature, such as the Mini-Commander).
Because the cord is attached to my belt I could just grab the handle and pull out or up, extending the cord till the knife pops free, but this is even more obtuse a movement than when drawing in the same manner from a front pocket. I’m not a fan.
Belt
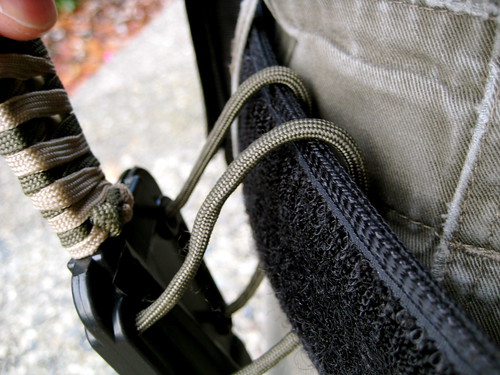
The paracord and cord lock really become useful when you decide you want to carry the Izula on your belt. The first step is to unloop the cord from the sheath. Then remove the knot in either end of the cord so that the cord lock can be removed. Next, thread either end of the cord through the two holes in the side of the sheath and the reinstall the cord lock, retying the same knot in either end of the cord to prevent the cord lock from being removed.
Move the cord lock about halfway up the cord, grab a bit of the cord and pull it through the large slit opposite the two holes on the sheath. What you now have on the front of the sheath is a line of paracord crossing the top horizontally and, on the bottom, the cord coming together horizontally to the cord lock. On the back of the sheath you have two vertical loops that you can thread your belt through.
With the sheath attached to your belt, you can then move the cord lock tight against the sheath, pulling as much paracord through the lock as you can. The Izula will then be mounted on your belt.
When I first saw this carry option pictured in the manual that RAT provides with the Izula, I was skeptical of using the paracord this way. I didn’t think that you could could get the paracord tight enough to eliminate any wiggling or movement. I’ve now carried the knife a good deal like this and I am perfectly happy with it. The sheath is just as secure as a sheath with a belt clip or malice clip (albeit easier to cut off). If you keep it attached to your belt consistently for a few days, the cord lock will eventually slide down a bit, loosening up the cord and causing the sheath to move a little when the knife is drawn. This can be addressed by checking the tightness of the lock once a day every time you put on your pants, which I don’t think is too much to ask.
The downside to this method is that, because we’re using the same piece of paracord as we use when wearing the knife around our neck, the paracord is necessarily long. You will have 6” or so or cord dangling below the lowest point of the sheath. This would be a problem if the two ends of the cord had been tied together, forming a loop, but because they have not been tied thusly, the two ends are loose and will not get caught on anything. They don’t bother me.
Spine
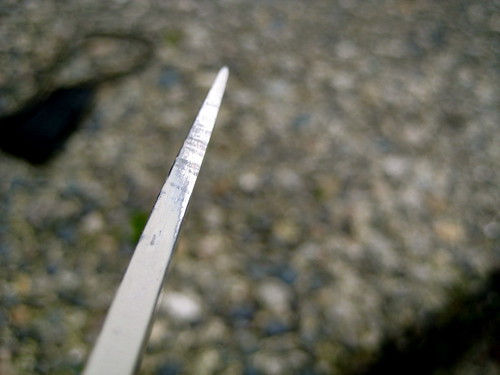
The spine itself is .156” thick, with about 1/2” of a grooved thumb ramp at the start of the blade. I’ve never found these thumb ramps to be necessary on any knife, but they don’t get in the way, either.
Initially, I found that I could not generate any sparks by sparking the spine of the Izula against a ferro rod. I know 1095 is high-carbon, so I figured it must either be the tan-colored paint that was preventing me from getting any sparks, or the corner of the spine was slightly rounded. To address both potential problems I set the spine flat on top of a coarse silicon-carbide stone and slowly ground down the first 2” from the tip. This removes the paint and squares off the edge, giving a 90 degree angle that should be ideal for striking sparks. With that change made, the Izula will throw a decent shower of sparks.
Overall
I’ve been EDCing the RAT Izula for just over two months now. So far, I have been extremely impressed with the knife. Unless I am for some reason forced to carry a folder instead of a fixed blade, I doubt that I will go back to carrying the Emerson Mini-Commander. Direct comparison between a fixed blade and a folder is not exactly fair since they have both been designed with different intentions and are markedly different tools, but I find the Izula to be a superior knife. If I woke up in the zombie apocalypse, I’d much rather find the Izula in my pocket than the Mini-Commander.
If you think you can get away with EDCing a fixed blade, I’d strongly urge you to consider the Izula. As I mentioned in the beginning, the $80 that RAT asks for the knife is overpriced, but it’s not hard to pick up an Izula for closer to $50, which I think is a very good value. (It’s certainly cheaper than a quality folder like an Emerson!)
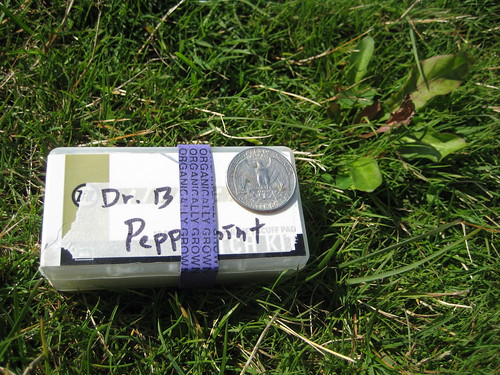
Here’s another great idea that I gleaned from scanning the BackpackingLight Forums: using the plastic container from an old bike tube patch kit as a soap bar container.
Whole soap bars tend to be far too large and heavy for any but the longest of travels. Cutting up a bar of soap to make it smaller is easier enough, but prior to this I had never come across a correctly sized container to package it in.
This container is perfect. It measures in at 3.25” x 1.75” x 0.9”, weighs 2.5 oz when full, and holds about 1/3rd of a bar of Dr. Bronner’s Bar Soap. I wrap a rubber band around it for added security.
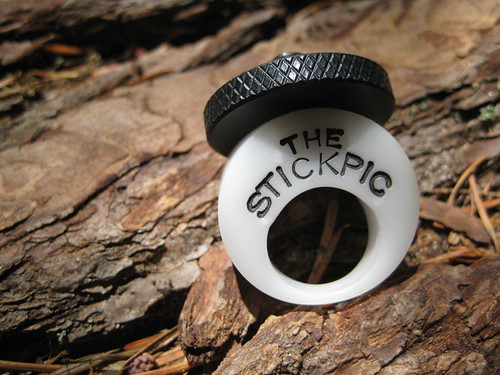
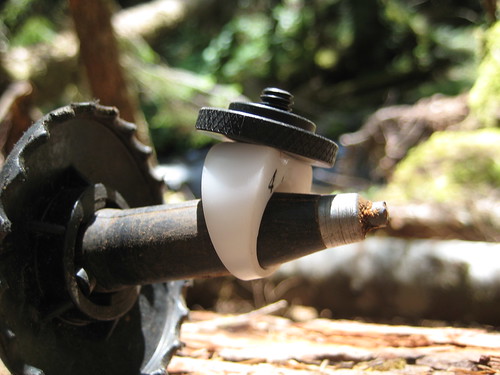
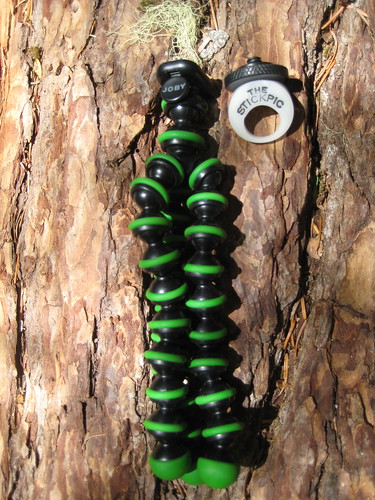
It’s a very simple device. The top screws into a camera’s standard tripod socket and the bottom slides onto the tapered end of a trekking pole. You can then set the camera’s self timer, hold out the pole, and take a self portrait. Or pretend that you’re Les Stroud and shoot a little video. Overall, an ingenious little device.
My initial worry about the StickPic was that it would fall off the tip of the pole, taking my camera for a tumble down the side of a mountain. So far, that has not been a problem. You can jam the StickPic on the tip of the poles pretty tightly, and also loop your camera’s wrist strap around the pole above the basket for added security.
I usually carry a Joby Gorillapod with me and keep the attachment doohickey for that screwed into my camera’s tripod socket. Switching that out for the StickPic takes only a few seconds.
The Gorillapod is overall a more versatile device, but fails to address the problem that StickPic primarily concerns itself with: when you are alone, in an alpine environment, with no conveniently situated tree branches to wrap the Gorillapod around or perfectly sized boulders to set it on top of.
In terms of size and weight, the StickPic wins out. It weight 0.3 oz, compared to the Gorillapod’s 1.5 oz.
So far this summer, I’ve been carrying both. They each address different needs and only weigh a combine total of 1.8 oz. Not much weight for the extra versatility added to your photography arsenal.
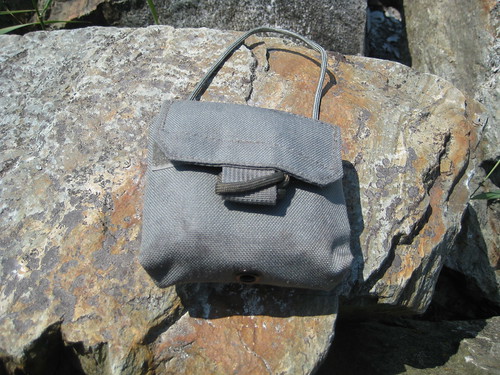
My possibles pouch began as being simply a Doug Ritter Pocket Survival Pak. The Survival Pak comes in a waterproof envelope that is meant to be carried in a pocket. I prefer a belt-mounted solution, so I ditched the waterproof envelope and moved the contents to a TAD Gear SERE SP pouch. The SERE pouch has velcro webbing on the back, which allows it to be mounted to be mounted to any sort of belt or PALS webbing.
When using the possibles pouch, I’m often traveling with my Kifaru ZXR. The ZXR is built upon Kifaru’s WrapTech Plus Suspension system, one of the primary components of which is the belt. The belt is a very thick, wide belt that is designed to work with the anatomy of the body and allow the user to comfortable carry obscenely heavy loads. The design of the ZXR’s belt makes it unpractical to have many pouches mounted to your own pants belt. Because of this, I didn’t want to actually mount the SERE pouch to my belt itself, but instead mount it so that it dropped down a bit below my waist, thus not interfering with the ZXR belt. To accomplish this, I simply tied a short loop of paracord through the pouch’s webbing. To mount the pouch, I pull the loop through the backside of my belt and run the pouch through the loop. This allows me to both don and doff the pouch without removing my belt.
The contents of the pouch have changed since I first removed them from the waterproof envelope. The Doug Ritter Pocket Survival Pak still forms the base of the pouch, but I’ve added and removed other items to cut down on redundancy and better compliment the other gear that I carry. I also don’t intend the possibles pouch to be strictly a “survival” item. All of the pouch’s contents have utility in a survival situation, but some of them are not intended explicitly for that.
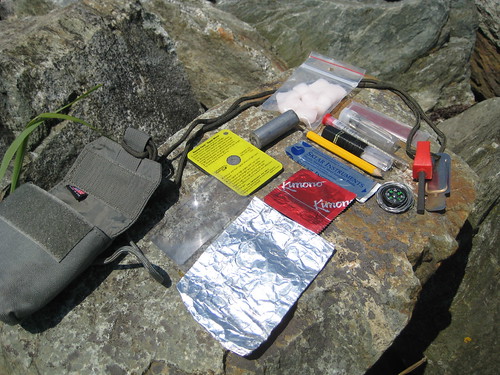
The contents are as follows:
Ferrocerium rod, striker and paracord
Duct tape (26" x 2")
Pencil
Aluminum Foil (3 sq. ft.)
Condom
2 match strikers
8 Coghlan's Emergency Tinder
Sterile stainless steel surgical blade
20mm compass
Stainless steel utility wire (6' of .020")
Signal mirror
Magnifying lens
4 large safety pins
Repair kit
Fishing kit
The components that remain from the Doug Ritter Pocket Survival Pak are the duct tape, pencil, safety pins, 20mm compass, stainless steel utility wire, sterile stainless steel surgical blade, magnifying lens, signal mirror, and aluminum foil. The other items I’ll cover here.
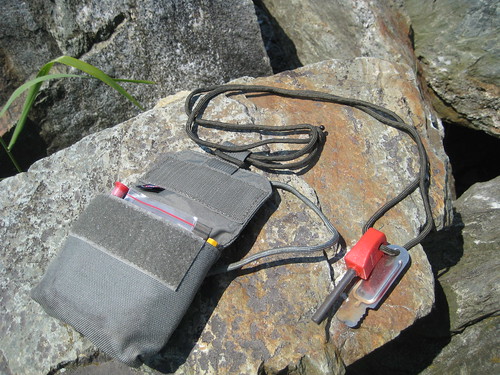
Ferrocerium rod, striker and paracord
This is a standard Light My Fire Scout firesteel and striker. It is not my primary firesteel, but a backup that I can be sure of always having securely attached. You might have noticed that the paracord that I use to secure the rod and striker to the pouch is rather long (about 3.5’). Paracord, of course, has hundreds of uses, so carrying a bit more of it than is strictly necessary isn’t always a bad idea. But the primary reason for the length of this particular piece of cord is that I can use it as a bow string on a fire-bow set.
Condom
This is just one standard latex condom. It can be used as a water carrier, a makeshift glove for a few fingers while taking care of a wound, a barrier to help stop the creation of a new species of half humans half wood nymphs, or utilized in the creation of emergency balloon animals.
Match Strikers
REI Storm Proof Matches always come with 2 spare strikers sealed within a piece of plastic. I find that so-called “strike anywhere” matches can be hit and miss, so by carrying this, I assure myself of always having a dry, reliable surface to strike any kind of match on.
Coghlan's Emergency Tinder
This stuff is not my favorite fire starting tinder, but it does work, and I have a bit of it kicking around, so I tossed it in. They’re stored within a small waterproof bag.
Repair Kit
My repair kit, I think, is somewhat ingenious. I like it, at least. I previously carried a small leather pouch with an assortment of different needles, types of thread, and safety pins. The whole thing was far larger and heavier than I could ever justify it being, so I ditched it and started from scratch. I got the idea for this new kit from the BackpackingLight Forums.
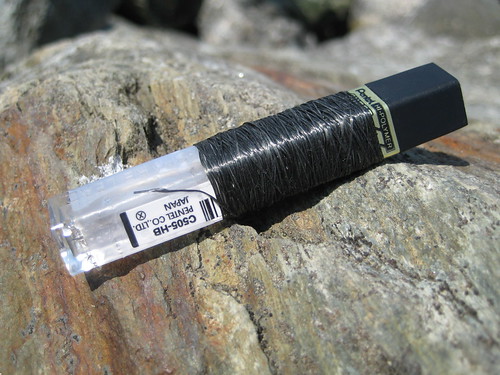
The container is an old Pentel mechanical pencil led refill case. This is the perfect size to secure the two needles I’ve chosen to carry and the case itself is light enough to make me happy. (And it’s free.)
Around the outside of the case, I’ve wrapped a length of black Kevlar thread. When I built this kit, I just wrapped till I got bored, so I have no idea how much thread there is. Enough, I think, for any repairs that I am likely to encounter. I chose Kevlar thread as the best complement of weight and strength. Previously, I carried a bit of standard, thin sewing thread. The thinness of that thread is suitable for sewing things like clothing, but it is decidedly weak. Kevlar thread is the same thickness, not noticeably heavier, but much stronger. I also previously carried a bit of thick waxed nylon string that is appropriate for sewing things like thick leather, heavy cotton canvas, or thick nylon. This is very heavy by my standards and overkill for most repair jobs. Out of all the gear I carry, it would probably be appropriate for repairing only my Kifaru rucksack. And Kifaru rucksacks don’t fail. If by some strange happenstance it did fail, the Kevlar thread would probably be strong enough to get be back home or to some place where a more permanent repair could be made.
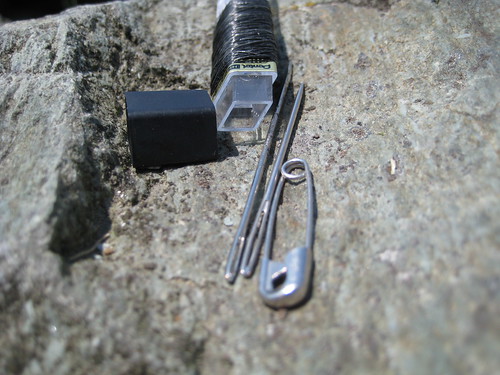
Inside the case I carry two needles. One that is thicker and stronger than most thin needles used for the hand-repair of clothing, but still small enough to qualify as small in my eye (just under 5mm in length and thin enough to not punch overly large holes in a thin cotton material). I believe this is the needle that comes with the Doug Ritter Survival Pak, but I could be wrong. The other needle is slightly longer (about 6mm) and has a slightly thicker head, making it more appropriate for heavier material. (I believe this one is technically a sail maker’s needle, but I could be wrong. I have a variety of different needles I’ve picked up over the years and lack the expertise to be able to identify their intended purpose.)
Also inside the case is a small safety pin. The purpose of this is actually just to take up more area inside the case so that the two needles don’t bounce around and make noise.
This repair kit, along with the 4 large safety pins also carried in the possibles pouch, makes for a very small and lightweight repair kit that is able to tackle any of the problems that I may encounter. In addition to this, I also carry a half dozen safety pins of a varying sizes and a couple spare buttons within the rucksack itself. The guts of paracord and the floss in my toiletry kit can also be appropriated as thread.
Fishing Kit
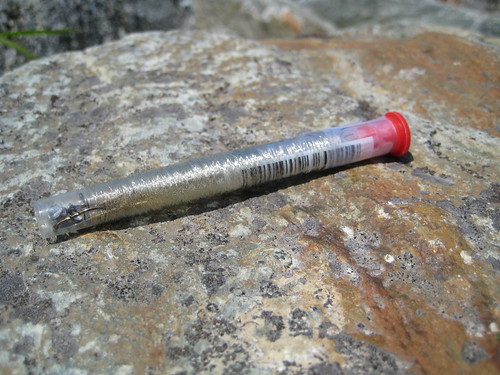
My fishing kit is actually a combination fishing kit and glasses repair kit. An odd combination, you say? I agree.
I am dependent on my glasses, so I have always carried a glasses repair kit. Such kits are available in any drug store in the country and usually consist of a small tube that contains a few of the small screws that most glasses use, a small screwdriver to match, and a couple spare rubber nose pieces.
A year and a half ago I purchased a new pair of glasses that happen to have plastic nose pieces integrated into the frames. Recently, I was going through the possibles pouch, rethinking each item, and came upon the glasses repair kit. I opened it up and was shocked – shocked, I tell you – to discover that it contained two of those small rubber nose piece replacements. With my new glasses, these were completely useless to me. I had been carrying around an extra 2 grams (or so) all this time! I disposed of the offending pieces and felt better immediately.
But then I looked at the tube and its contents and decided that it really was a waste of space. The tube was far too large for the spare screws and screwdriver that it now contained. I shrugged, moved on to looking at the rest of the contents of the possibles pouch, and then had a stroke of brilliance. I would turn the glasses repair kit into a fishing kit!
It follows on the same principle as the repair kit.
Around the outside of the tube, I wrapped a length of 4 lb monofilament fishing line (“ultragreen” in color). Again, I did not measure the length, but it is plenty for such an emergency kit.
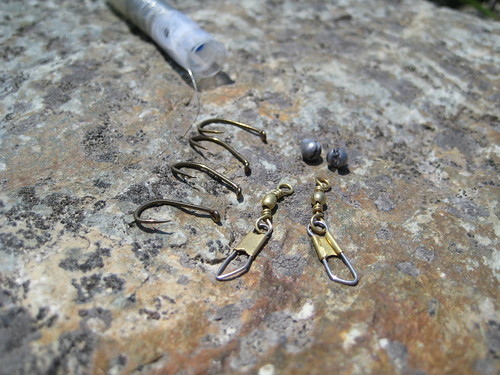
Inside the tube, I placed 4 small hooks, 2 split shot, and 2 snap swivels. This is clearly a very minimalist fishing kit, meant for emergencies only, not for when one intends to actually catch fish for a main form of sustenance, but I have used it. It does work.
This particular glasses repair tube is well-suited for such a kit because the lid for the tube is the screwdriver itself. The top of the screwdriver can then be removed, exposing the inside of the hollow handle. It is in here that the spare screws are stored. This allows the glasses repair bit to be separate from the fishing bit.
It should also be noted that the fishing line wrapped around the outside can also be used as repair thread.
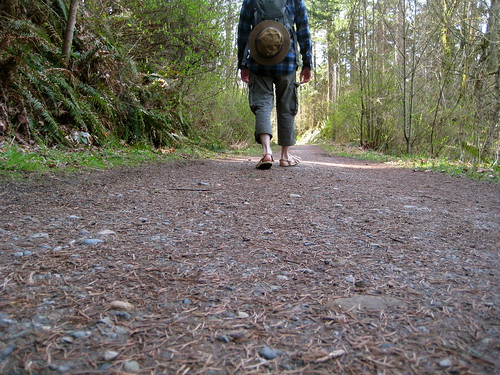
I was given the sandals a few years ago and always toss them in my pack when traveling in warmer climates. They’re light enough to not weight down the pack, and function as excellent camp shoes at the end of the day. I’ve never done any serious hiking with them though, and I wanted to see how capable they (and I) were.
I ended up doing a 15 mile hike. Towards the end, the balls of both my feet felt a little sore. They feel as if they’re developing a new callus (good thing) rather than a blister (bad thing).
I think it’s a healthy habit to do a hike every now and again with minimal-to-no foot support (such as barefoot, or with sandals similar to these). We all know that shoes are supposed to be bad things. If you’re the type who wears 6” or taller boots everyday, it’s especially important. Combat boots provide so much support for the foot and ankle that the muscles and tendons don’t have to do any work. They waste away. Walking with less supportive footwear will allow your feet to develop to a more healthful level.
For myself, I was surprised to find that the muscles in my lower back seemed to get the greatest workout. I usually have very bad posture, but walking with the sandals, for some reason, forced me to stand straighter than usual.
I decided to bring the Kifaru E&E instead of my normal EDC pack to cut down on weight. Here’s what I carried in it:
Joby Gorillapod
TAD Gear BC-8 pouch
Canon Powershot SD1000
Klean Kanteen (40 oz)
Possibles pouch
Challah (1/2 loaf)
Grimloc Carabiner (2x)
Bushcraft Northwest BCNW-O1 knife
Filson Tin Cloth Packer Hat
Minimalist Self-Aid kit
Buff
The Wilderness Tactical Halfway-Decent Glasses Case
...most of my townsmen would fain walk sometimes, as I do, but they cannot. No wealth can buy the requisite leisure, freedom, and independence, which are the capital in this profession. It comes only by the grace of God. It requires a direct dispensation from heaven to become a walker. You must be born into the family of the Walkers. Ambulator nascitur, non fit. Some of my townsmen, it is true, can remember, and have described to me some walks which they took ten years ago, in which they were so blessed as to lose themselves for half an hour in the woods, but I know very well that they have confined themselves to the highway ever since, whatever pretensions they may make to belong to this select class. No doubt, they were elevated for a moment as by the reminiscence of a previous state of existence, when even they were foresters and outlaws.
Henry David Thoreau
I have refrained from posting gear lists from my travels here mostly out of laziness, but partly because of a fear that they will be taken as absolute. The gear that I pack varies greatly from trip to trip. The type of travel, duration, terrain, and anticipated weather all factor into what I pack. On top of this, I always experiment with different gear and different configurations, seeking the best of both. Thus, my gear will differ even on nearly identical trips.
I should also note that I pack with an eye towards preparedness. That is to say that, for me, the only difference between 3 days and 30 days is the amount of food, and I’m not going to be carrying 30 days worth of food, anyway.
Still, people have expressed interest in what I pack, and I know that I do appreciate it when others whom I respect post their pack lists. So, here is the list from my last trip. The trip was 7 days long, and included about 85 miles of travel on dirt trails, paved roads, and bushwhacking. The route was never what I would call true wilderness or backcountry, meaning that I was always within one days walk of an urban area – and by urban I mean what is probably rural by most standards. The route also took me directly through small towns, which allowed me to restock on food.
I performed the trip over the last week of March. Days got up to around 45 degrees Fahrenheit, with nights around 35. Days were unusually dry (which meant it misted constantly, but didn’t actually rain). During the night, it did rain, but not terribly hard. On the first night, which was at about 1700 feet, it snowed. (The rest of the hike was through valleys and along the coast, so the elevation was well below 1000 feet.) In all, this pack list is a good representation of what I will choose to carry in Winter, not Spring. In the deep, dark of Winter, I will probably carry a few more layers of clothing and switch out some of the lighter garments for heavier ones, but, other than that, this list represents a more-or-less standard pack list for a one week journey in a Cascadian Winter, below elevation.
I do not have a reliable scale, so I cannot weigh my gear. All in all, I’d estimate the pack to be at about 45 lbs.
I’m compiling this list a few days after returning from the trip. I have already unpacked about half the items, so I may have missed something, but the bulk of the gear is certainly here. If you have any questions, or notice any stark absences, feel free to comment. Ideally, I would create a pack list as I’m packing, before the trip. Maybe next time…
The list is subdivided into two sections: what I wore on my body and what I carried in my pack. In the pack section, I decided to separate out what was carried in the lid (called an XTL), which detaches to become a man-purse and so also functions as a sort of escape and evasion bag (or a bail-out bag for the bail-out bag) and the body of the ZXR itself. Otherwise, I have not distinguished between what is carried in the main compartment, the slot pockets, or mounted on the belt. The clothing consists of three main insulating layers: a light wool shirt, a fleece vest, and a lightweight fleece jacket. These three would, of course, alternate between my body and my pack depending on where I was and what I was doing. During most of the hiking, I wore the wool shirt and packed the other two.
Worn On Body
Smartwool Hiking socks
Smartwool Microweight Boxer Briefs
Ibex Woolies long underwear bottoms
Patagonia Capilene Level 2 long sleeve tshirt
Nemesis Hellion neck knife
Atwood Tactical Whistle (worn on paracord around neck)
Railriders Versatac Light pants
Small bandana
Ultimate Survival Technologies Strike Force
K & M Industries Matchcase
Hair tie
Bic lighter
The Wilderness Tactical Frequent Flyer belt
Bushcraft Northwest BCNW-O1 knife
Leatherman Charge ALX
Pendleton Western lightweight wool shirt
Buff
Filson Tin Cloth Packer Hat
Lowa Renegade Gore-Tex boots
Sole Ed Viesturs Ultra Cushion footbeds
Kifaru ZXR
Kifaru XTL
Kifaru Standard Chamber Pocket
Rite-in-the-Rain notepad (model 393-M)
Lens cloth
Hair tie
Glasses strap
Badger Healing Balm
Purell Hand Sanitizer
Jetstream ballpoint pen
Fisher space pen
REI titanium spork
2x spare camera batteries
REI keychain thermometer
Large ziploc
Maps (5x)
Inova 24/7 with head band
Light My Fire Scout Swedish Firesteel and striker
Cell phone
Possibles pouch (Note: I'm not going to discuss the contents of this here, as I'm rethinking it with an eye toward redesign. In it's current incarnation, the items are housed within a TAD Gear SERE SP pouch, which measures 1" deep x 4" tall x 4" wide. It began as a modified Doug Ritter Pocket Survival Pak that I wanted to mount to my belt, instead of carrying it in a pocket. Many of the items remain the same.)
Joby Gorillapod
TAD Gear BC-8 pouch
Canon Powershot SD1000
Fallkniven DC4 sharpening stone
Kleenex pocket pack
REI Storm Proof matches
Maxpedition Rollypolly mini dump pouch
Self Aid Kit (Note: I'm also not going to discuss the contents of this here. Suffice for now, it is a small, pocket-sized kit composed of items in two different small aloksaks)
Small ziploc bag
Ultimate Survival Technologies Wetfire cubes (6x)
Garbage bag (8 gallon)
Small bandana
Platypus collapsible bottle (32 oz)
Outdoor Research Celestial Jacket hardshell
Integral Designs Sil Poncho/Tarp
REI Peak UL Compact carbon fiber trekking poles
Blackhawk Hellstorm SOLAG gloves
Kershaw folding saw
Cambelback 100oz Omega Resevoir
MSR Hyperflow water filter
Kifaru Paratarp
Big Agnes Seedhouse SL1 Fast Fly Floor
Assorted stakes (12x)
Nite-Ize Figure 9 small (4x)
25ft paracord (6x)
Kifaru Stuff Sack (small)
Kifaru 20 degree Slick bag
Outdoor Research Hydrolite Pack Sack #1
Thermarest Prolite 4
Sea-to-Summit Ultra-Sil Dry Sack (8 liters)
Smartwool Hiking socks (2x)
Generic cotton boxer briefs
Ex-Officio Boxer Briefs
Ibex Outback long sleeve shirt
TAD Gear Merino long underwear bottoms
REI synthetic towel, 25" x 15.5" (Note: I bought this a number of years ago and I do not know the specific model name. It does not appear to be the "MultiTowel" currently listed on REI's website.)
TAD Gear Pathfinder fleece hoodie
REI fleece vest (Note: I do not remember the model name and REI no longer sells it. It is made of a light-weight microfleece, with stretchy, spandex-like sides that provide a larger range of movement than a vest of all fleece.)
Trail Designs Ti-Tri Titanium Stove System (900ml pot)
AntiGravity Gear custom pot cozy
Large bandana
Food (Note: this was an assortment of trail mix, couscous, a few energy bars, 2 dry miso packets, 2 bullion cubes, a couple freeze dry meals, 2 tea bags of kukicha, 2 bags of green tea, and one chocolate bar. My journey took me through towns every couple days where I could purchase a meal and supplement my stores with fresh food such as bread, cheese, and fruit. All told, I carried roughly 3 days worth of food at a time.)
REI Nylon Mesh Storage Sack (10" x 6")
Small comb
Hair tie
Nail brush (Note: used not for nails, but for laundry.)
Floss
Toothbrush
Small tube of toothpaste
Ziploc bag
Dr. Bronner's Magic Soap (Almond castile, 2 fl oz.)
Kifaru Standard Chamber Pocket
Coghlan's Emergency Tinder (6x)
Sharpie
Highlighter
Pencil
Small repair kit
Keys
Small plastic bag (Note: used for trash)
Large contractor garbage bag (Note: this bag is large enough to fit over the whole pack. When traveling internationally, I use these to protect all the straps and webbing on the rucksack from the airport conveyor belts. In the wilderness, it can be used internally as a pack liner, externally as a pack cover, or as an emergency bivy.)
Small paperback book (The Golden Spruce by John Vaillant)
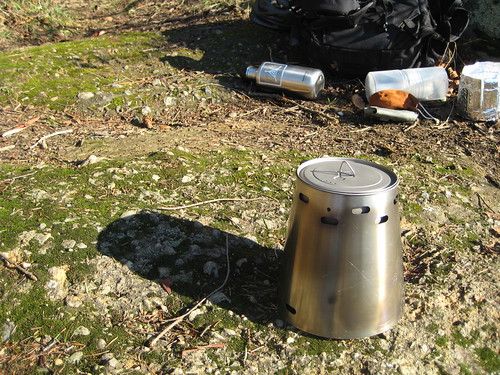
I’ve had a few requests to do a review of the new stove system I’ve been using for the past couple weeks. I don’t feel like I have enough experience with it yet to do a proper review, but I snapped some photos today to let people know what it’s all about.
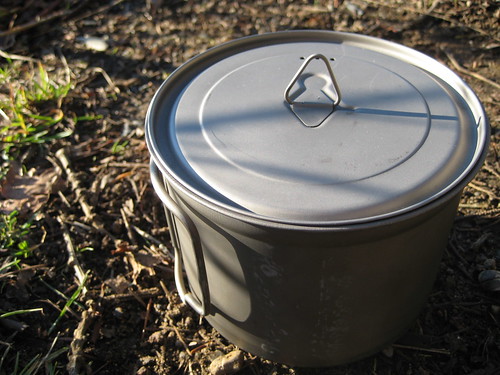
If you already have a pot you’d like to use, you can contact Trail Designs and have them build a cone for you. Elsewise, the Ti-Tri is available with a pot from Titanium Goat. I’ve previously mentioned my love affair with my Snow Peak Trek 700 mug/cup/pot/thing, but I had been thinking of acquiring a larger, 900ml pot for somewhat more extravagant cooking. Because of this, I decided to get the 900ml Ti-Tri from Titanium Goat, rather than have a Ti-Tri built for my Snow Peak mug.
Titanium Goat’s 900ml pot is a basic affair: handles on the body, a decent lid with a thingy on top that allows it to be easily lifted, as well as three holes for venting or draining water. Titanium Goat claims that the pot and mug weigh in at 4.4oz, which seems correct to me.
The Ti-Tri system itself comes inside of the same caddy system as does the normal Caldera. It’s basically two pieces of plastic that screw together. The diameter of the caddy is the same as a 32oz Nalgene, so it will nest in the same cups (such as the aforementioned Snow Peak 700). This is a somewhat bulky way of carrying the system, I find, but the caddy is constructed out of food grade plastic, so both pieces can double as a bowl or mug. It also does a great job of protecting all the components. So far, I’ve been packing everything in the caddy. I haven’t decided if I’ll keep doing it that way or not.
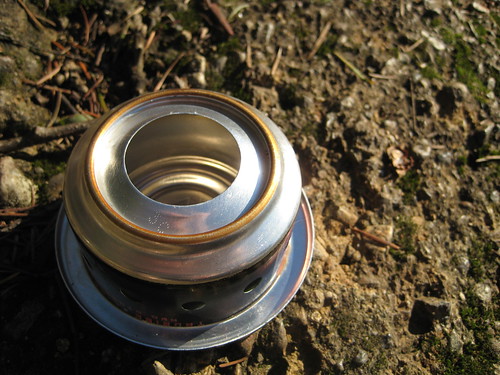
The alcohol stove that comes with the Ti-Tri is a Trail Designs 12-10 which, they claim, has been designed to “perform optimally with the restricted air flow and higher heat retained by the cone during operation.” My expertise in the design of alcohol stoves are lacking and, as I said before, I don’t feel I yet have enough experience with this system to draw a comparison between it and my Vargo Triad XE (which I also haven’t had for all that long), but the 12-10 has seemed extremely efficient so far (and much easier to light).
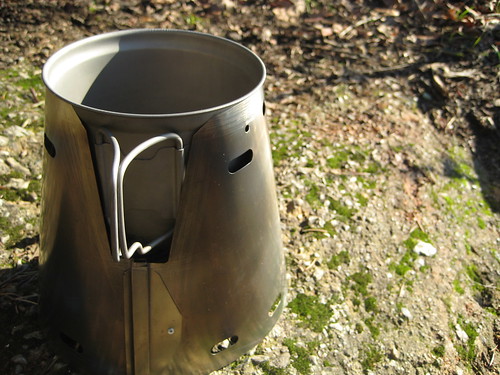
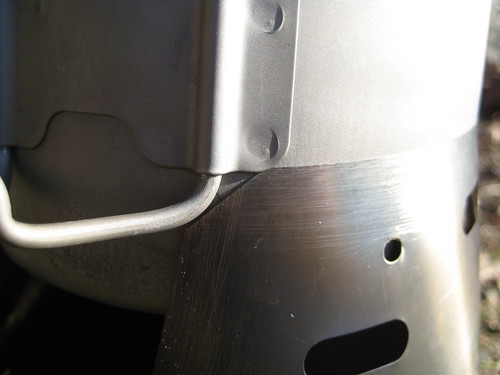
The pot’s lip holds it up. Even with the thinness of the cone’s material, it is a surprisingly sturdy setup. You do have to be somewhat watchful when sliding the pot into the cone, as the pot handle’s mountings will sometimes get caught on the edge of the cone’s opening. I say sometimes, but this actually happens to me the majority of the time. It’s greatly annoying.
If you’re sure to center the handles over the opening in the side of the cone, the handle mountings will not get caught.
The base is an optional addition to the Ti-Tri system to be used for wood burning. It’s simply another piece of titanium foil, slightly larger in diameter than the cone. When burning wood, you set the cone on the base, put the included titanium stakes through the holes in one end of the cone and out the other. These then support the pot higher up, allowing you to shove your fuel in the cone’s side opening.
The Ti-Tri’s third fuel option are esbit tabs, which uses Trail Design’s GramCracker. The GramCracker consists of three pieces of titanium: two sides and a stand. The sides pieces are slid into either side of the stand, which then holds the esbit tab.
This setup directs the heat for a much more efficient burn than that offered by a standard esbit stove. (The GramCracker also comes with a small piece of foil to be used as a base, but since I already carry the larger base for wood burning, I leave this smaller piece at home.) With the GramCracker assembled, the cone is placed on top, and the pot is nested just as with the alcohol stove.
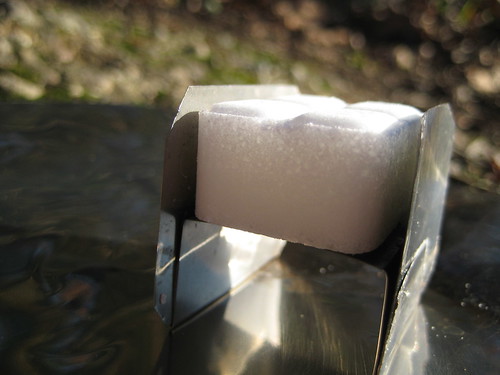
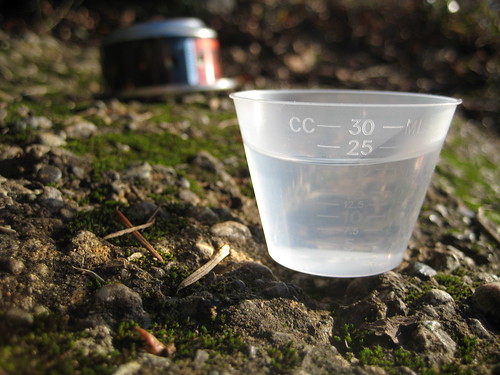
Today, I was planning on using the Ti-Tri as an alcohol stove. Trail Designs claims that the Ti-Tri can bring 2 cups of water to a boil with 15ml of alcohol. I’ve found that 15ml brings 2 cups to more of a simmer. For a boil, you’d want 25ml. I didn’t measure exactly how much water I poured into the pot, so I decided to use a bit over 20ml of fuel.
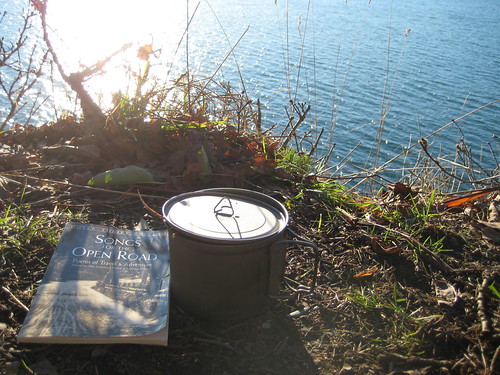
Tea, today, would be Doug Fir and Cedar. After pouring the the fuel from the measuring cup into the stove, I lit the 12-10 with a match, tossed on the cone, settled in the pot (after getting the handle mountings caught on the edge of the cone), and shifted my attentions elsewhere. I didn’t time it this time around, but I think it burned for a bit over 10 minutes. My water was brought to a full, rolling boil – much more than I really needed just for tea, but I was just out for a day-hike, so I wasn’t terribly concerned with fuel conservation. After the burn, I tossed the Doug Fir and Cedar into the pot to steep and settled in for some tea and poetry.
Overall, the Ti-Tri comes in at just under 10oz. It’s not the lightest or most compact alcohol stove setup, but seems to me to be extremely efficient. It’s a bit like the JetBoil of the alcohol stove world. Of course, the Ti-Tri’s primary advantage over other alcohol stoves is that it is not an alcohol stove: it’s an alcohol stove, esbit stove, and wood stove. Having three different fuel options in your pack (and at such a light weight) is quite an invaluable thing. I’m greatly looking forward to further use and testing of what has become my primary cooking system.
The Ti-Tri is a somewhat new product, but has already garnered some positive press, such as a 2008 Backpacking Light Staff Pick. I’m quite curious as to how the system’s wood burning compares to that of the Bush Buddy.
Check out Trail Design’s gallery for photos further photos of the Ti-Tri in use, including at -20 degrees Fahrenheit in the Yukon.
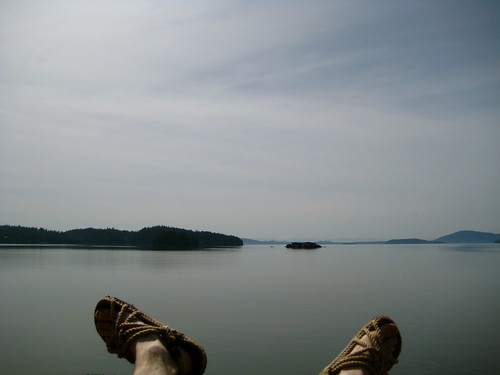
Today’s post brought to you by: that feeling you get when you dangle your legs over a precipice that could probably kill you. And blue skies.
Bed in the bush with stars to see,
Bread I dip in the river --
There's the life for a man like me,
There's the life for ever.
from The Vagabond, Robert Louis Stevenson