High carbon steels have a tendency to rust without proper care. This is especially true of knives made from O1 tool steel, such as my BCNW-O1.
A patina is a thin film that develops on some metals due to oxidation. It is a type of rust, but a good one, that protects the blade rather than corroding and eating away at the metal. Over time, most knives will develop a patina, regardless of the material that they’re made from. Many people are attracted to the distinctive and aged look that a patina imparts onto a knife, and will make an effort to force a patina onto their blades. The easiest way to do so is to use the knife to prepare acidic foods: potatoes, onions, tomatoes, pickles, and the like all work well. Some people will soak a rag in vinegar and wrap it around the blade, or coat the blade with mustard and leave it overnight.
I wanted to force a patina onto my BCNW-O1, for both the aged look and the extra protection that it gives. The first step I took was to take a slightly-moldy potato out of my fridge and stab the blade into it, up to the handle. I left this in overnight. In the morning, I took the blade out, rinsed it, and stabbed it into another spot on the potato. I repeated this through-out the day, leaving the blade in one spot for a few hours at a time. This sort of approach adds a multi-layered texture to the patina.
After the blade had been in and out of the potato for about 24 hours, I tossed the potato, cleaned the knife, and used it to slice an orange. After the orange was sliced, I left the knife on the plate with the orange as I ate, so that the juices could soak into the blade a bit. After this, I rinsed and dried the blade again, then sliced another orange the next day.
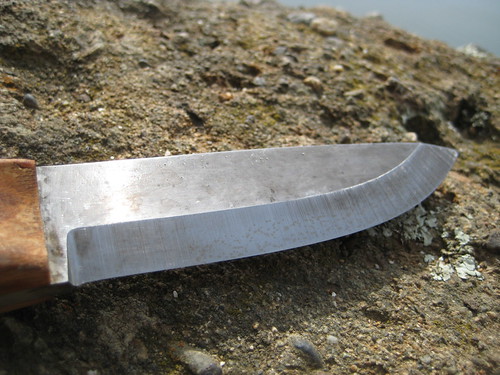
I figured all of this would probably be good enough, so, after slicing the final orange, I rinsed the blade once more, then gave it a good scrubbing with a soapy sponge to clean off any bacteria that might be growing on it after all the exposure to food. This removed a lot of the rust – more than I thought it would – but, after I dried the knife off, I had a beautiful patina on the blade.
Since the patina is a type of rust, it does eat away the sharp edge of the knife a bit. So, after it was all clean, I gave the knife a session on my 6000 grit japanese water stone, which sharpened it back up again.
Usually after the sharpening the knife, I coat it in camellia oil, which was used in Japan by samurais to protect their blades. It is a non-toxic oil that is often used for skin care, and can even be cooked with, so I have no problem using it on a knife that I will prepare food with and eat with. The main purpose of the oil is to protect the blade from rust so, with the patina applied, it is not strictly as necessary as before. Still, I apply it so that both it and the patina can ward away any bad rust.
Using a fine-grit Japanese water stone with a nagura stone to sharpen the blade creates a slightly abrasive cleaner that can be purposefully rubbed into the blade to clean off the beginnings of a patina, if one so desires. I do not do this on purpose, but I have sharpened my knife multiple times since applying the patina and, as a result, the bevel of the blade is much shinier and less-rusted than the upper part.
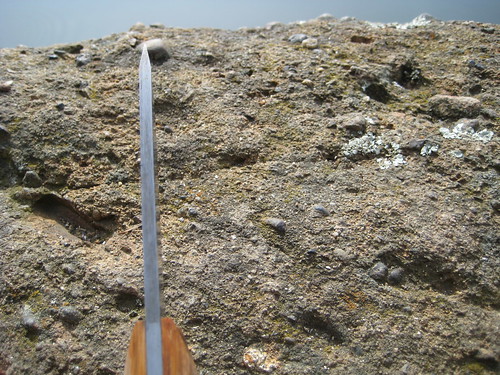
You can tell this patina is forced, because it terminates at the handle (I couldn’t stab it into the potato any deeper!) of the BCNW-O1. The exposed part of the tang is shiny clean, like new.
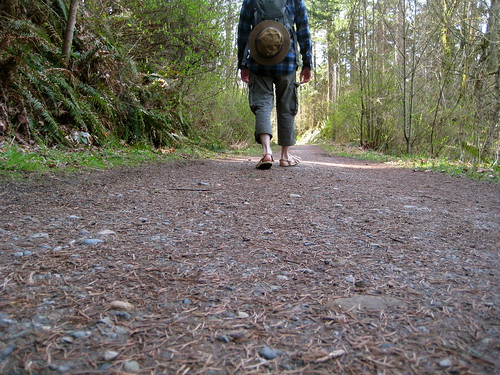
I was given the sandals a few years ago and always toss them in my pack when traveling in warmer climates. They’re light enough to not weight down the pack, and function as excellent camp shoes at the end of the day. I’ve never done any serious hiking with them though, and I wanted to see how capable they (and I) were.
I ended up doing a 15 mile hike. Towards the end, the balls of both my feet felt a little sore. They feel as if they’re developing a new callus (good thing) rather than a blister (bad thing).
I think it’s a healthy habit to do a hike every now and again with minimal-to-no foot support (such as barefoot, or with sandals similar to these). We all know that shoes are supposed to be bad things. If you’re the type who wears 6” or taller boots everyday, it’s especially important. Combat boots provide so much support for the foot and ankle that the muscles and tendons don’t have to do any work. They waste away. Walking with less supportive footwear will allow your feet to develop to a more healthful level.
For myself, I was surprised to find that the muscles in my lower back seemed to get the greatest workout. I usually have very bad posture, but walking with the sandals, for some reason, forced me to stand straighter than usual.
I decided to bring the Kifaru E&E instead of my normal EDC pack to cut down on weight. Here’s what I carried in it:
Joby Gorillapod
TAD Gear BC-8 pouch
Canon Powershot SD1000
Klean Kanteen (40 oz)
Possibles pouch
Challah (1/2 loaf)
Grimloc Carabiner (2x)
Bushcraft Northwest BCNW-O1 knife
Filson Tin Cloth Packer Hat
Minimalist Self-Aid kit
Buff
The Wilderness Tactical Halfway-Decent Glasses Case
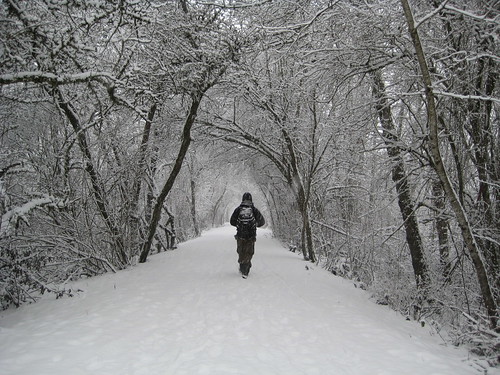
...most of my townsmen would fain walk sometimes, as I do, but they cannot. No wealth can buy the requisite leisure, freedom, and independence, which are the capital in this profession. It comes only by the grace of God. It requires a direct dispensation from heaven to become a walker. You must be born into the family of the Walkers. Ambulator nascitur, non fit. Some of my townsmen, it is true, can remember, and have described to me some walks which they took ten years ago, in which they were so blessed as to lose themselves for half an hour in the woods, but I know very well that they have confined themselves to the highway ever since, whatever pretensions they may make to belong to this select class. No doubt, they were elevated for a moment as by the reminiscence of a previous state of existence, when even they were foresters and outlaws.
Henry David Thoreau
I have refrained from posting gear lists from my travels here mostly out of laziness, but partly because of a fear that they will be taken as absolute. The gear that I pack varies greatly from trip to trip. The type of travel, duration, terrain, and anticipated weather all factor into what I pack. On top of this, I always experiment with different gear and different configurations, seeking the best of both. Thus, my gear will differ even on nearly identical trips.
I should also note that I pack with an eye towards preparedness. That is to say that, for me, the only difference between 3 days and 30 days is the amount of food, and I’m not going to be carrying 30 days worth of food, anyway.
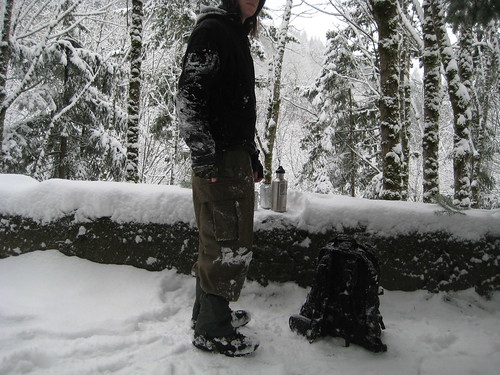
Still, people have expressed interest in what I pack, and I know that I do appreciate it when others whom I respect post their pack lists. So, here is the list from my last trip. The trip was 7 days long, and included about 85 miles of travel on dirt trails, paved roads, and bushwhacking. The route was never what I would call true wilderness or backcountry, meaning that I was always within one days walk of an urban area – and by urban I mean what is probably rural by most standards. The route also took me directly through small towns, which allowed me to restock on food.
I performed the trip over the last week of March. Days got up to around 45 degrees Fahrenheit, with nights around 35. Days were unusually dry (which meant it misted constantly, but didn’t actually rain). During the night, it did rain, but not terribly hard. On the first night, which was at about 1700 feet, it snowed. (The rest of the hike was through valleys and along the coast, so the elevation was well below 1000 feet.) In all, this pack list is a good representation of what I will choose to carry in Winter, not Spring. In the deep, dark of Winter, I will probably carry a few more layers of clothing and switch out some of the lighter garments for heavier ones, but, other than that, this list represents a more-or-less standard pack list for a one week journey in a Cascadian Winter, below elevation.
I do not have a reliable scale, so I cannot weigh my gear. All in all, I’d estimate the pack to be at about 45 lbs.
I’m compiling this list a few days after returning from the trip. I have already unpacked about half the items, so I may have missed something, but the bulk of the gear is certainly here. If you have any questions, or notice any stark absences, feel free to comment. Ideally, I would create a pack list as I’m packing, before the trip. Maybe next time…
The list is subdivided into two sections: what I wore on my body and what I carried in my pack. In the pack section, I decided to separate out what was carried in the lid (called an XTL), which detaches to become a man-purse and so also functions as a sort of escape and evasion bag (or a bail-out bag for the bail-out bag) and the body of the ZXR itself. Otherwise, I have not distinguished between what is carried in the main compartment, the slot pockets, or mounted on the belt. The clothing consists of three main insulating layers: a light wool shirt, a fleece vest, and a lightweight fleece jacket. These three would, of course, alternate between my body and my pack depending on where I was and what I was doing. During most of the hiking, I wore the wool shirt and packed the other two.
Worn On Body
Smartwool Hiking socks
Smartwool Microweight Boxer Briefs
Ibex Woolies long underwear bottoms
Patagonia Capilene Level 2 long sleeve tshirt
Nemesis Hellion neck knife
Atwood Tactical Whistle (worn on paracord around neck)
Railriders Versatac Light pants
Small bandana
Ultimate Survival Technologies Strike Force
K & M Industries Matchcase
Hair tie
Bic lighter
The Wilderness Tactical Frequent Flyer belt
Bushcraft Northwest BCNW-O1 knife
Leatherman Charge ALX
Pendleton Western lightweight wool shirt
Buff
Filson Tin Cloth Packer Hat
Lowa Renegade Gore-Tex boots
Sole Ed Viesturs Ultra Cushion footbeds
Kifaru ZXR
Kifaru XTL
Kifaru Standard Chamber Pocket
Rite-in-the-Rain notepad (model 393-M)
Lens cloth
Hair tie
Glasses strap
Badger Healing Balm
Purell Hand Sanitizer
Jetstream ballpoint pen
Fisher space pen
REI titanium spork
2x spare camera batteries
REI keychain thermometer
Large ziploc
Maps (5x)
Inova 24/7 with head band
Light My Fire Scout Swedish Firesteel and striker
Cell phone
Possibles pouch (Note: I'm not going to discuss the contents of this here, as I'm rethinking it with an eye toward redesign. In it's current incarnation, the items are housed within a TAD Gear SERE SP pouch, which measures 1" deep x 4" tall x 4" wide. It began as a modified Doug Ritter Pocket Survival Pak that I wanted to mount to my belt, instead of carrying it in a pocket. Many of the items remain the same.)
Joby Gorillapod
TAD Gear BC-8 pouch
Canon Powershot SD1000
Fallkniven DC4 sharpening stone
Kleenex pocket pack
REI Storm Proof matches
Maxpedition Rollypolly mini dump pouch
Self Aid Kit (Note: I'm also not going to discuss the contents of this here. Suffice for now, it is a small, pocket-sized kit composed of items in two different small aloksaks)
Small ziploc bag
Ultimate Survival Technologies Wetfire cubes (6x)
Garbage bag (8 gallon)
Small bandana
Platypus collapsible bottle (32 oz)
Outdoor Research Celestial Jacket hardshell
Integral Designs Sil Poncho/Tarp
REI Peak UL Compact carbon fiber trekking poles
Blackhawk Hellstorm SOLAG gloves
Kershaw folding saw
Cambelback 100oz Omega Resevoir
MSR Hyperflow water filter
Kifaru Paratarp
Big Agnes Seedhouse SL1 Fast Fly Floor
Assorted stakes (12x)
Nite-Ize Figure 9 small (4x)
25ft paracord (6x)
Kifaru Stuff Sack (small)
Kifaru 20 degree Slick bag
Outdoor Research Hydrolite Pack Sack #1
Thermarest Prolite 4
Sea-to-Summit Ultra-Sil Dry Sack (8 liters)
Smartwool Hiking socks (2x)
Generic cotton boxer briefs
Ex-Officio Boxer Briefs
Ibex Outback long sleeve shirt
TAD Gear Merino long underwear bottoms
REI synthetic towel, 25" x 15.5" (Note: I bought this a number of years ago and I do not know the specific model name. It does not appear to be the "MultiTowel" currently listed on REI's website.)
TAD Gear Pathfinder fleece hoodie
REI fleece vest (Note: I do not remember the model name and REI no longer sells it. It is made of a light-weight microfleece, with stretchy, spandex-like sides that provide a larger range of movement than a vest of all fleece.)
Trail Designs Ti-Tri Titanium Stove System (900ml pot)
AntiGravity Gear custom pot cozy
Large bandana
Food (Note: this was an assortment of trail mix, couscous, a few energy bars, 2 dry miso packets, 2 bullion cubes, a couple freeze dry meals, 2 tea bags of kukicha, 2 bags of green tea, and one chocolate bar. My journey took me through towns every couple days where I could purchase a meal and supplement my stores with fresh food such as bread, cheese, and fruit. All told, I carried roughly 3 days worth of food at a time.)
REI Nylon Mesh Storage Sack (10" x 6")
Small comb
Hair tie
Nail brush (Note: used not for nails, but for laundry.)
Floss
Toothbrush
Small tube of toothpaste
Ziploc bag
Dr. Bronner's Magic Soap (Almond castile, 2 fl oz.)
Kifaru Standard Chamber Pocket
Coghlan's Emergency Tinder (6x)
Sharpie
Highlighter
Pencil
Small repair kit
Keys
Small plastic bag (Note: used for trash)
Large contractor garbage bag (Note: this bag is large enough to fit over the whole pack. When traveling internationally, I use these to protect all the straps and webbing on the rucksack from the airport conveyor belts. In the wilderness, it can be used internally as a pack liner, externally as a pack cover, or as an emergency bivy.)
Small paperback book (The Golden Spruce by John Vaillant)
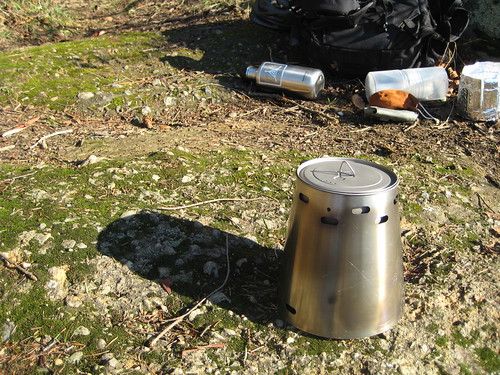
I’ve had a few requests to do a review of the new stove system I’ve been using for the past couple weeks. I don’t feel like I have enough experience with it yet to do a proper review, but I snapped some photos today to let people know what it’s all about.
If you already have a pot you’d like to use, you can contact Trail Designs and have them build a cone for you. Elsewise, the Ti-Tri is available with a pot from Titanium Goat. I’ve previously mentioned my love affair with my Snow Peak Trek 700 mug/cup/pot/thing, but I had been thinking of acquiring a larger, 900ml pot for somewhat more extravagant cooking. Because of this, I decided to get the 900ml Ti-Tri from Titanium Goat, rather than have a Ti-Tri built for my Snow Peak mug.
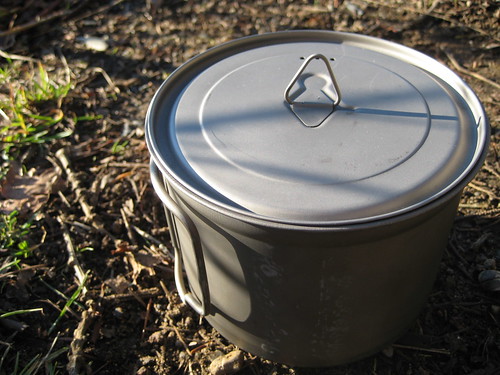
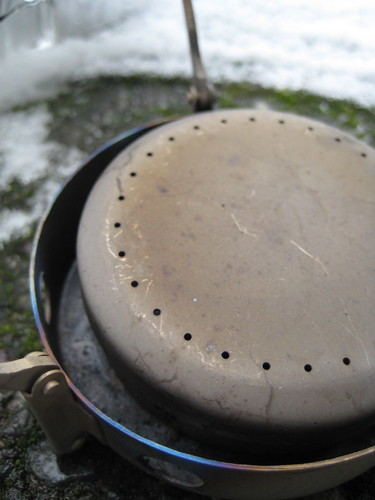
Titanium Goat’s 900ml pot is a basic affair: handles on the body, a decent lid with a thingy on top that allows it to be easily lifted, as well as three holes for venting or draining water. Titanium Goat claims that the pot and mug weigh in at 4.4oz, which seems correct to me.
The Ti-Tri system itself comes inside of the same caddy system as does the normal Caldera. It’s basically two pieces of plastic that screw together. The diameter of the caddy is the same as a 32oz Nalgene, so it will nest in the same cups (such as the aforementioned Snow Peak 700). This is a somewhat bulky way of carrying the system, I find, but the caddy is constructed out of food grade plastic, so both pieces can double as a bowl or mug. It also does a great job of protecting all the components. So far, I’ve been packing everything in the caddy. I haven’t decided if I’ll keep doing it that way or not.
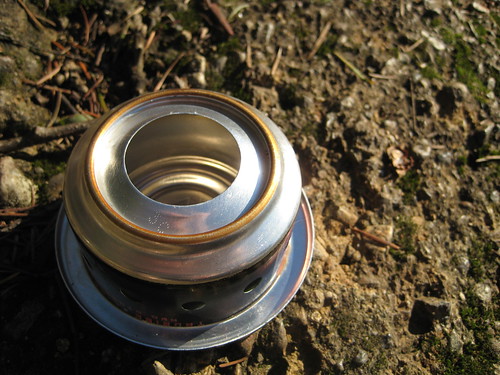
The alcohol stove that comes with the Ti-Tri is a Trail Designs 12-10 which, they claim, has been designed to “perform optimally with the restricted air flow and higher heat retained by the cone during operation.” My expertise in the design of alcohol stoves are lacking and, as I said before, I don’t feel I yet have enough experience with this system to draw a comparison between it and my Vargo Triad XE (which I also haven’t had for all that long), but the 12-10 has seemed extremely efficient so far (and much easier to light).
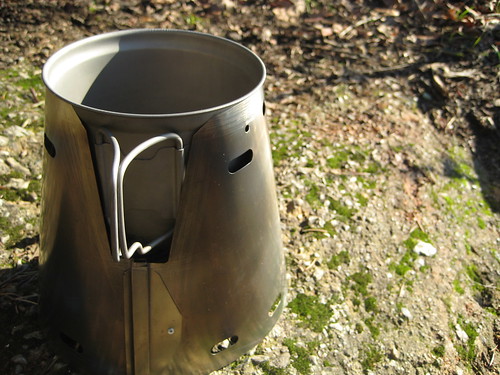
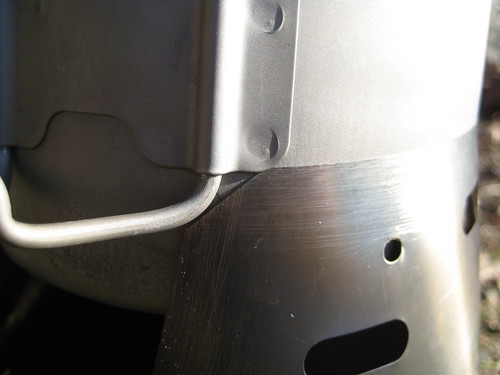
The pot’s lip holds it up. Even with the thinness of the cone’s material, it is a surprisingly sturdy setup. You do have to be somewhat watchful when sliding the pot into the cone, as the pot handle’s mountings will sometimes get caught on the edge of the cone’s opening. I say sometimes, but this actually happens to me the majority of the time. It’s greatly annoying.
If you’re sure to center the handles over the opening in the side of the cone, the handle mountings will not get caught.
The base is an optional addition to the Ti-Tri system to be used for wood burning. It’s simply another piece of titanium foil, slightly larger in diameter than the cone. When burning wood, you set the cone on the base, put the included titanium stakes through the holes in one end of the cone and out the other. These then support the pot higher up, allowing you to shove your fuel in the cone’s side opening.
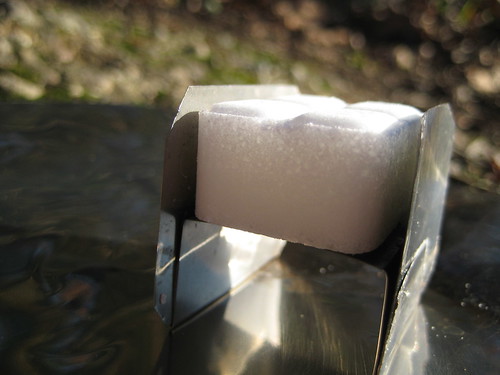
The Ti-Tri’s third fuel option are esbit tabs, which uses Trail Design’s GramCracker. The GramCracker consists of three pieces of titanium: two sides and a stand. The sides pieces are slid into either side of the stand, which then holds the esbit tab.
This setup directs the heat for a much more efficient burn than that offered by a standard esbit stove. (The GramCracker also comes with a small piece of foil to be used as a base, but since I already carry the larger base for wood burning, I leave this smaller piece at home.) With the GramCracker assembled, the cone is placed on top, and the pot is nested just as with the alcohol stove.
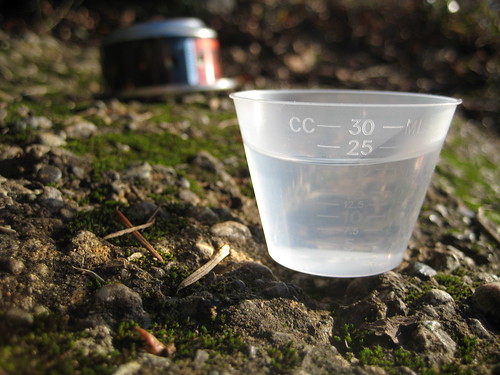
Today, I was planning on using the Ti-Tri as an alcohol stove. Trail Designs claims that the Ti-Tri can bring 2 cups of water to a boil with 15ml of alcohol. I’ve found that 15ml brings 2 cups to more of a simmer. For a boil, you’d want 25ml. I didn’t measure exactly how much water I poured into the pot, so I decided to use a bit over 20ml of fuel.
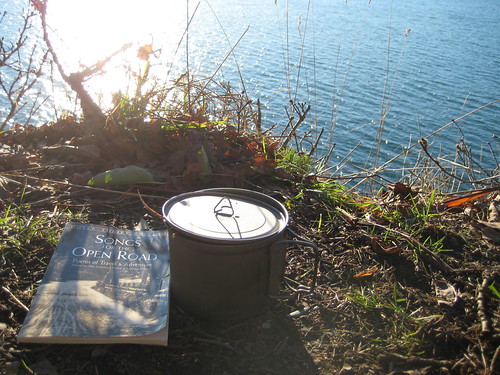
Tea, today, would be Doug Fir and Cedar. After pouring the the fuel from the measuring cup into the stove, I lit the 12-10 with a match, tossed on the cone, settled in the pot (after getting the handle mountings caught on the edge of the cone), and shifted my attentions elsewhere. I didn’t time it this time around, but I think it burned for a bit over 10 minutes. My water was brought to a full, rolling boil – much more than I really needed just for tea, but I was just out for a day-hike, so I wasn’t terribly concerned with fuel conservation. After the burn, I tossed the Doug Fir and Cedar into the pot to steep and settled in for some tea and poetry.
Overall, the Ti-Tri comes in at just under 10oz. It’s not the lightest or most compact alcohol stove setup, but seems to me to be extremely efficient. It’s a bit like the JetBoil of the alcohol stove world. Of course, the Ti-Tri’s primary advantage over other alcohol stoves is that it is not an alcohol stove: it’s an alcohol stove, esbit stove, and wood stove. Having three different fuel options in your pack (and at such a light weight) is quite an invaluable thing. I’m greatly looking forward to further use and testing of what has become my primary cooking system.
The Ti-Tri is a somewhat new product, but has already garnered some positive press, such as a 2008 Backpacking Light Staff Pick. I’m quite curious as to how the system’s wood burning compares to that of the Bush Buddy.
Check out Trail Design’s gallery for photos further photos of the Ti-Tri in use, including at -20 degrees Fahrenheit in the Yukon.
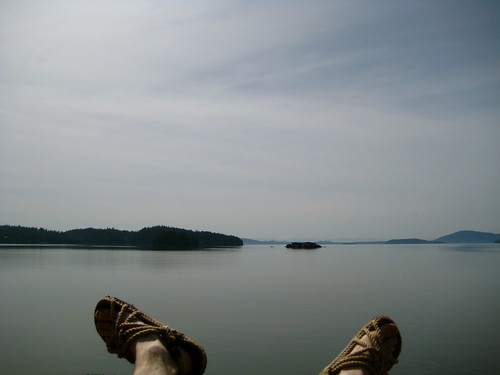
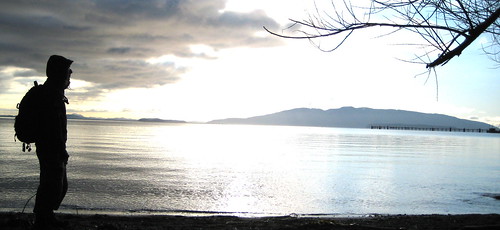
Today’s post brought to you by: that feeling you get when you dangle your legs over a precipice that could probably kill you. And blue skies.
Bed in the bush with stars to see,
Bread I dip in the river --
There's the life for a man like me,
There's the life for ever.
from The Vagabond, Robert Louis Stevenson
I love titanium. It’s so light, yet strong, and discolors beautifully when burned.
The Snow Peak Trek 700 has been with me on every foray into the wilderness for the past four years, and it’s still going strong. It’s my primary pot/mug/bowl, whether I’m cooking with a fire, canister stove, or alcohol. If I were to create a list of my top ten most valued possessions, I think this would be on it.
I’ve only had the Vargo Triad XE for a few months, but it’s quickly become my favorite stove. It’s far lighter and more versatile than the Esbit stove. I haven’t even looked at my Jetboil since purchasing the Triad. The stove burns both denatured alcohol and fuel tabs, giving it a wider operating potential than most stoves that burn only either one or the other. My experience with alcohol stoves is limited, so I can’t compare the burn efficiency of the Triad to its competitors, but I, so far, have zero complaints.
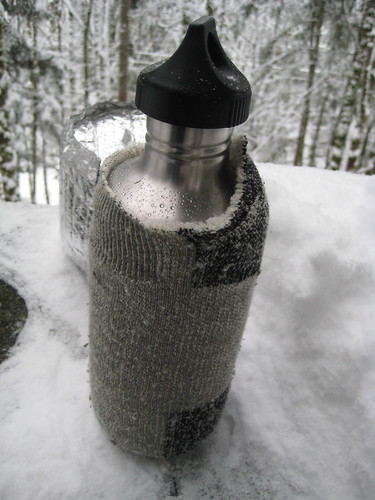
In one of my EDC photos last week, I showed that I carry a 40oz Klean Kanteen. I think the water tastes better from the stainless steel bottle than from a plastic Nalgene, and prefer carrying 40 ounces over just 32.
The main complaint many people express concerning a single-walled stainless steel bottle is that you can’t carry hot liquids in it. That’s not much of a detraction for me, since I have a different bottle for that. What does annoy me is that, in the cold, when the bottle is filled with cold water, the stainless steel can become too cold to touch without gloves. To address this, I took an old wool sock and cut it off at about the neck of the bottle. Instant insulation.
The only disadvantage is that the sock is just a little too thick for the bottle to nest inside my mug. Depending on how you carry the bottle, you might want to cut off a few inches from the bottom of the sock as well as the top.
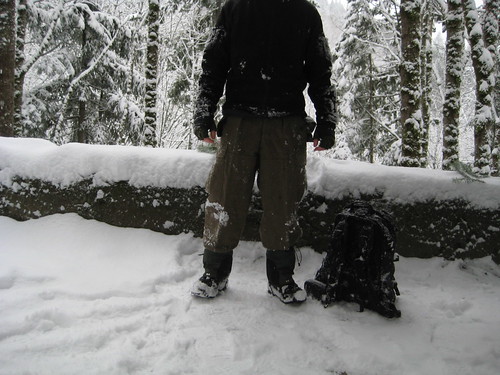
Winter arrived early last weekend, a week before the solstice. The daily temperatures have been hovering in the low 20s Fahrenheit (that’s somewhere around -5 for you centigrade folks), with high winds and plenty of snow. I’ve been out hiking every day, practicing winter fire lighting and taking advantage of the snow for tracking. It’s also provided ample opportunity to test out the wool pants I bought a few months ago.
They’re surplus from the West German army, circa 1976. I acquired them on ebay for $20.
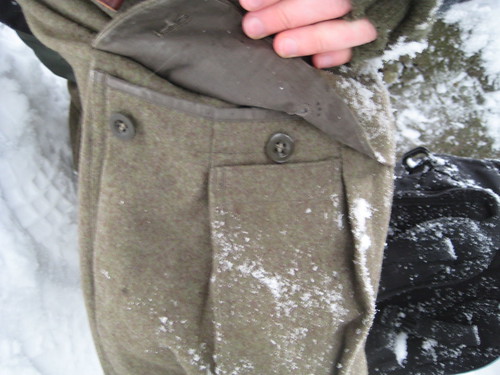
They have a standard 6 pocket design. The back pockets and two side pockets have button closure flaps. The cargo pockets have flaps with two button closures: one in the middle and one on the back. The front edge of the pocket flap is actually sewn onto the pants, which prevents the flap from, you know, flapping. It encourages the flap to stay closed, even when both the buttons are undone, providing for somewhat secure storage while still having instant access. On the outside of each cargo pocket is a smaller, 3” wide pocket with no closure. It was probably originally meant for a magazine, but is a perfect size for a cell phone or camera. It’s a little small for my compass or GPS.
The front of the pants is reinforced roughly 7” above the knee to 7” below. The butt is not reinforced
The crotch is closed via four buttons, rather than a zip. Buttons are easier to replace in the field, but makes access a little slower. Annoying when nature calls. There’s also a series of buttons along the waistband, both on the inside and the outside. Some of these can be used to make minute adjustments to the waist size, others just seem to be spares. In all, there’s probably about 10 buttons that could be salvaged to repair the crotch or pocket closures. On the inside back of the waist band, there’s also attachments for suspenders.
On the hem of each leg, there’s are snaps that allow the legs to be tightened and the excess material folded, useful for blousing the pants with boots or for wearing under gaiters.
I love these pants. I received them in new condition, and their worth could easily be placed upward of $60. My only complaint is the button crotch, which I would prefer to be zippered.
In the cold (and somewhat wet) snow, I’ve been staying perfectly warm and dry with these and a pair of merino wool long underwear worn underneath. In slightly warmer weather, I’ve found the wool to be soft enough to be worn without the underwear underneath. (I haven’t ever worn US Army surplus wool, but I’m told that the West German stuff is softer. I’ve also been told that wool from the former Eastern Bloc is the itchiest, and warned to stay well away from it.)
I’d recommend the West German wool to anyone. When passing someone on the trail decked out in plastic from head-to-toe, making that annoying swish-swish-swish sound as they walk by, you can chuckle to yourself, content in the knowledge that you are warmer, quieter and more comfortable in your wool.
I took some photos of my EDC pack today. I live in an urban area and commute on my bike, but I also use the pack during day hikes, so the pack includes an odd mix of urban, bicycle, and wilderness tools. All the items are identified by comments and notes on flickr.
The pack itself is a TAD Gear FAST Pack EDC, which is probably evident to most of you. It’s been my every day carry pack for a little over a year now. I’m very pleased with it.
The gear that I EDC on my person is probably more interesting. Maybe someday I’ll take pictures of that.