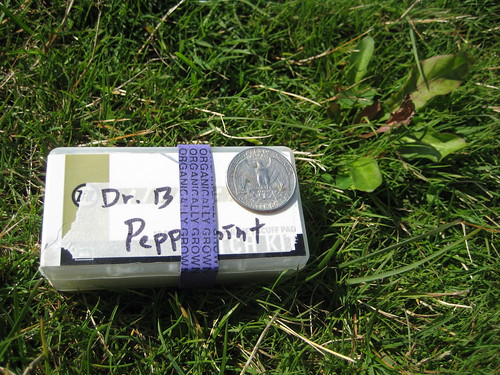
Here’s another great idea that I gleaned from scanning the BackpackingLight Forums: using the plastic container from an old bike tube patch kit as a soap bar container.
Whole soap bars tend to be far too large and heavy for any but the longest of travels. Cutting up a bar of soap to make it smaller is easier enough, but prior to this I had never come across a correctly sized container to package it in.
This container is perfect. It measures in at 3.25” x 1.75” x 0.9”, weighs 2.5 oz when full, and holds about 1/3rd of a bar of Dr. Bronner’s Bar Soap. I wrap a rubber band around it for added security.
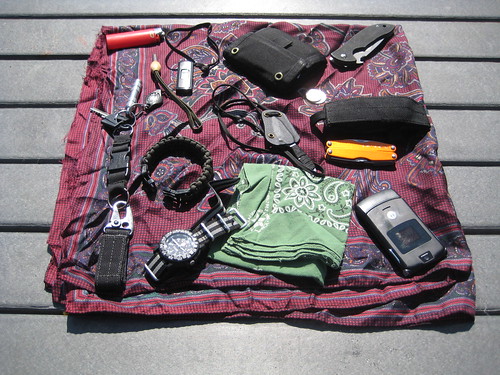
I took a break during today’s bike ride to dump out all the gear I had on me and snap a few photos. For the most part, this is representative of what I have on me every single day. There were a couple items in my pack that aren’t normally in there, but I noted those on the Flickr photo page.
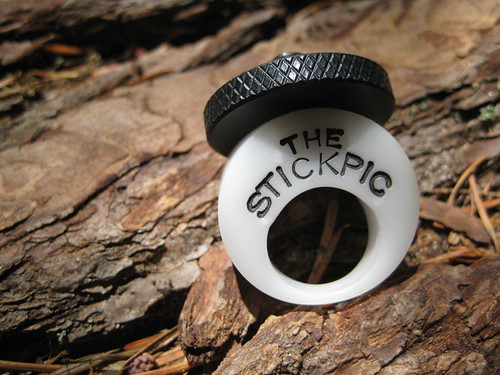
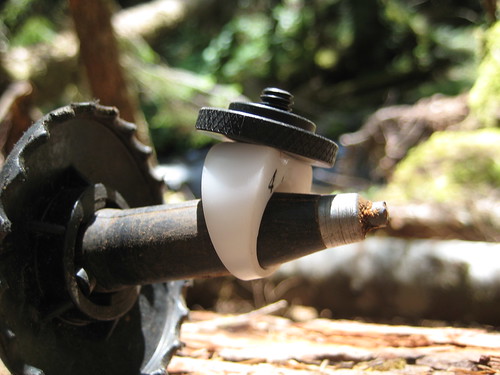
It’s a very simple device. The top screws into a camera’s standard tripod socket and the bottom slides onto the tapered end of a trekking pole. You can then set the camera’s self timer, hold out the pole, and take a self portrait. Or pretend that you’re Les Stroud and shoot a little video. Overall, an ingenious little device.
My initial worry about the StickPic was that it would fall off the tip of the pole, taking my camera for a tumble down the side of a mountain. So far, that has not been a problem. You can jam the StickPic on the tip of the poles pretty tightly, and also loop your camera’s wrist strap around the pole above the basket for added security.
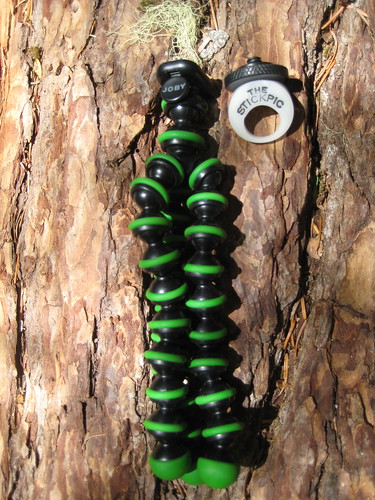
I usually carry a Joby Gorillapod with me and keep the attachment doohickey for that screwed into my camera’s tripod socket. Switching that out for the StickPic takes only a few seconds.
The Gorillapod is overall a more versatile device, but fails to address the problem that StickPic primarily concerns itself with: when you are alone, in an alpine environment, with no conveniently situated tree branches to wrap the Gorillapod around or perfectly sized boulders to set it on top of.
In terms of size and weight, the StickPic wins out. It weight 0.3 oz, compared to the Gorillapod’s 1.5 oz.
So far this summer, I’ve been carrying both. They each address different needs and only weigh a combine total of 1.8 oz. Not much weight for the extra versatility added to your photography arsenal.
(A new version of this tutorial has appeared on ITS Tactical, detailing my updated construction method. The following is outdated, but left for posterity.)
Tyvek is a synthetic material made by DuPont, most regularly used at construction sites for wrapping house frames. It is a rather strong material and fairly waterproof. It is so ubiqitous in industrial usage as to be freely available to the intrepid individual. Partly because of this, Tyvek is popular among many lightweight travelers for use as a cheap, lightweight, and effective groundcloth for a tarp shelter.
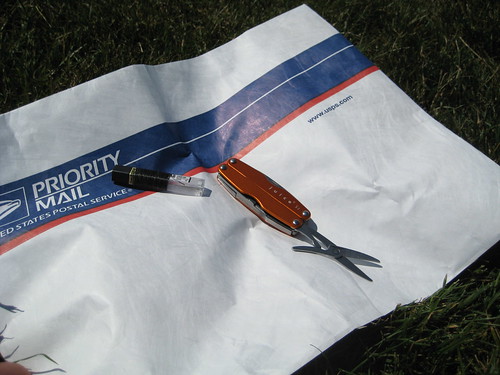
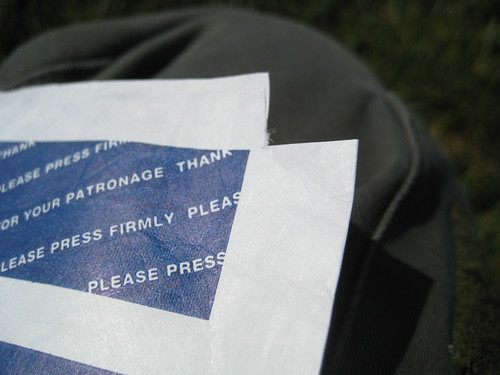
The United States Postal Service’s Priority Mail envelopes are also made out of the material. A few months ago I saw a picture of one of these envelopes in use as a stuff sack. I thought it was a great idea and decided to make my own. I’ve since made two of them. It’s a very simple process.
You need only a few items for the project: a USPS Priority Mail envelope, a needle and thread (from the repair kit in your trusty possibles pouch, no doubt), a bit of cord, a cordlock, and a sharp object. You could make the needed cuts with a knife, but scissors are a bit easier. I use the pair on my Leatherman Juice S2, which has replaced the Charge ALX as my daily carry.
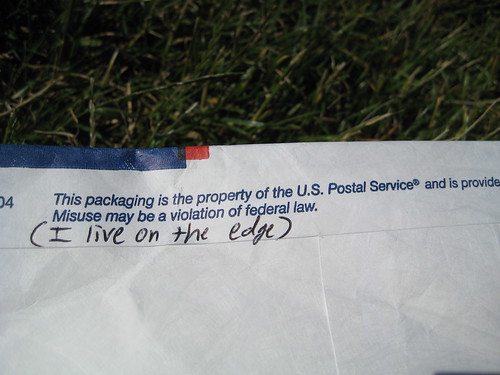
The envelope can be new or used. Any post office will have new envelopes available in the lobby, free for the taking. Still, I would feel a little guilty about taking a brand new envelope just for this purpose. There’s plenty enough used envelopes floating around, and it seems a waste to steal a brand new one. I lucked out in that recently someone sent me a package in a box, but, within the box, used the pictured envelope to organize the goods. So the envelope is used, but brand new.
This project also warrants a disclaimer: Priority Mail envelopes, whether new or used, are property of the United States Postal Service. They are intended solely for the use of the postal system and, contrary to logic, just because somebody paid to mail you a package in one doesn’t make it yours (or theirs). So repurposing the envelope in this way is probably a federal offense. Law abiding citizens should immediately navigate away from this page and return to their cells. The rest of us can move on.
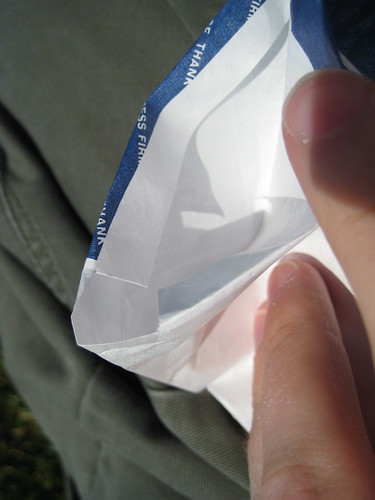
The first step in the process is to cut a little square in one corner of the open end of the envelope. No need to measure. Just eyeball whatever looks good. The height of the square will determine the size of the channel which we will sew and then pass the cord through (this one happened to be about 1.5mm).
If you are using a brand new envelope, you’ll want to cut the top bit with the sticky stuff off, so that both sides of the envelope are the same height. On a used envelope, you might have to do some trimming to achieve the same thing, depending on how you opened the envelope.
After the square is cut, fold down the rim of the envelope all the way around, using the height of the square to determine how much is folded. If you want, you can cut a slit in the other corner of the envelope to help fold it down. I did this on the first stuff sack. For this one, I chose not to. There’s a slight bit of bunching in that corner as a result, but it’s fine.
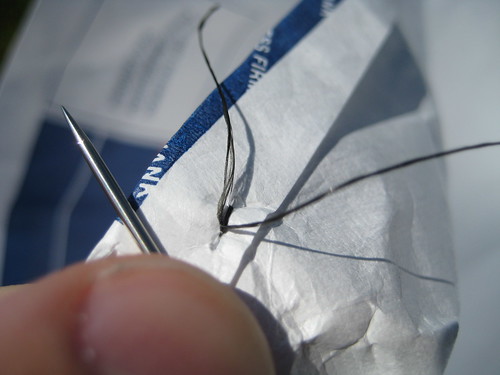
Now that you have the top flap folded down all along the top of the envelope, sew it shut. This creates a channel which we may then thread a bit of cord through, using it to cinch the sack shut.
I start my stitching on the inside of the envelope, poke the needle through, and pull all the thread through except for a tag of about 3”. Then I poke the needle back through in another hole, pull all the thread through back to the inside, and use the tag end of the thread to tie a square knot, thus securing my first stitch.
With the sewing done, now would be a good time for the camera battery to die. Curse a little, perhaps shed a tear, then decide that your audience is intelligent enough to struggle through the next steps without pictures.
For this stuff sack, I used ALSE survival vest cord, also known as accessory cord or Type I paracord. This stuff has a breaking strength of 100 lbs, is 1/16 of an inch in diameter, and tips the scale at 1oz per 50 feet. Pick it up at Supply Captain. You could use any cord you happen to have, including the standard (Type III) 550 paracord, but I don’t think the cord on this little stuff sack needs to have a breaking strength of 550lbs and Type III paracord is much, much heaver than Type I. We’re trying to go lightweight here.
Threading the cord through the channel can require a little perseverance. I usually tie a knot in one end, stick it in, and then use the knot to push the cord along with my fingers from the outside. If need be, you can shove a skinny stick or something in there to help it along.
When the cord comes out the other side, all that’s left is to cut it to length, slide the cordlock over both ends, tie some sort of knot so that the cordlock can’t be inadvertently slide off the cord, and you’re done!
The resulting stuff sack is durable, lightweight, and free (or close to it, depending on what materials you have in your craft box). Though you’re obviously not going to get a water-tight seal by cinching the sack closed, the Tyvek material itself is waterproof and will suffice to keep your gear organized and dry in any pack. If water crossings and momentary submersion is a concern, use a trash bag as a liner in your pack and you will be very well off for almost no cost in weight or money.
Lighter, stronger, more waterproof, and better constructed stuff sacks can of course be purchased, but for an exponentially higher price. I have nice stuff sacks for my sleeping bag and spare clothes, so, for the time being, this Tyvek stuff sack is used for my food.
Last weekend I decided to finally invest in a digital postal scale for the accurate weighing of gear. Prior to that, all I’ve had is a small kitchen scale that I use for weighing herbs. It was inaccurate (and not digital, so reading its inaccurate measure was always a trick that invariably introduced further inaccuracies) and weighed only up to 16 oz.
The scale I’ve replaced it with is an Ultraship #35 shipping scale. In addition to having a digital display, it’s also able to weigh in ounces, grams, pounds, and kilograms. It’s accurate to 0.1 oz, which is good enough to me. The #35 in the product name signifies that it can weigh up to 35 lbs (they also have #55 and #75 models). The display bit can actually separate from the scale bit, which is a nifty feature when weighing over-sized items. The scale only cost $25 (including shipping). I bought it on eBay from OldWillKnottScales.
I received the scale this morning. I’ve started a database of weights of individual pieces of gear using Google Docs, which I’ve published for anyone to view. I’ll add to the document as I weigh more gear.
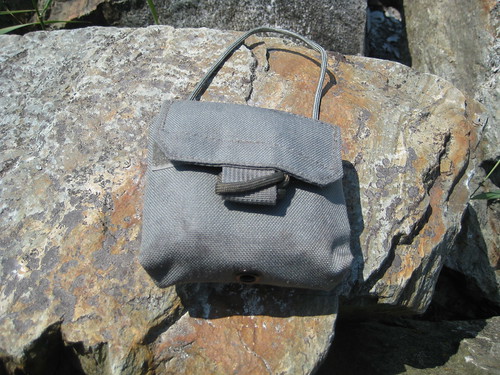
My possibles pouch began as being simply a Doug Ritter Pocket Survival Pak. The Survival Pak comes in a waterproof envelope that is meant to be carried in a pocket. I prefer a belt-mounted solution, so I ditched the waterproof envelope and moved the contents to a TAD Gear SERE SP pouch. The SERE pouch has velcro webbing on the back, which allows it to be mounted to be mounted to any sort of belt or PALS webbing.
When using the possibles pouch, I’m often traveling with my Kifaru ZXR. The ZXR is built upon Kifaru’s WrapTech Plus Suspension system, one of the primary components of which is the belt. The belt is a very thick, wide belt that is designed to work with the anatomy of the body and allow the user to comfortable carry obscenely heavy loads. The design of the ZXR’s belt makes it unpractical to have many pouches mounted to your own pants belt. Because of this, I didn’t want to actually mount the SERE pouch to my belt itself, but instead mount it so that it dropped down a bit below my waist, thus not interfering with the ZXR belt. To accomplish this, I simply tied a short loop of paracord through the pouch’s webbing. To mount the pouch, I pull the loop through the backside of my belt and run the pouch through the loop. This allows me to both don and doff the pouch without removing my belt.
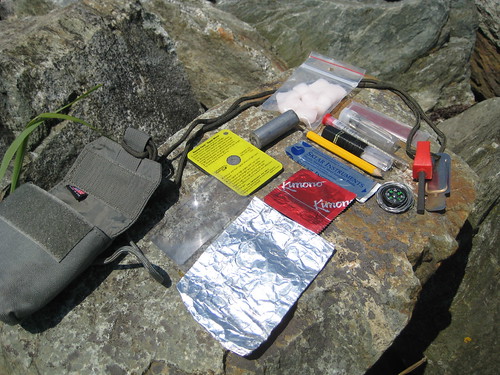
The contents of the pouch have changed since I first removed them from the waterproof envelope. The Doug Ritter Pocket Survival Pak still forms the base of the pouch, but I’ve added and removed other items to cut down on redundancy and better compliment the other gear that I carry. I also don’t intend the possibles pouch to be strictly a “survival” item. All of the pouch’s contents have utility in a survival situation, but some of them are not intended explicitly for that.
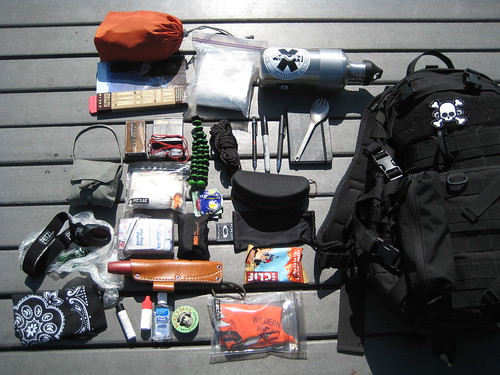
The contents are as follows:
Ferrocerium rod, striker and paracord
Duct tape (26" x 2")
Pencil
Aluminum Foil (3 sq. ft.)
Condom
2 match strikers
8 Coghlan's Emergency Tinder
Sterile stainless steel surgical blade
20mm compass
Stainless steel utility wire (6' of .020")
Signal mirror
Magnifying lens
4 large safety pins
Repair kit
Fishing kit
The components that remain from the Doug Ritter Pocket Survival Pak are the duct tape, pencil, safety pins, 20mm compass, stainless steel utility wire, sterile stainless steel surgical blade, magnifying lens, signal mirror, and aluminum foil. The other items I’ll cover here.
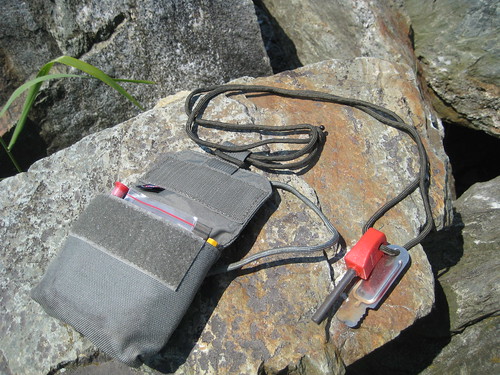
Ferrocerium rod, striker and paracord
This is a standard Light My Fire Scout firesteel and striker. It is not my primary firesteel, but a backup that I can be sure of always having securely attached. You might have noticed that the paracord that I use to secure the rod and striker to the pouch is rather long (about 3.5’). Paracord, of course, has hundreds of uses, so carrying a bit more of it than is strictly necessary isn’t always a bad idea. But the primary reason for the length of this particular piece of cord is that I can use it as a bow string on a fire-bow set.
Condom
This is just one standard latex condom. It can be used as a water carrier, a makeshift glove for a few fingers while taking care of a wound, a barrier to help stop the creation of a new species of half humans half wood nymphs, or utilized in the creation of emergency balloon animals.
Match Strikers
REI Storm Proof Matches always come with 2 spare strikers sealed within a piece of plastic. I find that so-called “strike anywhere” matches can be hit and miss, so by carrying this, I assure myself of always having a dry, reliable surface to strike any kind of match on.
Coghlan's Emergency Tinder
This stuff is not my favorite fire starting tinder, but it does work, and I have a bit of it kicking around, so I tossed it in. They’re stored within a small waterproof bag.
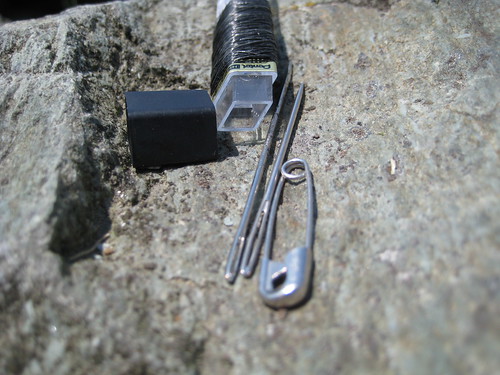
Repair Kit
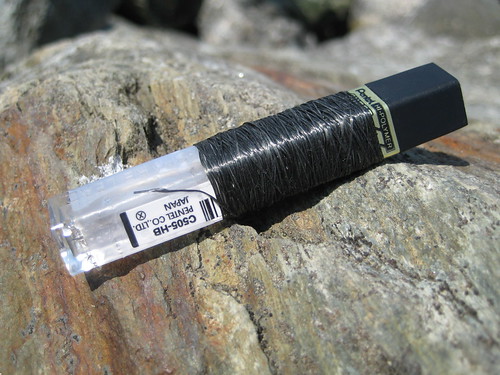
My repair kit, I think, is somewhat ingenious. I like it, at least. I previously carried a small leather pouch with an assortment of different needles, types of thread, and safety pins. The whole thing was far larger and heavier than I could ever justify it being, so I ditched it and started from scratch. I got the idea for this new kit from the BackpackingLight Forums.
The container is an old Pentel mechanical pencil led refill case. This is the perfect size to secure the two needles I’ve chosen to carry and the case itself is light enough to make me happy. (And it’s free.)
Around the outside of the case, I’ve wrapped a length of black Kevlar thread. When I built this kit, I just wrapped till I got bored, so I have no idea how much thread there is. Enough, I think, for any repairs that I am likely to encounter. I chose Kevlar thread as the best complement of weight and strength. Previously, I carried a bit of standard, thin sewing thread. The thinness of that thread is suitable for sewing things like clothing, but it is decidedly weak. Kevlar thread is the same thickness, not noticeably heavier, but much stronger. I also previously carried a bit of thick waxed nylon string that is appropriate for sewing things like thick leather, heavy cotton canvas, or thick nylon. This is very heavy by my standards and overkill for most repair jobs. Out of all the gear I carry, it would probably be appropriate for repairing only my Kifaru rucksack. And Kifaru rucksacks don’t fail. If by some strange happenstance it did fail, the Kevlar thread would probably be strong enough to get be back home or to some place where a more permanent repair could be made.
Inside the case I carry two needles. One that is thicker and stronger than most thin needles used for the hand-repair of clothing, but still small enough to qualify as small in my eye (just under 5mm in length and thin enough to not punch overly large holes in a thin cotton material). I believe this is the needle that comes with the Doug Ritter Survival Pak, but I could be wrong. The other needle is slightly longer (about 6mm) and has a slightly thicker head, making it more appropriate for heavier material. (I believe this one is technically a sail maker’s needle, but I could be wrong. I have a variety of different needles I’ve picked up over the years and lack the expertise to be able to identify their intended purpose.)
Also inside the case is a small safety pin. The purpose of this is actually just to take up more area inside the case so that the two needles don’t bounce around and make noise.
This repair kit, along with the 4 large safety pins also carried in the possibles pouch, makes for a very small and lightweight repair kit that is able to tackle any of the problems that I may encounter. In addition to this, I also carry a half dozen safety pins of a varying sizes and a couple spare buttons within the rucksack itself. The guts of paracord and the floss in my toiletry kit can also be appropriated as thread.
Fishing Kit
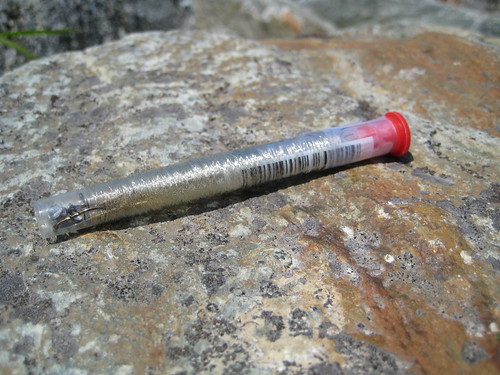
My fishing kit is actually a combination fishing kit and glasses repair kit. An odd combination, you say? I agree.
I am dependent on my glasses, so I have always carried a glasses repair kit. Such kits are available in any drug store in the country and usually consist of a small tube that contains a few of the small screws that most glasses use, a small screwdriver to match, and a couple spare rubber nose pieces.
A year and a half ago I purchased a new pair of glasses that happen to have plastic nose pieces integrated into the frames. Recently, I was going through the possibles pouch, rethinking each item, and came upon the glasses repair kit. I opened it up and was shocked – shocked, I tell you – to discover that it contained two of those small rubber nose piece replacements. With my new glasses, these were completely useless to me. I had been carrying around an extra 2 grams (or so) all this time! I disposed of the offending pieces and felt better immediately.
But then I looked at the tube and its contents and decided that it really was a waste of space. The tube was far too large for the spare screws and screwdriver that it now contained. I shrugged, moved on to looking at the rest of the contents of the possibles pouch, and then had a stroke of brilliance. I would turn the glasses repair kit into a fishing kit!
It follows on the same principle as the repair kit.
Around the outside of the tube, I wrapped a length of 4 lb monofilament fishing line (“ultragreen” in color). Again, I did not measure the length, but it is plenty for such an emergency kit.
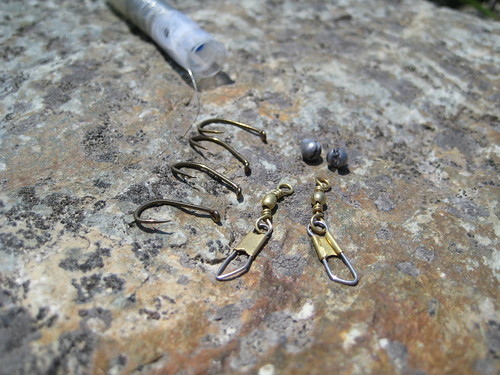
Inside the tube, I placed 4 small hooks, 2 split shot, and 2 snap swivels. This is clearly a very minimalist fishing kit, meant for emergencies only, not for when one intends to actually catch fish for a main form of sustenance, but I have used it. It does work.
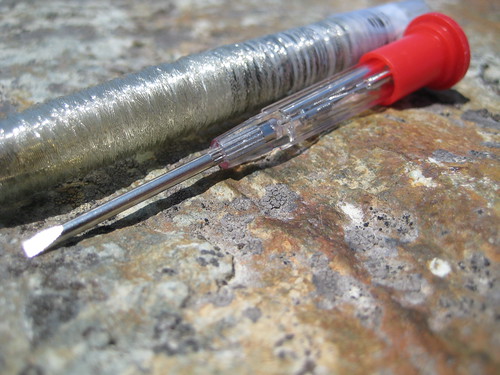
This particular glasses repair tube is well-suited for such a kit because the lid for the tube is the screwdriver itself. The top of the screwdriver can then be removed, exposing the inside of the hollow handle. It is in here that the spare screws are stored. This allows the glasses repair bit to be separate from the fishing bit.
It should also be noted that the fishing line wrapped around the outside can also be used as repair thread.
Last year, Backpacking Light published a review of the MSR Hyperflow filter. It was one of their subscription-only articles, so I never read it. Apparently, the reviewer attempting to filter only slightly-less-than-clear water and experienced a very quick build-up of material in the filter element that could not be removed by back-flushing and vastly deteriorated the flow-rate of the filter. Since the review, MSR has acknowledged the problem and released a new filter cartridge to address the problem.
I have had a MSR Hyperflow for a little under a year and have never experienced the clogging problem or the lack of effectiveness of back-flushing. I do tend to be judicial about selecting my water sources and filter the clearest water I can find, which may be why I have not experienced the reviewer’s problem. (In fact, I could probably get away without using any filtering on many of the water sources I choose, but I, like most, have been indoctrinated with the need to fear all wild water sources.)
What caught my eye in the second review was that MSR was offering free replacement filter cartridges to those who had filters manufactured prior to November, 2008. The cartridge is the most substantial component of the filter, and getting a new one is a bit like getting a whole new filter for free. This afternoon I called Cascade Designs (MSR’s parent company) at 1-800-531-9531, read them the serial number on my filter, and there is now a new filter cartridge in the mail for me! MSR customer service gets two thumbs up, even if there may be issues with the product.
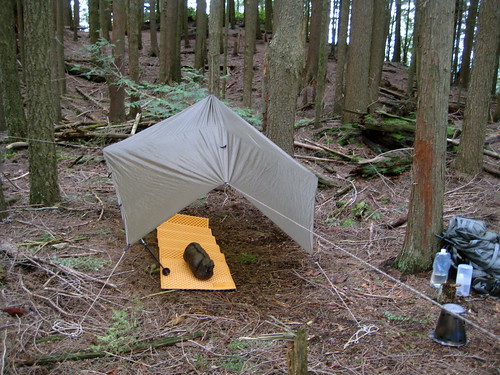
This past weekend I took a walk out to the Chuckanuts, visiting the same spot Avagdu, HatterOfMaddnesz, and I visited a couple months prior. The ice had disappeared from the lake by now. I opted to pitch my tarp up at the viewpoint above the lake, which had caught my fancy last time around. The sun was out and not a drop of rain fell from the sky for both days, making for a pleasant contrast with the last few trips I’ve taken. In the evening I could watch the sun set over the San Juan islands in the west, and the following morning watch the sun rise over Mt. Baker to the east.
I set my Kifaru Paratarp up in an elevated manner, opting to rig it to trees with paracord rather than using my trekking poles underneath. This makes for a huge amount of living space underneath.
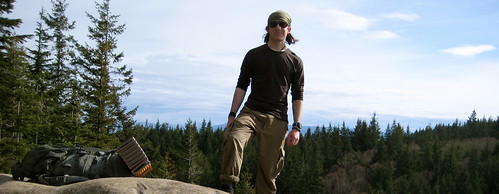
On the way out, I made a detour to Raptor Ridge, another nearby viewpoint that I had been unable to visit on the outing with Avagdu and Hatterz.
After fixing a small breakfast and soaking in the view, I finished the 12-ish mile hike home, munching on the odd Stinging Nettle leaf plucked from the side of the trail and pondering butterflies.