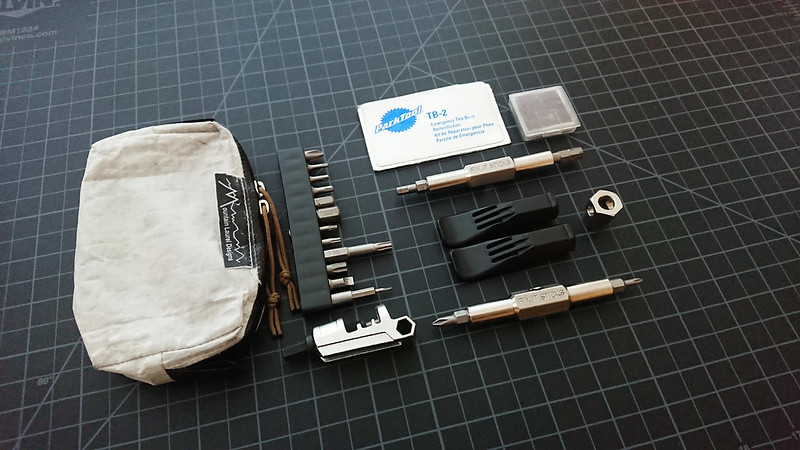
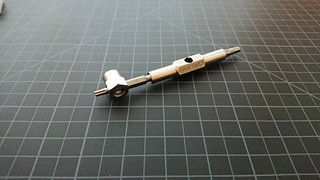
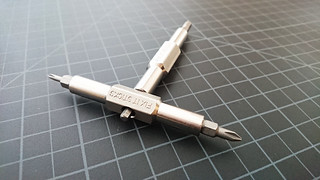
Fix It Sticks are 1/4” magnetic bit drivers, originally intended as bicycle repair tools. Each stick holds two bits, and can be used individually or connected together in a “T” when more torque is wanted.
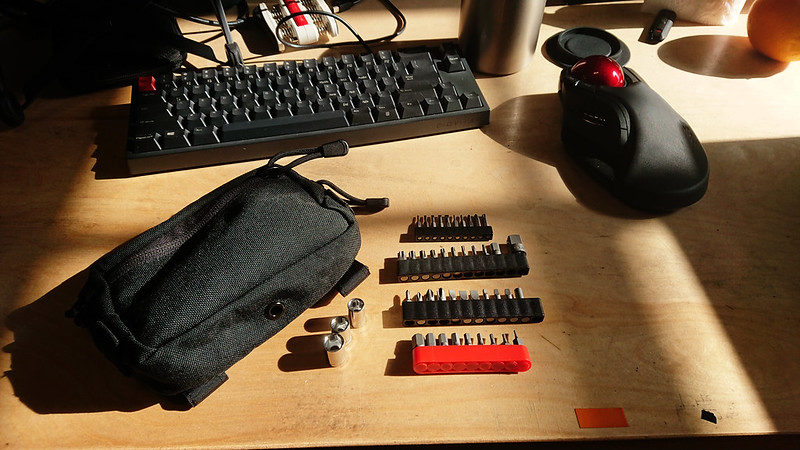
I backed the Fix It Sticks Kickstarter campaign back in 2014, selecting the $99 pledge level for the titanium Fix It Sticks reward. For the past 4 years, the titanium Fix It Sticks have been part of my EDC. I carry them with a selection a bits optimized for bike repair, as well as a few supplemental bits that are not intended for my vehicle, but are useful to have on hand for general screwing. Extra bits are carried in a Toolcool bit holder.
At home I have an excessive collection of 1/4” bits, including things like socket adapters, extensions, and the Fix It Sticks Glock kit. What’s most attractive about the bit and driver system to me is that these 80-some bits take up a miniscule fraction of the space that I would otherwise need for the tools. I keep a Wera Kraftofmr 816 RA driver at home for those times when I want something that ratchets, but the Fix It Sticks are what I pull out the vast majority of the time.
At work I keep some additional bits, along with a few other tools, in a GPP1. Some of these duplicate my EDC bits, but most of them are things that are not common enough to warrant carrying, but common enough that I like to have them around.
The bits I EDC are fairly standard. 4mm and 5mm hex bolts live in one stick. Those two attack the majority of bolts on my bike. A Phillips #0 and #1 live in the other stick. Those two are most useful for general screwing. In the bracket, I keep:
Phillips #2
Hex 2mm, 2.5mm, 3mm, 6mm, and 8mm
Security Torx 7, 10, 25, and 30
Slotted 5mm
1/4” to 4mm adapter, with a Slotted 1.5mm Micro
Carrying the “security” Torx instead of the standard Torx allows me to tamper with tamper-resistant electronics, which is a useful capability to have. They drive normal Torx bits screws just fine, which accounts for the majority of their use. The T25 is a longer (50mm) bit. I use this one as leverage when operating my Pitlocks.
The 1/4” to 4mm adapter allows me to run any 4mm micro bit in the Fix It Sticks. Part of the collection of bits in my GPP1 at work are micro bits that I use to attack electronics (at home I have the iFixit 64-bit Kit, which is a great hardware hacking kit for the price). A slotted 1.5mm bit is the right answer for most eyewear, which is why I carry that bit in the adapter every day.
On my scale, a single titanium stick without bits weighs in at 28 grams. Both sticks, with the 4 bits that I keep in them, tip the scale at 74 grams. When I add the bracket with 12 additional bits, the total weight is 148 grams. Adding the chain tool and two tire lever attachments to that, the whole kit is 228 grams, or 8 ounces. That’s pretty reasonable for all the capability those items offer.
Fix It Sticks only made a small number of the titanium sticks for the Kickstarter campaign. The sticks they sell today are steel. The weight of the steel Fix It Sticks Replaceable Edition is listed as 116 grams. I assume that weight is for both sticks and the 8 included bits. With my titanium sticks and the same 8 bits, I’m at 100 grams. So the titanium sticks shave off a little weight, but not really a notable amount – particularly considering that the titanium sticks were the reward for donations at 3x the cost of the steel sticks. I think my titanium sticks are perfect, and if offered I would purchase them again, but if they were lost I’d immediately replace them with the steel version with only a little heartbreak.
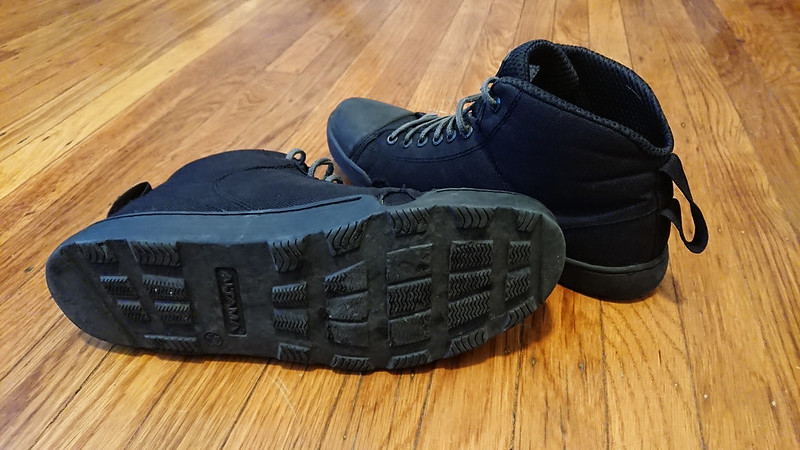
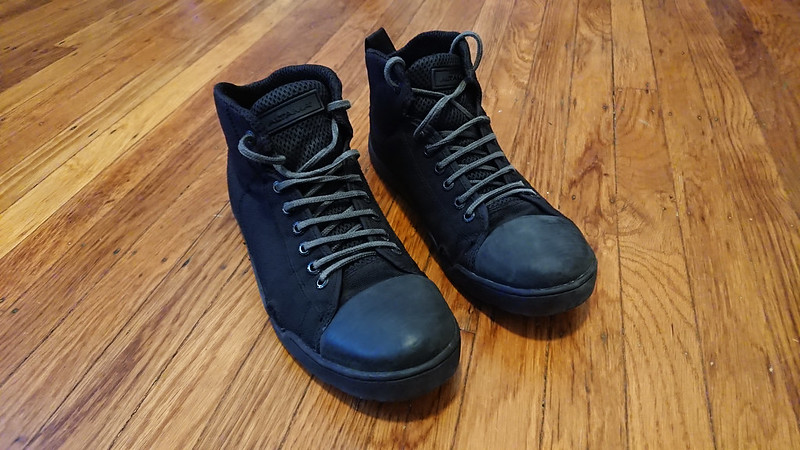
The Altama OTB Maritime Assault Boots are a great pair of everyday footwear. Modeled off of Chuck Taylors, they’re a fairly simple concept: a 1000D Cordura upper, large rubber toe cap, and low-profile outsole with minimal lugs.
The boots provide excellent grip on wet and dry concrete. Altama claims to use some sort of special sticky rubber, though it feels like typical shoe rubber to me. It is not noticeably sticky, like Five Ten’s rubber. The lug pattern is not ideal for dirt and mud, but for an everyday urban shoe I have no complaints. After 6 months, my boots shoe a reasonable amount of wear.
I bought them in a size US 10 / EUR 43, which fit me perfect. In most brands I alternate between a US 9.5 or 10, which usually translates to a fairly consistent EUR 42. They tip my scale at 29.3 oz (832 grams) for the pair.
The laces that come with the boots are ridiculously long. Unless you tuck them into the boot, they’ll catch on things. They constitute a hazard on the bike. I replaced them with Lawson Toughlaces, laced in a double helix and tied in a bowknot. Lawson’s laces are just heavy pieces of Technora with metal aglets on the end. Abrasian resistant, fire resistant to 932 degrees Fahrenheit, and with a breaking strength in excess of 1,000 lbs – you can saw through restraints all day with the Toughlaces and they will still probably last until the heat death of the universe. I have them cut to 58” for these boots.
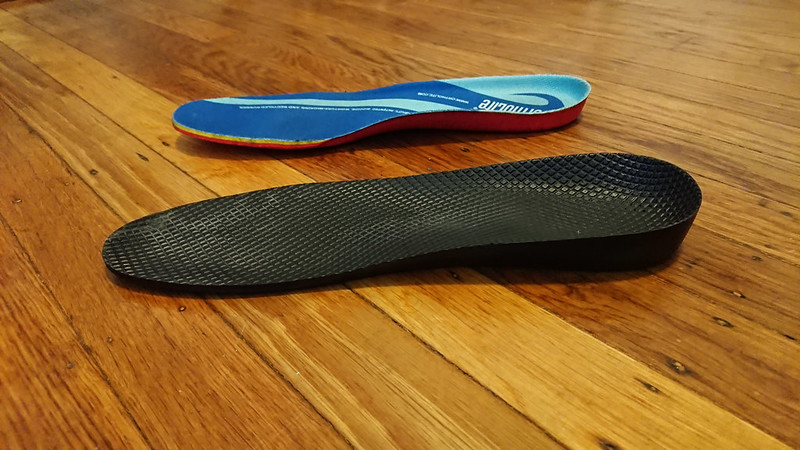
Altama ships the boots with removable polyurethane insoles. This material makes sense for the intended water application of the boot, but I worried that they would be hot and uncomfortable for my more pedestrian use. So far I’ve not found that to be the case, but I’ve only had the boots since the end of September, so I can’t comment on their comfort in hot weather.
Neither the insole nor the boots themselves have any arch support, but they are not zero drop. There’s a heel to toe differential that feels like it is probably in the 6mm-8mm range. All of this lift, however, comes from the insole. After replacing the laces, my second modification was to purchase a pair of Ortholite Fusion Insoles. These are completely flat. The size 10 insole fit perfectly in my boots without any trimming, transforming them into zero-drop footwear. Unfortunately, the boots really want a slightly higher volume insole. With the Ortholites installed, I get a small amount of heel slippage that cannot be addressed by lacing. This is not an issue for my typical everyday wear, but would become problematic if hiking.
I still find myself switching between the stock polyurethane insoles and the Ortholites, but I lean toward the Ortholite being a more comfortable choice. It’s worth experimenting with them if you find high heels uncomfortable.
Discovery Trekking‘s Extreme Ultralight Travel Towels are the best quick-drying, packable towels I’ve found. Typical microfiber towels are scratchy and quick to stink. The Extreme Ultralight Travel Towel forgoes microfiber for Polartec Power Dry with a Polygiene treatment. They are soft, pleasant to use, and resistant to funk.
It’s use may be somewhat unintuitive for those who cut their teeth on traditional towels. Rather than the typical rubbing action, the Extreme Ultralight Travel Towels work best when you pat yourself down.
I bought my first of their towels in 2015. I go to the boxing gym in the morning and shower before work, so I’ve used that single towel multiple times per week for the past 3 years. It has no smell. In fact it is indistinguishable from the new towel I just bought last week.
I prefer the towels in size medium, which measure 28” by 34”. It’s the right size to dry off my whole body, though if I had long hair I may opt for the larger size. The only shortcoming of the towel is that it has no loop to hang it from, but this is easily remedied with a piece of paracord and some thread. On my scale, the size medium (with paracord hanging loop added) weighs 3.4 oz (98 grams).
I own the towels in charcoal and olive brown. The olive brown color is similar to that shown on Discovery Trekking’s website, but is what the rest of the world would call coyote brown. The charcoal color is nothing like what they show on their site. In their images it appears black, but in reality it is a grayish green, similar to foliage green, but slightly darker. I like it.
Normally I would not care about the color of a towel, but I note the colors here because the fabric is comfortable enough that I actually use the towel as a scarf – something which I cannot say about any microfiber towel. It provides warmth in cooler weather, and sun protection in hot weather. The Power Dry fabric is rated at UPF 15. This dual use makes it easy to justify the towel’s miniscule weight and volume in a pack, ensuring you always know where your towel is.
Any man who can hitch the length and breadth of the galaxy, rough it, slum it, struggle against terrible odds, win through, and still know where his towel is, is clearly a man to be reckoned with.
I began carrying an N95 respirator in my bag every day around 2007. The masks can be easily added to any first aid kit without much of a weight or size penalty, and offer respiratory protection far superior to that of a bandanna or a surgical mask. While useful during an influenza pandemic, my motivation for carrying the mask was centered more around urban disaster. Any time there are buildings coming down, I assume there will be asbestos, concrete dust, and similar contaminants in the air that I don’t in my lungs.
Most discussion of the extended use and reuse of respirators centers around contagions and the influenza use-case. While it seems safe enough to assume that the masks have an unlimited functional shelf life if stored properly, I’ve not found any information related to visual inspection of the masks for proper use. My own respirators get cycled every two or three years, but there is still a lot of room for abrasion in the pack, which I assume diminishes the protection the masks offer.
I had not thought much about this until last year. The respirator was something I carried but didn’t use. After a decade of carry, my first time actually needing to take the respirator out of my pack was this past October during the Napa and Sonoma fires.
After using the masks I had on hand during the fires (and unsuccessfully attempting to barter my surplus for chocolate), I began to better store the replacement batch for next time.
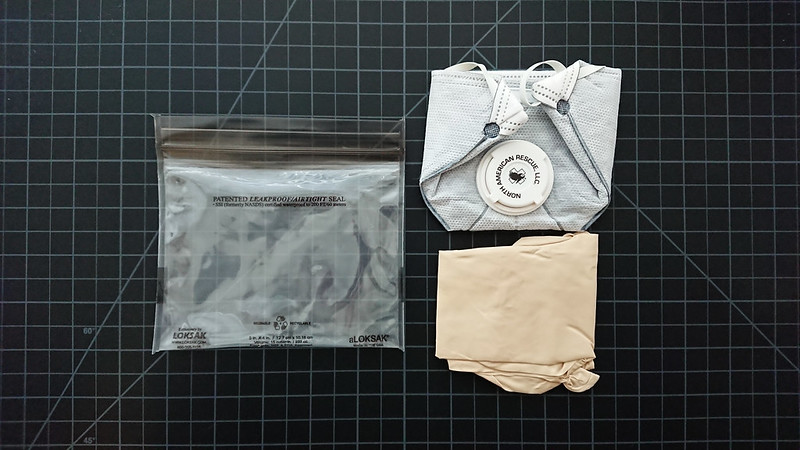
By keeping the respirator in a 5” x 4” aLOKSAK I’m ensured that no damage is done to during storage. The airtight seal offered by the bag means that the inside of the mask stays clean, at least until the first time I take it out in a contaminated setting. By added a pair of nitrile gloves to the bag, I create a compact, wallet-sized PPE kit. The same thing can be purchased, but all the prebuilt kits I’ve seen are too bulky for me to want to carry. My PPE kits can easily be slid in with the medical supplies in various my first aid and disaster kits. Pair that with EDC eye protection and you have a decently comprehensive solution.
The only appreciable thickness comes from the vent on the respirator, but I’ve found that vented respirators are key. A properly fitted respirator without a vent hampers my ability to perform physically, which isn’t a great trade-off in any situation where I find myself needing to wear a respirator.
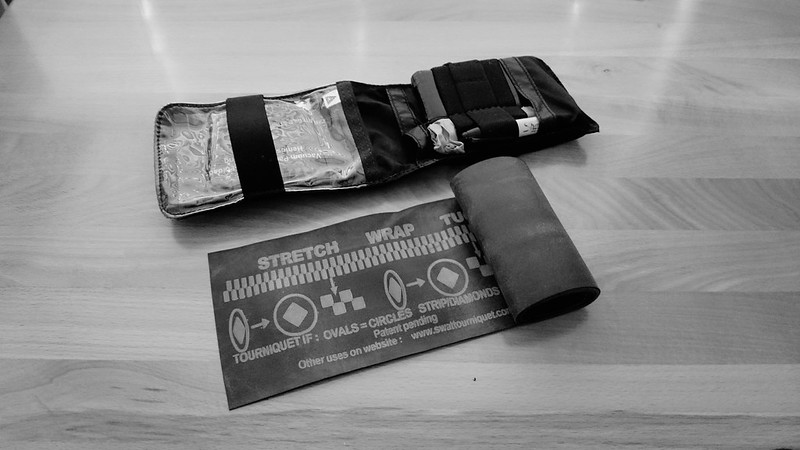
My dislike of the SWAT Tourniquet stems from its difficulty to self-apply one-handed. That eliminated it from the running when evaluating pocket tourniquets, but the PHLster Flatpack has made that category of tool less relevant. Now that I can easily and comfortably carry a primary tourniquet (specifically, a SOFTT-W) on-body, I’ve rethought what I should be carrying in my pack.
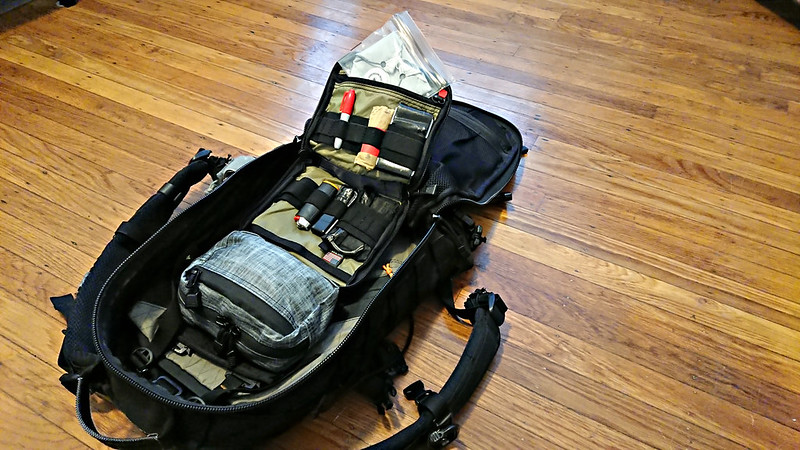
In the past I’ve carried a SOFTT-W as part of a small blow-out kit. The kit is in a Triple Seven Gear Micro Kit pouch, which fits easily into whatever pack I’m using. If I’m already carrying a SOFTT-W on my belt, is carrying a second one the best use of the available weight and space? The SWAT tourniquet does have a few things going for it. It works well as a tourniquet, as long as you have two hands to apply it. The width of the SWAT-T allows it to occlude blood flow at a relatively low pressure, and its elasticity can help it to compensate for muscle relaxation. It can function as part of a pressure dressing, or be used to improve an improvised splint, swathe, or sling. And it burns well.
I decided to replace the SOFTT-W in my blow-out kit with a SWAT-T. With a SOFTT-W in the PHLster Flatpack on my belt, I’m confident in my ability to quickly administer self-aid. Having the SWAT-T in my bag gives me additional options, whether I need to use it as a second tourniquet or as something else.
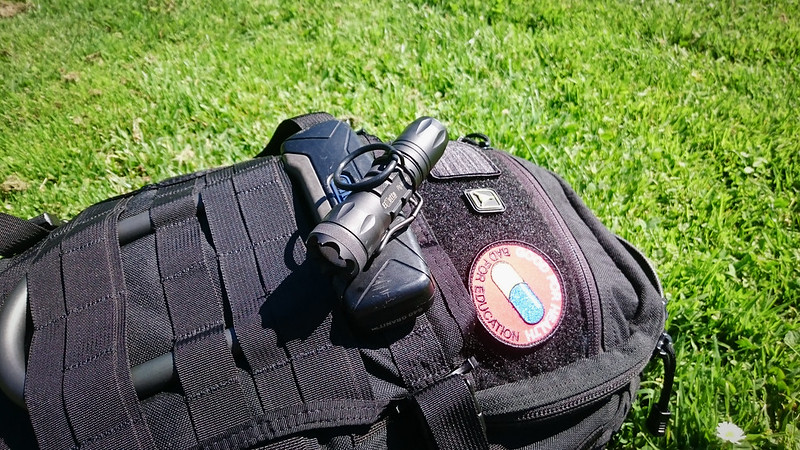
The Elzetta Alpha A323 has been part of my EDC for 2 years now. For all but a few weeks of that time I’ve been carrying it on my belt with a Prometheus Lights Titanium Pocket Clip, which works great on the Alpha. I changed over to the Raven Concealment Systems Pocket Clip to get the finger ring, which is just a large rubber O-ring that allows you to use your hands for something else without dropping the light.
I’ve used a pair of Rudy Project Rydon Stealth glasses as sun and safety glasses for about five years now. They’re a great eye protection system for active wear, and I think are especially attractive for those who require prescription eyewear. The Rydon offers an adaptable system with interchangeable lenses and full coverage, in a lower profile compared to popular tactical eyewear systems like the Revision Sawfly, Oakley M Frame or ESS ICE.
The temples and nosepads of the Rydon are made from an pliable rubber material that lets the user adjust them however they want. You can have straight temples or hook them down behind your ears. You can move the nosepads to get the right height and clearance on your face. I find that both adjustments largely stay in place after being set. If they do move, it is simple to reset them.
Safety & Durability
The only difference between Rudy’s “Stealth” and non-“Stealth” line is the ANSI Z87.1 rating applied to the frame. Z87.1 is the standard for eyewear protection that will be familiar to anyone who has worn safety glasses or so-called “tactical” eyewear. It describes, among other things, impact resistance. The Rydon lenses are interchangeable between Stealth and non-Stealth variants, and certain lens selections have their own Z87.1 ratings. The Stealth frames are made from a different material than non-Stealth. The non-Stealth Rydons fail to meet Z87.1 standards due to how they shatter1.
Unfortunately, Rudy has not certified the Rydon for MIL-PRF-32432, the military specification for ballistic eyewear.
As you might expect, the Rydon have proven to be very durable. I’ve used them regularly over the past five years. I shoot in them, I crash bikes in them, and I’ve been punched in the face more times than I can count in them. They’re none the worse for wear. Certain lenses have minor scratches, but none that I notice when I’m actually wearing them. The frames themselves are like new. The rubber material does not absorb sweat and odors, which is a complaint I’ve heard of Oakley’s “unobtainium” rubber temples.
ImpactX
Rudy is well known for their ImpactX lenses. They describe it as being a “bullet-proof, transparent, and light-weight material capable of providing superior protection, reliability and longer lasting performance than polycarbonate”. It is what Apache windshield panels are made out of, which makes me feel good about myself2.
ImpactX is actually just Rudy-branded NXT. NXT is a variant of Trivex. I’m not sure what the difference is between NXT and Trivex. It may be that NXT is just a specific branding of Trivex. I do know that the Z87.1 impact protection that NXT/ImpactX claims is a property of the Trivex. Trivex gives equal protection.
Trivex is a polymer that was introduced as an alternative to polycarbonate. Traditionally, most safety glasses are made out of polycarbonate. When you get a prescription insert from Revision or ESS and have them fill the prescription, the lenses they’re putting in are polycarbonate. “Plutonite” is Oakley’s proprietary brand of polycarbonate. Trivex offers equal impact protection, but has a lower Abbe number than polycarbonate, which translates to superior optical quality.
Trivex is slightly more expensive (polycarbonate costs ~$40, Trivex ~$50). Trivex also has a slightly lower refractive index, which translates to Trivex prescription lenses being slightly thicker than polycarbonate. But Trivex has a lower specific gravity, so the Trivex lenses will be slightly lighter than the equivalent polycarbonate, despite the added thickness.
There’s nothing rare or special about Trivex. Everyone does it. You can bring any set of frames into any optometry office and tell them you want to put Trivex lenses in it. As long as your prescription fits the frame, they can do it. The resulting lenses will meet or exceed Z87.1, even though your optometrist likely isn’t going to get them certified for the Z87.1 stamp.
Photochromic
The ImpactX lenses, in addition to offering impact protection, are also photochromic. Photochromic lenses darken when exposed to ultraviolet radiation. Having a clear lens in a pair of safety glasses is critical for indoor work, and being able to use the same lenses as sunglasses outdoors keeps the overall price down. It is also helpful for transitions. If you start out in the sun and then go inside, or the clouds roll in or the sun sets, your optics quickly respond without you needing to take time to remove the glasses or swap lenses.
When I first purchased the Rydon system, one of the lenses I included was the ImpactX photochromic clear-to-black. This is a neutral lens that offered 18-78% light transmission. A few months ago, I purchased Rudy’s ImpactX-2 photochromic clear-to-black lenses. These offer 9-74% light transmission. In addition to the change in light transmission, ImpactX-2 also reacts faster and is supposed to respond slightly better to non-UV light3.
Other Lenses
While the ImpactX lenses are the only offerings from Rudy with the Z87.1 stamp, the company does offer some other lens options.
Rudy’s Polar 3FX is their polarized lens solution. Polarized lenses reduce glare, which is useful on water and snow. I have a pair of Polar 3FX brown lenses. At 15% light transmission, these offer about the same protection as my old Julbo Micropore glacier glasses. They’re a great supplement to the ImpactX photochromic lenses, and are light enough that I am happy to carry them as a secondary option on backpacking trips for use above the tree line.
The third lens I went with is what Rudy calls Racing Red. These are a high contrast red lens with 28% light transmission. A contrast lens in something like red or yellow is a great option for hazy days when it isn’t bright out and you don’t want much light reduction, but you find yourself squinting from the glare4.
Of the three lenses (or four, since I now have two of the photochromic clear-to-black lenses), I use the Racing Red least of all. They’re great in certain conditions, but the ImpactX(-2) lenses work well in all conditions, so I find that I can just leave them in the frame all the time and never think about it. Plus, Z87.1.
Prescription
Rudy has a few options for people who need prescription lenses. The option that I’ve gone for is the Optical Insert. I used a similar setup back in the day with Revision Sawfly eyewear and their insert, but I think Rudy does it better. While this kind of dual lens system does result in a slight degradation of optical quality, it means that you only pay for the prescription once. Being able to purchase multiple non-prescription lenses that sit in front of the prescription lens is the only thing that makes this kind of multi-lens system tenable.
Rudy offers two different carrier styles: a full metal frame and a “rimless” option.
When I first purchased the Rydon system I went with the full metal frame. It has served well over the years. Like the Rydon frame, it still functions like new. Occasionally a punch in the face will cause the insert to be knocked out of the Rydon, but that hasn’t caused any damage to the carrier, and it only takes a second to pop it back in.
This past spring, when I bought the new ImpactX-2 lenses, I also wanted to purchase another carrier to have my new prescription put in it. This time around I tried the “rimless” model. The “rimless” carrier is not actually rimless: the lenses are held in place by a thin wire that goes around the circumference of each lens. This can result in a thicker lens. With a rimless carrier, the lens need a groove cut into it to accept the wire. Prescription lenses are thinnest on the inside (near the nose) and thickest on the outside. If your prescription is weak enough that the outside of the lens is not already thick enough for the groove to be cut, the thickness will need to be increased.
I’ve not found that the lenses in my rimless carrier appear any thicker than the ones in my old carrier, but that’s something that you may want to keep in mind when deciding between the two carrier options.
When you’ve received the carrier, you can take it to any optometrist to have your prescription lenses filled. Finding an optometrist who has some experience with this kind of setup – whether they are actually a Rudy dealer or offer some other sport brand with an insert system – will like behoove you. With my first pair, I used a Rudy dealer. The optometrist that I used when filling the new carriers this year was not a Rudy dealer, nor had they ever dealt with something like this before. However, they actually grind their lenses in house, which is something I’ve never seen before. When placing the order I was able to talk with the lab manager who would actually be making the lenses, which gave me confidence that I wouldn’t be wasting my money5.
For the prescription lenses, I went with polycarbonate. With a dual lens system like this, both weight and thickness are a concern. While Trivex would have been lighter, we decided that the thinner polycarbonate would be better suited for my prescription. The polycarbonate prescription lenses would be behind the Rydon’s ImpactX(/NXT/Trivex) lenses, so I don’t have much concern about the lower impact resistance.
This time around I went with an anti-fog coating, which I did not have previously. While it was rarely ever an issue, I did occasionally experience fogging with the old lenses. It usually happens when walking into a sweaty gym when it is cold and dry outside. It’s not really the time of year for me to be able to evaluate if the anti-fog coating is doing anything on the new lenses.
I think an anti-glare coating on the prescription lens is unnecessary. The tinted Rydon lenses should take care of that problem whenever necessary.
I did also go with an edge polish on the new prescription lenses. Previously I opted to forgo that option with the old metal carriers, but with the rimless carrier I thought that it would help maintain a lower profile look – both from the outside looking in and the inside looking out. I think it was a smart decision.
Notes
↵ Personally, I think that wearing sunglasses which are not Z87.1 rated is stupid and a waste of money, outside of certain specialty requirements. Eyes are important. You can't fight what you can't see, unless you are a time travelling samurai.
↵ When you get down to it, why wouldn't you protect your eyeballs with the same technology used in gunships?
↵ Traditionally, one of the shortcomings of photochromic lenses is that they don't work well in cars. Windshields filter UV light. ImpactX-2 is supposed to handle that a little better. I can't comment on that -- I spend very little time in cars.
↵ I also believe that having a contrast lens that you can wear when it isn't necessarily bright enough for normal sunglasses is useful to combat color-based advertising intended to condition us to better suit our extraterrestrial overlords.
↵ With most optometrists you end up dealing with the people who sell lenses. Talking to someone who actually makes the things lets you dip into a different knowledge base.
It’s the first solution I’ve found that allows me to carry a SOFTT-W on-body, comfortably and unobtrusively. The Flatpack prevents the need to resort to a secondary tourniquet for first line carry, which makes it a valuable supplement to any EDC. BFE Labs offers an overview of the product in their first look.