You are currently viewing all posts tagged with gear.

Sleeping with Silk

While in Yellowstone earlier this month I ripped my Cocoon Silk Mummy Liner. I had originally purchased this in 2005, in an attempt to eek out a little more warmth from the sleeping bag I had at the time (a Snugpak Special Forces 1 purchased from TAD Gear). The claim was that a silk liner would add around 10 degrees Fahrenheit to the sleeping bag rating. My experience was that it may have contributed 10 degrees to the survivability, but closer to 5 degrees to the comfort. Still, I continued to augment my sleeping bags with that same liner for the subsequent 14 years.

I find the primary benefit of a liner is cleanliness. Sleep systems get dirty – dirt, oil, sunblock, etc. all get transferred from your skin to whatever you’re crawling into. It is much easier to clean all of that out of a liner than the sleeping bag itself. A sleeping bag worth purchasing is an expensive investment, and I think liners can help extend the life of that investment. I’ve also carried my liner by itself when travelling internationally. It functions well when the guest house doesn’t provide sheets, or when their cleanliness is questionable (silk resists bed bugs and dust mites), or for a little warmth during unexpected stealth camps.

A liner may be purchased in a number of different materials, but the characteristics of silk make it the only material that interests me. It is easily packable, thanks to its low weight and ability to be compressed. It is breathable, quick drying, and comfortable against the skin. This last property is particularly important in a liner. I find synthetic materials like polyester and microfiber can be scratchy or grabby, which is unpleasant in bedding – especially in subfreezing temperatures when there is no moisture in the air.

So when the Cocoon liner ripped, I knew I would immediately replace it with another silk liner. I would have been happy with an identical replacement from Cocoon, but I decided to look around and see if there was anything new worth considering. I settled upon the Sea to Summit Premium Silk Travel Mummy Liner.

Sea to Summit makes their liner out of a ripstop silk, unlike my original Cocoon liner (though Cocoon does now offer a ripstop variant). It uses a thin shock cord and cord lock to cinch the hood, where my Cocoon liner offered a simple silk drawstring that was annoying to use (causing me to never cinch down the hood). But what I found most intriguing about the Sea to Summit offering is that it featured stretch Lycra panels down each side of the liner. If you move around at night, liners have a tendency to get somewhat twisted up. The silk itself has little stretch. The combination of these two characteristics is what led my liner to finally rip. The rip occurred along one of the side seams while I was turning in my sleep. I think that the Lycra panels on the Sea to Summit liner will reduce the likelihood of this happening again.

My initial impressions of the Sea to Summit liner have been positive. The silk is comfortable, though not as soft as the Cocoon liner. This may partially be due to the 14 years of wear placed on the Cocoon silk, but I suspect the presence of the ripstop grid on the Sea to Summit silk is a more significant factor. The dimensions of the two are pretty much the same. The Sea to Summit footbox and hood are both a little smaller than the Cocoon, but I don’t think this contributes to any practical difference. I’ve tried sleeping in the Sea to Summit liner and so far the stretch Lycra panels do seem effective at reducing the twisting and binding that I’ve come to expect from my silk liner. I purchased the new liner in the eucalyptus green color, which is acceptable, but I much prefer the greenish brown of the old Cocoon. The Sea to Summit liner weighs 142 grams (5 oz). This is slightly more than the 114 grams (4 oz) of the Cocoon, but close enough for me not to care. These weights are for the liners only. Both liners come with small mesh storage bags, which I never use.

If you have a Snow Peak Trek Titanium Bowl, consider augmenting it with a lid from Four Dog Stove.

The lid costs about as much as the bowl – maybe more if you acquired the bowl on sale – but it is a well made tool that turns my favorite bowl into an eminently practical pot that is equally useful at home or in the backcountry. Throw in a pot lifter, a cozy and there’s nothing you can’t accomplish.

Snow Peak Bowl and Lid

The bowl has a capacity of about 600 milliliters. My bowl and lid weigh in at a combined 82 grams (2.9 oz).

I consider the hacksaw marks on my lock to be a seal of approval.

I first noticed the marks a couple of years ago. I don’t know when they first appeared. They’re asymmetric, so I assume they’re from a hacksaw rather than bolt cutters. This real world, unsolicited testing makes me feel good about my choice of the ABUS GRANIT Plus 640.

ABUS GRANIT Plus 640

Elzetta Thoughts

I purchased an Elzetta ZFL-M60-CS2D flashlight in 2013. Elzetta updated their product line later that year, replacing the Malkoff M60 LED unit with their new AVS heads and creating a new naming convention for their products. In this new line, I believe my ZFL-M60-CS2D is equivalent to the Bravo B313 model.

In 2014 Elzetta released the single cell Alpha model, which offered the same build quality as the larger 2-cell in a more pocket friendly size. I was quick to purchase the Alpha A323, and for the past 5 years it has remained a fairly constant part of my EDC.

  • Elzetta Lights
  • Elzetta Lights

There’s plenty of reviews out there focusing on the technical aspects of Elzetta lights – runtime, candela, lumens, etc. I’m not qualified to discuss those aspects, nor do I find them terribly interesting. I’ll just say that I’m happy with the operation of both my lights.

The modularity of the lights requires the user to make some decisions prior to purchasing. I’ve remained happy with the choices I made when ordering the Alpha.

Bezel

I bought the Alpha with the crenellated bezel ring. Elzetta’s crenellations aren’t sharp and pointy, but they do have deep grooves. They’re intended to be used in a twisting motion, thus tearing flesh rather than just puncturing it. I’ve never been convinced one way or the other as to the efficacy of bezel crenellations on flashlights, but I lean in their favor simply because the downside of having them seems limited.

The primary downside the crenellated bezel does have is that it makes some people nervous. I’ve flown domestically with the Alpha in my carry-on baggage plenty of times over the years and it has never been given any attention. But I know that there is the potential for the bezel to make some poor TSA agent nervous, and that possibility in turn makes me nervous. I haven’t traveled internationally with the Elzetta due to this concern.

The modular nature of Elzetta lights solves this problem. Recently I purchased the standard bezel ring. When I fly I now install the harmless looking standard bezel and keep the crenellated bezel separate in my bag. After going through security the bezels can be quickly swapped and I’m back to normal. If the crenellated bezel ring by itself scares someone and is stolen, I’m only out $15.

Lens

I bought the Alpha with the flood lens. The standard lens is more appropriate for long distance, or concentrating a beam of photons in the optical nerve of a ne’er-do-well. But the flood lens is a better solution for my typical flashlight use. I most often use my everyday carry light indoors – lighting up dark rooms, or dark nooks and crannies. Both applications are best solved by the wide, even dispersion of light provided by the flood lens. At these closer ranges – say within 20 feet – the flood lens is definitely bright enough to get a reaction out of anybody it is aimed at. I’m comfortable using it defensively.

I included the standard lens in my recent purchase of the standard bezel ring and forced myself to use it for a while. It confirmed my suspicions about the best lens for me, and I was quick to move back to the flood lens. The modular design once again proves its worth by allowing me to easily switch between the two lenses.

Elzetta Lenses

Tailcap

I bought the Alpha with the high-low tailcap. This is the same interface as on my original ZFL-M60, and I wish it was available on all flashlights. I place a high value on the ability to rapidly turn a light on and off, without that action causing the light to cycle through modes. The high-low tailcap allows me to press the button as much as I want at whatever speed I want. There is no click when pressing the tailcap for momentary on. Applying more pressure results in a near silent click and constant on. The difference between the pressure required for momentary and constant on is great enough that I’ve never accidentally turned the light to constant on when trying for momentary on. A slight counter-clockwise twist in the tailcap switches the light from 415 lumens to 15 lumens. This low output mode is great for close and detailed work in a dark environment (especially with the flood lens) where high output causes too much splash to be comfortable.

Clip

There are a number of pocket clips compatible with Elzetta lights. Elzetta offers their own Speed Clip, which features the typical hallmarks of Elzetta design: simple, eminently functional, and butt-ugly. I keep the Speed Clip on my ZFL-M60, but I think there are better options for carrying the Alpha.

For the first two years I carried the Alpha on my belt with the Prometheus Lights Titanium Pocket Clip. This clip is cool because it is titanium, and everything titanium is cool. Functionally, it works fine, but there’s nothing special about it beyond the material.

Cash Drawer Opened with EDC Tools

Back in 2016 I switched to the Raven Concealment Systems Pocket Clip. This has remained my preferred solution. The clip itself works great. I’ve used it to carry the Alpha on my belt and in my pocket without any problem. The finger O-ring allows the light to be retained while using both hands for a different task – an ability which is particularly practical and should not be limited to the tactical light market. When not in use the finger O-ring lays flat and can be ignored. I’ve never had it snag or get in the way of anything.

Elzetta Alpha w/ RCS Pocket Clip

The Thyrm SwitchBack and Thyrm SwitchBack 2.0 both fit on Elzetta lights, but neither are compatible with the high-low tailcap. They prevent the tailcap from being screwed down all the way, which limits the light to only working in low output mode. I suspect both would work fine with the click tailcap, though possible only in momentary mode.

Durability

One of the factors that initially contributed to my purchasing the ZFL-M60 was Colion Noir’s review. In it he likened the light to a cockroach, joking that after a nuclear blast the only things left would be cockroaches and Elzetta lights. It doesn’t seem like too much of a stretch.

The durability of Elzetta lights has been established. The electronics are fully potted, making them waterproof. The body is made from 6061-T6 aluminum. The lens is solid acrylic.

People have abused Elzetta lights by throwing them out of helicopters, shooting them with buckshot, and using them to assault a defenseless coconut. My lack of a southern accent disqualifies me from attempting this type of abuse, but I have used mine as a hammer.

The downside of this durability is that the body design of these lights isn’t exactly svelte. The Alpha is on the fatter side of what I’m willing to keep in a pocket, but it is within the acceptable range. In it’s normal configuration, including battery and Raven pocket clip, my Alpha tips the scale at 110 grams (3.9 ounces).

Both of my Elzetta lights have scratches and small chips (from altercations with concrete), but both still function like new. I’m confident both will outlast me.

Mirrors on a bike are no different than mirrors on any other vehicle.

They aren’t a replacement for turning your head, but they can be a useful supplement for maintaining 360 degrees of awareness.

Drop Bar Mirrors

I purchased a pair of Sprintech Drop Bar Mirrors last spring. I had never used a bike mirror before, but I’ve grown fond of these over the past three months of use. The viewport is small, but adequate to identify vehicles of any size. I keep the mirrors canted outboard slightly, which means they move if I lean the bike up against a wall. Sometimes I’ll bump one when straddling the bike at a stop light. But they’re easy to move back into place, and I’ve never had them move on their own – rough roads aren’t enough to rattle them – so I don’t mind this. Having never used any other kind of bike (or helmet) mounted mirror, I can’t compare them against their competition, but I think the Swiss are on to something with these. I’d buy them again.

It should go without saying that I've sanitized my e-reader.

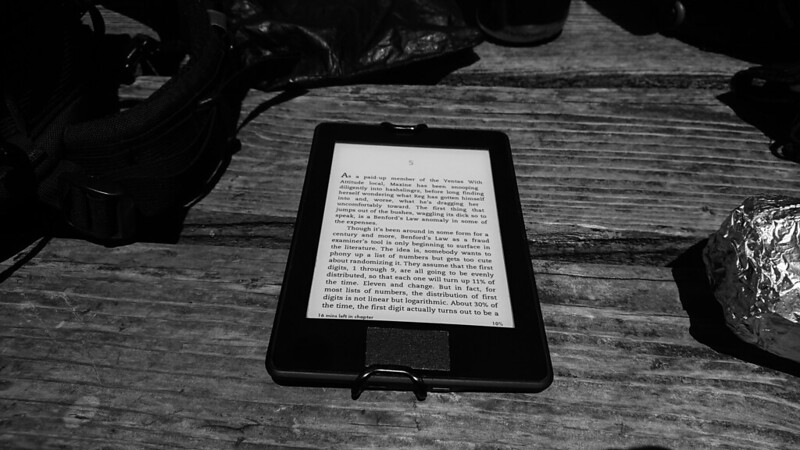
Trying to inject advertising into the reading experience is sick and sacrilegious. A privacy sticker from N-O-D-E covers the logo on the back of my Kindle, while a piece of tape sanitizes the front. Between this and my offline, DRM-free method of using the device, I enjoy the Kindle without the corporate mindshare.

Kindle at Lunch

Currently reading Bleeding Edge by Thomas Pynchon.

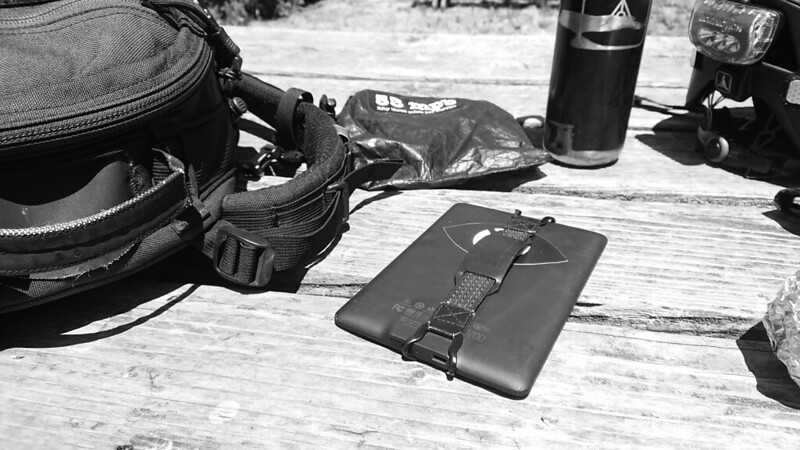
I've found a hand strap to be a useful addition to my e-reader.

I bought the TFY Security Hand Strap for my Kindle Paperwhite 18 months ago. It makes holding the e-reader for long periods of time much more pleasant – especially when reading in bed and holding the device up above my head. No pinch grip required. It doesn’t add noticeable bulk or weight to the Kindle, and I can ignore it completely when I’m not using it. Originally I went looking for some kind of case with a cover that could be folded into a more ergonomic shape to hold, but when this strap appeared in my search results I realized it was a simpler solution to the problem. The strap could probably be made with a wire hanger and some elastic webbing.

Kindle Handstrap at Lunch

Sawyer Squeeze

I’m a satisfied user of the Sawyer Squeeze. My first Sawyer water filter was the Mini Squeeze, which had a terrible flow rate that made it a piece of garbage. If I were buying a new filter today I’d look at the Micro Squeeze, which is supposed to combine the performance of the standard Squeeze with the size and weight of the Mini. For the time being, I am content with my standard Squeeze.

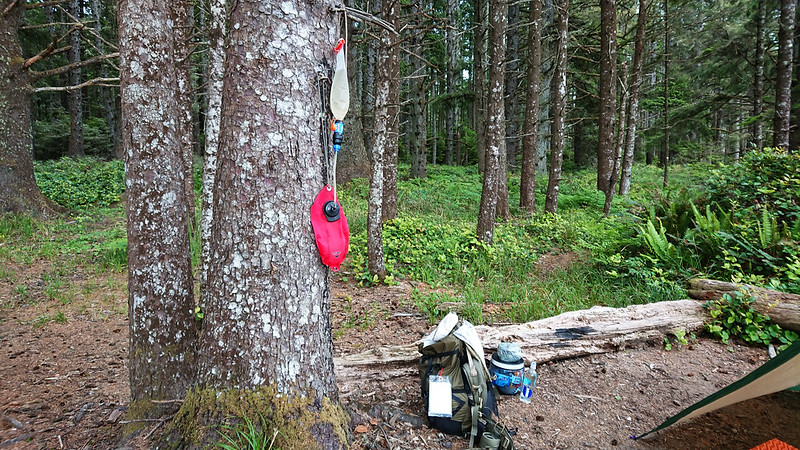
I use a CNOC Vecto 2L for a dirty bag. It’s heavier than the Sawyer pouches or a 2L Evernew Bottle, but I appreciate both the durability and the ease with which it can be filled. It makes it easy to collect water from small trickles through a rock face, and I feel comfortable throwing it around if I’ve climbed up some place to collect water and need both hands to get back down.

I prefer to carry clean water rather than sucking straight on the filter. My preferred drinking vessel for this system is a recycled Smartwater 23.7 oz bottle. The one with the sport lid. It holds an acceptable amount of water, is decently durable for the weight, has threads which are compatible with the Sawyer, and fits easily into a Hill People Gear 3” Bottle Holster.

If I don’t want to squeeze the water through, this setup can easily be suspended to make a gravity filtration system. I carry a Sawyer Cleaning Coupling to attach the bottle to the output of the filter. The bottle will fill in a couple minutes in this setup. Occasionally, when the bottle gets about half full, the flow of water will diminish due to pressure buildup in the bottle. Unscrewing the bottle slightly is enough to burp the excess air out of the bottle and allow the water to continue to flow.

CNOC, Sawyer Squeeze, Smartwater

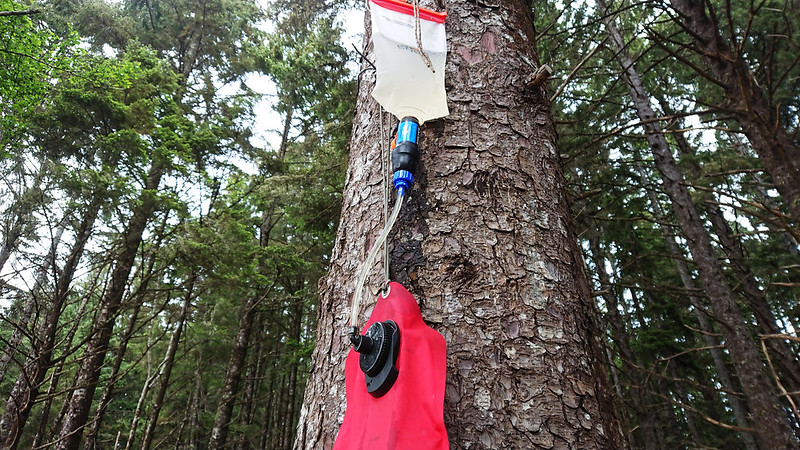
I always carry my vintage MSR 2L DromLite, primarily as storage for additional clean water. I’m unlikely to use it during the day, but having it allows me to camp away from a water source without any stress. With the DromLite, Smartwater bottle, and CNOC Vecto I can carry just under 3 liters of clean water and an additional 2 liters of dirty water. That’s plenty for drinking, washing, and cooking between water holes.

To integrate the DromLite into the Sawyer filter, I purchased a Sawyer Hydration In-Line Adapter and dug out an old MSR Hydration Kit that I had stopped using. I cut the MSR hose so that I was left with the piece that screws onto the DromLite lid and about 10” of hose. Then I jammed half of the Sawyer adapter into the open end of the hose. Now I have a small, lightweight accessory that I can pull out whenever I want to use the DromLite as part of a gravity system.

CNOC, Sawyer Squeeze, DromLite

The Squeeze does need to be backflushed every now and then. It comes with a syringe for this, but I never carry it.

The Smartwater bottle threads directly onto the input of the filter, allowing me to backflush with that, but doing so is pretty annoying. It’s hard to get enough pressure by squeezing the hard plastic bottle. However, I can also use the cleaning coupling and my hacked together MSR adapter to backflush via the DromLite, and that works great. I can push a full 2 liters at high pressure through the filter element. This takes minimal effort to accomplish (the hardest part is remembering to perform the backflush before you’re out of clean water), and keeps the filter running like new.

I still carry Aquamira chlorine dioxide on some trips. My decision is dependent on the type of trip and the expected water sources, but I find myself leaning towards the Sawyer Squeeze more often than not.

CNOC, Sawyer Squeeze, DromLite

The Squeeze runs about $35 to $41 depending on which package you go with. Given it’s versatility and the claimed unlimited life of the filter element, it’s pretty easy for me to justify that expense.