You are currently viewing all posts tagged with edc.

Pocket Tourniquets

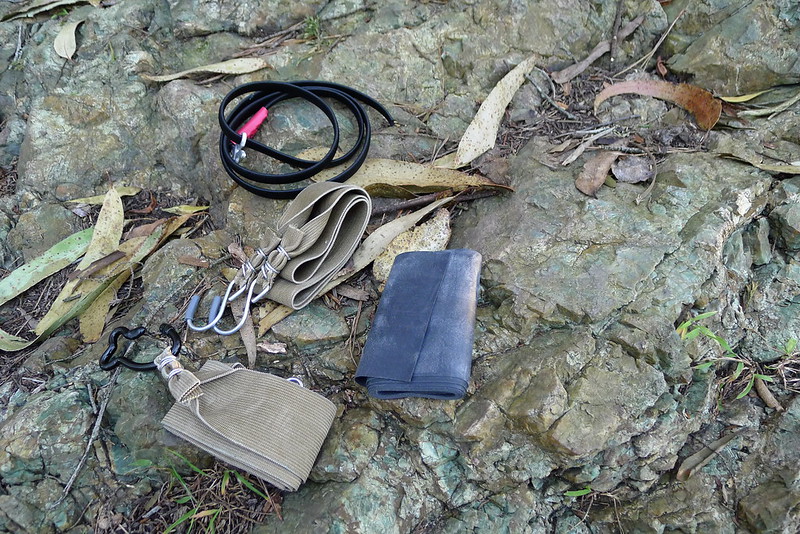
The tourniquet market is dominated by the SOFTT-W and CAT tourniquets, and for good reason. I prefer the SOFTT-W. There is always one in my bag. Some people can make the SOFTT-W or CAT work for everyday on-body carry, whether through ankle holsters or always wearing cargo pants. Neither tourniquet, however, is something that I can fit into my on-body EDC. To solve that problem, I have to look at what Jonathan Willis refers to as secondary tourniquets.

Pocket Tourniquets

The SWAT-T is likely the most popular offering in the secondary tourniquet market. It tries to function as both a tourniquet and an emergency bandage, and ends up being mediocre in both roles. In its role as a tourniquet its largest failure is its difficultly to apply one-handed. If I can’t self-apply a tourniquet with one hand during training, the tourniquet is pretty much useless to me. I’ve heard some people claim the ability to apply the SWAT-T with a single hand (with the assistance of a wall to hold it in place), but I’ve never figured it out.

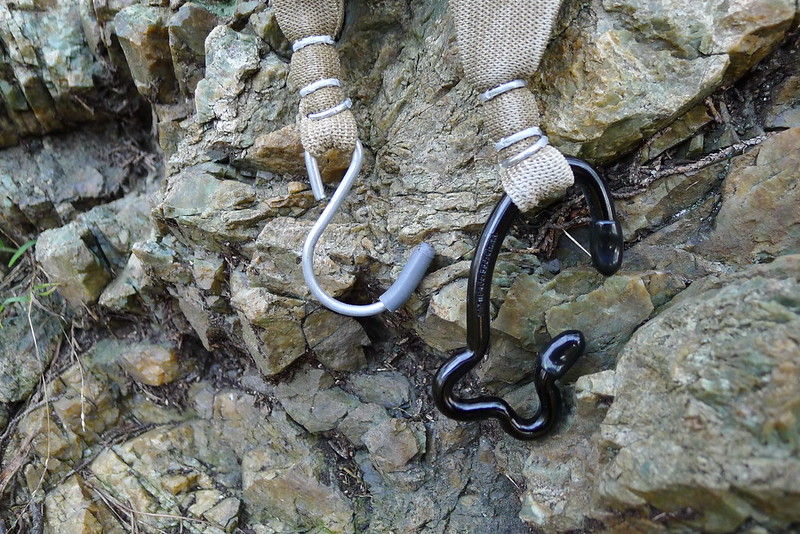
At first glance, the TK4 appears like it could be a promising solution. It is an elastic strap, roughly 36” long by 2” wide, with 2” metal hooks on either end. It folds to a compact size and easily fits in a pocket. Unfortunately the hooks are only 1” wide, which doesn’t work so well with the 2” wide strap. In my trials the strap would often pop out of the hook when attempting to start the wraps. I find it much more effective if used as an improvised tourniquet, with two overhand knots and a pen as a windlass, which is a terrible thing to say about any product that bills itself as a tourniquet.

The TK4-L is identical to the TK4, except one of the hooks is replaced by something akin to a gateless carabiner. This carabiner is shaped such that the elastic strap will actually fit inside of it and not pop out. The result is a product that is compact, not too difficult to apply, and effective.

TK4 and TK4-L

  • CAT and TK4-L
  • TK4-L and SOFTT-W

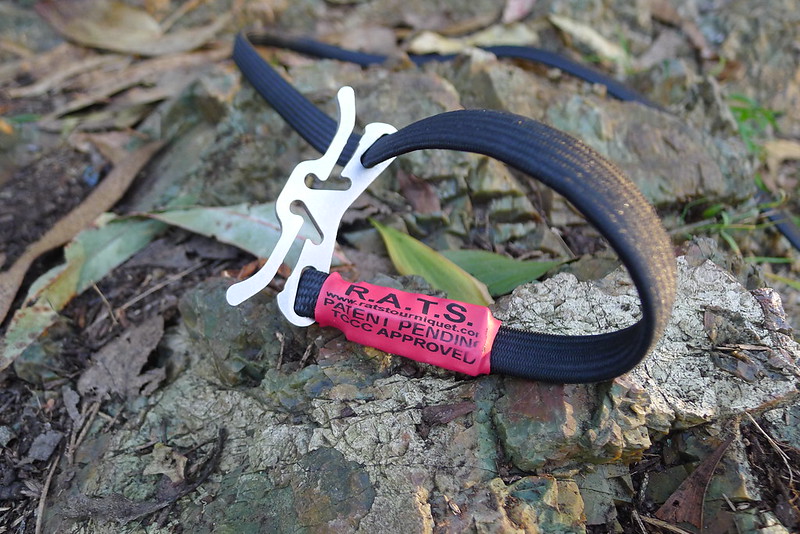
The RATS is made from a heavy duty, bungee-type strap and a unique buckle which locks the strap in place. The strap is around 45” in length but only 0.5” wide. With any tourniquet, you want a wide strap to avoid causing tissue and nerve damage. The idea with the RATS is that you get the desired width by performing parallel wraps, distributing the pressure over an area closer to 2” in width. This requires some care to be taken when applying the tourniquet, and it makes it less useful on larger limbs. On my leg I only get 3 wraps with the RATS.

RATS Tourniquet

Of these 4 secondary tourniquets that I’ve experimented with, the RATS is the most durable and, with the exception of the issue of parallel wrapping, the easiest to self-apply. However, the TK4-L folds up better for pocket carry, and its 2” wide strap inspires more confidence. I feel better carrying it and have been doing so for the past month and a half. It sits in my left rear pocket, with the carabiner hooked over the top of the pocket so that it can be easily grabbed without any fishing around.

Choosing a secondary tourniquet is an exercise in trade-offs. Without a windlass, pressure is achieved through tight wraps only. They certainly cannot replace a primary tourniquet, but may supplement it in areas where size or weight present limiting constraints. Given the choice between carrying no tourniquet on my body or carrying one that works but is less than ideal, I’ll choose the latter. Coupled with an H&H Mini Compression Bandage and a package of z-folded QuickClot Combat Gauze, you can build a compact blow-out kit that is easy to distribute across your body.

Lockpicking: A Practical Skill

Triple Aught Design is a small business. All of us wear multiple hats to make things go. Sometimes I end up wearing hats that may be considered odd in other businesses.

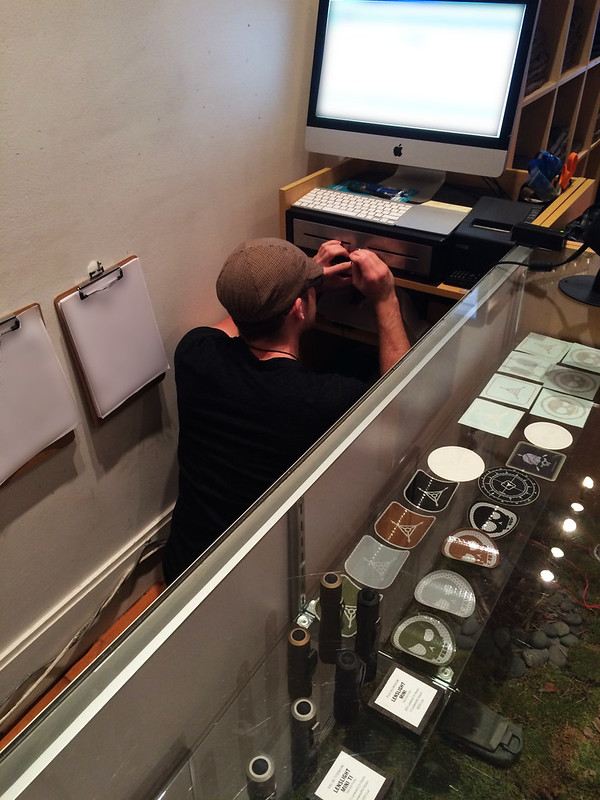
Today I got a call from our retail store manager. The key for the cash drawer at our Hayes Valley Outpost had been accidentally locked inside the drawer. As the guy generally responsible for security-related things, and the lockpicker in the office, the retail team thought I could help.

Job Requirement #634: Lockpicking

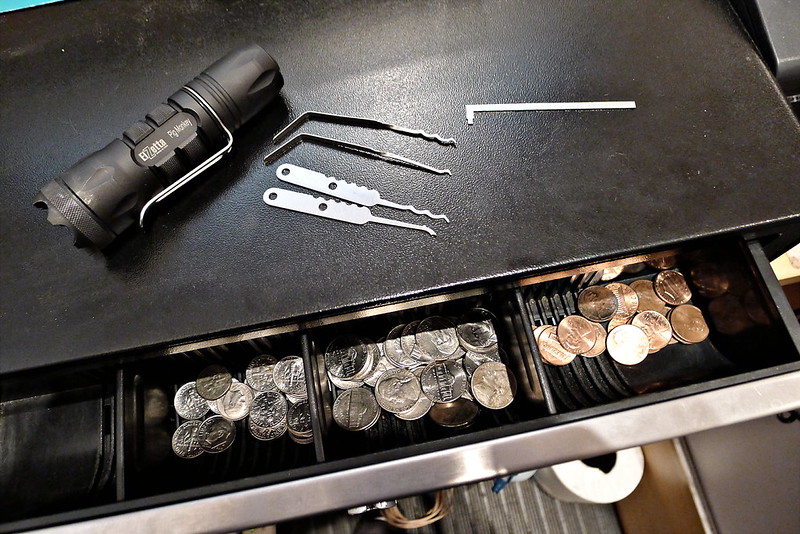
I’ve carried a set of Bogota picks in my wallet every day for a number of years. The popularity of the Bogota picks is well-deserved, but I found that this particular lock was too small for me to insert both the pick and the tension wrench. Fortunately I just picked up a pair of Kelly Alwood‘s ALS Mini Flats a couple weeks ago, and happened to have those in my pack. I don’t like the picks as much, but the tension wrench has a nice small tip that left me just enough room to insert the single hook Bogota pick. Between the ALS wrench and the Bogota pick I had the drawer opened shortly, and recovered the key.

Unfortunately I did not get to keep what was inside.

Cash Drawer Opened with EDC Tools

On the wall of the Outpost we have the well-known Heinlein quote, which is something of a driving force for what we do at Triple Aught Design, and struck me as appropriate today.

A human being should be able to change a diaper, plan an invasion, butcher a hog, conn a ship, design a building, write a sonnet, balance accounts, build a wall, set a bone, comfort the dying, take orders, give orders, cooperate, act alone, solve equations, analyze a new problem, pitch manure, program a computer, cook a tasty meal, fight efficiently, die gallantly. Specialization is for insects.

Everyday Carry OC

This past summer I attended Paul-E-Palooza. One of the courses I attended was Chuck Haggard’s Less-Lethals for the Concealed Carrier, which was all about OC (oleoresin capsicum) or pepper spray. Chuck is a Lieutenant in the Topeka, KS Police Department. He’s been training with OC for a long time and has a lot to say on the subject. I’ve been sprayed with OC before in training, but have not consistently carried it myself or incorporated it into any of my defensive training. After Chuck’s course I decided to rectify that.

OC

I’ve tried a handful of different cans from brands like Sabre Red, Fox Labs and Aerko. They’re all effective products, but I failed to find one that both came in a pocketable form-factor and had a safety design that I felt comfortable with – until I tried an ASP Defender.

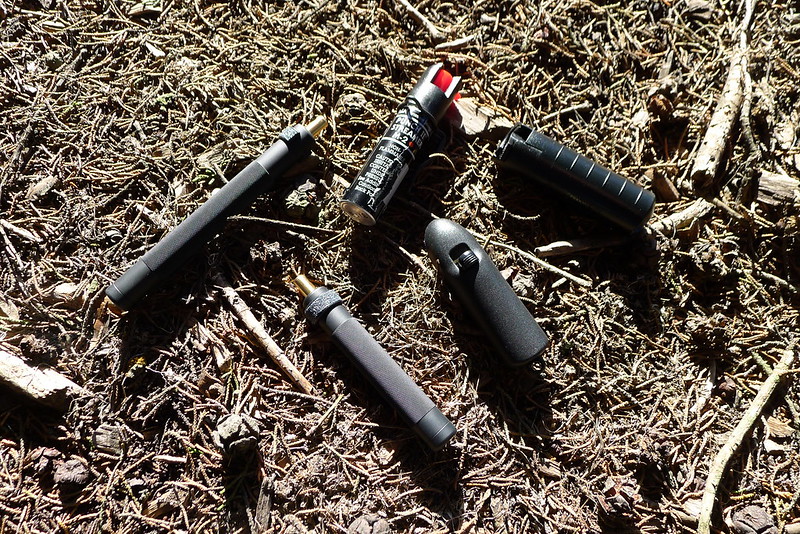
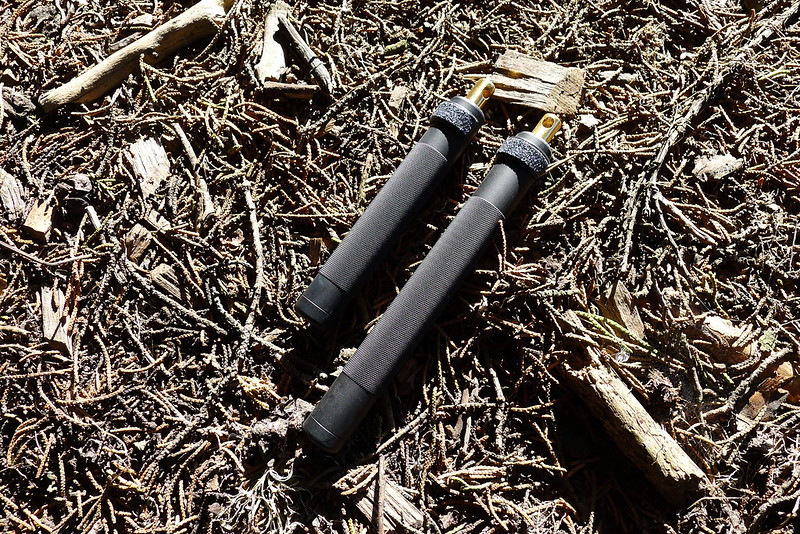
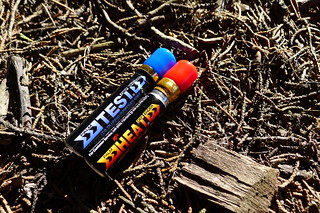
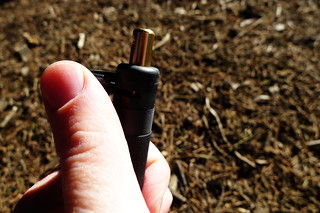
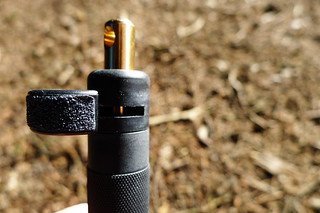
The Defender series come in a variety of sizes, but are all long and skinny. This roughly pen-like form factor makes them easy to carry and also usable as a lightweight Kubotan. They feature a safety that inspires confidence in its ability to prevent an accidental discharge, while still being easy to actuate when needed. The capsules are replaceable, and ASP sells inert capsules for training in addition to the live “heat” capsules. They discharge a solution of 10% of 2,000,000 SHU oleoreson capsicum.

ASP Palm and Key Defenders

  • ASP Palm Defender: Inert and Live Cartridges
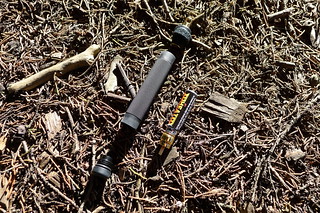
  • ASP Palm Defender: Disassembled

I purchased both the Key Defender and Palm Defender models. Both are 0.6” inches in diameter. The Key Defender is 5.75” long, while the smaller Palm Defender is 4.5” in length. The Key Defender capsule contains 4 grams of solution. The Palm Defender capsule contains 3 grams.

The stated range for the Key and Palm Defenders are 5 feet and 3 feet, respectively. In my trials I found that the difference in range between the two models was negligible: I achieved 4-5 feet with the Palm Defender, and about 5 feet with the Key Defender. This was outdoors, with the heat cartridges and a small amount of wind. The primary difference was in the number of shots. While the Palm Defender offered 4 cone-shaped bursts of about 1/2-second each, the Key Defender gave me 7.

Given the small differences between the Key and Palm Defender, I personally opt for the smaller form-factor of the Palm Defender for my EDC. My only complaint about this model is that, given the length, I find that I need to grip the body slightly lower so that my fingers do not interfere with the outward swing of the safety. This puts the opposite end of the Defender into my palm. Because of this, once I have disengaged the safety I need to readjust my grip slightly, so that the business end of the Defender is just beyond the edge of my hand – where it needs to be for both striking and discharging the OC. Ideally I would like to see a model in between the Key and Palm Defenders in length. As it is, this is a minor complaint, which I can train around and which does not dampen my enthusiasm for the Palm Defender.

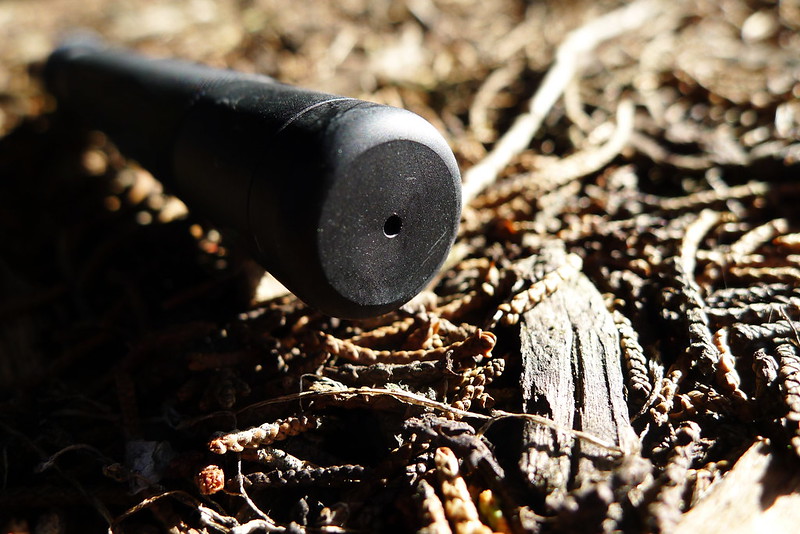
ASP Key Defender: Business End

While the aluminium body of the Defenders is knurled for grip, the safeties are smooth. I addressed this by placing a small strip of grip tape over them, making it easier for me to disengage the safety with my thumb.

  • ASP Palm Defender: Actuating Safety
  • ASP Palm Defender: Safety Disengaged

I have been EDCing the Palm Defender in the front, support-side welt pocket of my pants. My preference would be to find a pocket clip for it – which I imagine is doable, since the Defender is roughly the size of a large pen or marker – so that I could have the option of moving it to other pockets or onto a belt. I’ve also experimented with carrying it on one of Chris Fry‘s Pocket Shields (via a tactical hair tie), but as of yet I have not integrated the Pocket Shield into my daily carry.

The EDC Keychain

Below the Maxpedition Keyper I connect a quick-release fob. This adds enough length to the setup that the keys can be silenced in my pocket, but still securely attached to my belt via the Keyper. The side-release buckle provides easy, one-handed access. The fob attaches to the Keyper via a normal split ring.

For most of the 8 years that I’ve used the fob, I’ve attached the keys to it via another split ring. I tried a cable ring from CountyComm for some time, but it was too large and the closure unscrewed itself frequently. Later, when the FREEKey came out, I gave it a shot. It worked well enough but I found that it offered no practical advantage over a normal split ring. Finally, last March I learned about the Flex O Loc Key Ring from Brian Green. I bought a pack of them and have been using one on my keychain ever since. I find that they’re perfect: the right size, easy to open, and secure when closed.

EDC Keychain

On the keychain itself I carry three keys: an apartment key, a work key and a bike lock key. Next to the keys is a Kingston DataTraveler SE9 (16GB). I find that the DataTravelers are a good combination of performance, durability and price. I consider this my “dirty” stick: it holds no personal information and is formatted with FAT32. I’ll stick it in pretty much anything. It used to hold Liberté Linux, but unfortunately that project seems largely abandoned now. Next to the USB stick is a Photon Freedom Micro LED light with a green beam. I’ve lost count of how many years I’ve had this. It doesn’t produce a significant beam, but it frequently comes in handy. I like to know that I always have a light source attached to me. Next on the ring is the pit for my Pitlocks. This is a specially keyed nut that is needed to remove the Pitlock skewers on my bike. It increases the difficulty of stealing a wheel. The final item is a SERE V Cutter. I consider this more of a toy than a tool. It does cut cord very well, but so does a knife. I wouldn’t buy it again, but as long as I have it I figure I might as well use it, and it is small and light enough that I can put it on my keychain and forget that it’s there.

Alternative Carry of the ESEE Candiru

The ESEE Candiru is another nice knife that suffers from a terrible sheath.

In fact, it is a great little knife. Unfortunately the only sheath that the Candiru comes with is a simple Cordura pouch. I threw this away immediately upon receiving the knife and replaced it with a horizontal belt sheath from Dark Star Gear. The Dark Star Gear sheath first came to my attention on pistol-forum.com. At the time I hadn’t purchased the Candriu, but horizontal carry of a small fixed blade at about 11:00 on the belt impressed me as a great idea. I knew I wanted to give it a shot.

Dark Star Gear Sheath

I considered ordering the sheath for my Izula, which is the knife I usually carry when I want a fixed blade, but I was concerned that it would be a little too big to conceal horizontally on my waist1. Instead I decided to purchase the ESEE Candiru, which Brian Green had raved about last year, just for this carry method. (I actually ordered the sheath before I ordered the knife.)

I’m extremely pleased with both purchases. The Candiru is not quite as general-purpose as the larger Izula, but it performs all the functions that I require of an urban EDC blade, and provides yet another option for an EDC fixed blade. This is something that I have come to prefer over a folder since I purchased the Izula about 4 years ago. The Dark Star Gear sheath allows me to carry it comfortable and conceal it with nothing more than a t-shirt, while still providing for a quick draw. The sheath has also exposed me to the idea of carrying at 11:00, which is a very nice piece of real-estate on the belt that I have previously overlooked.

ESEE Candiru / Dark Star Gear Sheath

  • ESEE Candiru / Dark Star Gear Sheath
  • ESEE Candiru / Dark Star Gear Sheath

I have carried the Candiru in the Dark Star Gear sheath as my primary knife for about 2 months now. Up until a few days ago the Candiru’s handle had been cord wrapped2. I just recently purchased and installed the optional Micarta slabs. The Candiru does suffer from a small handle – a necessary evil for a knife this size. It can use all the extra bulk it can get. My initial impressions of the Micarta slabs are that they greatly improve the feel of the knife in the hand without any negative impact on the ability to easily conceal the knife in the Dark Star Gear sheath.

For a second carry option I also purchased a Kydex neck sheath for the Candiru. This is the sheath that the Candiru should ship with. The size of the knife makes it a great option for those who find the Izula a bit too large for comfortable carry around the neck3, but still want something a bit more functional than a tiny CRKT RSK Mk5 or Nemesis Hellion. I carry the knife around my neck when I run, since for that activity I’m not usually wearing a belt appropriate for the Dark Star Gear sheath. Adding the Micarta slabs does make the Candiru a bit heavier and bulkier around the neck. If you intend to use the Candiru primarily as a neck knife, I would stick with a cord wrap on the handles.

ESEE Candiru / Kydex Neck Sheath

Notes

  1. While bigger folk could probably conceal an Izula in the Dark Star Gear sheath, I'm confident that this was the right choice for me. I feel pretty sure that the Izula handle would stick out too far on my small waist.
  2. The handle was wrapped with Technora Four Hundred Cord. I had bought a hank of this cordage a while ago to play around with and found that the smaller diameter worked better than paracord (gutted or non) on the Candiru's small handle.
  3. The Izula is at the upper-end of my size range for comfortable neck carry.

CRKT RSK Mk5 Sheaths

The CRKT RSK Mk5 is a nice knife cursed by a terrible sheath.

I’ve been EDCing the knife since my Nemesis Hellion was lost last November. Unfortunately, the “glass filled nylon” sheath that the RSK Mk5 ships with is a poor design. The grommet in the tip is too small to accept a piece of paracord. This was done to keep the overall size of the sheathed knife small enough to fit inside an Altoids tin. I have never understood the obsession with the Altoids tin survival kit. I prefer to carry a knife about this size around my neck.

CRKT RSK Mk5: Standard Sheath

Some time ago I purchased a new sheath for my RAT Izula from a fellow on eBay who goes by lemonwoodgallery. I was pleased with that purchase, so as soon as I bought the RSK Mk5 I shipped it to him to make me a custom kydex sheath. It’s nothing fancy – just your standard taco style sheath with two grommets at the top for a piece of paracord and one on the side for retention. This is the same design as the sheath for the Nemesis Hellion, which served me well for 6 years. The new sheath has held the RSK Mk5 around my neck for about 8 months now. It’s a much appreciated upgrade.

CRKT RSK Mk5: Custom Sheath

I've been using the same Maxpedition Keyper for 8 years.

The paint is chipped. There is a little rust on the gate. The hook has been reshaped by almost a decade of rubbing by a split ring. It still works as good as the day I bought it.

Maxpedition Keyper

If you need to hang something off your belt, seriously consider the Maxpedition Keyper.

Impressions of the Preon P1

I use two Fenix LD20 lights mounted to my handlebars via Twofish Lockblocks as headlights. An old TAD-branded JETBeam Jet 1 MkII is mounted on my helmet. As a result, whenever I have my bike – which is the majority of the time – I have a light. When I’m not around my bike, I tend to be left in the dark. I do carry a Photon Freedom Micro on my keychain, which is a great little device, but no replacement for a hand-held torch. A more substantial light has not been part of my on-body EDC for a few years.

Last month I decided to change that. I wanted to find a small, unobtrusive LED light that I could carry in a pocket. My JETBeam helmet light is powered by a single AA battery. While the height on that light is about right, I felt the diameter was too large for what I had in mind. I decided to look for a light powered by a single AAA. Two options presented themselves: the Maratac AAA Rev 2 and the Foursevens Preon P1. They both have similar specifications and both seem to earn equally positive reviews. The Maratac light is less expensive and features a knurled body, as opposed to the Preon P1’s smooth body, which made me initially favor the Maratac. Unfortunately, both lights are twist-activated. One of my requirements for any light is that it can be activated with one hand. That necessitates a clicky tailcap.

A review of the Preon P1 on ITS presented a solution. The Preon P1 is compatible with pieces from the Preon P2, which is a double-AAA flashlight that does have a clicky tailcap. I could purchase a replacement Preon clicky tailcap and install that on a Preon P1 to get the light I wanted. The Preon P1 and the tailcap cost $45. That’s a lot for a small light, and quite a bit more than the $25 price of the Maratac light, but it would make for a system that fit my requirements. I chose to purchase the Preon.

Preon P1

I have been carrying the Preon P1 for a couple weeks now. At a height of about 3 inches and a diameter just over half an inch, I can clip it in my pocket and completely forget that it is there until I need it, which is exactly what I was looking for. All the various modes of the light can be cycled through by clicking the tailcap, although I don’t particularly care about them – I only use the light with its standard output setting.

The clicky tailcap could be improved. I’m accustomed to tailcaps being inset into the light slightly. The Preon tailcap juts out from the top of the body of the light, which I think increases the chances of it accidentally being clicked on and draining the battery. It also has an amount of free movement in it. The button can be depressed about halfway before it actually hits the clicky part of the mechanism, which makes the button feel a bit loose. I don’t know that this affects the functionality of the tailcap, but it does make it feel cheaper.

Preon P1 (AAA) vs JETBeam Jet1 MkII (AA)

Despite the less-than-perfect tailcap, I’m happy with the light. The runtime isn’t incredible, but that’s acceptable for my use. I intend to use the light only as a backup to those on my bike. When the battery does die, I just throw it in the charger and install another Eneloop. If you’re looking for a small EDC light, the Preon P1 is worth consideration.