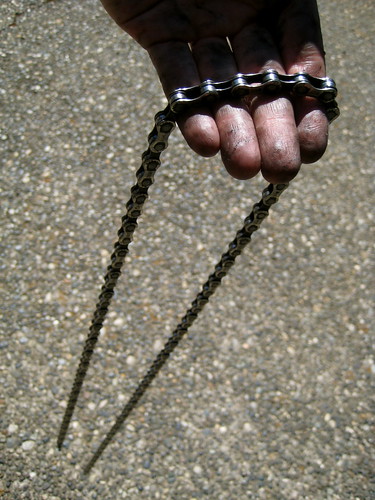
Those chain cleaning tools sold at most outdoors stores tend to pretty useless in my experience. They run around $30, but end up being cheap and ineffective pieces of plastic. I’ve given up on them in favor of cleaning my chain manually via a method discovered on Sheldon Brown’s chain maintenance page (any man with a beard like that must be infallible).
All that’s needed is a chain tool, a bottle, some sort of degrease-ing dish soap, and water.
The process is simple. Break the chain with the chain tool and drop it into the bottle. (I use an old Gatorade bottle.) Then put in a small dollop of the soap. Fill up the bottle with water, shake it around a bit, and let it sit. The water becomes black immediately. After it has sat for about 15 minutes I’ll dump it out, rinse off the chain, and put it back into the bottle with fresh soap and water. I do this until the water stays clear, which generally takes about 3 cycles.
When it’s done, you should have a chain that’s relatively clean-ish. Dry it, toss it back on the bike, lube up, and start cruising! If the chain was really dirty, you might also want a cheap brush to scrub it down.
Needs? I guess that is what bothers so many folks. They keep expanding their needs until they are dependent on too many things and too many other people. I don't understand economics, and I suppose the country would be in a real mess if people suddenly cut out a lot of things they don't need. I wonder how many things in the average American home could be eliminated if the question were asked, "Must I really have this?" I guess most of the extras are chalked up to comfort or saving time.
Funny thing about comfort -- one man's comfort is another man's misery. Most people don't work hard enough physically anymore, and comfort is not easy to find. It is surprising how comfortable a hard bunk can be after you come down off a mountain.
- Richard Proenneke, One Man's Wilderness
Although I have misgivings about their durability, Platypus‘ 2L+ bottles remains the primary water reservoirs in my pack. It’s been a bit over a year now since I started using them. At the same time I switched over to Platypus, I also started treating my water with chemicals rather than filtering it. Both methods of treatment have their advantages and disadvantages, but lately I have been using chemicals almost exclusively.
A water filter, of course, filters out not only the invisible nasties that upset the stomach, but also the visible things things that don’t cause much harm but aren’t altogether pleasant: dirt, dead bugs, small rocks, and the like. When I moved to using chemicals I was just dumping the water into my drinking vessel direct from the source. Without any sort of filter, the water could sometimes be a bit gritty. Too textured for my taste.
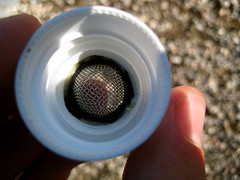
As a first attempt to solve this I started to place a bandanna over the opening of the Platypus, and then poured the source water over that. That worked great for getting out the sediment, but then I had the problem of having a wet rag. If the sun is out, it dries, but the other 307 days of the year, the bandanna – even a synthetic Buff – became a bit of a hassle to dry. I wanted some sort of pre-filter that I could get wet without worrying about it.
The solution (like more than a few before it) came while browsing the BackpackingLight forums.
A filter washer is a rubber washer with a mesh screen in the middle. Apparently they’re used in garden hoses and washing machines to remove sediment. I was able to find them easily in the plumbing section of a local hardware store.
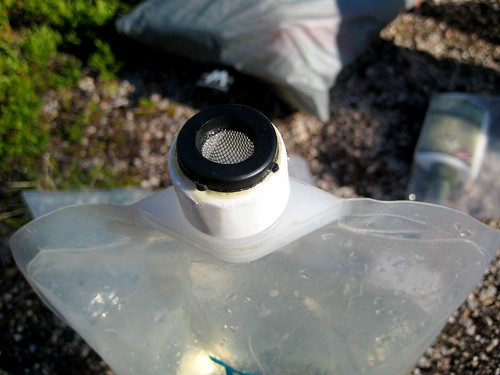
I took an old Platypus cap and drilled out the center of it. Then, with a little Gorilla Glue, glued the filter washer onto the cap. That’s all there is to it! The new pre-filter cap weighs 2 grams (0.07 oz) and shouldn’t cost much more than $1 to make.
The downside to the pre-filter cap is that it does noticeably decrease the flow rate of the water. To fill the Platypus, I use a scoop made out of an older Platypus bottle with the top cut off. Without the pre-filter cap, it takes all of 30 seconds to fill the Platypus bottle. With the pre-filter cap, it takes something more like 2 minutes to fill up the bottle. I have to pour the water out of the scoop much more slowly. Because of this I’ll sometimes forgo using the pre-filter cap if the water looks very clean, but the majority of the time I do use the cap. It’s become a permanent addition to my pack.
A large populace held in check by a small but powerful force is quite a common situation in our universe. And we know the major conditions wherein this large populace may turn upon its keepers --
When they find a leader. This is the most volatile threat to the powerful; they must retain control of leaders.
When the populace recognizes its chains. Keep the populace blind and unquestioning.
When the populace perceives a hope of escape from bondage. They must never even believe that escape is possible!
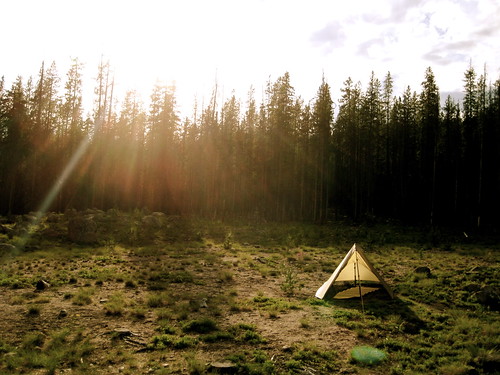
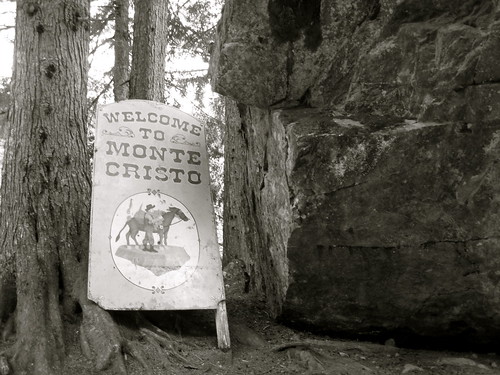
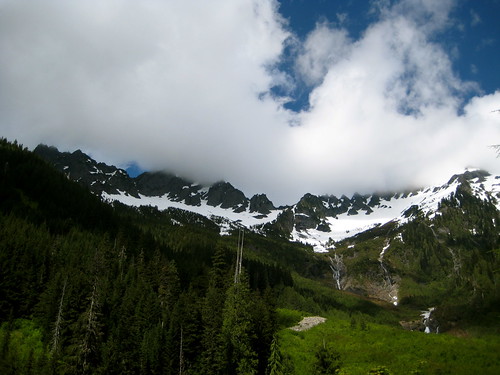
Yesterday I headed out to Monte Cristo for a quick night out. I was in this area last fall when I visited Gothic Basin, but had not continued all the way down the main trail to the town site.
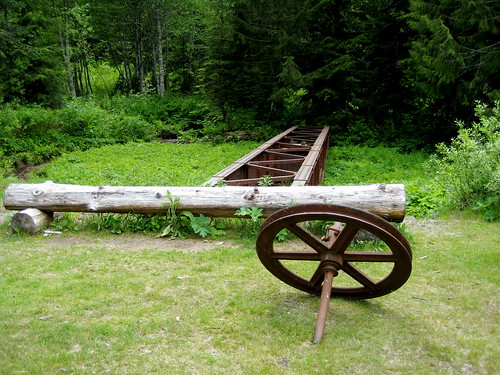
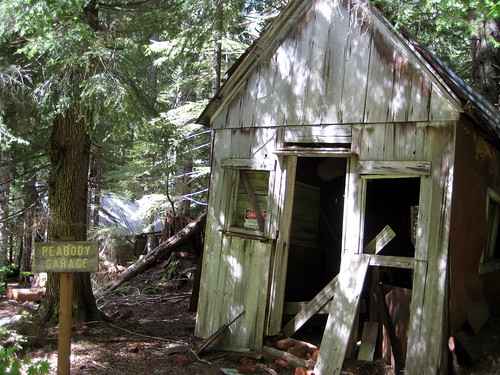
Monte Cristo is an old mining town that was founded in the 1890s and lasted until 1907. It’s now a ghost town, maintained by the Monte Cristo Preservation Association. The trail into town is an easy hike along the old railroad grade. Most of the buildings in the town itself have burned down or were long ago dismantled, leaving only a few remnants. More interesting than the buildings are the metal artifacts strewn about the site.
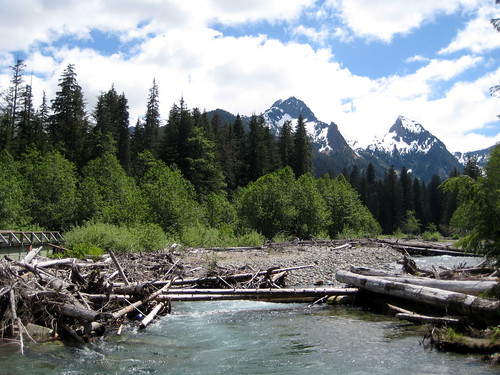
From Monte Cristo, my plan was to head up to Glacier Basin in the Henry M. Jackson Wilderness (just the other side of Cadet Peak from Goat Lake) and see what the snow was doing. The hike up to the basin goes uphill alongside a waterfall that carries away the melting snow, as well as melt from Columbia Glacier.
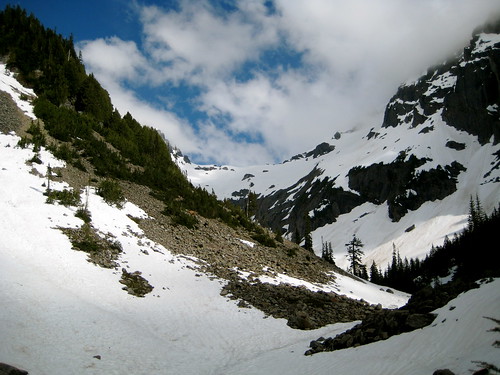
The whole drainage, including the trail, had been hit by at least one major avalanche somewhat recently, leaving lots of debris and snapped trees for me to climb over. The hike was hot, but enjoyable. I encountered no snow until just before the basin at 4,500 feet. Before venturing further, I stopped to put on my gaiters, take out my other trekking pole and put the snow baskets on both. I almost always forget to pack the snow baskets for my poles, so I was excited to have remembered them this time around. Heading on into the snow, my pace slowed. It was now late afternoon – just about the worst time to attempt to traverse a snow field on an inclined slope. The sun had been beating down on the snow all day, making it soft and prone to slipping. I managed not to fall off any mountains, but, due to my lack of snowshoes, did posthole up to my crotch two different times. Soon enough I made it to a scree field just inside the basin.
My original plan had been to spend the night up here, but it didn’t look very promising. I dropped my pack in order to be a little lighter on my feet and took off to survey the basin. Most of it was still covered in the same deep, wet snow that I struggled through at the entrance. I didn’t fancy sleeping on this. The areas that were melted were rocky and devoid of any flat spaces. I imagine it will be mostly cleared up in another couple weeks, but for now I decided to turn around and spend the night at a lower elevation.
I managed not to sink or slip on the snow field on the way out. Retracing my steps, I made my way back down along the waterfall. The avalanche had exposed a lot of smooth rock that, wet with snow melt, made for slippery going. Near the bottom I slipped and slid down about ten feet on my side, slicing open my left knee. It was a 3” long incision across the front of the patella, but not very deep. I continued on the trail for a bit, letting it bleed. As long as it’s not a gusher, letting wounds ooze a little blood helps to clean them out.
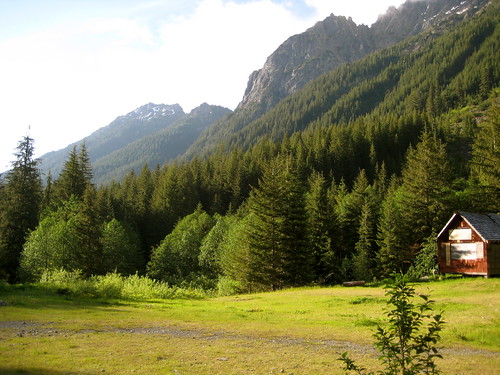
Five minutes further down I found a nice rock sit on. I dropped my pack, grabbed the first aid kit, and pulled out my syringe. It took just under a liter of water to fully clean the cut. I had noticed a patch of yarrow further up the trail, but there didn’t seem to be any around my rock. Instead, there was a large hemlock tree that must have been knocked down by the recent avalanche. It still looked green and alive. When I punctured it with my knife, it oozed sap. I used this to cover the cut. The sap is antiseptic and forms a barrier to keep dirt or anything else from the wound. Plus, it smells good! After the sap had dried, I bandaged it and carried on down the trail, arriving back at Monte Cristo at 7PM. I had dinner in the town and took advantage of the long summer evening to scout out an agreeable place to sleep in the surrounding forest.
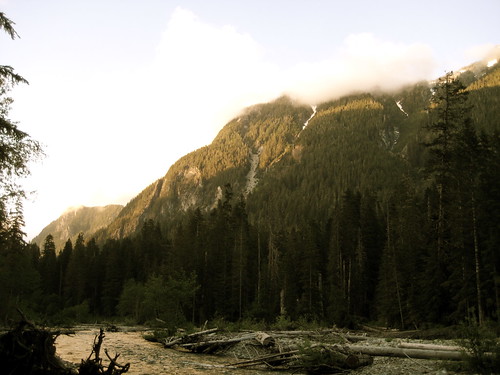
The following morning I breakfasted and started to head back to the trailhead. On the way out I decided to make a short detour up to Gothic Basin. As with neighboring Glacier Basin the climb was mostly clear, but I hit deep snow just at the entrance. After looking around a bit I climbed back down and finished the walk back to the road, arriving at the trailhead late that morning.
This past week I read Dominic Reeve’s Smoke in the Lanes. The book is a first-hand account of the lives of Romani in England during the mid-1950s, which marked the end of the era of horse-drawn wagons. It’s an interesting read if you’re at all interested in itinerant lifestyles.
Toward the end of the book the author describes lighting his daily fire in very wet conditions:
Nobody had collected any wood for the morning's fire, so I scrambled into the middle of a tangle of thorn-bushes, the limbs of which were heavy with rain that showered down on me; and within a matter of minutes I was completely soaked. I did not possess a raincoat and my old jacket and cord trousers were inadequate to withstand the water. Nevertheless, I managed to gather quite an imposing amount of dead wood, all sodden, and I returned with it to the site of the previous night's fire. I took a stump of candle from my pocket and broke it in half, then I lit one half and set it upright in the watery ashes, piling some twigs and small wood round and above it. When I had placed sufficient twigs above the tiny flame I laid the other half of the candle stump in the wood directly above the flame so that the heat from below gradually rose upwards, melting the wax which then caught fire and ignited the soggy twigs. It is an old Romani trick, and a very successful one.
Le Loup often talks about carrying a beeswax candle in his 18th century fire kit. I always assumed that this would be used to keep a flame below damp tinder to dry it out, similar to how today we might take advantage of the long burn time of cotton balls soaked in petroleum jelly to light slightly damp materials. It never occurred to me to break the candle in two and melt the second half above for even more heat. Neat trick!
None but the Romanies, or perhaps the few remaining tramps, can know how great a comfort is afforded by a fire. Once its warming tongues lick upwards into the pile of sticks and one's tingling, numbed fingers are eased in its glow, one experiences great pleasure and satisfaction. It is a creative, aesthetic, pleasure. On countless grey winter mornings, often in company with other travellers, I have sat huddled close to an immense [fire], my front glowing and steaming with heat and my back running with rain or heaped with snow. The fire is everything to us. With it we can cook, eat, survive and live: without it we should perish.


