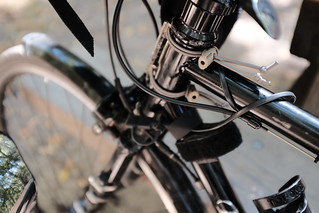
The previously mentionedOrfos Pro LED flares ship with Velcro One-Wrap for mounting. This works well enough, but lately I’ve decided I prefer using shock cord and cord locks. The cordlocks add a little weight to the system, but this setup mounts to all the things I want to mount the lights to, and makes it very easy to tighten. After tightening the lights don’t move around at all, where with the Velcro they would move a little on a bumpy road. This system is also quick to attach and detach, which I appreciate when parking, and can be more easily manipulated when wearing full-fingered gloves.
I’ve used the Raven Concealment Systems Pocket Shield on and off since 2014. In the past I would outfit it only in specific environments where showing a pocket clip would be inappropriate, such as night clubs and weddings. Towards the end of 2019 I decided I wanted to try never showing a pocket clip, which meant incorporating the Pocket Shield into my everyday carry. For the past few months I have been happy with a setup utilizing two different Blue Force Gear pouches: the Single Pistol Mag Belt Pouch and the Ten-Speed Single Pistol Mag Pouch.
The former pouch has a Velcro strap on the back, intended to be attached to a belt. The latter has Blue Force’s MOLLE strap on the back for attaching to any PALS grid. The pouches have other minor differences, but the attachment method is the only difference that matters. Both work equally well on the Pocket Shield.
The belt pouch is used to secure my Triple Aught Design Dauntless MK3. When attaching the belt pouch, I roll over the top of the lower Velcro loop, which causes the Velcro to stick out a bit from the Pocket Shield instead of sitting flush. This acts as a stop for the knife’s pocket clip, preventing the knife from sitting all the way into the pouch. Increasing the ride height of the knife makes it much easier to deploy than it would be if it were completely inserted. The pouch keeps the knife from wandering around, which it is wont to do when just clipped directly over the top edge of the Pocket Shield.
Lately I’ve also been keeping my Elzetta Alpha on the Pocket Shield, but I’m not entirely convinced that I like it there.
A bicycle chain elongates as it is used. This elongation – commonly referred to as “stretch” – is caused by the wearing down of the pins that hold the chain links together and the enlargement of the bore hole in the inner plates that the pins are inserted through. If left unchecked, wear on the chain causes the teeth on the cassette cogs and crank chainrings to become reshaped to the point that they will no longer mesh with a new chain. To extend the service live of these more expensive components, it behooves one to replace the chain before it becomes excessively worn. For drivetrains below 10-speed, the common advice is to replace the chain when it measures 0.75% elongation. For drivetrains above 10-speed, the common advice is to replace the chain when it measures 0.50% elongation. For 10-speed drivetrains, opinion varies between the two measurements, so take your pick.
Chain elongation may be measured with a ruler – 12 complete links on a chain should measure exactly 12 inches – but performing this measurement with accuracy and precision, and identifying when the measurement is off by 0.50% or 0.75% can be difficult. Hence the market for chain measurement tools.
In the past I have used a Park Tool CC-3.2 and a Park Tool CC-2. The CC-3.2 was a simple go-or-no-go measurement tool which attempts to identify when the chain has reached the 0.50% or 0.75% limits. The gauge of the CC-2 provides a more detailed look, attempting to show you not just if the chain has reached the replacement point but also how closely you are approaching it. Both of these tools share the same weakness: they measure from opposing roller faces, meaning that when the tool is inserted into the chain it is applying pressure in opposite directions. This behaviour incorporates inconsistencies of the roller diameter into the measurement, rather than just measuring the pin-to-pin distance, which can result in the tool providing a premature indication of the chain’s wear.
Recently I purchased the Pedro’s Chain Checker Plus II. This is one of a newer generation of tools which attempts to eliminate the previous inaccuracy by measuring from the same side of the roller. The tool applies the load to the chain in the same direction during measurement, rather than pulling in opposite directions. This simulates how the cog experiences the chain when the bike is pedaled and allows the tool to more accurately gauge the pin-to-pin distance. Compared to an older style tool like the Park CC-3.2 or CC-2, it should tell you to replace the chain later. Getting more life out of the chain (without potentially damaging the other components of the drivetrain) is useful not only for your wallet, but also to reduce waste. A Duke University study claims that the manufacturing of a chain is one of the more wasteful parts of bicycle production.
The Park Tool CC-4 should provide the same measurement as the Pedro’s Chain Checker Plus II. I went with Pedro’s option because it also provides a chainring nut wrench (useful when tightening or replacing chainrings) and a chain hook tool (theoretically useful when installing or removing chains with master links, though I’ve never found a tool necessary for this).
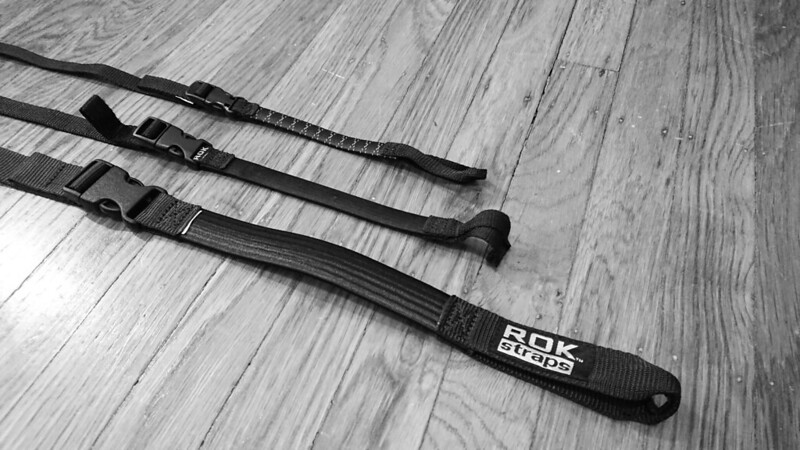
ROK Straps are superior bungie cords. They are designed to be safe and long lasting during prolonged outdoor use. Each end of the strap consists of a sewn loop, allowing it to be securely fastened to a wide variety of frameworks without concern for scratching or marring the surface, or for a hook coming released under tension and finding its way into an eyeball. Cargo secured by the ROK Strap is easily accessed via the side-release buckle. Most of the ROK Strap is simple webbing, adjustable thanks to the buckle. One side of the ROK Strap has a short segment of a durable natural rubber, giving the strap some elasticity, but not enough that unintended recoil will likely result in the strap finding its way into an eyeball. The rubber is contained in a polyester braid for UV protection and additional durability.
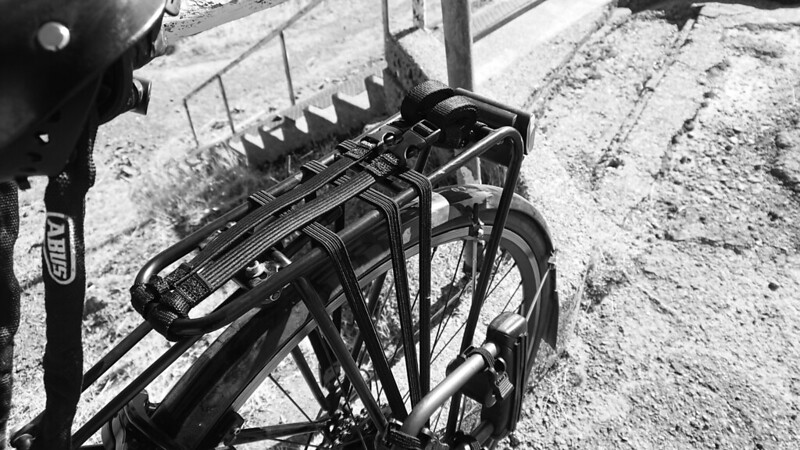
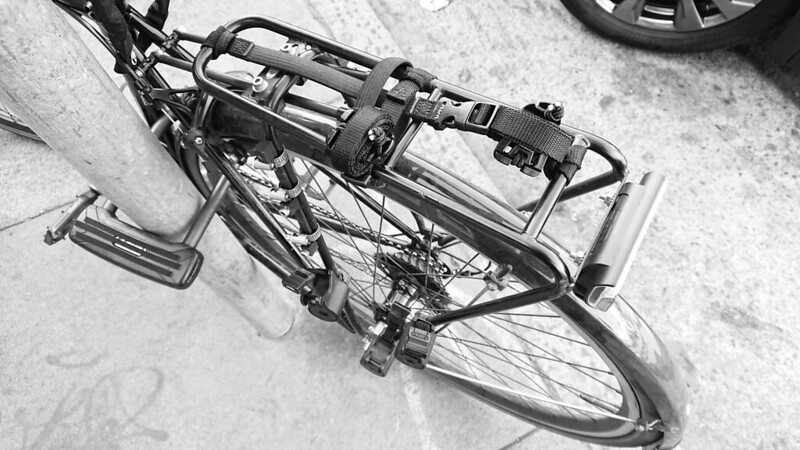
For securing cargo to a bike rack, my preferred model is the Pack Strap. These expand from 12” to 42” inches. They are 5/8” wide and are rated to carry up to 55 lbs. I find this is the right size for most cargo and have used it to transport: sleeping pads, folding chairs, toilet paper restocks, a year’s supply of paper towels, pizza, and takeout yakisoba.
The smallest model is the Commuter Strap. These expand from 12” up to 28”. They are 1/2” wide and are rated to carry up to 40 lbs. If you just want to lash down a jacket or sleeping bag, these may be appropriate. They are long enough to secure common small cargo on a bike, but I would always rather have the extra range of the Pack Strap for handling awkward loads.
ROK Straps are also available in the ATV Strap model. These expand from 18” to 60”. They are 1” wide and are rated to carry up to 100 lbs. Apparently these are popular among people who ride motor-scooters. The 18” minimum length is too large for some of what I want to attach to a bike, and I’m not keen to carry cargo that would require the 60” maximum length. I saw a photo once of somebody who used these to attach a 45 gallon trash can to the back of his scooter. If that’s what you need to do, I guess consider these, but for what I find myself carrying I don’t need the extra length or weight rating of these over the 42” Pack Strap. This model stays at home in my bag of miscellaneous bondage.
The above measurements are of the ROK Straps when the rubber is at rest. When under load, all three models can stretch about an additional 4”.
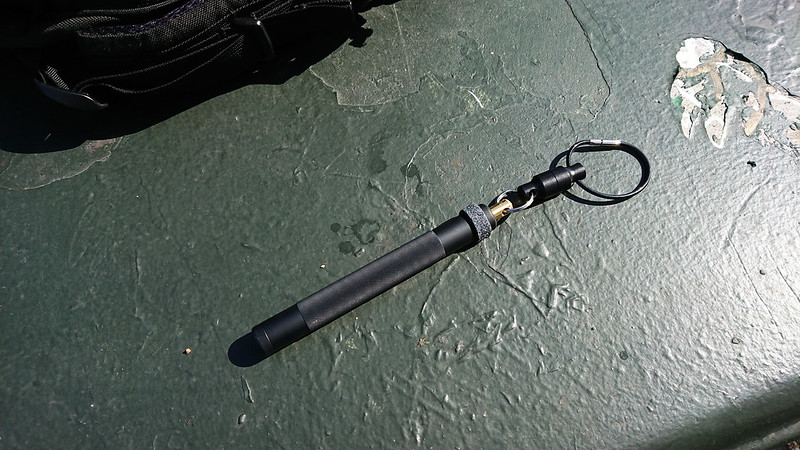
While I prefer pocket-carry for everyday, I’ve often thought about something that would allow for quicker access – especially on the bike. I’ve looked at a number of solutions for mounting a capsicum delivery mechanism to a bike, but never found one I liked. Instead, I ended up purchasing a second ASP Key Defender and mounting it to the shoulder strap of my backpack, which I wear frequently when in the saddle.
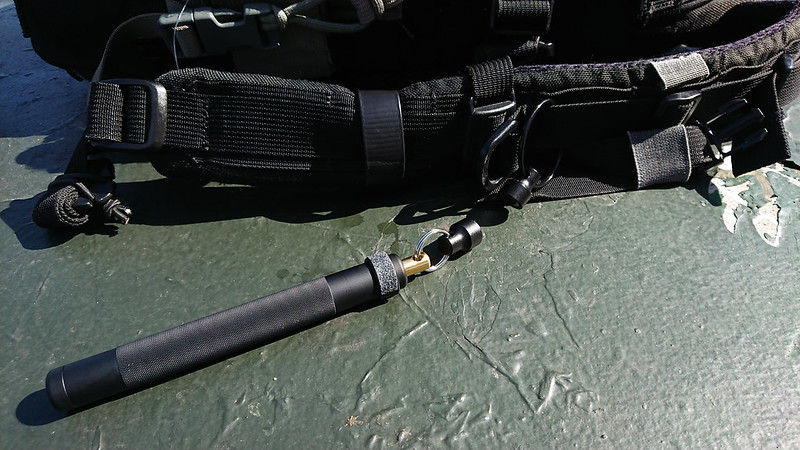
A small split ring connects the Defender to a magnetic clasp. This in turn is attached to a Lucky Line Flex-o-loc (the same thing I’ve been using on my keychain for seven years), which connects the whole setup to the webbing on my shoulder strap. To prevent the Defender from swinging around, I attach an IWB Soft Loop around the shoulder strap and shove the Defender through that.
The Soft Loop holds the Defender tight enough against the strap that it doesn’t spin around during daily carry. When mounting the Defender, I orientate it so that safety clasp (which I still cover with grip tape) is against the shoulder strap. This eliminates any chance of the safety somehow accidentally becoming released and the trigger actuating. It also keeps the safety in a known, consistent position when the Defender is drawn.
Enough of the shaft of the Defender is left below the Soft Loop that it can be easily gripped. It is deployed by simply ripping downward. The magnetic clasp breaks away and the top of the device slides through the Soft Loop. This is very quick and very easy to do, with either hand, even when wearing gloves.
Another neat benefit to the magnetic clasp is that it allows you to easily reattach the Defender, if you decide you quickly want both hands free. The magnet is strong enough that it will connect if you simply wave the top of the Defender within a couple inches of the half of the clasp still attached to the shoulder strap. This can be done without looking. Of course, the Defender will swing around as you move until you shove it back underneath the Soft Loop – a procedure which does take two hands and at least one eye.
I’m happy with this setup as a supplement to the OC carried in my pocket. It can move easily to different backpacks. It could probably be made to work with any pepper spray intended to be attached to a keychain, though it works especially well with the ASP Defender series thanks to the hammer grip used to deploy them.
He’s experimented with a wide range of products, and I’ve bought most of them. These days he’s known mostly for his cordage, which is unique and inovative, but cordage is not a topic I get overly excited about. I do get excited about stakes and Lawson’s aluminum Apex Stakes and Titanium Shepherd’s Hook Stakes are both probably the best on the planet. The titanium stakes are currently on sale, and he sent a description of how they are made to his newsletter today:
We cut, bend, and point each tent stake one at a time in our shop. I usually have to buy a very large quantity worth of Titanium, per diameter. And this is practically me begging them to sell to me. The mills I buy from require very large qty’s in order to sell to us, as they usually sell to big aerospace companies like Lockheed Martin, Boeing, United Technologies, etc, So it is very expensive to stock a product like our titanium stakes, as it is 100% an aerospace material.
The rods come to the shop in a wooden crate via motor freight. They are usually about 12 feet long. We first start off by using a rod parter to cut the stakes to length to get our blanks. If you have never seen one of these machines before they are very neat. It essentially breaks/shears the rod in a very clean and controlled manner. So they do not have to be saw cut. It’s like a sheet metal shear for round rods. Our rod parter will accurately cut rods from 1/16”-5/8”. There are two parting disc’s used to do all the of the work. They are made from hardened tool steel. So they are cutting like scissors so to speak, but the rod goes through a hole to keep the end round and to reduce the burr as much as possible. There is an adjustable stop on the machine that allows the first rod to be cut as the 10,000th one, with no real measurable difference between any of them. It is a highly precise machine.
Next, they are bent either one, two, or three at a time (depending on the rod diameter) on a custom made bender. This is a bender that I made myself over 10 years ago, and it has probably made 100,000+ tent stakes ever since. Last the stakes are pointed in another machine that I also custom-built. The stake is fixtured into a holder where it advances towards the cutting head and then puts a point on the end using a special end type mill.
There is no machine in the world that you could buy that could make a stake from start to finish, so I had to custom make two of the three machines to make these. This is the reason we are the only manufacturer in the USA making titanium tent stakes. (and probably because I am bad at bean counting…) I do know that it would be far more profitable for me to stock and sell Chinese stakes, but for me, the details matter. And I honestly love making custom machinery that can make products that not many other companies can. BUT as a result, this means I usually have way too many titanium tent stakes in stock as I have to make about a year’s supply at one time. Obviously, if I sold more stakes, then this wouldn’t be an issue, but since I don’t, this is the one product that I have a lot of my working capital tied up into.