Titanium Gaiwan
Last year I started getting into gongfu – or, at least, brewing tea in a gaiwan. I first bought a normal porcelain gaiwan. After gaining some experience with it and figuring out what properties were important, I went looking for a titanium version, as is my wont. I wanted something I could throw in a bag for brewing tea out in the world, and porcelain – even in a padded container – wasn’t going to cut it.
I’m sure that an expert would criticize the use of a titanium brewing vessel, especially double-walled. I don’t think the metal itself imparts a flavor to the tea, but it has heat retention qualities that differ from more common materials like porcelain, celadon, or glass. Fortunately, I am not an expert, and do not care. The tea I brew in titanium tastes the same to me as the tea I brew in porcelain. And I can abuse my matériel.
I found two options from the friendly capitalists in the People’s Republic of China, and purchased both.
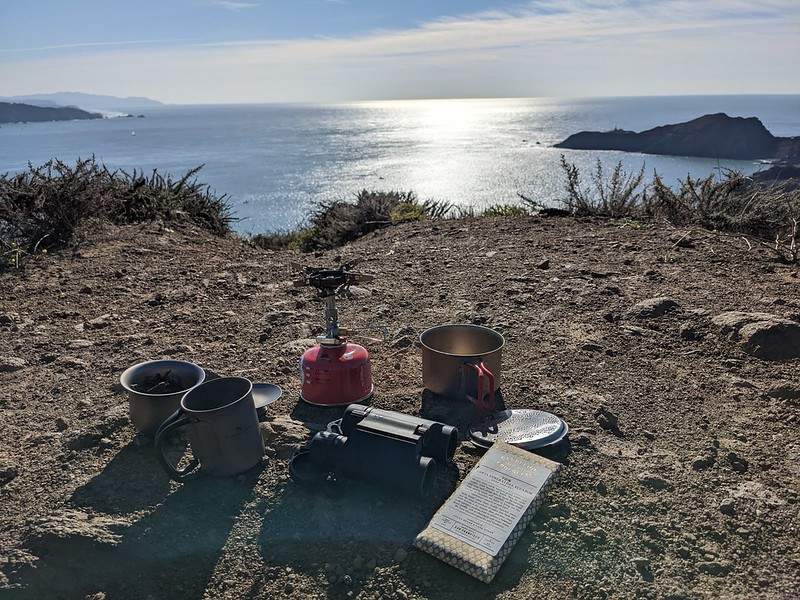
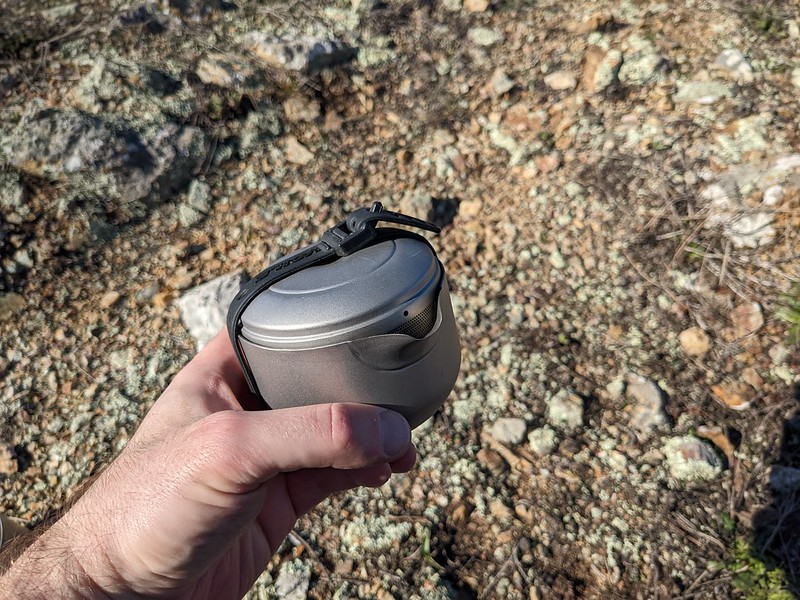
First up, the Tiartisan 130mL Titanium Gaiwan. It weights 71 grams. The stated volume of 130mL is a bit less than a typical gaiwan. My porcelain gaiwan weighs 40 grams and holds 180mL. Both those volume measurements are with water filled all the way up to the rim. In practice, some of that volume is taken up the tea leaf, and you probably stop pouring when the water level is a bit shy of the rim. With the Tiartisan gaiwan, I end up brewing about 100mL of tea liquor. With my porcelain gaiwan, it is closer to 160mL. That’s a significant difference. It means that my porcelain gaiwan is sufficient ordnance for a party of four, where the Tiartisan gaiwan is really only appropriate for one or two people.

The most significant disadvantage of the Tiartisan gaiwan is the diameter of the lid in comparison to the diameter of the bowl at the top of the rim. The lid ought to be ever so slightly larger. Compared to the porcelain set, the titanium lid sits a little deeper in the bowl. This cuts down on the usable volume, since you’re only brewing tea in the bowl up to where the lid sits.
But for the size, it is a nice lid. It rolls within the bowl as it should, allowing you to control the size of the outlet when pouring. All in, the Tiartisan is a great low-volume option. If you’re just brewing tea for one or two people, the volume is adequate.
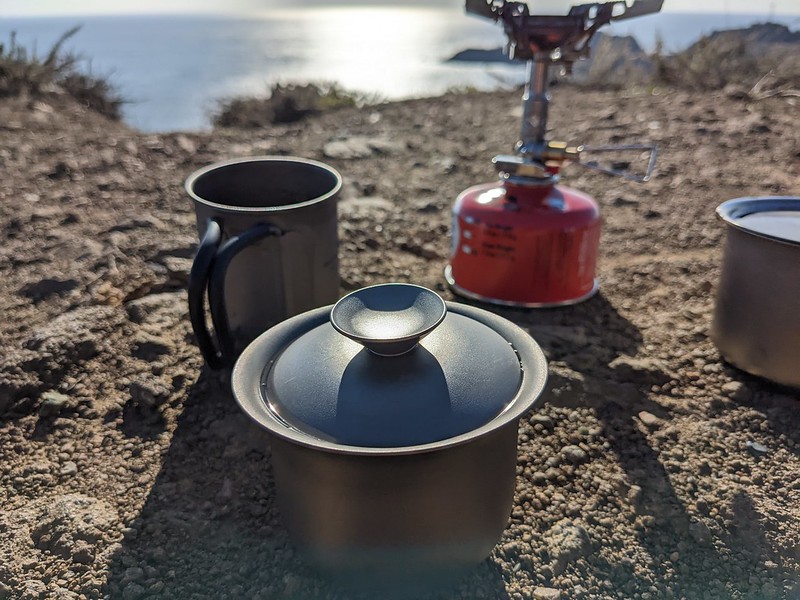
Next up, the Boundless Voyage Titanium Tea Set. This is a more complete package, consisting of a brewing vessel, a fairness pitcher, a lid that fits on both, and two 40mL cups.
The hypothetical gongfu expert will probably take issue with this set. It isn’t an actual gaiwan. It has a spout to pour from. The lid has a little strainer built in. Still, it brews a great cup (or three) of tea.
The brewing vessel can hold about 185mL of water before it starts to come out the spout. But that is impractically full. The usable volume is closer to 145mL. Some of that is taken by the tea leaf, so in practice you’re brewing about 125mL of tea liquor. That puts it between the Tiartisan gaiwan and my porcelain set. When brewing for one or two people, this difference doesn’t matter. If you want to brew for four people, this Boundless Voyage set still struggles.
Where this set really fails miserably is in the relative size of the brewing vessel and the fairness pitcher. The fairness pitcher only holds about 85mL, and that when it is filled up to the rim, where you’re going to be struggling not to spill anything. But the set allows you to brew about 125mL of tea. So you cannot actually decant directly into the fairness pitcher. You could brew your 125 mL of tea, fill both the included 40mL cups, and then pour the last serving into the fairness pitcher for your two drinkers to fight over. But that sort of defeats the purpose of the fairness pitcher.
So in practice, the fairness pitcher component is garbage. The rest of the set is great, but unfortunately you have to pay for the fairness pitcher to get your hands on the good bits.
The brewing vessel and lid weigh 95 grams. The fairness pitcher is another 50 grams. Each cup is another 20 grams (only two can fit inside the brewing vessel for transport.)
The strainer on the lid is nice for finer, processed teas. I have a genmaicha with matcha that I like, which I cannot brew in a gaiwan (or, at least, I can’t really serve from a gaiwan), but works fine in the Boundless Voyage set. But for most whole leaf teas, neither the spout nor the strainer lid offer much advantage over the traditional gaiwan shape. A real gaiwan takes a little practice, but once you figure it out, it is easy to pour from.

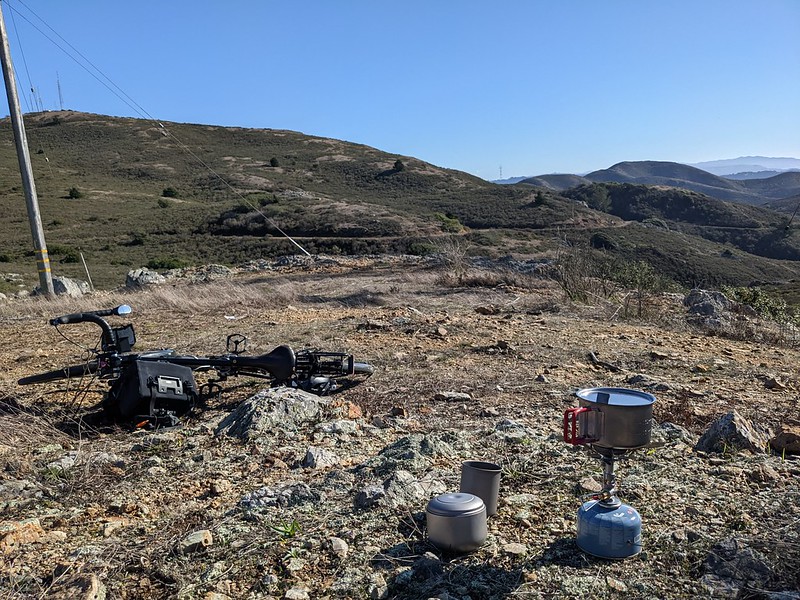
I like both of these options. The Tiartisan gaiwan I keep at work, with a Snow Peak H200 to decant into and drink out of. The Boundless Voyage set I keep at home, usually decanting from the brewing vessel straight into a Boundless Voyage 200mL Titanium Cup. I use both regularly. Since the Boundless Voyage set lives at home, it tends to get thrown in the bag more than the Tiartisan gaiwan for portable tea adventures.
Having both, I’m not sure that I have a strong preference between the two. I paid $32 for the Tiartisan gaiwan, which I think is a fair price for a nice piece of double-wall titanium kitchenware. I paid $80 for the Boundless Voyage set, which is a reasonable price for all the included components, but it is more difficult to justify when I only use the brewing vessel and the lid – not the fairness pitcher, and not the cups (the cups are really nice – and I’ve actually purchased more to have at home – but most of the time I’m just brewing for myself, so I want to decant all the liquor into a single vessel I can sip from). The Tiartisan gaiwan, being an actual gaiwan, is more aesthetically pleasing. And aesthetics are an important part of gongfu.