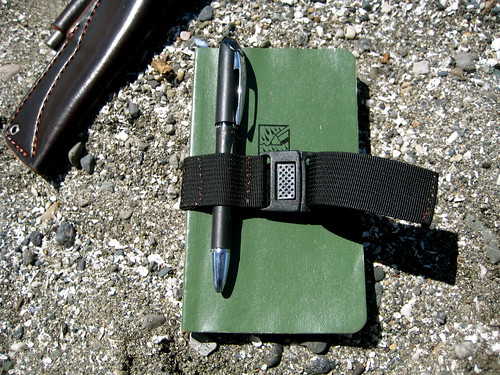
Here’s an idea I stole from the excellent BFE Labs: hacking a Rite in the Rain notebook to include a retention strap. The original idea at BFE was just a strap to keep the notebook closed and contain loose leafs that were shoved inside, but while making the strap he accidentally cut the webbing too short. To solve this he sewed on another piece of webbing as an extension and found that the overlap between the two pieces made a good pen holder.
I thought this was a neat idea, but the tri-glide fastener used in BFE’s version seemed a little cumbersome. I knew I would want some sort of quick release buckle. A traditional side release buckle would be too bulky for my tastes, particularly when the notebook is shoved in a pocket. The other thought I had was that using elastic webbing for the pen loop might increase the versatility of the strap, since it could expand to fit different sized tools.
I didn’t have any 1” elastic webbing hanging about, but I did have some spare webbing and an old buckle from a previous project. With those two things along with a knife and my repair kit, I set out to see what I could do about whipping up some kind of strap.
My initial intention was to create the pen loop the same way as the BFE strap: cut one strap short and sew on an extension piece with a bit of an overlap. But before I got to that part, I had to sew one end of the buckle onto the webbing. In preparing to do this, I realized that I would already be sewing a loop right there. I could just pull a bit more webbing through the buckle to create my overlap, throw in a stitch to hold down the end of the webbing, another stitch closer to the buckle, and between the two I would have the perfect loop for my pen. Simple.
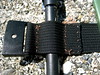
On the back of the notebook I created two slits for the webbing to pass in and out of, just like in the BFE hack (except I used my knife rather than a Dremel tool).
I’m happy with how this hack came out and will probably perform it on my other Rite in the Rain notebooks. The whole process takes only a few minutes and does not strain my juvenile sewing skills. My one complaint is with the buckle that I happened to choose. I appreciate the low profile, center-release design, but the male end of it doesn’t grip the webbing very well. This means that while it is adjustable, it doesn’t hold much tension, and so the buckle doesn’t snap open as much as it should when I release it. I’m thinking of sewing the webbing down on the male end of the buckle just like I did on the female end. The strap would no longer be adjustable, but I could be guaranteed the proper tension and that the buckle would open with the speed and ease which I desire. This would also present the opportunity for me to create another loop to hold a second tool. Perhaps a pencil or a highlighter to go along with the pen.
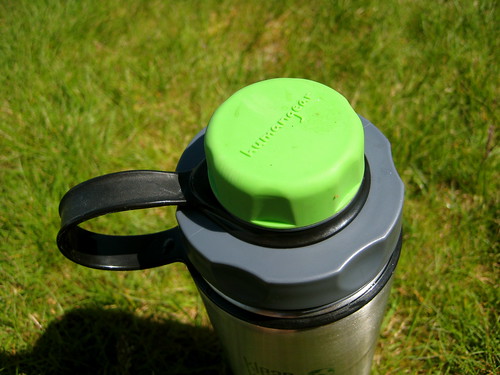
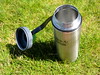
I bought one of the newer 27oz wide mouth Klean Kanteens back in March. My favorite bottle is still the old 40oz Klean Kanteen that I keep in my EDC bag, but I’ve been wanting something a bit skinnier that could fit in the bottle cage on my bike. I also was looking for an excuse to try out one of the newfangled wide mouth Klean Kanteens. I prefer a wide mouth opening on my bottles, but my 40oz Klean Kanteen (despite being beat on fairly heavily for the past few years) is in too good a shape to justify replacing it with a 40oz wide mouth. A new 27oz wide mouth bottle that would fit on my bike (not to mention in most car cup holders) and so supplement the 40oz bottle was easier to talk myself into!
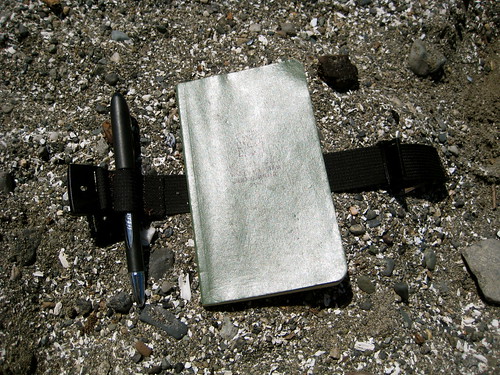
To go along with the wide mouth bottle, I also purchased a humangear capCAP. This product of questionable capitalization addresses the same problem as Guyot Design’s Splashguard: how to drink from a wide mouth bottle while moving without ending up with half the bottle’s contents on your face and the other half up your nose. The capCAP allows the user to take advantage of the wide mouth for filling and cleaning (as well as water filter integration), but also provides a smaller opening for drinking.
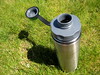
The wider cap has indentations on it making it easy to grab and turn. The smaller cap, in addition to the indentations of the larger cap, is made of rubber, which makes for an easy grip while wearing gloves. The rubber has a tendency to pick up small amounts of dirt and sand, but so far I have not found this to be an annoyance.
My habit in unscrewing bottle lids is to hold the body of the bottle in my left hand and unscrew the lid with my right. The problem with doing this with the capCAP is that attempting to unscrew the small lid tends to start to loosen the larger lid as well. All that’s needed to rectify this is to hold the larger cap in my left hand rather than the body of the bottle itself. This forces a change of habit, which took me a couple weeks to get used to, but I now grab the larger cap with my left hand while unscrewing the smaller cap without thinking. I haven’t had a problem with it since.
When using the capCAP with my wide mouth Klean Kanteen, I find that it does leak slightly. If the bottle lays down on its side for a bit, a couple drops of water will escape from underneath the larger cap. The threads on the bottle’s lip must not match up perfectly with those on the capCAP. If the bottle was to be thrown loosely into the body of the pack where it could shift around and potentially get a drop or two on some form of paper, I would opt for the more secure closure of the standard Klean Kanteen lid. But when the bottle is in the cage on my bike or stored upright in a pouch on my pack’s waist belt, this small leak is no problem.
The capCAP can of course be used on other wide mouth bottles. I also use it on my 32oz HDPE Nalgene as well as my 32oz Guyot Designs Backpacker and have not noticed any leaking with those bottles. It’s a pretty neat product that I think makes a great addition to any wide mouth bottle.
Here are the weights of various lids, measured on my scale:
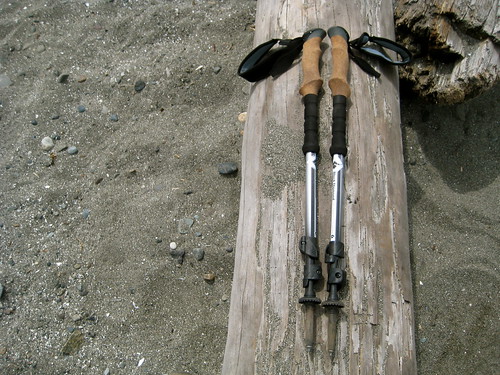
My last trekking poles were a pair of REI Peak UL Carbon Compacts. I was quite fond of them. At 11 oz for the pair, they were one of the lightest pair of telescoping poles available. Sadly, I broke them last January. A lot of folks who have only used aluminium poles cast a critical eye on those made of carbon fiber, thinking them flimsy and weak, so I think it is important to point out that it was a piece of the plastic locking mechanism that broke, not the carbon fiber pole shafts. I think that carbon fiber is a perfectly adequate material for trekking poles and should stand up to all reasonable abuse.
When my old poles broke, I took them into REI hoping that there might be some way to repair them. We spent an hour or so going through all their spare parts and trying to hack something usable back together, but in the end we couldn’t come to a solution that I was satisfied with. The fellow I’d been talking with mentioned that he could give me credit for the broken poles, which surprised me. I’ve returned plenty of used gear to REI, but never an item that was actually broken (and broken, as far as I’m concerned, due to user error and not any fault in the product itself). I guess they’re serious about that guarantee.
The credit was certainly welcome. I took it, but now I had to decide what to replace the poles with. REI no longer makes the Peak UL Carbon Compact trekking poles, so I couldn’t get another pair of the same. I started to look around to see what was on the market. My first limiting factor in the search was that I needed telescoping poles. I use trekking poles to pitch my Kifaru Paratarp. For the tarp, the needed height of the rear pole is 26”. This rules out a lot of poles that only collapse to something closer to 30”, such as those from Titanium Goat and Gossamer Gear. The other big factor was weight. Ideally, I wished to stay as close as possible to the 11 oz weight of the old poles. A quick look around told me that I would have to come to terms with at least some weight gain, as there didn’t seem to be anything to compete with the weight of the Peak UL Carbon Compacts. Some poles weighed 20 oz or more for the pair, which was just ridiculous! Leki had a few poles in the 14-16 oz neighborhood. A decent weight, I thought, but none of the poles really jumped out at me.
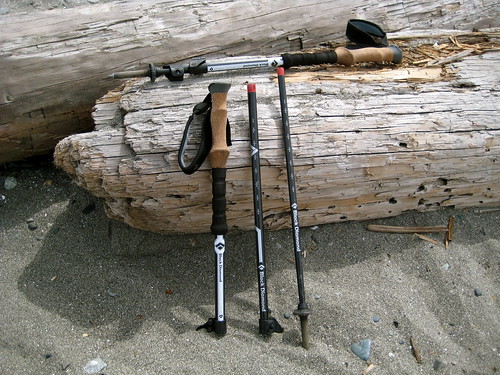
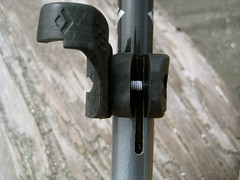
Eventually I came upon the offerings from Black Diamond. Their poles use the FlickLock locking mechanism, which I had heard of before. It had always intrigued me but I’d been turned off by the extra weight associated with it. Most of the big names in trekking poles, like Leki and Komperdell use a twist-lock mechanism which, as anybody who has ever used such poles can attest, is finicky at best. 1
After a bit more research, I decided that the greater functionality of the FlickLock system would be worth the weight gain. I landed on the Black Diamond Alpine Carbon Cork trekking poles. At 17.5 oz they were a good deal heavier than my old poles, but I thought I would give them a chance.
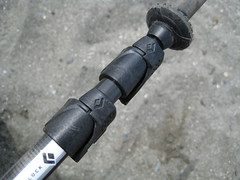
As the name implies the Alpine Carbon Cork poles have a cork handle and three shafts made of carbon fiber. They collapse down to 25” and expand to 51”.
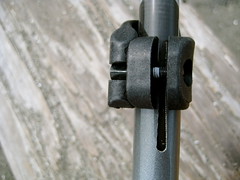
FlickLock
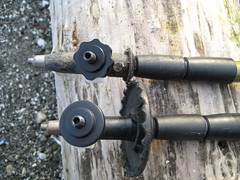
The FlickLock mechanism operates as basically a clamp. When shut, it compresses the outer shaft, which prevents the inner shaft from moving. The tightness of the clamp can be adjusted with a single screw. It is simple, effective, and works in all conditions. There is no messing around with twisting one shaft to expand some little doohickey that you can’t see in the hopes that pressure will be built up against the inside of the outer shaft, no sitting around twisting one pole in the proper direction for 5 minutes wondering if the thing will ever lock, and there is little chance that shafts will accidentally collapse while in use. 2 Beyond the fact that the FlickLock mechanism actually works on a reliable basis, the next advantage is the speed of use: flick it open, adjust, and flick it closed. The main idea behind adjustable poles is that you can alter the length to meet the terrain: make the poles shorter for going uphill, longer for going downhill. With my previous twist-lock poles, I never did this. I only set the length once before setting out for the day. Periodically adjusting the poles was too risky (there was a likely chance I’d unlock them to adjust and spend countless minutes trying to get them to lock again) and even if I could be assured that the locking mechanism would work it still took a few seconds longer than I liked. Now with the FlickLock poles, I find myself merrily adjusting the poles to suit the terrain all day.
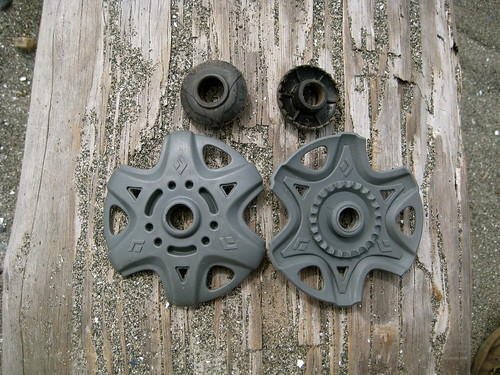
Baskets
As with any decent trekking poles, the Alpine Carbon Corks come with both dirt and snow baskets. The snow baskets are nothing special, but I was surprised at how small the dirt baskets were. I’m not sure why they chose to make the baskets with so small a diameter. So far I have no noticed no difference in how they work. I’m probably not the best judge of that though, as I find all kinds of baskets to be unnecessary when there isn’t any snow. (I had a habit of losing baskets with all my old poles, but since I noticed no difference without the baskets I never spent the money to replace them.)
Rather than just sliding on the pole and being secured with a nipple and indentation, the baskets on the Black Diamond poles are actually threaded. You slide them on and then screw them down over the threaded area. This seems like a much more secure system. I think it unlikely that I’ll inadvertently loose these baskets.
Handles
The cork handles on these poles are new to me. My previous poles have always had foam handles. I’ve heard claims that cork handles are more comfortable than foam, but so far I have noticed no difference in that department. Still, I have only had these poles for the cooler part of the year. Perhaps in the summer heat with sweaty palms I will appreciate more of a difference. I am curious to see if there is much difference in the durability of the cork. I’ve already had a couple small pieces chip off – not enough to raise too much concern, but I’ll keep an eye on it.
The ergonomic shape of the handle is fine, but I don’t use it much. Rather than grasping the poles properly, my preferred method of use for trekking poles has always been to rest my wrist in the strap and lightly hold the lower part of the handle in the fleshy part of my hand between thumb and forefinger. I don’t think this is the most efficient way of doing things – placing all the weight on the wrist doesn’t seem the best thing to do – but it has always been most comfortable and natural to me. It allows me to freely swing the pole back and forth as I walk without much movement of the arm. (I say pole, not poles because though I always carry two to setup my tarp, I rarely hike with more than one pole. I like to have one hand free and find two poles cumbersome and unnecessary except for going down the steepest of hills.)
Below the cork handle, the upper part of the shaft has a foam grip, which I appreciate it. My old REI UL Carbon Compact poles lacked this (because of the extra weight it would entail, no doubt) and I found that I missed the feature. It’s nice to have a comfortable spot to grip when you are climbing up a short steep hill and don’t want to adjust the length of the poles.
StickPic
Of course, with a new pair of poles I needed a new StickPic. My old models wouldn’t fit on the tip of the Black Diamond Alpine Carbon Corks. I tried to buy a new one, but Rodney Java refunded my money. That’s three now he’s given me for free. Someday I’ll track him down and shove the money under his door.
Impressions
I’ve been using the Black Diamond Alpine Carbon Cork for about 4 months now and they have exceeded my expectations. I was wary at first about not getting a return for the significant increase in weight. Of course I still would like them to be lighter, but I feel that the increased functionality has justified the increased weight. 3 I am very pleased with the poles.
Notes
↵ I had heard that Leki would be releasing a line of poles this spring using a new external locking mechanism similar to Black Diamond's FlickLock. They since have, and call it the SpeedLock, but this was back in winter and I couldn't wait the few months till the release. I haven't seen the new SpeedLock in person yet. It sounds like a good replacement of the old twist-lock system, but I'm not sure how it stacks up against Black Diamond's FlickLock. The closest Leki poles to compare with the Black Diamond Alpine Carbon Corks seem to be the Corklite Aergons.
↵ Ok, ok, the twist-lock isn't really that bad. It works most of the time -- but we're talking like 75% of the time, not 99%. Sometimes it made me want to beat the poles against a tree.
↵ The weight I gave for the poles includes the straps and dirt baskets. The straps weigh about 1 oz and the dirt baskets 0.3 oz, so a bit of weight could be saved by ditching those.
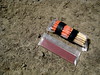
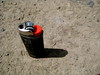
This kit is kept in the lid of my rucksack, which also functions as a man-purse for short trips away from camp. It is intended for emergencies only, and so is secondary (or even tertiary) to my normal fire starting equipment: ferro rod(s), rubberized BIC lighter, matches, and a fair amount of cotton balls covered in petroleum jelly. The kit here is to be used only when these other methods of starting fire have for some reason failed.
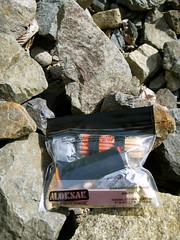
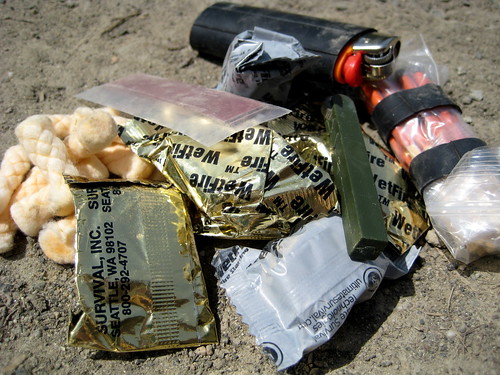
It is quite simple and is probably nothing unique. Everything is kept together and dry inside of a small aLOKSAK (measuring 5”x4”). It weighs 2.8 oz. The contents are as follows:
That’s a whole lot of fires that I can start with just this small kit, and I don’t even have to start messing around with natural tinder or making char-cloth yet!
Previously the envelope held a small ferrocerium rod and striker in lieu of the Spark-Lite. I’ve never been too impressed with the Spark-Lites: the sparks produced are relatively small and weak. They are fine for starting a fire with prepared tinder such as cotton balls or those commercial products included in this kit, but trying to get a natural tinder to take with them can be a bit of a pain. As for the whole one-handed fire starting thing – well, I have never broken my arm or hand. I have been cold enough to not have the fine motor control needed to reliably operate a Bic lighter or Spark-Lite. So for me, given the choice between a normal ferro rod and a one-handed Spark-Lite, I’d go for the normal rod. It requires a gross movement that I know I can always achieve, even when cold.
I decided to remove the ferro rod and add the Spark-Lite to this kit because I figure that I have enough ferro rods stashed here-and-there (including at least one tethered to my body) that the chances of me losing all of them are very slim. (I would be more likely to lose this kit, which is kept in my pack, not on my body.) I should never have to depend on whatever spark-making tool I keep in the envelope, but by opting to make that tool a Spark-Lite, I do give myself the possibility of one-handed fire making (without depending on lighters or trying to light a match held in my teeth). Doug Ritter would be proud.
In the past, I used Camelbak bladders as my primary water reservoir. I’ve had three of their military hydration systems and never experienced a leak – except once when I neglected to fully close the bladder’s lid. In snowy, alpine conditions I would chuckle at others whose hydration hoses were frozen shut, while I confidently sucked on my insulated Camelbak hose. The Camelbak mouthpiece always insured a high flow-rate, unlike some other brands, and the hose could be shut off at either end, providing further protection against the accidental leaks that have been known to plague other bladders.
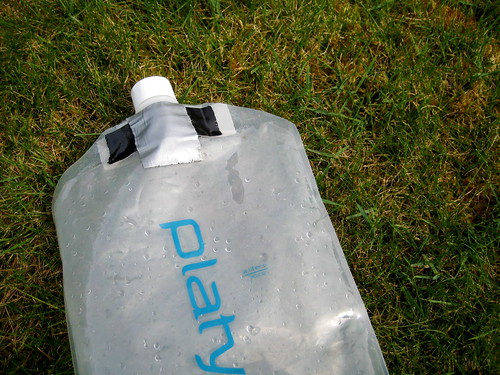
But the Camelbak’s durability comes at a price. My 100oz Omega Reservoir (including bite valve and insulated tube) weigh in at 10oz. Not exactly light. So last year, I decided to give Platypus bladders a shot. I had been critical of their toughness in the past, but their 2 liter bottle weighed in at only 1.4oz. With optional drink tube kit and bite valve cover, the full system weighed 3.6oz. It had been referred to as the “gold standard” in ultralight bottles. Too enticing not to pick up.
Of course, the low weight of the Platypus system also comes at a price. The small opening makes the bladder less convenient to fill. The tube is uninsulated, and so inappropriate for much cold weather use. The bite valve has a low flow rate and is prone to leaking. The bite valve cover is cumbersome and difficult to close. And the bladder itself is made of a much thinner and less durable plastic than the Camelbaks. Still, I have been very happy overall with the 2L Platypus bottle. I have not touched the Camelbak once since making the conversion.
But now my Platypus has begun to leak. I’ve patched it with Gorilla Tape, which seems to be an effective fix, but it is only temporary. I need to replace the bottle. Nowadays, all the rage seems to be for the new bottles with their ugly colors. The largest of these is 1 liter, and so not an option for me.
Platypus also now offers two newer hydration systems. The first is the Hoser, which is similar to the old bottle, but with a grab loop at one end and an angled port at the other. The manufacturer’s weight for this system is 3.6oz, which is the same weight that I have measured for my old bottle, hose, and valve. The trouble with the Hoser is that the bottom does away with the traditional expanding bottom of the old bottles in favor of a grab loop. Because of the small opening of the bladders, the best way that I have found to fill it is to scoop up water with something else and pour it into the standing bladder (a method made popular by Jason Klass). For one person to achieve this, the bladder has to stand on its own. The Hoser bladder will not, so it isn’t an option for me.
The other new offering from Platypus is the Big Zip SL. The zipper closer on this addresses the difficulty of filling. The manufacturer’s listed weight is listed at 5.5oz (though I’ve heard reports that it is actually heavier): still a good deal lighter than the Camelbak, but significantly heavier than the old bottle system.
I could go back to the old Camelbak, but the weight deters me. It is also difficult to pour precise amounts of water out of the Camelbak bladder for cooking, which is a disadvantage now that I’m used to the Platypus bottles.
The other option is a bladder from Source. I first heard of these with MilitaryMoron’s review. They have many features that are attractive to me, but I haven’t seen anybody post an accurate weight. Source themselves list their 2L bladder at 0.53lbs (8.48 oz), but they have the same weight listed for the 1.5L and 3L bladders. It seems highly improbable to me that three different sized objects weigh exactly the same. More likely, the manufacturer’s listed weights are inaccurate. I am assuming that the Source bladders will be heavier than the comparable Platypus Big Zip SL and that they have the potential to be slightly lighter than a Camelbak, but that is only a guess. I would rather not purchase a Source bladder without knowing an accurate weight.
For now, I think I will buy another 2L Platypus bottle to replace my leaky one. Despite the durability issues, they seem to be the best mix of price, performance, and weight. They must be thought of as disposable, but that is true of all plastic water carriers. I’m not sure why they have lately become more difficult to acquire from large retailers.
Does anybody know of any other options that I have overlooked?
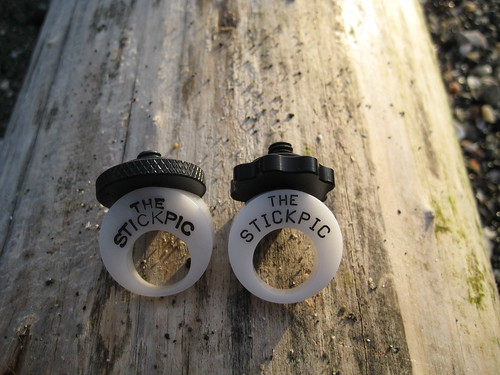
This past summer, I reviewed the StickPic, which Rodney Java, the inventor, was kind enough to send me. Last week Rodney sent me one of his new and slightly improved StickPic models.
The first change is in how the markings are applied to the StickPic. According to Rodney,
We now have a new machine shop producing the StickPic who cnc engraves our name and model numbers. In the past, we used a metal die stamp and stamped every StickPic by hand. This produced inconsistent results.
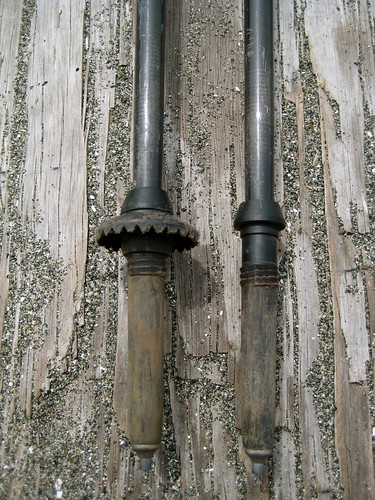
The difference is noticeable. In the old model, pictured on the left, you can see how the thickness of the lettering varies. The new engraving looks more professional, but this is only a cosmetic difference, and not one that I think really matters.
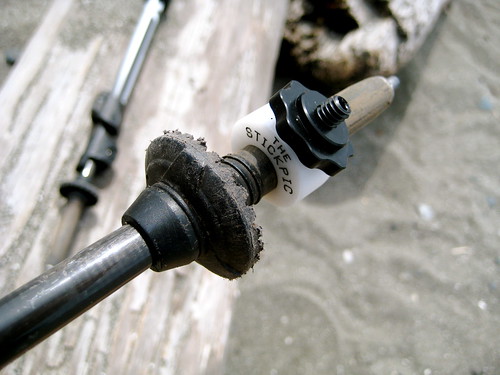
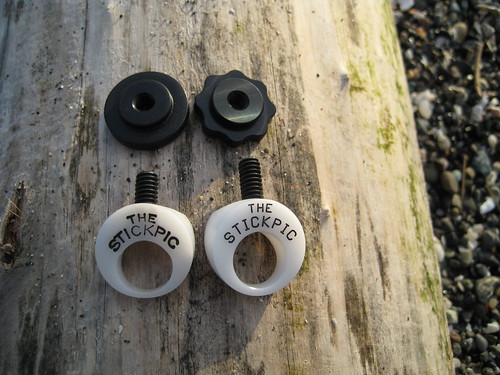
The next immediately noticeable difference is the nut:
A new 8 star jam nut is now used which allows the user, while wearing gloves, to easily attach the StickPic to the camera.
This is certainly a more significant change than the engraving. I find that it makes the StickPic easier to both attach and deattach even when not wearing gloves. The new nut is not only easier to grab, but it also spins more freely than the old.
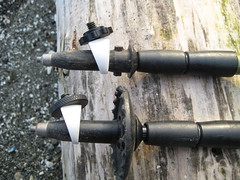
The third and final change is the hole itself:
The through hole on the new model is also slightly tapered to ensure it stays on the trekking pole more securely; it wedges in a little better.
You can see in the photos that the new Stickpic slides much further down the tip of the pole than does the old one. I’m not sure how much this contributes to security: I installed both StickPics on either one of my poles and shook them around violently. Neither came off. Granted, I didn’t have the extra weight of a camera attached to either StickPic. But I’ve also never had my camera fall off the pole during normal use with the old StickPic.
The weight of the new StickPic has been slightly increased – probably due to the winged nut. My scale puts the old model at 8 grams and the new one at 10 grams. (Though my scale is only accurate down to 1 gram, so it isn’t the best for measuring such lightweight items.) Personally, I think the new nut is worth an additional 2 grams!
I think that all three changes to the StickPic are marked improvements, with the new nut being the most significant of the lot. I do not think that any of the changes are enough to warrant purchasing the new model if you are happy with the old one, but they will improve the device for new users.
Note:
In the above photos, the new StickPic is installed on a trekking pole without a basket. It is not necessary to remove the pole’s basket to use the StickPic. I simply lost the basket for that pole a while back and never replaced it. Even though it slides much further down the tip of the pole than does the old model, the new StickPic will fit on the other pole without interfering with the basket.
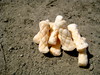
I don’t like paying for brand-name ferrocerium rods with handles when blanks can be got for much cheaper – usually $5 less than their handled counterparts. But I do like to have a handle on the rod, and I require some sort of lanyard. When it comes to something as important as a ferro rod, I find comfort in knowing that it is secured to this-or-that.
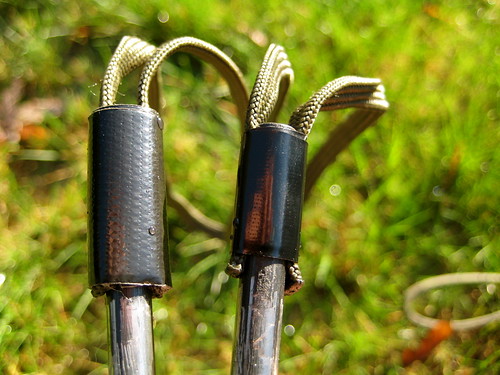
The simplest solution is to tape a loop of paracord to one end of the rod. I use gutted paracord. The tape can be wrapped a few extra times to make a handle however thick I like.
The other rod in the above photo has a similar lanyard attached in a different manner. The paracord is first taped to the rod with a small piece of electrical tape. Then, on top of that, I slid a small piece of heat-shrink tubing (the kind used for electrical wiring). That was blasted with a hair dryer, causing it to shrink.
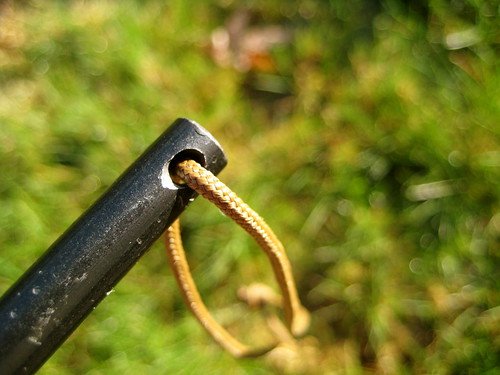
A small hole could also be drilled in one end of the rod. This is something of a fire hazard: the drill and rod will be throwing a whole lot of sparks as the drill works its way through. And it requires access to power tools, which isn’t always practical.
My favorite method is the tape. The lanyard is secure and the tape provides a thick, padded handle.
I like to buy my blanks from Ben’s Backwoods. If you like misch metal blanks, Going Gear is the place to be.
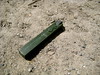
The greatest disappointment about any Mora knife is the sheath: a flimsy, plastic thing that won’t easily fit on a decent sized belt and does not even hold the knife very securely. As they come, I consider them unusable. But a few simple modifications and additions make them quite acceptable.
The Mora knife sheaths are designed to be mounted either on a button on a pair of coveralls or through a belt. Apparently people wear very small, skinny belts in Sweden. Over here in the United States of Gun Belts, that doesn’t fly. The belt slot on the sheath can be forcefully enlarged by shoving in a piece of wood, such as a ruler, and applying heat to cause the plastic to expand, but I don’t trust that such an act will not over weaken the plastic. I’m not a big fan of carrying a Mora directly on my belt, anyway. Usually, I’ll carry the knife either on a lanyard around my neck or as a dangler off my belt. But both of these setups allow the possibility of the knife and sheath to swing freely, accentuating the problem of an insecure fit.
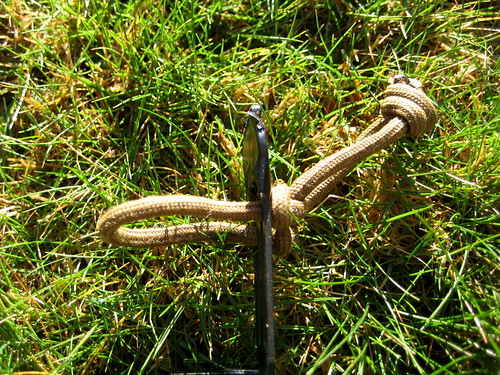
Both the problem of how to carry the sheath and the problem of the insecure fit can be addressed with a single piece of paracord.
With the knife in the sheath, I take a piece of paracord and run both ends around the handle and through the slot for the belt. Then, tight against the back of the sheath, I tie an overhand knot in either end of the cord. This creates a loop of paracord on the front of the sheath that can be made smaller, but cannot become any wider than the bottom third of the handle. Because the handles on Mora knifes are somewhat tapered – fatter in the middle than on either end – this loop prevents the knife from being removed from the sheath. Even if the knife is only lightly dropped into the sheath rather than securely pressed, it cannot be removed without first sliding off the loop of paracord.
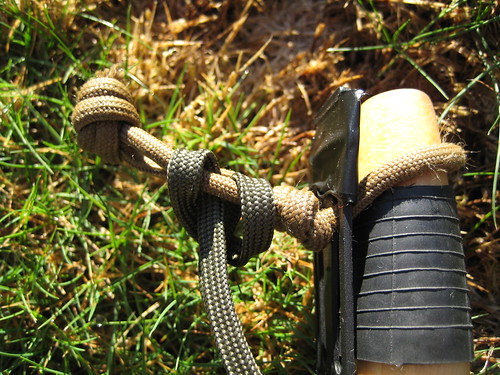
After tying the two knots against the back of the sheath in either end of the paracord, I take both ends and tie them together, forming a loop on the back of the sheath. This provides my carry options.
To carry the knife in a dangler system, I prefer to use a Maxpedition Keyper rather than a carabiner. The Keyper is mounted on my belt and clipped into the loop of paracord on the sheath. (To reduce movement in this setup, I’ll stick the knife and sheath in my pocket.)
The last thing that I do to this part of the sheath is add a small wrap of electrical tape around the very top, covering the upper bit of the belt loop and the button hole. This prevents the paracord from sliding to the top of the sheath and forces the securing loop to be about .75” from the very end of the handle. I’ve found that if this is not done, the securing loop is like to slip off the handle.
That’s all that is needed to make the sheath usable, but a few other additions can be made to increase its utility.
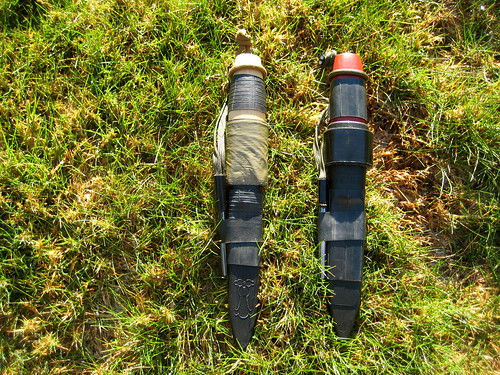
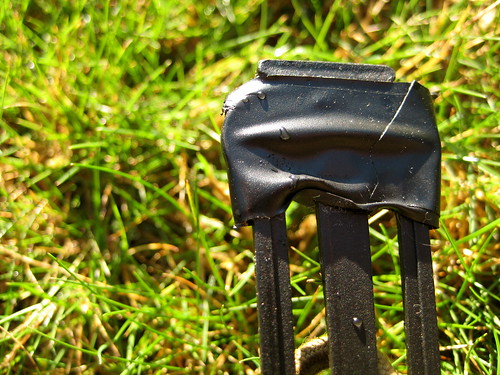
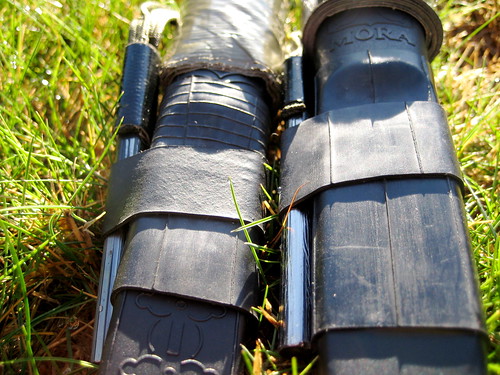
Around the top of the sheath, I wrap tape. In the sheaths pictured here, one has 2” olive drab duct tape, the other has 1” black Gorilla Tape (which is like duct tape, but thicker and stickier). One can never carry enough tape. I imagine, also, that the tape likely increases the structural integrity of the sheath.
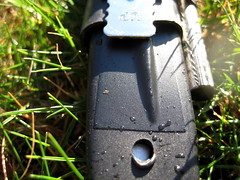
On the back of both sheaths, I have a #17 sailmaking needle, pre-threaded with black kevlar thread, taped down with some electrical tape. As I mentioned in my review of the RAT Izula, this is an idea I first picked up from one Dave Canterbury’s videos. The extra needle and thread adds no noticeable weight and could be a welcome addition to the sheath if you ever find yourself separated from your pack, with the knife and sheath as your only piece of gear.
The next modification on the body of the sheath was also inspired by Dave Cantebury. In another of his videos, he showed how he had layered different width pieces of inner-tube on a machete sheath to create pockets that could store small items, such as a sharpening stone and magnesium fire starter. With that in mind, I add a wide piece of inner-tube onto the middle of the Mora sheath (which also serves to cover and further secure the taped down needle). Then, on top of that, I put a skinnier piece of inner-tube. Slid between both pieces is a backup ferro rod. Because the rod has rubber below it and rubber atop, there is an incredible amount of friction. The ferro rod becomes difficult to remove. I have carried blank rods in these “pockets” and they have never fallen out. Still, I prefer to carry rods with a lanyard of some sort on them. I loop the rod through its lanyard around the paracord loop on the top of the sheath, guaranteeing that the rod is secured.
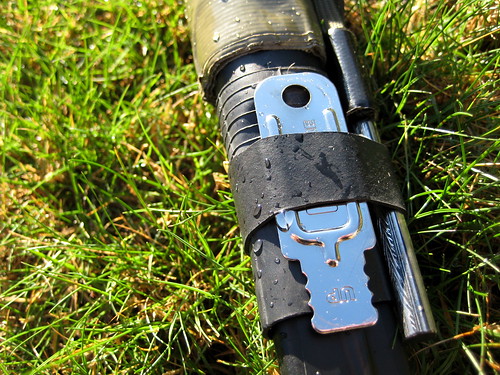
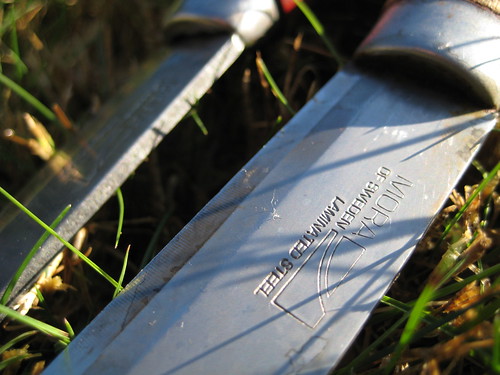
The sheath for my KJ #1 knife has only a ferro rod. That knife is carbon steel and can generate sparks off the spine. On the sheath for the larger SL-2, however, I have added a small striker slid between the two pieces of inner-tube on the back. The SL-2 is made of laminated steel, which is too soft to reliably produce sparks.
These modifications made to the Mora sheath help to secure the knife, allow for different carry options, guarantee a source of fire, and provide a needle, thread and tape for repairs. They turn what is otherwise a near useless sheath into a functional item worthy of being matched with the Mora blade.
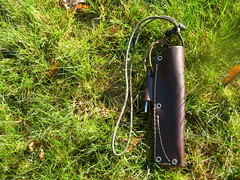
(I also own a high-quality leather sheath made by JRE Industries for the KJ #1 knife. I tie a loop of paracord through the top loop of leather on the sheath so that the knife may be carried around the neck or on a dangler, similar to the modified plastic sheath. The leather sheath does not require a loop of paracord on the front to secure the handle. Nor does it need pieces of inner-tube to create a pocket for a ferro rod. The only thing that it lacks is a repair needle, but I have found that most tape does not adhere very well to leather, so I cannot stick one on the back.)