You are currently viewing all posts tagged with gear.

The Vagabond's Spatula

Cleaning my pot in the wilderness has always proved a challenge. I’m not hugely concerned with completely sanitizing it – that would not be realistic – but I do like to get all the food remnants out of the pot after every meal. A few extra ants in my ramen? No problem. Fungi and bacteria in the oatmeal? I’d rather avoid that.

Getting every last bit of food out of the pot with a spork doesn’t work. If I’m in a desert or on the beach, sand can be used to scrub the pot. The Equisetum family (Horsetails) are also good scrapers, due to their high silica content. But neither sand nor Horsetails are available frequently enough on my trips to make them realistic solutions. As well, cleaning the pot with those means that I’m dumping food remnants onto the ground, rather than into my belly. If I’ve humped it, I’d rather eat it.

I used to carry a piece of a green scouring pad. Those work great when the sun is available to dry them out after use. Here in Cascadia that means they work about 3 months of the year. The other 9 months – especially in winter – it proves a challenge and a hassle to dry them fully. I don’t like storing the pad with any moisture in it. Doing so would create the perfect incubator for bacteria.

Enter Crow. She had the excellent idea of using a spatula head to clean the pot. It’s a simple system:

  1. Eat dinner out of pot
  2. Clean pot with spatula, licking food remnants off of spatula as you go
  3. Boil water in pot
  4. Pour heated water from pot into bottle for tea

The pot is cleaned with the spatula. Afterward, boiling water in the pot helps to kill any nasties that might be hanging about.

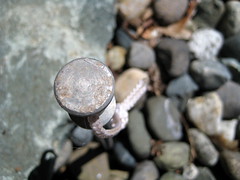
I discovered this idea on Crow’s blog about a year ago. At first I took a small kitchen spatula and cut the handle off. It worked, but there was about 2” of the plastic handle inside of the head that couldn’t be removed, which translated to dead weight. Later I discovered that people actually sell spatulas with removable heads (to make them dishwasher safe, I think). I bought one of those online, but when it arrived the head was a little too small for my tastes. (In the wilderness I always treat my hands as dirty. If I’m licking the spatula, I want it to be big enough where I can hold it with my fingers near the top and lick near the bottom. I do not want to lick where my fingers are.)

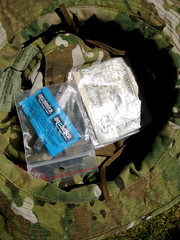
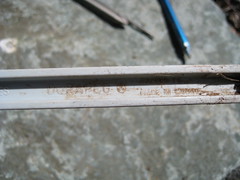
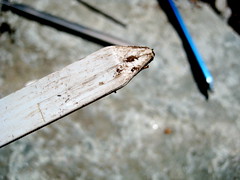
About a month after I had started to use the sawed-off spatula, I discovered that GSI made exactly what I wanted: a compact scraper.

GSI Compact Scraper

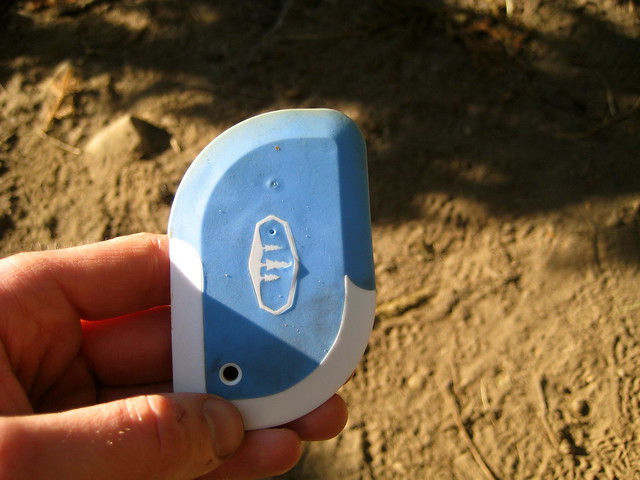
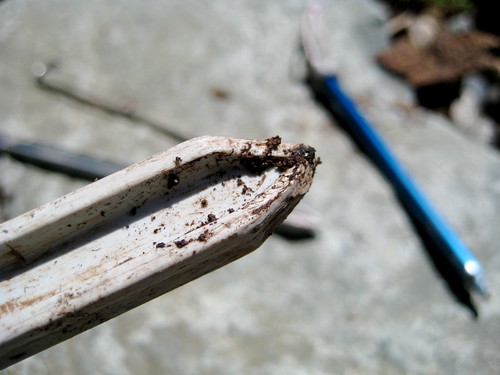
At 16 grams (0.5 oz), it’s not the lightest possible solution. But it’s lighter than my first attempt, and the perfect size for my needs. The blue part is a soft rubber, like a normal spatula head. The white bit is hard plastic, meant for scraping burnt foods. (Burning your meal, I think, is a mistake you only make once. So far I’ve not actually used the white part to scrape the pot. It’s where I keep my fingers.)

My method of using the scraper differs slightly from Crow’s. I eat the meal with my spork, attempting to get as much of the food as possible. Afterward, there will still be plenty left in the pot.

Pot After Oatmeal

When the spork is of no more use, I pour some water into the pot, swish it around, and drink. (A habit I picked up in southern Idaho’s desert. Water was scarce, so if you used it to clean your pot, you still had to drink it afterward. The taste is not always entirely pleasant, but you get used to it, and are wasting no resource.) This takes care of some of the left over food, but with meals like oatmeal, there’s still gunk left over.

Pot After Water

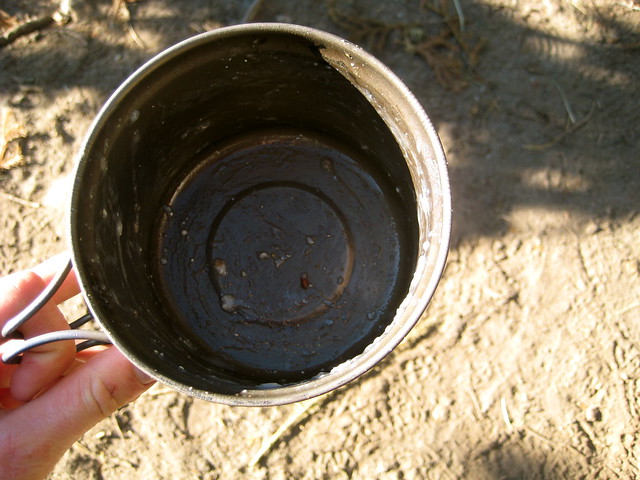
After this precursory cleaning, I go to work with the scraper: scraping the pot clean, licking clean the spatula as I go (leave no calorie behind, I say). The pot will then be visibly clean.

Pot After Scraping

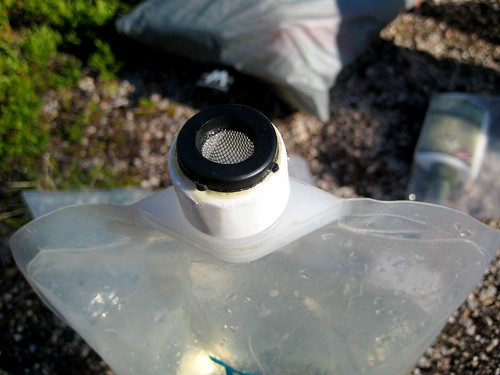
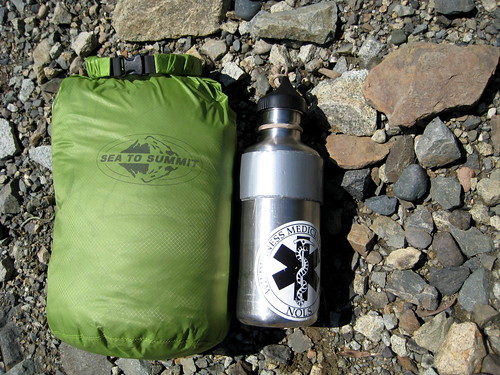
At this point, I may or may not boil water in the pot. If I have brought enough fuel for an after-meal drink, I’ll boil the water in the pot to finish cleaning it, then dump the water into an old Vitamin Water bottle for a drink. Most of the time I don’t plan on warm drinks. Either way, at the end of the process the pot will still have a little moisture in it. If I’ve just had dinner, the cleaning is complete: I’ll leave the pot till breakfast. On the other hand, if I’m moving again after the meal, I don’t like to pack my pot away wet, so I’ll wipe it down with a small piece of an absorbent camp towel.

The GSI Compact Scraper is now a permanent part of my kitchen. Since I started using it at the end of last year, it’s also the piece of gear that people request to borrow the most! (It goes in my mouth. I never lend it.) I’d recommend any wilderness traveler pick up some sort of cheap spatula or scraper.

Eagle Creek Slim Wallet

I carried the Spec-Ops THE Wallet Jr for four or five years. It’s certainly well made and, other than the tags I cut off of it, looks the same as the day I bought it. But it’s bulky, heavy, and carries more than I need. Primarily because of the bulk, I went looking for a slimmer wallet, settling on the Eagle Creek Slim Wallet (which now seems to be a discontinued product). In another couple months it will have seen a year of use.

Eagle Creek Slim Wallet

The Slim Wallet is made out of 420D Double Box HT nylon, which so far seems tough enough to survive my pocket: there is, as of yet, no noticeable damage to the wallet. It’s simple interior consists of a billfold, clear pastic ID window, and three card slots. There are actually three additional slots inside the wallet. I don’t think these were intended as such (instead they seem to just be byproducts of how the wallet was sewn), but they work to carry additional cards or hide small items.

Eagle Creek Slim Wallet

As the name implies, the wallet is incredibly thin. Perhaps not as thin as an ALL-ETT wallet (I considered one of those, but wasn’t convinced as to the durability), but a huge improvement over the Spec-Ops wallet. This took some getting used to. After years of carrying a bulky wallet, I was accustomed to feeling the wallet in my pocket, which provides some sense of security. The Slim Wallet is slim enough so that you don’t always notice that it’s there.

My only complaint about the wallet is that the billfold is just as wide as a Federal Reserve Note, which makes it somewhat tricky to get the bills in there. If the wallet was half an inch or so wider, bills could be more easily slid inside.

Billfold

I carry a few items in the wallet in addition to the normal cash, few cards, and ID.

Wallet Survival Items

There is a small repair kit, which consists of a #17 sailmaker’s needle, a #5 crewel needle, kevlar thread, a small safety pin, and a very small misch-metal ferro rod.

Wallet Repair Kit

In addition to the repair kit are two AquaMira water purification tabs, two emergency $20 bills (to be used only if I’m lying half dead in a ditch), and a small piece of Rite-in-the-Rain paper with my GPG key fingerprint. (If this sounds familiar, it’s because I keep almost identical items in my hat.)

All of these items tuck nicely inside the wallet’s hidden slots and add no noticeable weight or bulk.

For more ideas about urban wallet survival kits, check out TEOTWAWKI blog.

Gear List

I’ve had a few requests to do a gear list for some of my recent trips. Since it’s been over a year since the last one, I thought I would acquiesce. What follows is the list from my recent journey to the Goat Rocks. Though that was a short trip, my gear has varied very little on any trip this year. I’ll take warmer clothing earlier (and later) in the year, and of course the amount of food varies based on the length of the trip, but most everything else remains static. This is quite the change from even just a year ago, where it seems like my gear would change drastically from trip to trip! Perhaps I know what I’m doing a little better now.

Some of the gear is light, some of it isn’t. Regular readers know that I always struggle to find a balance between lightweight, functionality, and durability. Certain items that I carry – like, say, the saw – are not likely to be found in the pack of an average backpacker, but are suited to my method of travel. In all, my base weight for this trip was right at 20lbs. I’m not too ashamed of that. In fact, considering that my pack alone weighs 6lbs when empty, that base weight is pretty darn good.

If you have any questions or comments about the items, feel free to get in touch.

Packed

  • Kifaru ZXR
  • Kifaru Longhunter Lid
    • Shoulder strap
    • 1 quart ziploc
      • Toilet paper
      • 1 oz Hand sanitizer
    • Emergency fire kit
    • First aid kit
    • Kifaru Ultralight Pullout (small)
      • REI Keychain Thermometer
      • K & M Industries Match Case
      • Croakies Glasses Retention Lanyard
      • Jetstream ballpoint pen
      • Sharpie
      • Highlighter
      • #2 Pencil
      • All-Terrain Lip Armor (SPF 25)
      • 4x safety pins
      • Duct tape (length unknown, .75" diameter roll)
      • StickPic #3
      • Badger Healing Balm
    • Sea to Summit Headnet
    • Petzl Tactikka headlamp
    • Tyvek Stuff Sack
    • Rite in the Rain No. 393-M
    • Large garbage bag
    • 1 quart ziploc
      • 3x Green Trails maps
    • Plastic vial-type container (found on street)
      • 16x cotton balls w/ petroleum jelly
    • Hard glasses case (unknown brand/model)
      • Oakley soft lens cloth bag
      • Julbo Micropores (Rx)
    • Sea to Summit Ultra-Sil Dry Sack (2 liter)

On Body

(I do hope that I haven’t forgotten anything. If you notice anything conspicuously absent, please let me know!)

Every Day Carry

It’s been about a year since the last one, so today I did another dump of what is currently in my pockets and bag. Everything that I am carrying today is representative of what I carry most every day. Much of it is the same as last year.

Some things occasionally change: I frequently switch between the Emerson Mini-Commander and the Izula (I probably carry the Izula more frequently than the Emerson). If I need more stuff, I might change the bag to my TAD Gear FAST Pack EDC or the Kifaru E&E.

Urban EDC Level 1: Worn

Urban EDC Level 2: Carried

Urban EDC Level 3: Vehicle

As usual, you can visit the Flickr photo pages for identification of every item.

The Humble Boonie Hat

I’m a big fan of fancy hats. I discovered the joy of a well-made and stylish hat a couple years ago with the Duluth Oil Cloth Packer Hat. After that hat died, I tried others. My current favorites are the Tilley T3 and the (locally made) Filson Tin Cloth Packer. But as great as those hats are, sometimes it’s nice to get back to basics.

If all you want to do is keep the sun off, it’s hard to beat the boonie hat. It’s lightweight, cheap, and compresses down to fit into a pocket.

Boonie Hat: Top

Boonie Hat: Bottom

Being cotton, I find these hats to be useless in the rain, but I do tend to have a hooded hard shell with me for that purpose.

This particular boonie hat happens to be MultiCam. I bought it back when MultiCam was new and I could fool myself into thinking that it was low-profile. “Hey, nobody actually issues MultiCam, so it’s not like this hat looks very military-like. If anything it makes me look like a harmless airsofter.” Something along those lines. Now that everybody and their grandma is issuing MultiCam, it’s maybe a little more military looking. I sewed a Rebel Alliance patch on the top to make me feel better about it (and because rebelling against empires is always the cool thing to do).

Boonie Hat: Pocket

The other modification I made to this hat was to sew a little velcro on the pocket. After getting my Tilley hat, I became somewhat addicted to having a pocket in the top of my hat. Most boonie hats have them, but they’re just a slit, with no sort of closure. I don’t trust them to hold small items. Having added the velcro, I can feel sure that whatever I put in there won’t fall out.

Boonie Hat: Stash

What I keep in all my hats that have pockets in them is the same: in one ziploc bag, an emergency $20 bill (using this is to be avoided as much as possible). In another ziploc bag, I keep four AquaMira water purifying tabs and a repair kit.

This particular hat weighs 122 grams (4.3 oz) with added patch and velcro. Including the contents of the pocket, the total weight is 134 grams (4.7 oz). A nylon hat like a Tilley LT5B could save me an ounce, but for the money it’s hard to beat the boonie.

DIY Platypus Pre-Filter Cap

Although I have misgivings about their durability, Platypus2L+ bottles remains the primary water reservoirs in my pack. It’s been a bit over a year now since I started using them. At the same time I switched over to Platypus, I also started treating my water with chemicals rather than filtering it. Both methods of treatment have their advantages and disadvantages, but lately I have been using chemicals almost exclusively.

A water filter, of course, filters out not only the invisible nasties that upset the stomach, but also the visible things things that don’t cause much harm but aren’t altogether pleasant: dirt, dead bugs, small rocks, and the like. When I moved to using chemicals I was just dumping the water into my drinking vessel direct from the source. Without any sort of filter, the water could sometimes be a bit gritty. Too textured for my taste.

As a first attempt to solve this I started to place a bandanna over the opening of the Platypus, and then poured the source water over that. That worked great for getting out the sediment, but then I had the problem of having a wet rag. If the sun is out, it dries, but the other 307 days of the year, the bandanna – even a synthetic Buff – became a bit of a hassle to dry. I wanted some sort of pre-filter that I could get wet without worrying about it.

The solution (like more than a few before it) came while browsing the BackpackingLight forums.

DIY Platypus Pre-Filter Cap

A filter washer is a rubber washer with a mesh screen in the middle. Apparently they’re used in garden hoses and washing machines to remove sediment. I was able to find them easily in the plumbing section of a local hardware store.

I took an old Platypus cap and drilled out the center of it. Then, with a little Gorilla Glue, glued the filter washer onto the cap. That’s all there is to it! The new pre-filter cap weighs 2 grams (0.07 oz) and shouldn’t cost much more than $1 to make.

  • DIY Platypus Pre-Filter Cap
  • DIY Platypus Pre-Filter Cap

The downside to the pre-filter cap is that it does noticeably decrease the flow rate of the water. To fill the Platypus, I use a scoop made out of an older Platypus bottle with the top cut off. Without the pre-filter cap, it takes all of 30 seconds to fill the Platypus bottle. With the pre-filter cap, it takes something more like 2 minutes to fill up the bottle. I have to pour the water out of the scoop much more slowly. Because of this I’ll sometimes forgo using the pre-filter cap if the water looks very clean, but the majority of the time I do use the cap. It’s become a permanent addition to my pack.

DIY Platypus Pre-Filter Cap

Sea to Summit Ultra-Sil Dry Sacks

I love my Sea To Summit Ultra-Sil Dry Sacks. They’re made out of a thin and slippery silnylon Cordura, which makes them tough, light, and easy to slide in and out of a pack. The Hypalon roll top closure means no water can get in or out. All the seams are double stitched and taped on the inside. In all, the Ultra-Sil sacks are some of the lightest weight dry bags out there that still maintain a good level of durability. I’ve had an 8 liter and 2 liter model for about three years. Last Fall, I picked up a 13 liter model.

Sea to Summit Ultra-Sil Dry Sacks

  • Inside Out Ultra-Sil
  • Sea to Summit Ultra-Sil Dry Sacks

8L Ultra-Sil

The 8 liter model is my most used bag. I use it primarily to carry clothing. For me, it’s the perfect size for 3 season use. During the winter, when I’m carrying more puffy clothing, I sometimes have to supplement it with a secondary sack. I’ve had the whole thing accidentally submerged multiple times and never came out with wet contents.

8L Ultra-Sil

The 8 liter sack also functions as my pillow at night. This is a bit tough on the sack, since as a pillow it normally sits directly on the ground above my sleeping pad and so gets rubbed around on the dirt and rocks. In the 3 years that I’ve used it as a pillow, I’ve only ever had one failure – and that one just after this last trip. There was a small abrasion near the seam in the middle of the bag that I noticed dripping water when I was cleaning the bag. A dab of Mcnet Silnet on the inside and the outside of the bag sealed that right up and the sack is once again waterproof.

  • 8L Ultra-Sil with Seam Sealed Abrasion
  • 8L Ultra-Sil with Seam Sealed Abrasion

2L Ultra-Sil

The smaller 2 liter bag has seen a variety of duties. It’s held a first aid kit, notes, and small clothing items like gloves and a hat. For the past 6 months it has functioned as my camera case. You may remember that back when I did an EDC post I mentioned in the photo notes for my level 2 items that I wrapped my camera in a bandanna for padding and then put that in a waterproof Aloksak. The problem with that setup is that Aloksaks aren’t incredibly durable, nor are they cheap. I can’t afford to replace them every time they fail. So I moved to putting the bandanna-wrapped camera in the 2 liter Ultra-Sil sack. It’s just as waterproof (if not more so), but also more durable. The other benefit to using the Ultra-Sil is that I have plenty of room left over in the sack to dump in my cell phone when traveling in the wilderness.

13L Ultra-Sil

The 13 liter Ultra-Sil I bought last Fall to hold my sleeping bag. Prior to this I used a Kifaru Compression Stuff Sack. The Kifaru sacks are great at compressing bulky items down. Patrick developed them to compress around the circumference of the item, rather than length wise, so that they actually fit in the bottom of a pack (strangely enough, a novel idea). They’re made of a lightweight and waterproof material, but only close with a drawstring closure. This means that water can potentially creep inside. I’ve used one of these sacks in some capacity since 2007 and never once had an item get wet, but it’s always a risk. The other issue for me is that I rarely ever max out the capacity of my pack. I can afford the space for bulky items and don’t need to compress them. So I decided to start using the Ultra-Sil sack for my sleeping bag. They don’t compress, but they guarantee that my sleeping bag will always stay dry and, due to the lack of compression straps, the Ultra-Sils are lighter than the Kifaru sacks. (The small Kifaru compression sack – which I use for both my 20F bag and my 40F bag – weighs 68 grams, or 2.4 oz.) The 13 liter is a good size for my 20F bag. The 8 liter is a better size for my 40F bag, but because I only have one 8 liter sack and it’s always used for clothing, I usually end up using the 13 liter sack when carrying my 40F bag as well.

Kifaru 20F Slick Bag in a 13L Ultra-Sil

Kifaru 20F Slick Bag in a #1 (small) Kifaru Compression Sack

The only thing that I don’t like about the Ultra-Sil sacks is lack of a grab handle on the bottom. When I stuff my sleeping bag into the sack and purge out the air, it gets packed in there pretty well. To remove it I have to hold the bottom of the sack. Since there’s no grab loop, that means that I have to pinch the bottom, which also means pinching the sleeping bag itself. It’s not a big deal, but a grab loop on the bottom would make removing the sleeping bag ever-so-slightly easier.

If you’re looking to keep gear dry without a large penalty in weight, I would strongly recommend picking up two or three of the Ultra-Sil Dry Sacks.

Sea to Summit Ultra-Sil Dry Sack

Weight

2 L Ultra-Sil
20 grams / 0.7 oz
8 L Ultra-Sil
30 grams / 1 oz
13 Ultra-Sil
42 grams / 1.5 oz

Concerning Stakes

I’m always looking to shed a gram or two from my pack without sacrificing too much functionality. One of the categories of gear that I have been focusing on of late are my tarp stakes. For the past year and a half I have attempted to discover what works best by experimenting with four different types of stakes in a wide variety of ground conditions. The stakes I’ve used are Durapegs (6”), Tite-Lite Titanium Stakes (6.5”), Easton Aluminum Stakes (6.25”), and Big Agnes X-peg Stakes (7”).

Different Stakes

Big Agnes X-peg Stakes

The X-pegs measure 7” in length, are made of aluminum, and tip the scale at 11 grams (0.38oz). They came with my old Seedhouse SL1, which was the last tent I bought before moving to tarps. The four-sided design gives them a lot of grip in the earth and the notched top securely grabs cordage or a webbing tie out. It’s a pretty basic design, but effective in many types of earth. I’ve beat on these stakes for some time and haven’t bent or broken one in any use.

Easton Aluminum Stakes

The Easton stakes are 6.25” long, also made of aluminum, and weigh 8 grams (0.28oz). These are popular stakes with lightweight backpackers. They have a nice flat head to hammer on with a rock and a small cordage loop at the top to make pulling them out of the ground very easy.

Easton Aluminum Stake

At first glance, one would expect the Easton stakes to be inferior to the X-pegs. Though both are made of aluminum, the Easton stake is hollow, which makes it lighter but easier to break. The body of the Easton stake is cylindrical and smooth so that it doesn’t grip in the earth as well as the four-sided X-peg. Despite all this, I have yet to break or bend an Easton stake. I have also never had one accidentally pull out.

  • Easton Aluminum Stake Head
  • Easton Aluminum Stake

Tite-Lite Titanium Stakes

The Tite-Lite is a 6.5” titanium stake that weighs only 6 grams (0.2oz). It’s a simple stake in the classic shepherd hook design. Though the weight is great, this is the least functional and my least favorite of the bunch. Because of the small diameter it will go into most any ground, but it will also pull out. I’ve had these stakes come out in the middle of a windstorm, forcing me to get up three or four different times during the night to replant them (the Easton stakes and Durapegs were also in use at the same time and never once came out). They twist in the ground fairly easily, allowing cordage and webbing tie outs to slip off. And in very rocky ground, they will bend.

Bent Titanium Shepard Hook Stake

For me, there’s too much functionality sacrificed for the savings in weight. I no longer use these.

Durapeg

The Durapeg is 6” long, made of ABS plastic, and weighs 14 grams (0.49oz). These are the stakes that Kifaru sells with all their shelters. Similar to the X-peg, they are four-sided and have wide indents on two sides to grip the dirt. There’s a flat top for pounding on and a good hook to hold a tie out. Once you put these things in the ground, they don’t tend to move. Despite the fact that they’re the heaviest of the bunch, they’re also my favorite. They simply have proven themselves to be the most effective stake in the widest array of ground conditions. The wide indentations on either side eat a whole lot of ground, making them better in snow and sand than the X-pegs (though they certainly aren’t the best option for a dedicated snow stake).

Durapeg

  • Durapeg
  • Durapeg
  • Durapeg

I have had a Durapeg bend in very rocky ground but, unlike with the Tite-Lite, the bend in the Durapeg was not enough to affect the functionality. Still, the bent Durapeg has been removed from my rotation. I have yet to have any of these break, but I’m afraid that the bend will be enough to snap the Durapeg if I tried to pound that particular stake into really hard ground again.

Bent Durapeg

The top of the Durapeg does get chewed up a bit after being beat on with a few rocks. So far this hasn’t proved to weaken or in any other way damage the stake overall. I’ve also had some pitting occur on the flat head of the Easton stake due to being driven in with rocks.

Durapeg and Easton Aluminum Stake Heads

Current Carry

My Kifaru Paratarp has 12 different tie out points. Using all of these allows one to get a real tight pitch, but I find is almost always unnecessary. When I’m pitching the tarp in an elevated manner by tying it out to trees, the most that I’ll need are 4 stakes – one for each corner. When pitched in the normal manner with trekking poles, I find that 7 stakes are all that are needed for a good pitch. An eighth stake placed in the webbing tie out between the front and middle tie out on whichever side I’m sleeping on will widen out the shelter a bit and give me more head space. I carry 8 stakes. Currently those 8 stakes consist of 6 Durapegs and 2 Eastons. Also in the bag are 4 Nite-Ize Figure 9s which help me to pitch the tarp from trees or toss up a clothesline or a place to hang a water bladder. The bag itself a lightweight silnylon thingy that came as the stake bag with the Big Agnes Seedhouse SL1.

Stake Package

The whole package – bag, stakes, and Figure 9s – weighs 122g or 4.3oz. With this (and a couple hanks of paracord) I find that I can throw up a secure and comfortable shelter in just about any condition. Occasionally I’ll switch out a couple of the Durapegs for a couple X-pegs, but currently I prefer the greater holding power of the former.

Camp

I do still have two of the lightweight Tite-Lite stakes that I carry with my Ti-Tri. These serve to elevate the pot in wood-burning mode. If I want to I can use these when pitching the tarp to bring up the total number of stakes to 10, but I rarely do.

If anybody has a favorite stake different from the ones discussed here – and it weighs 14g or less – let me know about it! I’m always looking to improve the package.