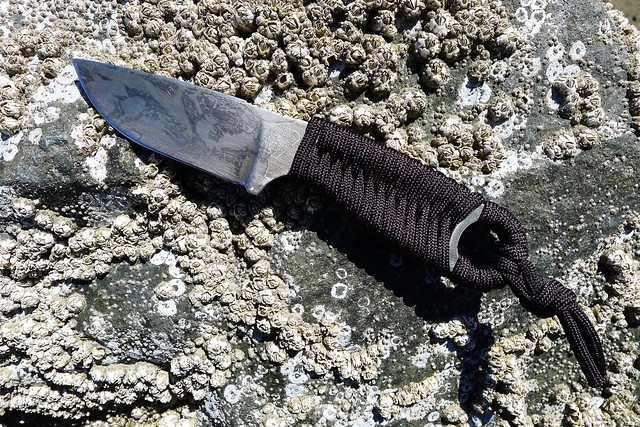
About a month ago I gave my Izula a cosmetic make-over, inspired by Widerstand‘s similar mods to his Becker knives.
Originally the knife had a light tan powder coating on it, which protected the blade from rust and other wear, but did nothing for style. The first step I made in the modification process was to spend a couple hours with a piece of sandpaper, scraping off the coating until I was down to bare metal. That gave the knife a nice, raw look. But it also made it susceptible to rusting. The solution: a patina!
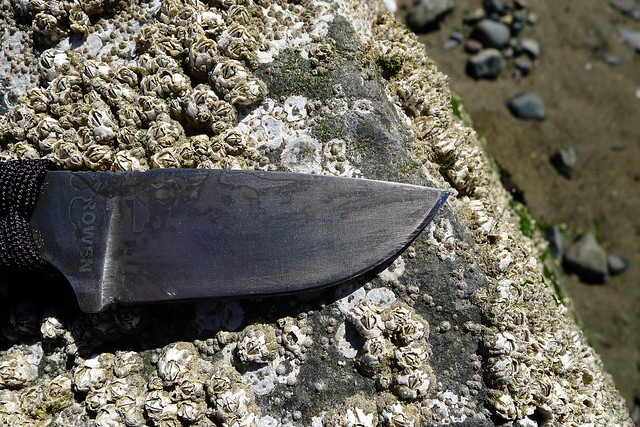
The last time I talked about patinas I achieved it with moldy potatoes and citrus fruit. This time around I went the easier route and dumped the Izula into a bowl of vinegar over night. I thought it looked great when it came out, and I was pleasantly surprised that I could still see the RAT logo and Izula ant. To finish off the coating I rubbed a little mustard on a few spots on either side of the blade.
The way the knife comes from the factory, the gimping is nice and rounded, providing a comfortable grip for the thumb. I almost never place my thumb on the back of the spine, so gimping doesn’t do much for me. And because it was rounded, it couldn’t throw any sparks off a ferro rod. To make the whole affair a bit more useful I took a Dremel tool and redid the gimping. It’s much more rough and sharp now, less ideal for thumbs but great for throwing sparks.
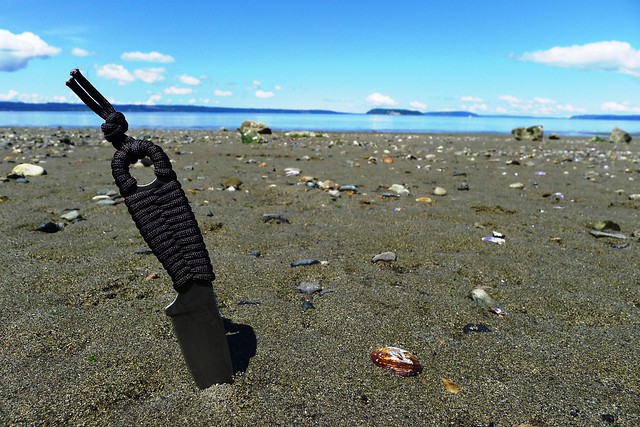
After that all that was left was to re-wrap the handle with a new piece of paracord – black this time – and the job was done. My favorite EDC knife: even better than before.
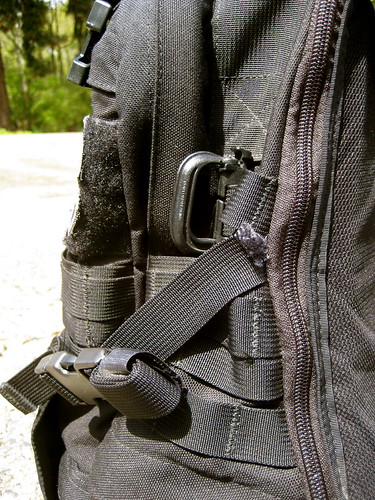
Last week I noticed that the top right compression strap on my Triple Aught Design FAST Pack EDC had begun to rip off from the pack. This is the first failure I’ve experienced on the pack, which has been in regular use since Fall 2007.
I’m surprised that it was this particular strap that failed first. I don’t often carry heavy items in the Transporter Tail, so the strap does not have a lot of stress placed on it. Still, I feel better about sewing it back down than I would about repairing a load-bearing strap.
Now: A needle, a length of #69 nylon thread, and a bit of time.
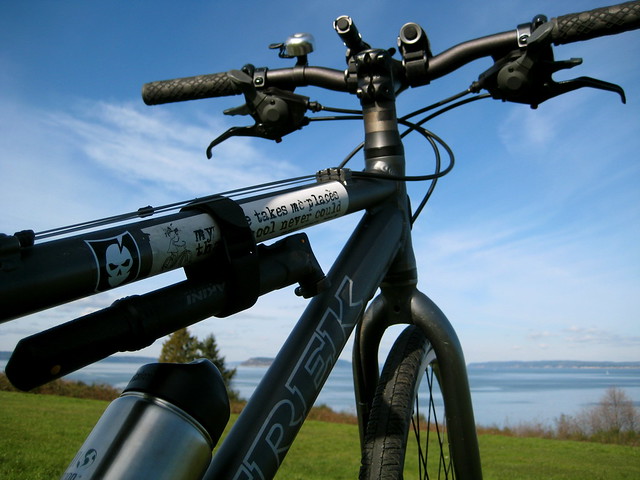
For the past few years I have been using a cheap headlight from Cateye on the front of my bike. When turned on to the blink setting, it did an acceptable job of making me seen, but it did very little to light up the road. Last January I decided that I wanted to replace or supplement it with a better light.
I looked at the lights carried by various bike shops for a while, but none of them impressed me. The high end bike-specific lights are bright, to be sure, but they tend to be much more expensive than a hand-held light of comparable output.
I thought it would be neat if I could somehow attach a normal light to my handlebars. Not only would this be cheaper than purchasing the equivalent bike headlight, but the light would be multifunctional: appropriate either for my bike or my belt. None of my own hackish attempts to mount a normal light on the handlebars satisfied me, so it was with relief that I heard about a company called Twofish.
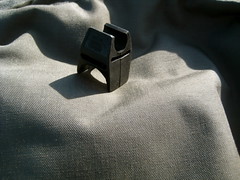
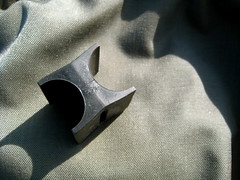
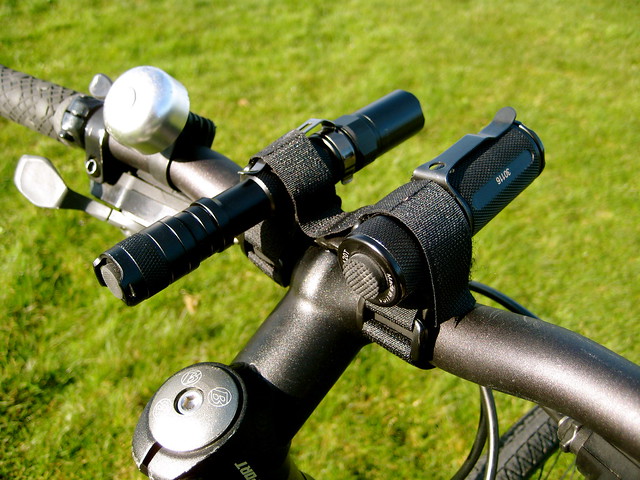
The Lockblock is a piece of rubber with perpendicular “U”s on either side. Each side fastens to an object with a small piece of hook-and-loop webbing. The Bikeblock is similar, but the two “U”s are parallel, and each side fastens to its respective object with a single continuous piece of hook-and-loop webbing. Lockblocks are to be used when you want to mount an object perpendicular to something else, such as a light on handlebars. Bikeblocks are appropriate when you want to mount the object parallel to something else, such as a pump to a frame. I bought three of each.
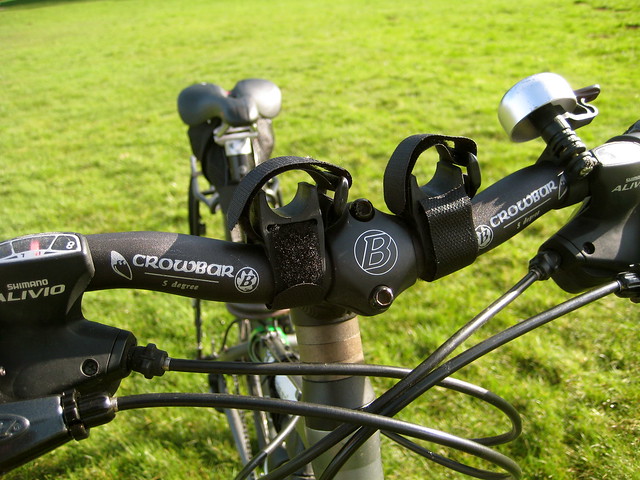
My first use of the Lockblock was to replace the Cateye headlight with my old Novatac 120T. The difference was immediately noticeable on my first night-ride. The 120T lights up the road, both bringing me to the attention of motorists and bringing potholes to the attention of me.
But I still thought it could be better. I wanted a second light.
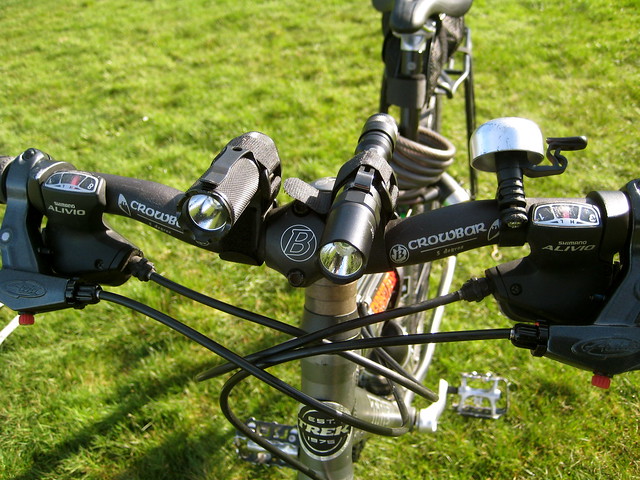
Research showed that the Fenix LD20 was a popular choice to use in conjunction with Lockblocks. It blasts out a fair number of lumens and I liked that it ran on AA batteries rather than CR123s, so I picked one up.
The combination of the Fenix LD20 and Novatac 120T really light up the road. The Lockblocks hold both lights securely, and they make for a safe commute on long winter nights.
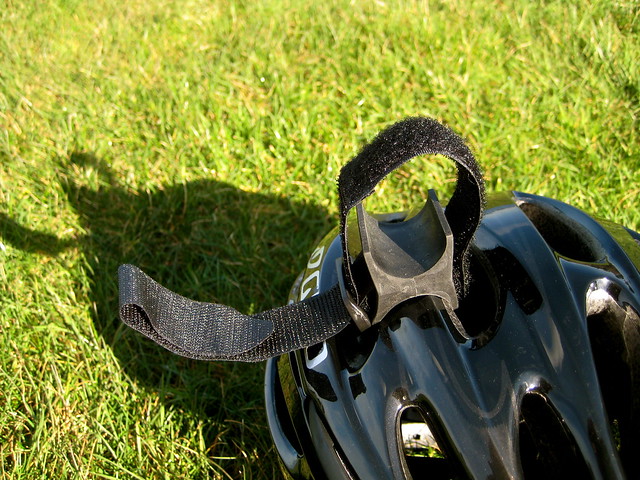
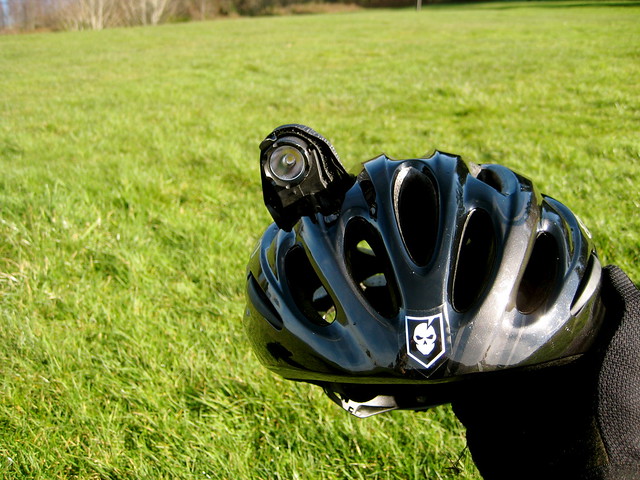
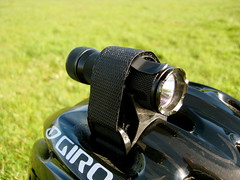
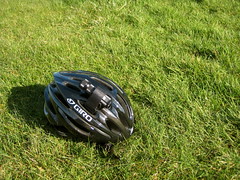
Although I was happy with this setup, I wanted to try using the parallel mount of the Bikeblock to add a helmet light into the mix. The Bikeblock fastens easily and securely across the vents of my Giro Stylus. Between my two lights, the shorter profile of the Novatac 120T made it more appropriate for a helmet mount.
I’ve been running the 120T on my helmet for about a week now. It’s nice to have the light point wherever I’m looking – and the ability to flash inattentive drivers is appreciated – but the light does add a noticeable weight. It’s annoying enough that I don’t keep the light on my helmet during the day, but so far I’ve been steadily putting it back after the sun sets. I haven’t decided if I’ll keep it up there, or if I’ll ditch the helmet light idea. I think that as winter turns to spring and the days lengthen, the Bikeblock will come off of my helmet.
I also use a Bikeblock for its intended purpose – to hold a pump to the bike frame. This is much more secure than my previous method, which consisted only of two pieces of hook-and-loop webbing.
Twofish’s mounts offer a serious challenge to the standard bike-light market. I’m pleased with both the Lockblock and Bikeblock and cannot see any reason to move back to a bicycle-specific headlight.
Lanolin is a kind of wax that sheep and other wool-bearing animals produce to protect their coats. It is, in fact, a waterproofing agent. Any lanolin that remains in the wool after shearing is generally stripped out during the process of turning the hair into clothing, thus reducing the wool’s ability to shed water.
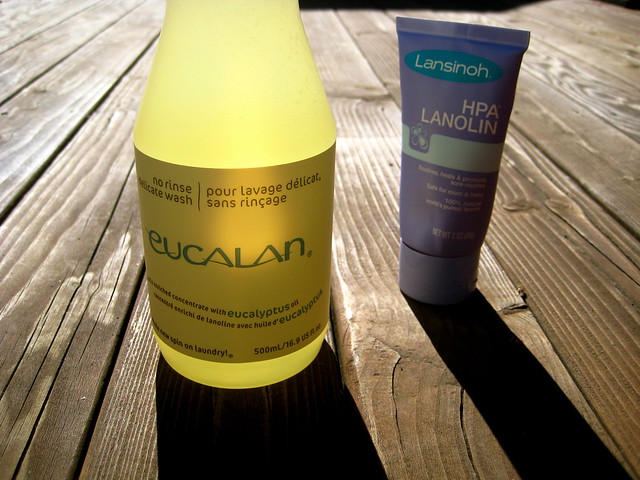
Commercially, lanolin is often used as a skin treatment product for humans. Lansinoh, in particular, makes a pure-lanolin nipple cream for breast-feeding mothers.
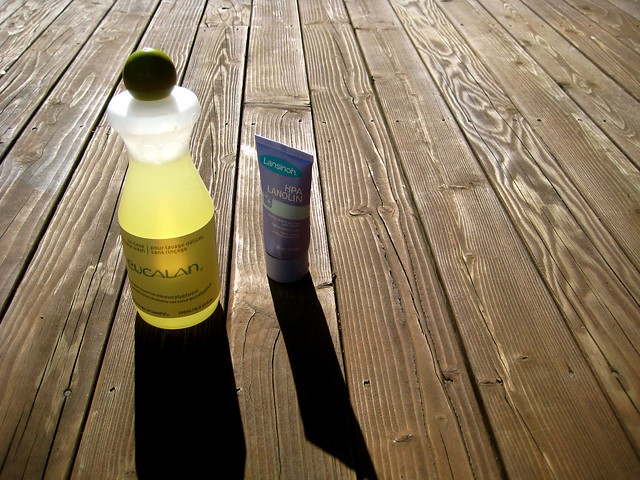
I first learned about lanolin from a comment on my review of West German wool pants. Jenne, the commenter, recommended washing wool products using something called Eucalan. Eucalan is a natural wash that deposits lanolin in the wool. Rinsing isn’t necessary with Eucalan, so much of the hassle (and danger of felting) that is usually associated with washing wool can be avoided.
For an extra treatment, Jenne recommended dissolving a small amount of Lansinoh’s pure lanolin in hot water before adding the Eucalan.
I was intrigued by this method. The no-rinse aspect made it simpler than carefully washing wool with Dr. Bronner’s, which was my previous choice. And increasing the health and functionality of my wool by restoring the natural oils made good sense – the same thing must be done to leather. I bought both the Eucalan and the nipple cream.
Eucalan comes in a few different scents. I first bought the unscented version, which seemed most appropriate for outdoor wear. Later I bought a jug of the Eucalyptus version. Eucalyptus oil is a deterrent to moths and fleas, so Eucalan recommends using this version before storing wool garments for a while. (The eucalyptus scent is very subtle after the wool has been dried – you’re not going to go around smelling like flowers.)
I’ve since washed my West German wool pants, West German wool knickers, Italian wool knickers, and two Pendleton wool shirts – the majority of my non-merino wool clothing – in Eucalan with added Lansinoh and have been pleased with the results. I recommend giving it a shot if you wear wool in wilderness settings.
The Process
Dissolve a small amount (about one inch) of Lansinoh HPA Lanolin in hot water
Add enough room-temperature water to cover the garment to be washed
Add about two cap-fulls of Eucalan and mix it in
Add the wool to be washed
Let soak for 15 – 30 minutes
Pull out the wool, hold it up, and let the water drip out for a minute or two
When I first bought my scale, I started a spreadsheet containing the weights of various pieces of gear. It seemed like a good idea – I knew I wanted some sort of database to store my measured weights and other notes in – but I never got around to updating it. Data in a spreadsheet is too static. You can’t do much with it. I think that characteristic contributed to my disinterest with the spreadsheet.
So for a while now I’ve had the idea of writing a web application to track my gear. Over the past week, I finally got around to doing it.
Gear Tracker is built on Django, a web application framework. (If you’re not familiar with Django, and you have anything to do with making websites, it’s probably worth your time to learn a thing or two.)
Gear
Gear Tracker’s primary purpose is to track gear.
Each item has a weight and acquisition date associated with it. It can be categorized, tagged, and related to other items. There are fields to input size, a link to the manufacturer’s page, a link to a review, and to upload an image. A text area allows the user to store any notes related to the item.
Items can be archived. This provides a way to not list gear that the user no longer owns, but to keep it in the database for future reference of its weight or other attributes.
Weights
Weights are always input in grams.
The metric system makes the most sense and is the easiest to work with. An item’s weight can be displayed in grams or, if the item weighs more than 1,000 grams, kilograms. But because some of us are crippled and still like to see imperial weights, Gear Tracker can also display the item’s weight in ounces or pounds.
Gear Lists
Gear Tracker can also generate gear lists.
One of the things that has prevented me from doing many gear lists in the past is that they’re a pain in the rear to create. It takes a while to manually write out every item of gear that I take on a trip. If I want to add the weight of each item – well, that’s asking too much! It’s not worth it.
Now, making gear lists is easy. Gear Tracker already has detailed knowledge about each piece of gear. All it takes to create a gear list is to select the item, specify how many of that item I took, and whether the item was packed or carried. The result is an organized, detailed gear list for every trip. Total weights are calculated, of course, and can be output in either metric or imperial units.
Private Gear Lists
Gear lists can be made private.
I generally create gear lists when I’m packing before a trip. But I don’t like to publish the lists until I actually return from the trip and also have a report and photos for people to peruse. So, Gear Tracker allows a gear list to be marked as private.
Download It, Hack It, Use It
I’m running Gear Tracker at /gear, but if you want to grab your own copy and run it yourself, you can! I’ve open-sourced the code under a BSD-license. You can find it at GitHub.
A CLO value is a measurement of the warmth provided by a garment. It serves as a means of comparing the relative warmth of various clothing insulated with synthetic materials.
Developed in 1941, [CLO] was the first real attempt to explain the insulation value of clothing so people would know how much clothing they might need to stay warmer or cooler in a given temperature environment. A CLO value of 1 is defined as the amount of clothing required by a resting human (in other words, sitting, lying down or standing, but not moving) to be comfortable at a room temperature of 21 degrees C, or approximately 71 degrees F. That single value of CLO is equivalent to a typical business suit worn by a man -- shirt, undershirt, trousers and suit jacket. The higher the CLO number, the more insulating value is provided.
I recently put together a list comparing the CLO values of various synthetic puffy pants for a forum that I belong to. Some of you may find it useful as well, so I’m posting it here.
All of the weights given are manufacture weights. They might not be entirely accurate. I found the CLO values for the various insulating materials by searching online. Some of them are provided by the manufacturer, some by third parties.
I previously had 782 Gear's Chaps listed as using Climashield Combat. Now I'm told by a retailer that they actually use Primaloft (what type of Primaloft wasn't specified). This agrees with 782's technology page, which lists Primaloft as one of the products that they use. Yet 782 has recently updated the Chaps' product page to specify that the pants use "Climashield" (what type of Climashield isn't specified). Until this is cleared up, I'm leaving the Smokin' Chaps off this list.
Cleaning my pot in the wilderness has always proved a challenge. I’m not hugely concerned with completely sanitizing it – that would not be realistic – but I do like to get all the food remnants out of the pot after every meal. A few extra ants in my ramen? No problem. Fungi and bacteria in the oatmeal? I’d rather avoid that.
Getting every last bit of food out of the pot with a spork doesn’t work. If I’m in a desert or on the beach, sand can be used to scrub the pot. The Equisetum family (Horsetails) are also good scrapers, due to their high silica content. But neither sand nor Horsetails are available frequently enough on my trips to make them realistic solutions. As well, cleaning the pot with those means that I’m dumping food remnants onto the ground, rather than into my belly. If I’ve humped it, I’d rather eat it.
I used to carry a piece of a green scouring pad. Those work great when the sun is available to dry them out after use. Here in Cascadia that means they work about 3 months of the year. The other 9 months – especially in winter – it proves a challenge and a hassle to dry them fully. I don’t like storing the pad with any moisture in it. Doing so would create the perfect incubator for bacteria.
Clean pot with spatula, licking food remnants off of spatula as you go
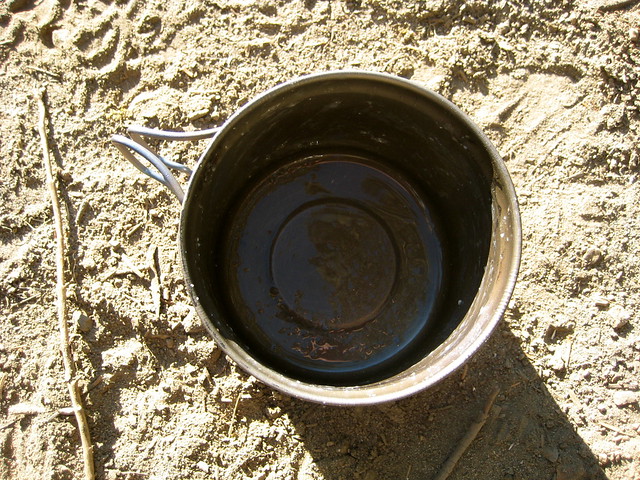
Boil water in pot
Pour heated water from pot into bottle for tea
The pot is cleaned with the spatula. Afterward, boiling water in the pot helps to kill any nasties that might be hanging about.
I discovered this idea on Crow’s blog about a year ago. At first I took a small kitchen spatula and cut the handle off. It worked, but there was about 2” of the plastic handle inside of the head that couldn’t be removed, which translated to dead weight. Later I discovered that people actually sell spatulas with removable heads (to make them dishwasher safe, I think). I bought one of those online, but when it arrived the head was a little too small for my tastes. (In the wilderness I always treat my hands as dirty. If I’m licking the spatula, I want it to be big enough where I can hold it with my fingers near the top and lick near the bottom. I do not want to lick where my fingers are.)
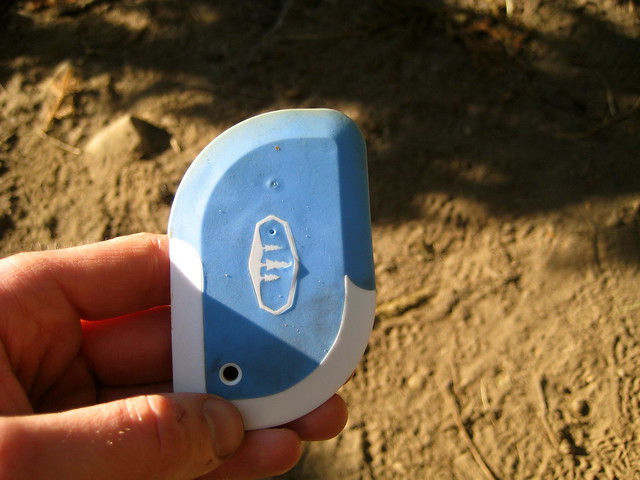
About a month after I had started to use the sawed-off spatula, I discovered that GSI made exactly what I wanted: a compact scraper.
At 16 grams (0.5 oz), it’s not the lightest possible solution. But it’s lighter than my first attempt, and the perfect size for my needs. The blue part is a soft rubber, like a normal spatula head. The white bit is hard plastic, meant for scraping burnt foods. (Burning your meal, I think, is a mistake you only make once. So far I’ve not actually used the white part to scrape the pot. It’s where I keep my fingers.)
My method of using the scraper differs slightly from Crow’s. I eat the meal with my spork, attempting to get as much of the food as possible. Afterward, there will still be plenty left in the pot.
When the spork is of no more use, I pour some water into the pot, swish it around, and drink. (A habit I picked up in southern Idaho’s desert. Water was scarce, so if you used it to clean your pot, you still had to drink it afterward. The taste is not always entirely pleasant, but you get used to it, and are wasting no resource.) This takes care of some of the left over food, but with meals like oatmeal, there’s still gunk left over.
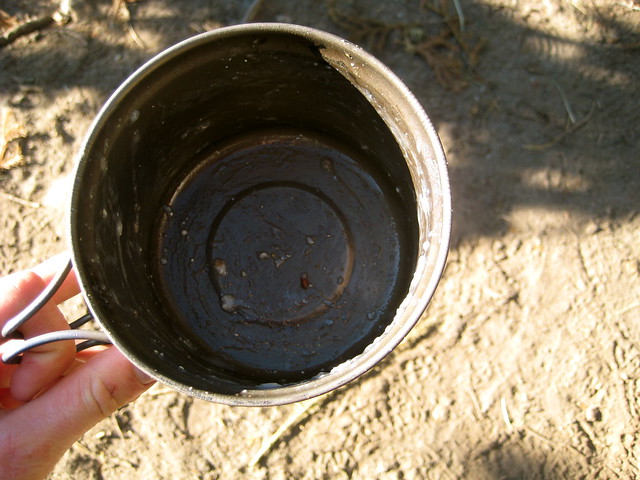
After this precursory cleaning, I go to work with the scraper: scraping the pot clean, licking clean the spatula as I go (leave no calorie behind, I say). The pot will then be visibly clean.
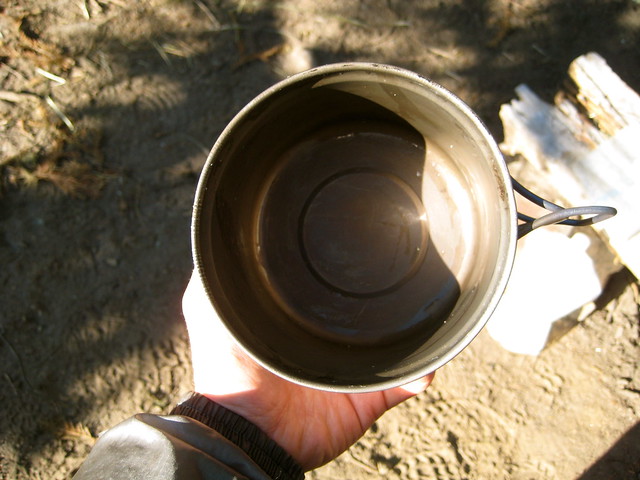
At this point, I may or may not boil water in the pot. If I have brought enough fuel for an after-meal drink, I’ll boil the water in the pot to finish cleaning it, then dump the water into an old Vitamin Water bottle for a drink. Most of the time I don’t plan on warm drinks. Either way, at the end of the process the pot will still have a little moisture in it. If I’ve just had dinner, the cleaning is complete: I’ll leave the pot till breakfast. On the other hand, if I’m moving again after the meal, I don’t like to pack my pot away wet, so I’ll wipe it down with a small piece of an absorbent camp towel.
The GSI Compact Scraper is now a permanent part of my kitchen. Since I started using it at the end of last year, it’s also the piece of gear that people request to borrow the most! (It goes in my mouth. I never lend it.) I’d recommend any wilderness traveler pick up some sort of cheap spatula or scraper.
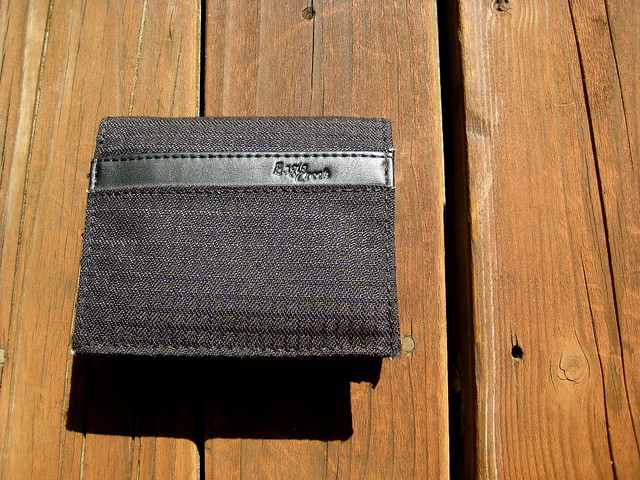
I carried the Spec-Ops THE Wallet Jr for four or five years. It’s certainly well made and, other than the tags I cut off of it, looks the same as the day I bought it. But it’s bulky, heavy, and carries more than I need. Primarily because of the bulk, I went looking for a slimmer wallet, settling on the Eagle Creek Slim Wallet (which now seems to be a discontinued product). In another couple months it will have seen a year of use.
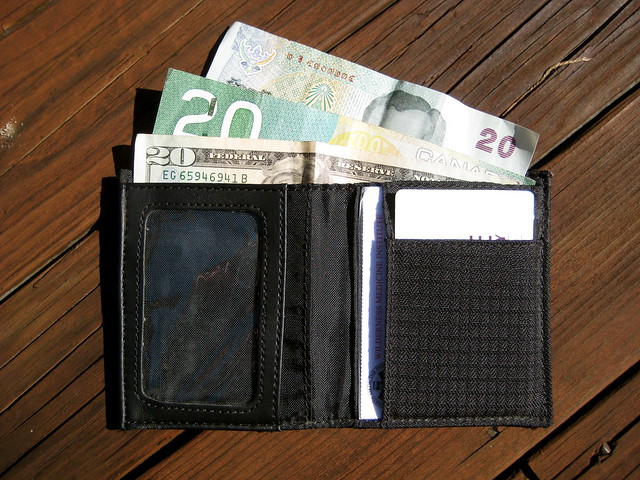
The Slim Wallet is made out of 420D Double Box HT nylon, which so far seems tough enough to survive my pocket: there is, as of yet, no noticeable damage to the wallet. It’s simple interior consists of a billfold, clear pastic ID window, and three card slots. There are actually three additional slots inside the wallet. I don’t think these were intended as such (instead they seem to just be byproducts of how the wallet was sewn), but they work to carry additional cards or hide small items.
As the name implies, the wallet is incredibly thin. Perhaps not as thin as an ALL-ETT wallet (I considered one of those, but wasn’t convinced as to the durability), but a huge improvement over the Spec-Ops wallet. This took some getting used to. After years of carrying a bulky wallet, I was accustomed to feeling the wallet in my pocket, which provides some sense of security. The Slim Wallet is slim enough so that you don’t always notice that it’s there.
My only complaint about the wallet is that the billfold is just as wide as a Federal Reserve Note, which makes it somewhat tricky to get the bills in there. If the wallet was half an inch or so wider, bills could be more easily slid inside.
I carry a few items in the wallet in addition to the normal cash, few cards, and ID.
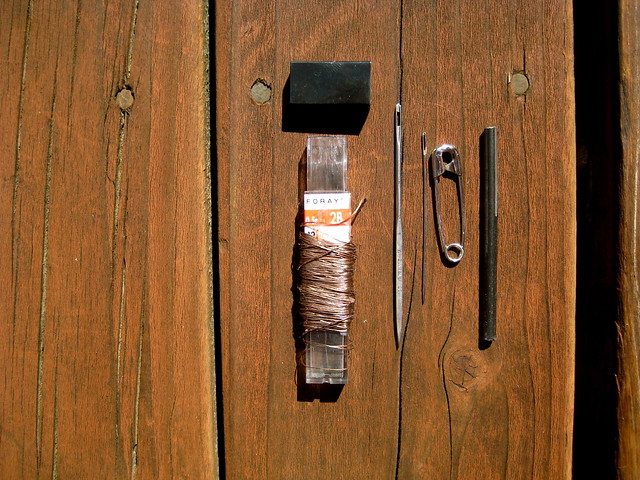
There is a small repair kit, which consists of a #17 sailmaker’s needle, a #5 crewel needle, kevlar thread, a small safety pin, and a very small misch-metal ferro rod.
In addition to the repair kit are two AquaMira water purification tabs, two emergency $20 bills (to be used only if I’m lying half dead in a ditch), and a small piece of Rite-in-the-Rain paper with my GPGkey fingerprint. (If this sounds familiar, it’s because I keep almost identical items in my hat.)
All of these items tuck nicely inside the wallet’s hidden slots and add no noticeable weight or bulk.
For more ideas about urban wallet survival kits, check out TEOTWAWKI blog.