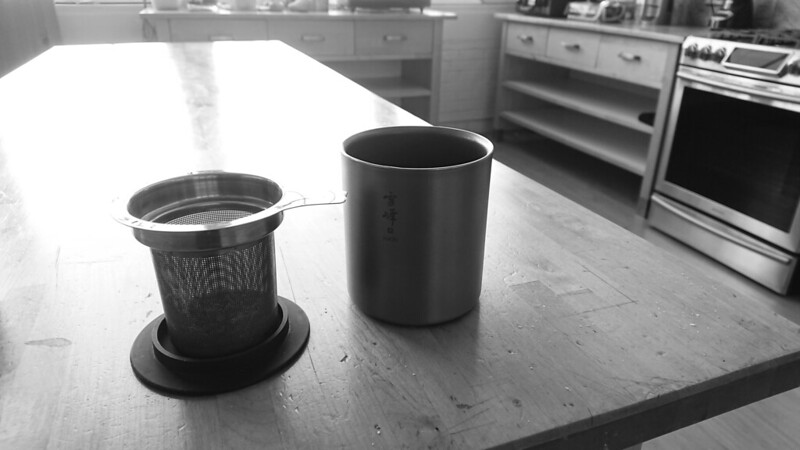
I keep a Snow Peak H450 Mug at work. This is double-walled titanium and as such is expensive and entirely unnecessary. But it is a luxury I enjoy, and I expect that (like most Snow Peak titanium products) it will last approximately until the heat death of the universe. As the name implies, it has a capacity of 450mL. It has an outer diameter of 86mm and a height of 97mm. This is the mug I use for my daily oatmeal and miso.
Tea is brewed in the mug using a FORLIFE Brew-in-Mug Tea Infuser, which fits perfectly in the H450. It is easy to clean, allows the tea to breathe, and lives up to its name as being something that ought to last for life.
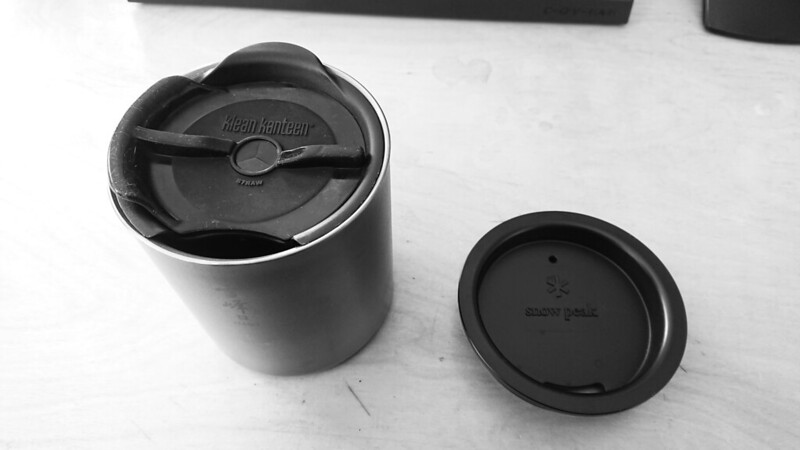
The Snow Peak MGC-053 Lid fits on the H450 mug and provides a cafe style lid. A better option is the old, discontinued Klean Kanteen Pint Lid. Klean Kanteen made this for their pint cup, but it fits perfectly on the H450. It gives you a cafe style lid, and has a rubber piece that rotates into place to cover the hole that you sip out of. There’s also a sealed hole for a straw, though I’ve never used this (maybe you could use it for your bombilla if you were into such things). I would prefer the lid to be deeper, like the MGC-053, so that liquid that does splash up out of the hole has a better chance of being contained within the dish of the lid and then running back into the mug. However, the rotating cover of the old Klean Kanteen lid reduces the chance of liquid escaping in the first place. Neither lid is leak proof, and I rarely use either because I’m generally not moving around while drinking tea, but the Klean Kanteen Pint Lid lives in the small pouch of tea supplies that I keep at my desk. It will get slapped on if I’m walking someplace.
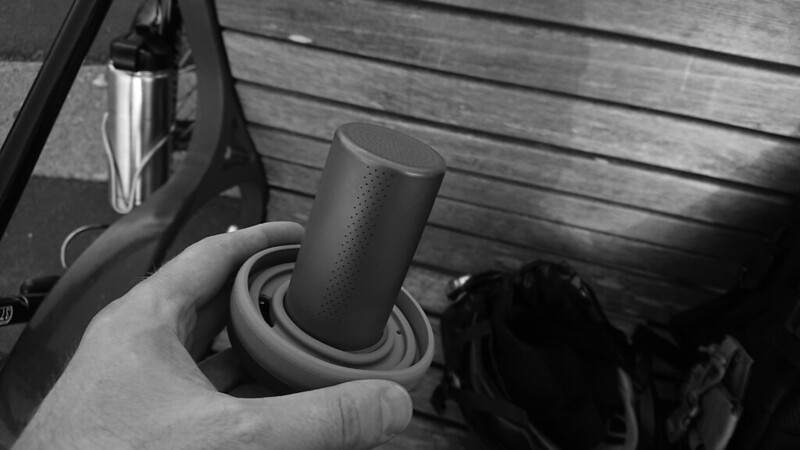
At home I keep a Keith Titanium Ti3521. Keith is a Chinese brand that previously was only available direct from the People’s Republic on AliExpress. In the past couple of years I’ve seen them start to be distributed directly stateside. The Ti3521 has a capacity of 450mL, an outer diameter of 78mm and a height of 125mm. Compared to the Snow Peak mug, it’s a little skinnier and a little taller. What makes this product unique are the lids. It has a silicone cafe style lid with a sippy hole that fits tightly over the rim of the mug. As with the lid options for the Snow Peak H450, this lid is adequate to protect from spills while walking with the mug. The Ti3521 also has a titanium lid. This can be placed directly on the mug, but it isn’t a tight fit and is mostly useless here. It is intended to be placed over the silicone lid, covering the hole you drink out of and providing further protection. The titanium lid has a small pin hole in it to allow heat to escape, so the setup isn’t waterproof – you certainly wouldn’t want to put it in a pack when it had liquid in it – but it will probably keep you from scalding yourself on a bumpy car ride.
The Ti3521 includes its own titanium infuser. The infuser inserts into the silicone lid and hangs down into the mug. The infuser is small, with a diameter of 42mm and a height of 78mm. Some teas, I find, need a bit more room to breathe. For those teas, the FORLIFE Brew-in-Mug Tea Infuser does fit in the Ti3521. But the Keith infuser works well enough for many teas. It has a larger volume than your typical tea ball or stick infuser, so if you are happy with those you’d probably be happy with this.
When new, the silicone lid did impart a strong silicone taste. Since I purchased the product direct from China, I have no way of knowing if the silicone is what the USA FDA would consider “food grade”. When I first received the Ti3521, I made a number of different attempts to reduce the silicone taste from the lid – boiling water, baking soda and vinegar, lemon juice, etc. Nothing really helped, but after just using it for a few months the taste finally went away.
I use the silicone lid to hang the infuser basket, and I use the titanium lid as a dish to place the infuser on when I’m done with it. I rarely drink through the silicone lid.
In addition to its use at home, the Ti3521 is the mug I’ll usually grab when travelling. I find that its skinnier-but-taller form factor tends to be slightly easier to slide into a pack than the Snow Peak mug, and I like that all of the components are more tightly integrated than the H450 and FORLIFE infuser.
I own a few other Keith Titanium products in addition to the Ti3521. My experience with them is that they are of a perfectly acceptable quality, though not quite as nice as Snow Peak. The Ti3521 is exemplary of this. When boiling water is poured into the Snow Peak H450, the outer wall is warm but comfortable to hold. When the same water is poured into the Keith Ti3521, the outer wall is hot. Not too hot to hold, but certainly hotter than the Snow Peak mug. I don’t know if this is because the Keith titanium is thinner, or because the walls are closer together, or because the vacuum between them is imperfect.
The Snow Peak H450 is part of a three piece set of nesting mugs. The H200 is the smallest of the set. I’ll sometimes use it if I have brewed tea in a pot and I want a cup that just holds a small amount, but otherwise it is not very useful. The middle-sized H300 is more interesting. It holds a full cup of tea and is a nice size to drink out of. It also just so happens that the 23.7 oz Smartwater bottle that I like to use as part of my backcountry hydration setup with the Sawyer Squeeze fits perfectly inside the H300 mug. By perfectly I mean that if the mug were a millimeter narrower the bottle would not fit. So if I want the luxury of backcountry tea brewed in something other than my cook pot, my setup is the Smartwater bottle, inside the H300 mug, inside the Hill People Gear 3” Bottle Holster.
For brewing, the lower portion of the FORLIFE Brew-in-Mug Tea Infuser does fit in the H300. But this is far too bulky for me to ever want to pack into the backcountry. A tea ball works, but those are always cheaply made with soft walls that flatten and small hinges that break. They don’t survive long in a pack. A stick infuser is too tall. I’ve successfully used a Tuffy Steeper with the H300 (an idea from Backpacking Light). When collapsed this is small and easily packable. When fully expanded it is roughly the size of the FORLIFE Brew-in-Mug Tea Infuser, though it tapers toward the bottom. However, it can be used when only partially expanded, which allows it to fit better into the H300. As with the silicone lid on the Keith Ti3521, the Tuffy Steeper imparted a strong silicone taste when I first bought it. Over time this has diminished, but I still sometimes notice it. Another option is the House Again Tea Ball Infuser. This is a bit larger than the typical tea ball, and much more robust. It fits in the H300 and packs well separately. Usually this is the option I’ll choose.
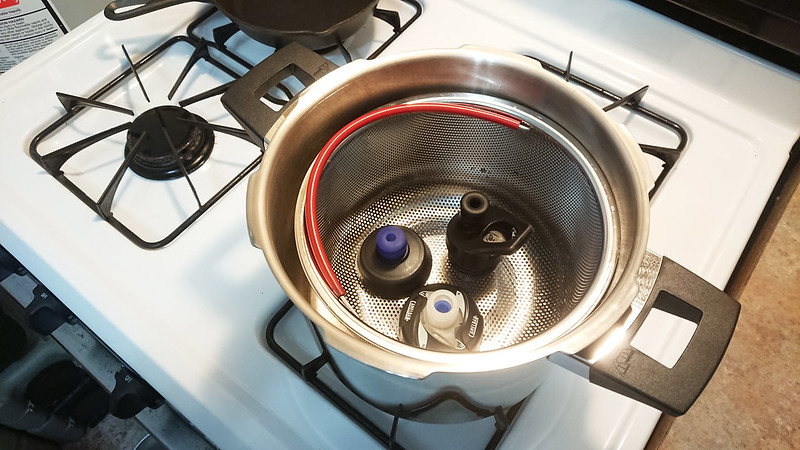
If I want to brew a pot of tea, I use the Fire Maple Titanium 1L Kettle – another AliExpress purchase. There is absolutely nothing special about this pot, except that it is titanium, and thus cool. It is single-walled, so it can be used on a stove or over a fire. I bought it after breaking a glass teapot and vowing Never Again. It also features some neat knot work on the handle, which I assume was tied by the deft hands of small children who sleep on the cold concrete underneath their workstations, piss in buckets, etc.
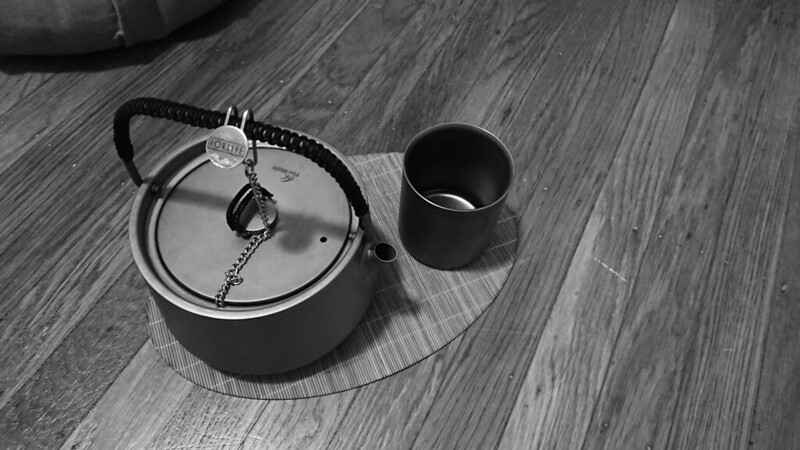
The Fire Maple kettle does have an extremely coarse strainer in the spout. If you’re brewing some sort of blossoming tea, it may work, but it isn’t great for the teas I typically enjoy. Instead I use the FORLIFE Capsule Infuser, which is a great big infuser that is meant to be used in a large pitcher. It is a good size for a 1L pot, and the lid will still fit on the teapot while the strainer is inside.