Having been back from the Glacier Peak Wilderness for near a week, I felt a need to return to the mountains. The maps suggested a few possibilities, but one didn’t commend itself to me over the others. I thought to contact Avagdu, who was still in Washington, to see if he had time for another walk before returning to California. He did, so I gave him the options I had come up with and asked what he would prefer.
We settled on heading into the Wild Sky Wilderness. I would lead him back to Eagle Lake, where we would spend the first night. The next day we would climb the ridge of Townsend Mountain, descend down the opposite side, and make our way to Sunset Lake for our second night. From there, we would hike out on the third day.
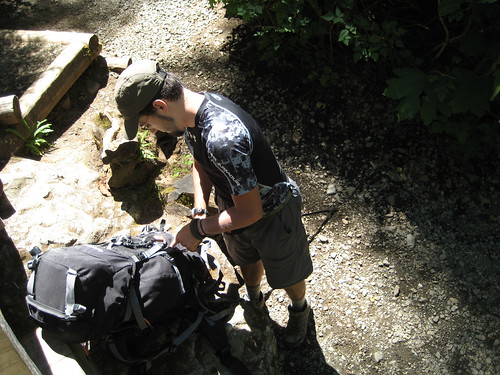
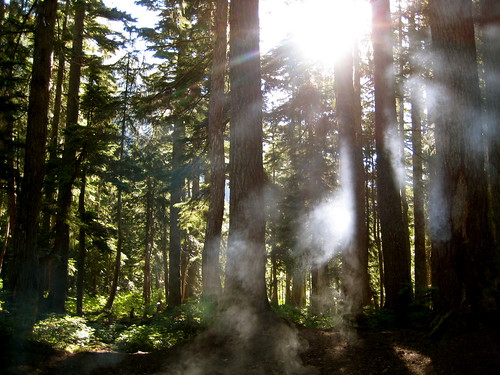
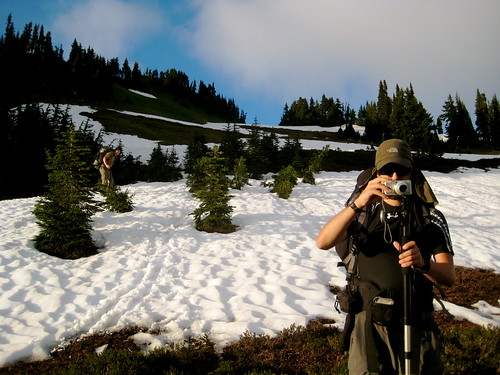
When we arrived at the trailhead in the early afternoon it was hot – somewhere in the upper 80 degrees Fahrenheit. Too hot for hauling around a pack, but luckily the short, flat hike to the first destination of Barclay Lake was mostly in the shade. From there we would head up, and I hoped the higher elevations would be cooler.
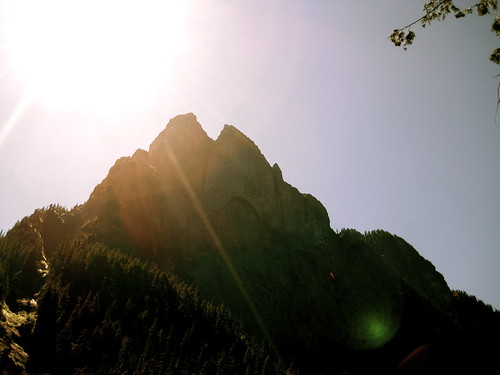
I’ve traveled to Eagle Lake via Barclay Lake a half dozen or so times, but the sight of the steep north face of Mount Baring jutting up from the lake basin never fails to impress. On the drive over I had told Avagdu that only yesterday a base-jumper had died leaping off Baring when her parachute failed to open. The death is tragic, but still, I felt, like Ed, the need to congratulate her taste.
Looking out on this panorama of light, space, rock and silence I am inclined to congratulate the dead man on his choice of jumping-off place; he had good taste. He had good luck -- I envy him the manner of his going: to die alone, on rock under sun at the brink of the unknown, like a wolf, like a great bird, seems to me very good fortune indeed. To die in the open, under the sky, far from the insolent interference of leech and priest, before this desert vastness opening like a window onto the eternity -- that surely was an overwhelming stroke of rare good luck.
- Edward Abbey, Desert Solitaire
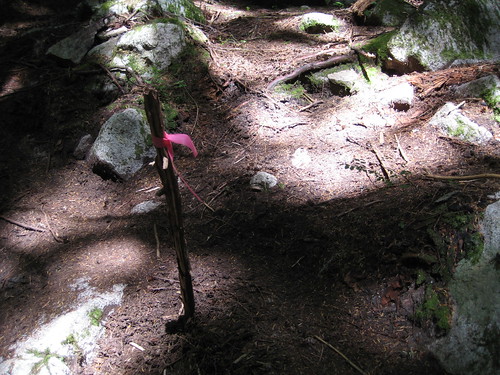
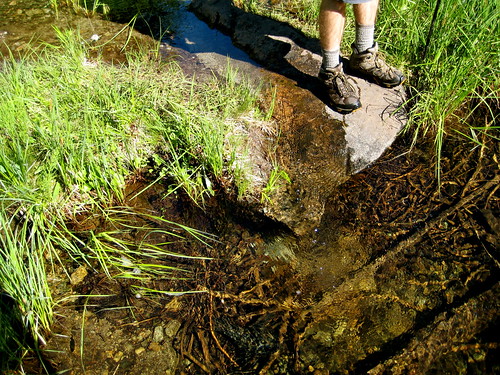
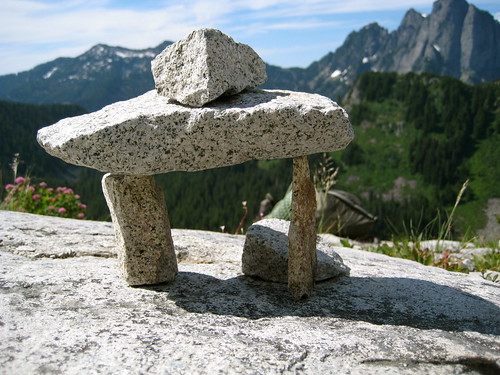
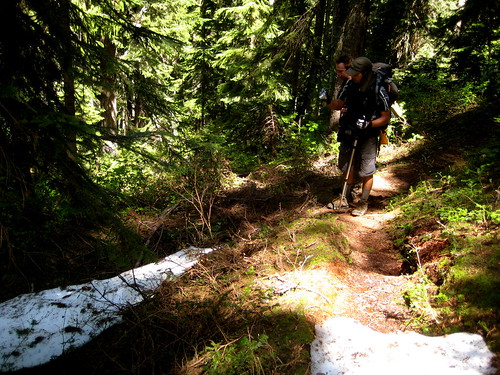
At Barclay Lake, the official trail ends. We turned north and headed up the steep slope to Stone Lake, which sits in a small saddle at the top of the ridge. The first half of the route is through forest. It’s a popular route, so a trail made by the many feet of travelers is vaguely visible. The way is also marked by occasional flagging, which I always have a difficult time spotting on the way up. (On the way down, sticking to the route is easy.)
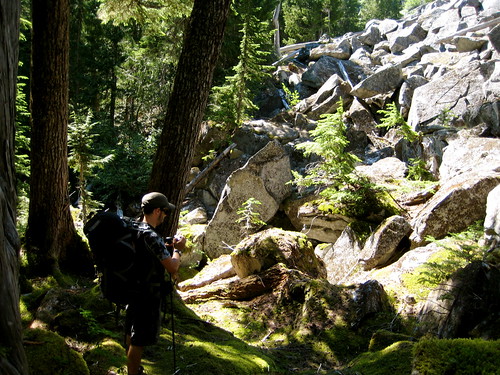
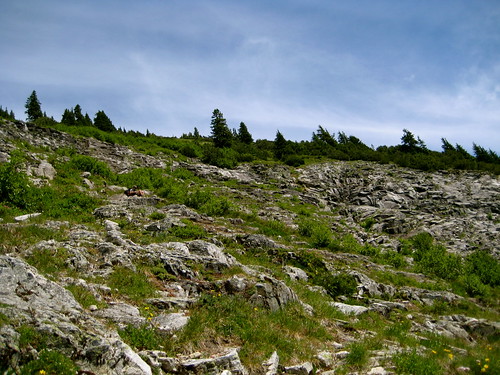
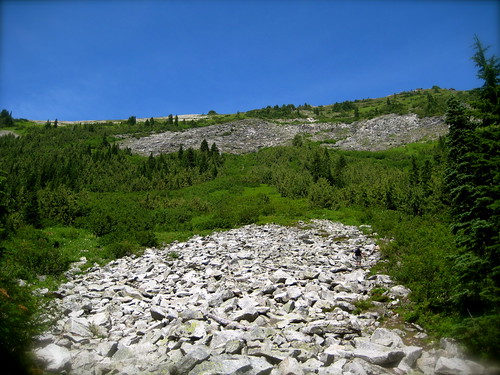
After breaking out of the trees we entered the boulder field. Here the route is marked by cairns, but at this point the way is obvious enough that the markers aren’t really needed – at least, the way is obvious enough to me after having ascended and descended the field a few times before!
At Stone Lake we stopped for a breather. We had gained enough elevation that the temperature was no longer uncomfortably hot, but still pleasant. While waiting for Avagdu to reach the lake, I ate an apple that I had been carrying.
From Stone Lake it was only a short 15 minute walk through Paradise Meadow to our day’s destination of Eagle Lake. I warned Avagdu that the meadow would be extremely muddy, but in fact it was surprisingly dry. I had been in the area earlier in the year and later in the year, but never had I visited in late July, so clearly my predictions were off.
I enjoyed the pleasant walk through green grass, trying to avoid the occasional mud patch, and jumping over the creek as it meandered through the meadow. We spotted a few frogs jumping around, and one or two small trout in the creek.
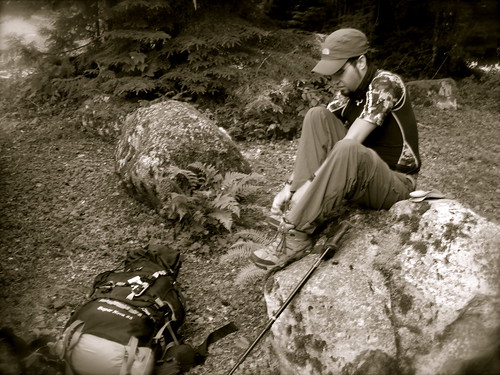
As we approached Eagle Lake I saw a tent in the clearing on the edge of the lake at the south side of the creek. There was no one there, so we ventured over to the cabin to see if anyone was about. At the cabin was a family of three fishing the lake. They had spent the previous night at the lake and were planning on one more at the same site before heading out in the morrow. There had been no luck fishing, which surprised me as you usually can barely throw a rock into the lake without hitting a trout. We talked about Townsend and what lay on the other side before I suggested Avagdu take a look inside the cabin.
It’s a neat place. I don’t enjoy spending the night inside: it’s small and dark and smelly and the mice always want to share the bed – much better to spend the night under the stars – but I enjoy visiting. The cabin looked to be in good repair and was cleaner than the last time I visited (in early February of this year). One new addition that caught my eye was a small inner tube tucked away in the corner. I had visions of floating about the lake, followed by visions of being extremely cold. But the latter was not enough to deter me. I knew that I could not echo the timeless lament of Shaquille O’Neal (particularly since I had used that quote as my email signature for the better part of a year and even had the piece of zen wisdom inscribed on a bright yellow pin).
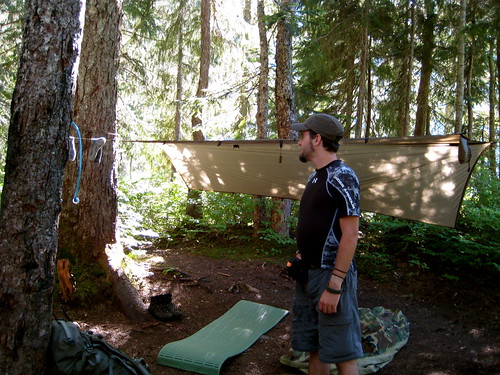
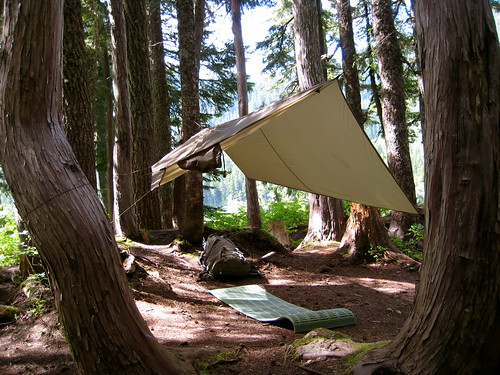
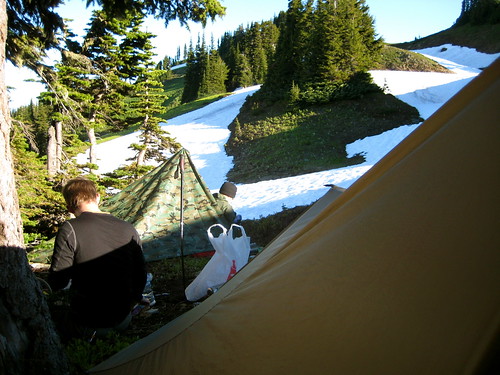
We left the cabin to go make camp. My preferred site was on the opposite side of the creek that drains the lake. There was one clear, flat spot that I usually used for my tarp, but no other spot that was ideal for Avagdu. Since I intended to pitch the tarp in an elevated manner, we decided that there would be plenty of room for both of us to sleep below it. The chance of rain that night was slight, anyways.
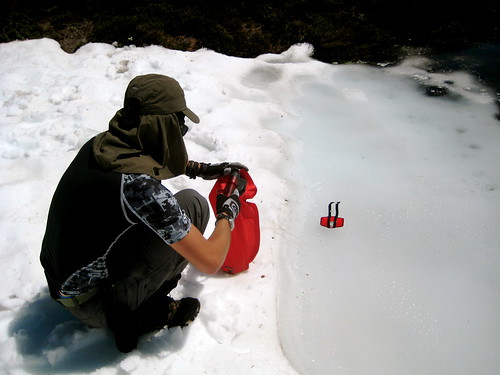
Having made camp and filled up on water, I returned to the cabin to grab the inner tube. It was about 5 PM. I figured that I had enough time to kick around the lake for a bit and then dry off before the sun was lost behind Merchant Peak.
The tube, it turned out, was a little small. It floated, but after putting my weight on it, it sunk in about halfway. With my butt hanging down the middle, I was submerged up to my navel. Still, the water was actually pleasant after getting over the initial shock – much warmer than some of the icy cold rivers and alpine lakes I’ve jumped into in the past. I kicked around for a bit and thought to use the opportunity to try out a small pocket fishing kit I had put together a few months ago, but I was unable to efficiently cast with it. After seeing that I hadn’t died of shock from the water, Avagdu decided to join me. He slowly made his way in until the water was up to his neck. I suggested that, since my small kit had failed, he could swim down the shore to the cabin and pick up the spinning rod that was hung on one of the rafters. He had had the same thought.
As Avagdu swam, I slowly attempted to follow, but it was difficult to propel the tube in the direction I wanted to go. After he got the rod, Avagdu walked back down along some of the logs that cluttered the shore and we managed to meet about halfway. I had him hold out the tip of the rod to me as I tied on a rooster tail lure that I had spotted in the water near where I had gotten on the tube. “Okay, you’re fishing!” I announced.
We figured out how the spin-cast reel worked and, after only a couple tips, Avagdu was casting out to the lake. I gave it a couple shots as well, but neither of us had any bites.
Soon the sun fell beneath the peak of Merchant. Though there were still many hours till dark, neither of us wished to be standing around wet without the direct warmth of the sun. We walked back to camp.
I had gotten in the lake in my underwear and pants. Dry underwear and merino long johns awaited me in my pack, so I wasn’t concerned about that. The pants were quick drying, but in the meantime I didn’t want to put them on and wet out my dry underwear. So I was walking around camp in my long johns, which I was concerned about: being made of a lightweight merino wool, they are somewhat delicate. I didn’t want to sit down directly on the ground or on a log without some other layer of protection, out of fear of snagging them. Before leaving for the trip I had taken my normal rain pants out of the pack to save weight, but had tossed in a garbage bag rain skirt on the off-chance that rain did occur. So, as a bit of protection until my pants dried, I donned the stylish garbage bag skirt.
We both wanted a fire to dry our things. Easy to gather wood was scarce in the area, but soon enough we had a merry blaze.
As the sun set the bugs came out in force. They bothered me a bit, but were bearable. Avagdu, however, they loved. He couldn’t go more than a minute without waving his hands around and slapping himself. I had packed along a bottle of a natural insect repellent that I was skeptical of, but wished to test further. After trying it out, Avagdu concurred with my conclusion that the repellent worked great for ten or fifteen minutes, but then failed. Still, we had the smoke of the fire to protect us.
The following day we rose around 7 AM, breakfasted, and broke camp. Shouldering our packs, we headed for the ridge of Townsend Mountain that lay along the north side of the lake.
The first part of the route was through thick bush, but this quickly led to an easy climb up a small talus field. As with the previous day’s walk, there was no official trail, but people did sometimes come this way and cairns occasionally suggested a route.
After the talus it was back into the bush. I enjoy off-trail travel, but the trouble is that when making my own way, I have a tendency to always go straight up and make nary a switchback. A defect in my character, perhaps. No matter. Switchbacks are luxuries, not necessities.
Breaking through the bush we entered an open area of rock. This was a little over halfway up the mountain. We stopped for a breather and to enjoy the view.
Observing the face of the mountain from below I had pointed out this large face of rock to Avagdu, saying “See that rock? We don’t want to go up it, so we’ll just hug the edge and make our way around. We’ll come above it and then have only a short skip to the top.” A good plan. But near the rock on which we sat I spotted a cairn, and another beyond it. This seemed to suggest that there was a safe route across the field. Okay, I said to myself. I had never been up here before, so thought to trust to the judgment of my predecessors on the mountain. We donned our packs, and I led Avagdu off in the direction of the markers.
The route started out easy, but progressively got steeper. I couldn’t spot any more cairns, so I observed the rock and picked my own route. We moved from scrambling to what was basically rock climbing – but with full packs, boots, and no ropes or other safety equipment. This was my idea of fun. I was quite enjoying myself. Avagdu was making his way, but struggling a bit and falling behind. As I was waiting on a small ledge for him, he called out that he would need some help. I stashed my pack in a crack and, after making sure that it was secure, went back down to him. It was his pack that was slowing him down, so I threw it on my back, climbed back up, and stashed it with my own. Then I guided him to the ledge where I waited.
Directly above us the way looked more technical. We would have had more difficulty climbing that with our packs. But off to one side I spotted another cairn on an angle of the slope. Studying the rock, I saw what would make a decent enough path for us to use to traverse over to the cairn. Due to the angle I couldn’t see what lay on the other side, but I assumed that since there was a marker it would lead us back onto a more manageable route. I pointed out the cairn to Avagdu and the path that I meant to follow. He wisely queried how we would get from where we were to the ledge that started the path. I replied “I don’t know. Just follow me.” I was making this up as I went!
Getting to the path wouldn’t have been much trouble, but for the water. Most of the rock between it and where we were was wet from a trickle that came down from the top of the mountain (from snow melt I thought, since the map showed no other water source up there). It made the rock slick and extremely difficult to get any purchase on. I managed to traverse a few feet laterally from where Avagdu stood till I got myself jammed in a crack. I hoped to be able to make my way down the crack to where the path started below. But there was water in there as well and I couldn’t get enough holds. About halfway down I decided that this wasn’t going to work. There was a slope to the crack and I had been making my way down it facing out. With my pack on again, I couldn’t turn around and face into the mountain to climb back up. I tried inching my way back up while still facing out, but that didn’t work either: I had no holds for my feet and I couldn’t spot where I should be placing my hands. There was no going anywhere with the pack on.
I pushed out on either side of the crack with both my legs so that I could temporarily take my hands off the rock and slip out of my pack straps. Then I slowly moved my body forward and down to see if the pack was jammed in enough to stay where it was. I had to move only a couple inches before realizing that the pack was coming too. That wouldn’t work. I yelled back up to where Avagdu was watching and asked if he had any paracord. He did, so I told him to throw me one end and keep the other. He got it out and untangled it as I thought to myself “Does he have to take forever with this?” I’m sure it was only 15 seconds or so, but my feet had slipped, and I was holding up both my body and my pack with only my locked out arms.
Eventually he tossed the end to me and I was able to get enough purchase with my feet again to temporarily remove my hands and tie the cord in a quick knot around one of the shoulder straps of my pack. Having done this, I instructed Avagdu to slowly start to pull in the cord until it was taut. “Okay,” I said. “You have my pack.” I moved forward away from the pack, but found that even without the extra weight on my back, I wasn’t going to be able to make it along this route to where the path started. I was able to get out of the crack and onto the rock face on the opposite side from Avagdu and scrambled back up till I was level with him. I asked him to hold onto the cord for a bit longer until I could figure out what to do, and then went scrambling around, trying to find a route. There wasn’t much of promise. I scrambled up a little higher along a slick face till I couldn’t go up anymore, and then found that I couldn’t get back down. “Whoops,” I thought to myself and announced out loud that I was stuck (which probably didn’t do much good for Avagdu’s morale). But I found that by laying down on the rock so that my whole body was in contact I was able to generate enough friction to slowly slide and inchworm my way back down to a more secure area.
Avagdu suggested that we turn around. The way showed no signs of easing up and since I was having such difficulty I knew that Avagdu would probably not enjoy this next bit, even if he could do it. So I agreed. I was disappointed that we wouldn’t make the top and see what was on the other side, but it was my fault for trying to go up along these rocks rather than trusting my original plan of hugging the edge and going around them.
But there was still that cairn that I had spotted over in the distance. The way we took up was certainly not the intended trail and would be no easier going down. If that cairn marked the trail, it would probably offer a better path back down to the lake. I stilled wanted to reach it.
I thought to try the crack again. I made my way back down till I was above the pack and, making sure that Avagdu still had a good hold on the cord, gave it a slight kick till it swung out of the way. With the crack cleared, I eventually made it down to the path that I had been aiming for. I walked along it a ways toward the cairn, but I didn’t like what I saw between us and it. And I didn’t like what I couldn’t see, on the other side of the angle. I decided to take the known challenge offered by the route that we had come up, rather than risk the unknown.
Back at the bottom of the crack I had come down on, I found that I couldn’t make it back up to where Avagdu sat. I spotted what looked like a doable route below me and announced to Avagdu that I would make my way down a bit, traverse to the other side, and then climb back up to where he was. He assented, though I’m sure he was tired of holding up my pack by a single piece of paracord at this point. He probably was thinking that I would fall off and die and there would be no one to get him off the mountain.
I have thought briefly about getting caught in rock slides or falling from a rock face. If that happened, I would probably perish on the mountain in much the same way many of the big animals do. I would be long gone before anyone found me. My only wish would be that folks wouldn't spend a lot of time searching. When the time comes for man to look his Maker in the eye, where better could the meeting be held than in the wilderness?
- Richard Proenneke, One Man's Wilderness
Getting down and over was easy. The way back up proved more challenging. There were handholds, but with my boots on, I couldn’t get my toes into anyplace where they needed to be. So I basically pulled myself back up the mountain with just my arms.
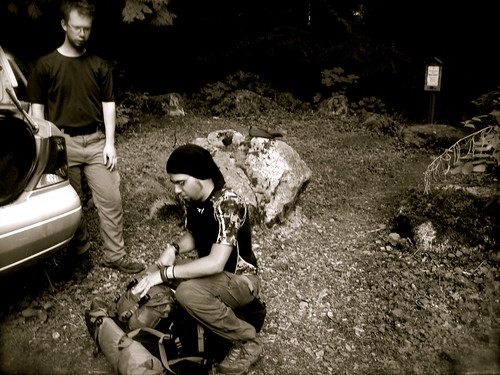
I had almost reached Avagdu, but then found that, on this side, I could actually get to where my pack was hanging and take that off his hands. So I headed over there, got a hold on it, and had him drop the cord. Then I traversed off in the other direction a bit till I found a spot where I could securely stash the pack. I untied the paracord from it, wrapped it around my hand, and went back to the spot where the pack had previously been dangling, right below Avagdu. Tossing one end of the cord back up, I instructed him to tie it onto his pack. He did so, and I said that he should then slowly lower the pack down to where I was. I would hold onto the end of the cord and he would lower from above, acting as a sort of pulley in the three-point system. He lowered it down till I could grab it. I put it on my back and had him drop the cord, then traversed back over to my pack and stashed his next to it.
Avagdu came over till he was directly above me and I guided him down to where I was. He wasn’t comfortable moving down the mountain with his pack on, so I donned my own and climbed down 30 feet or so till I found another spot where I could take it off and stash it. Then I had him slowly lower his own pack to me via the paracord. When I could grab it, he would drop the cord and I would stash his pack with mine and wait for him to make his way down.
We repeated this procedure a couple times till the slope of the rock eased up again and the going was simpler. I figured he could make it down easily enough with the pack on. I made my own way down to a sort of mini-cirque where I could stand comfortably and wait for him.
Avagdu made his way down, dragging his pack along side him. Above where I was standing he announced that he was going to drop his pack. I assumed he meant that he would hold on to one end of the cord that was still tied to the pack. I got out of the way and saw him toss down the pack without holding onto the cord. Turning around, I watched the pack tumble off the cliff behind me and vanish from sight.
Luckily Avagdu could watch it fall down the mountain from his higher vantage point. He saw it land in a finger of greenery that shot up into the rocks from the treeline below. It was a bit off from the path that I had intended to follow back down.
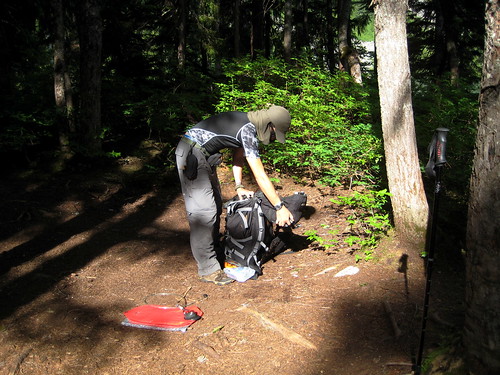
We went down a ways before I dropped my pack and said that I would go down into the bushes and retrieve his. I knew he was physically tired at this point and the fact that he had just thrown his pack off a mountain suggested that he was somewhat mentally exhausted. I didn’t think he needed to climb down, beat around the bushes for a bit, and then climb back up till where we could continue our planned descent.
The bushes were thick. I poked around a bit and, not finding anything, climbed back up till where I could see Avagdu. I yelled up to him, asking exactly where he saw the pack come in. He replied that he couldn’t be sure from the spot where he was. I silently thought to myself “Well you need to be fucking sure! I can’t scour this whole mountain for the pack that you threw off it.” But rather than voicing my thoughts, I turned around and dived into another spot in the bushes and small trees. Pushing my way through, I stumbled upon the pack. I looked it over briefly and nothing appeared to be broken, so I threw it on my back and began the hard climb back up to where Avagdu waited. “Don’t do that again,” I suggested as I returned his pack.
I knew that my internal frustration toward Avagdu was unjustified. I was supposed to be the experienced one who was leading this little venture. I could only blame myself for anything that occurred. It pointed at my own mental exhaustion. We both needed to sit down, hydrate, and eat something. In the distance below us I could spot the rock that we rested on as soon as we had broken out of the tree line on the way up. I took off for that.
From there it was only an hour’s easy climb back down to the lake, so I didn’t have any problem draining my last liter of water. After drinking, I threw down a Clif Bar. Feeling much better after that, I yelled out a bit of guidance to Avagdu, who was a little ways behind me but doing a good job of making his way down. As he approached, he teased me, saying my problem was that I confused backpacking with mountaineering. I smiled, but replied honestly that in my book they were the same thing. I couldn’t spot a difference. Later, I reminded him that before heading out I had told him that this would be an easy, mellow trip. “I’m a man of my word,” I said.
After Avagdu had drank and eaten something, I led the way back down. I broke off from the marked route after a few hundred feet, favoring what looked like a more direct path. It went through a bit thicker bush, but I still think it ended up being a quicker descent.
Since the family of three had gone, we decided to make camp in the larger clearing opposite the creek from where we had camped the previous night. I quickly threw up my tarp, filled up my water containers, gathered some firewood, and cooked an early dinner while Avagdu was still pitching his own tarp. It was about 5 PM. We were both glad to be back at the lake, and I had my mind set on that inner tube and fishing rod again. After Avagdu pitched his tarp, he helped to gather a bit more wood before filtering water for himself. I had finished my rice before he started to cook his own meal, but I waited around for a bit to get a little digestion happening before getting into the lake.
When I jumped on the tube, the cold water was invigorating and refreshing. I kicked around the lake a little bit while Avagdu ate his meal. Eventually I tired of that and thought I would see what I could do about getting some line wet.
On the second or third cast I noticed a small trout investigating my scavenged lure, but he wouldn’t bite. I tried to get the next cast in that general area and, by luck, succeeded. As soon as it hit, I felt the bite and started to reel it in. But the line snapped and the little guy made off with my hook. I have no idea what type of line was in the reel or what its age or condition was, but it also might have been the fault of my knot. I tried casting a few more times with a couple of the different hooks and lures that I had in my pocket kit, but had no luck. All the fish were jumping for the bugs on top of the water, but none but the one who had taken my lure seemed interested in anything under the surface. A fly rod would probably have been the weapon of choice.
Avagdu and I hung out on the logs on the shore of the lake until the sun dipped below Merchant Peak once more. As the sun left, the mosquitoes appeared. We decided to return to the camp and light up the fire to smoke all the bugs out.
On the way down the mountain, Avagdu had ripped out the stitching on one of the bottom compression straps on his pack. It was his first field repair, so I loaned him the kit from my hat to sew it up. I advised an X-ed box stitch. After preparing my second dinner, I looked back to his sewing and saw his creative interpretation of a box stitch. We both laughed as I pointed out what I had meant by a box stitch. His stitching looked plenty strong for the job, so it didn’t much matter. Embolden by his sewing success, Avagdu decided to use the Reflectix material I had given him to make his first pot cozy.
The rest of the evening was spent talking around the fire. There had been a few thick logs stacked next to the fire ring. After our fire had got good and hot I was able to arrange three of the thick logs into a tripod and had them burning strongly in a manner that probably would have heated us all night, had we wanted it. Around 11 PM we retired to our bags for sleep.
I awoke once at 2 AM to get up and pee. The fire was still burning brightly.
Next morning I slept in, awakening at 8 AM to find Avagdu already tending the fire and cooking breakfast. We had a slow morning, eating, talking, and packing. Late in the morning we left Eagle Lake and returned through Paradise Meadow to Stone Lake. Then, it was an easy hike back down to Barclay Lake.
It was the hottest day of the trip. When we reached Barclay Lake I took off my shirt and jumped in (much to the the chagrin of some of the family day hikers who were there, I think). I swam for about a minute before getting out and eating a little beef jerky followed by granola while drying off. After Avagdu had eaten something we hit the trail again for the final stretch back to the trailhead.
Avagdu had a bus to catch late that afternoon, so I set a 4 mph pace. We reached the trailhead in good time and, after refreshing ourselves, traded the safety of mountains for the hazards of urbanity.
We are vagabonds of a peculiar type. Our chief pleasure is in roving about the mountains. Each of us has a month's wages -- forty-five dollars -- and consequently we feel wealthy. Our lives are free from care, therefore we have but to enjoy ourselves.
- Pat Quayle, quoted in Gary Ferguson's Walking Down the Wild
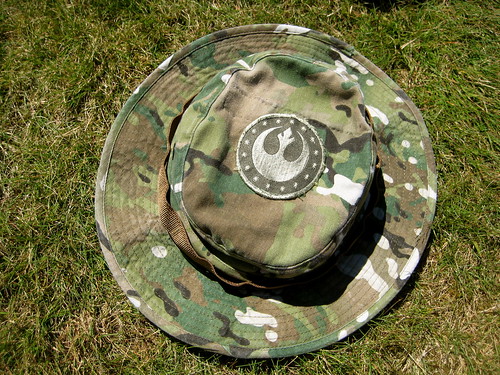
I’m a big fan of fancy hats. I discovered the joy of a well-made and stylish hat a couple years ago with the Duluth Oil Cloth Packer Hat. After that hat died, I tried others. My current favorites are the Tilley T3 and the (locally made) Filson Tin Cloth Packer. But as great as those hats are, sometimes it’s nice to get back to basics.
If all you want to do is keep the sun off, it’s hard to beat the boonie hat. It’s lightweight, cheap, and compresses down to fit into a pocket.
Being cotton, I find these hats to be useless in the rain, but I do tend to have a hooded hard shell with me for that purpose.
This particular boonie hat happens to be MultiCam. I bought it back when MultiCam was new and I could fool myself into thinking that it was low-profile. “Hey, nobody actually issues MultiCam, so it’s not like this hat looks very military-like. If anything it makes me look like a harmless airsofter.” Something along those lines. Now that everybody and their grandma is issuing MultiCam, it’s maybe a little more military looking. I sewed a Rebel Alliance patch on the top to make me feel better about it (and because rebelling against empires is always the cool thing to do).
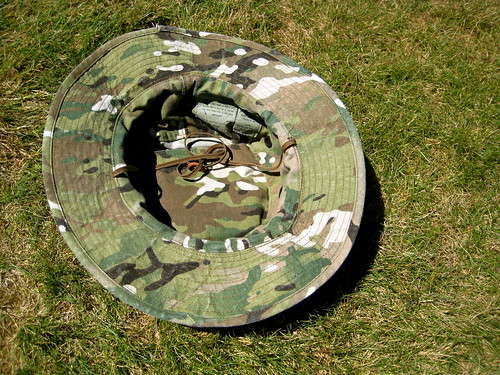
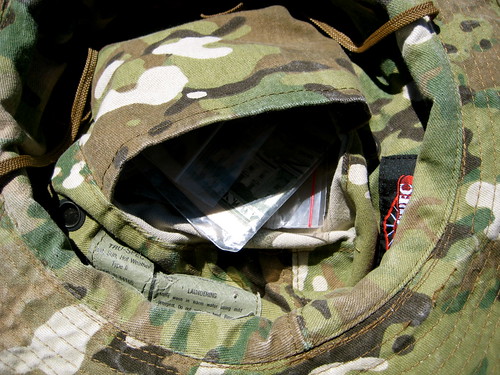
The other modification I made to this hat was to sew a littlevelcro on the pocket. After getting my Tilley hat, I became somewhat addicted to having a pocket in the top of my hat. Most boonie hats have them, but they’re just a slit, with no sort of closure. I don’t trust them to hold small items. Having added the velcro, I can feel sure that whatever I put in there won’t fall out.
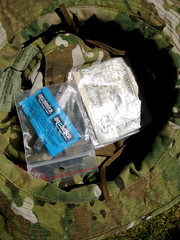
What I keep in all my hats that have pockets in them is the same: in one ziploc bag, an emergency $20 bill (using this is to be avoided as much as possible). In another ziploc bag, I keep four AquaMira water purifying tabs and a repair kit.
This particular hat weighs 122 grams (4.3 oz) with added patch and velcro. Including the contents of the pocket, the total weight is 134 grams (4.7 oz). A nylon hat like a Tilley LT5B could save me an ounce, but for the money it’s hard to beat the boonie.
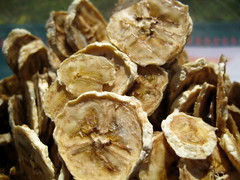
My favorite food to toss in the dehydrator are bananas. The sugars caramelize as the slices heat up. I’ll leave them in for 7-8 hours if I want them to dehydrate fully, so that the final product is like a chip. But my preference is to leave them in for only 6-7 hours, so that they’re still a bit chewy, like candy. Starburst doesn’t have anything on these!
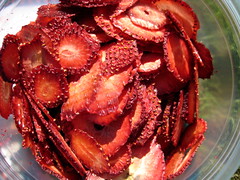
On our recent trip, Kevin mentioned how much he liked the dehydrated strawberries that he recently had. I thought I’d give them a shot.
I cut them up in 1/4” slices, which is the same as I do for bananas, but they turned out too thin after coming out of the dehydrator. Mary Bell’s Complete Dehydrator Cookbook claims that strawberries are 90% water, whereas bananas are only 76%. So in retrospect it makes sense that the strawberry slices would shrink down a bit more.
No matter. They’re still tasty! But the bananas remain my favorite.
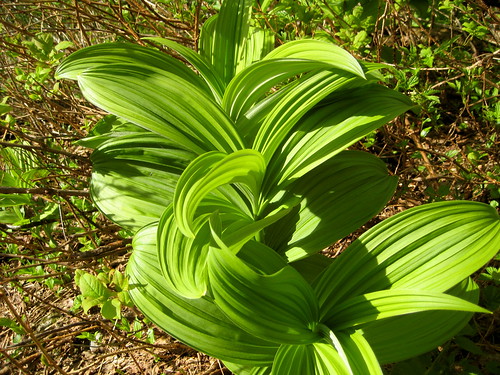
Indian hellebore is one of the most violently poisonous plants on the Northwest Coat, a fact recognized by all indigenous groups. This plant was, and still is, highly respected, for even to eat a small portion of it would result in loss of consciousness, followed by death. It is sometimes known as 'skookum' root, the Chinook jargon for 'strong, powerful.' This plant was an important and respected medicine, used by most northwest coast groups. The Tlingit used an Indian-hellebore medicine for colds. The Nisga'a used small quantities of the root for toothache. There is one report of a Haisla who was cured of tuberculosis by placing a lozenge of dried Indian-hellebore root under his tongue for a day. It is said that his face went numb, but he recovered. The Haida made a poultice for sprains, bruises, and rashes, and a medicine for colds. It was believed almost any disease could be cured with Indian hellebore. The Haida also treated kidney and bladder troubles and acute fevers with this plant. The Nuxalk made preparations for chronic coughs, gonorrhea, constipation, stomach pains, chest pains, heart trouble and for toothache or rotting teeth. The Kwakwak'wakw made medicinal preparations for constipation, internal back and chest pains, colds and to abort pregnancy. The Nuu-chah-nulth rubbed the mashed root on sores or rheumatic areas to stop pain, and as a general liniment. Among the Coast Salish this plant was utilized by the Quinalt, Squamish, Sechelt, Mainland Comox, Southern Vancouver Island Salish and other groups for similar cures.
Some species of this genus are powdered to form the garden insecticide 'hellebore.' People who drink water in which hellebore is growing have reported stomach cramps. Other symptoms of hellebore poisoning include frothing at the mouth, blurred vision, 'lockjaw,' vomiting and diarrhea.
- Jim Pojar, Plants of the Pacific Northwest Coast
This past week, Kevin arrived in Seattle for the last leg of his America trip. I couldn’t let him come all the way from Scotland without seeing a few mountains, so we had planned a four day trip into the Glacier Peak Wilderness. Avagdu‘s schedule had recently opened up, allowing him to come up from California to join us. I had planned a loop of about 47 miles around the ridges just southwest of Glacier Peak.
We arrived at the North Fork Sauk River trailhead late in the morning and, after quickly adjusting gear, hit the trail at 11:30 AM.
The trail paralleled the north fork of the Sauk and led into forests of old-growth cedar, with forest floor covered in Skunk Cabbage and Devil’s Club.
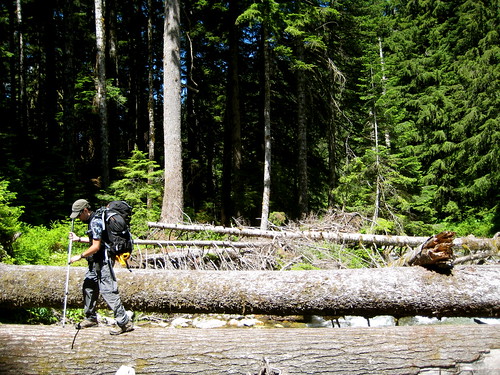
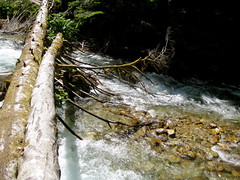
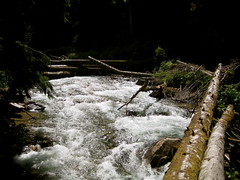
We quickly reached the junction with the Pilot Ridge trail, which heads south, cuts over the river, and begins to climb the ridge. Originally I had thought we would have to ford the river at this point, but there were a few logs laying across that allowed us to easily avoid getting wet.
The trail up to Pilot Ridge gains about 3,000 feet in 2 miles. That qualifies as steep by most definitions. It’s times like that when all the physical training (particularly on Mailbox Peak) really pays off. I find that the easiest way to tackle a steep climb like that is to set a slow pace and keep on climbing with a minimal amount of rest stops – stopping and starting sucks a lot of energy. Kevin was able to keep up a pretty good pace for most of the steep part of the climb. Avagdu lagged behind a bit, but did much better than the last time we went on a hike. I wanted to keep both of them in sight, which meant extra work for me. I would walk with Kevin, then stop and stand around for a few minutes, waiting for Avagdu to catch up. After walking with Avagdu for a bit, I would cruise on ahead, catch up with Kevin, and walk with him for a time before stopping and waiting for Avagdu again.
Luckily the steepest section of switchbacks quickly led to a more gradual climb, so I didn’t have to maintain my inefficient pacing for too long. As the trail leveled off a bit, I would walk ahead and find the path so that the other two didn’t have to worry about navigating.
We hit our first small patches of snow at around 4,200 feet. Near 4,500 feet the patches became larger and began to obscure the trail. The snow slowed the pace of the others a little bit, which provided time for me to go ahead and find where the trail came out on the other side of the snow.
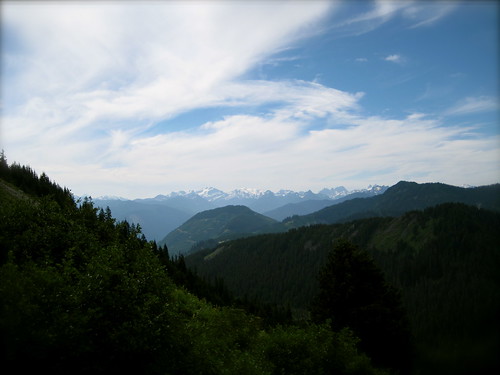
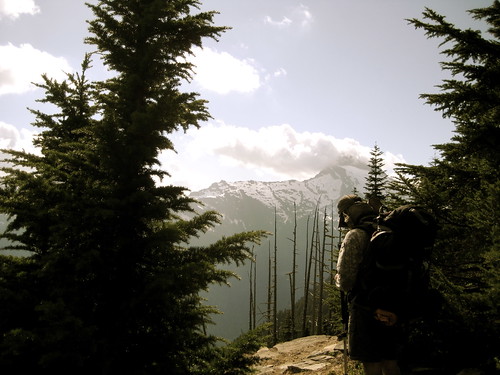
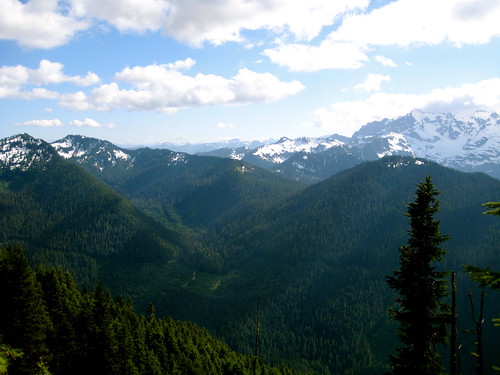
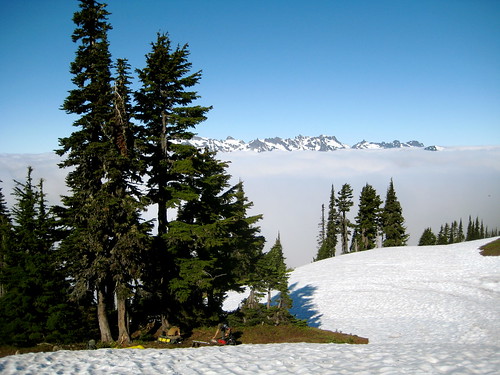
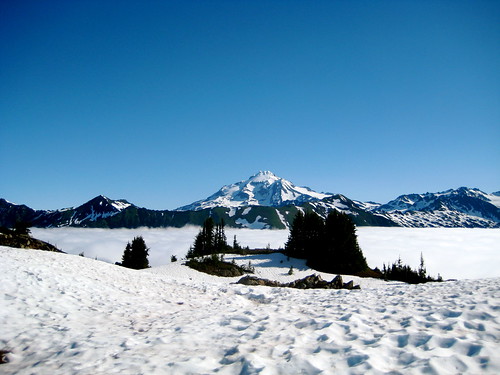
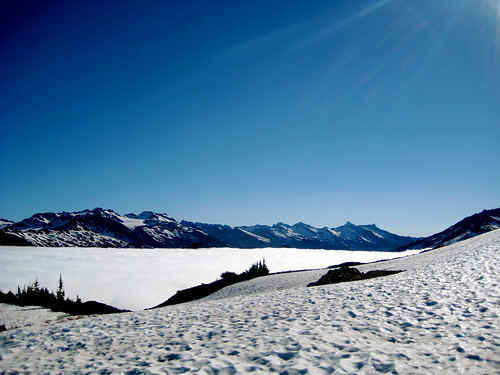
We came out of the trees at 5,100 feet and were greeted by views of Glacier Peak in the east, Sloan Peak in the west, and Mt. Rainer far away to the south. I could just make out the top of Mt. Baker sticking above the clouds in the north.
The snow fields became more constant at this point, so we donned gaiters before continuing further. When we did move on, the trail dropped a couple hundred feet down into the trees again for a short time before regaining the elevation and opening up to a beautiful alpine traverse of the ridge. At this point we were walking the wilderness boundary, with one foot in the Henry M. Jackson Wilderness and the other in the Glacier Peak Wilderness.
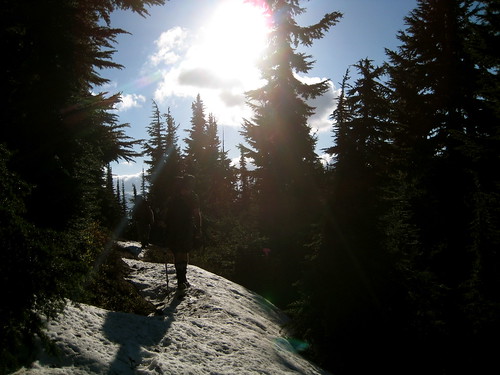
What was supposed to be open meadows filled with wildflowers atop the ridge turned out to still have significant snow fields on it. Many of these were too steep for us to safely walk directly across, so we would have to either go above or below them. Either way it was steep going.
When we would reach a large snow field, Kevin and Avagdu would wait on the trail while I went ahead and cruised above, below, or across it (or all three), searching for where the trail came out and the best route to the other side. It was nerve racking when we were unable to avoid the snow fields, as neither Kevin or Avagdu had much experience in that kind of mountain travel. I would go first and kick steps as they continued behind. I think it’s safe to say that they both now have more snow experience than the average recreational backpacker. They’re both well on their way to becoming certified mountain goats!
Our intended destination for the first day was Blue Lake. We had gotten a later start than I had planned and the steep climb mixed with snow had slowed our pace some. At 8:30 PM we were still about a mile and a half from the lake. There had been no running water since climbing the ridge, so all three of us were thirsty. As I climbed to the top of one snow field to scout out the route I noticed a few dry and flat spots at the top of the ridge. After glissading back down I put it to the others that we could continue to the lake, which at our pace and given the snow we wouldn’t reach till probably a little after dark, or we could spend a night on top the ridge. Water would be the issue on the ridge – it would take us some time and work to gather enough of the sparsely available wood to build a good fire and melt enough snow. They elected to spend the night on the ridge, which I thought was a good choice.
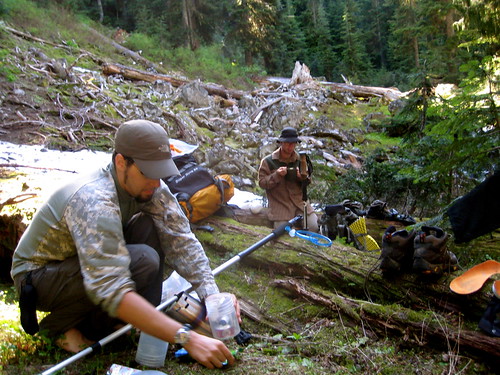
I had climbed back up and was waiting for the others when I heard a yell from behind. Turning around I saw a solitary fellow standing a couple hundred feet away. It was a surprise to see anyone else out here in this remote area – particularly since we were off the trail at this point – so I walked over to say hello. It turns out he was a local hunter who was up there to glass the slopes. He had his tent setup in a bare spot behind a clump of trees. When I told him our predicament he invited us to camp there with him. Kevin and Avagdu had made it up at this point, so we all introduced ourselves and prepared to make camp. When I mentioned that we were hoping to melt snow for water, the hunter said that just over on the other side of the ridge were a few small puddles of snow melt that he had used to fill his bottles. I left to go pump water for the three of us. With Avagdu’s Dromlite and my Platypus we had 8 liters, which was enough for that evening and the following morn.
When I returned Kevin and Avagdu had their tarps up and the hunter had a small fire going. I threw on a couple warmer layers of clothing and pitched my own shelter. Kevin quickly cooked a bit of dinner on his stove and went straight to bed. Avagdu and I stayed up a bit later eating dinner and chatting with the hunter. He knew the area pretty well and showed me on the map where I could find a few unmarked hunting trails. We also talked a bit about Kifaru packs and tarps, both of which he wanted for himself. He crawled into his tent to sleep and Avagdu and I retreated to our tarps soon thereafter.
I slept in a bit, waking around 7 AM to find Kevin and Avagdu both already awake and starting on breakfast. The hunter had been up early with his binoculars. He hadn’t seen much and was breaking his camp, preparing to head back down to the trailhead.
Temperatures that night probably dropped to a few degrees below freezing. I slept well in my cozy 20°F bag, but the others didn’t have so restful a night. Both had been cold, and the ground that Avagdu had pitched on turned out to have a slight angle so that he was slowly sliding off the mountain all night.
That morning there were clouds filling the valley on either side of the ridge. We were cut off from the world below, isolated in the mountains.
After breakfast we went down the slope to where we had left the trail the previous evening. As we did so the clouds moved in from the valley below, covering us in fog. I went ahead to scout out the route, but couldn’t see more than a hundred feet in any direction. We were in a white out. It wasn’t safe to travel, so we stopped where we were and had a sit, waiting for the clouds to burn off.
The clouds did burn off in about an hour and we once again had blue, sunny skies. We continued on much as the last day, doing our best to avoid dangerous snow fields, which inevitably meant steep going, both up and down.
We were coming to the end of the ridge. As I scouted ahead I was able to see a good deal of our future route. It looked like we would be able to get to the lake without much trouble, but past that the snow got worse. I would have continued on if I was by myself, but I felt responsible for the others and didn’t feel comfortable leading them on into even more difficult terrain. When I returned to where they were resting I told them that the original plan was out. I proposed that we could continue to the lake and spend a night there before turning around, or spend another night at the camp from last night, or head back down to the north fork of the Sauk and spend a night or two down there. They decided to turn around and head back to the river.
Since we knew that the next stretch would be dry, we first stopped by last night’s camp and filled up our water containers with the snow melt.
After snacking a bit, we headed out once more to retrace our route from yesterday. It was now near noon.
Heading back across the ridge was easier going than the previous day. I knew the land now and could lead them across a more efficient route. Plus, we were rested, and, going down hill, there were lots of opportunities for quick and fun glissading. Soon we were back in the trees.
We stopped for lunch at about 4 PM before heading onto the steep switchbacks that lead down to the bottom of the valley.
We reached the river around 7PM. Both Avagdu and Kevin had wet feet from traversing the snow, so I had collected a bunch of firewood on the way down and strapped it to my pack. After crossing the river we pitched our tarps and I went to go pump another 8 liters of water for us. We all processed the wood I had brought down and quickly had a bright fire burning. That night we all went to bed an hour or so after dark.
The next morning I woke around 6 AM and peeked out of my tarp to see if anybody had the fire going. No one was up. I continued to sleep a bit and look out every 30 minutes, until 8 AM rolled around and finally I decided that I better get up. There weren’t enough hot coals left in the fire to blow it back to life, so I started it again with a cotton ball. The others came over soon after I had thrown a few pieces of wood on the blaze.
That day we didn’t have any plans. Late in the morning I jumped in the river to rinse off the previous two days worth of sweat and sunblock. I couldn’t convince Kevin to get in, but Avagdu braved the water for a few seconds before declaring it too cold.
I collected a bunch more wood for the evening’s fire. Avagdu and I spent a while splitting it all down till we had a nice pile.
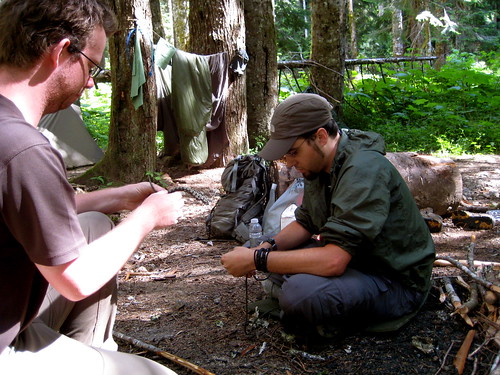
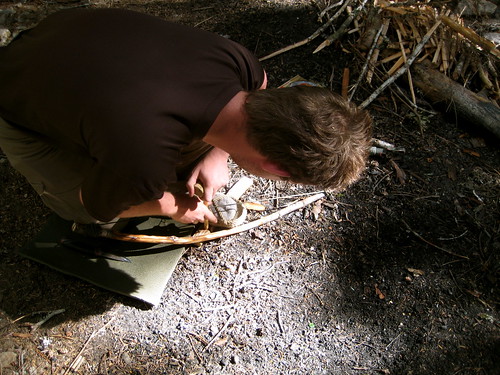
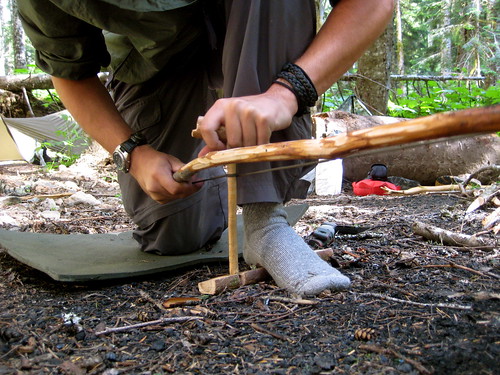
That afternoon Kevin taught Avagdu how to weave a paracord bracelet while I used some of the nearby cedar to throw together a quick bow drill for the other guys to play with.
Kevin got close to getting a coal a couple times.
Avagdu struggled a bit more.
Another night, another fire. Kevin went to bed a bit after dark. Avagdu and I stayed up another half hour or so, till the fire was burned down to glowing coals.
We left camp the next morning and made it back to the trailhead at 10 AM. I was refreshed and ready to brave the cities for a few more days.