The Field Message Pad
My first experience with a field message pad was in 2005. I carried a Field Message Pad Cover by Canadian Peacekeeper – now CP Gear – filled with the Canadian military standard issue pad. I was introduced to the concept by one of the early episodes of Patrolling with Sean Kennedy. The idea of having a cover for one’s notepad, which not only protected the pad but also contained pens and the other tools necessary for a dead tree data dump, simply made sense. The system was a pleasure to use, but after filling my last Canadian pad in 2006, I left it in favour of more conventional notepads. The refill pads, being available only from Canada, were difficult to acquire, and all the cool kids were using Moleskines and similar products. I forgot about the old field message pad until this year.
I keep a box that holds all of my filled notepads. Last March I was digging through the box, looking for a particular note (sadly, you can’t grep dead trees), when I came across the Canadian pad and cover. I was reminded of the pleasure the system previously provided me, and the practicality of it. No more digging around for a pen – if you have your notepad, you have your pen. Need to toss your pad into the dirt to free both hands? No problem, it’s protected by the cover. I decided that I would like to revisit the system, but perhaps with a more commonly available pad, and a more mature eye brought to the market’s current offerings.
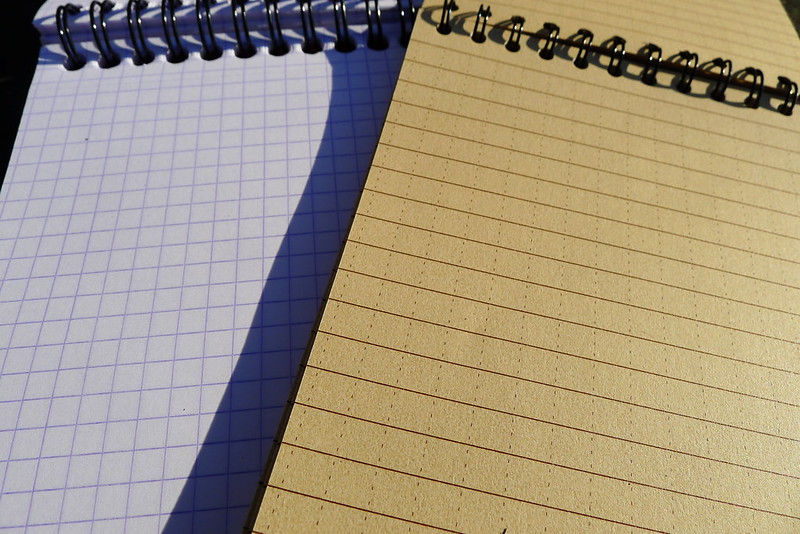
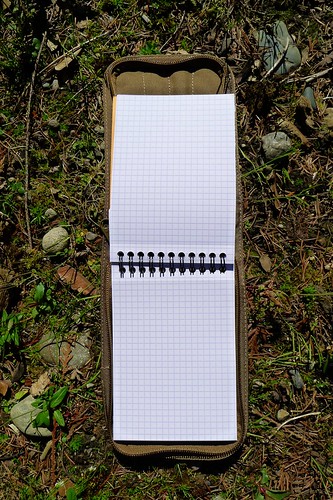
One of Sean Kennedy’s original requirements for the notepad was that the paper was gridded. I agree with that. Graph paper can be incredibly useful in certain circumstances, and the rest of the time holds no disadvantage for me. The original Canadian pads were gridded, but only on one side of the paper. That made the back of each page less useful, and seemed wasteful to me.
The size of the Canadian pad was acceptable, but a little larger than my ideal. Particularly when the cover was added, it made for just a little bit too much bulk and was sized slightly too large for some cargo pockets. I’d used plenty of the pocket-sized Moleskine notepads. Their size is also acceptable, but if I’m being picky: they’re just a tad too small. Ideally, I would like something sized in between the two.
My third requirements was the the notepad was top-bound. I prefer that over a side-bound pad, as I find them to be easier to access quickly. The binding should be spiral, as that allows the pad to lay open.
It’s a fairly simple criteria, but I was surprised at how difficult it was to accommodate.
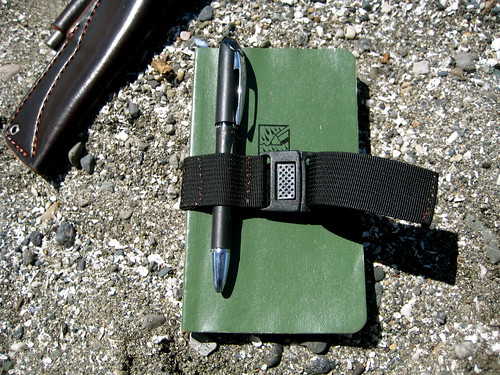
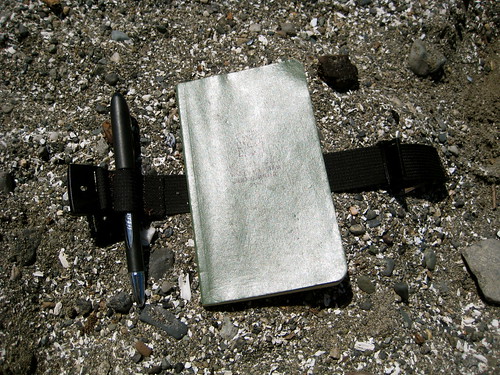
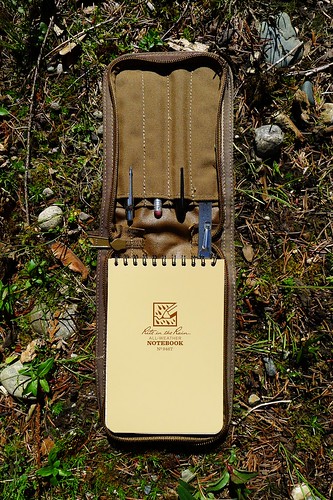
The only pad I could find that met the requirements was from Rite in the Rain. Specifically, the 146 (or 946 or 946T for tacticool colors). It is gridded on both sides, is spiral bound on the top, and measures in at 4” x 6” – just slightly larger than a Moleskin, and a bit smaller than the Canadian pad. Rite in the Rain makes an excellent product. I always carry one of their pads when in wilderness environments, but I prefer not to carry them around town. Their waxy paper is unpleasant to write on. If I do not need to worry about the paper getting soaking wet, I prefer to carry a normal notepad. It makes the act of writing more pleasant, which encourages me to write more often.
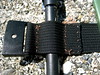
The nice thing about Rite in the Rain pads, though, is that covers are readily available for them. Tactical Tailor makes a line of covers that Rite in the Rain sells. Maxpedition produces their own. The Tactical Tailor / Rite in the Rain cover for the 146 notepad is the C946. Maxpedition offers a similar cover. They looked great and encouraged me to revisit the notepad search, this time armed with a specific size: 4” x 6”.
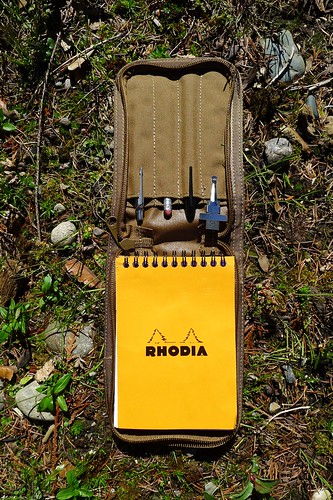
Having the dimensions to narrow the search made all the difference. I quickly came upon the Rhodia 13500. It is gridded, 4” x 6”, and top-bound. The exact same as the Rite in the Rain 146, but with normal paper.
These findings allowed me to put together my new field message pad system: a Rite in the Rain pad, Rhodia pad, and a cover. I chose the Tactical Tailor cover simply because it is made about 60 miles from me, where Maxpedition claims that their covers are “imported”. With that cover and two identically sized pads, I could swap in whichever pad was more appropriate for my environment. Around town I carry the Rhodia pad. When I’m heading to the mountains I install the Rite in the Rain pad. Inside the cover I carry a pen (I’m partial to a Parker Jotter with a gel cartridge), a No. 2 pencil, a Sharpie, and a ruler. When I swap the Rhodia pad for the Rite in the Rain, I sometimes also swap the Parker pen for a Fisher Space pen, but in general I don’t like the way the ink comes out of the pressurized cartridges (and I already carry the pencil, which is field-serviceable and is able to write in inclement conditions just as well as the space pen).

I’ve been using this system since April. It is both versatile and functional, and has proved itself perfect for my needs. It is large enough to write on without feeling cramped, and small enough to place in the cargo or ass-cheek pocket of my pants when running around the woods in the middle of the night setting up dead-drops. The cover, Rite in the Rain pad, ruler, Sharpie and pencil are all made in the US. The Parker pen and Rhodia pad are made in France.
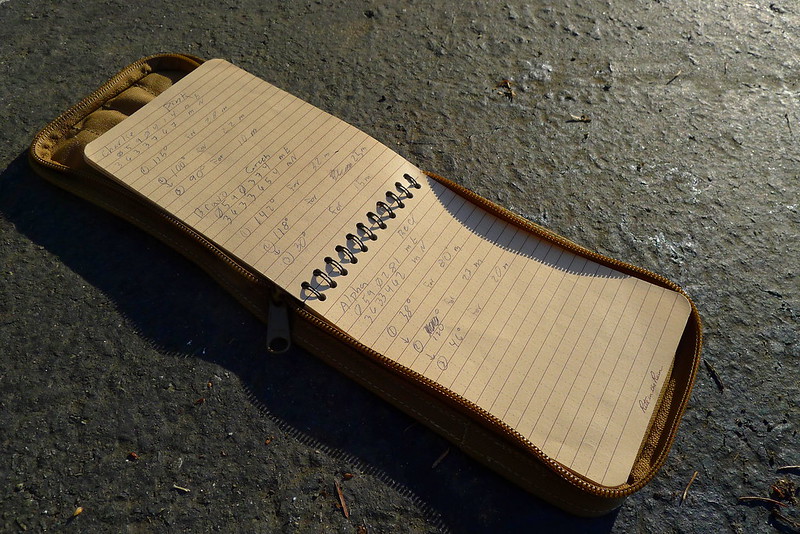
Photo comparisons between this and the Canadian system are available on Flickr.