You are currently viewing all posts tagged with ablution.

On Scouring

Back in 2013 Brian Green published a review of the Lunatec Trekr washcloth. My showers haven’t been the same since.

The Trekr is a simple nylon scouring cloth, measuring 11” x 11”, with an elastic loop for hanging. It’s the same material as a synthetic loofah, but being a flat cloth it doesn’t hold moisture. At the time Brian posted the review I was on a campaign to eliminate sponges and sponge-like things from my life. Any cleaning tool in the bathroom or kitchen that holds water becomes a Petri dish for bacteria, in humid areas especially so. I bought the Trekr to try at home, and it immediately earned a spot in my daily ablutions.

Lunatec’s marketing campaign for the Trekr revolves heavily around the cloth being “self-cleaning”, which just means that the material doesn’t absorb anything, dries quickly, and every time you use it you are cleaning it with soap and water. I think this claim is accurate, though I still throw them into the laundry every couple weeks, more as impetus to rotate the cloths than out of the need to clean them.

Shortly after acquiring the Trekr I learned that it was just a smaller take on the Salux cloth. Hailing from Nippon, the Salux is exactly the same material as the Trekr, but measures in at a longer 33” x 11”. The larger size makes it easy to scour your back, as demonstrated by the naked lady on their packaging.

I now own about half a dozen of the Salux cloths for use at home, and the same number of Trekr cloths. I throw a Trekr cloth in my bag whenever I’m showering away from home – travel, backpacking, at the gym, or after the axolotl tanks.

To use either the Trekr or Salux, I wet the cloth, give it a few gentle swipes across a bar of soap (it also works fine with liquid soap), and then start scrubbing from head to toes. The cloth lathers, cleanses, and exfoliates dead skin – which, as we learned from Gattaca is key to leading a successful life in our future eugenic utopia.

I have also tried the Lunatec Scrubr dishcloth, which is made of a thicker and more abrasive nylon. It is less exciting. I’ll occasionally use it to scrub a surface clean at home, but for backcountry dish cleaning the spatula reigns supreme.

The Laundry Alternative

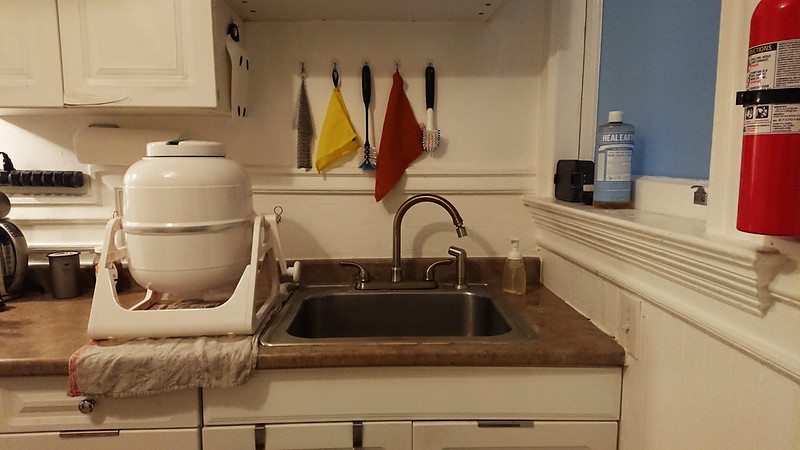
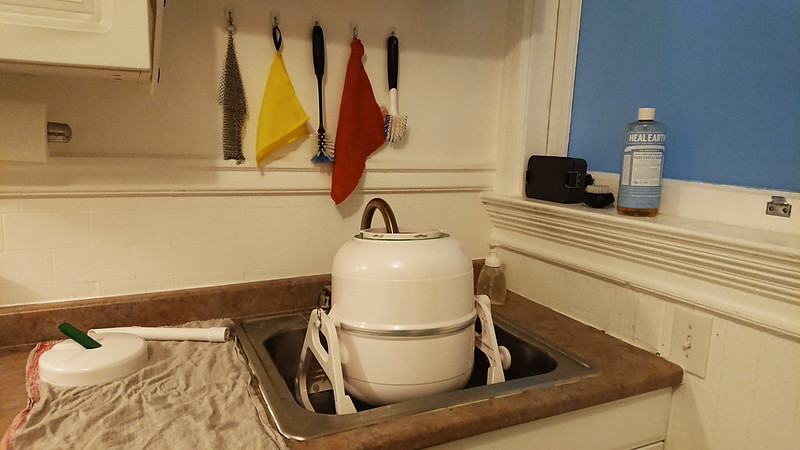
The Laundry Alternative Wonder Wash is a portable, hand-crank washing machine. It is basically a bucket with a sealed lid, mounted on a base via an axle with a handle that allows the bucket to be spun. The bucket is filled with warm water. When the lid is sealed and the machine is spun, the pressure increases, which causes the soapy water to be pushed through the fibers of the fabric being washed. As such, the Wonder Wash results in cleaner garments, and accomplishes this in a shorter period of time, than a traditional electric washing machine that relies on simply agitating the material. It achieves this in a package that is compact, portable, and off-grid compatible.

I purchased a Wonder Wash nine years ago. It has been my primary washing machine for the past five years. It’s a great solution for things like gym clothes that you want to wash frequently and not leave sitting around, getting funky, until you build up a large enough load to justify the use of a typically sized electric washing machine. The small size of the machine makes it easy to store when not in use, which is important for apartment dwelling, as well as the RV market that The Laundry Alternative seems to target. While I doubt the volume of the machine is practical for the laundry generated by a family of four, I find it works great for me. It encourages me to do laundry more frequently than I otherwise would – I typically do 2-3 loads per week – which in turn allows me to own less clothing (and towels, and bedding, etc). I don’t have to consider the it-will-be-AWOL-in-a-laundry-pile-on-the-floor-for-2-weeks factor when determining how many pairs of underwear I need in my life. The gentleness of the Wonder Wash allows me to keep what clothing (and towels, and bedding, etc) I do choose to own in service for longer than I otherwise would if I were regularly treating them to the abuse of a traditional washer and dryer.

I also find the smaller capacity of the Wonder Wash to be useful when washing waterproof garments with a technical wash like Nikwax Tech Wash. I usually only have one or two waterproof garments to wash at a time. With a traditional electric washing machine, I need to use more water and thus more of the expensive soap than is really warranted. With the Wonder Wash I can easily scale down the water and soap to what is appropriate for the load.

My apartment has an electric washer and dryer in the building, but not in my unit. I use it maybe once every 3 months, when I’ve neglected laundry and have enough dirty things that I would need 3+ loads of the Wonder Wash to clean it. If I had an electric washer and dryer in the unit I think I would still favor the Wonder Wash.

Laundry Alternative Wonder Wash

Use

The process of using the Wonder Wash is pretty simple.

  1. Add warm water, soap and clothing to the machine.
  2. Seal the bucket and spin, about one rotation per second, for 2-3 minutes.
  3. Dump the soapy water and fill with cold water to rinse.
  4. Seal the bucket and spin, about one rotation per second, for about 1 minute.
  5. Dump the water and remove clothing to dry.

The washing and rinsing part of the process take at most 4 minutes. The most time consuming part is filling the machine with water.

Laundry Alternative Wonder Wash

Soap

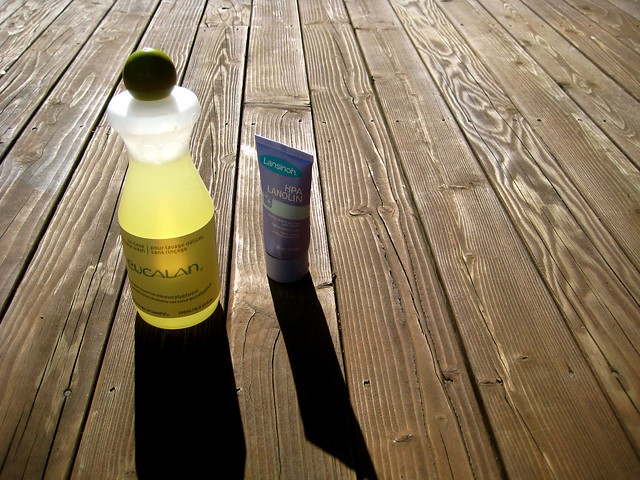
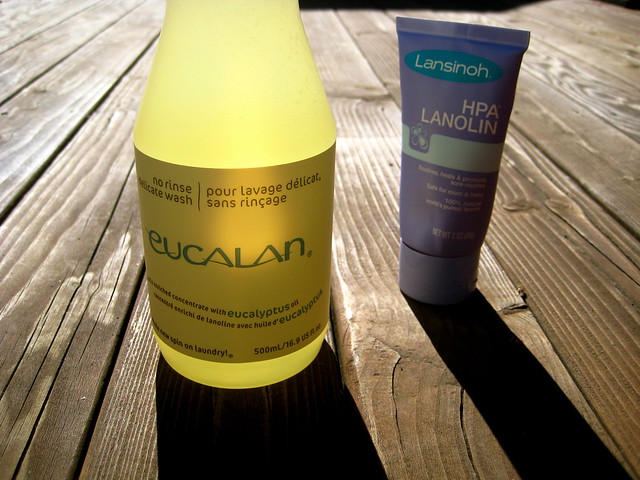
When I first began using the Wonder Wash I tried it with Seventh Generation Free & Clear Liquid Detergent. This is the soap I have always used in electric washing machines. This detergent is very sudsy, and I found it challenging to use enough soap to clean, but little enough to not require multiple rinse cycles. I quickly gave up on this and moved to Eucalan. I keep this around for occasionally lanolizing wool. Eucalan is a no-rinse soap, which works well in the Wonder Wash. I still performed a single, quick rinse cycle, but if I accidentally used too much soap I didn’t have to worry about ending with excessive suds that would require multiple rinses. Unfortunately Eucalan isn’t the cheapest soap out there.

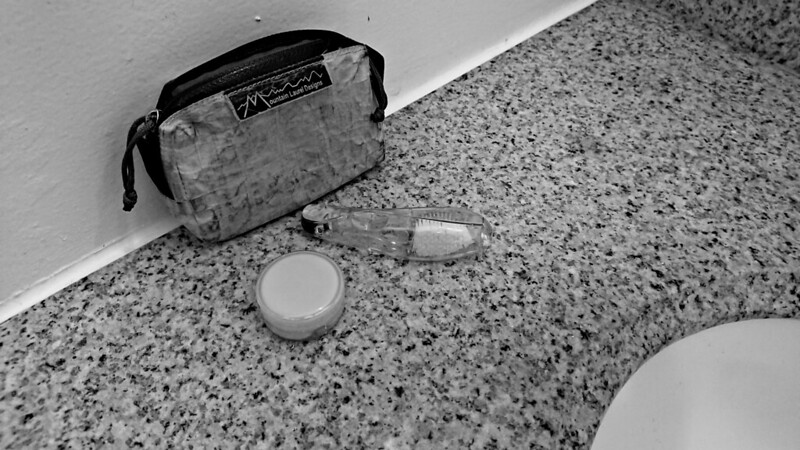
I used Eucalan in the Wonder Wash for a couple years before realizing that I could probably just use the same soap I used for everything else in my life: Dr. Bronner’s. I shower, shave, wash hands, wash fruit, and clean surfaces with Bronner’s products. It is always effective, tends to be readily available and affordable, and is most likely not giving me cancer. So why not laundry? As it turns out, it works great with the Wonder Wash. I use one tablespoon of the Baby Unscented Castile Liquid Soap for a full load. It’s especially nice for attacking dust mites in bedding.

For the rinse cycle I’ll add about two tablespoons of distilled white vinegar, which helps to remove residue left over from the soap as well as soften the load. This softening is important for heavy cotton things, like towels, which otherwise become quite stiff when air dried.

Drying

Without an additional tool, any time saved by using the Wonder Wash instead of an electric washing machine will be lost after all the wringing required. Laundry removed from the Wonder Wash and placed directly on a drying rack will take days to dry. If electricity is available, the best solution to this is an electric spin dryer. Mine is a discontinued model made by the Laundry Alternative, but they have other models available. These dryers are simply steel drums that spin the clothes really fast to remove the water. It’s similar to the final cycle of an electric washing machine, except they spin much faster (around 1800 RPM). No heat is involved, so they do not shorten the service life of your clothing like a normal heat dryer.

Laundry Alternative Electric Spin Dryer

I run the spin dryer until water stops coming out the drain spout, which tends to be around 90-120 seconds. After this cycle, clothing is still damp, but it is impossible to wring any moisture out of it. Something light and quick drying like a Merino wool t-shirt could be worn immediately and dried out with body heat in maybe half an hour, but I move everything from the spin dryer to a drying rack. Anything I wash will dry on the rack within a couple hours. I usually end up doing laundry at night and leaving it on the rack overnight.

Durability

The Wonder Wash is all plastic, except for the axle the machine spins on. I’d like to see a version with more durable metal components, but given the low price of the current design and the availability of replacement parts, this is barely worth mentioning.

Over the nine years I had the original Wonder Wash I cracked the base and snapped off the end of the handle. The machine was still functional with this damage. More recently, the lid began to leak when I spun the machine, which I assume was caused by the degradation of the rubber seal over time. This was enough for me to finally want to replace all three parts. The handle and base were readily available, but The Laundry Alternative released a new version of the Wonder Wash a few years ago, with the primary change being a snap attachment for the lid instead of a nob. I contacted them and they confirmed that they had no more stock of the old lid and that the new lid would not fit on the old bucket. So instead of purchasing replacement parts, I bought the new version of the machine. Given the price of the machine, I’m fine replacing it once every decade or so.

The new snap lid works just as good as the old knob lid worked when it was new. I don’t think there is a practical difference between the two. If for some reason you really want the old lid, the Avalon Bay EcoWash appears to be a direct knock-off of the original Wonder Wash.

The spin dryer is still going strong, in about the same condition it was in when I bought it nine years ago.

Lanolizing Wool

Lanolin is a kind of wax that sheep and other wool-bearing animals produce to protect their coats. It is, in fact, a waterproofing agent. Any lanolin that remains in the wool after shearing is generally stripped out during the process of turning the hair into clothing, thus reducing the wool’s ability to shed water.

Commercially, lanolin is often used as a skin treatment product for humans. Lansinoh, in particular, makes a pure-lanolin nipple cream for breast-feeding mothers.

I first learned about lanolin from a comment on my review of West German wool pants. Jenne, the commenter, recommended washing wool products using something called Eucalan. Eucalan is a natural wash that deposits lanolin in the wool. Rinsing isn’t necessary with Eucalan, so much of the hassle (and danger of felting) that is usually associated with washing wool can be avoided.

For an extra treatment, Jenne recommended dissolving a small amount of Lansinoh’s pure lanolin in hot water before adding the Eucalan.

Lanolizing Wool

I was intrigued by this method. The no-rinse aspect made it simpler than carefully washing wool with Dr. Bronner’s, which was my previous choice. And increasing the health and functionality of my wool by restoring the natural oils made good sense – the same thing must be done to leather. I bought both the Eucalan and the nipple cream.

Eucalan comes in a few different scents. I first bought the unscented version, which seemed most appropriate for outdoor wear. Later I bought a jug of the Eucalyptus version. Eucalyptus oil is a deterrent to moths and fleas, so Eucalan recommends using this version before storing wool garments for a while. (The eucalyptus scent is very subtle after the wool has been dried – you’re not going to go around smelling like flowers.)

I’ve since washed my West German wool pants, West German wool knickers, Italian wool knickers, and two Pendleton wool shirts – the majority of my non-merino wool clothing – in Eucalan with added Lansinoh and have been pleased with the results. I recommend giving it a shot if you wear wool in wilderness settings.

The Process

  1. Dissolve a small amount (about one inch) of Lansinoh HPA Lanolin in hot water
  2. Add enough room-temperature water to cover the garment to be washed
  3. Add about two cap-fulls of Eucalan and mix it in
  4. Add the wool to be washed
  5. Let soak for 15 – 30 minutes
  6. Pull out the wool, hold it up, and let the water drip out for a minute or two
  7. Lay the wool out on a dry towel
  8. Roll up the towel, gently squeezing out the water
  9. Lay flat to dry for 24 – 48 hours

Lanolizing Wool

The Vagabond's Spatula

Cleaning my pot in the wilderness has always proved a challenge. I’m not hugely concerned with completely sanitizing it – that would not be realistic – but I do like to get all the food remnants out of the pot after every meal. A few extra ants in my ramen? No problem. Fungi and bacteria in the oatmeal? I’d rather avoid that.

Getting every last bit of food out of the pot with a spork doesn’t work. If I’m in a desert or on the beach, sand can be used to scrub the pot. The Equisetum family (Horsetails) are also good scrapers, due to their high silica content. But neither sand nor Horsetails are available frequently enough on my trips to make them realistic solutions. As well, cleaning the pot with those means that I’m dumping food remnants onto the ground, rather than into my belly. If I’ve humped it, I’d rather eat it.

I used to carry a piece of a green scouring pad. Those work great when the sun is available to dry them out after use. Here in Cascadia that means they work about 3 months of the year. The other 9 months – especially in winter – it proves a challenge and a hassle to dry them fully. I don’t like storing the pad with any moisture in it. Doing so would create the perfect incubator for bacteria.

Enter Crow. She had the excellent idea of using a spatula head to clean the pot. It’s a simple system:

  1. Eat dinner out of pot
  2. Clean pot with spatula, licking food remnants off of spatula as you go
  3. Boil water in pot
  4. Pour heated water from pot into bottle for tea

The pot is cleaned with the spatula. Afterward, boiling water in the pot helps to kill any nasties that might be hanging about.

I discovered this idea on Crow’s blog about a year ago. At first I took a small kitchen spatula and cut the handle off. It worked, but there was about 2” of the plastic handle inside of the head that couldn’t be removed, which translated to dead weight. Later I discovered that people actually sell spatulas with removable heads (to make them dishwasher safe, I think). I bought one of those online, but when it arrived the head was a little too small for my tastes. (In the wilderness I always treat my hands as dirty. If I’m licking the spatula, I want it to be big enough where I can hold it with my fingers near the top and lick near the bottom. I do not want to lick where my fingers are.)

About a month after I had started to use the sawed-off spatula, I discovered that GSI made exactly what I wanted: a compact scraper.

GSI Compact Scraper

At 16 grams (0.5 oz), it’s not the lightest possible solution. But it’s lighter than my first attempt, and the perfect size for my needs. The blue part is a soft rubber, like a normal spatula head. The white bit is hard plastic, meant for scraping burnt foods. (Burning your meal, I think, is a mistake you only make once. So far I’ve not actually used the white part to scrape the pot. It’s where I keep my fingers.)

My method of using the scraper differs slightly from Crow’s. I eat the meal with my spork, attempting to get as much of the food as possible. Afterward, there will still be plenty left in the pot.

Pot After Oatmeal

When the spork is of no more use, I pour some water into the pot, swish it around, and drink. (A habit I picked up in southern Idaho’s desert. Water was scarce, so if you used it to clean your pot, you still had to drink it afterward. The taste is not always entirely pleasant, but you get used to it, and are wasting no resource.) This takes care of some of the left over food, but with meals like oatmeal, there’s still gunk left over.

Pot After Water

After this precursory cleaning, I go to work with the scraper: scraping the pot clean, licking clean the spatula as I go (leave no calorie behind, I say). The pot will then be visibly clean.

Pot After Scraping

At this point, I may or may not boil water in the pot. If I have brought enough fuel for an after-meal drink, I’ll boil the water in the pot to finish cleaning it, then dump the water into an old Vitamin Water bottle for a drink. Most of the time I don’t plan on warm drinks. Either way, at the end of the process the pot will still have a little moisture in it. If I’ve just had dinner, the cleaning is complete: I’ll leave the pot till breakfast. On the other hand, if I’m moving again after the meal, I don’t like to pack my pot away wet, so I’ll wipe it down with a small piece of an absorbent camp towel.

The GSI Compact Scraper is now a permanent part of my kitchen. Since I started using it at the end of last year, it’s also the piece of gear that people request to borrow the most! (It goes in my mouth. I never lend it.) I’d recommend any wilderness traveler pick up some sort of cheap spatula or scraper.

Bicycle Chain Cleaning

Those chain cleaning tools sold at most outdoors stores tend to pretty useless in my experience. They run around $30, but end up being cheap and ineffective pieces of plastic. I’ve given up on them in favor of cleaning my chain manually via a method discovered on Sheldon Brown’s chain maintenance page (any man with a beard like that must be infallible).

Bicycle Chain Cleaning

All that’s needed is a chain tool, a bottle, some sort of degrease-ing dish soap, and water.

Bicycle Chain

The process is simple. Break the chain with the chain tool and drop it into the bottle. (I use an old Gatorade bottle.) Then put in a small dollop of the soap. Fill up the bottle with water, shake it around a bit, and let it sit. The water becomes black immediately. After it has sat for about 15 minutes I’ll dump it out, rinse off the chain, and put it back into the bottle with fresh soap and water. I do this until the water stays clear, which generally takes about 3 cycles.

When it’s done, you should have a chain that’s relatively clean-ish. Dry it, toss it back on the bike, lube up, and start cruising! If the chain was really dirty, you might also want a cheap brush to scrub it down.

Repackaged Soap Bar

Here’s another great idea that I gleaned from scanning the BackpackingLight Forums: using the plastic container from an old bike tube patch kit as a soap bar container.

Whole soap bars tend to be far too large and heavy for any but the longest of travels. Cutting up a bar of soap to make it smaller is easier enough, but prior to this I had never come across a correctly sized container to package it in.

Repackaged Soap Bar

This container is perfect. It measures in at 3.25” x 1.75” x 0.9”, weighs 2.5 oz when full, and holds about 1/3rd of a bar of Dr. Bronner’s Bar Soap. I wrap a rubber band around it for added security.

Badger Brush Cleaning

I’ve been wet shaving now for 6 months. Earlier today, I decided to clean my badger hair brush.

The brush is soaked with soap and water during every use, and there doesn’t seem to much of a consensus online whether that is enough or if a dedicated cleaning is warranted. For those who say the badger hair brush should be occasionally cleaned, the period I most often see is 2-3 months. Performing my first cleaning at 6 months, then, is a little off.

To clean, I mixed a solution of baking soda and lukewarm water into a thick paste. Covering the brush with the paste, I attempted to rub it into the hairs as best I could. This, I let sit for about 3 hours. Then, I thoroughly rinsed the brush with water, drying it as usual.

No animal funk is radiating from the bristles (I actually liked the smell of it new) and the hairs appear to the eye as both fluffy and dark. During the rinse, the brush held as much water as usual.

It seems to have worked.

3-6-08 Update:

I hadn’t really noticed anything to warrant the cleaning – no caked soap, and the brush seemed to hold as much water as ever. Was I ever wrong. During my first use after cleaning, there was a very noticeable difference. The brush held much more water, providing for a better lather. It’s one of those things where the degradation is so slow and gradual that you don’t notice it.

Today, we make soap

(Did you know 60% of anything you put in your skin will go into your bloodstream?)

Today was my Soap Alchemy class. We made cold process soap with palm oil, coconut oil, and olive pomace oil. One batch we put in lavender, the other peppermint. Right now, the soap looks like this:

00001

In 48 hours it will harden and I’ll take it out of the mold (paper cup). Then, in 30 days, the lye will have completed mixing with the oils and I’ll have soap.

Here are the recipes Suzanne gave us:

Cold Process Soap Materials: -Stainless steel pot (8-12 qt, no aluminum) -Scale (measuring in ounces preferred) -Glass jar (gallon size -- check for cracks before use) or 4-8qt stainless steel pot -Wooden spoon (used for soap only) -Soap molds - no aluminum, cast iron, or teflon -Soap base oils, lye, water, herbs, spices, essential oils. Directions -Measure lye and place into glass jar or small stainless steel pot. Add cold water and stir until lye is dissolved. You may choose to wear eye protection and rubber gloves. The water will get very hot (180F). Be careful of the rising steam, as it is caustic and irritating to the throat and lungs. Set aside to cool to room temperature (may put container in tub of cold water). -Melt oils together on high heat in stainless steel pot. Remove from heat (do not let smoke), set aside to cool to room temperature (may put pot in tub of cold water). -Pour lye solution slowly into oils when the lye solution and fats are room temperature. -Stir constantly until mixture is thick and creamy with a "pea soup" consistency: approx 15-20 minutes -Stir in essential oils (1/2~1 1/2 oz) and dried herbs and spices with the amounts to your preference. -Pour into molds. -Cover and keep warm. Place in a draft free warm area for 48 hours. -Remove the soap from the molds. If there is any difficulty removing the soap from the molds, place them in your freezer for 24 hours. Run warm water over the bottom of the molds, the soap will slide out easily. -Cut and let cure in the open air for 30 days. 2 Basic Soap Recipes Recipe #1 40 oz. Palm Oil 25 oz. Coconut Oil 20 oz. Olive Pomace Oil 32 oz. Cold Water 10 1/2 oz. Lye Recipe #2 40 oz. Coconut Oil 45 oz. Olive Pomace Oil 32 oz. Cold Water 10 1/2 oz. Lye

The above is for cold process soap. Hot process soap – which we didn’t make in my class today – takes a little more effort up front, but is usable in a few hours, instead of 30 days.

The recipes will make about 25 bars of soap.

It’s important that you acquire Olive Pomace Oil – not just Olive Oil or Pomace Oil. This is the third pressing of the olive.

Suzanne, my instructor, uses an oak mold which she first lines with parchment paper.

Lye, contrary to Fight Club, will not burn you. It dries your skin, which will cause itching. Simply rinse it off with water and pat dry.