You are currently viewing all posts tagged with ablution.

Cleaning Brakes

The same spray bottle of isopropyl alcohol used to clean my human interface devices is also used to clean the brake pads and braking surface on my bike.

Cleaning Brakes

Soap, degreasers, and similar cleaners are best avoided on these components. They can leave residue that decrease braking performance and causes squealing (thus diminishing the all important bike ninja factor). Spraying the brake pad with isopropyl alcohol and wiping it off with a clean rag is usually all that’s needed. Sometimes I’ll hit the pads with a Scotch-Brite Scour Pad after spraying them.

The braking surface on the rims is cleaned the same way: spray with alcohol, wipe with rag. Occasionally, if the wheels are especially dirty, I will break out the big guns in the form of my all-purpose cleaner. Before spraying the rim with this I remove the wheel from the bike because I don’t want to get the cleaner on my brake pads. After spraying the rim with the cleaner, I wipe it down with a clean rag. Finally any residue from the cleaner needs to be removed, which is accomplished by spraying the rim with isopropyl alcohol, and wiping it down again. Sometimes it takes a second cycle of alcohol-and-wipe to eliminate squealing.

Cleaning Human Interface Devices

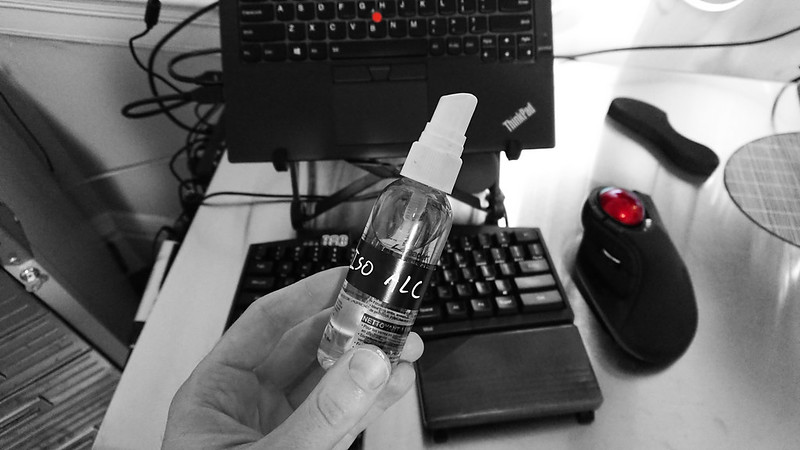
Human interface devices must be cleaned frequently to prevent them from becoming petri dishes that will breed our eventual doom. I use isopropyl alcohol to clean my keyboard, pointing device, and the body of my laptop. This removes grease and oil, making the device feel clean. More importantly, it disinfects.

I keep the alcohol in a recycled 2 oz spray bottle. To clean, I spray the device directly and then wipe it off with a microfiber cloth. Spraying a cleaning solution directly onto any electronics is generally frowned upon, but I began cleaning things using this method 14 years ago and I’ve yet to experience any problems.

Human Interface Device Cleaning

I buy the alcohol in 70% concentration, which is commonly available at any drugstore and apparently the best for disinfection:

The presence of water is a crucial factor in destroying or inhibiting the growth of pathogenic microorganisms with isopropyl alcohol. Water acts as a catalyst and plays a key role in denaturing the proteins of vegetative cell membranes. 70% IPA solutions penetrate the cell wall more completely which permeates the entire cell, coagulates all proteins, and therefore the microorganism dies. Extra water content slows evaporation, therefore increasing surface contact time and enhancing effectiveness. Isopropyl alcohol concentrations over 91% coagulate proteins instantly. Consequently, a protective layer is created which protects other proteins from further coagulation.

Solutions > 91% IPA may kill some bacteria, but require longer contact times for disinfection, and enable spores to lie in a dormant state without being killed. A 50% isopropyl alcohol solution kills Staphylococcus Aureus in less than 10 seconds (pg. 238), yet a 90% solution with a contact time of over two hours is ineffective.

A higher concentration is probably more appropriate if cleaning a circuit board directly, but for enclosed electronics like keyboards, trackballs, trackpads, and laptop bodies, I’ve never had the 30% water cause any problems.

I’ve tried using ROR to clean keyboards. It results in a keyboard that feels clean, but it is more expensive than isopropyl alcohol, and doesn’t disinfect. I prefer to reserve the ROR for optical surfaces.

Prior to the spray, I’ll sometimes use a micro vacuum attachment to pick up lint, crumbs, and the like. Stubborn dust sometimes require a gas duster, but I find them mostly unnecessary. (I once tried a DataVac. It wasn’t worth the cost to buy it or the space to store it.)

I use my pressure cooker to sterilize equipment.

Sport bottles lids often have small nooks and crannies that are excellent for growing bacteria and difficult to clean by hand. I occasionally throw these lids into my pressure cooker with a steaming basket or trivet to sterilize them. Multiple studies show that a standard pressure cooker can be an effective alternative to an autoclave in austere environments. The general rule of thumb seems to be about 15 psi for 15 minutes, though 30 minutes may be a safer bet for medical instruments.

Poor Man Autoclave

Bicycle Chain Cleaning

I clean my bike chain with odorless mineral spirits.

Drivetrain Cleaning Tools

I’ve been doing this for about eight years now, after a handful of years of using water and dish soap. The disadvantage of a water-based solvent is that you have to be careful to dry the chain thoroughly, including the area between the links. After cleaning a chain with mineral spirits, the chain can be wiped mostly dry. What’s left after that will mostly evaporate. What’s left after that can just be ignored. Mineral spirits are often used as one of the ingredients in home made chain lubricants; the small amount of residue left over after cleaning isn’t going to hurt anything.

The drawback to mineral spirits is that it is usually considered a hazardous material. Disposal must be completed at special facilities, not your kitchen sink. Fortunately, it can be reused for a long time. When I’m done cleaning my chain, I dump the used mineral spirits into a mason jar for storage. The debris settles to the bottom of the jar. The next time I need it, I can easily pour off the clean mineral spirits without disturbing the debris at the bottom. This same cycle can be repeated for years.

I use mineral spirits in a few different ways depending on how dirty the chain is:

  • Sometimes I’ll break the chain at its reusable link, place the chain in a Nalgene jar, and cover it with mineral spirits to soak. The dimensions of the Nalgene jar are superior to those of the Gatorade bottle mentioned in the previous dish soap post. I can cover the chain using less solvent, and it’s easier to fish the chain out.
  • Sometimes I’ll use a chain tool to clean the chain on the bike. These work just as well with mineral spirits as they do with specialized solvents. The Finish Line Pro Chain Cleaner is the only one of these tools that I don’t hate. I think it is a better design than the Park CM-5.2 Cyclone and Pedro’s Chain Pig.
  • Sometimes I’ll soak the bristles of a brush in mineral spirits and scrub with that. The Finish Line Grunge Brush is the best chain cleaning brush I’ve used. (The Park GSC-1 GearClean is great for the cassette and crank.)

During the less rainy part of the year, I often don’t need to use mineral spirits at all. I just wipe the chain clean with a dry rag.

After cleaning, I’ll lubricate the chain and wipe off any excess (unless I only wiped the chain clean without using any solvent, in which case applying more lube is likely not necessary), and pedal off into the sunset with a buttery smooth and silent drivetrain. This system helps keep vehicular maintenance costs very low.

All-Purpose Cleaner

My all-purpose cleaner consists of:

I use this to clean my dishes, my shower, every surface in my apartment, and every part of my bike except the chain. About the only things I can think of that don’t get cleaned with this mixture are my body and my electronics. Previously I used a mixture of Bronner’s castile soap and water for all of these things, but Sal Suds is better at cutting grease. This makes it preferable for kitchen (and bike) duty. I saw no reason to keep two cleaners around, so I phased out the castile soap mix.

I mix this in a recycled 0.5 L glass bottle with a neck that has standard 28-400 threading, allowing me to add a sprayer. The half liter bottle lasts me roughly two weeks. A single batch costs me in the neighborhood of $0.25, meaning I spend somewhere around $6.50 per year to clean my things.

I go back and forth on the vinegar – sometimes I skip it and use 0.5 L of water instead. I don’t notice a difference in the cleaning performance, but I tend to use more of it when I skip the vinegar. Vinegar is an effective bactericide and, unlike with castile soap, there’s no harm in mixing it with the Sal Suds detergent, so I generally opt to put it in.

To measure the detergent I use an OXO Mini Angled Measuring Cup, which has proved a useful thing to keep around.

I soak produce in a solution of baking soda.

A study from the University of Massachusetts found that a baking soda wash can be effective at removing pesticides from the surface:

Surface pesticide residues were most effectively removed by sodium bicarbonate (baking soda, NaHCO3) solution when compared to either tap water or Clorox bleach. Using a 10 mg/mL NaHCO3 washing solution, it took 12 and 15 min to completely remove thiabendazole or phosmet surface residues, respectively, following a 24 h exposure to these pesticides… This study gives us the information that the standard postharvest washing method using Clorox bleach solution for 2 min is not an effective means to completely remove pesticide residues on the surface of apples. The NaHCO3 method is more effective in removing surface pesticide residues on apples. In the presence of NaHCO3, thiabendazole and phosmet can degrade, which assists the physical removal force of washing. However, the NaHCO3 method was not completely effective in removing residues that have penetrated into the apple peel. The overall effectiveness of the method to remove all pesticide residues diminished as pesticides penetrated deeper into the fruit. In practical application, washing apples with NaHCO3 solution can reduce pesticides mostly from the surface.

I use a dish washing basin with a drain filled with 6 liters of water (I’ve previously placed pieces of tape on the side of the basin to indicate water levels for 2, 4, 6, and 8 liters). The study’s 10 mg/mL NaHCO3 washing solution translates to 60,000 mg of baking soda for this amount of water, or about 4 tablespoons, which I dump in and swirl around a bit. Then in goes the produce. After 15 minutes I can just pull the drain, blast everything with some pressure from the faucet, and let it sit in the basin (with drain open) to dry until I get around to putting everything away. It is most important to perform this process on the Environmental Working Group’s Dirty Dozen, but the procedure requires such a low amount of effort that I soak any produce which is lacking a thick peel (like oranges) as soon as I get back from the market, regardless of its providence.

Bacteria is a different matter.

Toothpaste Capsule

When travelling, I store toothpaste in a 10 gram round pill container. I bought mine from The Container Store. Depending on the thickness of the toothpaste, I find that I can get 14-20 servings out of this volume of container. I brush my teeth twice per day, so this translates to 7-10 days of travel.

These containers probably wouldn’t be leak-proof if they were used to store a liquid, but they are up to the challenge of securing a higher viscosity substance like toothpaste.

Toothpaste Capsule

After using these for a while I bought a set of 15 gram containers, thinking that this would allow me to carry a two week supply. They accomplish that, but the containers aren’t as nice. They have fewer threads, which make me think it is possible for them to pop open in my bag (though I haven’t experienced this), and their slightly greater height makes them a bit less convenient to pack. I stick with the smaller containers, which are an adequate volume for most of my travel.

I think these toothpaste capsules are superior to travel-sized toothpaste tubes. I can fill my container with whatever toothpaste I prefer, instead of being limited only to those toothpastes for which I can find the elusive travel-sized tube. When I run out, I can refill the container with whatever toothpaste is around, instead of wastefully disposing of a used tube and beginning the hunt for another travel-sized tube. The capsule is easy to fill, unlike other options for repackaging. And they don’t take the time and forethought (and low-humidity environment) that is required for Mike Clelland’s toothpaste dots.

After finding that these toothpaste capsules worked well for me, I began using an identical pill container to carry sunblock. Sunblock can be repackaged more easily than toothpaste into mini dropper bottles, but it’s impossible to clean those bottles out after use. The pill containers are simple to empty and clean, and applying sunblock from them is just as easy as it is out of a dropper or squeeze bottle. Unfortunately the toothpaste capsule and sunblock capsule look identical in my bag. So now I have the habit of sniffing my toothpaste and sunblock before I use it to make sure that I don’t brush my teeth with sunblock or rub toothpaste into my skin. I should probably label them.

Residual Oil Remover

Late last year I ran out of lens cleaner. In the past I’ve never made an informed purchase of lens cleaner, opting instead for the free bottles given out at optometry offices or whatever generic bottles were presented on the counter of the closest drug store. This time around I thought I’d look to see if there was any specific product worth purchasing. I assumed that there were probably picky photographers who had performed a survey of cleaners for their camera lenses, and that their conclusions would apply to other optical surfaces.

Surprisingly, I found only one useful review: a 2013 post on on the Digital Photography Review Forum, which outlined a testing method for cleaning solutions and concluded:

Three branded cleaners out of about a dozen, after 5 test repetitions, walked away with the honors. They are: Zeiss Lens Cleaning Solution, Nikon Lens Cleaning solution and ROR Lens Cleaning Solution. At the bottom of the list was surprisingly, Purosol, that tied with straight distilled water for having absolutely zero emulsifying properties for removing skin oil in all 5 of our test repetitions. When I spoke with the Purosol folks, and asked “How does NASA use your product and for what cleaning purposes”, I was politely told, “That information is classified, and, we unfortunately don’t know!”

Between the 3 top reviewed products, I flipped a coin and ended up purchasing ROR, or Residual Oil Remover.

ROR certainly works. I use it on my Rudy lenses, my laptop screen and external monitors, as well as the screen of my phone. But because I made the purchase after I was out of my previous cleaner, I wasn’t able to compare it to anything else for a couple months. Later on I found a partially used bottle of generic lens cleaner from my optometrist and was able to do a comparison. ROR cleans better with less rubbing.

I don’t know what the contents were of that last bottle of generic cleaner, or how it compares to the other cheap, generic cleaners that I’ve used in the past. But I am happy enough with ROR that I will continue to use and recommend it. I have three bottles stashed around my frequented areas at home and work, and appreciate its ability to keep the clarity of my optical devices at a maximum.