The Elusive Triple Crank
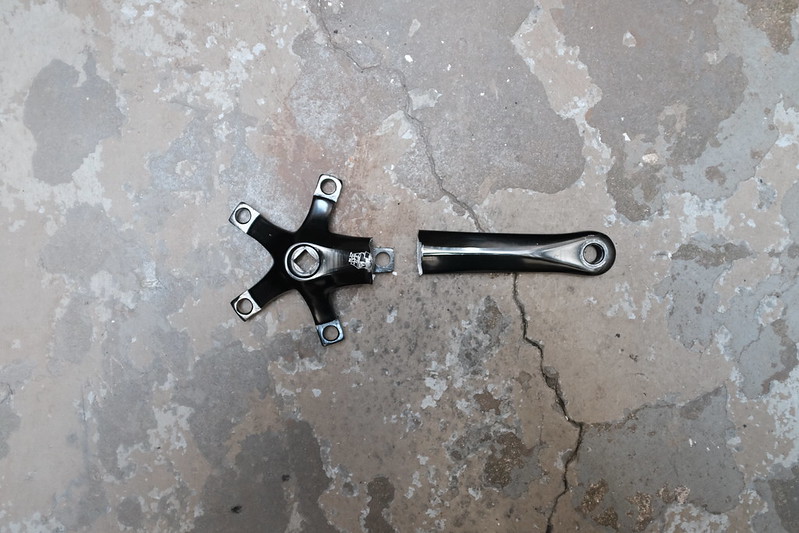
I broke the drive-side crank on my New Albion XDT crankset. I have strong legs.
The crankset was only 5 years old. I don’t track distance, so I don’t know what sort of mileage it had – more than 10,000 miles and less than 100,000, on a healthy mixture of pavement and dirt – but it is certainly too new for these sorts of shenanigans.
New Albion is one of the many brands of local company Merry Sales. They are responsible for bringing a number of Japanese bicycle components to the American market, and are usually associated with quality equipment. The New Albion XDT is basically a clone of the Sugino XD – made from the same molds, in the same factory, out of the same 6061 aluminum. I also have a lot of miles on an actual Sugino XD (and I put an old one back on after this break so I could limp around town while deciding on a more permanent fix). I’ve never had any problems with that crank. So I’m prepared to accept that this was just a fluke, and it probably would not happen again, but I still wanted to replace it with something I could have more confidence in.
Unfortunately the dystopian hellscape that is the modern bicycle industry means square taper triple cranks are few and far between.
Fortunately Rivendell is still fighting the good fight. The best option I found was their Silver crank. These are made of 7075 aluminum, and Rivendell claims that they pass the EN 14766 mountain bike fatigue standard. They use a 110 BCD for the middle and outer rings, and 74 BCD for the inner. That makes them compatible with any triple chainrings a reasonable connoisseur would want to use.
I bought their full triple crankset with 44x34x24 chainrings. But as I was waiting for it to ship, I sat staring at my broken New Albion crankset and decided that its 48x36x26 chainrings were all still in pretty good shape (if in need of a cleaning). And while I was prepared to try Rivendell’s gearing, I do really like the big 48 ring for flying down mountain roads, and I’ve never really felt like I need anything lower than a 26 granny gear on this bike. So when the Silver crankset arrived, I broke it apart, stored its chainrings for later use, and installed the (cleaned) rings from the New Albion.
The Silver seems to have a slightly wider Q factor than a Sugino or any of its clones. I run a Phil Wood bottom bracket with a 113mm spindle, just like God intended. After slapping on the Silver, I was getting some chain rub on the big chainring when in the two outermost sprockets on the cassette. I was able to adjust the derailleur to account for this, but that makes me think that a couple millimeter shorter spindle would be needed to maintain the same Q factor as I had before. The difference is minor enough that I don’t notice it when actually pedalling. It rides great. And it looks pretty good too.
The other options that turned up in my search all disappointed in one way or another.
The Velo Orange Grand Cru 110 is pretty, but they recommend a 124mm bottom bracket. I didn’t want to buy a new bottom bracket.
The Rene Herse Triple is pretty and passes the EN 14781 racing bike fatigue standard (which I’m guessing is lesser than the mountain bike standard), but is prohibitively expensive, and they too recommend a wider bottom bracket. Their instructions also state that “if you have broken cranks in the past, we recommend that you do not use lightweight components like the Rene Herse cranks.” I now belong to that rarefied coterie, so they’re not for me.
Sugino triples are still to be found here and there, but can be difficult to locate. I wanted something stronger than the 6061 aluminum of the XD, if only for my own psychological comfort. Some years ago I ran a Sugino Alpina 2 Triple. I don’t remember what kind of aluminum it was made of. I stripped the threads on the drive-side after I wore down the bearings on my previous Phil Wood bottom bracket until they were mush and rounded the spindle (they said it couldn’t be done – I took that as a challenge). So I didn’t really want another one of those.
If I had been displeased with the Silver, I would have purchased a Spa Cycles TD-2. This is another Sugino clone – made in the same factory, out of the same molds – but it is made of 2014 aluminum, so ought to be plenty strong. (It’s also a clone of the Alpina 2 rather than the XD. That means the 5th bolt is easy to access, rather than hidden behind the crank, which makes swapping around rings easier.)
But as it is I’m very happy with the Silver cranks. If you need a well designed and well built square taper triple crank – and who doesn’t – I’d say just buy one of those and be done with it. I see no reason why the cranks shouldn’t last me forever. When I need new chainrings, if I don’t want to go with the 44x34x24 gearing from Rivendell, I’ll probably buy the Spécialités T.A. rings that Spa Cycles sells. (I’m pretty anal about staying on top of chain wear, so it may be a while.)
Elzetta Retention
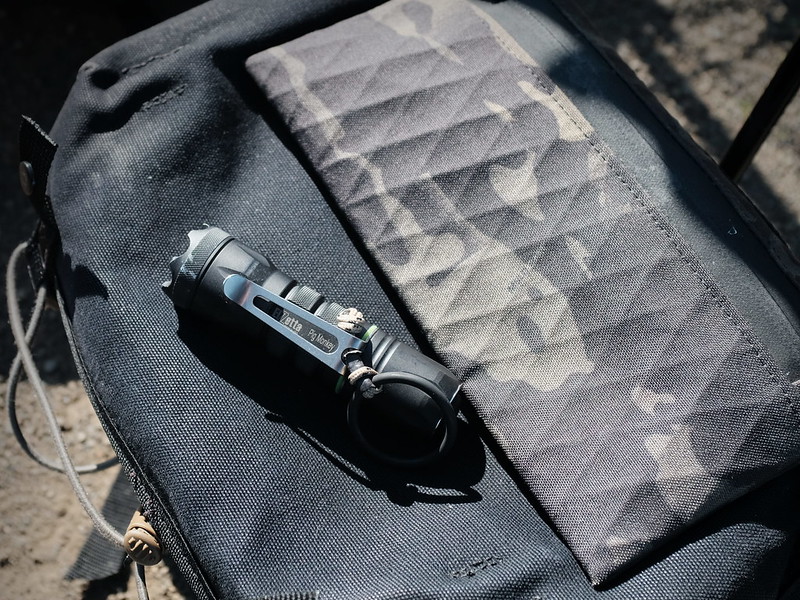
As I have previously mentioned, I started out using a Prometheus Lights Titanium Pocket Clip on the Elzetta Alpha before switching to the now-discontinued Raven Pocket Clip in 2016. The O-ring provided by the Raven Pocket Clip is key to how I use the light. It allows me to release the light and use my hand for something else, without dropping the light. The clip itself is perfectly adequate, though not as tight and springy as the titanium clip.
Last summer, I decided to move back to the titanium clip, but to add my own O-ring. I basically knocked off what Retention Ring sells, just using spare bits I already had around. It consists of a little bit of Lawson Ironwire, an O-ring with 1” internal diameter, a tiny piece of heat shrink tubing, and a knot. It isn’t pretty, but it has been working great as part of my EDC for the past 8 months.
Recent Inks
Goulet Pens will sell you sample vials of ink. I took advantage of this to expand beyond my long-time staple of Noodler’s 19001 Black, without ending up with a bunch of full bottles I wasn’t going to use. Mostly I was looking for a blue. I came out the other side with two new favorites – neither of which are really blue.
Noodler’s 19808 Heart of Darkness is more black than black. It’s like, how much more black could this be? And the answer is none. None more black. It also dries relatively quickly, and writes well on the cheap paper one often encounters out and about in the world.
Noodler’s 19040 Air Corp Blue-Black isn’t really much of a blue-black. It is more of a teal-black. It’s a really pretty shade, and unique, but still subtle enough that it can be used anyplace there aren’t strict color requirements. This one also dries relatively quickly, and writes well on the vulgar paper of the unrefined. This ink loaded in my Pilot Vanishing Point is my daily writer now.
Working through all these sample vials over the last few months also caused me to move away from piston converter cartridges. I now just use standard cartridges, and refill them with a syringe and needle. This ends up being quicker, cleaner, and less hassle. It also means I can use the last little bit of ink in the container, without buying a snorkel.
The Things I Do for Time
I am a believer in the sacred word as defined in ISO 8601, and the later revelations such as RFC 3339. Numerical dates should be formatted as YYYY-MM-DD. Hours should be written in 24-hour time. I will die on this hill.
Since time immemorial, this has been accomplished on Linux systems by setting LC_TIME to the en_DK locale. More specifically, the git history for glibc shows that en_DK was added (with ISO 8601 date formatting) by Ulrich Drepper on 1997-03-05.
A few years ago, this stopped working in Firefox. Instead Firefox started to think that numerical dates were supposed to be formatted as DD/MM/YYYY, which is at least as asinine as the typical American MM-DD-YYYY format. I finally got fed up with this and decided to investigate.
The best discussion of the issue is in Thunderbird bug 1426907. Here I learned that the problem is caused by Thunderbird (and by extension Firefox) no longer respecting glibc locales. Mozilla software simply takes the name of the system locale, ignores its definition, and looks up formatting in the Unicode CLDR. The CLDR has redefined en_DK to use DD/MM/YYYY1.
The hack to address the problem was also documented in the Thunderbird bug report. The CLDR includes a definition for en_SE which uses YYYY-MM-DD2 and 24-hour time. (It also separates the time from the date with a comma, which is weird, but Sweden is weird, so I’ll allow it.) There is no en_SE locale in glibc. But it can be created by linking to the en_DK locale. This new locale can then be used for LC_TIME.
$ sudo ln -s /usr/share/i18n/locales/en_DK /usr/share/i18n/locales/en_SE
$ echo 'en_SE.UTF-8 UTF-8' | sudo tee -a /etc/locale.gen
$ sudo locale-gen
$ sed -i 's/^LC_TIME=.*/LC_TIME=en_SE.UTF-8/' /etc/locale.conf
Now anything that respects glibc locales will effectively use en_DK, albeit under a different name. Anything that uses CLDR will just see that it is supposed to use a locale named en_SE, which still results in sane formatting. Thus one can use HTML date input fields without going crazy.
I spent yesterday afternoon at the California International Antiquarian Book Fair.
They had first editions from everyone from William Gibson to Isaac Newton, proofs and manuscripts from Neal Stephenson and Ludwig Wittgenstein, 17th century books on witchcraft with binding that did not appear to be from livestock, and Turing’s programming manual for the Ferranti Mark 1. But the books I saw the most copies of at different booths were firsts of The Monkey Wrench Gang and Grapes of Wrath.
Many of the sellers were from London or Paris. So I find myself imagining a shadowy cabal of Parisian antiquarians, realizing that they have a show in San Francisco coming up and wondering what the Americans will buy. “J’ai trouvé!” one of them declares. “Ed Abbey and Steinbeck. They won’t be able to resist.”


