I was up around Lake Twenty Two yesterday, further exploring the area and testing small changes to my gear load out. I was surprised at the amount of snow I encountered. There was a good foot of it around the lake, whereas at the end of January there was only a dusting. Winter and Spring seem to have gotten themselves confused.
It’s been nearly two years since I last redesigned this site. Don’t let me go that long again! The web is supposed to be a dynamic place, you know. Anyway, here’s the new look.
It isn’t drastically different from the old one. I’m still keeping it clean and simple, and the base colors are the same.
You might notice the rounded corners on some things. Yeah, that’s right. Web 2.0, here I come! I think rounded corners are only acceptable if accomplished with simple CSS. CSS3 is slated to include the border-radius property to achieve rounded corners. The specifications are not yet finalized, but Mozilla browsers have implemented the property with -moz-border-radius and WebKit browsers with -webkit-border-radius. Those are the properties that I’m using. That means you’ll get rounded corners in browsers like Firefox and Safari. Opera seems to work too. Internet Explorer, not so much. (Come on, IE has a hard enough time complying with current standards. You can’t expect it to look to the future!)
If you notice any bugs or would like to suggest any changes, let me know. After all, the site is really for you, dear user.
(I did briefly look at everything on a Windows box running IE8. It seemed to work – other than the rounded corners, of course – but if you notice any bugs in that particular browser, you know the drill.)
Two of the things that really spurred this design are Readability and Clippable. For about a month now, I’ve been using these bookmarklets while reading longs articles online. They help a lot. But it’s really a problem with the design of some sites that I feel the need to use them. I decided that I wanted to redesign my site with typography in mind.
I’m also now integrating Twitter posts into the blog. We’ll see how that goes. They’re styled differently, so there is a visual distinction between a tweet and a normal post. The idea is that I’m now just using twitter as a back-end to create short posts. If I want to, I can switch to some other microblogging service and you, the user, need never know the difference. (I could even just use Wordpress to create short posts! But that might get me kicked off the interwebs…)
Tweets integrated into the blog means tweets in the RSS feed, as well. That makes my RSS mash-up a bit irrelevant. If you currently subscribe to that, I’d recommend changing your subscription back to the normal feed. For those who don’t want to change, I’ve removed the Twitter feed from the mash-up’s input. That way you won’t have to read each of my tweets twice. The mash-up feed will now only include the blog and Flickr stream.
Blueprint
This design is built upon the Blueprint CSS framework. I’ve used it a handful of times before, but never properly. My method was always to link to the three Blueprint CSS files (screen.css, print.css, and ie.css) in the header and then toss in a link to my own stylesheet underneath them. I never used the compressor.
The idea behind the compressor is pretty simple. It allows you to maintain one central instance of Blueprint and use that to generate the CSS needed for each individual project.
<ul><li>Keep a core Blueprint folder checked out with <ahref="http://git-scm.com/">Git</a> on your computer</li><li>Create a settings.yml file within the Blueprint folder with all the specifics of each project using Blueprint</li><li>Use the command line to generate <spanclass="caps">CSS</span> for a project on command
<ul><li>Incorporating any site-specific attributes
<ul><li>Namespace on all Blueprint classes</li><li>Custom grid template rather than the standard 24 columns / 30px column width / 10px gutter width</li></ul></li><li>Compressing any custom <spanclass="caps">CSS</span> and appending to the end of the Blueprint stylesheets</li><li>Appending custom semantic selectors to the end of the Blueprint stylesheets</li></ul></li></ul>
When I first head about this, I though that the compression bit was all well and good, but I’ve never been really adamant about optimizing CSS for speed in the first place. I’m more concerned about compliance with standards and readability. Maintaining a central Blueprint instance didn’t appeal to me much, either. What really stood out is the ability to have custom semantic selectors.
CSS frameworks are neat. I’ve used a handful. Like any other tool, they’re not always appropriate. When they are, they have certain advantages and disadvantages. One of the main things that I dislike about them is that they encourage you to clutter your code with framework-specific junk. If you’re using 960.gs you’re going to have elements with classes like “container_x”, “grid_x”, “omega”, and “suffix_x” all over the place. With Grids you’ll have “yui-g”, “yui-b”, “yui-main”, and the like. Readability of code is diminished and you’ll probably end up suffering from a case of div-itis. Not to mention, you can forget about a strict separation of markup and styling. Sure, you could copy the style definitions for the specific framework classes into the classes or IDs of your own elements, but how many folks actually take the time to do all that copying and pasting? I sure don’t! The appeal in a CSS framework is to save time, not make the process of building a site longer. Plus, there’s an appeal in having the framework-related styling separate from the normal site styling. Such a separation makes the framework easy to update.
This is where Blueprint’s semantic classes comes in. It allows you to tell Blueprint to take one of your classes (or IDs) and apply to it the properties of one of Blueprint’s classes. A-mazing.
As an example, the header of this page might look something like this if built on Blueprint without the compressor:
Clean as a whistle! No useless divs, all elements semantically named, and not dependent on any framework.
As great as the compressor is, I do have a couple problems with it. When using the compressor, Blueprint intends that you only have 3 final (compressed) stylesheets: screen.css, print.css, and ie.css. Wordpress, of course, requires a style.css file to define the template. That’s no problem. I just a create a style.css file that has the theme information in it and then toss in a @import url(‘blueprint/screen.css’). Then in the Wordpress header I can put a link to style.css, print.css, and ie.css. Everybody’s happy.
Styling a website basically boils down to making a small change to the stylesheet and refreshing the page to see how that looks. Running the compressor after each change to combine the custom stylesheet with the screen.css file is not productive. So for the development process I tossed a @import url(‘blueprint/custom.css’) into the main style.css file. That works fine.
Then I finish building the theme. I’m ready to compress the stylesheets, so I remove the call to the custom stylesheet in style.css. I tell the compressor where the custom stylesheet is and have it combine it with the screen.css file. I run the compressor, reload the site, and everything explodes.
Just when I thought I was done!
The problem is that in the stylesheet the compressor generates, it puts my custom styles above the semantic classes. Throughout the development process, I was calling the screen.css file (which includes the semantic classes) before the custom stylesheet. As you no doubt know, stylesheets cascade. You can’t just switch up the order of elements without breaking stuff.
Oh well, I thought. At this point I was tired working on the site and didn’t care enough to fight it. I just put the line to call the custom sheet back in style.css after Blueprint’s screen.css file. I still feel like the whole semantic classes bit is enough of a reason to use the compressor, even if I’m not actually compressing my main stylesheet!
In the past, I used Camelbak bladders as my primary water reservoir. I’ve had three of their military hydration systems and never experienced a leak – except once when I neglected to fully close the bladder’s lid. In snowy, alpine conditions I would chuckle at others whose hydration hoses were frozen shut, while I confidently sucked on my insulated Camelbak hose. The Camelbak mouthpiece always insured a high flow-rate, unlike some other brands, and the hose could be shut off at either end, providing further protection against the accidental leaks that have been known to plague other bladders.
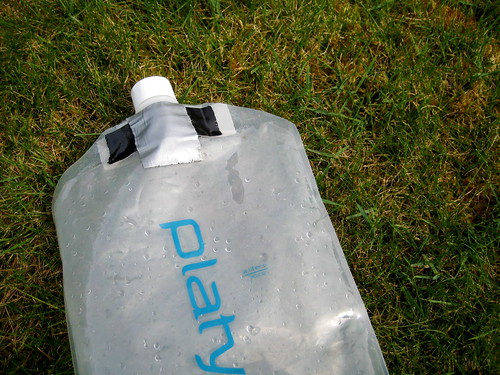
But the Camelbak’s durability comes at a price. My 100oz Omega Reservoir (including bite valve and insulated tube) weigh in at 10oz. Not exactly light. So last year, I decided to give Platypus bladders a shot. I had been critical of their toughness in the past, but their 2 liter bottle weighed in at only 1.4oz. With optional drink tube kit and bite valve cover, the full system weighed 3.6oz. It had been referred to as the “gold standard” in ultralight bottles. Too enticing not to pick up.
Of course, the low weight of the Platypus system also comes at a price. The small opening makes the bladder less convenient to fill. The tube is uninsulated, and so inappropriate for much cold weather use. The bite valve has a low flow rate and is prone to leaking. The bite valve cover is cumbersome and difficult to close. And the bladder itself is made of a much thinner and less durable plastic than the Camelbaks. Still, I have been very happy overall with the 2L Platypus bottle. I have not touched the Camelbak once since making the conversion.
But now my Platypus has begun to leak. I’ve patched it with Gorilla Tape, which seems to be an effective fix, but it is only temporary. I need to replace the bottle. Nowadays, all the rage seems to be for the new bottles with their ugly colors. The largest of these is 1 liter, and so not an option for me.
Platypus also now offers two newer hydration systems. The first is the Hoser, which is similar to the old bottle, but with a grab loop at one end and an angled port at the other. The manufacturer’s weight for this system is 3.6oz, which is the same weight that I have measured for my old bottle, hose, and valve. The trouble with the Hoser is that the bottom does away with the traditional expanding bottom of the old bottles in favor of a grab loop. Because of the small opening of the bladders, the best way that I have found to fill it is to scoop up water with something else and pour it into the standing bladder (a method made popular by Jason Klass). For one person to achieve this, the bladder has to stand on its own. The Hoser bladder will not, so it isn’t an option for me.
The other new offering from Platypus is the Big Zip SL. The zipper closer on this addresses the difficulty of filling. The manufacturer’s listed weight is listed at 5.5oz (though I’ve heard reports that it is actually heavier): still a good deal lighter than the Camelbak, but significantly heavier than the old bottle system.
I could go back to the old Camelbak, but the weight deters me. It is also difficult to pour precise amounts of water out of the Camelbak bladder for cooking, which is a disadvantage now that I’m used to the Platypus bottles.
The other option is a bladder from Source. I first heard of these with MilitaryMoron’s review. They have many features that are attractive to me, but I haven’t seen anybody post an accurate weight. Source themselves list their 2L bladder at 0.53lbs (8.48 oz), but they have the same weight listed for the 1.5L and 3L bladders. It seems highly improbable to me that three different sized objects weigh exactly the same. More likely, the manufacturer’s listed weights are inaccurate. I am assuming that the Source bladders will be heavier than the comparable Platypus Big Zip SL and that they have the potential to be slightly lighter than a Camelbak, but that is only a guess. I would rather not purchase a Source bladder without knowing an accurate weight.
For now, I think I will buy another 2L Platypus bottle to replace my leaky one. Despite the durability issues, they seem to be the best mix of price, performance, and weight. They must be thought of as disposable, but that is true of all plastic water carriers. I’m not sure why they have lately become more difficult to acquire from large retailers.
Does anybody know of any other options that I have overlooked?
ITS Tactical is a site that, in their words, is dedicated to living better on the tactical side of life. The site only launched in April of 2009, but with its tutorials, gear reviews, and other articles, has already established itself as mainstay in the community. I first discovered ITS last summer, and it immediately became one of my daily reads.
Last week, Bryan, the editor-in-chief, contacted me and said that he was interested in featuring my work with the DIY Tyvek Stuff Sacks on ITS. I had been meaning to rewrite that article, anyways, in order to demonstrate my new method for constructing the sacks. So I jumped at the opportunity to be a guest writer for ITS. You can see my article on ITS right here, and all the photos are of course available on Flickr.
I decided that I wanted to do something useful with my links page, so I’ve updated it to list those blogs that I subscribe to with my feed reader. Currently, there are 59 links. I’ll try to keep the list updated as I stop reading old blogs or start to read new ones.
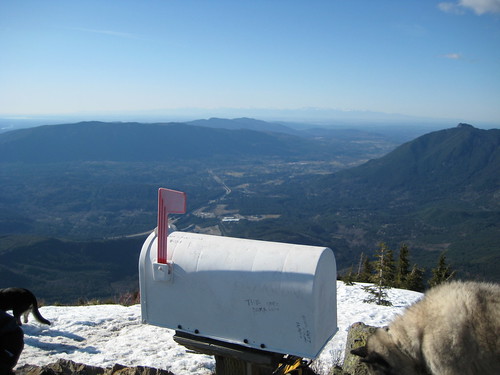
Remember Mailbox Peak? The mountain that was supposed to provide one of the most difficult, thigh-burning day hikes in the region? When I climbed it last October my reaction was a cocky “Psch. That ain’t no challenge! Maybe will a full pack it’d cause some pain.” Yesterday, I climbed it again. This time with a 60lb rucksack on my back.
Reaching the summit took three exhausting, slow hours. I allowed myself only one 10 minute break each hour. For the last quarter of the hike I was just stumbling along, slowly plodding my way up higher and higher (thinking “Whose bright idea was this?”). The trail near the top was too covered with snow and ice to make it smart to attempt without some sort of traction device, so I opted for the neighboring boulder field. Scrambling up that required more leg power, balance, and mental facilities than I had left at the time, but I managed to make it.
Upon reaching the summit, I immediately dropped my pack and sat down. I could only relax for a minute before realizing that I was freezing. And so I had to exert myself further by grabbing more layers from my pack and tossing them on.
I realized that I was dizzy, shaking, and – despite having been constantly sucking on my hydration hose on the way up – not sweating as much as I felt that I should have been, so I took a packet of Emergen-C from my first aid kit, dumped it into one of the 1 liter water bottles I had been using for weights, and forced myself to drink it all down before starting my descent.
I felt better after that and, munching on some granola, wandered around the summit, enjoying the view. It had been a spring-like day, with only a few clouds and temperatures around 50F at the bottom. Gazing at the other peaks with their light dustings of snow, I decided that the hike had been worth it.
There was only one mailbox up there this time. The black one must have blown away.
I decided to head down. The boulder field was tricky going, but, afterward, it was just a slow and steady plodding down the mountain. Near the bottom I had to poo, but, upon assuming the position, discovered that I didn’t have the length strength left to squat.
Finally, I made it back to the trail head, around two and a half hours after leaving the top. That night I had energy only to shower and eat a double serving of oatmeal before crashing. Today, I am stiff, but not as sore as I thought I would be.
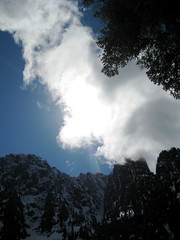
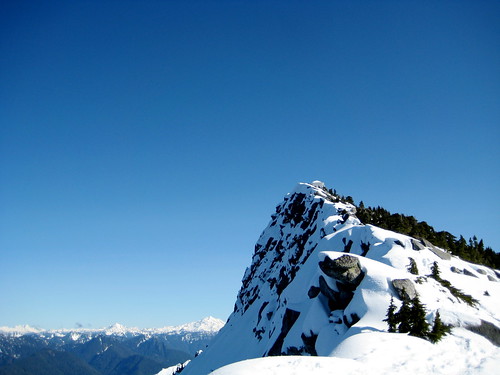
I took the day to climb to the top of Mount Pilchuck today. The road to the trail head is usually closed and impassable in the winter, but this year it was open and free of snow. From the trail head, it’s only about 3 miles and 2,500 feet to the 5,324 foot summit and the old fire lookout tower. This is the first day hike of the year that I took only a small day pack on, rather than loading up my large rucksack with weights, heavy books, and water. I practically flew up the mountain!
It was a clear day today, without a cloud in the sky. Snow started about a mile up the trail. First, just a little ice and packed slush, but it soon grew to about 5 feet deep. Plenty of people had been up the mountain this winter, leaving me a trail of compacted snow to follow and making crampons or snowshoes unnecessary for the way up.
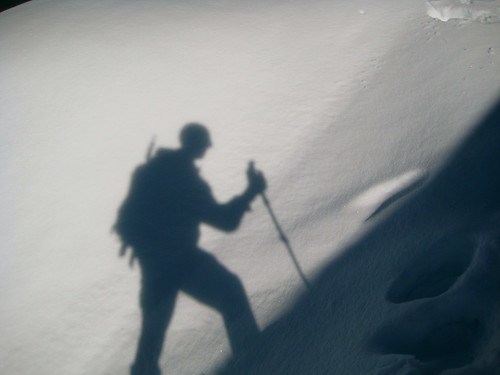
For the most part, it was easy going, until the trail climbed a slope up onto the ridge of the mountain. It was a little steep. I had to climb with both hands, occasionally punching or kicking holds for hands and feet.
From then on, the trail followed the ridge, but occasionally meandered slightly down onto the south side of the mountain. The sun had been beating on the snow pretty hard over there, turning what was nice crusty snow on the north side to a wet, slushy mixture. It required careful footing to make my way without sliding down the whole face.
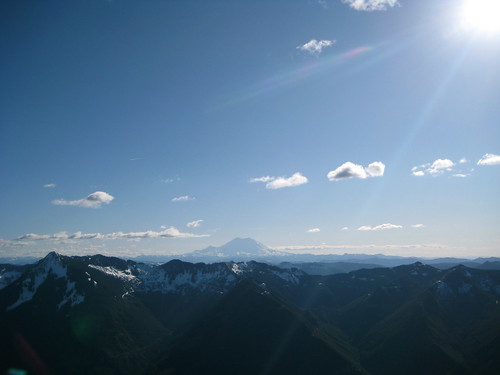
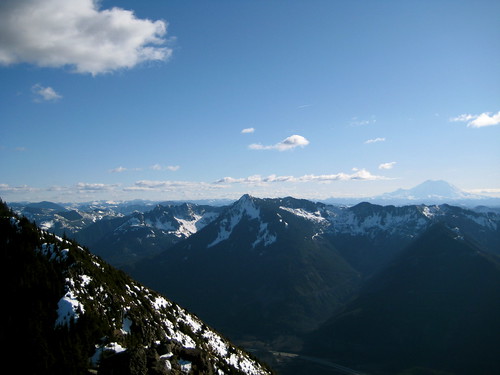
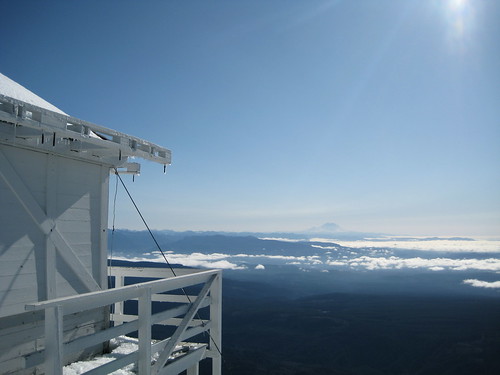
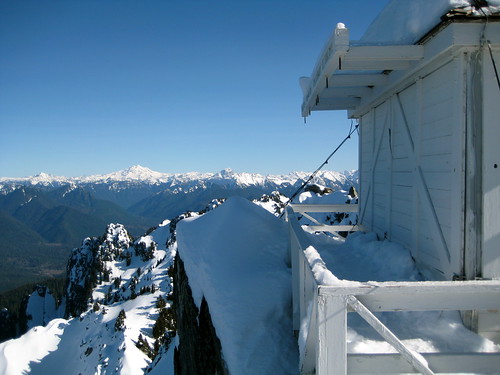
I summited and arrived at the lookout at about 1:30PM, two hours after leaving the trail head. The sky was still clear, allowing me to see to Mt. Rainier in the south, Mt. Baker in the north, Glacier Peak in the East, the Puget Sound and the Olympics to the West, along with everything in between. I opened up a few of the heavy shutters on the tower and spent some time trying to identify various peaks in the visible wilderness areas where I have traveled.
I wasn’t looking forward too much to the way down, knowing that without crampons and an ice ax it might mean a tricky brush with death. I put it off a bit longer by cooking up some ramen and jerk. But, after lunch, I had to turn around and head down.
Where the trail along the ridge deviated onto the southern face, I had no choice but to squat and slide down on my feet and butt, doing my best to control my decent with a trekking pole. Occasionally this worked. Occasionally I was able to dig my feet in to stop before going off the edge. Other times I just had to aim for trees, using them as breaks to stop me from taking the quick way off the mountain, then turn around and climb back up to the trail that I had slid past.
The near vertical slope I climbed on the way up was on the north face of the mountain. The snow there was hard and crusty, so I was able to climb my way back down using the holds I had previously made.
From then on, it was fairly easy going. I spotted one storm cloud, but the way down was otherwise uneventful.
Man is not adapted to live in a mirror-lined box, generating his own electric light and sending for selected images from outside when he happens to need them. Darkness and a bad smell are all that can come of that. We need the vast world, and it must be a world that does not need us; a world constantly capable of surprising us, a world we did not program, since only such a world is the proper object of wonder.
-Mary Midgley
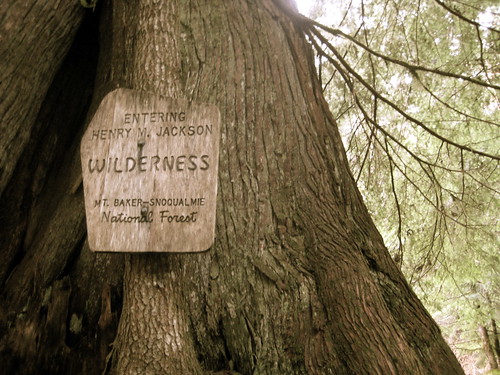
I wandered into the Henry M. Jackson Wilderness this morning, taking a 10 mile walk with full pack to Goat Lake. The lake is a popular destination for day trippers in the summer, which has always caused me to avoid the place. I figured the warm winter might give me a chance to enjoy the area with a few less bipeds around.
The trail was deserted, making it an enjoyable jaunt. As per usual for this unusual year, no snow nor ice was encountered. There was quite a bit of blow-down and a few land slides, most likely from this year’s storms, which caused me to misplace the trail now and again, but it was otherwise uneventful.
I’ll say one thing about old Hank: he’s got some big cedars in his country. I mean, big. Some looked like they may almost match a sequoia. The going was slow, as every 10 feet or so I encountered another that required a pause, a bend of the neck, and a moment’s consideration. There was also evidence of past logging, such as Tree On a Stump. A nice little “fuck you” to humans from the forest, I thought.
From one particularly aged and gnarly specimen, I cut a branch of needles. I planned to make tea later and perhaps infuse some of that 1,000 vitality into myself.
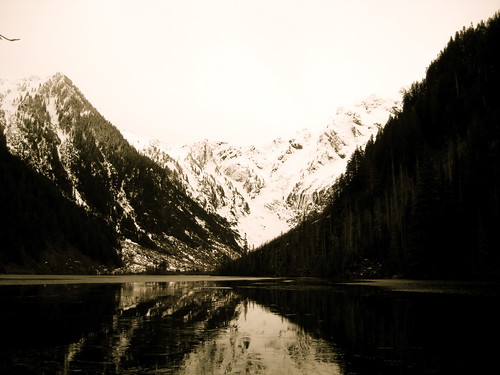
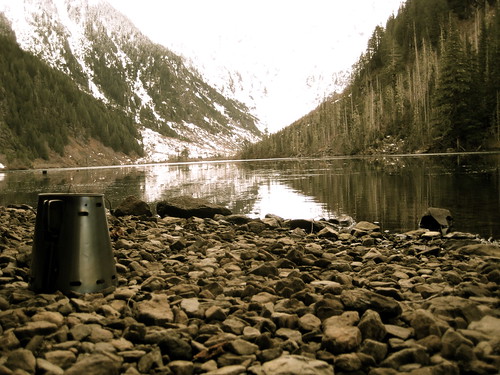
The lake itself had no ice, but Cadet Peak above was topped with snow. It was difficult to tell where mountain ended and sky began, for all the white clouds in the afternoon sky.
Lunch was intended to be couscous with a bit of curry, but ended up being curry with a bit of couscous. Afterward, I washed it down with warm cedar tea and a few chunks of dark chocolate – a combination most pleasing to my tongue.
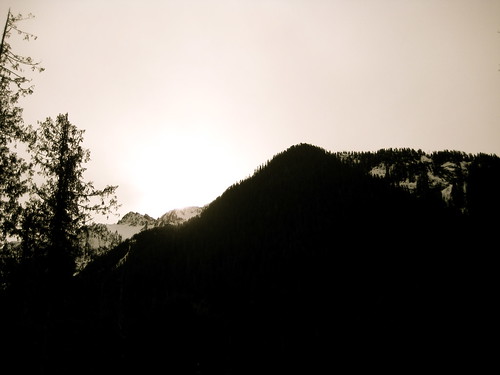
Then: a walk back home as the sun set.
I don't know what the answer is. In time man gets used to almost anything, but the problem seems to be that technology is advancing faster than he can adjust to it. I think it's time we started applying the brakes, slowing down our greed and slowing down the world.
I have found that some of the simplest things have given me the most pleasure. They didn't cost me a lot of money either. They just worked on my senses. Did you ever pick very large blueberries after a summer rain? Walk through a grove of cottonwoods, open like a park, and see the blue sky beyond the shimmering gold of the leaves? Pull on dry woolen socks after you've peeled off the wet ones? Come in out of the subzero and shiver yourself warm in front of a wood fire? The world is full of such things.
- Richard Proenneke, One Man's Wilderness