You are currently viewing all posts tagged with review.

Oatmeal Capsules

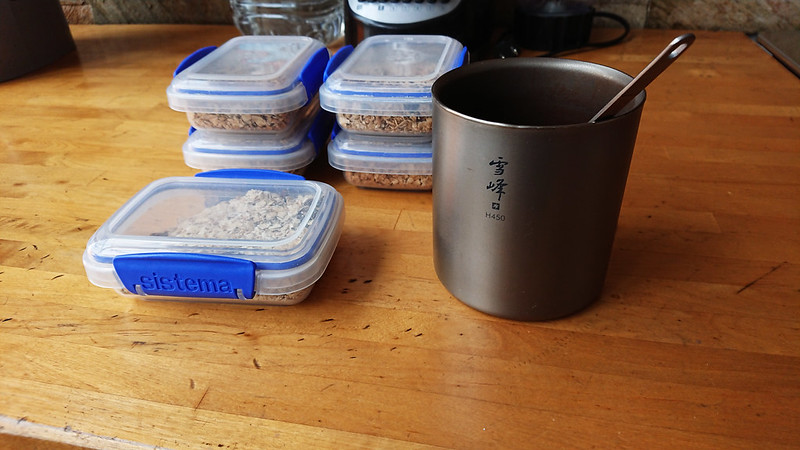
When I began mixing my standard issue oatmeal I stored it in Ziploc bags. The thicker freezer bags were reusable for a couple months before they needed to be replaced, but I wanted a longer lasting solution. This led me to the Sistema Klip It 1520. At 200ml this container is the right size for a single serving. The seal and locking clips keep the contents fresh. It is durable enough to last pretty much forever, and the stackable design makes it convenient to store multiple units.

Oatmeal Capsules

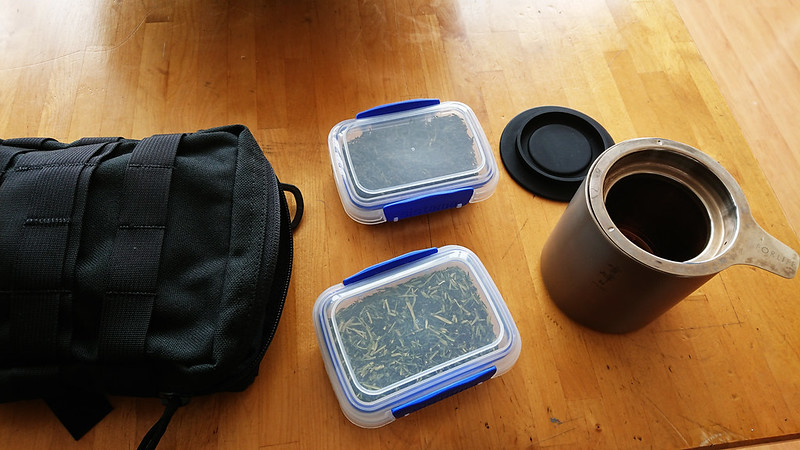
I’ve been using these as oatmeal capsules for about a year now. Five of them suffice for my weekday breakfast, but the size is useful enough that I purchased a handful more. I use them to store tea and snacks like umeboshi, dark chocolate covered almonds, and baby carrots.

Tea Storage

Sistema makes a handful of other containers that can be used with the 1520 to build a modular, stackable system that stores well in small spaces. The 1540 has the same footprint as the 1520, but is twice the height. The lids are interchangeable between the two. The 1550 is the same height as the 1520 but twice as wide. The 1600 has the same footprint as the 1550, and shares the same lid, but is the height of the 1540. These four units work well together.

On Scouring

Back in 2013 Brian Green published a review of the Lunatec Trekr washcloth. My showers haven’t been the same since.

The Trekr is a simple nylon scouring cloth, measuring 11” x 11”, with an elastic loop for hanging. It’s the same material as a synthetic loofah, but being a flat cloth it doesn’t hold moisture. At the time Brian posted the review I was on a campaign to eliminate sponges and sponge-like things from my life. Any cleaning tool in the bathroom or kitchen that holds water becomes a Petri dish for bacteria, in humid areas especially so. I bought the Trekr to try at home, and it immediately earned a spot in my daily ablutions.

Lunatec’s marketing campaign for the Trekr revolves heavily around the cloth being “self-cleaning”, which just means that the material doesn’t absorb anything, dries quickly, and every time you use it you are cleaning it with soap and water. I think this claim is accurate, though I still throw them into the laundry every couple weeks, more as impetus to rotate the cloths than out of the need to clean them.

Shortly after acquiring the Trekr I learned that it was just a smaller take on the Salux cloth. Hailing from Nippon, the Salux is exactly the same material as the Trekr, but measures in at a longer 33” x 11”. The larger size makes it easy to scour your back, as demonstrated by the naked lady on their packaging.

I now own about half a dozen of the Salux cloths for use at home, and the same number of Trekr cloths. I throw a Trekr cloth in my bag whenever I’m showering away from home – travel, backpacking, at the gym, or after the axolotl tanks.

To use either the Trekr or Salux, I wet the cloth, give it a few gentle swipes across a bar of soap (it also works fine with liquid soap), and then start scrubbing from head to toes. The cloth lathers, cleanses, and exfoliates dead skin – which, as we learned from Gattaca is key to leading a successful life in our future eugenic utopia.

I have also tried the Lunatec Scrubr dishcloth, which is made of a thicker and more abrasive nylon. It is less exciting. I’ll occasionally use it to scrub a surface clean at home, but for backcountry dish cleaning the spatula reigns supreme.

ABUS Ugh Bracket

For the majority of my time on a bike I’ve carried a U-lock in my bag. I’d rather have the weight on the bike than on my back, but I’d never found a way to accomplish this without unacceptable compromise. Mounting the lock inside the triangle interferes with throwing the bike on my shoulder when going up or down stairs. Bungee cords on a rear rack can hold the lock securely, but don’t prevent it from rattling around, and I place a very high value on the ability to move silently.

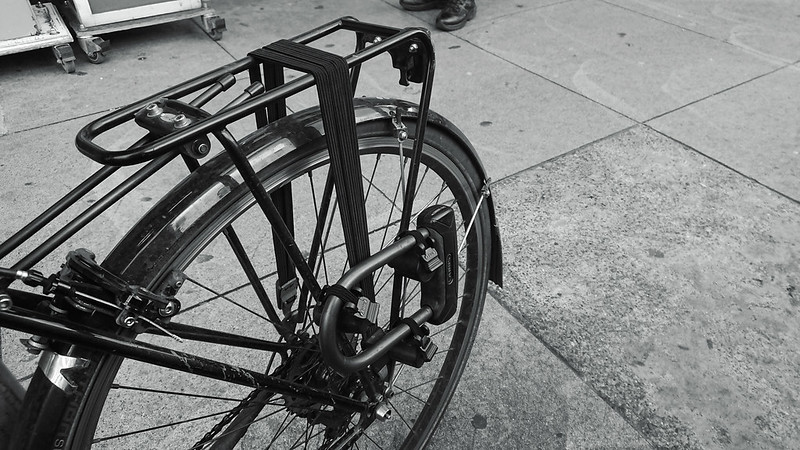
A little over a year ago I solved this problem by purchasing the ABUS Ugh Bracket. The Ugh is a three-piece bracket that mounts to the arms of any rear rack. Each component has a groove which holds the U-Lock arm and a small elastic band with a toggle which locks the arm in place. The bracket is clearly meant for large sized U-Locks, but I was able to make it work with my compact ABUS GRANIT Plus 640 and Tubus Vega rack by mounting at the bottom of the rack where the arms are closest together.

ABUS Ugh Bracket

The Ugh holds the lock securely and silently. It gets the weight off of my back and ensures that the lock is always on my bike. It makes accessing the lock quick and easy. I would like to see the elastic strap replaced with some material with a longer life, but other than that I have been very happy with the bracket. I think it’s one of the better options out there for carrying a U-Lock.

When the bracket is installed, a pannier cannot be mounted to the same side of the rack. I use panniers when touring, but I don’t tour with a U-Lock, so this isn’t something I care about most days. It only takes a couple minutes to uninstall, but it is annoying to do and another barrier to heading out on a multi-day trip.

When I purchased the Ugh I couldn’t find anybody selling it in the US. I had to pay for it in Euros and ship it from Germany, which made it an expensive experiment. It is now carried by Lockitt, though at $32.00 it remains a pricey item. I’ve been happy enough with mine that I’d buy it again, but it is definitely pricier than throwing a couple Twofish Blocks on your bike.

Pillow Talk

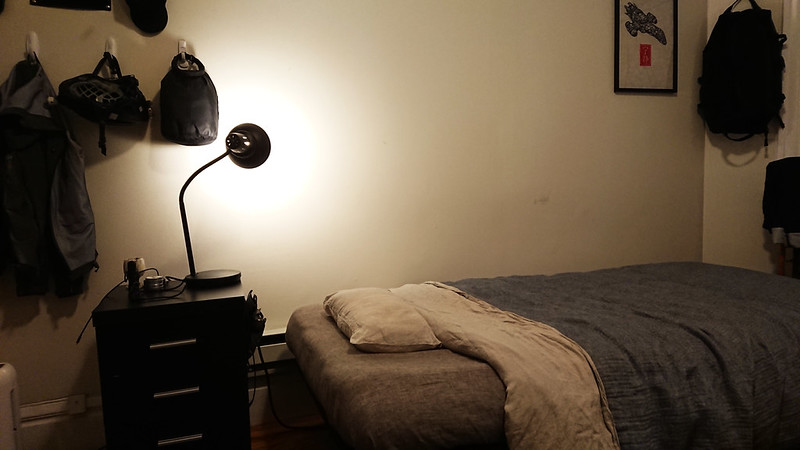
One component of optimizing for sleep is selecting the right tools. Back in 2010 I went looking for a replacement for the stereotypical feather pillow. Feather pillows work well enough when new, but degrade over time and are impossible to thoroughly clean without damaging them. This limited service life is suboptimal, and I assumed there must be a better solution out there.

I settled on buckwheat hulls. I reasoned that these would be easy to replace, which meant the life of the pillow would be determined by the shell rather than the filling. That the hulls were easily removed also meant the pillow could be washed. These two factors addressed my primary complaints against feather pillows.

I already had a zafu filled with buckwheat hulls, so I had some experience with the material that made me think it would work well for sleeping. Buckwheat hulls are lightweight and springy, making them easy to adjust to the contours of the body. The shape of the hulls means that, even under load, they do not compress flat, but instead leave a path for the movement of air. They are hypoallergenic and aren’t a food source for anything, which minimizes the probability of dust mites or other bugs taking up residency.

About the only negative thing one can say about buckwheat hulls is that they are loud. This was never a concern with my zafu, but I was worried that the noise would be unpleasant for a head pillow that I was trying to sleep on.

The solution to this was provided by a (now defunct) company called Serenity Pillows. They offered a patented dual-chamber pillow, which was filled with buckwheat hulls on one side, and a sheet of felted wool on the other side. By placing your head on the wool side you retained all the benefits of a buckwheat hull pillow, plus the temperature-regulation of wool, while the wool also muffled the sound of the hulls. I was sold on this idea as soon as I saw it.

Serenity Pillows offered two sizes of this dual-chamber pillow: one that we in the Western world would call a normal sized pillow, and a smaller version named the Shambho. The smaller size was about 16” x 10” (with a variable depth, depending on the amount of hulls you added or removed), which they claimed was closer to the traditional size of buckwheat hulls pillows used in Japan. I had never questioned the size of a pillow before, but when presented with this choice I couldn’t come up with any rational argument to support the larger size. I purchased the Shambho.
Shambho Pillow

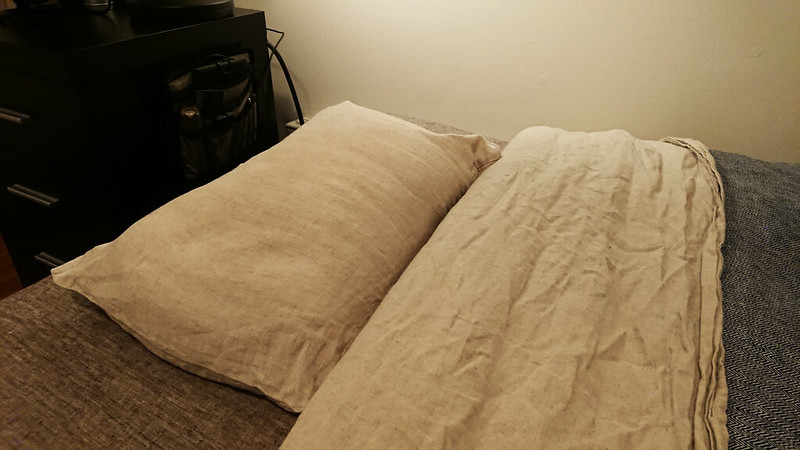
I’ve been sleeping on that same pillow for close to a decade now. It is never too hot or too cold. The amount of hulls can be adjusted to user preference. The shape of the pillow can be molded to support back or side sleeping. And I’ve never thought of a reason to want a larger size. It’s the perfect pillow.

I wash pillow cases regularly, and the pillow shell itself once or twice per year. This is a simple matter of dumping the hulls into a bucket, removing the felted wool sheet, and tossing the empty shell into the laundry machine with a bit of bleach.

Initially, the unusually small size of the pillow did make it difficult to find pillow cases, but I found that you can search for “toddler pillow cases” and find a plethora of appropriately sized (around 20” x 14” flat) options. Or you can have them made. I prefer linen – as in flax – for bedding, which I acquire from the large number of Eastern European sellers on Etsy. Since these products are usually made to order, I’ve found you can just send them the proper dimensions and they’ll sew up whatever you want. I always request a pillow case with an envelope closure, since the non-closing pillow cases more common in this country are dumb and their existence can only be justified by laziness. For this style of pillow case, 18” x 14” is about the right size.

At one point a few years ago I heard that Serenity Pillows had gone out of business, and was disappointed that I would never be able to replace this pillow – until last year, when I discovered a company called Sachi Organics had purchased the designs to both sizes of the Serenity dual-chambered pillows. They sell both the Shambho and the larger model Rejuvenation.

At the end of 2017 I purchased the Sachi Shambho during a sale at one of their dealers. It is identical to the original pillow, except for the tag. The small size of the Shambho makes it easy to store, so I was able to justify to myself the purchase of a second pillow both as a spare for guests, and against the day when the original Shambho must be replaced (if that day ever comes – today it is as good as new, but for some discoloration from use). I also purchased a replacement wool sheet for the original pillow. On top of its comfort, the serviceability of the pillow – that you can rejuvenate it by simply replacing the buckwheat hulls and wool – is another factor that attracts me to the Shambho. I expect I’ll be sleeping on the same pillow for at least another decade.
Shambho Pillow

I subscribe loosely to the idea of a daily uniform.

Loosely because I own more than one style of shirt, jacket, and pants. But I do try to keep things paired down, and standardizing on the color black means everything goes together and is largely fashion-agnostic. The approach reduces mental taxation.

I am more firm in the area of socks. Darn Tough makes the best socks, and the Tab No Show Light Cushion is the best Darn Tough sock. I bought my first pair in 2009. Over the subsequent years I have added a few additional pairs to my collection, but those original socks continue to be in regular rotation. I maintain a small number of other socks in my arsenal for specialty purposes – a couple pair of boot socks for those rare occasions when I wear tall boots, a couple pair of toe socks for augmenting huarache style sandals, and a pair of waterproof socks I bought to experiment with – but for almost all of my sock-wearing days each year I have the Tab No Show Light Cushion socks on my feet.

The Laundry Alternative

The Laundry Alternative Wonder Wash is a portable, hand-crank washing machine. It is basically a bucket with a sealed lid, mounted on a base via an axle with a handle that allows the bucket to be spun. The bucket is filled with warm water. When the lid is sealed and the machine is spun, the pressure increases, which causes the soapy water to be pushed through the fibers of the fabric being washed. As such, the Wonder Wash results in cleaner garments, and accomplishes this in a shorter period of time, than a traditional electric washing machine that relies on simply agitating the material. It achieves this in a package that is compact, portable, and off-grid compatible.

I purchased a Wonder Wash nine years ago. It has been my primary washing machine for the past five years. It’s a great solution for things like gym clothes that you want to wash frequently and not leave sitting around, getting funky, until you build up a large enough load to justify the use of a typically sized electric washing machine. The small size of the machine makes it easy to store when not in use, which is important for apartment dwelling, as well as the RV market that The Laundry Alternative seems to target. While I doubt the volume of the machine is practical for the laundry generated by a family of four, I find it works great for me. It encourages me to do laundry more frequently than I otherwise would – I typically do 2-3 loads per week – which in turn allows me to own less clothing (and towels, and bedding, etc). I don’t have to consider the it-will-be-AWOL-in-a-laundry-pile-on-the-floor-for-2-weeks factor when determining how many pairs of underwear I need in my life. The gentleness of the Wonder Wash allows me to keep what clothing (and towels, and bedding, etc) I do choose to own in service for longer than I otherwise would if I were regularly treating them to the abuse of a traditional washer and dryer.

I also find the smaller capacity of the Wonder Wash to be useful when washing waterproof garments with a technical wash like Nikwax Tech Wash. I usually only have one or two waterproof garments to wash at a time. With a traditional electric washing machine, I need to use more water and thus more of the expensive soap than is really warranted. With the Wonder Wash I can easily scale down the water and soap to what is appropriate for the load.

My apartment has an electric washer and dryer in the building, but not in my unit. I use it maybe once every 3 months, when I’ve neglected laundry and have enough dirty things that I would need 3+ loads of the Wonder Wash to clean it. If I had an electric washer and dryer in the unit I think I would still favor the Wonder Wash.

Laundry Alternative Wonder Wash

Use

The process of using the Wonder Wash is pretty simple.

  1. Add warm water, soap and clothing to the machine.
  2. Seal the bucket and spin, about one rotation per second, for 2-3 minutes.
  3. Dump the soapy water and fill with cold water to rinse.
  4. Seal the bucket and spin, about one rotation per second, for about 1 minute.
  5. Dump the water and remove clothing to dry.

The washing and rinsing part of the process take at most 4 minutes. The most time consuming part is filling the machine with water.

Laundry Alternative Wonder Wash

Soap

When I first began using the Wonder Wash I tried it with Seventh Generation Free & Clear Liquid Detergent. This is the soap I have always used in electric washing machines. This detergent is very sudsy, and I found it challenging to use enough soap to clean, but little enough to not require multiple rinse cycles. I quickly gave up on this and moved to Eucalan. I keep this around for occasionally lanolizing wool. Eucalan is a no-rinse soap, which works well in the Wonder Wash. I still performed a single, quick rinse cycle, but if I accidentally used too much soap I didn’t have to worry about ending with excessive suds that would require multiple rinses. Unfortunately Eucalan isn’t the cheapest soap out there.

I used Eucalan in the Wonder Wash for a couple years before realizing that I could probably just use the same soap I used for everything else in my life: Dr. Bronner’s. I shower, shave, wash hands, wash fruit, and clean surfaces with Bronner’s products. It is always effective, tends to be readily available and affordable, and is most likely not giving me cancer. So why not laundry? As it turns out, it works great with the Wonder Wash. I use one tablespoon of the Baby Unscented Castile Liquid Soap for a full load. It’s especially nice for attacking dust mites in bedding.

For the rinse cycle I’ll add about two tablespoons of distilled white vinegar, which helps to remove residue left over from the soap as well as soften the load. This softening is important for heavy cotton things, like towels, which otherwise become quite stiff when air dried.

Drying

Without an additional tool, any time saved by using the Wonder Wash instead of an electric washing machine will be lost after all the wringing required. Laundry removed from the Wonder Wash and placed directly on a drying rack will take days to dry. If electricity is available, the best solution to this is an electric spin dryer. Mine is a discontinued model made by the Laundry Alternative, but they have other models available. These dryers are simply steel drums that spin the clothes really fast to remove the water. It’s similar to the final cycle of an electric washing machine, except they spin much faster (around 1800 RPM). No heat is involved, so they do not shorten the service life of your clothing like a normal heat dryer.

Laundry Alternative Electric Spin Dryer

I run the spin dryer until water stops coming out the drain spout, which tends to be around 90-120 seconds. After this cycle, clothing is still damp, but it is impossible to wring any moisture out of it. Something light and quick drying like a Merino wool t-shirt could be worn immediately and dried out with body heat in maybe half an hour, but I move everything from the spin dryer to a drying rack. Anything I wash will dry on the rack within a couple hours. I usually end up doing laundry at night and leaving it on the rack overnight.

Durability

The Wonder Wash is all plastic, except for the axle the machine spins on. I’d like to see a version with more durable metal components, but given the low price of the current design and the availability of replacement parts, this is barely worth mentioning.

Over the nine years I had the original Wonder Wash I cracked the base and snapped off the end of the handle. The machine was still functional with this damage. More recently, the lid began to leak when I spun the machine, which I assume was caused by the degradation of the rubber seal over time. This was enough for me to finally want to replace all three parts. The handle and base were readily available, but The Laundry Alternative released a new version of the Wonder Wash a few years ago, with the primary change being a snap attachment for the lid instead of a nob. I contacted them and they confirmed that they had no more stock of the old lid and that the new lid would not fit on the old bucket. So instead of purchasing replacement parts, I bought the new version of the machine. Given the price of the machine, I’m fine replacing it once every decade or so.

The new snap lid works just as good as the old knob lid worked when it was new. I don’t think there is a practical difference between the two. If for some reason you really want the old lid, the Avalon Bay EcoWash appears to be a direct knock-off of the original Wonder Wash.

The spin dryer is still going strong, in about the same condition it was in when I bought it nine years ago.

The Expedition Sewing Kit

A few months ago I accidentally ripped out the top stitches of the pull tab on one of my Altama OTB boots, making the already-large loop even larger. Normally repairing this would be a job for the Speedy Stitcher, but I decided to use the excuse to try the Patagonia Expedition Sewing Kit.

Patagonia Expedition Sewing Kit

The Patagonia kit is a reissue of an old piece of kit by Chouinard Equipment. Both the old and new versions come with a chuck that is used to hold a machine needle, and a cotter pin which slides through the chuck to provide a handle. The cotter pin is also intended to aid in rethreading draw strings through a channel on a sleeping bag, pack, or jacket hood.

The instructions included with the Patagonia kit explain the use of both the awl and the cotter pin. Users on the Zombie Hunters forum scanned and cleaned the instructions from the original Chouinard kit, which I have reposted here for comparison. This video also demonstrates the use of an awl for those unfamiliar with the process.

The idea behind the Chouinard awl and the Speedy Stitcher is the same. It provides a way to hold a machine needle, push it through heavy material, and easily create a secure lock-stitch. The immediately apparent difference between the two is in size and weight. The chuck and cotter pin in the Patagonia reissue of the Chouinard awl weigh 10 grams and could fit in the smallest coin pocket. A Speedy Stitcher (with thread, bobbin, and needles removed to make the comparison fair) weighs 64 grams and isn’t going to make the cut in any reasonable backpacking gear list.

I repaired my Altama OTB boots twice so that I could compare the process. First I completed the repair with the Chouinard awl, and then I went back and stitched it again with the Speedy Stitcher. The Speedy Stitcher, living up to its name, was much faster. The primary reason for this is that, between the bobbin within the handle and the thumb tack the thread is wrapped around before going through the eye of the needle, the Speedy Stitcher is able to keep the awl side of the thread under tension when completing a stitch. With the Chouinard awl I had to try to secure the thread with my thumb, which didn’t work terribly well. This made each stitch slower, as I had to carefully manage the tension in order to get a tight stitch but not pull the thread through too far on either side of the project.

Fortunately the solution to this problem was simple and presented itself to me after the boot project. First I tried placing the thread between the two pieces of the cotter pin. This increases tension, but it isn’t so tight that the thread cannot be pulled out. I have taken to doing this and then carefully pulling through the amount of thread I need. When I have the right amount of thread, I cut off a tail that’s an extra few inches long and simply tie it in a clove hitch around the cotter pin. The thread is now as secure as with the Speedy Stitcher and the efficiency of the tool is greatly increased.

DIY

The Chouinard kit was unavailable for many years until Patagonia’s reissue, which has led to people replacing the awl with off-the-shelf components. I thought this sounded like an easy and fun project, and would allow me to return the borrowed Patagonia kit. For the chuck I went with the recommended Mini Keyless Chuck. This comes with a shank that I cut off with a pair of snips, and then filed the cut smooth with the file on a Leatherman. The chuck already has a hole tapped in the side of it, but it is too small to fit a cotter pin or any other useful handle. I drilled this hole out with a 1/8” drill bit, after which it was the perfect fit for a 2.5” cotter pin I found at the hardware store.

The chuck ships with two collets. One is too large to hold any of the needles I tried. The smaller of the two works well.

One of the annoyances I had when using the Chouinard awl was that the chuck would often slide off the cotter pin when both of my hands were occupied on the other side of the project in creating the lock stitch. To solve this for my version, I simply added an O-ring with a 3mm interior diameter to the cotter pin. This prevents the chuck from sliding off the handle, as well as preventing it from sliding over the part of the cotter pin where I have the thread clove-hitched.

Expedition Awl

This version of the expedition awl – including modified chuck, cotter pin, and O-ring – tips the scale at 13 grams. That is 3 grams heavier than Patagonia’s reissue, but cheap and easy to make. The chuck is also a bit more compact than Patagonia’s.

I’ve used this version of the awl on a couple of small projects, and it works great. It is certainly something I would pack on any kind of extended travel, and for use at home it works just as well as the Speedy Stitcher.

Thread

In order to be able to store thread with the my new awl I purchased a pack of plastic thread bobbins. These have notches to prevent the thread from unwinding, a space to label the bobbin so that you know what thread it contains, and they keep the thread in a flat profile that makes it easy to slide into a small kit.

I chose three different threads to store with the awl. Sunstop V-69 Black Polyester UV from Sailrite, Z-69 Nylon from a spool I bought from Seattle Fabrics something like 15 years ago and have yet to use up, and a waxed nylon thread from Tandy.

Sailrite recommends the UV-treated polyester thread for general outdoor purposes, and the nylon thread for applications where greater strength is wanted but prolonged exposure to the sun is not expected. Between the two I think I have most eventualities covered.

The waxed nylon thread is probably heavier than what I need in a field repair kit given the type of equipment I generally carry, so I may end up removing it.

Needles

For needles, I began with the Straight #4 and Straight #8 from the Speedy Stitcher kit. These are my most frequently used needles with the Speedy Stitcher.

To supplement these two needles I copied the well-considered Chouinard kit recreation at Three Points of the Compass and purchased two needle sets from Superior Threads. I added one of the #60/8 Microtex Sharp Titanium-coated Needles and a #80/12 Topstitch Titanium-coated Needle to my kit. The Microtex #60/8 is a very sharp, fine needle that would be my choice when using the awl on lighter fabrics, like clothing or a silnylon tarp. The Topstitch #80/12 is a little larger, and also incredibly sharp, making it a good bridge between the Microtex and the two needles from the Speedy Stitcher.

I don’t pretend to understand all the different types of sewing needles out there and when one should use which type, but between these four I feel that I can confidently hack together any kind of field repair I am likely to need.

Despite this kit being built around the awl, I did also add one hand-sewing needle. I’m not sure what size or style it is. I acquired it sometime early in the millennium when I purchased a selection of vintage British sail-making needles (claimed to be from the early 20th century) on eBay. This one is clearly not a sail-making needle – or at least it is much finer than the typical triangular #16 I generally associate with sail-making – but it’s the needle I’ve always come back to for any repair when I have not been using an awl and machine needle.

As I mentioned when discussing my possibles pouch, I’ve always carried repair needles in one of the little plastic cases that you get when you purchase lead for a mechanical pencil. In fact, at some point – probably around the point I became an adult and stopped using mechanical pencils with any frequency – I started purchasing replacement lead just for the containers.

Et cetera

Rounding out the kit is a small selection of safety pins, and three small pieces of Tenacious Tape (black, clear, and green). Despite the fun of using the awl, a small piece of good tape is often a better repair tool for technical materials.

I’ve placed all of these items in a spare Zpacks Wallet Zip Pouch.

The kit in its entirety weighs 42 grams. In comparison, the complete Patagonia Expedition Sewing Kit weighs 40 grams. I have more and better thread, what I think are probably better needles, and a much nicer pouch to keep it all in. The Patagonia kit does include some different colored thread, but I don’t believe in visual pollution and I think a bit of black thread on earth-tone equipment is fine. Patagonia also includes a needle threader and a couple buttons, but I don’t think those are necessary additions.

All considered I’m very happy with this kit. The original awl from Chouinard Equipment was a great idea, and Patagonia’s reissue is perfectly serviceable. I had fun putting together my own version. It’s an extremely low cost investment that provides a lot of functionality and serves to increase my resiliency on any trip of extended length, as well as being useful at home.

Expedition Sewing Kit

Laser Red

My criteria for sunglasses is fairly simple:

  1. They must offer impact protection. Not protecting my eyeballs has always seemed dumb. Not protecting them after I’ve sunk a few thousand dollars into my cornea would be even dumber. ANSI Z87.1 is a good standard for impact protection, but I will of course happily accept MIL-PRF-31013.
  2. They should offer interchangeable lenses. This is not critical, but it is nice to have. Different lens colors are appropriate in different environments. Good eyewear is usually expensive, which can make purchasing multiple pairs prohibitive. If you do purchase multiple pairs, you still have to carry them, which is much less attractive than carrying one pair of frames and different lenses. Photochromic lenses make the single-lens option more palatable, until you realize that the alternative is interchangeable photochromic lenses.
  3. They should not be butt-ugly.

Prior to PRK, the fourth and most important criteria was that they somehow be prescription compatible. I always assumed this was the most limiting criteria. While recovering from my shine job I lay in bed thinking about eyewear, and assumed that there would be a much wider range of options available to me when I could see again.

Imagine my disappointment when, after I recovered enough to see a computer, I found that there were actually no compelling new options. Even without the need of prescription lenses, the Rudy Rydon Stealth are still the best thing out there.

Determined to not be so easily dissuaded from spending money, I decided to treat myself to a new pair of lenses for the Rydons. After some consideration I landed on the ImpactX2 Photochromic Laser Red. Red lenses provide excellent contrast and visual depth. I have owned a pair of Rudy’s non-photochromic Racing Red lenses for a while and found them to be the ideal option for overcast days, but their static nature gave them a more narrow window of effectiveness which limited their actual use. The Photochromic Laser Red take the same excellent color and add the dynamism I’ve come to enjoy: the lenses offer 75% light transmission on the clear side and 16% light transmission on the dark side. On the light side that’s actually 1 point higher than the same generation clear-to-black lenses, making them even more appropriate for indoor or night work. On the dark side, that’s right in the middle of the transmission range typical of most sunglasses. The “laser” in the name refers to a light mirrored coating. These aren’t the mirrorshades Bruce Sterling promised you, but the lasering does serve to reduce glare and eye strain by reflecting some of the light away rather than absorbing it. It also adds an attractive bluish sheen.

I bought these lenses last December and I’ve removed them from the Rydons in exactly two situations: on water and on snow. In those environments I think a good, dark polarized brown lens is hard to beat. I opt for the Rudy Polar 3FX. In every other environment I’ve been in over the past year, my preference has been for the Photochromic Laser Red. I wear them whenever I’m on the bike. Even if I’m riding past midnight and it is pitch black, they transmit enough light that I barely notice I have them on. I wear them indoors when things are going bang. I wear them during the equinox when the sun is low on the horizon, pointing directly into my eyes. Like all photochromic lenses, they react to UV light, and so are suboptimal in cars. They will darken, but not completely. I tend to only spend a collective handful of hours per year in cars, so this isn’t a consideration for me.

If I was only going to have one pair of lenses, it’d be these. (But I like interchangeable lenses so I keep the brown lenses in my pack too.)

Rudy Rydon ImpactX2 Laser Red: Dark

Rudy Rydon ImpactX2 Laser Red: Clear