You are currently viewing all posts tagged with bicycle.

Better Bondage with ROK Straps

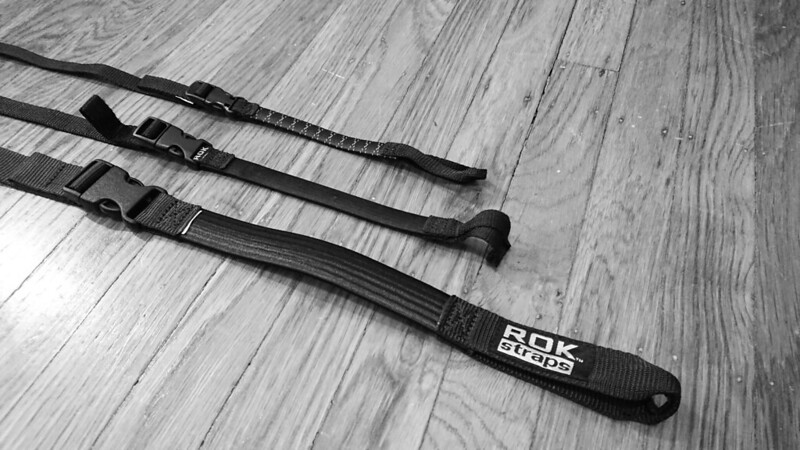
ROK Straps are superior bungie cords. They are designed to be safe and long lasting during prolonged outdoor use. Each end of the strap consists of a sewn loop, allowing it to be securely fastened to a wide variety of frameworks without concern for scratching or marring the surface, or for a hook coming released under tension and finding its way into an eyeball. Cargo secured by the ROK Strap is easily accessed via the side-release buckle. Most of the ROK Strap is simple webbing, adjustable thanks to the buckle. One side of the ROK Strap has a short segment of a durable natural rubber, giving the strap some elasticity, but not enough that unintended recoil will likely result in the strap finding its way into an eyeball. The rubber is contained in a polyester braid for UV protection and additional durability.

ROK Strap: Models

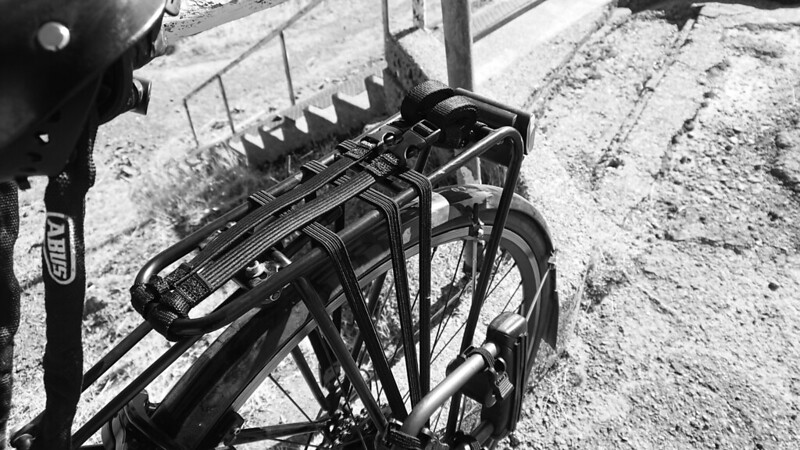
For securing cargo to a bike rack, my preferred model is the Pack Strap. These expand from 12” to 42” inches. They are 5/8” wide and are rated to carry up to 55 lbs. I find this is the right size for most cargo and have used it to transport: sleeping pads, folding chairs, toilet paper restocks, a year’s supply of paper towels, pizza, and takeout yakisoba.

  • ROK Straps: Toilet Paper Transport
  • ROK Straps: Yakisoba Transport

The smallest model is the Commuter Strap. These expand from 12” up to 28”. They are 1/2” wide and are rated to carry up to 40 lbs. If you just want to lash down a jacket or sleeping bag, these may be appropriate. They are long enough to secure common small cargo on a bike, but I would always rather have the extra range of the Pack Strap for handling awkward loads.

ROK Straps are also available in the ATV Strap model. These expand from 18” to 60”. They are 1” wide and are rated to carry up to 100 lbs. Apparently these are popular among people who ride motor-scooters. The 18” minimum length is too large for some of what I want to attach to a bike, and I’m not keen to carry cargo that would require the 60” maximum length. I saw a photo once of somebody who used these to attach a 45 gallon trash can to the back of his scooter. If that’s what you need to do, I guess consider these, but for what I find myself carrying I don’t need the extra length or weight rating of these over the 42” Pack Strap. This model stays at home in my bag of miscellaneous bondage.

The above measurements are of the ROK Straps when the rubber is at rest. When under load, all three models can stretch about an additional 4”.

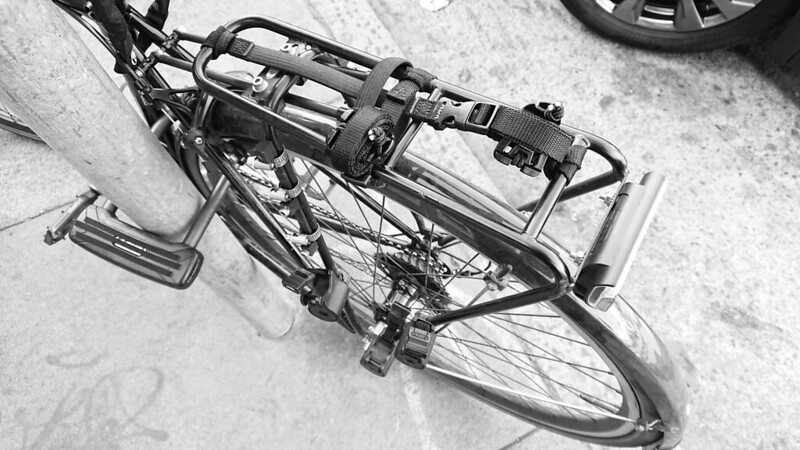
The loose ends of the ROK Straps can be secured using either VELCRO One-Wrap or ITW Web Dominators.

ROK Straps: One-Wrap

ROK Straps: Web Dominators

Shoulder Mounted OC

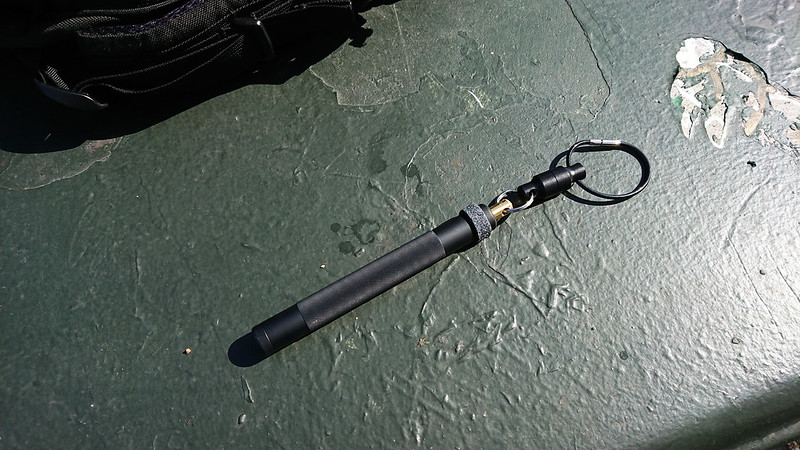
In 2014 I identified the ASP Defender series as the best pepper spray for my needs. I stand by this today, except that originally my preference was for the 4.5” Palm Defender. Over the years my preference has migrated to the 5.75” Key Defender. The Key Defender is in my pocket every day.

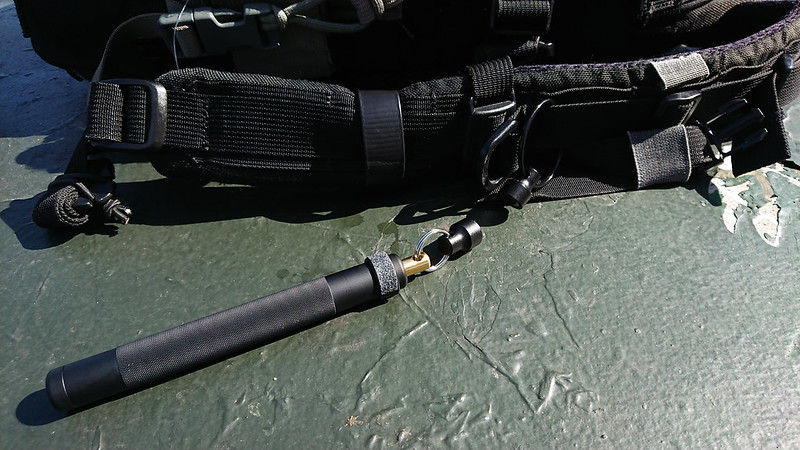
While I prefer pocket-carry for everyday, I’ve often thought about something that would allow for quicker access – especially on the bike. I’ve looked at a number of solutions for mounting a capsicum delivery mechanism to a bike, but never found one I liked. Instead, I ended up purchasing a second ASP Key Defender and mounting it to the shoulder strap of my backpack, which I wear frequently when in the saddle.

Shoulder Mounted OC

A small split ring connects the Defender to a magnetic clasp. This in turn is attached to a Lucky Line Flex-o-loc (the same thing I’ve been using on my keychain for seven years), which connects the whole setup to the webbing on my shoulder strap. To prevent the Defender from swinging around, I attach an IWB Soft Loop around the shoulder strap and shove the Defender through that.

The Soft Loop holds the Defender tight enough against the strap that it doesn’t spin around during daily carry. When mounting the Defender, I orientate it so that safety clasp (which I still cover with grip tape) is against the shoulder strap. This eliminates any chance of the safety somehow accidentally becoming released and the trigger actuating. It also keeps the safety in a known, consistent position when the Defender is drawn.

Shoulder Mounted OC

Enough of the shaft of the Defender is left below the Soft Loop that it can be easily gripped. It is deployed by simply ripping downward. The magnetic clasp breaks away and the top of the device slides through the Soft Loop. This is very quick and very easy to do, with either hand, even when wearing gloves.

Another neat benefit to the magnetic clasp is that it allows you to easily reattach the Defender, if you decide you quickly want both hands free. The magnet is strong enough that it will connect if you simply wave the top of the Defender within a couple inches of the half of the clasp still attached to the shoulder strap. This can be done without looking. Of course, the Defender will swing around as you move until you shove it back underneath the Soft Loop – a procedure which does take two hands and at least one eye.

Shoulder Mounted OC

I’m happy with this setup as a supplement to the OC carried in my pocket. It can move easily to different backpacks. It could probably be made to work with any pepper spray intended to be attached to a keychain, though it works especially well with the ASP Defender series thanks to the hammer grip used to deploy them.

humangear capCAP+

Ten year ago I discussed the humangear capCAP. My conclusion was: the capitalization of the brand and product name is stupid, the cap itself is a good upgrade to any wide mouth (63mm) bottle, but it will allow a few drops to leak out of a wide mouth Klean Kanteen.

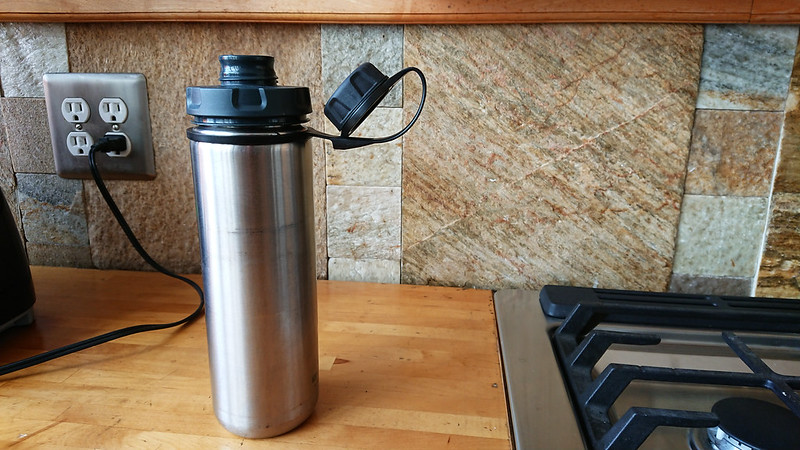
Recently I was made aware of a new model: the humangear capCAP+. This one adds silicone gaskets to both parts of the lid, and boasts compatibility with a wider range of bottles. However, humangear explicitly states that this one remains incompatible with the wide mouth Klean Kanteen.

I like to live dangerously, so I bought the new model anyway. For a couple weeks now I’ve been using it on the same Klean Kanteen Wide 27oz bottle used in the previous review. Despite humangear’s warning, I have had nary a drop leak out from the cap. I have tried to make the lid leak by filling the bottle and storing it on its side, and by balancing the bottle upside down on the cap, but no water has escaped.

humangear capCap+

Other changes in the new model include redesigned grip cutouts, which I find to have made no practical change to the functionality of the cap, and a cap retention thing that I thought would be kind of a gimmick but is actually surprisingly useful. (I will point out that the full name of this feature is the “humangear capCAP+ CapKeeper”. Someone at this brand hates English.)

humangear capCap+

The new model weighs 56 grams (2 oz), which is 20 grams (0.7 oz) more than the original capCAP.

I’m happy with the capCAP+. If you have the original capCAP, and it doesn’t leak on your bottle of choice, it probably is not worth upgrading. If it does leak, consider trying the new one. If you have neither model, but you use a wide mouth bottle and rely on something like the Guyot Designs Splashguard, the capCAP+ may improve your life.

Cleaning Brakes

The same spray bottle of isopropyl alcohol used to clean my human interface devices is also used to clean the brake pads and braking surface on my bike.

Cleaning Brakes

Soap, degreasers, and similar cleaners are best avoided on these components. They can leave residue that decrease braking performance and causes squealing (thus diminishing the all important bike ninja factor). Spraying the brake pad with isopropyl alcohol and wiping it off with a clean rag is usually all that’s needed. Sometimes I’ll hit the pads with a Scotch-Brite Scour Pad after spraying them.

The braking surface on the rims is cleaned the same way: spray with alcohol, wipe with rag. Occasionally, if the wheels are especially dirty, I will break out the big guns in the form of my all-purpose cleaner. Before spraying the rim with this I remove the wheel from the bike because I don’t want to get the cleaner on my brake pads. After spraying the rim with the cleaner, I wipe it down with a clean rag. Finally any residue from the cleaner needs to be removed, which is accomplished by spraying the rim with isopropyl alcohol, and wiping it down again. Sometimes it takes a second cycle of alcohol-and-wipe to eliminate squealing.

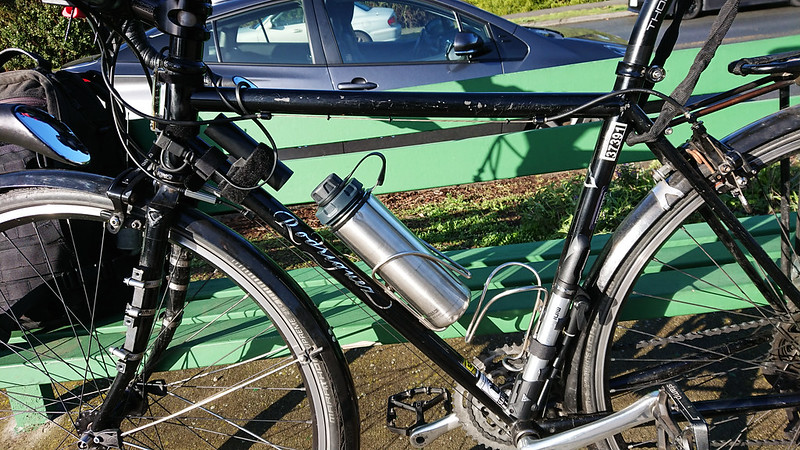
I added a bottle cage to my rear rack.

A Cleaveland Mountaineering Fork Clamp Mount allows me to mount a King Cage to my old Tubus Vega rack, providing another option for carrying water. I’ve wanted something like this since I saw Logan’s Vega modification on bikepacking.com. Cleaveland’s mounts makes it easy.

Rear Rack Bottle Cage

I use Norma Torro Worm Drive Hose Clamps to attach the mount. These German made clamps are far superior to the Chinese hose clamps frequently found in hardware stores. The 9mm wide, 8-16mm diameter clamps are the right size for this job.

Luer Lock Lubing

Earlier this year I purchased the Occam Lube DIY Kit from Occam Defense. This is a simple but ingenious solution for carrying and applying oil and grease by utilizing the Luer lock system from the medical industry. I shoot tupperware that runs dirty, and I have not travelled enough with firearms to need to think about lubricating them away from home, but I have needed to pack chain lube for my bike on longer tours. In the past I’ve been disappointed by the bottles of both bicycle and firearm lubricant, which may either leak or make it difficult to apply the contents precisely. There’s nothing in the Occam kit that you couldn’t put together yourself, but it is very reasonably priced and I credit it with being my introduction to the idea of using Luer components for lubrication. As soon as I stumbled upon the kit I purchased it.

The Occam kit includes one 30ml Luer syringe, three 3ml Luer syringes, three 22 gauge Luer dispensing tips, three 14 gauge Luer dispensing tips, four Luer caps, and a Luer gender adapter. Oil is drawn up into the large syringe, which is then attached to one of the smaller syringes via the gender adapter. If using grease, the grease is simply packed into the large syringe after removing the plunger, and then pushed into one of the smaller syringes. About 1.5ml of oil (or grease) may be pushed into the small syringe from the large syringe. The remaining 1.5ml of space inside the small syringe is needed to store one of the dispensing tips and the plunger cap. The intent is for the filled, smaller syringes to be placed in various kits and be taken on the road, giving you the ability to store the oil in a leak-proof manner and dispense of small amounts of it in precise areas. For applications where you need very little lubrication, like firearms, this works great.

Luer Lock Lubing

I had never given much attention to what volume of oil I use when lubricating a bike chain, so I wasn’t sure if the smaller syringes would really be useful for this application. I’ve always been a one-drop-per-roller kind of guy, which I think results in the best lubrication with the least amount of waste. With my current oil of choice, I find that I use a bit over 3ml of oil when servicing my chain. When one of the dispensing tips is stored in the small syringe, the remaining 1.5ml capacity won’t work for me. But I can store the dispending tip separately, fill up the entire 3ml with oil, and still have a very compact, lightweight, and leak-proof option for lubricating on the go.

As happy as this makes me, I admit that carrying lube on a bike isn’t the most pressing concern. Good oil lasts, so unless you’re putting on a lot of miles in challenging conditions, you probably won’t find yourself needing to drop oil away from home. However, I have found that the Luer system is useful even at home, with a few additional purchases to supplement the contents of the Occam kit.

Chain-L for Chains

I purchased Luer lock bottle caps for 15-415 threading, 24-410 threading, and 20-410 threading. Between these three sets of caps I can convert most existing lube bottles to the Luer system. If I come across an oil in a bottle with some other type of threading (as is the case with Boeshield T-9), I transfer it into an appropriately sized bottle with standard threading.

I also purchased a few additional dispensing tips (the angled ones are nice), and a package of syringe tip caps to make the lids leak-proof when no dispensing tip is attached.

Tri-Flow for Derailleur Pivots

I can now be sure that none of my oils will leak, which is important to me whether the bottle is in a bag or a toolbox. Using a Luer gender adapter, I can easily transfer oil to a smaller travel sized container, be it one of the Occam syringes or simply a 0.5 oz bottle, or any other Luer-compatible container. Using a dispensing tip, I can accurately deposit precise amounts of lubricant, eliminating waste.

All of this is entirely unnecessary, but I find that small improvements in efficiency like this do translate to a higher quality of life. If you ever find yourself dispensing small amounts of a liquid, and you have a personality that values accuracy and precision (and tidiness), I’d definitely recommend picking up an assortment of Luer components. The Occam Lube DIY Kit is a great place to start.

Travel Tri-Flow

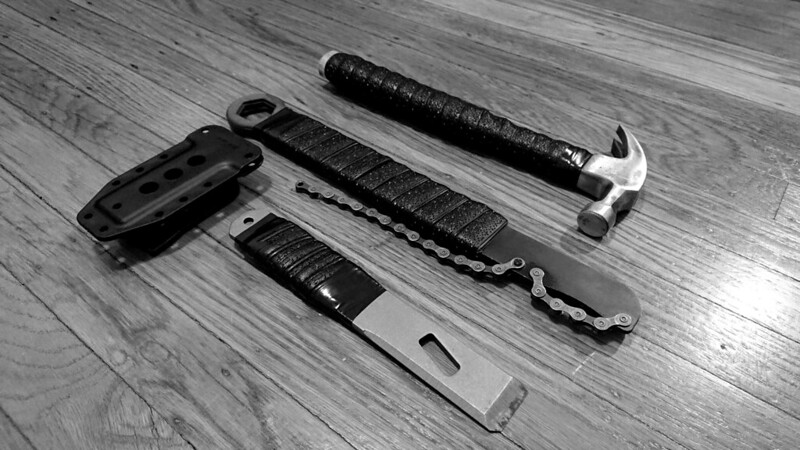
Old bar tape can be used to wrap various hand tools.

A few weeks ago I installed a new set of handlebars. My old tape was cut too short for the new bars, so I had to replace it. I used the old tape to improve the grip and padding of a hammer, chain whip, and breacher bar.

Recycled Bar Tape

Last year I bought a set of Orfos Pro lights.

The Orfos Pro is a simple and flexible LED light that is powered by a separate USB battery. I use the white light model as my bike headlight. This means that, when not in use, the light has a male USB Type-A plug hanging off the bike. In inclement conditions I usually want light, so I’ll have the connector inserted into a battery. I haven’t been too worried about protecting the plug when not in use. Over the past 14 months I haven’t noticed any problems. But when I saw the CozyCaps USB Caps I decided they would be a worthwhile addition to the setup. I expect they will do a good job of protecting the connectors from dirt or light moisture.

Orfos Pro with CozyCap USB Cap

I power the headlight with an Anker PowerCore 5000, which mounts to the down tube via a Twofish Bikeblock.