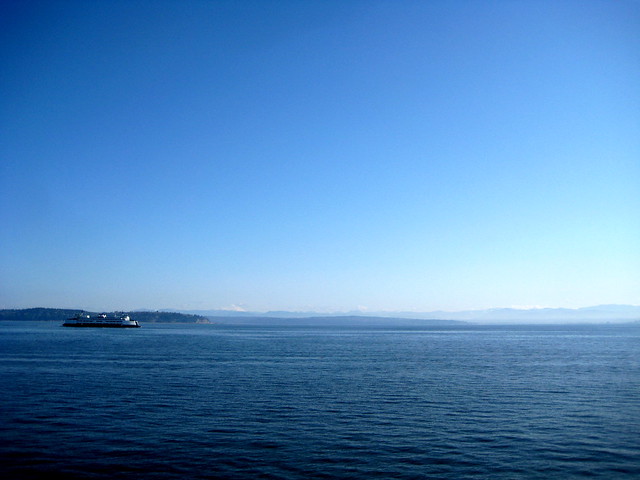
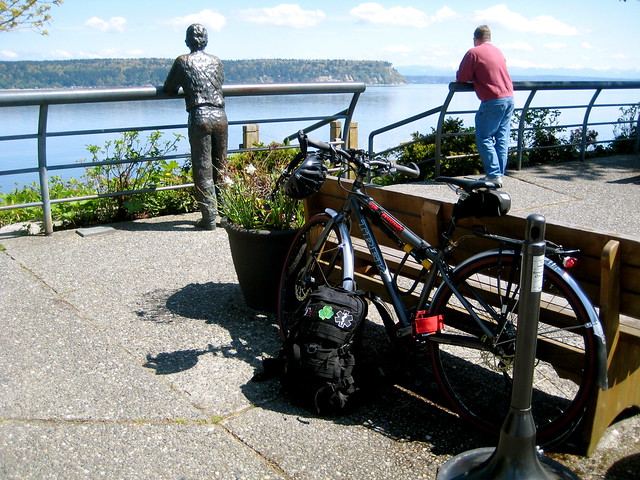
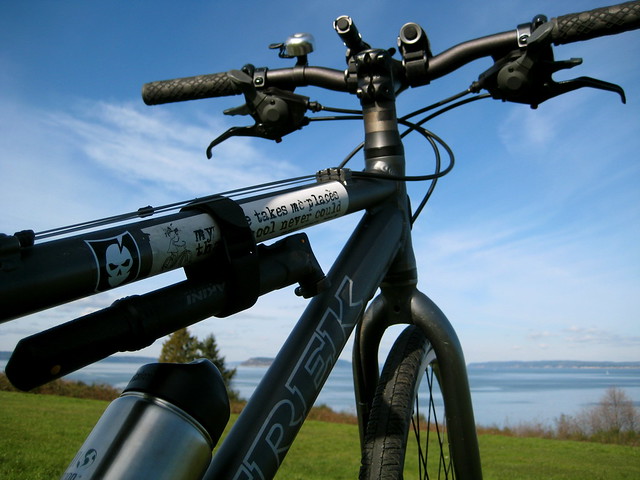
I’ve toured Whidbey Island before by bus, car and foot, but never by bicycle. I decided to remedy that today. It was forecast to be warm and sunny (only the third day of the year I can say that about), so I woke up early to make the 9:00 AM ferry sailing.
Whidbey is a pleasant mixture of forest and pastoral farmland. I decided to confine my explorations to the south end of the island, as that’s the area I know least.
I logged about 45 miles in the saddle over a leisurely 6 hours, plus about 2 hours of breaks, including lunch in Langley.
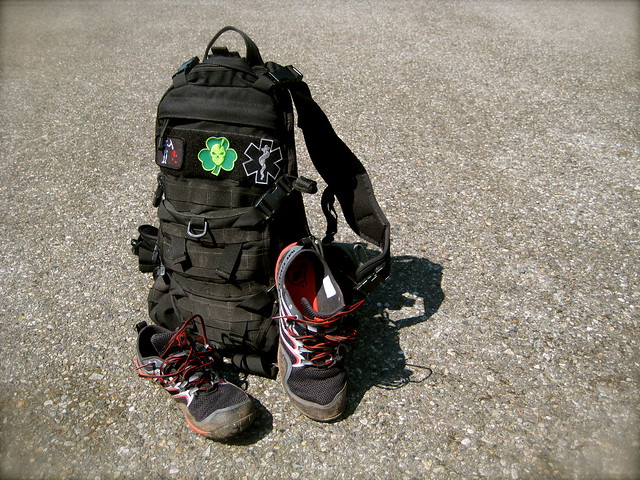
Yesterday I felt that I was becoming too complacent on my runs. I needed something to increase the challenge. So, this morning I tossed 20 lbs. into the FAST Pack and strapped it on. That made things interesting.
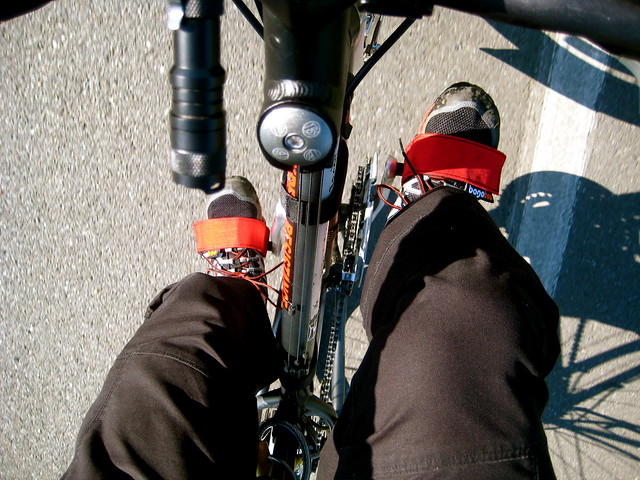
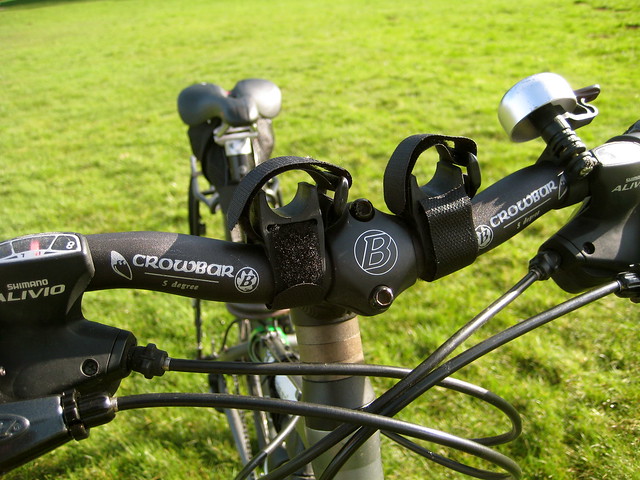
For the past few years I have been using a cheap headlight from Cateye on the front of my bike. When turned on to the blink setting, it did an acceptable job of making me seen, but it did very little to light up the road. Last January I decided that I wanted to replace or supplement it with a better light.
I looked at the lights carried by various bike shops for a while, but none of them impressed me. The high end bike-specific lights are bright, to be sure, but they tend to be much more expensive than a hand-held light of comparable output.
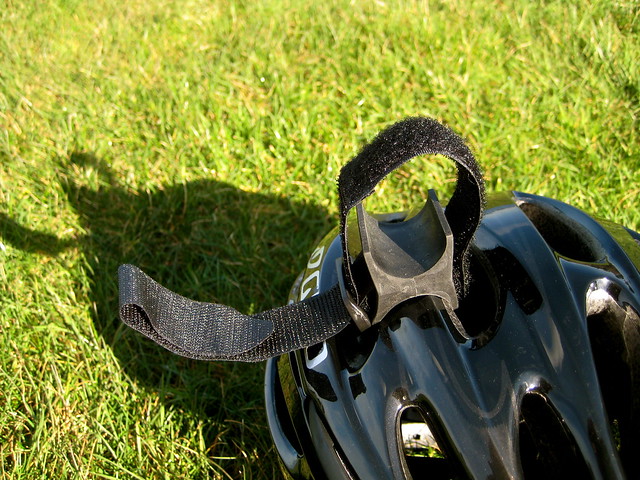
I thought it would be neat if I could somehow attach a normal light to my handlebars. Not only would this be cheaper than purchasing the equivalent bike headlight, but the light would be multifunctional: appropriate either for my bike or my belt. None of my own hackish attempts to mount a normal light on the handlebars satisfied me, so it was with relief that I heard about a company called Twofish.
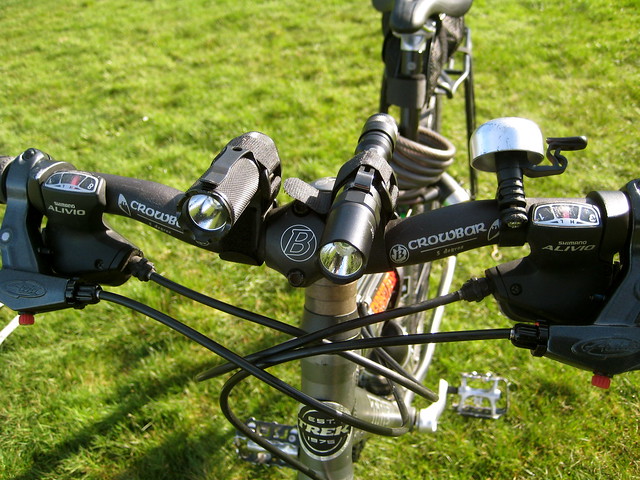
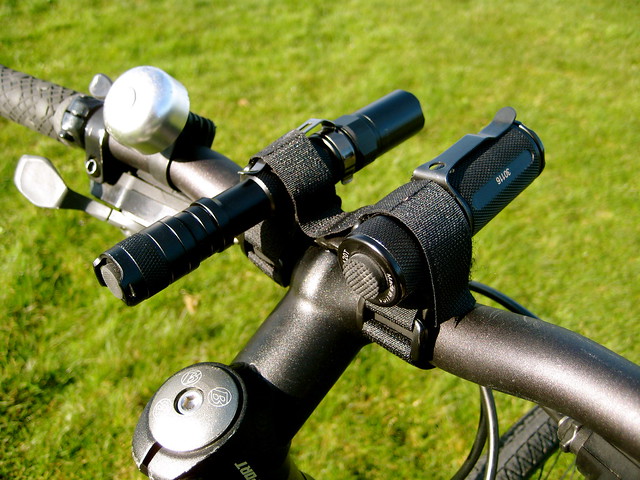
The Lockblock is a piece of rubber with perpendicular “U”s on either side. Each side fastens to an object with a small piece of hook-and-loop webbing. The Bikeblock is similar, but the two “U”s are parallel, and each side fastens to its respective object with a single continuous piece of hook-and-loop webbing. Lockblocks are to be used when you want to mount an object perpendicular to something else, such as a light on handlebars. Bikeblocks are appropriate when you want to mount the object parallel to something else, such as a pump to a frame. I bought three of each.
My first use of the Lockblock was to replace the Cateye headlight with my old Novatac 120T. The difference was immediately noticeable on my first night-ride. The 120T lights up the road, both bringing me to the attention of motorists and bringing potholes to the attention of me.
But I still thought it could be better. I wanted a second light.
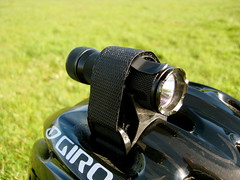
Research showed that the Fenix LD20 was a popular choice to use in conjunction with Lockblocks. It blasts out a fair number of lumens and I liked that it ran on AA batteries rather than CR123s, so I picked one up.
The combination of the Fenix LD20 and Novatac 120T really light up the road. The Lockblocks hold both lights securely, and they make for a safe commute on long winter nights.
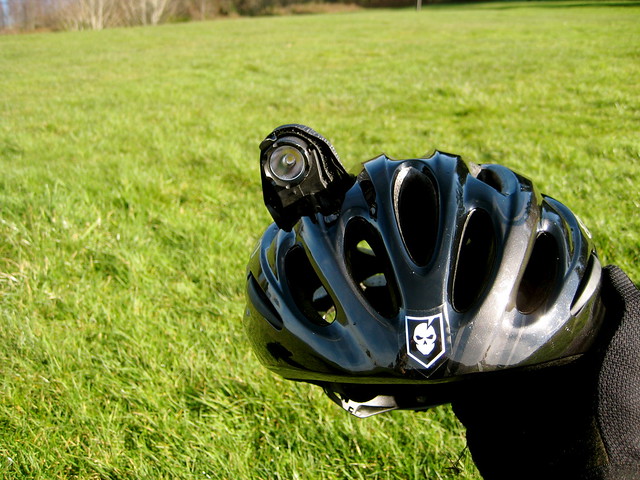
Although I was happy with this setup, I wanted to try using the parallel mount of the Bikeblock to add a helmet light into the mix. The Bikeblock fastens easily and securely across the vents of my Giro Stylus. Between my two lights, the shorter profile of the Novatac 120T made it more appropriate for a helmet mount.
I’ve been running the 120T on my helmet for about a week now. It’s nice to have the light point wherever I’m looking – and the ability to flash inattentive drivers is appreciated – but the light does add a noticeable weight. It’s annoying enough that I don’t keep the light on my helmet during the day, but so far I’ve been steadily putting it back after the sun sets. I haven’t decided if I’ll keep it up there, or if I’ll ditch the helmet light idea. I think that as winter turns to spring and the days lengthen, the Bikeblock will come off of my helmet.
I also use a Bikeblock for its intended purpose – to hold a pump to the bike frame. This is much more secure than my previous method, which consisted only of two pieces of hook-and-loop webbing.
Twofish’s mounts offer a serious challenge to the standard bike-light market. I’m pleased with both the Lockblock and Bikeblock and cannot see any reason to move back to a bicycle-specific headlight.
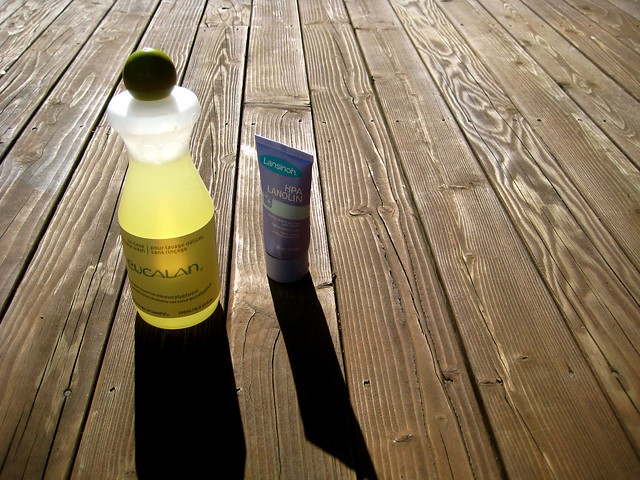
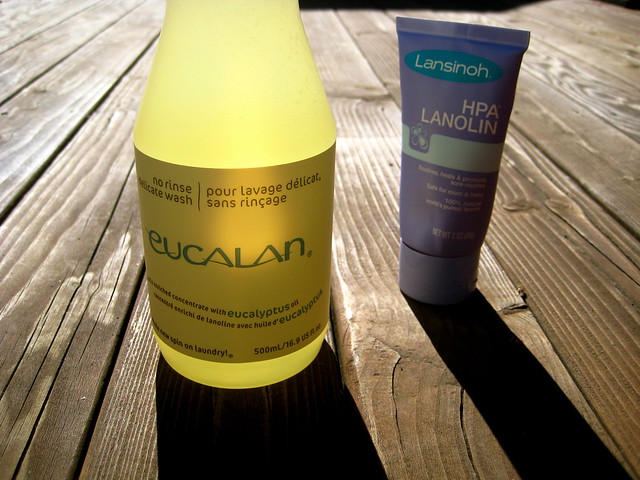
Lanolin is a kind of wax that sheep and other wool-bearing animals produce to protect their coats. It is, in fact, a waterproofing agent. Any lanolin that remains in the wool after shearing is generally stripped out during the process of turning the hair into clothing, thus reducing the wool’s ability to shed water.
Commercially, lanolin is often used as a skin treatment product for humans. Lansinoh, in particular, makes a pure-lanolin nipple cream for breast-feeding mothers.
I first learned about lanolin from a comment on my review of West German wool pants. Jenne, the commenter, recommended washing wool products using something called Eucalan. Eucalan is a natural wash that deposits lanolin in the wool. Rinsing isn’t necessary with Eucalan, so much of the hassle (and danger of felting) that is usually associated with washing wool can be avoided.
For an extra treatment, Jenne recommended dissolving a small amount of Lansinoh’s pure lanolin in hot water before adding the Eucalan.
I was intrigued by this method. The no-rinse aspect made it simpler than carefully washing wool with Dr. Bronner’s, which was my previous choice. And increasing the health and functionality of my wool by restoring the natural oils made good sense – the same thing must be done to leather. I bought both the Eucalan and the nipple cream.
Eucalan comes in a few different scents. I first bought the unscented version, which seemed most appropriate for outdoor wear. Later I bought a jug of the Eucalyptus version. Eucalyptus oil is a deterrent to moths and fleas, so Eucalan recommends using this version before storing wool garments for a while. (The eucalyptus scent is very subtle after the wool has been dried – you’re not going to go around smelling like flowers.)
I’ve since washed my West German wool pants, West German wool knickers, Italian wool knickers, and two Pendleton wool shirts – the majority of my non-merino wool clothing – in Eucalan with added Lansinoh and have been pleased with the results. I recommend giving it a shot if you wear wool in wilderness settings.
The Process
Dissolve a small amount (about one inch) of Lansinoh HPA Lanolin in hot water
Add enough room-temperature water to cover the garment to be washed
Add about two cap-fulls of Eucalan and mix it in
Add the wool to be washed
Let soak for 15 – 30 minutes
Pull out the wool, hold it up, and let the water drip out for a minute or two
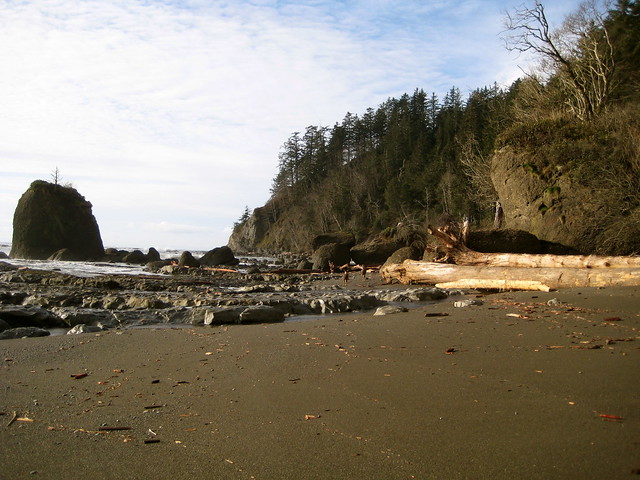
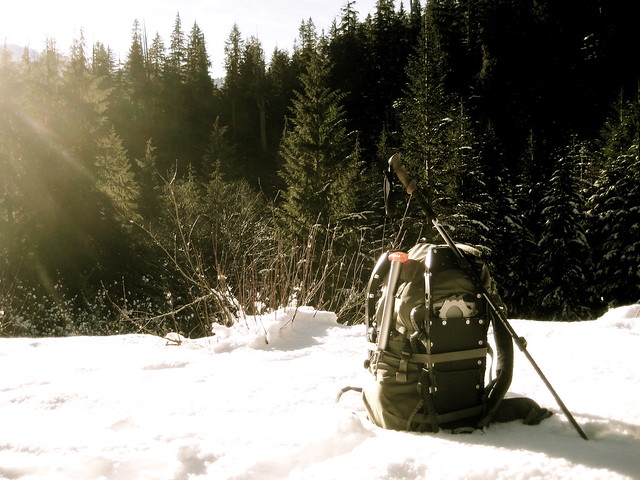
Arriving at Rialto Beach just past 1:00 PM, I took a few minutes to stuff my food into the bear can I had borrowed from the Ranger Station on my way out. The cans are required to keep food secure not from bears, but from marauding raccoons. This was to be the third year I had hiked the Olympic Coast in Winter and, outside of the Sierra Nevada, these have been the only times I’ve carried a bear can. Still, thanks to the warmer temperatures along the coast, even with the can my pack feels light compared to what I must carry this time of year when high in the mountains.
High tide had been at 11:30 AM. It is still high enough to make beach-walking difficult. I opt to make my way through the thick trees and marsh instead of braving the beach. There are no cars in the parking lot when I leave, but I surprise two people panning for gold along a small creek. Neither are talkative. When I ask if they had found anything, the one only replies “a little”. I don’t know if that is the truth, or if he was just anxious to get me gone.
I spend an hour in the woods. The tide is low enough now that I can make my way down to the beach, exchanging thick trees for wet sand. Occasionally I have to run up the beach and jump on top of driftwood to escape from the occasional wave, but for the most part the way is easy going between Rialto and Hole-in-the-Wall.
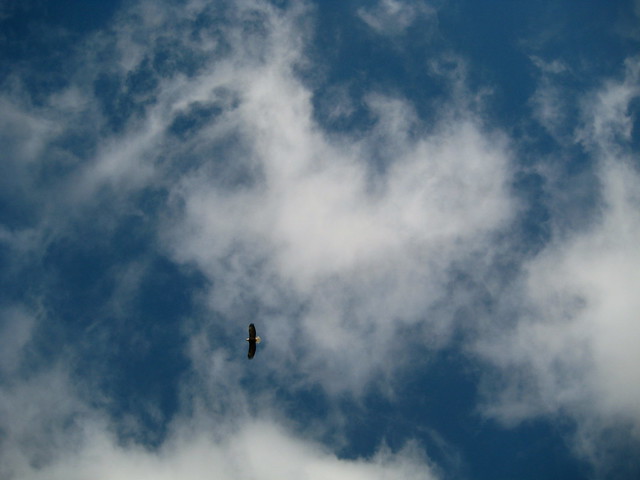
The area is thick with Bald Eagles. Every 15 minutes or so I spot one in a tree, or landing on a sea stack, or one flying over the ocean. At one point I see two eagles eating on a large fish head that had washed up on the beach. (I don’t know what kind of fish, but the head was close to the size of a football.) The two are eating just on the other side of a large boulder. We don’t notice each other until I come around the rock, at which point they jump and fly off. At a distance of about 10 feet, that’s the closest I have ever been to an eagle.
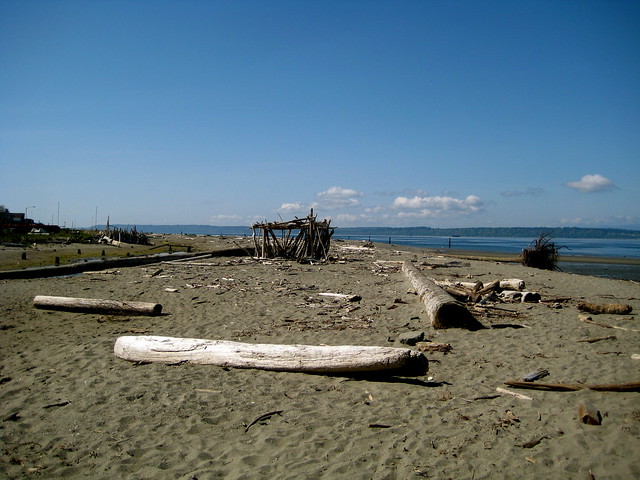
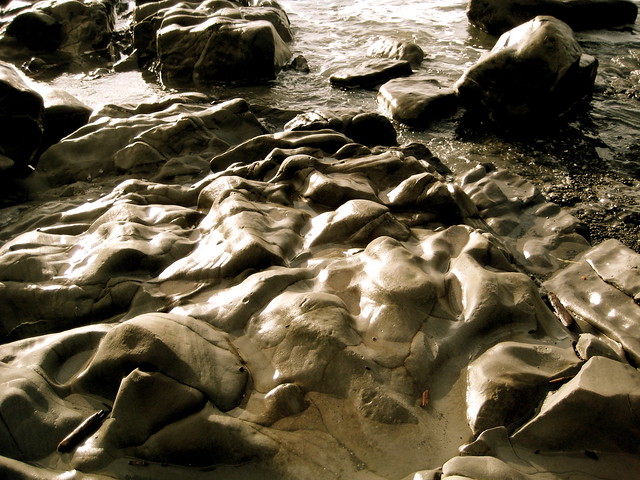
At Hole-in-the-Wall, the sandy beach comes to an end for a good while. Now begins the obstacle course that defines a walk along the wild coast. Piles of driftwood, tide pools, slippery rocks, and tall headlands all present a much different challenge from the steady plodding that characterizes walking in the mountains. The various balancing tricks, pull ups and push ups that are required make one thankful for a well packed backpack.
After rounding one headland I come upon two deer, out looking for whatever seafood it is that deer fancy. They don’t seem too concerned about me, but eventually bound up the steep cliff as I close in.
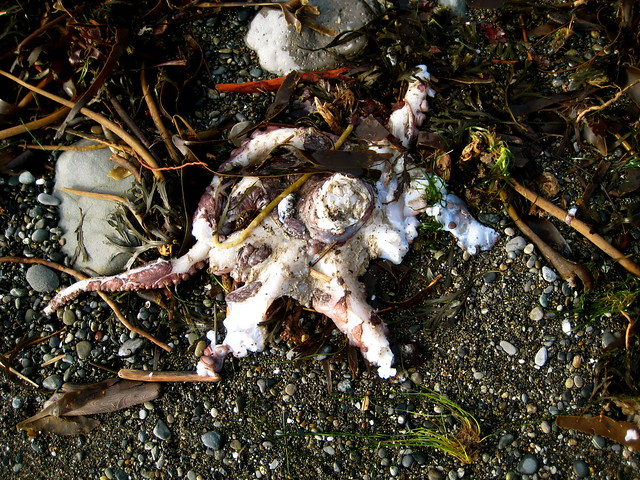
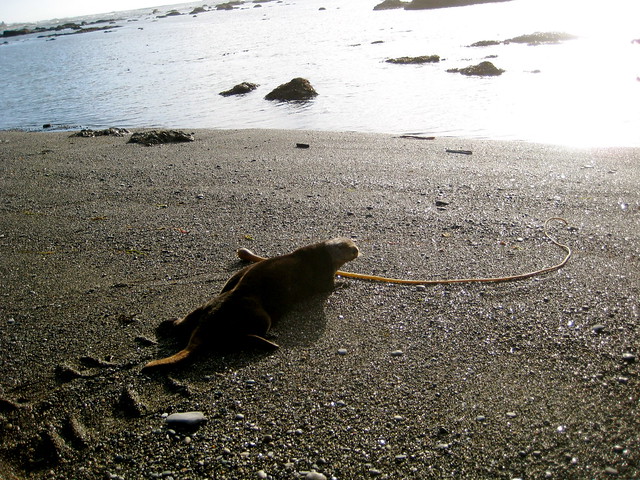
Around the next headland there’s an octopus lying in the sand. It has been partially eaten by something.
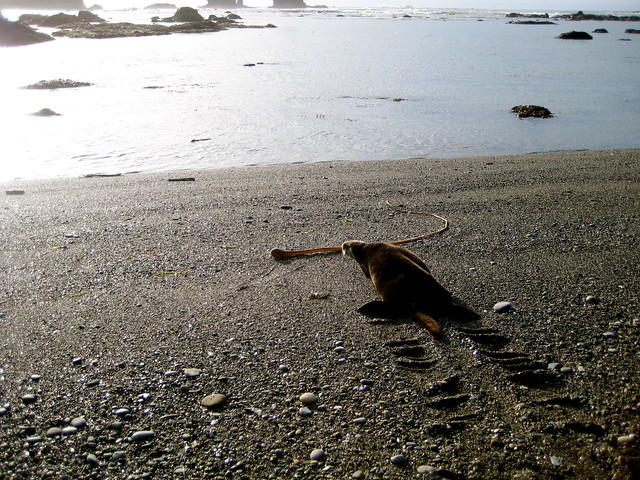
The tide is out now. I walk blissfully along a rare sandy stretch of beach that doesn’t require much attention, and find myself surprised by a dark brown spot ahead of me. My first thought is Marmot, but they belong in the mountains, not the coast. Then I think Badger, but the tail is wrong and they also had no business on the coast. An Otter! I couldn’t identify it at first, as I had no experience to link it to. This was the first time I had seen an Otter – leastwise, on land and in the wild.
The Otter is slowly flopping down the beach, throwing his front arms forward and then pulling along the rest of his body. His legs wiggle a bit but are clearly useless on land. I approach slowly. He turns his head and looks at me, slows and then finally stops as I approach. I don’t know if he isn’t concerned by my presence, or if he is tired from inefficient land movement. Perhaps he thinks the best course of action is to play (sorta) dead.
I’m able to get within four feet of the Otter, where I stop to admire his fur and watch his whiskers twitch as he sniffs me. It would be easy to approach close enough to touch him – a tempting thought – but I don’t think he’ll appreciate that. Instead I try to make conversation. “Hey, you’re a mammal. I’m a mammal. We both have nipples.” At this the Otter’s concern seems to grow, so I leave him and continue around the next headland. I don’t want him to have to cut short his time on the beach on my account.
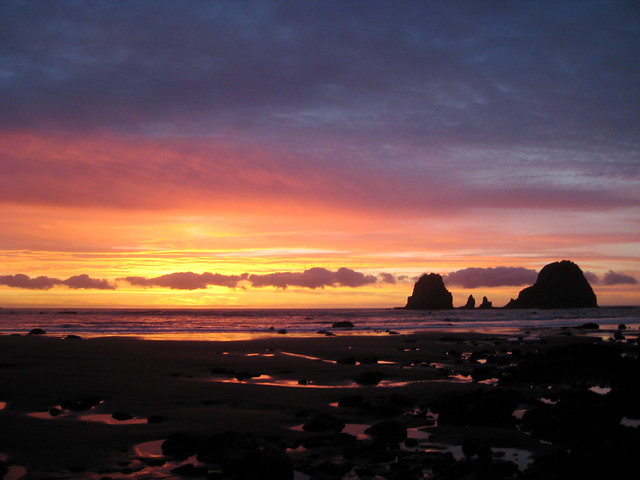
My tide chart has sunset scheduled for 5:00 PM, which is drawing near. I’m still in an area with the ocean on my left and sharp cliffs on my right. The map shows that it is a long way to the next suitable camp spot. I resign myself to hiking for a short while in the dark. At least the tide won’t be coming in till 7:00 PM.
I walk along, and watch the sun set over the edge of the world.
At 6:00 PM I come to an area where the cliffs on my right give way to a clump of trees. I make my way inside and find a spot to pitch the tarp. After dinner in the dark, I crawl into my bag and go to sleep. The roaring of the tide wakes me once around midnight, but, unlike the last time I spent the night out here, my camp tonight is well above the high tide mark.
The tide gives me trouble the next day. It is about an hour later than the day before, with high tide hitting at 12:30 PM. I was hoping to wake up early and log a few miles at low tide around 6:30 AM, but I end up not waking till 9 AM. At that point the tide is high enough that I could barely get anywhere before high tide, at which point I would be able to go nowhere at all. I decide not to make any move until after high tide, though that means a later start than yesterday, and so a longer hike into the night.
It is a gray morning. Rain steadily falls from the sky, coupling with the ocean mist to give all a good soaking. I lie about, enjoy a slow breakfast, read some and write some. By 1:00 PM my patience is gone and I decide to see if any progress can be made. After breaking camp I find that I can scale partway up the cliff that starts on the north edge of my clump of trees, and traverse along that a way. From there I’m able to hop along a few large boulders that stick up out of the ocean, but I can’t get far. Eventually I have to stop and sit out the tide atop a group of rocks. It always goes out slower when you’re waiting for it.
An hour passes and the tide has gone down far enough that there are occasional stretches of bare sand between waves. This allows me some progress. I watch the waves go up and down for a minute, try to get a feel for the timing, and dash along the briefly-bare beach, clambering up the next pile of driftwood or large boulder before the waves come. Sometimes I make it, sometimes the waves catch me. More than once I make it to the top of a rock, but the wave hits with enough force that the water bounces up and splashes me. I’m wet already from the rain, so in the end it makes little difference.
The gray morning turns into a gray afternoon, which passes without difference. I don’t notice it getting dark until only a few minutes before sunset. I’m no more than halfway to where I want to be, but why pack a headlamp if you’re not going to use it? The next two hours are spent along the usual obstacle course of driftwood, headlands, and barnacle covered rocks, made even more interesting due to the dark. But after I pass them, the last hour and a half is along another rare stretch of sandy beach. I make up for lost time by running stretches. With a pack on my back and soft sand underfoot, running is a challenge, but it keeps me warm. Still, I don’t arrive into camp till 8:30 PM.
The rain continues into the next morning. I breakfast on the westernmost point in the contiguous US, turn south, and retrace my steps for a couple days back to Rialto Beach.
"In the static mode an observer may unify the pieces of a puzzle, but only as a blueprint -- kinetics adds the third dimension of depth, and the fourth of history. The motion, however, must be on the human scale, which happens also to be that of birds, waves, and clouds. Were a bullet to be made sentient, it still would see or hear or smell or feel nothing in land or water or air except its target. So, too, with a passenger in any machine that goes faster than a Model A. As speed increases, reality thing and becomes at the pace of a jet airplane no more substantial than a computer readout."
- Harvey Manning, Walking the Beach to Bellingham
Wishlist is a Django application for creating wishlists.
I used Amazon Wishlist for a number of years, but my paranoia finally caught up to me and I decided that I didn’t need to give Amazon that much more information about my interests.
I tried a few substitutes and found that my requirements for a wishlist were less than common. I don’t often use wishlists in the usual way of asking people for gifts on special occasions. Instead, I use wishlists privately to keep track of items that I wish to purchase myself. It helps me to determine savings goals, to track books that I want to read, etc. As such, I usually do not want items on my wishlist to be publicly viewable.
Out of the substitutes I tried, Wishlistr was undoubtedly the best, but there were some aspects of it that I didn’t like. After using it for a while, I decided to write my own app.
When I first bought my scale, I started a spreadsheet containing the weights of various pieces of gear. It seemed like a good idea – I knew I wanted some sort of database to store my measured weights and other notes in – but I never got around to updating it. Data in a spreadsheet is too static. You can’t do much with it. I think that characteristic contributed to my disinterest with the spreadsheet.
So for a while now I’ve had the idea of writing a web application to track my gear. Over the past week, I finally got around to doing it.
Gear Tracker is built on Django, a web application framework. (If you’re not familiar with Django, and you have anything to do with making websites, it’s probably worth your time to learn a thing or two.)
Gear
Gear Tracker’s primary purpose is to track gear.
Each item has a weight and acquisition date associated with it. It can be categorized, tagged, and related to other items. There are fields to input size, a link to the manufacturer’s page, a link to a review, and to upload an image. A text area allows the user to store any notes related to the item.
Items can be archived. This provides a way to not list gear that the user no longer owns, but to keep it in the database for future reference of its weight or other attributes.
Weights
Weights are always input in grams.
The metric system makes the most sense and is the easiest to work with. An item’s weight can be displayed in grams or, if the item weighs more than 1,000 grams, kilograms. But because some of us are crippled and still like to see imperial weights, Gear Tracker can also display the item’s weight in ounces or pounds.
Gear Lists
Gear Tracker can also generate gear lists.
One of the things that has prevented me from doing many gear lists in the past is that they’re a pain in the rear to create. It takes a while to manually write out every item of gear that I take on a trip. If I want to add the weight of each item – well, that’s asking too much! It’s not worth it.
Now, making gear lists is easy. Gear Tracker already has detailed knowledge about each piece of gear. All it takes to create a gear list is to select the item, specify how many of that item I took, and whether the item was packed or carried. The result is an organized, detailed gear list for every trip. Total weights are calculated, of course, and can be output in either metric or imperial units.
Private Gear Lists
Gear lists can be made private.
I generally create gear lists when I’m packing before a trip. But I don’t like to publish the lists until I actually return from the trip and also have a report and photos for people to peruse. So, Gear Tracker allows a gear list to be marked as private.
Download It, Hack It, Use It
I’m running Gear Tracker at /gear, but if you want to grab your own copy and run it yourself, you can! I’ve open-sourced the code under a BSD-license. You can find it at GitHub.
I can’t think of a better way to spend the winter solstice than breaking trail in fresh powder.
Days and months are the travelers of eternity. So are the years that pass by... I myself have been tempted for a long time by the cloud-moving wind -- filled with a strong desire to wander... I walked through mists and clouds, breathing the thin air of high altitudes and stepping on slippery ice and snow, till at last through a gateway of clouds, as it seemed, to the very paths of the sun and moon, I reached the summit, completely our of breath and nearly frozen to death. Presently the sun went down and the moon rose glistening in the sky.
- Basho


