I like food. I don’t do diets. I cast a wary eye upon fasting. I don’t subscribe to the idea of “cleansing” the body of “toxins”. Despite all of this, the drink that is central to the Master Cleanse fast is part of my fueling strategy. I learned of the Master Cleanse while attending The Sean Kennedy School of Patrolling and I now use it as an electrolytedrink when my body tells me I am running low.
The components of a single serving of Go Juice are:
I juice the lemon into a wide mouth pint sized mason jar using a Jarware Stainless Steel Juicer Lid. If I have a small lemon I’ll juice the whole thing. If I have a medium sized lemon I’ll juice half. Either way, the amount of juice is confirmed via the gradations on the side of the mason jar. Next, using the gradations, I pour in an equal amount of maple syrup. The rest of the jar is then filled with water. I add a very small amount of capsicum – enough to get a small kick, not enough so I really taste it. Finally I toss on a leak-proof lid and shake it around for a few seconds.
The result is delicious and the effect immediate. I cannot imagine that anything good would come of trying to fuel the body on maple syrup and lemon juice alone, but as an occasional, supplementary kick it is a tool worth considering.
Notes
↵ A few years ago the cabal of maple syrup producers decided that assigning letter grades to the different types of maple syrup made it too simple to buy what you wanted. Instead they decided to confuse people by moving to wordy, subjective labels. The maple syrup I buy is now labelled "very dark, strong taste". But of course it still has a secondary sticker on it that loudly proclaims "Previously Grade B", because that's how people shop.
Surface pesticide residues were most effectively removed by sodium bicarbonate (baking soda, NaHCO3) solution when compared to either tap water or Clorox bleach. Using a 10 mg/mL NaHCO3 washing solution, it took 12 and 15 min to completely remove thiabendazole or phosmet surface residues, respectively, following a 24 h exposure to these pesticides… This study gives us the information that the standard postharvest washing method using Clorox bleach solution for 2 min is not an effective means to completely remove pesticide residues on the surface of apples. The NaHCO3 method is more effective in removing surface pesticide residues on apples. In the presence of NaHCO3, thiabendazole and phosmet can degrade, which assists the physical removal force of washing. However, the NaHCO3 method was not completely effective in removing residues that have penetrated into the apple peel. The overall effectiveness of the method to remove all pesticide residues diminished as pesticides penetrated deeper into the fruit. In practical application, washing apples with NaHCO3 solution can reduce pesticides mostly from the surface.
I use a dish washing basin with a drain filled with 6 liters of water (I’ve previously placed pieces of tape on the side of the basin to indicate water levels for 2, 4, 6, and 8 liters). The study’s 10 mg/mL NaHCO3 washing solution translates to 60,000 mg of baking soda for this amount of water, or about 4 tablespoons, which I dump in and swirl around a bit. Then in goes the produce. After 15 minutes I can just pull the drain, blast everything with some pressure from the faucet, and let it sit in the basin (with drain open) to dry until I get around to putting everything away. It is most important to perform this process on the Environmental Working Group’s Dirty Dozen, but the procedure requires such a low amount of effort that I soak any produce which is lacking a thick peel (like oranges) as soon as I get back from the market, regardless of its providence.
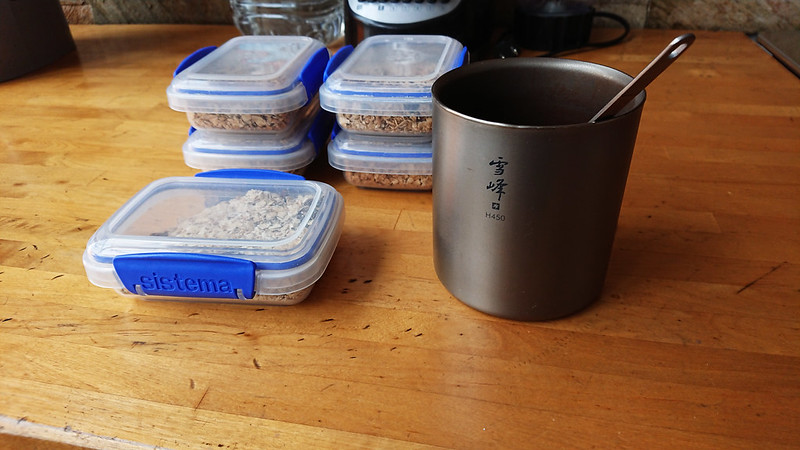
When I began mixing my standard issue oatmeal I stored it in Ziploc bags. The thicker freezer bags were reusable for a couple months before they needed to be replaced, but I wanted a longer lasting solution. This led me to the Sistema Klip It 1520. At 200ml this container is the right size for a single serving. The seal and locking clips keep the contents fresh. It is durable enough to last pretty much forever, and the stackable design makes it convenient to store multiple units.
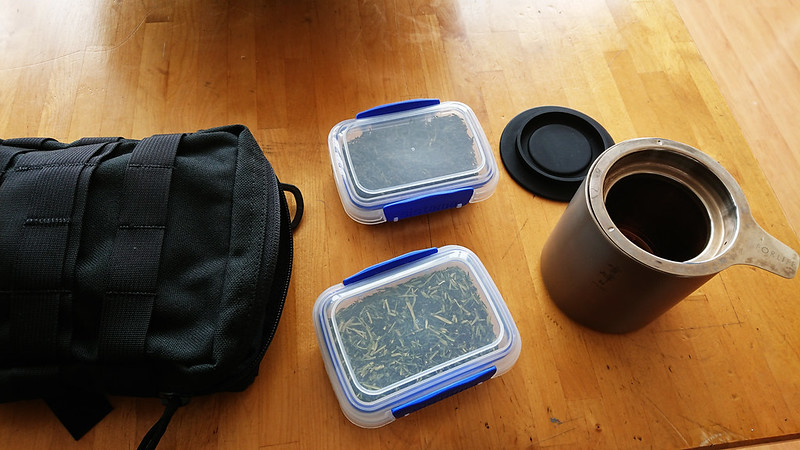
I’ve been using these as oatmeal capsules for about a year now. Five of them suffice for my weekday breakfast, but the size is useful enough that I purchased a handful more. I use them to store tea and snacks like umeboshi, dark chocolate covered almonds, and baby carrots.
Sistema makes a handful of other containers that can be used with the 1520 to build a modular, stackable system that stores well in small spaces. The 1540 has the same footprint as the 1520, but is twice the height. The lids are interchangeable between the two. The 1550 is the same height as the 1520 but twice as wide. The 1600 has the same footprint as the 1550, and shares the same lid, but is the height of the 1540. These four units work well together.
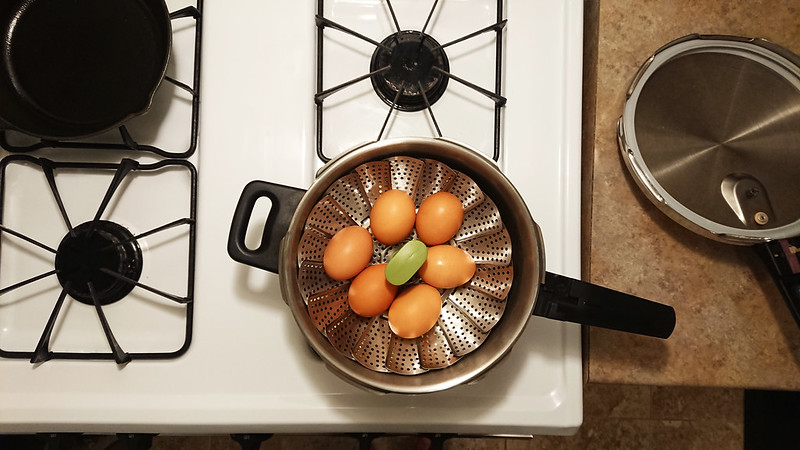
As with rice, “hard boiled” eggs are one of my go-to pressure cooker dishes when I don’t have the time or inclination to cook a full meal. I only began using the pressure cooker for this in the past couple years, but it has proven to be faster and to produce consistently better results than actually boiling the eggs.
To cook the eggs, I put one cup of water in the pressure cooker, drop in a steaming tray, and place the eggs on the tray. I then use the 5-5-5 method, which means:
5 minutes to reach high pressure
5 minutes at high pressure
5 minutes of natural pressure release, followed by quick release of any remaining pressure
After the pressure has been released, the eggs are placed in cold water to cool.
A cast iron skillet and a pressure cooker were two of the first kitchen utensils I purchased when I began cooking for myself back in college. I still have the same two tools, and the vast majority of the things I cook involve one or both of them.
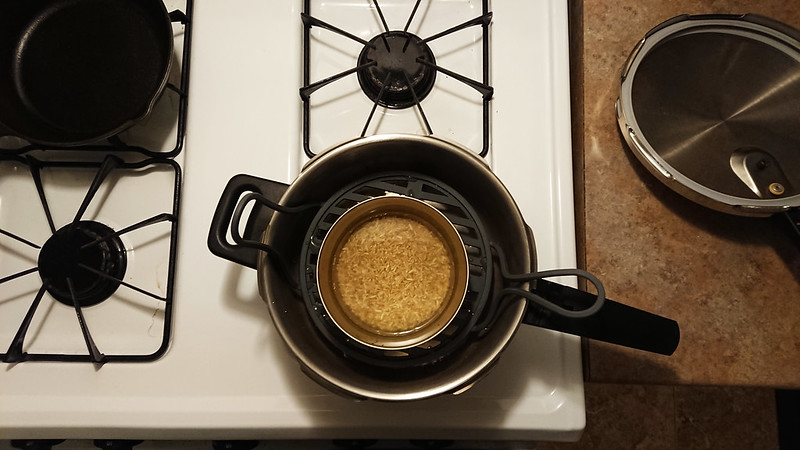
When considering the pressure cooker, the original appeal was that it seemed like an easy way to cook rice while being more versatile than a dedicated rice cooker. This assertion turned out to be true, but the 4-quart volume of my pressure cooker meant that I always had to make multiple servings of rice at a time. Cold, leftover rice is unappealing, which meant that the volume limitation of the pressure cooker diminished the frequency of my rice consumption.
Some years ago the internet came to the rescue, suggesting that a single serving of rice could be cooked in a pressure cooker of any size. Instead of placing the rice directly in the pressure cooker, the rice and water are put in a metal bowl, which is then placed into the pressure cooker on an elevated tray. Additional water is poured into the pressure cooker, outside of the bowl. My pressure cooker didn’t come with a tray, so I purchased an Instant Pot Silicone Steam Rack, which drops right into my pot. For the metal bowl I use a Snow Peak Trek Titanium Bowl, but any metal bowl of roughly the same size will work.
For white rice, my procedure is:
Add 1/2 cup of white rice, 3/4 cup water, 1/4 teaspoon of sea salt into metal bowl
Add 1 cup water into pressure cooker
Place metal bowl into pressure cooker on top of steam rack
Bring to pressure on high heat, about 5 minutes
Keep at high pressure for about 4 minutes, then remove from burner
Natural pressure release for about 6 minutes
For brown rice, I adjust the quantities and time:
Add 1/3 cup of rinsed long grain brown rice, 1/2 cup water, 1/4 teaspoon of sea salt into metal bowl
Add 1 cup water into pressure cooker
Place metal bowl into pressure cooker on top of steam rack
Bring to pressure on high heat, about 5 minutes
Keep at high pressure for about 15 minutes, then remove from burner
Natural pressure release for about 6 minutes
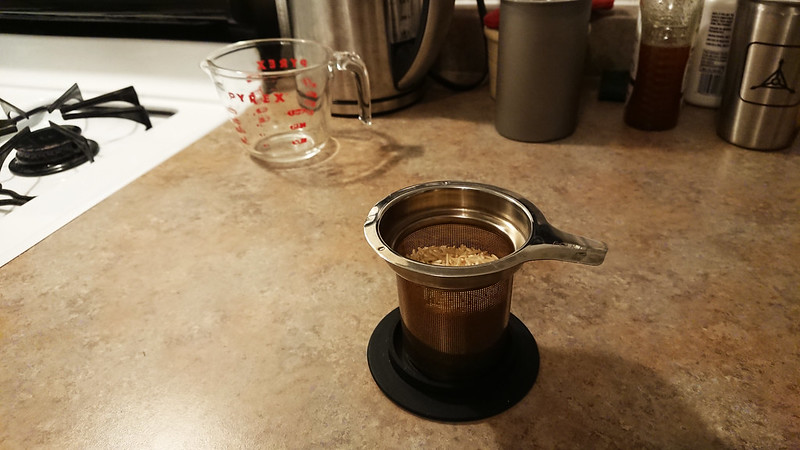
To rinse a single serving like this, I use my FORLIFE Tea Infuser. It’s the right size for this amount of rice, and has a lid in case you want to shake it around a bit while rinsing the grains.
The result is a perfectly cooked bowl of rice in a short period of time, with almost no effort. The cooked rice is consumed directly from the metal bowl, and the pressure cooker itself requires little more than a rinse at the end, so dishes are minimized. The simplicity of this process makes rice and furikake one of my go-to dishes when I don’t have the time or inclination to cook an actual meal. I also frequently cook a fresh, hot serving of rice to mix with cold leftovers, which makes them much more appealing.
I go the boxing gym in the morning before work. When I wake up I throw down a small amount of yogurt and granola, but I need a second breakfast that I can easily prepare in the office after the gym. Oatmeal is a good solution. A couple years ago I started preparing my own oatmeal instead of using store-bought packets.
I started out with The Yummy Life’s Healthy Instant Oatmeal Packets recipe and tweaked it slightly to create my Standard Issue Oatmeal. At some point over the weekend I whip up a handful of servings in separate Ziploc bags that I bring in on Monday and store in my desk for the week. It only takes a few minutes to prepare the packets, and at work it is easy to dump the contents of a Ziploc into a mug, poor in hot water, stir a bit and enjoy.
I haven’t gotten tired of this recipe after eating it regularly for a couple years. The maple sugar is the key ingredient in that regard, I think. It’s easy to add in dried fruit or other garnish to mix it up occasionally.
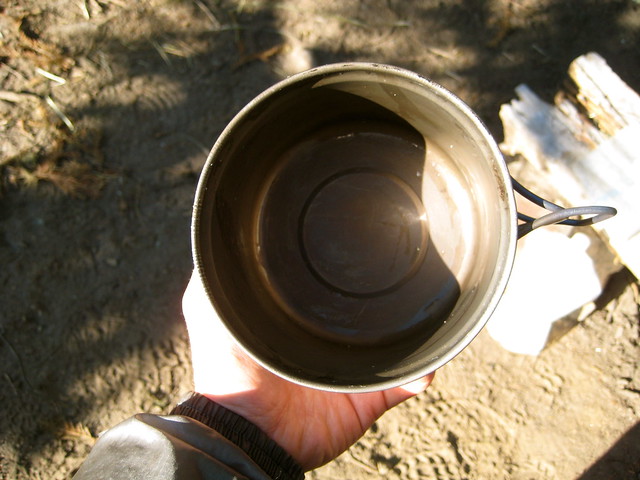
Cleaning my pot in the wilderness has always proved a challenge. I’m not hugely concerned with completely sanitizing it – that would not be realistic – but I do like to get all the food remnants out of the pot after every meal. A few extra ants in my ramen? No problem. Fungi and bacteria in the oatmeal? I’d rather avoid that.
Getting every last bit of food out of the pot with a spork doesn’t work. If I’m in a desert or on the beach, sand can be used to scrub the pot. The Equisetum family (Horsetails) are also good scrapers, due to their high silica content. But neither sand nor Horsetails are available frequently enough on my trips to make them realistic solutions. As well, cleaning the pot with those means that I’m dumping food remnants onto the ground, rather than into my belly. If I’ve humped it, I’d rather eat it.
I used to carry a piece of a green scouring pad. Those work great when the sun is available to dry them out after use. Here in Cascadia that means they work about 3 months of the year. The other 9 months – especially in winter – it proves a challenge and a hassle to dry them fully. I don’t like storing the pad with any moisture in it. Doing so would create the perfect incubator for bacteria.
Clean pot with spatula, licking food remnants off of spatula as you go
Boil water in pot
Pour heated water from pot into bottle for tea
The pot is cleaned with the spatula. Afterward, boiling water in the pot helps to kill any nasties that might be hanging about.
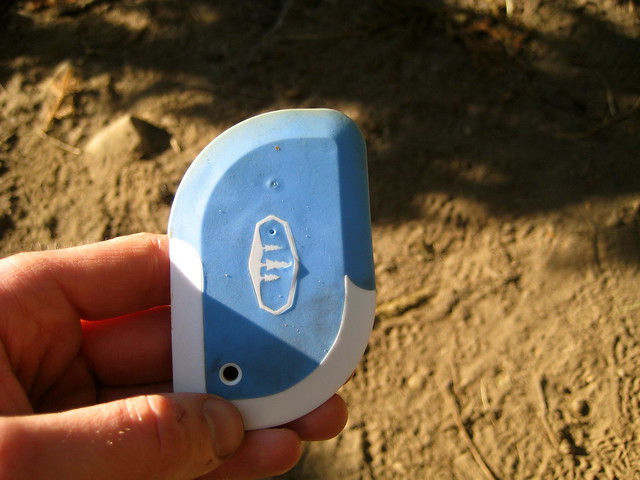
I discovered this idea on Crow’s blog about a year ago. At first I took a small kitchen spatula and cut the handle off. It worked, but there was about 2” of the plastic handle inside of the head that couldn’t be removed, which translated to dead weight. Later I discovered that people actually sell spatulas with removable heads (to make them dishwasher safe, I think). I bought one of those online, but when it arrived the head was a little too small for my tastes. (In the wilderness I always treat my hands as dirty. If I’m licking the spatula, I want it to be big enough where I can hold it with my fingers near the top and lick near the bottom. I do not want to lick where my fingers are.)
About a month after I had started to use the sawed-off spatula, I discovered that GSI made exactly what I wanted: a compact scraper.
At 16 grams (0.5 oz), it’s not the lightest possible solution. But it’s lighter than my first attempt, and the perfect size for my needs. The blue part is a soft rubber, like a normal spatula head. The white bit is hard plastic, meant for scraping burnt foods. (Burning your meal, I think, is a mistake you only make once. So far I’ve not actually used the white part to scrape the pot. It’s where I keep my fingers.)
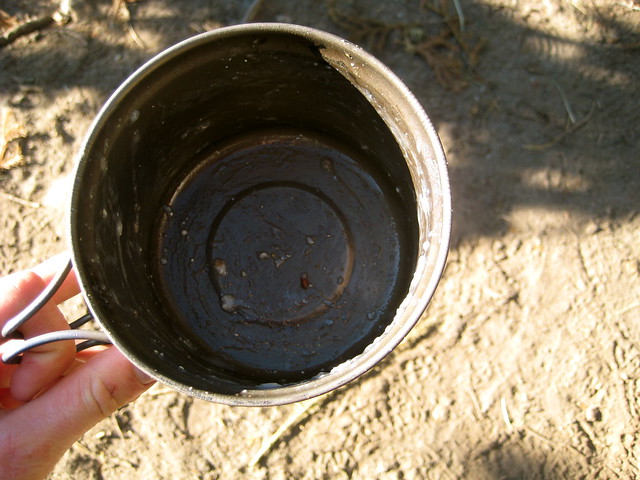
My method of using the scraper differs slightly from Crow’s. I eat the meal with my spork, attempting to get as much of the food as possible. Afterward, there will still be plenty left in the pot.
When the spork is of no more use, I pour some water into the pot, swish it around, and drink. (A habit I picked up in southern Idaho’s desert. Water was scarce, so if you used it to clean your pot, you still had to drink it afterward. The taste is not always entirely pleasant, but you get used to it, and are wasting no resource.) This takes care of some of the left over food, but with meals like oatmeal, there’s still gunk left over.
After this precursory cleaning, I go to work with the scraper: scraping the pot clean, licking clean the spatula as I go (leave no calorie behind, I say). The pot will then be visibly clean.
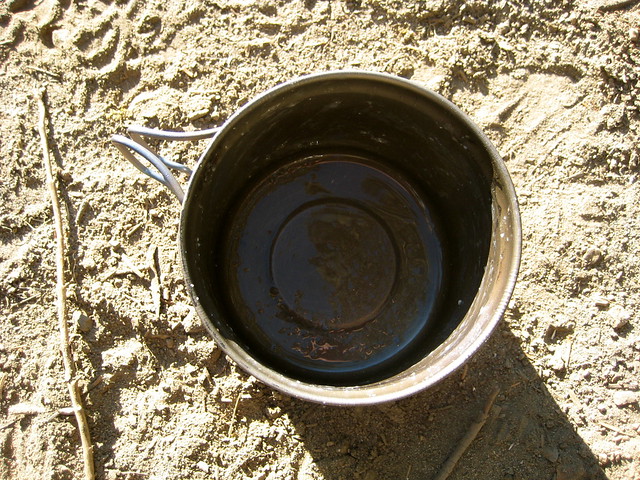
At this point, I may or may not boil water in the pot. If I have brought enough fuel for an after-meal drink, I’ll boil the water in the pot to finish cleaning it, then dump the water into an old Vitamin Water bottle for a drink. Most of the time I don’t plan on warm drinks. Either way, at the end of the process the pot will still have a little moisture in it. If I’ve just had dinner, the cleaning is complete: I’ll leave the pot till breakfast. On the other hand, if I’m moving again after the meal, I don’t like to pack my pot away wet, so I’ll wipe it down with a small piece of an absorbent camp towel.
The GSI Compact Scraper is now a permanent part of my kitchen. Since I started using it at the end of last year, it’s also the piece of gear that people request to borrow the most! (It goes in my mouth. I never lend it.) I’d recommend any wilderness traveler pick up some sort of cheap spatula or scraper.
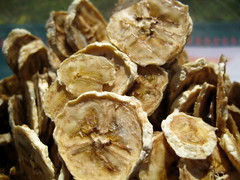
My favorite food to toss in the dehydrator are bananas. The sugars caramelize as the slices heat up. I’ll leave them in for 7-8 hours if I want them to dehydrate fully, so that the final product is like a chip. But my preference is to leave them in for only 6-7 hours, so that they’re still a bit chewy, like candy. Starburst doesn’t have anything on these!
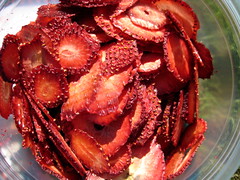
On our recent trip, Kevin mentioned how much he liked the dehydrated strawberries that he recently had. I thought I’d give them a shot.
I cut them up in 1/4” slices, which is the same as I do for bananas, but they turned out too thin after coming out of the dehydrator. Mary Bell’s Complete Dehydrator Cookbook claims that strawberries are 90% water, whereas bananas are only 76%. So in retrospect it makes sense that the strawberry slices would shrink down a bit more.
No matter. They’re still tasty! But the bananas remain my favorite.