I went on a lengthy bike ride around the Seattle area yesterday. There were a couple of errands I wanted to run in the city and I thought I’d use them as an excuse to test out Google Maps new bicycle directions feature, which I had yet to use.
The Interurban Trail runs through Snohomish and King Counties, forming a highway for human powered transport. At least, that’s the idea. Parts of the trail are on old railway routes and parts are on normal city streets. The part of the trail in King county is great, but the Snohomish county trail is very poorly signed and notoriously difficult to follow as it moves between trail sections and streets. If you’ve never ridden it before, you’re guaranteed to lose it. Since the trail parallels I-5 and 99, it’s difficult to actually get lost – just keep heading north or south and you’ll eventually get where you’re going – but it’s nice to be able to stay on the trail itself as the Interurban’s route is generally the friendliest to non-motorized vehicles.
I was very impressed with Google’s ability to keep me on the trail. The directions only once told me to turn onto a non-existent road. Other than that, they proved accurate. I also had with me photocopies of the relevant route directions taken from Biking Puget Sound. The directions from both were very similar, but where they differed, I found that Google’s route was superior.
Of course, the whole trip couldn’t be on the trail. I had to get on the Interurban at the beginning of my ride and off it at the end. For that bit, I was also happy with Google’s directions. The route on and off the trail was not as direct as the one I would have chosen myself, but Google seemed to go out of their way to keep me on smaller streets with less traffic. It’s clear that Google takes topography into account, as well, as the streets that Google suggested were flatter than those on the more direct route that I would have chosen.
The downside to Google’s route was the number of turns. The directions were 7 pages long for the full trip (both to my destination and from the destination back to my starting point). I think the longest section I had without a turn was about 2 miles. I would make a turn, pull the directions out of my pocket to see how long I had on this stretch and what the next turn would be, shove the directions back into my pocket, go on for a bit, make the turn, and repeat the process. It was a bit inconvenient, shoving the directions into my pocket and pulling them out so frequently, and the directions got crinkled and difficult to read. I need to figure out someway to mount them on my handlebars. The other problem with the directions was that, because much of the Interurban is on the old railway that doesn’t have street names, Google would occasionally give a direction like “Turn left in 58 feet”. Turn left? Turn left where? In this driveway? That business parking lot? The lake? With the infrequent signage on the trail itself, I would often miss these mysterious left turns. When that happened I would look a couple steps ahead on the directions till it had me turning onto a street with a number. I could make my way to that numbered street along normal roads and soon find myself back on Google’s route.
Overall I was pleased with the directions and will definitely be taking advantage of Google again for future trips – though if it’s in an area that I have no familiarity with, I would probably want to supplement them with a good road map for added security. I’ll also be curious to see how they do in other cities, or outside of urban areas altogether. I’m told that the team who developed the bike route feature is based in Seattle, so it would make sense that that city would have the most accurate directions.
In Seattle I made a bit of a tour. I went past Woodland Park and cruised around Green Lake a bit before stopping in the center of the universe to refuel. From there I went over the Ship Canal and decided to torture myself by pedaling up the hill to Queen Anne before heading down to Pike Place. At the market, I paid a visit to Left Bank Books to browse the zine collection before heading over to Metsker Maps. I have something of a map fetish, so Metskers is one of my favorite shops in that area. I spent 45 minutes in there pouring over various topos that are difficult to acquire anywhere else.
Outside of Pike Place I saw somebody with what looked like a TAD FAST Pack. I don’t see those around very often, so I went up to the guy to congratulate him on his taste in bags. But on closer inspection I saw it was one of those cheap Japanese airsoft knock-off designs.
After walking the bike around downtown and doing more people-watching, I started to head back north. I decided to take a different route and go the long way around Lake Union. Eventually I picked up the Burke-Gilman Trail and ended up back in Fremont. From there I made a slight detour over to Ballard (nope, it isn’t free yet) and visit Second Ascent. They’re one of the best independent (i.e. non-REI) gear shops in the area and usually have a good selection of used gear. Once there I spent another half hour looking at maps – this time aided with some of the guide books they had – and happened upon a nice 50-ish mile loop in the Glacier Peak Wilderness, which is something that I’ve been looking for lately.
From Ballard, it was back to Fremont where I made a quick stop at PCC for some dolmas and a couple of cookies before retracing my route back home.
The route that I took was supposed to be 50 miles, but for all my detours and added explorations, it was probably closer to 70. My butt cheeks hurt, despite my padded panties.
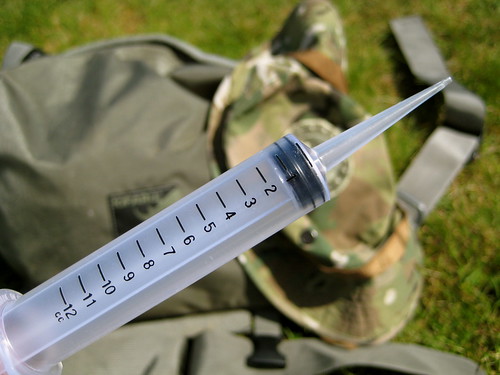
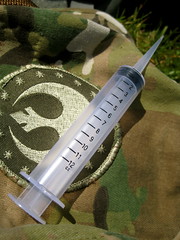
If I could only carry one first aid specific item in the wilderness, it would be an irrigation syringe.
There’s a lot that can be done with bandannas, duct tape, and paracord. A multitool, spare clothing, sleeping pad, tarp, poles – pretty much everything in a pack, including the pack itself, can be fashioned into some kind of medical implement with a little ingenuity. But cleaning a wound will always remain difficult. It also remains extremely important. Infection is both very common and very inconvenient in the wilderness, where you’re well away from definitive care.
Clean water should always available and irrigation is a simple and effective method of cleaning a wound. But water just poured over a wound won’t do much good. Pressure is needed. Occasionally you might hear people claim that you can fill up a ziploc bag with water, cut or poke a hole in one corner, and squeeze the bag to force out a stream of water. That’s certainly better than nothing, but in my experience the pressure from that is not comparable to the pressure from a syringe. With an irrigation syringe, you can take the cleanest water available (usually your drinking water) and shoot it into the wound. Pressure washing the wound like this allows you to easily clean out all the grit and dirt. There’s no need to go poking around in there with unsanitary tools, probably causing more harm than good. A 12cc syringe like the one I carry costs $1, weighs 8 grams (0.28 oz), and takes up very little room. I can’t think of a reason not to have one in your pack!
Remember: a clean wound is a happy wound. You can put all the effort you want into the perfect bandage, but if the wound isn’t clean, you’re going to have some problems down the line.
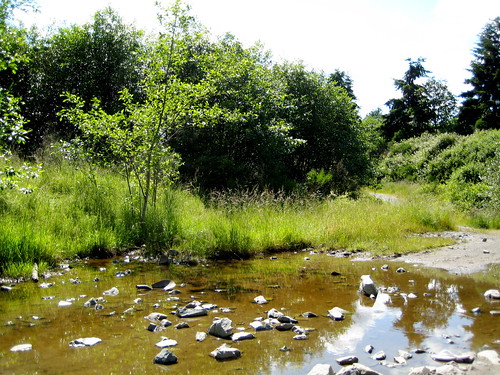
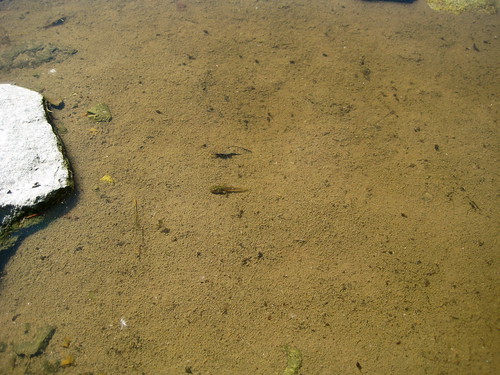
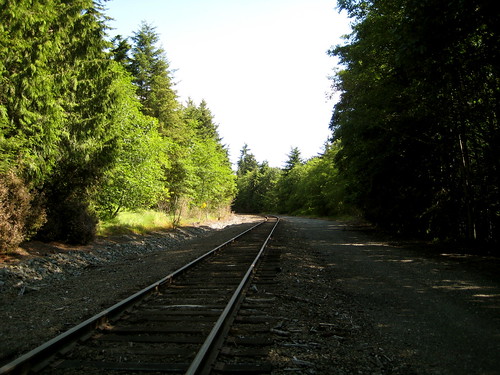
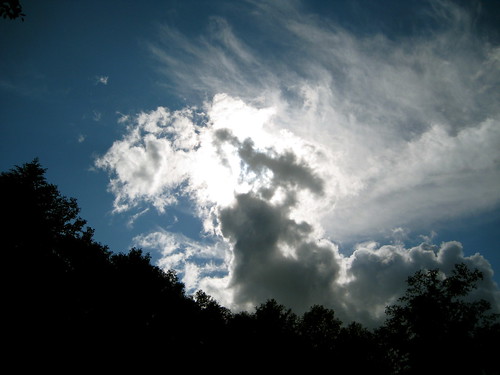
After taking the photos I wanted for today’s stuff sack review, I spent the rest of the afternoon watching tadpoles, walking along railroad tracks, and looking at clouds.
"Then one day it dawned on me that... you can't rely on the accomplishment of goals or journeys -- however great or small -- for your happiness, because the completion of a goal is only a temporary gratification. If you want to be happy then you must enjoy it all, at whatever point your are at, from the beginning to the end, because happiness it the acceptance of the journey as it is now, not the promise of the other shore."
- Stevie Smith, Pedaling to Hawaii
(Originally, this post was titled Just Another Wednesday, but I have now been informed that today is, in fact, Tuesday.)
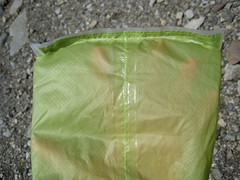
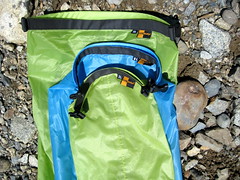
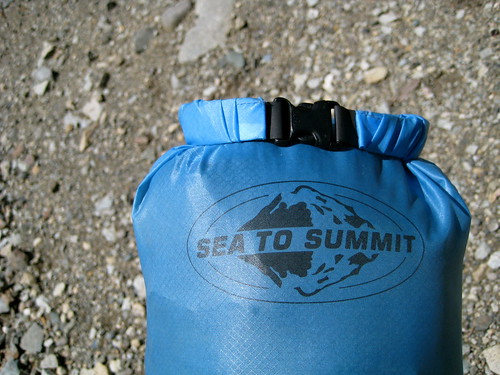
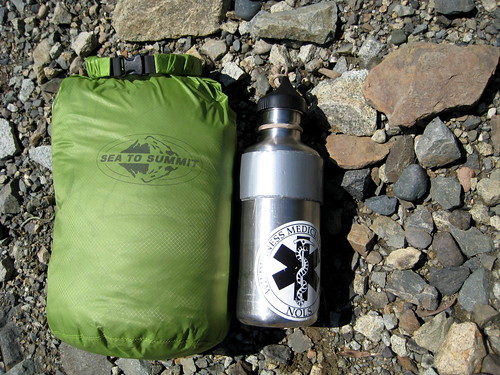
I love my Sea To Summit Ultra-Sil Dry Sacks. They’re made out of a thin and slippery silnylon Cordura, which makes them tough, light, and easy to slide in and out of a pack. The Hypalon roll top closure means no water can get in or out. All the seams are double stitched and taped on the inside. In all, the Ultra-Sil sacks are some of the lightest weight dry bags out there that still maintain a good level of durability. I’ve had an 8 liter and 2 liter model for about three years. Last Fall, I picked up a 13 liter model.
8L Ultra-Sil
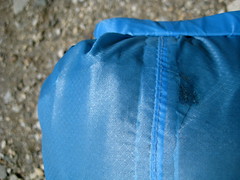
The 8 liter model is my most used bag. I use it primarily to carry clothing. For me, it’s the perfect size for 3 season use. During the winter, when I’m carrying more puffy clothing, I sometimes have to supplement it with a secondary sack. I’ve had the whole thing accidentally submerged multiple times and never came out with wet contents.
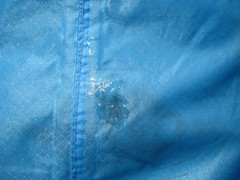
The 8 liter sack also functions as my pillow at night. This is a bit tough on the sack, since as a pillow it normally sits directly on the ground above my sleeping pad and so gets rubbed around on the dirt and rocks. In the 3 years that I’ve used it as a pillow, I’ve only ever had one failure – and that one just after this last trip. There was a small abrasion near the seam in the middle of the bag that I noticed dripping water when I was cleaning the bag. A dab of Mcnet Silnet on the inside and the outside of the bag sealed that right up and the sack is once again waterproof.
2L Ultra-Sil
The smaller 2 liter bag has seen a variety of duties. It’s held a first aid kit, notes, and small clothing items like gloves and a hat. For the past 6 months it has functioned as my camera case. You may remember that back when I did an EDC post I mentioned in the photo notes for my level 2 items that I wrapped my camera in a bandanna for padding and then put that in a waterproof Aloksak. The problem with that setup is that Aloksaks aren’t incredibly durable, nor are they cheap. I can’t afford to replace them every time they fail. So I moved to putting the bandanna-wrapped camera in the 2 liter Ultra-Sil sack. It’s just as waterproof (if not more so), but also more durable. The other benefit to using the Ultra-Sil is that I have plenty of room left over in the sack to dump in my cell phone when traveling in the wilderness.
13L Ultra-Sil
The 13 liter Ultra-Sil I bought last Fall to hold my sleeping bag. Prior to this I used a Kifaru Compression Stuff Sack. The Kifaru sacks are great at compressing bulky items down. Patrick developed them to compress around the circumference of the item, rather than length wise, so that they actually fit in the bottom of a pack (strangely enough, a novel idea). They’re made of a lightweight and waterproof material, but only close with a drawstring closure. This means that water can potentially creep inside. I’ve used one of these sacks in some capacity since 2007 and never once had an item get wet, but it’s always a risk. The other issue for me is that I rarely ever max out the capacity of my pack. I can afford the space for bulky items and don’t need to compress them. So I decided to start using the Ultra-Sil sack for my sleeping bag. They don’t compress, but they guarantee that my sleeping bag will always stay dry and, due to the lack of compression straps, the Ultra-Sils are lighter than the Kifaru sacks. (The small Kifaru compression sack – which I use for both my 20F bag and my 40F bag – weighs 68 grams, or 2.4 oz.) The 13 liter is a good size for my 20F bag. The 8 liter is a better size for my 40F bag, but because I only have one 8 liter sack and it’s always used for clothing, I usually end up using the 13 liter sack when carrying my 40F bag as well.
The only thing that I don’t like about the Ultra-Sil sacks is lack of a grab handle on the bottom. When I stuff my sleeping bag into the sack and purge out the air, it gets packed in there pretty well. To remove it I have to hold the bottom of the sack. Since there’s no grab loop, that means that I have to pinch the bottom, which also means pinching the sleeping bag itself. It’s not a big deal, but a grab loop on the bottom would make removing the sleeping bag ever-so-slightly easier.
If you’re looking to keep gear dry without a large penalty in weight, I would strongly recommend picking up two or three of the Ultra-Sil Dry Sacks.
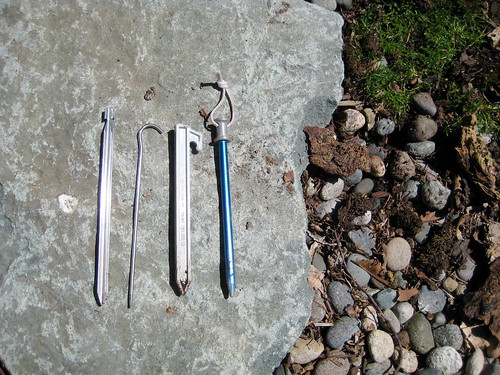
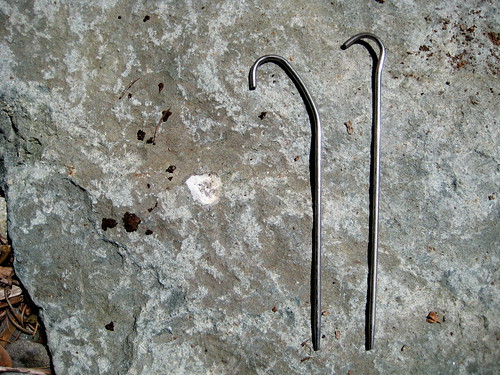
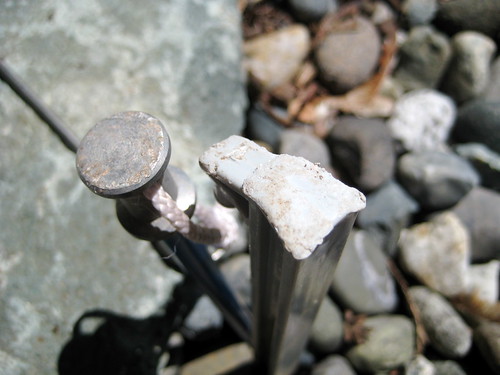
I’m always looking to shed a gram or two from my pack without sacrificing too much functionality. One of the categories of gear that I have been focusing on of late are my tarp stakes. For the past year and a half I have attempted to discover what works best by experimenting with four different types of stakes in a wide variety of ground conditions. The stakes I’ve used are Durapegs (6”), Tite-Lite Titanium Stakes (6.5”), Easton Aluminum Stakes (6.25”), and Big Agnes X-peg Stakes (7”).
Big Agnes X-peg Stakes
The X-pegs measure 7” in length, are made of aluminum, and tip the scale at 11 grams (0.38oz). They came with my old Seedhouse SL1, which was the last tent I bought before moving to tarps. The four-sided design gives them a lot of grip in the earth and the notched top securely grabs cordage or a webbing tie out. It’s a pretty basic design, but effective in many types of earth. I’ve beat on these stakes for some time and haven’t bent or broken one in any use.
Easton Aluminum Stakes
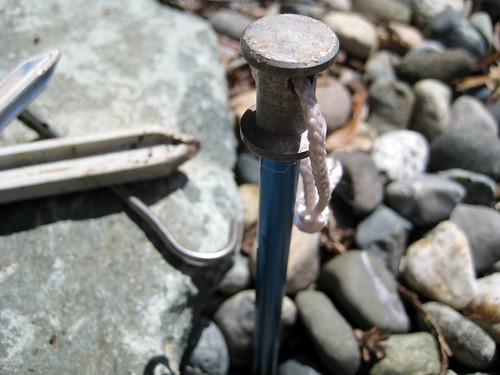
The Easton stakes are 6.25” long, also made of aluminum, and weigh 8 grams (0.28oz). These are popular stakes with lightweight backpackers. They have a nice flat head to hammer on with a rock and a small cordage loop at the top to make pulling them out of the ground very easy.
At first glance, one would expect the Easton stakes to be inferior to the X-pegs. Though both are made of aluminum, the Easton stake is hollow, which makes it lighter but easier to break. The body of the Easton stake is cylindrical and smooth so that it doesn’t grip in the earth as well as the four-sided X-peg. Despite all this, I have yet to break or bend an Easton stake. I have also never had one accidentally pull out.
Tite-Lite Titanium Stakes
The Tite-Lite is a 6.5” titanium stake that weighs only 6 grams (0.2oz). It’s a simple stake in the classic shepherd hook design. Though the weight is great, this is the least functional and my least favorite of the bunch. Because of the small diameter it will go into most any ground, but it will also pull out. I’ve had these stakes come out in the middle of a windstorm, forcing me to get up three or four different times during the night to replant them (the Easton stakes and Durapegs were also in use at the same time and never once came out). They twist in the ground fairly easily, allowing cordage and webbing tie outs to slip off. And in very rocky ground, they will bend.
For me, there’s too much functionality sacrificed for the savings in weight. I no longer use these.
Durapeg
The Durapeg is 6” long, made of ABS plastic, and weighs 14 grams (0.49oz). These are the stakes that Kifaru sells with all their shelters. Similar to the X-peg, they are four-sided and have wide indents on two sides to grip the dirt. There’s a flat top for pounding on and a good hook to hold a tie out. Once you put these things in the ground, they don’t tend to move. Despite the fact that they’re the heaviest of the bunch, they’re also my favorite. They simply have proven themselves to be the most effective stake in the widest array of ground conditions. The wide indentations on either side eat a whole lot of ground, making them better in snow and sand than the X-pegs (though they certainly aren’t the best option for a dedicated snow stake).
I have had a Durapeg bend in very rocky ground but, unlike with the Tite-Lite, the bend in the Durapeg was not enough to affect the functionality. Still, the bent Durapeg has been removed from my rotation. I have yet to have any of these break, but I’m afraid that the bend will be enough to snap the Durapeg if I tried to pound that particular stake into really hard ground again.
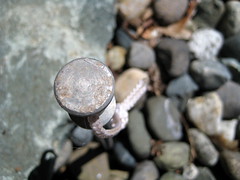
The top of the Durapeg does get chewed up a bit after being beat on with a few rocks. So far this hasn’t proved to weaken or in any other way damage the stake overall. I’ve also had some pitting occur on the flat head of the Easton stake due to being driven in with rocks.
Current Carry
My Kifaru Paratarp has 12 different tie out points. Using all of these allows one to get a real tight pitch, but I find is almost always unnecessary. When I’m pitching the tarp in an elevated manner by tying it out to trees, the most that I’ll need are 4 stakes – one for each corner. When pitched in the normal manner with trekking poles, I find that 7 stakes are all that are needed for a good pitch. An eighth stake placed in the webbing tie out between the front and middle tie out on whichever side I’m sleeping on will widen out the shelter a bit and give me more head space. I carry 8 stakes. Currently those 8 stakes consist of 6 Durapegs and 2 Eastons. Also in the bag are 4 Nite-Ize Figure 9s which help me to pitch the tarp from trees or toss up a clothesline or a place to hang a water bladder. The bag itself a lightweight silnylon thingy that came as the stake bag with the Big Agnes Seedhouse SL1.
The whole package – bag, stakes, and Figure 9s – weighs 122g or 4.3oz. With this (and a couple hanks of paracord) I find that I can throw up a secure and comfortable shelter in just about any condition. Occasionally I’ll switch out a couple of the Durapegs for a couple X-pegs, but currently I prefer the greater holding power of the former.
I do still have two of the lightweight Tite-Lite stakes that I carry with my Ti-Tri. These serve to elevate the pot in wood-burning mode. If I want to I can use these when pitching the tarp to bring up the total number of stakes to 10, but I rarely do.
If anybody has a favorite stake different from the ones discussed here – and it weighs 14g or less – let me know about it! I’m always looking to improve the package.
I’ve decided that I don’t like pulling individual tweets into the blog as uniquely styled posts. For now, that behavior has been disabled. I’ve moved to a single weekly aggregate post including all the previous week’s tweets. We’ll see how that goes.
Since individual tweets are no longer being pulled in, I’ve put a list of the most recent tweets down in the footer. Next to that you’ll also find a new list of the week’s most popular posts. Fancy!
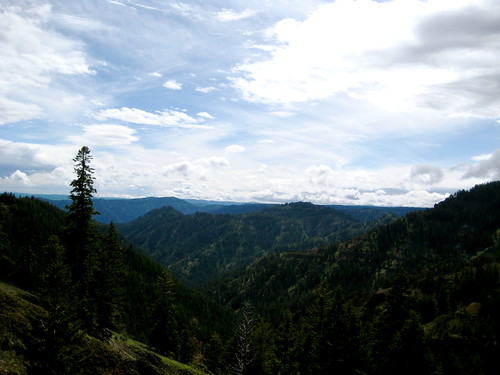
I arrived at the Panjab trailhead in the Tucannon canyon at around 3PM on Saturday. The plan for the day was to take a short walk and spend the night at Dunlap Spring, a distance of about 6 miles. The Panjab trail proved uneventful, with no interesting sightings. I reached the meadow above the spring at 6PM and was happy to see it free of snow. The meadow sits at 5,700 feet (around 2,500 feet higher than the trailhead) which was not the highest elevation I would be reaching during the loop, but close. It seemed a safe bet that I wouldn’t be post holing the whole trip, which is always good news.
As I walked down the meadow toward the spring, I ran into my first local. A black bear with a nice brown coat was having his supper about a hundred feet away. He had his butt toward me and his head down. I yelled a greeting. He didn’t budge. Not exactly the response I was hoping for. I yelled a bit more and he looked around but was either blind or uninterested in the biped waving frantically at him. After a minute, though, the wind shifted direction and brought my scent to him. He turned his head to look right at me, then ran off into the trees. Thanking him, I went on my way.
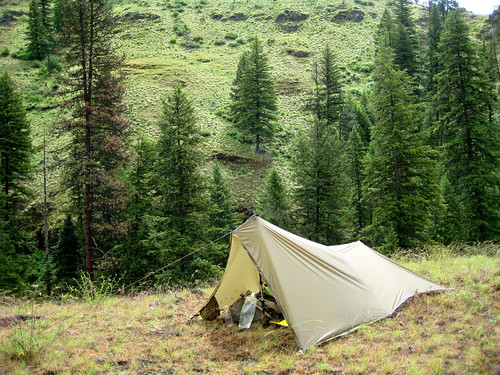
I found the spring without any trouble and filled up my water bladder. After pitching my tarp in a nice spot in the trees a little ways away, I started to think about dinner. The sky was clear that evening and there was a spot up on the meadow that would provide a nice seat to watch the sun as it set into the West. I grabbed my food, stove, and water and headed on up. Along the way I grabbed a few small sticks and twigs to fuel the stove. After dinner and the show I headed back down into the trees and climbed into bed at 9:30PM.
Sunday morning I awoke to a light sprinkle. No matter. I thought it’d be good to get a few miles under my belt before breakfast. I got out of bed and topped off my water at the spring. Just as I was about to start breaking down my small camp, the rain really started coming down. Maybe breakfast later on down the trail wasn’t such a good idea. It seemed like a better option to crawl back under the tarp and do a little breakfast from bed.
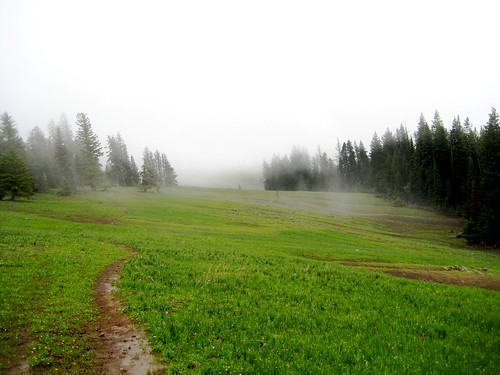
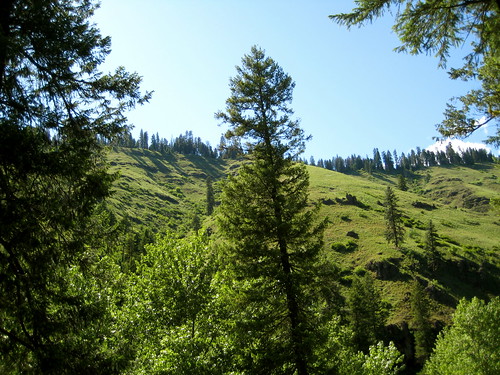
That proved a good choice. Just as I was finishing my noodles the rain stopped. I took advantage of the lull to quickly break camp and get on my way. Most of the day’s walk was along high meadows that should have provided good views to either side, but everything was covered in cloud and I was unable to see more than a hundred feet or so in any direction for all the mist.
Occasional small breaks in the cloud provided a hint of the country I was traveling through and I did manage to spot a herd of seven elk having breakfast further down the meadow.
The trail was gaining elevation and started to enter a few trees. Snow covered the ground. It was only a few inches deep and pretty crusty so I didn’t sink in, but it obscured the trail. I was looking around trying to decide where the trail might have gone when I spotted a pair of really big bear tracks. “Aha,” I thought. “Those are heading in the right direction. I’ll follow them.” The tracks led on through the trees and I followed (hoping not to meet the fellow who left the tracks). Eventually the tracks led out of the trees and deposited me on the trail at exactly where I wanted to be: the aptly named Bear Wallow Spring.
From then on whenever I lost the trail in the snow I would just follow the tracks of bear or elk. They always seem to know where they’re going and tend to take the most efficient route to get there.
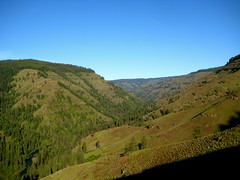
The trail continued east along the ridge, with a steep drop-off on the south side. At its highest point it got to around 6,200 feet, but there still was no more than a few inches of snow. The trail passed Squaw Spring, which was a disgusting mess of a hunter’s camp, and Sheephead Spring before finally reaching the high point at Diamond Spring. From that point my route turned south as I began a long, slow descent down into the canyon toward Oregon. I had been in fog all day and just as I started to descend the canyon I heard thunder off in the west. Whoops! That high open ridge was about the last place I wanted to be. I picked up the pace a bit and started to loose elevation. Safely back in the trees I spooked another elk, grazing all by his lonesome.
As I slowly (very slowly) lost elevation I began to get underneath the clouds and started to see a bit more of the country. Lots of canyons all around, and somewhere down there to the south the Wenaha River. Oregon Trail country. (Briefly, I relived childhood fears of dying of dysentery.)
At one point I misplaced my foot and starting to slide down the slope to my right. Throwing out my left hand I was able to stop myself but scraped up the palm of my hand in the process. Right where I fell was a patch of yarrow, which I grabbed and put on my palm as a poultice. After walking for another half hour or so I found a good spot to stop and properly clean and bandage the wound.
Continuing on, the trail finally finished its descent into the canyon and met up with Melton Creek. At 7PM I stopped to cook up dinner. The local ants were apparently of the mind that my meal was lacking in protein: a few of them crawled into the pot and ended up in my tummy. As I was eating dinner I spotted movement on the opposite side of the canyon. At first I thought it was an elk, but it turned out to be another black bear, this time with a light brown coat of fur around the body and dark fur around the neck and head. Just like an elk! Neat.
Another few miles down the trail and I finally arrived at the confluence of Melton Creek and Crooked Creek, where I intended to camp. After filling up my water supply and cleaning the pot from dinner, I pitched my tarp and crawled right in. It was a little after 9PM. I had walked around 17 miles that day.
Monday morning it was raining. It was to be a short day – I had only about 7 miles to go – so I decided I would wait it out. The rain fell for a good while as I killed time in the tarp.
Finally it stopped and I got out of bed, hitting the trail near 11AM. Just a few steps down the trail I had my first water crossing of the trip. I had to get to the other side of Melton Creek just north of where it joins with Crooked Creek. The water was cold, but only about knee deep. Another mile down the trail was another crossing, so I just left my sandals on and my shoes hanging around my neck.
When I got to it, First Creek proved to be a bit deeper and very fast moving. Had I slipped and fallen in Melton Creek I would have been cold and wet and might have come out with a bruised bum or stubbed toe, but it looked like if I was to fall here in First Creek I could actually get swept down it a ways.
The creek was waist deep. I made it across with no more trouble than frozen privates – which was trouble enough – but the creek also proved to be the boundary between winter and summer. Just as I got to the other side the sun popped out and the temperatures were soon in the mid-70F degrees. A bit downstream from the crossing was an old cabin and horse corral. I headed over there to cook up a brunch and dry out in the sun.
Back on the trail, the bush got really thick as I headed south down the side of Crooked Creek. I might as well have been bushwhacking, but the sun was out and there wasn’t a cloud in the sky so it didn’t much matter. A mile or so down the “trail” I ran into a mule train. They had just packed in an SCA crew down at the Oregon border who would be spending the summer working on this trail. Good luck! In a couple weeks it’ll be getting way to hot for me down in that canyon, but I’m glad that somebody will be working the trail. The guy at the head of the mule train seemed impressed when I told him my route – more so because I was solo. “That’s quite a walk!” he said. Before I had gotten on the trail, I was in the town of Pomeroy where I ran into a couple locals. They described the Wilderness as “bumfuck nowhere” and tried to discourage me from going in by myself. Apparently people who live in the region don’t venture into the Wenaha-Tucannon very often. Seems strange to me.
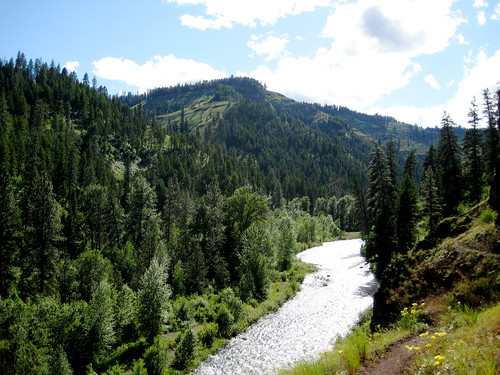
Soon after passing the mules I reached the Oregon border. Just off in the trees I found the trail crew having lunch. I headed over to say hello and swap stories about the SCA. Since this was their very first day, they were all still looking pretty neat and clean. One of the girls even had makeup on! I imagine they’ll look a bit different come August. Anyway, I wished them good luck and continued on my way, soon reaching the point where Melton Creek drains into the Wenaha River. Here, my route turned west and headed upstream along the river.
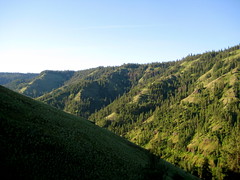
The Wenaha River and its canyon really are beautiful. It’s not the sort of area I associate with the Northwest, instead seeming like it belongs somewhere in Montana. At this point the day had warmed up till it was somewhere around 80F which seemed to please the two rattlesnakes I found hanging out in the middle of the trail.
I reached Fairview Bar just after 5PM and, after dropping my pack, stripped down and jumped in the river. It wasn’t any warmer than the ball-freezing First Creek, but was refreshing after the hot hike. After getting out of the Wenaha I threw up the tarp and collected water while drying off in the sun. I dressed as the sun began to sink below the canyon wall. Then, laying my pad out on the ground, I had a good sit. It lasted about 3 hours. During that time I cooked up dinner and paid a little attention to my feet, which were hurting due to the new footwear I was trying out.
While I was digging in my food bag for dinner I came across the chocolate bar I packed. I always like to pack a bar of chocolate in the cooler months when it won’t melt. Emergency Chocolate, I call it. Not only is it tasty and mentally comforting, but it provides a great energy boost and can be helpful in warding off hypothermia. When I pulled it out of the bag it was still firm, but I said to myself “Self, look at this here chocolate bar. With warm temperatures like today, it’s going to melt in no time! We better eat it before that happens.” To which I replied “I like the way you think, Self” and proceeded to eat the whole thing.
The next day I woke determined not to lounge around in bed that morning, but to get an early start on the day. I had a long and steep climb north out of the canyon ahead of me and wanted to get most of it done before the sun started beating down. Quickly breaking camp, I threw on my pack and started heading uphill just past 6AM. Sunrise in the Wenaha is a wonderful time. Undoubtedly, that leg of the trip had the best scenery.
Around 7:30AM I reached the trees and stopped to cook breakfast at the base of an old pine. I spotted two ospreys flying over head.
After that, my hike was through forest. Soon I was back in Washington. I lost the trail a couple times and stumbled upon another hunting camp, but found my way up out of the trees without much trouble.
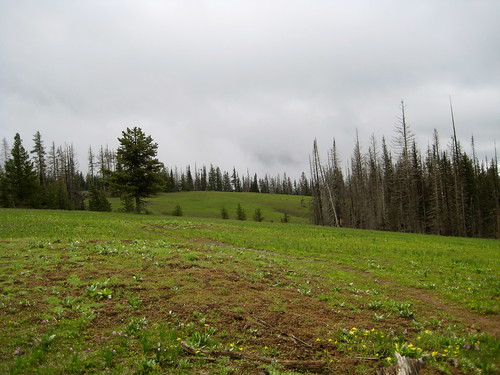
There are some great grassy ridges up there around Moore Flat and Smooth Ridge that demand one to at least have a sit on them, if not take a nap. I did a bit of both.
Soon I reached the top of Weller Butte and the highest point of elevation for the day. Lodgepole Spring, where I planned to spend the night, was just another few miles north of that.
Lodgepole Spring was a bit disappointing when I got there. It was fairly muddy and finding a good spot to put the tarp was difficult. Despite the day’s perfect weather, some clouds had started to move in and it was looking like rain. Eventually I found a spot a bit above the spring that was sort of flat and had a few trees around it to help protect from any wind. Most of an Elk skeleton lay beside it.
The wind did pick up and got pretty strong that night. I was cozy inside my tarp, but I had pitched the front left side a little sloppily which meant that it was making a lot of noise as the slack got blown back and forth in the wind. It woke me a couple times, but I was too comfy inside my bag to get up and do anything about it.
The next morning was rainy and windy. Still, I didn’t want to hang out in the tarp all morning. I broke camp, filled up on water at the spring, and headed on my way. Around 10AM the sky cleared up and the sun came out for another fine summer day.
As I headed north, I was gaining elevation. I went along the narrow ridge along Danger Point and a bit further on reached Oregon Butte – at 6387 feet, the highest point in the Wilderness area. Just north of Oregon Butte I reentered the snow and lost the trail. There was a confusing intersection with three or four trails heading off in different directions at that point and I wanted to make sure I got on the right one. I spent 20 minutes looking around for the correct trail – or even an area where the trail might be likely to go – but couldn’t find anything. Finally I gave up and just started heading cross country via map and compass along the route that the trail should have gone. About a mile further I had lost enough elevation for the snow to disappear and I found the trail again. I was only off by about 10 feet in my route calculations.
Just after noon the sky started to fill up with clouds again and darken. “More rain!” I thought. Then I heard a rumble. And another. And another. The storm was just northwest of me and heading in my direction. Once again I was up on top of an exposed ridge, the highest thing all around. I dropped off the trail and heading down to the tree line. Picking up my pace a bit, I paralleled the trail and kept my eyes open to see what would happen. I hadn’t seen any lightning yet, but the thunder was getting nasty.
Originally my plan had been to spend the night at Dunlap Spring again and then head out back to the trailhead the next morning. If the storm kept up though, I didn’t want to spend the night that high. I reached the meadow above the spring at 3PM. Just as I came out of the trees it started to hail. The thunder sounded like it was right on top of me at this point and I saw a flash or two of lightning. I decided I needed to get down. I started to half walk, half run toward the Panjab Trail that heads down into the trees toward the trailhead. Just before I reached the meadow I encountered another bear. This one was about 50 feet away, oblivious to my presence. I yelled at him. He didn’t budge. I was anxious to get down, but this guy was standing right where I wanted to go. Yelling at him again, he looked up at me and shook his coat, throwing water all over. “Yeah,” I yelled “it sure is wet up here, isn’t it? I bet it would be nice and dry in those trees down there! Wink wink nudge nudge.” Apparently bears don’t understand winks because he didn’t take my hints. He just kept doing what he was doing. More yelling and waving my arms around finally got him to look at me again. He cocked his head as if to express his displeasure at this disruption of his schedule and slowly turned around and waddled off into the trees.
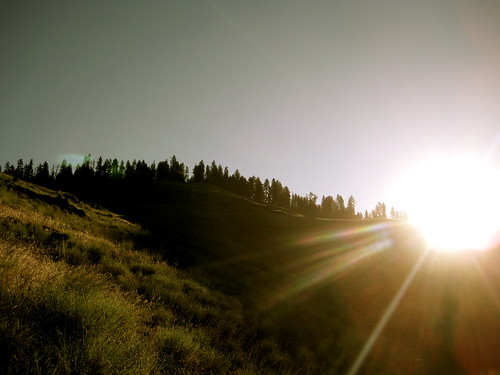
I reached the trees myself soon thereafter. Just as I left the meadow the hail stopped and the storm passed on further east. The clouds hung around and only allowed a few sun breaks the rest of the afternoon, but I was able to dry out. I continued down the trail to just a bit northeast of the trailhead and found a good spot to camp for the night. That evening the sky cleared and I was allowed a view of the awe-some golden sunset in the Tucannon Canyon.
Beyond a critical point within a finite space, freedom diminishes as numbers increase. This is as true of humans in the finite space of a planetary ecosystem as it is of gas molecules in a sealed flask. The human question is now how many can possibly survive within the system, but what kind of existence is possible for those who do survive.
- Frank Herbert, Dune