You are currently viewing all posts tagged with recipe.

I eat a lot of salmon.

My go to recipe is from Derek on Cast Iron. The only requirements are fish, olive oil, salt, pepper, and cast iron. Sometimes I substitute butter for the olive oil. If I have bacon grease available I’ll use that instead. The whole procedure takes about 10 minutes.

I consider a good piece of salmon and a sourdough baguette to be a complete meal. If the fish is less good, I’ll peel the skin off, dump it on top of a bowl of Single Shot Rice, mash it all together, and sprinkle furikake on top.

Mobile Miso Capsules

Instant miso is appropriate for wilderness travel, where weight is a primary concern and there is a multi-day absence of refrigeration. Outside of activities with those restrictions, I prefer to avoid it. One of the key advantages to miso is that it is a probiotic, containing living cultures. With dry, instant miso that advantage is lost.

When I want miso on the go, I’ll prepare a serving using the same ingredients I’d use to make miso at home. This seems like an obvious solution, but it hadn’t occurred to me until I saw it on Just One Cookbook. The author of that recipe stores the mixture in the container that she plans to eat the soup out of. I didn’t want to carry around a container that large, and I already keep a mug at work for my daily Standard Issue Oatmeal and kukicha. Instead, I store the ingredients in a Sistema Klip It 1520 – the same container I use for my oatmeal capsules.

Mobile Miso Capsule

My Mobile Miso Capsule contains:

  • 1 tablespoon of miso paste
  • 1/2 teaspoon of dashi powder
  • 6 to 12 pieces of wakame
  • Around 1/4 teaspoon of umeboshi furikake
  • Half a scallion, chopped

I keep things interesting by pedaling over to Nijiya in Japantown and purchasing random tubs of miso paste with labels that I usually cannot read, so I have no particular recommendation there.

The measurements are rough. As a general rule of thumb, a single serving of miso is considered to be 200 milliliters of water and 1 tablespoon of miso paste, but I use a little more water and the amount of miso paste needs to be adjusted based on your tastes and the strength of the particular tub of paste you’re using.

When refrigerated, this preparation will last for a week. It can keep at room temperature for a day. I can make 5 capsules over the weekend, and each weekday morning grab one out of the fridge to throw in my pack before heading out. I do this most weekdays, and end up fueling with the miso mid-afternoon, at around 15:00. None of these ingredients need to be cooked, so the final preparation is simple. It requires only hot water:

  1. Open the capsule and dump the contents into a mug.
  2. Pour about 300 milliliters of hot-but-not-boiling water over the top.
  3. Stir the contents for about 30 seconds.
  4. Let sit for a couple minutes.
  5. Consume.

The end result is predominantly drunk. A utensil (spork, spoon, chopsticks) is useful for transferring the ingredients to the mug, stirring, and for getting the last bits of wakame and scallion into your mouth.

As with my Standard Issue Oatmeal, this recipe makes a good base to which other items can be added. Sliced mushrooms – dried or fresh – are a good addition. The original recipe from Just One Cookbook included aburaage. Thinly sliced and diced carrots are another idea. Between these types of additions and the variety of miso pastes available, it is easy to keep this soup interesting, which is a characteristic I value in a daily fuel.

Dashi

The instant dashi powder used in this recipe is my deference to the mobile nature of the meal. Miso without dashi is blasphemous. I don’t want to carry around a liquid, so fresh dashi is out. Apparently miso paste with premixed dashi is a thing, but I’ve never tried it. I have experimented with a handful of different dashi powders.

Ajinomoto Hondashi is the first powdered dashi I tried. It comes in a jar and is simple to use. It does contain monosodium glutamate (which should go without saying as Ajinomoto is the company Dr. Ikeda created to market his discovery of MSG). This partially explains its deliciousness, but of course the only reason to include monosodium glutamate is because they aren’t using actual kombu and so need to get their glutamate from some other source. The ingredients are: salt, monosodium glutamate, lactose, sugar, dried bonito tuna powder, disodium inosinate, bonito extract, yeast extract, and disodium succinate.

Kayanoya Original Dashi Stock Powder comes in packets that are intended to be placed into 400 milliliters of water, boiled for a couple of minutes, and then discarded. I like the flavor of these packets, but the preparation method isn’t compatible with my capsules: I want to mix all the ingredients beforehand, I’m pouring less-than-boiling water over everything, and I’m only making a single serving with about 300 milliliters of water. I’ve tried opening the packet and adding half of the powder to one of my capsules. The resulting flavor is smooth, but very weak, and the powder does not disolve completely. I think this dashi powder really does need to be boiled briefly to extract its flavor. The ingredients are: raw flavor materials (dried bonito flakes, dried sardine extract powder, roasted flying fish, dried round herring flakes, kelp), starch hydrolysate, yeast extract, salt, soy sauce powder, and fermented seasoning (soy, wheat, vegetable starch, brewer’s yeast).

Nijiya Wafu Dashi is one of the good ones. Like the Kayanoya, it comes in individual packets, but the packets are not intended to be steeped. You rip open the packet and dump out the contents. One packet holds about one teaspoon, which to me is appropriate for two miso servings. I split the packet between two capsules. The ingredients are: sugar, salt, glucose, dried bonito powder, yeast extract powder, bonito extract powder (bonito extract, tuna extract), shiitake mushroom extract powder, and kelp powder.

Go Juice

I like food. I don’t do diets. I cast a wary eye upon fasting. I don’t subscribe to the idea of “cleansing” the body of “toxins”. Despite all of this, the drink that is central to the Master Cleanse fast is part of my fueling strategy. I learned of the Master Cleanse while attending The Sean Kennedy School of Patrolling and I now use it as an electrolyte drink when my body tells me I am running low.

Go Juice

The components of a single serving of Go Juice are:

  • 1 oz lemon juice
  • 1 oz maple syrup previously-known-as-grade-B1
  • 14 oz water
  • A dash of cayenne powder

I juice the lemon into a wide mouth pint sized mason jar using a Jarware Stainless Steel Juicer Lid. If I have a small lemon I’ll juice the whole thing. If I have a medium sized lemon I’ll juice half. Either way, the amount of juice is confirmed via the gradations on the side of the mason jar. Next, using the gradations, I pour in an equal amount of maple syrup. The rest of the jar is then filled with water. I add a very small amount of capsicum – enough to get a small kick, not enough so I really taste it. Finally I toss on a leak-proof lid and shake it around for a few seconds.

The result is delicious and the effect immediate. I cannot imagine that anything good would come of trying to fuel the body on maple syrup and lemon juice alone, but as an occasional, supplementary kick it is a tool worth considering.

Notes

  1. A few years ago the cabal of maple syrup producers decided that assigning letter grades to the different types of maple syrup made it too simple to buy what you wanted. Instead they decided to confuse people by moving to wordy, subjective labels. The maple syrup I buy is now labelled "very dark, strong taste". But of course it still has a secondary sticker on it that loudly proclaims "Previously Grade B", because that's how people shop.

Pressurized Eggs

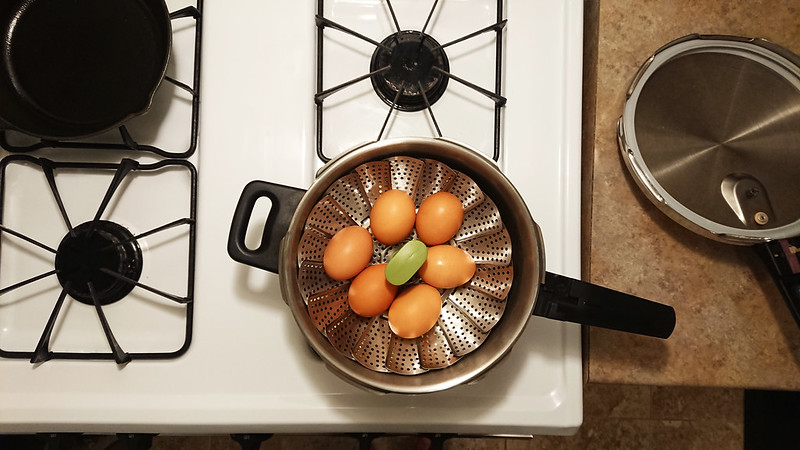
As with rice, “hard boiled” eggs are one of my go-to pressure cooker dishes when I don’t have the time or inclination to cook a full meal. I only began using the pressure cooker for this in the past couple years, but it has proven to be faster and to produce consistently better results than actually boiling the eggs.

To cook the eggs, I put one cup of water in the pressure cooker, drop in a steaming tray, and place the eggs on the tray. I then use the 5-5-5 method, which means:

  1. 5 minutes to reach high pressure
  2. 5 minutes at high pressure
  3. 5 minutes of natural pressure release, followed by quick release of any remaining pressure

After the pressure has been released, the eggs are placed in cold water to cool.

Pressurized Eggs

I use a stainless steel steamer basket for this, rather than the Instant Pot Silicone Steam Rack that I use to make rice. The basket makes it easier to remove the eggs and steamer from the pot while they are still hot.

Single Shot Rice

A cast iron skillet and a pressure cooker were two of the first kitchen utensils I purchased when I began cooking for myself back in college. I still have the same two tools, and the vast majority of the things I cook involve one or both of them.

When considering the pressure cooker, the original appeal was that it seemed like an easy way to cook rice while being more versatile than a dedicated rice cooker. This assertion turned out to be true, but the 4-quart volume of my pressure cooker meant that I always had to make multiple servings of rice at a time. Cold, leftover rice is unappealing, which meant that the volume limitation of the pressure cooker diminished the frequency of my rice consumption.

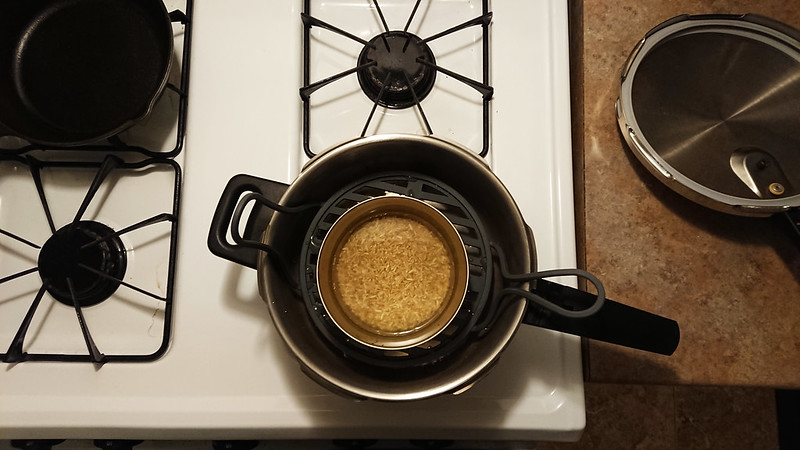
Some years ago the internet came to the rescue, suggesting that a single serving of rice could be cooked in a pressure cooker of any size. Instead of placing the rice directly in the pressure cooker, the rice and water are put in a metal bowl, which is then placed into the pressure cooker on an elevated tray. Additional water is poured into the pressure cooker, outside of the bowl. My pressure cooker didn’t come with a tray, so I purchased an Instant Pot Silicone Steam Rack, which drops right into my pot. For the metal bowl I use a Snow Peak Trek Titanium Bowl, but any metal bowl of roughly the same size will work.

Pressure Cooker Rice

For white rice, my procedure is:

  1. Add 1/2 cup of white rice, 3/4 cup water, 1/4 teaspoon of sea salt into metal bowl
  2. Add 1 cup water into pressure cooker
  3. Place metal bowl into pressure cooker on top of steam rack
  4. Bring to pressure on high heat, about 5 minutes
  5. Keep at high pressure for about 4 minutes, then remove from burner
  6. Natural pressure release for about 6 minutes

For brown rice, I adjust the quantities and time:

  1. Add 1/3 cup of rinsed long grain brown rice, 1/2 cup water, 1/4 teaspoon of sea salt into metal bowl
  2. Add 1 cup water into pressure cooker
  3. Place metal bowl into pressure cooker on top of steam rack
  4. Bring to pressure on high heat, about 5 minutes
  5. Keep at high pressure for about 15 minutes, then remove from burner
  6. Natural pressure release for about 6 minutes

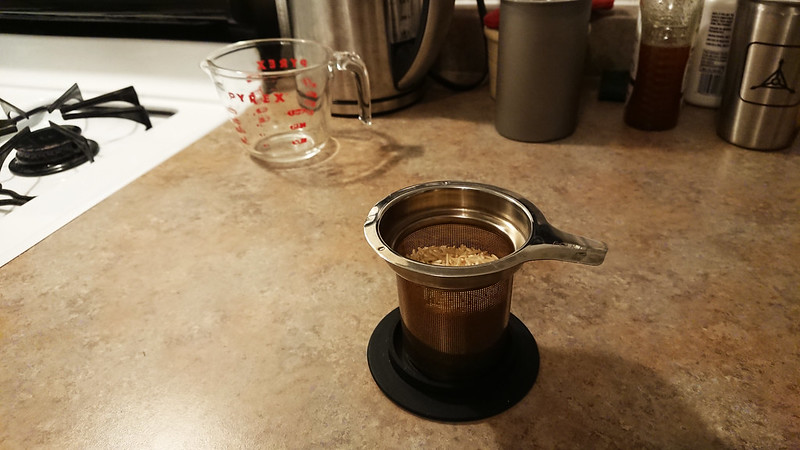
To rinse a single serving like this, I use my FORLIFE Tea Infuser. It’s the right size for this amount of rice, and has a lid in case you want to shake it around a bit while rinsing the grains.

Rice Rinsing

The result is a perfectly cooked bowl of rice in a short period of time, with almost no effort. The cooked rice is consumed directly from the metal bowl, and the pressure cooker itself requires little more than a rinse at the end, so dishes are minimized. The simplicity of this process makes rice and furikake one of my go-to dishes when I don’t have the time or inclination to cook an actual meal. I also frequently cook a fresh, hot serving of rice to mix with cold leftovers, which makes them much more appealing.

Standard Issue Oatmeal

I go the boxing gym in the morning before work. When I wake up I throw down a small amount of yogurt and granola, but I need a second breakfast that I can easily prepare in the office after the gym. Oatmeal is a good solution. A couple years ago I started preparing my own oatmeal instead of using store-bought packets.

I started out with The Yummy Life’s Healthy Instant Oatmeal Packets recipe and tweaked it slightly to create my Standard Issue Oatmeal. At some point over the weekend I whip up a handful of servings in separate Ziploc bags that I bring in on Monday and store in my desk for the week. It only takes a few minutes to prepare the packets, and at work it is easy to dump the contents of a Ziploc into a mug, poor in hot water, stir a bit and enjoy.

I haven’t gotten tired of this recipe after eating it regularly for a couple years. The maple sugar is the key ingredient in that regard, I think. It’s easy to add in dried fruit or other garnish to mix it up occasionally.

Pretty Good Oatmeal

Every Saturday morning, the first thing I do upon waking is go for run. After coming back and showering, I break-fast with this oatmeal, which I find to be mighty tasty.

Ingredients

All ingredients I acquire from the bulk section of my local food co-op (except the honey, which comes from the farmer’s market). Everything, of course, is organic.

  • 4 oz. thick rolled oats
  • 1 - 1 1/2 tablespoons brown sugar
  • 3 tablespoons raisins
  • 1 spoon full of honey
  • A pinch (or two) of sea salt

(For me, this makes one serving. Your mileage may vary.)

Directions

  1. Put the correct amounts of oats, sugar, and raisins in a container and set it aside.
  2. Place 1 cup of water in a pot and bring to a boil.
  3. Dump in the oats, sugar, and raisins.
  4. Add a pinch (or two) of sea salt.
  5. Mix it up, allow everything to return to a full boil, then lower the heat to something around medium.
  6. Watch it till the mixture becomes your preferred consistency, stirring occasionally. It usually takes 5-6 minutes for me.
  7. When it looks to be about done, turn off the heat and mix in one whopping, overflowing spoon full of honey.
  8. Let it cool for a minute or two, and enjoy!