DIY Field Notebook Hack
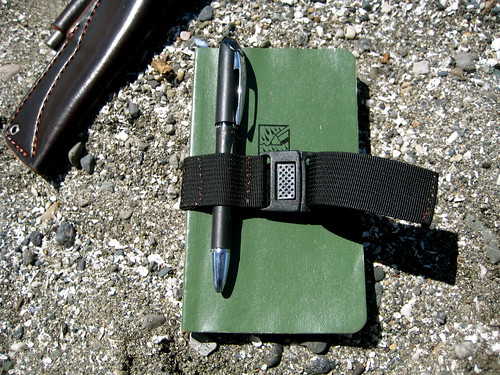
Here’s an idea I stole from the excellent BFE Labs: hacking a Rite in the Rain notebook to include a retention strap. The original idea at BFE was just a strap to keep the notebook closed and contain loose leafs that were shoved inside, but while making the strap he accidentally cut the webbing too short. To solve this he sewed on another piece of webbing as an extension and found that the overlap between the two pieces made a good pen holder.
I thought this was a neat idea, but the tri-glide fastener used in BFE’s version seemed a little cumbersome. I knew I would want some sort of quick release buckle. A traditional side release buckle would be too bulky for my tastes, particularly when the notebook is shoved in a pocket. The other thought I had was that using elastic webbing for the pen loop might increase the versatility of the strap, since it could expand to fit different sized tools.
I didn’t have any 1” elastic webbing hanging about, but I did have some spare webbing and an old buckle from a previous project. With those two things along with a knife and my repair kit, I set out to see what I could do about whipping up some kind of strap.
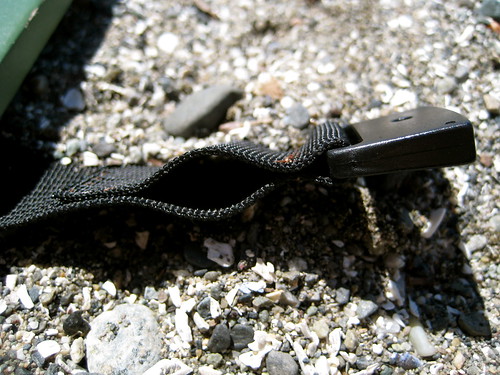
My initial intention was to create the pen loop the same way as the BFE strap: cut one strap short and sew on an extension piece with a bit of an overlap. But before I got to that part, I had to sew one end of the buckle onto the webbing. In preparing to do this, I realized that I would already be sewing a loop right there. I could just pull a bit more webbing through the buckle to create my overlap, throw in a stitch to hold down the end of the webbing, another stitch closer to the buckle, and between the two I would have the perfect loop for my pen. Simple.
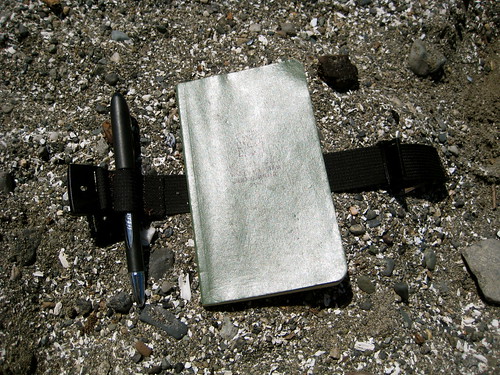
On the back of the notebook I created two slits for the webbing to pass in and out of, just like in the BFE hack (except I used my knife rather than a Dremel tool).
I’m happy with how this hack came out and will probably perform it on my other Rite in the Rain notebooks. The whole process takes only a few minutes and does not strain my juvenile sewing skills. My one complaint is with the buckle that I happened to choose. I appreciate the low profile, center-release design, but the male end of it doesn’t grip the webbing very well. This means that while it is adjustable, it doesn’t hold much tension, and so the buckle doesn’t snap open as much as it should when I release it. I’m thinking of sewing the webbing down on the male end of the buckle just like I did on the female end. The strap would no longer be adjustable, but I could be guaranteed the proper tension and that the buckle would open with the speed and ease which I desire. This would also present the opportunity for me to create another loop to hold a second tool. Perhaps a pencil or a highlighter to go along with the pen.


