You are currently viewing all posts tagged with water.

Hydro Flask Lightweight Trail Series Bottles

I’ve been using the Hydro Flask Lightweight Trail Series bottles for about a year and a half. They are the first double-wall insulated stainless steel bottles I’ve found that are light enough for me to want to carry regularly.

Hydro Flask Lightweight Trail Series

I first purchased the 21 oz when I happened to come across it on sale. I liked it enough to purchase the 24 oz a month later when I had an REI coupon. A couple months after that I purchased the 32 oz at full price.

I primarily use the bottles to keep cold water cold. I also sometimes use the 24 oz bottle to keep hot tea hot. I’ve not timed how long they hold the desired temperature, but they do so for at least as long as it takes me to drink whatever is in them, thus resetting the clock. They do not insulate as well as my Zojirushi SM-SA48-BA, but the Hydro Flasks are better as daily, general purpose bottles.

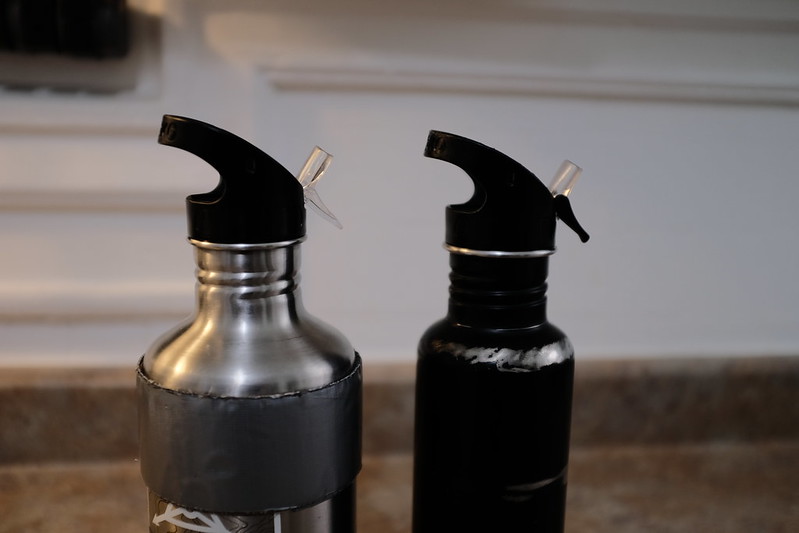
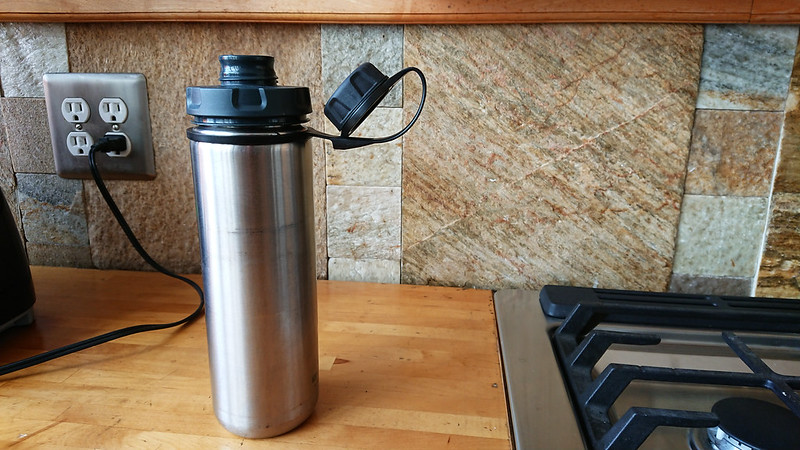
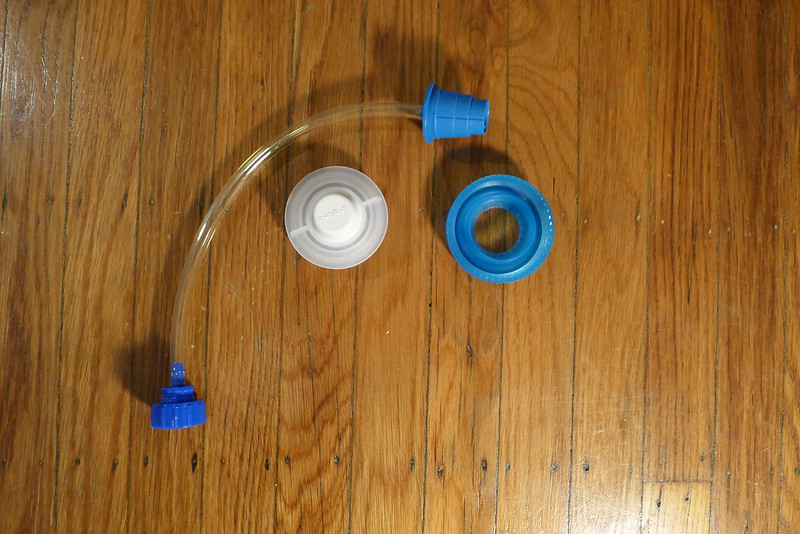
When buying a bottle, one of the things I look for is standard threading and neck diameters. I strongly dislike being locked in to proprietary lids. Hydro Flask meets this criteria, allowing me to replace their stock lids – which are adequate – with better options. The 21 oz has a standard narrow mouth. Mine wears a Topoko Straw Lid B. The 24 oz and 32 oz have standard wide mouth openings. Mine both wear the humangear capCAP+.

If not using the humangear capCAP+ on the wide mouth bottles, a splash guard is wanted. The old Guyot Designs SplashGuard will not work, nor will the newer HydraPak WaterGate. I have found the BottlePro SplashPro to work well.

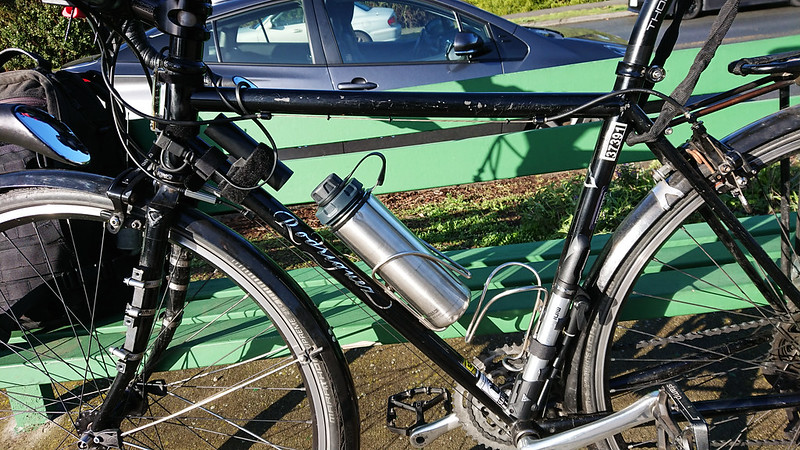
I have used the 21 oz and 24 oz bottles most. I first EDCed the 21 oz for about 8 months, before deciding that I really wanted those extra 3 oz of volume. The 24 oz has been my EDC for the past 8 months. Both carry well on the bike in a King Cage Iris Cage.

Without any lids, the three bottles register on my calibrated scale as:

  • 7.80 oz, or 221.1 grams, for the 24 oz bottle
  • 8.59 oz, or 243.4 grams, for the 24 oz bottle
  • 10.80 oz, or 306.2 grams, for the 32 oz bottle

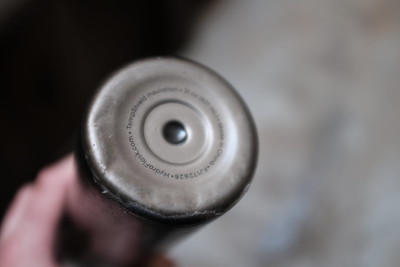
The bottles are not available in a raw finish. All three of mine are in the obsidian color, which is a nice chocolate brown. The paint does chip, particularly along the bottom, but this doesn’t bother me. One could probably avoid this by using one of those silicone boots, but these are not compatible with bike cages. I have dropped the bottles, and they do dent, but again, this does not bother me. If you’re looking for a pristine beauty queen, these bottles may not be your cup of tea. If you’re looking for functional, lightweight tools for a warming planet, these are great options.

  • Hydro Flask Lightweight Trail Series: Dents
  • Hydro Flask Lightweight Trail Series: Chipping

A Better Kanteen Lid

My favorite lid for standard mouth Klean Kanteen bottles is the Topoko Straw Lid B. It’s a simple flip-top straw lid. The only thing that makes it special is that the mouthpiece is covered when closed. It seems like a common sense concept, but so many sport lids have no provision for some sort of mud guard.

Topoko Straw Lid

Other than that, there’s not much to say about the lid. It is completely leak-proof when closed. It is easy to operate one handed. It comes with two straws that can be cut to length. One is stiff and the other is bendy. I’ve found no functional difference between the two.

I have these lids installed on both the bottles I use on a daily basis – the 27 oz that I carry on my bike, and the 40 oz I use at home.

I did break one of the lids by accidentally dropping the bottle from about 4 feet onto concrete. It broke where the carry loop connects to the base. The lid still sealed and functioned properly. I only use the loop for pulling the bottle out of a cage or pouch, but I still purchased a replacement (and another spare) immediately.

The new lids I received were slightly different from the old ones. The bit that covers the mouthpiece is clear instead of black, and the edge of it is flush with the edge of the lid. On the old model, the black cover was a couple millimeters proud of the edge of the lid, which provided more purchase when grabbing the piece to flip it open. The older design seems superior, but I haven’t actually noticed a practical disadvantage with the new one. I can still easily and reliably flip the lid open, even with a gloved finger. (That is, however, with light gloves – the older design may have more of an advantage with heavy winter gloves.)

Topoko Straw Lid: Old and New

I’ve only used the lids on Klean Kanteen bottles. I use these bottles for water. I don’t know if there are any special considerations that would make the lids less than ideal for hot beverages.

I’ve used every iteration of Klean Kanteen’s Sport Cap since I bought my first bottle from them in 2005. They’ve all left something to be desired. The Topoko lid is a superior solution.

humangear capCAP+

Ten year ago I discussed the humangear capCAP. My conclusion was: the capitalization of the brand and product name is stupid, the cap itself is a good upgrade to any wide mouth (63mm) bottle, but it will allow a few drops to leak out of a wide mouth Klean Kanteen.

Recently I was made aware of a new model: the humangear capCAP+. This one adds silicone gaskets to both parts of the lid, and boasts compatibility with a wider range of bottles. However, humangear explicitly states that this one remains incompatible with the wide mouth Klean Kanteen.

I like to live dangerously, so I bought the new model anyway. For a couple weeks now I’ve been using it on the same Klean Kanteen Wide 27oz bottle used in the previous review. Despite humangear’s warning, I have had nary a drop leak out from the cap. I have tried to make the lid leak by filling the bottle and storing it on its side, and by balancing the bottle upside down on the cap, but no water has escaped.

humangear capCap+

Other changes in the new model include redesigned grip cutouts, which I find to have made no practical change to the functionality of the cap, and a cap retention thing that I thought would be kind of a gimmick but is actually surprisingly useful. (I will point out that the full name of this feature is the “humangear capCAP+ CapKeeper”. Someone at this brand hates English.)

humangear capCap+

The new model weighs 56 grams (2 oz), which is 20 grams (0.7 oz) more than the original capCAP.

I’m happy with the capCAP+. If you have the original capCAP, and it doesn’t leak on your bottle of choice, it probably is not worth upgrading. If it does leak, consider trying the new one. If you have neither model, but you use a wide mouth bottle and rely on something like the Guyot Designs Splashguard, the capCAP+ may improve your life.

Sawyer Squeeze Filter Adapters

The Sawyer Squeeze water filter can attach directly to the threading on common disposable bottles. For other bottles you can aim the output freehand, or attach half of a Sawyer Hydration In-Line Adapter to a piece of hose and let that drip into your bottle. I prefer a closed system, both so that no debris fall into my reservoir while it is being filled, and so that if the reservoir is accidentally knocked over I don’t lose all the clean water. There are a number of adapters that can aid in this.

Previously I mentioned my hacked together solution for attaching a Sawyer filter to an MSR Dromlite bag. The Dromlite lid is 63mm in diameter and uses the same threading that is present on the majority of wide mouthed bottles, so I can use this adapter to attach the Sawyer Squeeze directly to a wide array of bottles: Nalgene wide mouth, Klean Kanteen wide mouth, Hydro Flask wide mouth, CamelBak Podium, and reservoirs like the HydraPak Expedition or bladders like the Source WXP.

Sawyer Dromlite Adapter

This adapter – including the Dromlite cap – weighs 40 grams (1.4 oz). 18 grams (0.6 oz) of that is the Dromlite lid, so if I’m already packing a Dromlite the adapter only adds 22 grams (0.8 oz) to my load.

Last autumn I bought a Platypus GravityWorks Universal Bottle Adapter. This consists of an inner lid with nipple, and outer lid ring, and a protective cover for the clean side of the lids. To integrate this adapter with the Sawyer Squeeze, I cut a short length of hose. One end I shoved over the nipple of the GravityWorks Universal Bottle Adapter. The other end I attached to one part of another Sawyer Hydration In-Line Adapter.

Sawyer GravityWorks Adapter

This adapter – including the same length of hose as the Dromlite system, and both caps, and the protective cover – weighs 70 grams (2.5 oz). 20 grams (0.7 oz) of that is the protective cover, which I’m not sure is really necessary.

GravityWorks Adapter Lid

The inner lid of the GravityWorks adapter is tapered so that it can fit into a range of narrow mouth bottles. The Sawyer Squeeze is already threaded to attach directly to common disposable bottles, but this adapter also allows me to get a seal with the Nalgene Oasis canteen, the smaller part of the humangear capCAP, the Hydrapak Stow, Vitaminwater bottles, or Vapur bottles.

When the inner lid is attached to the outer lid ring, the adapter can then attach to the standard 63mm wide mouth bottle threading, giving me all the same capability I have with my modified Dromlite adapter. But the outer lid ring can also attach to bottles with narrower mouths. Specifically, it works great with Klean Kanteen classic bottles, HydraPak Seeker, Nalgene “Wide Mouth” 16oz HDPE (which has a narrower, 53mm “wide mouth”), and with my Zojirushi SM-SA48.

  • GravityWorks Adapter to HydraPak Seeker
  • GravityWorks Adapter to Nalgene Oasis
  • GravityWorks Adapter to Klean Kanteen
  • GravityWorks Adapter to Camelbak Podium

I also have a Jetflow 63mm adapter. This takes the standard 63mm wide mouth bottle threading and steps it down to the narrow threading used by the Sawyer filter and most disposable bottles. You can then attach the filter directly to the bottle lid rather than going through a hose like my other two adapters.

The Jetflow adapter is neat because you can attach a bottle cap from a typical disposable bottle to the smaller end and then use it as your normal water bottle lid. It turns the whole contraption into something like a humangear capCAP. The Jetflow adapter weighs 18 grams (0.6 oz). Add a lid from a disposable water bottle and the total weight is 20 grams (0.7 oz).

Jetflow Adapter with Cap

I use my pressure cooker to sterilize equipment.

Sport bottles lids often have small nooks and crannies that are excellent for growing bacteria and difficult to clean by hand. I occasionally throw these lids into my pressure cooker with a steaming basket or trivet to sterilize them. Multiple studies show that a standard pressure cooker can be an effective alternative to an autoclave in austere environments. The general rule of thumb seems to be about 15 psi for 15 minutes, though 30 minutes may be a safer bet for medical instruments.

Poor Man Autoclave

Sawyer Squeeze

I’m a satisfied user of the Sawyer Squeeze. My first Sawyer water filter was the Mini Squeeze, which had a terrible flow rate that made it a piece of garbage. If I were buying a new filter today I’d look at the Micro Squeeze, which is supposed to combine the performance of the standard Squeeze with the size and weight of the Mini. For the time being, I am content with my standard Squeeze.

I use a CNOC Vecto 2L for a dirty bag. It’s heavier than the Sawyer pouches or a 2L Evernew Bottle, but I appreciate both the durability and the ease with which it can be filled. It makes it easy to collect water from small trickles through a rock face, and I feel comfortable throwing it around if I’ve climbed up some place to collect water and need both hands to get back down.

I prefer to carry clean water rather than sucking straight on the filter. My preferred drinking vessel for this system is a recycled Smartwater 23.7 oz bottle. The one with the sport lid. It holds an acceptable amount of water, is decently durable for the weight, has threads which are compatible with the Sawyer, and fits easily into a Hill People Gear 3” Bottle Holster.

If I don’t want to squeeze the water through, this setup can easily be suspended to make a gravity filtration system. I carry a Sawyer Cleaning Coupling to attach the bottle to the output of the filter. The bottle will fill in a couple minutes in this setup. Occasionally, when the bottle gets about half full, the flow of water will diminish due to pressure buildup in the bottle. Unscrewing the bottle slightly is enough to burp the excess air out of the bottle and allow the water to continue to flow.

CNOC, Sawyer Squeeze, Smartwater

I always carry my vintage MSR 2L DromLite, primarily as storage for additional clean water. I’m unlikely to use it during the day, but having it allows me to camp away from a water source without any stress. With the DromLite, Smartwater bottle, and CNOC Vecto I can carry just under 3 liters of clean water and an additional 2 liters of dirty water. That’s plenty for drinking, washing, and cooking between water holes.

To integrate the DromLite into the Sawyer filter, I purchased a Sawyer Hydration In-Line Adapter and dug out an old MSR Hydration Kit that I had stopped using. I cut the MSR hose so that I was left with the piece that screws onto the DromLite lid and about 10” of hose. Then I jammed half of the Sawyer adapter into the open end of the hose. Now I have a small, lightweight accessory that I can pull out whenever I want to use the DromLite as part of a gravity system.

CNOC, Sawyer Squeeze, DromLite

The Squeeze does need to be backflushed every now and then. It comes with a syringe for this, but I never carry it.

The Smartwater bottle threads directly onto the input of the filter, allowing me to backflush with that, but doing so is pretty annoying. It’s hard to get enough pressure by squeezing the hard plastic bottle. However, I can also use the cleaning coupling and my hacked together MSR adapter to backflush via the DromLite, and that works great. I can push a full 2 liters at high pressure through the filter element. This takes minimal effort to accomplish (the hardest part is remembering to perform the backflush before you’re out of clean water), and keeps the filter running like new.

I still carry Aquamira chlorine dioxide on some trips. My decision is dependent on the type of trip and the expected water sources, but I find myself leaning towards the Sawyer Squeeze more often than not.

CNOC, Sawyer Squeeze, DromLite

The Squeeze runs about $35 to $41 depending on which package you go with. Given it’s versatility and the claimed unlimited life of the filter element, it’s pretty easy for me to justify that expense.

I've been happily using my AquaRain filter for a little short of a decade now.

My only complaint about the system is that the filter elements degrade slowly enough that I rarely notice the decreased flow. Cleaning and assessing the health of the elements (which is done by measuring their circumference with the provided tool) should happen periodically, but it isn’t the type of thing I’ll ever think to do myself. As with my water rotation, I let taskwarrior solve the problem for me.

$ task add project:waterstorage due:2017-07-01 recur:6months wait:due-7days clean and assess aquarain filter

Water Rotation

I use four WaterBricks for water storage at home, and for the occasional vehicle-borne excursions. They’re simple to store in small areas, stack securely, and are easy to pour from with the spigot assembly. I prefer them over the more common Scepter Water Canisters. The 3.5 gallon capacity of the WaterBricks is in the sweet spot of being able to hold a lot of water, but isn’t so heavy that life sucks when you need to haul them around.

I took one of the WaterBricks on this year’s ARRL Field Day last month. This was the first time this particular WaterBrick had been opened in three years. The water tasted fine, albeit with a plasticy flavor that wasn’t surprising, but storing water for this length of time seems at best excessive and at worse negligent. I took this as an opportunity to implement a rotation schedule.

Each of the WaterBricks is now labelled. They are grouped in to two 12-month rotation periods, each six months apart. This provides an opportunity to not only change the water, but also bleach and dry the inside of the containers to discourage any growth. By performing the rotation six months apart, I can be assured of always having two full WaterBricks on hand.

By scheduling the rotation in taskwarrior I never have to think about it.

$ task add project:waterstorage due:2017-06-01 recur:yearly wait:due-7days rotate waterbrick alpha
$ task add project:waterstorage due:2017-06-01 recur:yearly wait:due-7days rotate waterbrick bravo
$ task add project:waterstorage due:2017-12-01 recur:yearly wait:due-7days rotate waterbrick charlie
$ task add project:waterstorage due:2017-12-01 recur:yearly wait:due-7days rotate waterbrick delta

I use 28 drops of Aquamira chlorine dioxide per WaterBrick, although I’m not sure how necessary that is now with the rotation schedule.